Prisma Access
Onboard a ZTNA Connector in VMware ESXi
Table of Contents
Expand All
|
Collapse All
Prisma Access Docs
-
- 6.1 Preferred and Innovation
- 6.0 Preferred and Innovation
- 5.2 Preferred and Innovation
- 5.1 Preferred and Innovation
- 5.0 Preferred and Innovation
- 4.2 Preferred
- 4.1 Preferred
- 4.0 Preferred
- 3.2 Preferred and Innovation
- 3.1 Preferred and Innovation
- 3.0 Preferred and Innovation
- 2.2 Preferred
-
-
- 4.0 & Later
- Prisma Access China
-
-
Onboard a ZTNA Connector in VMware ESXi
Onboard a ZTNA Connector in VMware ESXi.
To onboard a ZTNA Connector in VMware ESXi, complete the following steps. Before you
start, be sure to review the requirements and guidelines for ZTNA in general and VMware
ESXi deployments in particular.
Before you begin, review the requirements and guidelines and the FQDNs and ports you need to
configure to use ZTNA Connector with VMware ESXi.
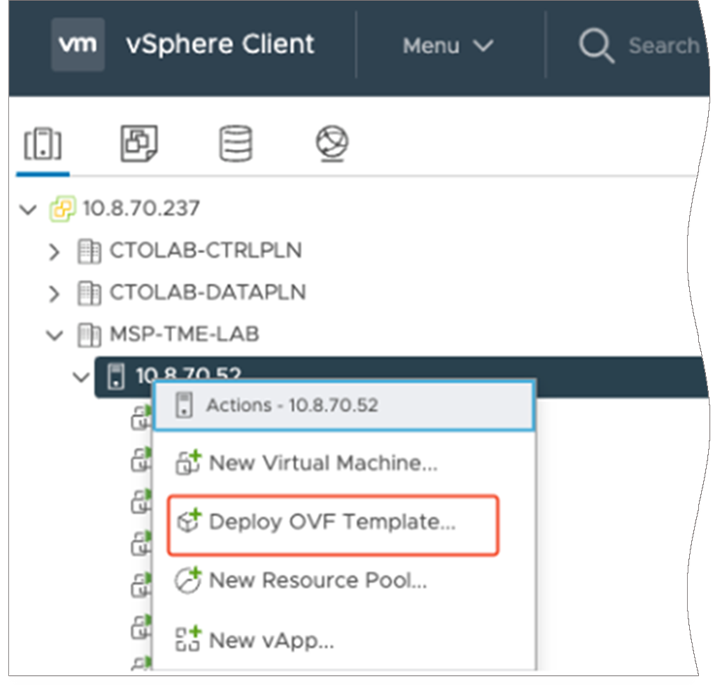
- Download the ZTNA Connector VMware ESXi image from the Customer Support Portal (CSP) under UpdatesSoftware UpdatesPrisma Access ZTNA Connector for VMware.Download a 1-nic version file for one-arm deployment and two-nic version file for two-arm deployment.Open VMware vCenter, select, and right-click the host and select Deploy OVF Template.
![]() Select the location from the Connector OVA (either a URL or a local file) and select Next.
Select the location from the Connector OVA (either a URL or a local file) and select Next.![]() Enter a virtual machine (VM) name and a location for the VM.
Enter a virtual machine (VM) name and a location for the VM.![]() Select the compute resource for the VM.
Select the compute resource for the VM.![]() Review the details for the template and select Next.
Review the details for the template and select Next.![]() Select Thick Provision Lazy Zeroed for the virtual disk format and the appropriate datastore for the ZTNA Connector VM.
Select Thick Provision Lazy Zeroed for the virtual disk format and the appropriate datastore for the ZTNA Connector VM.![]() Optional Select Thin Provision for the virtual disk format and the appropriate datastore for the ZTNA Connector VM, where, depending on the requirement, the server only allocates the space the host requires.
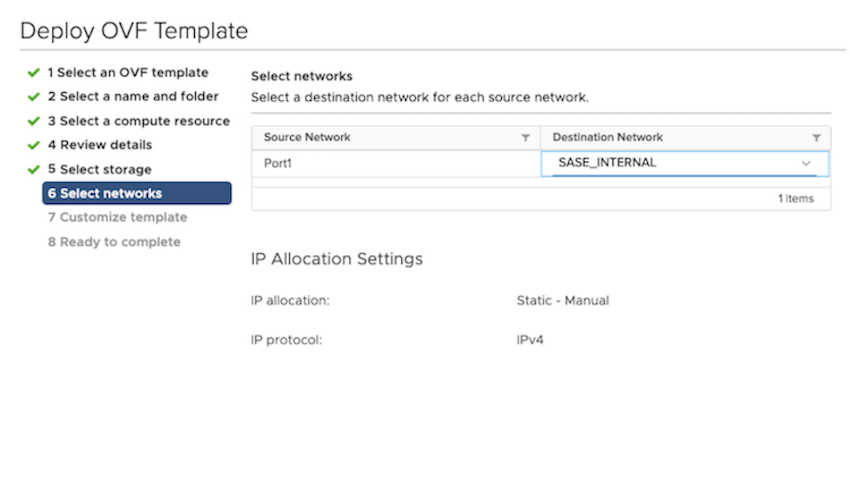
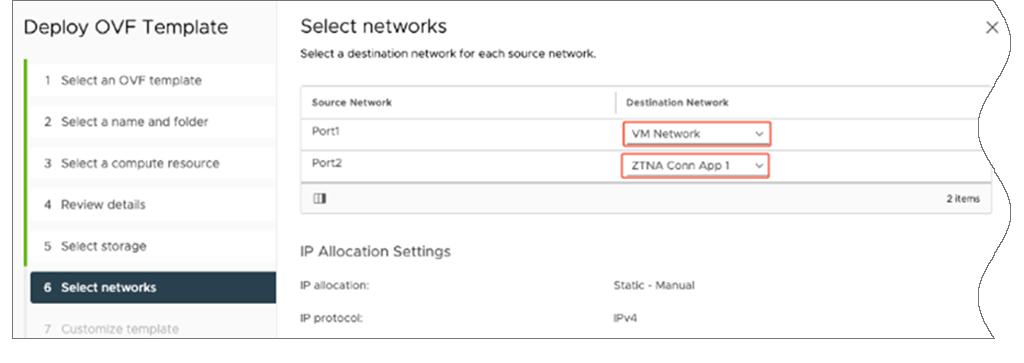
Optional Select Thin Provision for the virtual disk format and the appropriate datastore for the ZTNA Connector VM, where, depending on the requirement, the server only allocates the space the host requires.![]() Select the networks (for Port 1 and Port 2) for the interfaces that you created using the OVA configuration template.
Select the networks (for Port 1 and Port 2) for the interfaces that you created using the OVA configuration template.- If you're deploying a one-arm connector, Port 1 is the network that can reach WAN and LAN app servers. Select the WAN/LAN network for Port 1.
![]()
- If you're deploying a two-arm connector, select the internet facing port for Port 1 and the app server-facing network for Port 2.
- Port 1 is the WAN-facing port for IPSec connectivity to Prisma Access.
- Port 2 is the app-facing port.
![]()
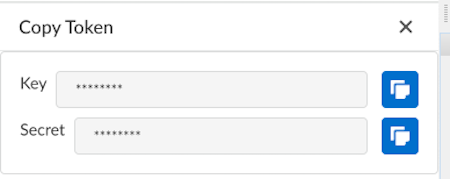
If you did not do so already, go to ConfigurationZTNA ConnectorConnectors, find the Connector object you created in Prisma Access to associate with this VM, and select Copy Token from the Actions tab (key icon); then, copy the Key and Secret values.![]() In the Customize template screen, make the following configuration changes:
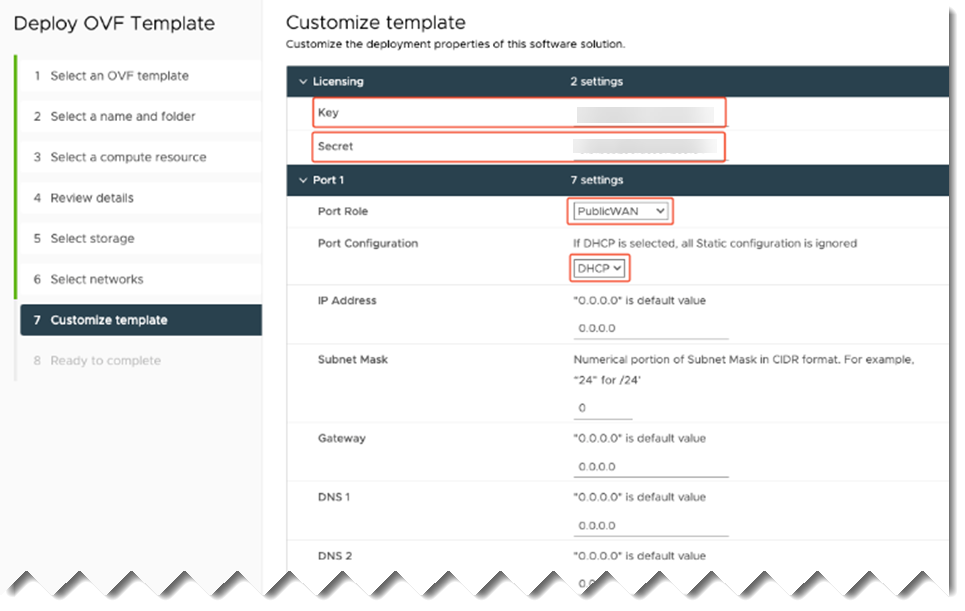
In the Customize template screen, make the following configuration changes:- Licensing area —Enter the Key and Secret values you retrieved from the Prisma SASE Portal.
- Port 1 (the Prisma Access-facing port)
area—Make the following changes:
- Role—Public WAN.
- Port Configuration—Either
DHCP or
Static.If you select Static, enter IP address, subnet mask, gateway, and one or two DNS server values.If you use DHCP, leave the default zeroes in the fields as shown in the following screenshot.
![]()
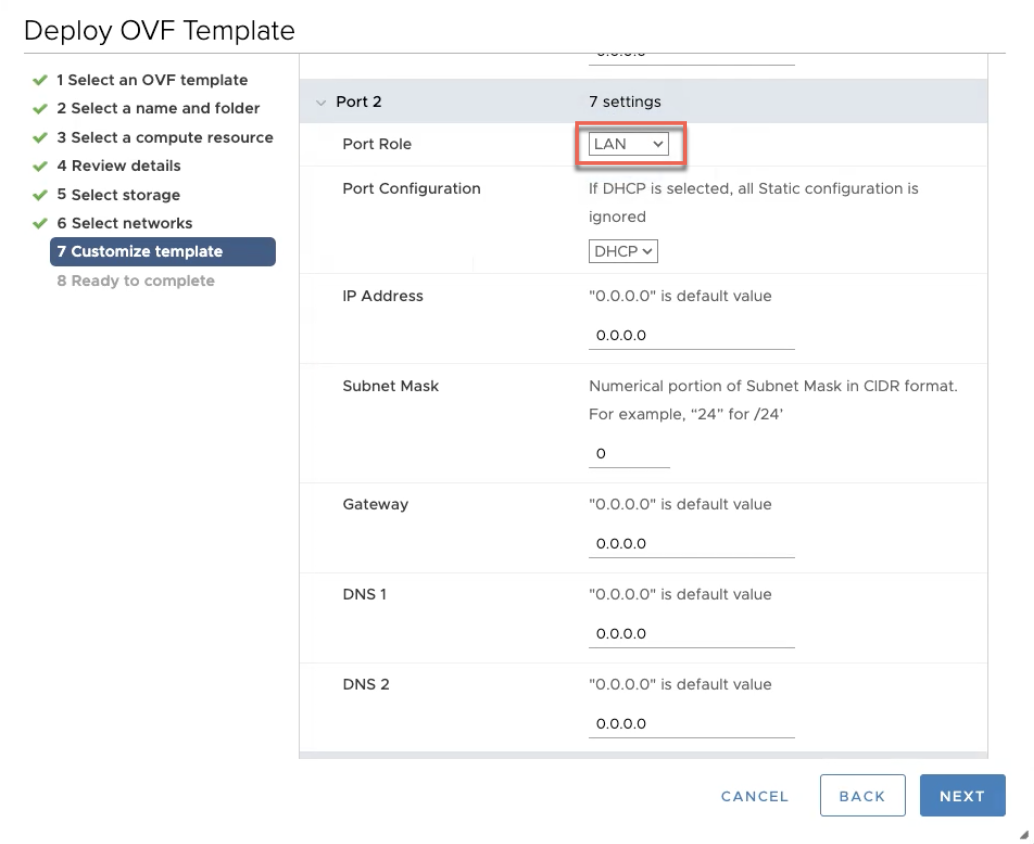
- Two-Arm ESXi Deployments Only If
you have a two-arm deployment, configure the Port
2 LAN IP interface with the same rules as applied for
Port 1 in Step 10.
![]()
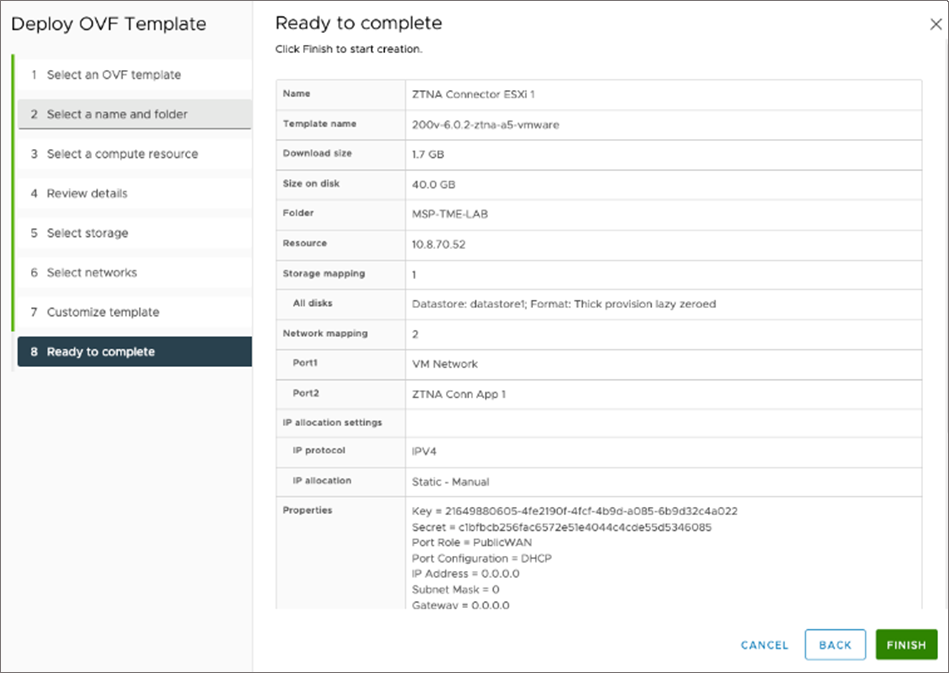
Review the summary then select Finish.![]() Power on the VM by using one of the following methods.
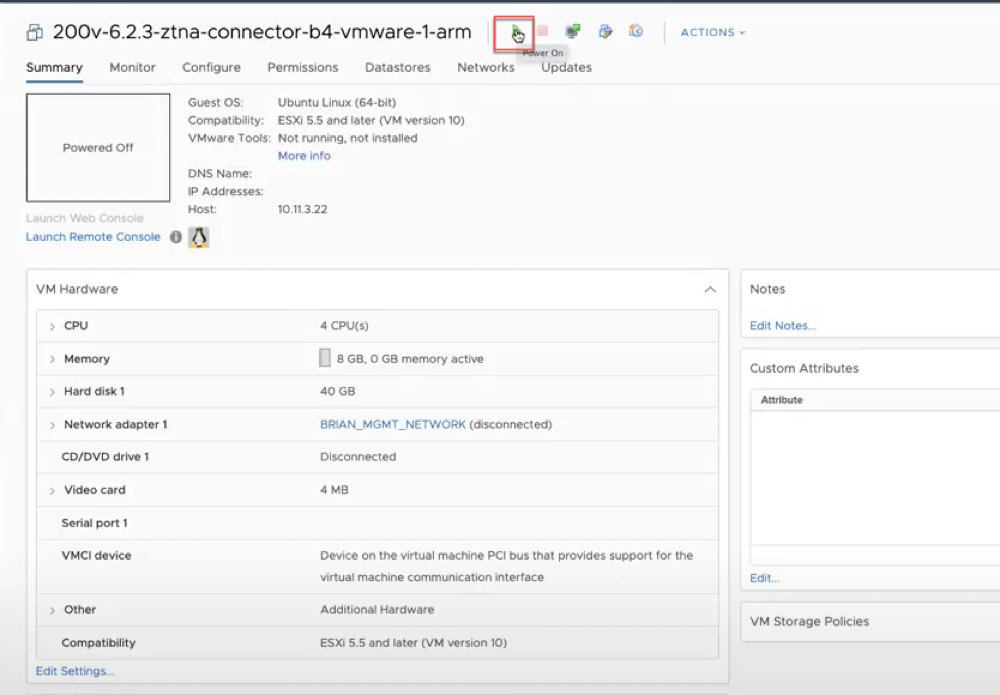
Power on the VM by using one of the following methods.- Select Power On to start the virtual
server.
![]()
- Right-click the interface, and select Power On (PowerPower On).
![]()
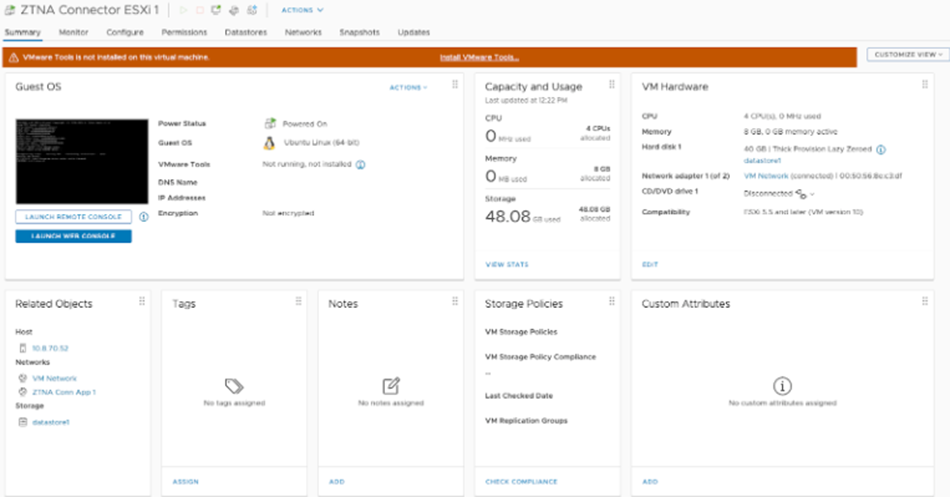
After deploying the VM, confirm that it has come up.After the ESXi virtual server comes up, Prisma Access completes the configuration of the device to be used as a ZTNA Connector.![]() On the Prisma SASE Portal, go to ConfigurationZTNA ConnectorConnectors, find the Connector you want to use, and make sure that it shows tunnel up.
On the Prisma SASE Portal, go to ConfigurationZTNA ConnectorConnectors, find the Connector you want to use, and make sure that it shows tunnel up.![]()

