Network Security
Create Custom Web Access Policies
Table of Contents
Create Custom Web Access Policies
Web Security Administrators can customize
and create web access policies.
- Select .Here, you can view and customize your web access policies. To create a new Custom Web Access Policy, select Add Policy. Or, you can skip down to Step 3, Default Web Access Policies.
![]()
![]() Choose a scope.Just like your Security policy, Web Security is part of your configuration hierarchy. You can even configure Web Security for GlobalProtect, Explict Proxy, and Remote Networks independently.
Choose a scope.Just like your Security policy, Web Security is part of your configuration hierarchy. You can even configure Web Security for GlobalProtect, Explict Proxy, and Remote Networks independently.![]() Review the following:
Review the following:- Web Security: Security Settings The default settings adhere to best practices and provide a good level of protection, but you can customize them if you’d like. Security settings are applied globally.
- Web Security: Objects
Use the policy objects available to help you build out your policy.
Review and Enable or Disable the Default Web Access Policies.- Global Web AccessEnforces your web application and URL category access restrictions for all users.
- Global Catch All PolicySets the default action for all outbound traffic to any Web Application or URL Category to allow. It’s a good practice to you leave the Global Catch All Policy enabled. Otherwise, any traffic not matching your Web Security rules is enforced according to the policies defined under .
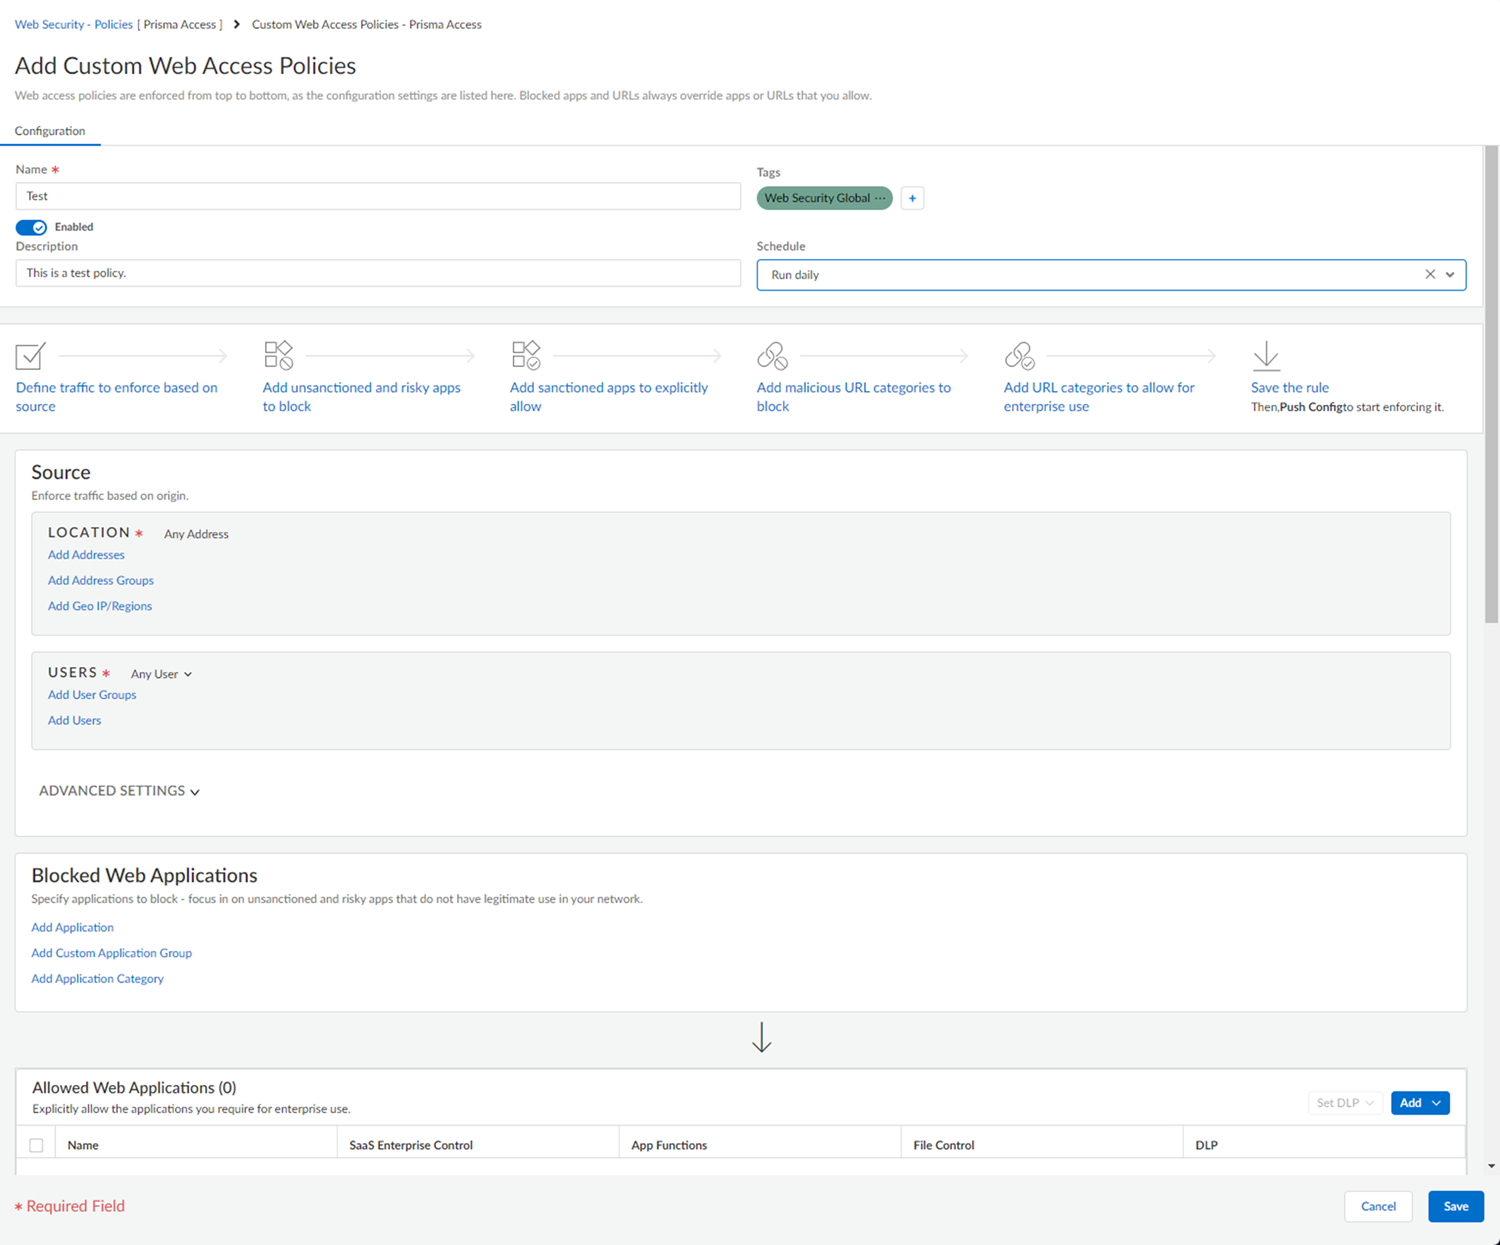
Use this table to guide you as you put together your policy.Web access policies are enforced from top to bottom. Blocked applications and URLs always supersede applications or URLs that you allow.Decide: Action to take: What's the purpose of this policy Give your policy a name. Optionally, you can add a description, tags, and a schedule for your policy. Giving your policy a descriptive name and a meaningful description of its purpose makes it easier to manage later on not just for you, but for other administrators as well. Tags can help you group policies with similar characteristics. Schedules can help you manage policies that need to be enforced at regular intervals. Where and for whom your policy is enforced In the Source section, define traffic to enforce based on its source. Location - Enforce web traffic based on where it originates. You can add locations by address, groups of addresses, and geographical region.Users - Add users and groups of users whom your policy affects.Advanced Settings - You can enforce traffic based on the deployment type:- All
- GlobalProtect
- Explicit Proxy
- Remote Networks
Device - Add a device posture profile to use device state information such as whether a device is jailbroken for policy enforcement.What gets blocked In the Blocked Web Applications and Blocked URL Categories sections, add applications and URL categories to block - Focus on unsanctioned and risky applications that do not have legitimate use in your network and malicious websites. What’s allowed In the Allowed Web Applications and Allowed URL Categories sections, add sanctioned applications and URL categories to explicitly allow for enterprise use. You can restrict access to features within specific allowed applications. You may want to allow Gmail, but block access to chat or calls within Gmail, for example. You can also choose what actions to take on files entering your network via allowed applications on a per application basis using file controls. You can Pre-configure file control rules using custom profiles and employ those custom profiles in your web access policies. Select Push Config at the top right corner of your screen.A Push window opens.Enter a description if you’d like, and then Push your new policy and settings to the cloud for enforcement.