Add a Custom Role Through Common Services
Table of Contents
Add a Custom Role Through Common Services
Learn how to add a custom role through the Common Services.
| Where Can I Use This? | What Do I Need? |
|---|---|
|
|
If you require more granular access control than the predefined roles provide, you can
add custom roles to define which permissions are enforced for your users. Similar to
predefined roles, custom roles are a set of permissions and permission sets. Unlike
predefined roles, each custom role is assignable only to the users in the hierarchy
under the Tenant Service Group (TSG) where it's
defined. This avoids name conflicts between similarly named custom roles defined by
different customers.
Consider an example using tenants called ParentTenant, ChildTenantEast,
ChildTenantNorthEast, and ChildTenantWest in the following screenshot.
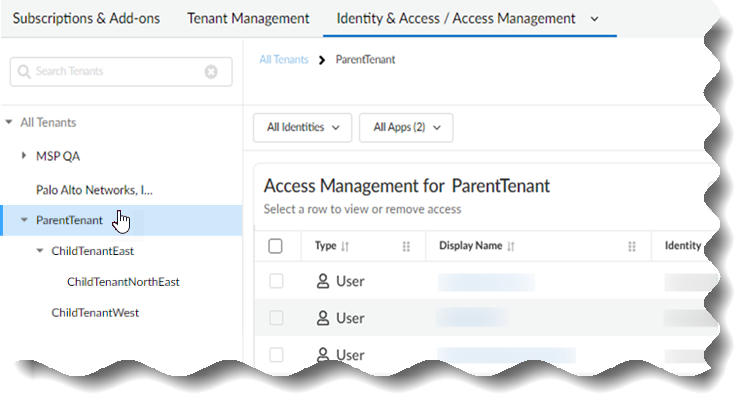
If
you add a custom role at the top level (ParentTenant) of the hierarchy,
that role is assigned to the tenants nested below it (ChildTenantEast,
ChildTenantNorthEast, and ChildTenantWest) so that the parent tenant
can manage the child tenants. If you add a custom role at ChildTenantEast,
the role is only inherited by ChildTenantNorthEast so that ChildTenantEast
can manage ChildTenantNorthEast. A custom role added at ChildTenantWest
is only for use by ChildTenantWest.
Name your custom roles
with specific names rather than generic names so that you can easily
tell them apart. For example, if you add a custom role named Investigator
to the ParentTenant, the role name of Investigator is also assigned
to all the tenants nested below it, so that role name can no longer
be used anywhere else in that nested hierarchy. Instead, consider
using ParentInvestigator at the parent level, so that you can use
ChildWestInvestigator if you need an investigator role that is only
for use by ChildTenantWest. The same behavior exists from the bottom
level of the hierarchy as well—if you first add a custom role named
Investigator to ChildTenantWest, then the name of Investigator is
no longer available for use by ParentTenant or any other tenant
in that nested hierarchy.
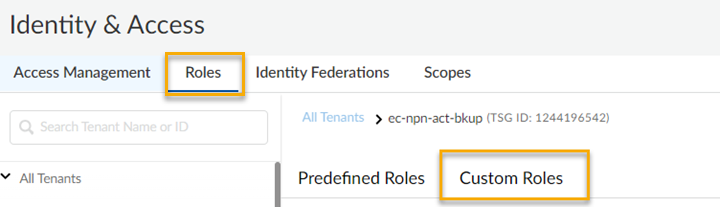
- Use one of the various ways to access .Select to add a custom role.
![]()
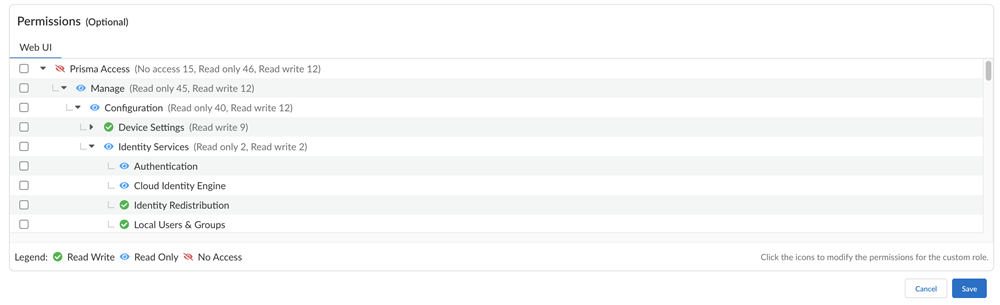
![]() Add a Name and a Description for the role.Add permissions. The permissions are split between web interface and API.(Optional) If you select Web Interface:Web interface permission sets are grouped in a hierarchy for each application. The icon next to the permission set name indicates the permission access status. You will see all the permission sets even if you don't have a license to use all the corresponding applications.
Add a Name and a Description for the role.Add permissions. The permissions are split between web interface and API.(Optional) If you select Web Interface:Web interface permission sets are grouped in a hierarchy for each application. The icon next to the permission set name indicates the permission access status. You will see all the permission sets even if you don't have a license to use all the corresponding applications.- Select an icon to toggle the permission set access.Select an icon at a higher level in the hierarchy to toggle permissions at the lower levels as well.Select a check box for bulk change actions. The Read Write, Read-Only, and No Access become visible when one or more permission sets are selected, so you can set many permission sets to the same access all at once, rather than selecting each one individually.
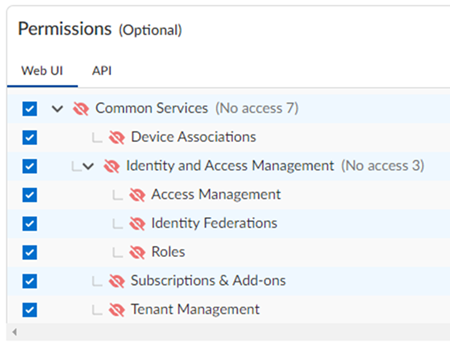
![]() A variety of menus and tabs can be hidden from users in the web interface, but he following example shows hiding all the Common Services from the UI, such as: Subscription & Add-ons, Tenant Management, Identity & Access, and Device Associations.Consider a scenario where a managed security service provider (MSSP) or a distributed enterprise customer needs to grant an admin user access to a tenant, but that user does not need to manage any of the Common Services. A custom role can be added with No Access for each of the Common Services elements in the web interface tab:
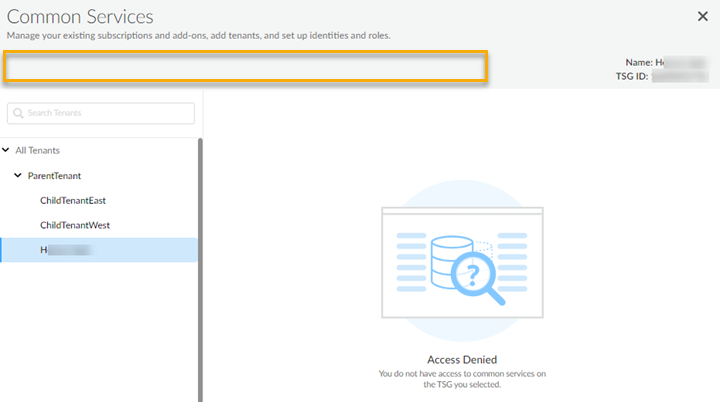
A variety of menus and tabs can be hidden from users in the web interface, but he following example shows hiding all the Common Services from the UI, such as: Subscription & Add-ons, Tenant Management, Identity & Access, and Device Associations.Consider a scenario where a managed security service provider (MSSP) or a distributed enterprise customer needs to grant an admin user access to a tenant, but that user does not need to manage any of the Common Services. A custom role can be added with No Access for each of the Common Services elements in the web interface tab:![]() After you assign that role to users, they can access the tenant, but the Common Services menus are hidden:
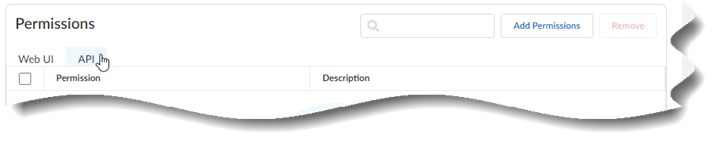
After you assign that role to users, they can access the tenant, but the Common Services menus are hidden:![]() (Optional) If you select API:Any permissions that you had set using Web Interface are visible. You can't remove them from here, but you can remove them by changing them in Web Interface.
(Optional) If you select API:Any permissions that you had set using Web Interface are visible. You can't remove them from here, but you can remove them by changing them in Web Interface.![]()
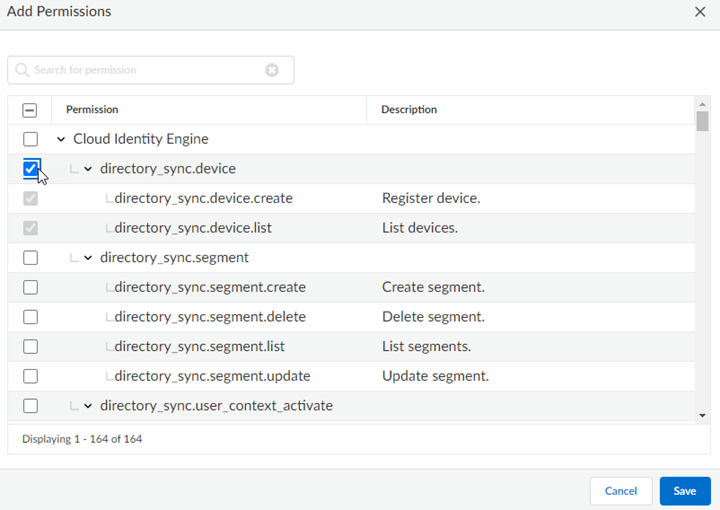
- Select Add Permissions to open the permissions modal. Permissions are listed in a hierarchy.Select permissions individually.Select a check box at a higher level in the hierarchy to toggle permissions at the lower levels as well.Select a check box for bulk change actions, so you can set many permissions all at once, rather than selecting each one individually.Save to add permissions to the list.
![]() Save your custom role changes.The role is saved with the following information:
Save your custom role changes.The role is saved with the following information:Property Description Custom Role NameThe role name you assigned.Custom Role IDThe role ID you can use to map a tenant for authorization.Inherited FromIf the role is inherited, the name of the parent tenant where the role is inherited.DescriptionThe role name you assigned.ActionsModify a custom role through edit, clone, or delete.