Advanced DNS Security Powered by Precision AI®
Manage External Dynamic List
Table of Contents
Manage External Dynamic List
The Advanced DNS Security Resolver can use EDLs to enforce policy actions on a set of
user-defined domains.
| Where Can I Use This? | What Do I Need? |
|---|---|
|
|
An external dynamic list is a text file hosted on an external web server so that
certain Palo Alto Networks products can use to import objects—IP addresses, URLs,
domains, International Mobile Equipment Identities (IMEIs), International Mobile
Subscriber Identities (IMSIs)—and enforce policy. The Advanced DNS Security Resolver can use
an EDL containing domains to apply a particular action (allow, block, sinkhole, or
alert) on a specific group of domains.
If your domain entries include subdomains, those are counted as additional entries
when automatic subdomain inclusion for external dynamic lists (EDLs) is enabled.
This eliminates the manual and error-prone process of defining both top-level
domains and their subdomains. When enabled, a single domain entry, such as
example.com automatically covers all its subdomains (*.example.com), ensuring
consistent security policy application across the entire domain hierarchy. While
this feature simplifies domain management, it consumes two entries per domain due to
the implicit wildcard generation. If this is not enabled, only the top-level domains
contained in the EDL are used and the subdomains are ignored.
- You can have a maximum of 30 EDL sources for your Advanced DNS Security Resolver. These EDLs are not associated with your Strata Cloud Manager EDLs and function only for theAdvanced DNS Security Resolver.
- Each External Dynamic List (EDL) has a default capacity of 30,000 entries, which includes expanded subdomains that occur during list processing. To increase this limit beyond the default value, contact your Palo Alto Networks sales representative.
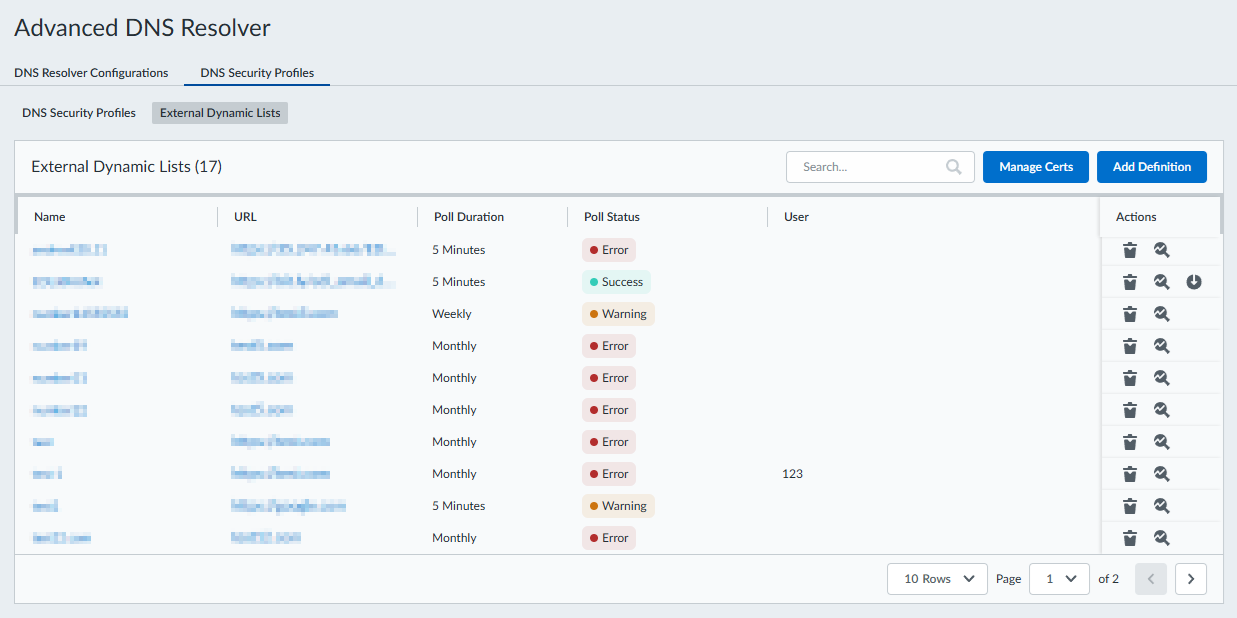
- Log in to the Strata Cloud Manager on the hub.Select ManageConfigurationADNS ResolverDNS Security Profiles and then go to the External Dynamic Lists tab.You can view your available EDLs and get an at-a-glance status of each EDL. Additionally, you can delete, test, and download the associated certificate for each EDL that was previously added. If you enable Automatically expand to include subdomains, hovering over the Poll Status reveals an additional entry, indicating the number of Expanded Lines.
![]() Enable Automatic Subdomain Expansion if you want subdomains related to the top-level EDL domain entries to be included in the EDL. This setting applies to all EDLs configured for your tenant.
Enable Automatic Subdomain Expansion if you want subdomains related to the top-level EDL domain entries to be included in the EDL. This setting applies to all EDLs configured for your tenant.- To create a new EDL entry:
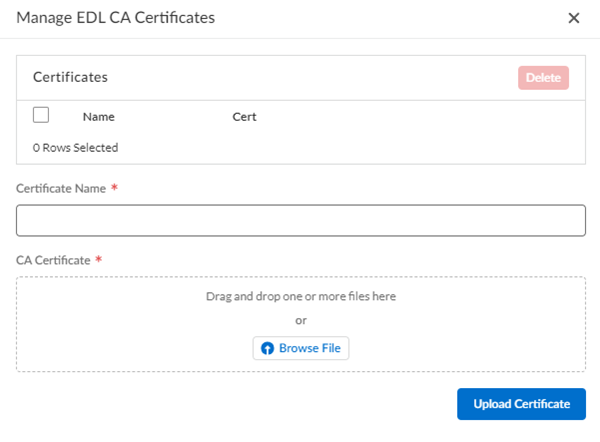
(Required if your EDL source requires a CA certificate to establish a secure connection) Upload CA certificate(s) to Strata Cloud Manager.![]()
- Select Manage Certs.
- For each CA certificate that you wish to add, provide a Certificate Name and a drive location for the certificate file and then Upload Certificate.
- Repeat for any additional CA certificates that you wish to add.
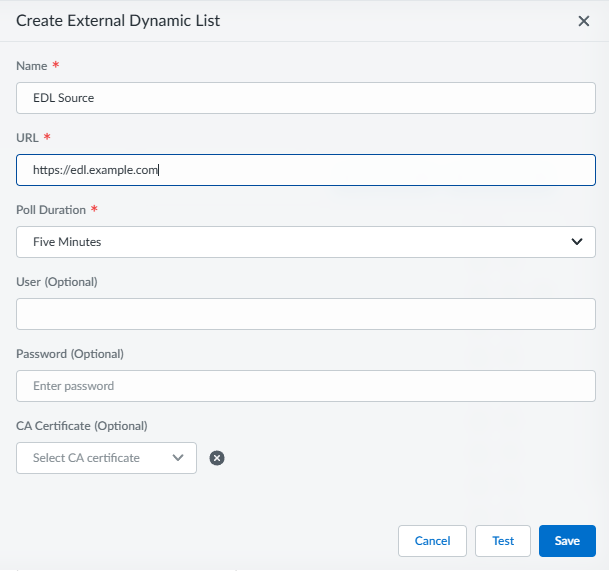
Select Add Definition and provide a name for the new EDL configuration. Additionally, specify the following EDL details:![]()
- URL—An HTTPS URL where the EDL is located.
- Automatically expand to include subdomains—Enables Automatic subdomain expansion if you want subdomains related to the top-level EDL domain entries to be included in the EDL.
- Poll Duration—The frequency at which the Advanced DNS Security Resolver checks for updates to the list.
- User (Optional)—The username used to access the URL hosting the EDL.
- Password (Optional)—The password used to access the URL hosting the EDL.
- CA Certificate (Optional)—The CA certificate required to facilitate the connection between SCM and URL hosting the EDL.You must first add CA certificates from ManageConfigurationADNS ResolverExternal Dynamic ListsManage Certs before you can select them from the CA Certificate dropdown.
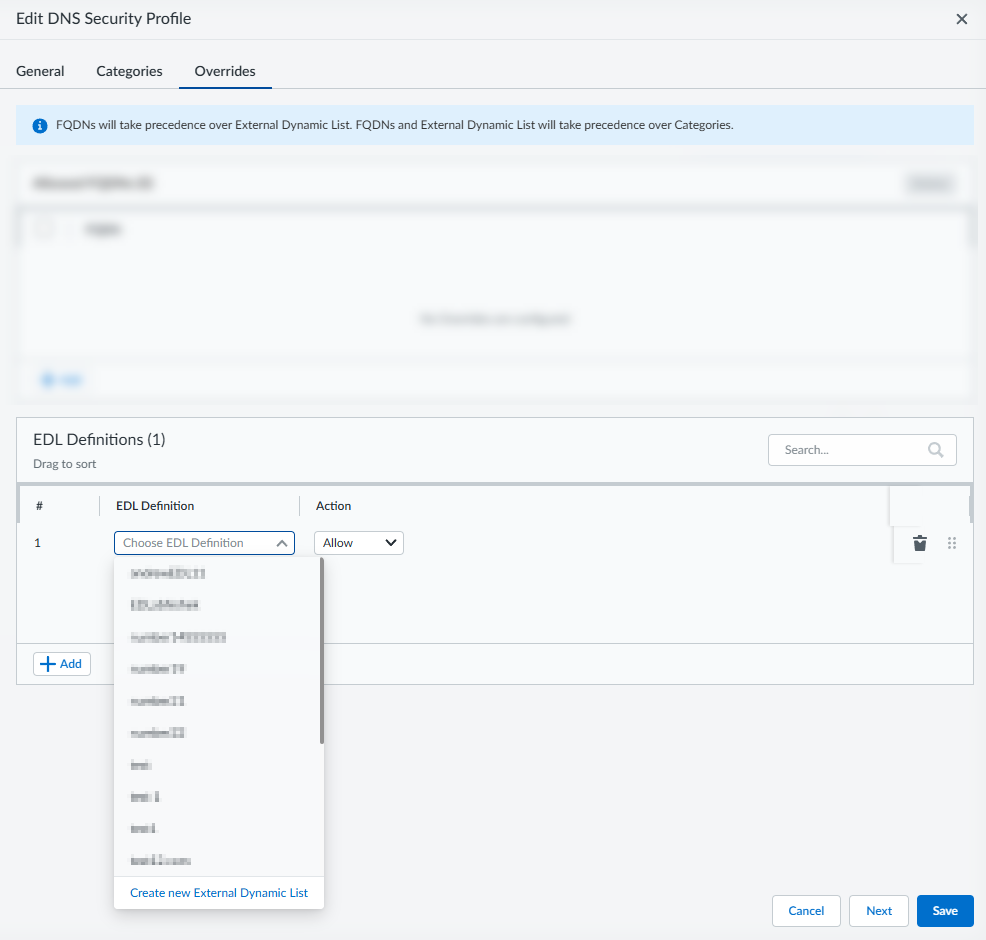
Test to verify that it is accessible and usable by the Advanced DNS Security Resolver. A confirmation appears in the upper-right corner.Save your EDL definition.To apply the EDL to a DNS Security Profile:Select ManageConfigurationADNS Resolver and then go to the DNS Security Profiles tab.Select a DNS Security profile that you want to apply the EDL to and select Overrides tab.![]() From the EDL Definitions panel, + Add or delete entries (using the icon) to modify the EDL list entries as necessary. Keep in mind, only EDL lists that have been previously created can be added.Select an Action for each EDL list entry.
From the EDL Definitions panel, + Add or delete entries (using the icon) to modify the EDL list entries as necessary. Keep in mind, only EDL lists that have been previously created can be added.Select an Action for each EDL list entry.- allow—The DNS query is allowed.
- alert—The DNS query generates an alert. DNS queries that generate an alert are saved in the DNS Security log.
- block—The DNS query is blocked.
- sinkhole—Forges a DNS response for a DNS query targeting a detected malicious domain. This directs the resolution of the malicious domain name to a specific IP address (referred to as the Sinkhole IP), which is embedded as the response.
You can add multiple entries by opening additional fields using + Add.Click Save when finished.


