Enterprise DLP
Create a Microsoft Exchange Inbound Connector
Table of Contents
Expand All
|
Collapse All
Enterprise DLP Docs
Create a Microsoft Exchange Inbound Connector
Create an inbound Microsoft Exchange Online Connector to return emails forwarded to
Enterprise Data Loss Prevention (E-DLP) for inline inspection back to Microsoft Exchange.
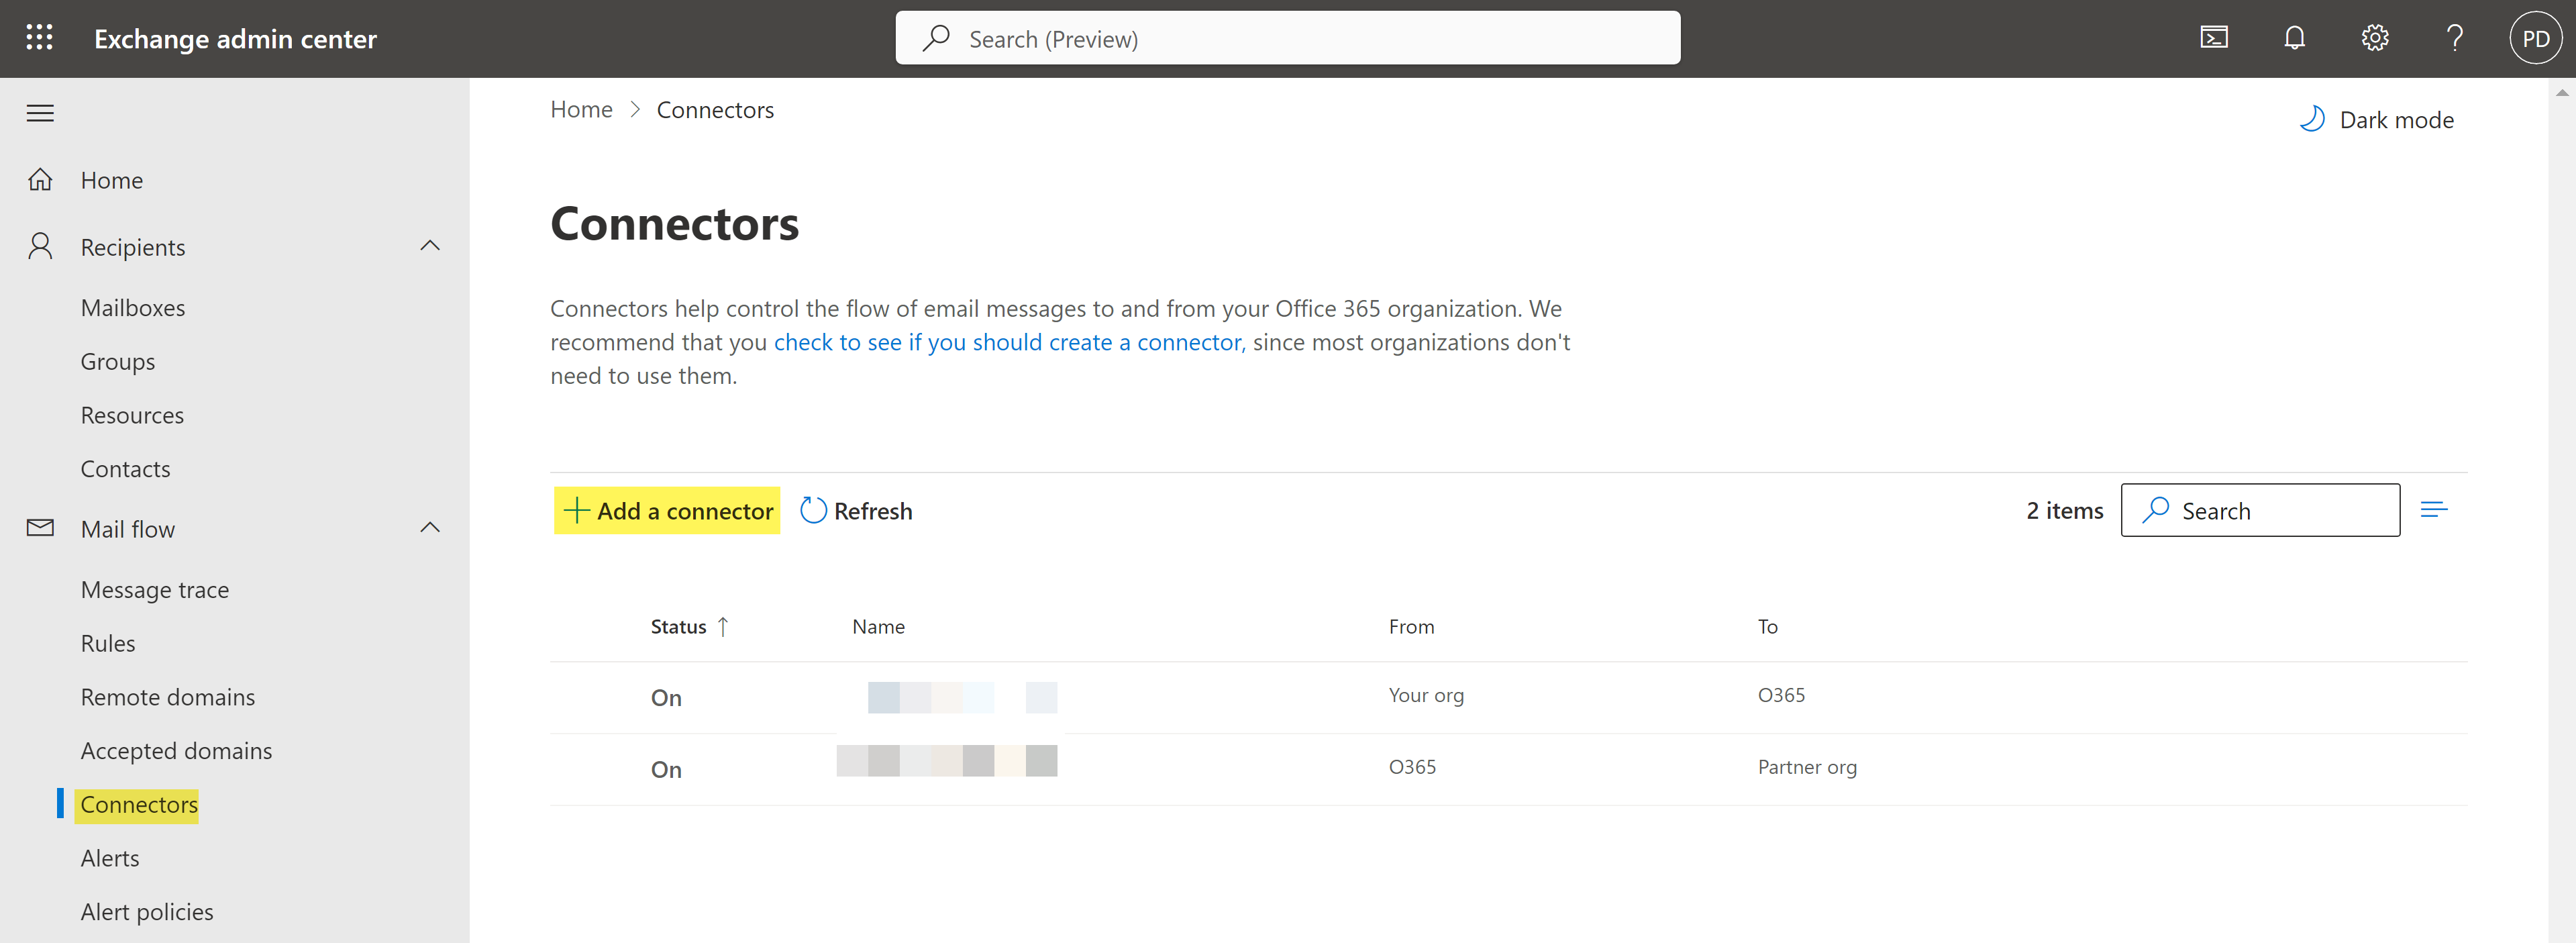
- Log in to the Microsoft Exchange Admin Center.Select Mail flowConnectors and Add a connector to launch the Microsoft Exchange Connector wizard.
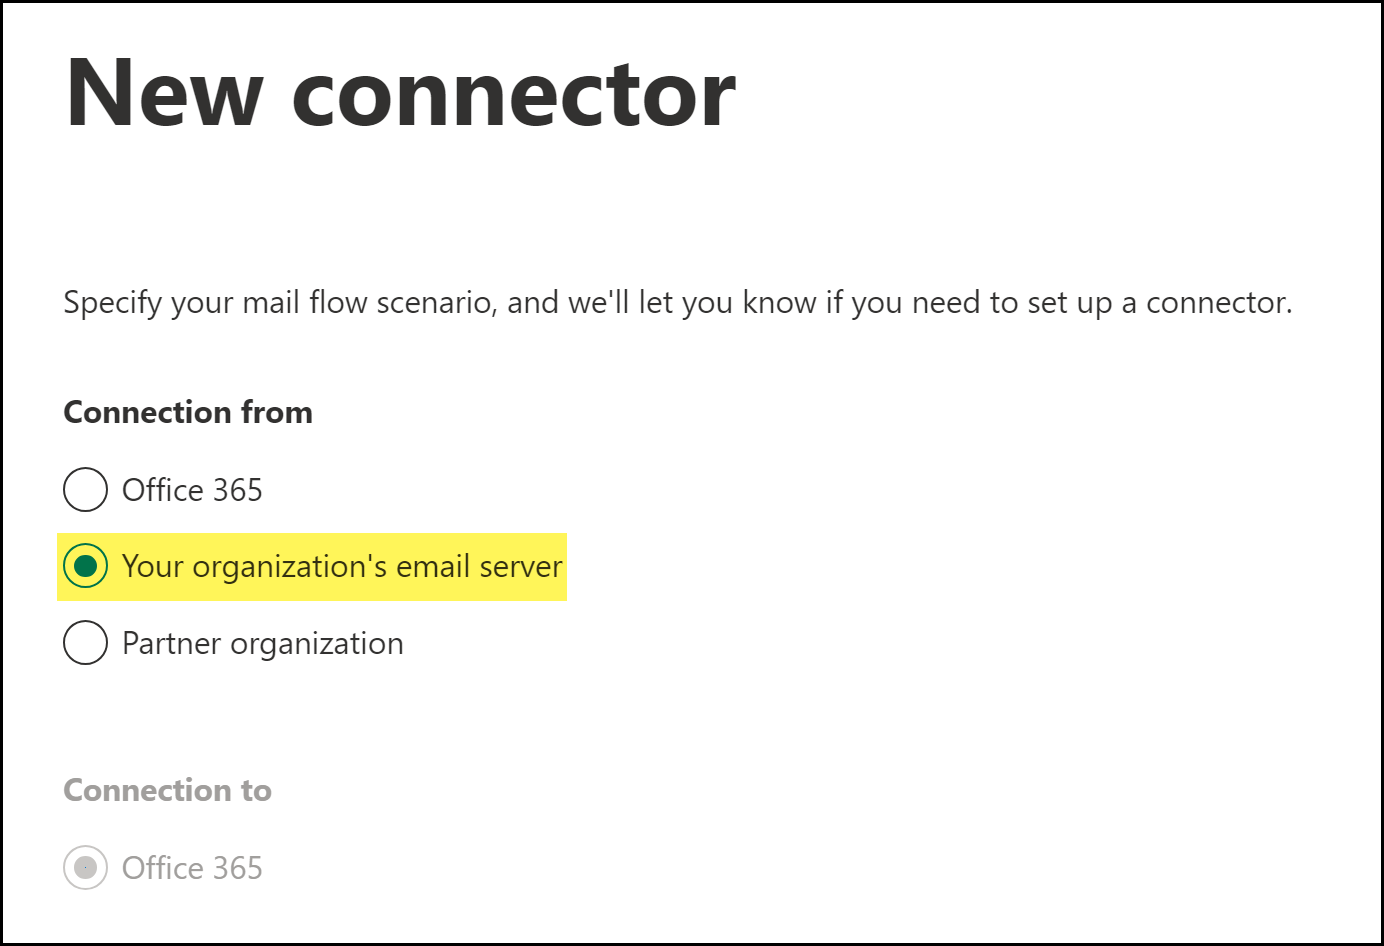
![]() Specify the connector source and destination.
Specify the connector source and destination.- For Connection from, select Your organization's email server.Click Next.
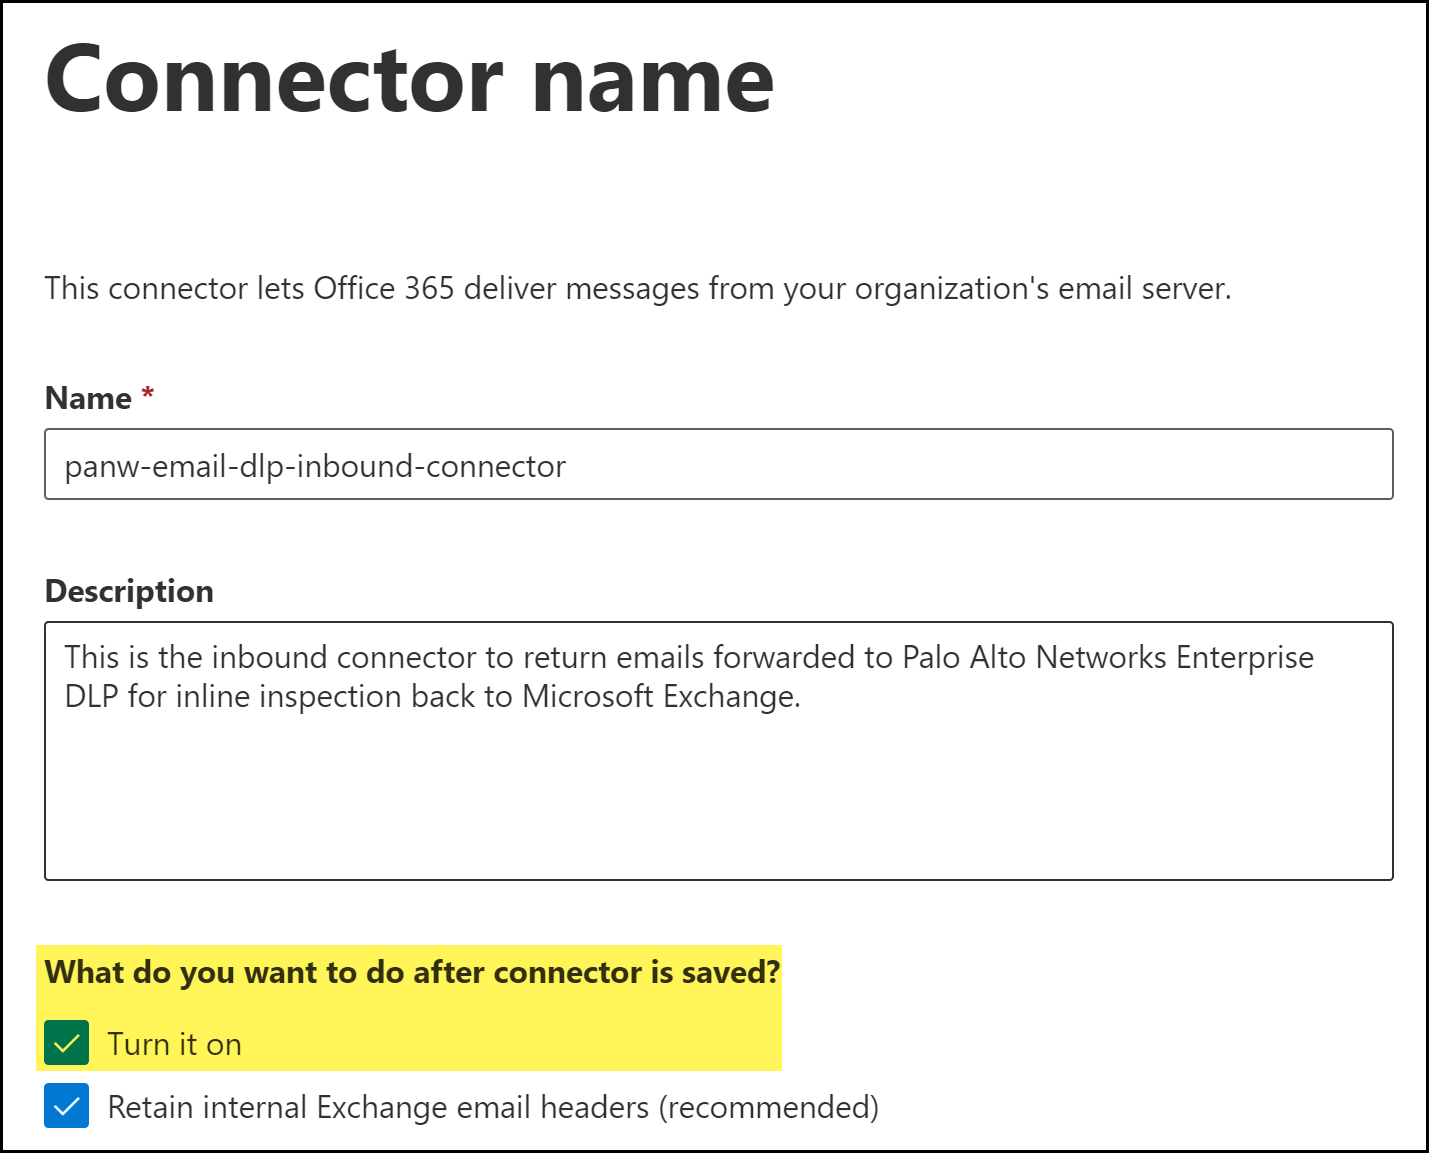
![]() Name the Microsoft Exchange connector.
Name the Microsoft Exchange connector.- Enter a descriptive Name for the connector.(Optional) Enter a Description for the connector.(Best Practices) For What do you want to do after connector is saved?, check (enable) Turn it on.Enable this to automatically turn on the connector after you have finished creating and saved the new Microsoft Exchange connector.Click Next.
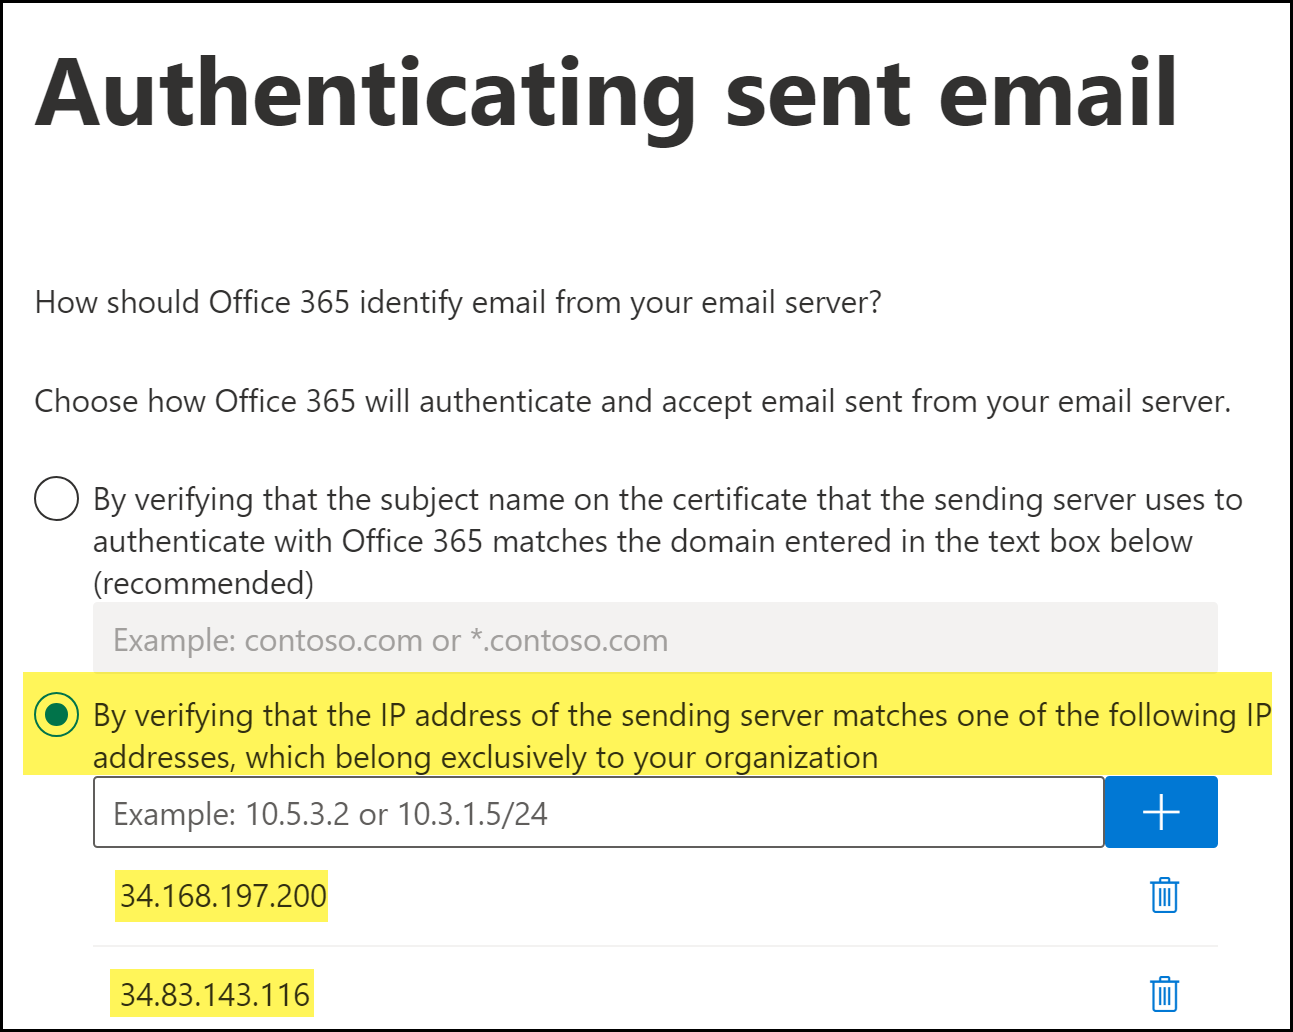
![]() Specify the authentication IP addresses that Microsoft Exchange uses to verify Enterprise DLP.Enterprise DLP requires the authentication IP addresses to forward emails back to Microsoft Exchange.
Specify the authentication IP addresses that Microsoft Exchange uses to verify Enterprise DLP.Enterprise DLP requires the authentication IP addresses to forward emails back to Microsoft Exchange.- Select By verifying that the IP address of the sending server matches one of the following IP address, which belong to your partner organization.Add the following to IP addresses.Add the IP addresses for the region where you host your email domain. You can add multiple regional IP addresses if you have email domains hosted in multiple regions.
- APAC35.186.151.226 and 34.87.43.120
- Australia35.197.179.113 and 35.244.122.65
- Europe34.141.90.172 and 34.107.47.119
- India34.93.185.212 and 35.200.159.173
- Japan34.84.8.170 and 35.221.111.27
- United Kingdom34.105.128.121 and 34.89.40.221
- United States34.168.197.200 and 34.83.143.116
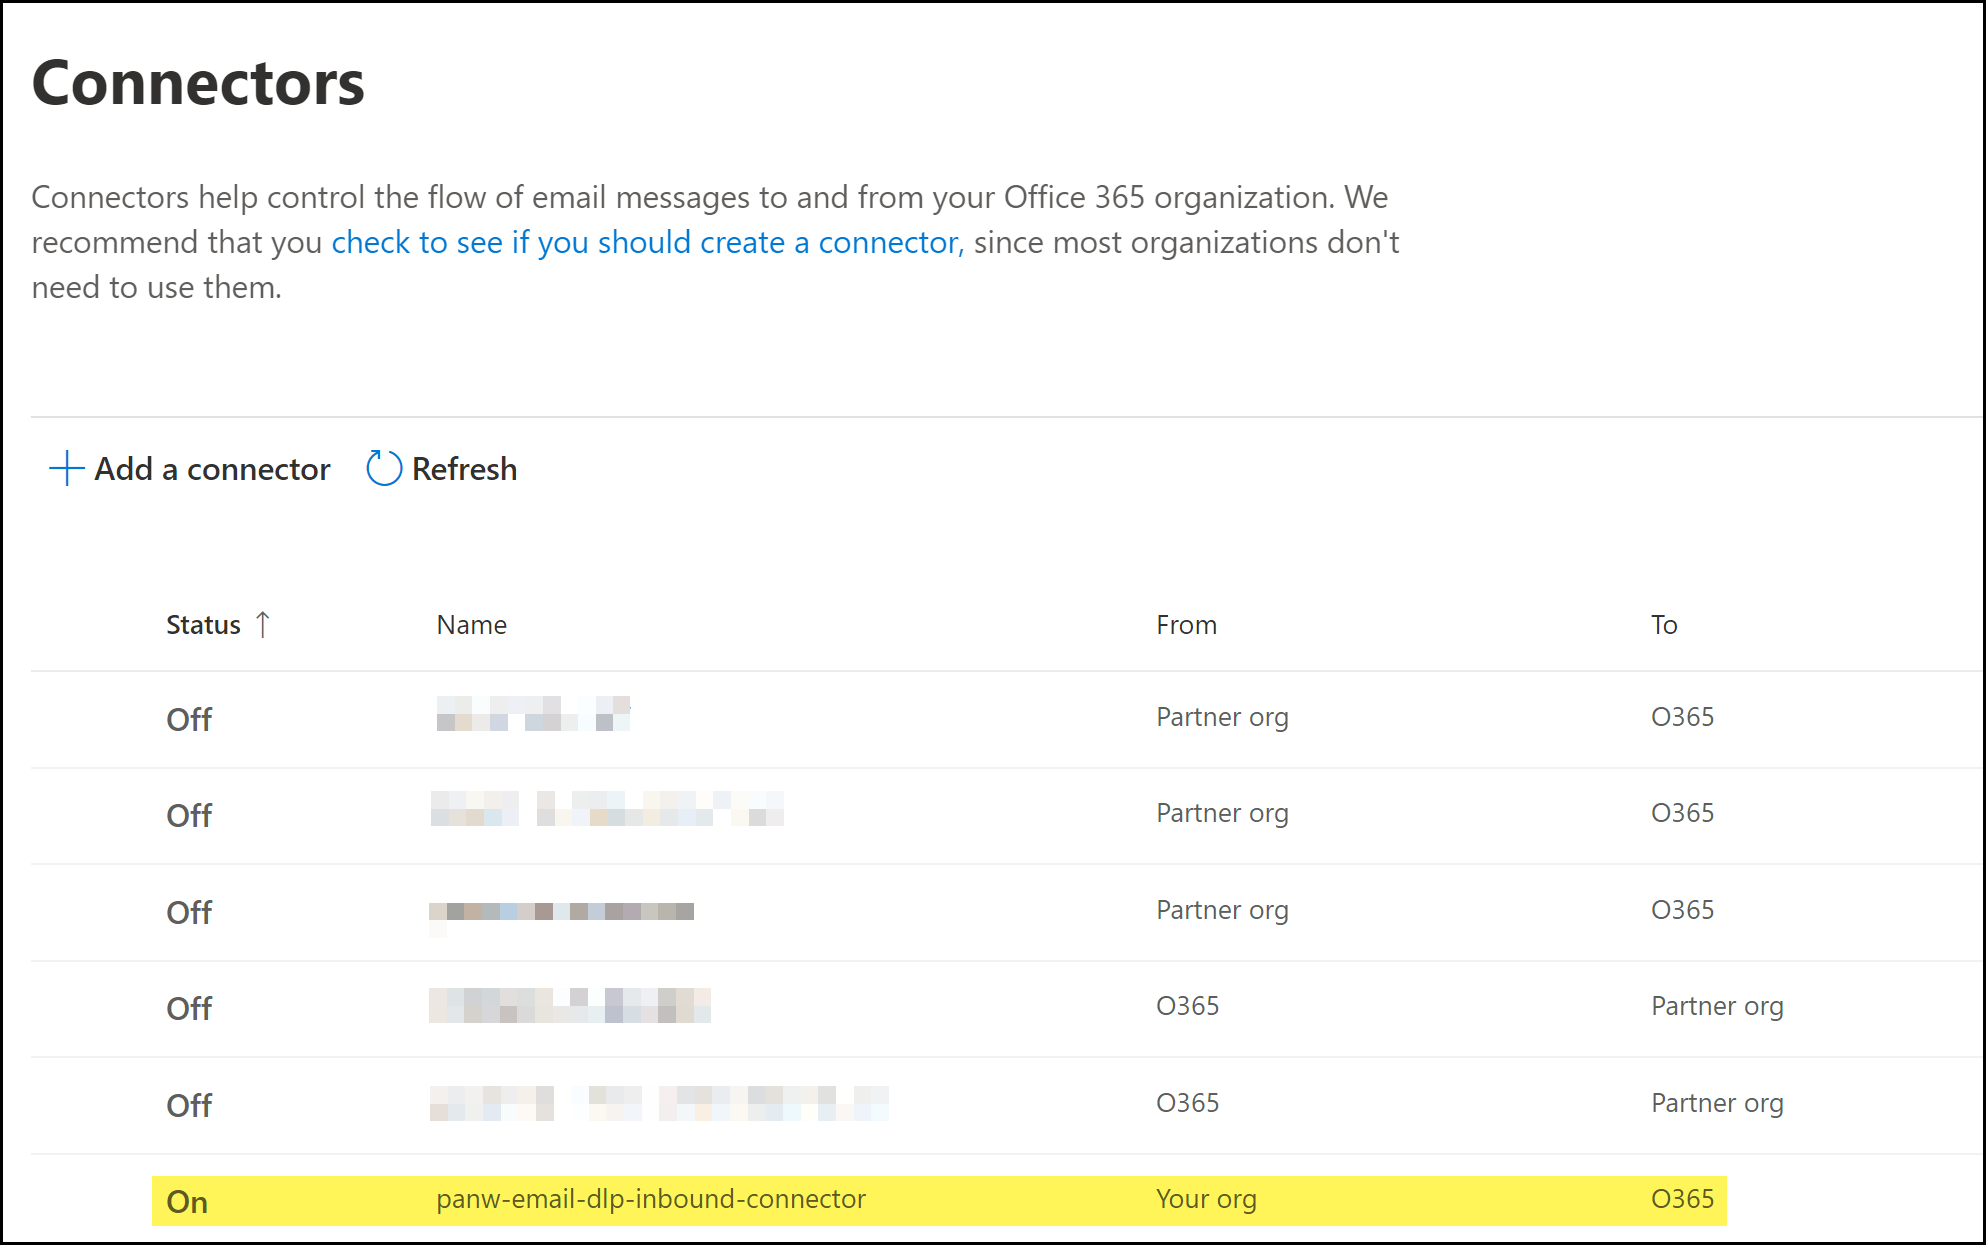
![]() Review the connector details and Create Connector.Click Done when prompted that you successfully created the inbound connector.Back in the Connectors page, verify the inbound connector is displayed and that the Status displays On.
Review the connector details and Create Connector.Click Done when prompted that you successfully created the inbound connector.Back in the Connectors page, verify the inbound connector is displayed and that the Status displays On.![]() Create the Microsoft Exchange outbound connector if not already created.Enterprise DLP requires the outbound connector to control the flow of emails forwarded from Microsoft Exchange Online to Enterprise DLP for inline inspection.Skip this step if you have already created the outbound connector.Create Microsoft Exchange Transport Rules.After you successfully created the Microsoft Exchange connectors, you must create Microsoft Exchange transports rule to forward emails to Enterprise DLP, and to specify what actions Microsoft Exchange takes based on the Enterprise DLP verdicts.
Create the Microsoft Exchange outbound connector if not already created.Enterprise DLP requires the outbound connector to control the flow of emails forwarded from Microsoft Exchange Online to Enterprise DLP for inline inspection.Skip this step if you have already created the outbound connector.Create Microsoft Exchange Transport Rules.After you successfully created the Microsoft Exchange connectors, you must create Microsoft Exchange transports rule to forward emails to Enterprise DLP, and to specify what actions Microsoft Exchange takes based on the Enterprise DLP verdicts.

