Install the PA-220 Firewall Using the PAN-PA-220-RACKTRAY
Table of Contents
Install the PA-220 Firewall Using the PAN-PA-220-RACKTRAY
Learn how to install a PA-220 firewall in the PAN-PA-220-RACKTRAY.
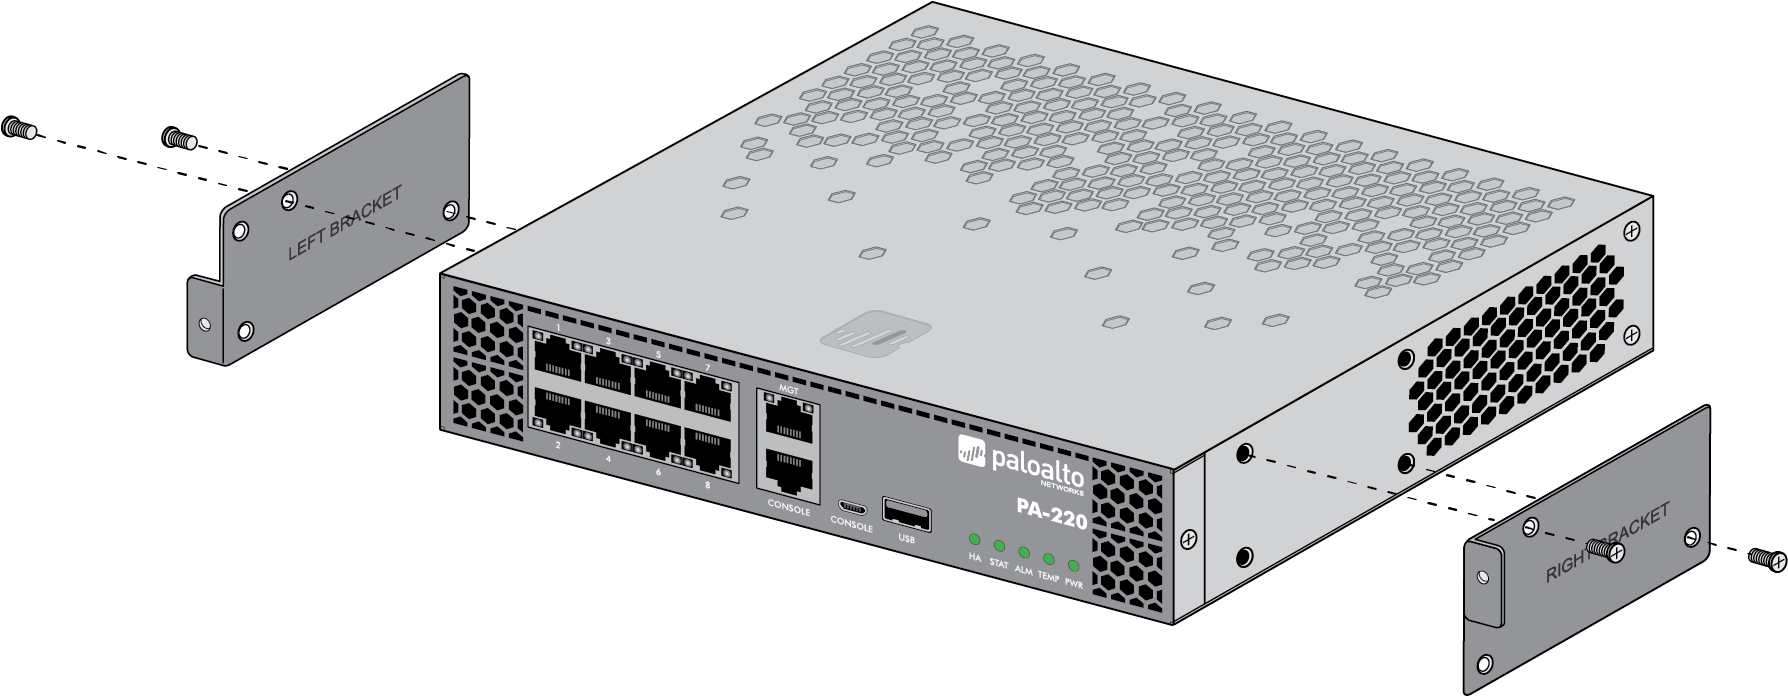
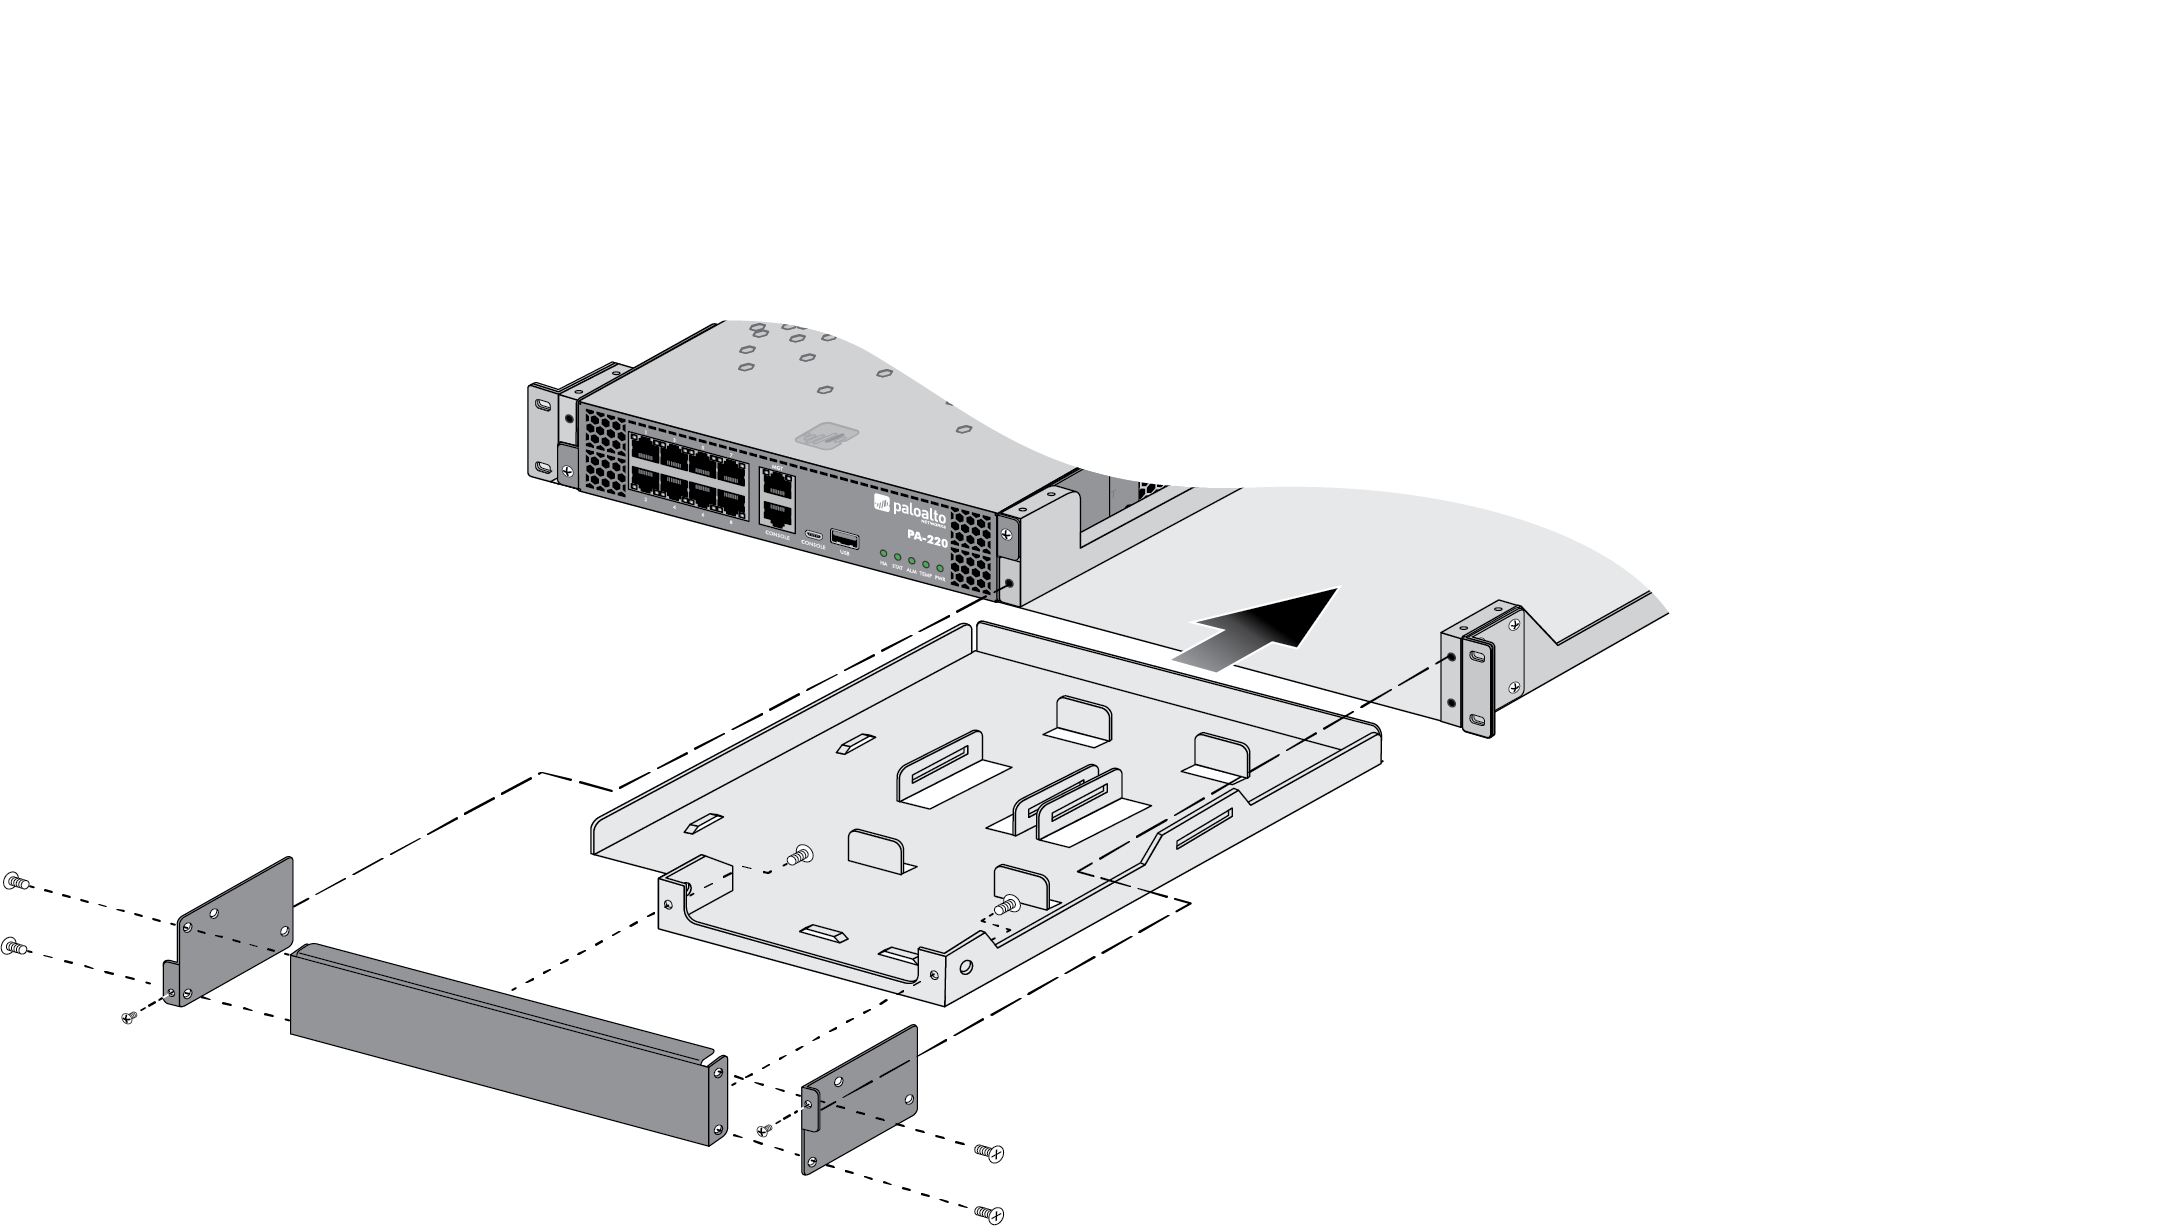
- Attach one rack tray bracket to each side of the firewall using
two 4-40 x 1/4” screws for each bracket. The brackets are labeled
left and right as shown in the illustration.
![]()
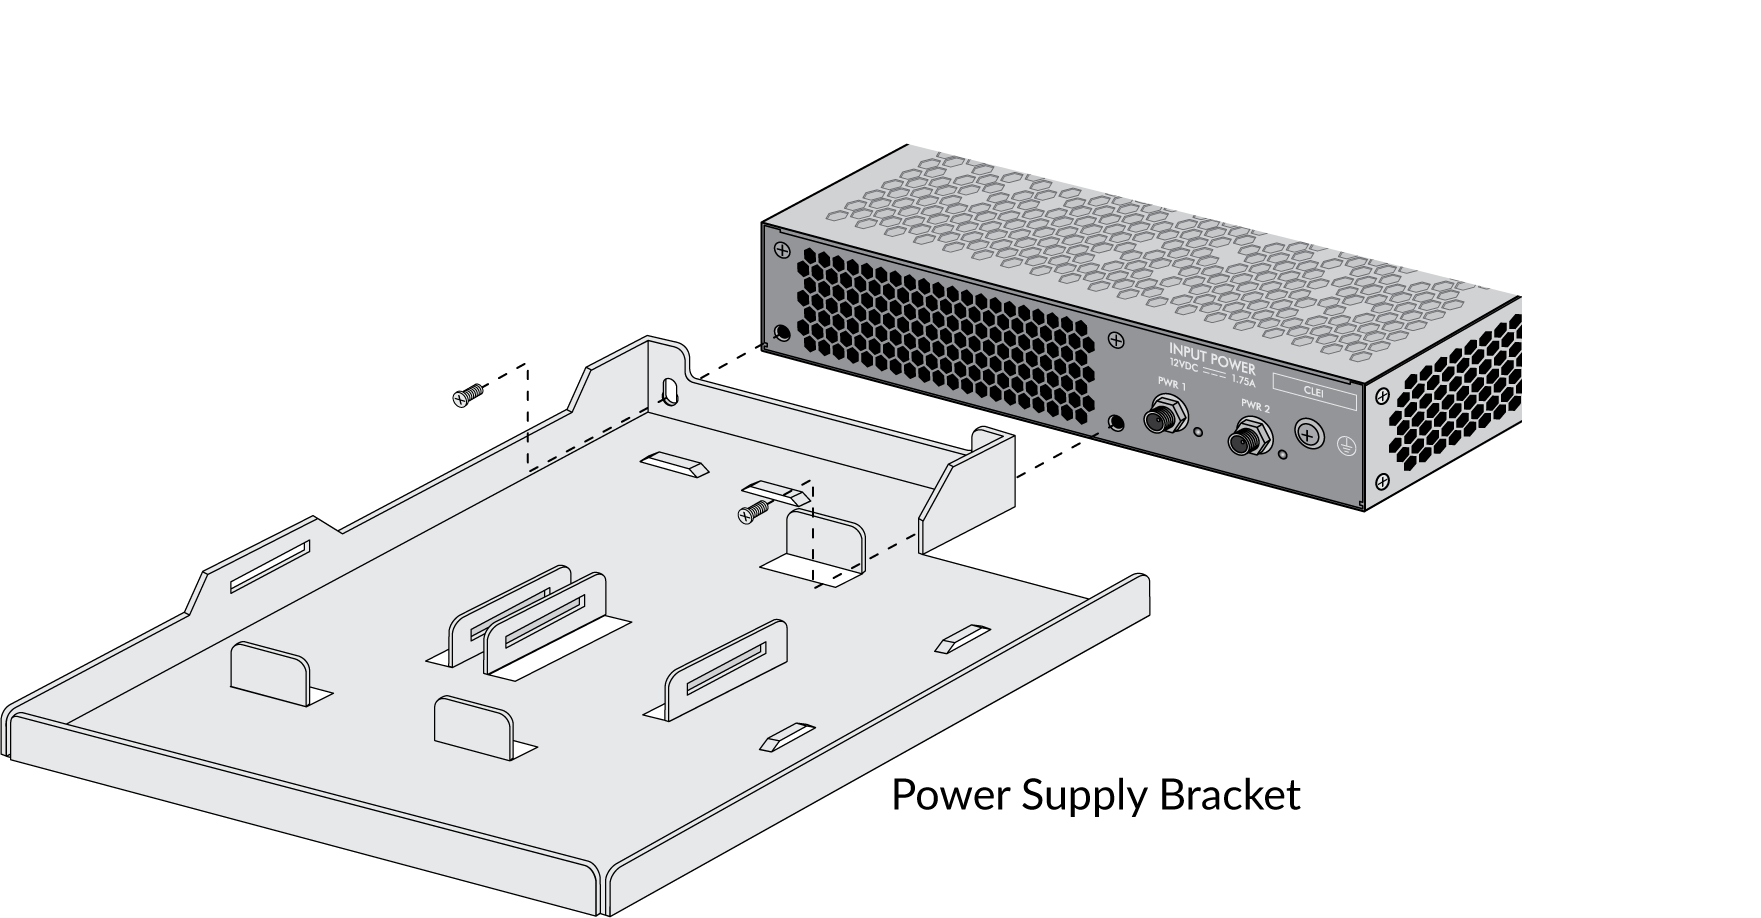
- Attach the power adapter bracket to the back of the firewall
using two 4-40 x 1/4” screws.
![]()
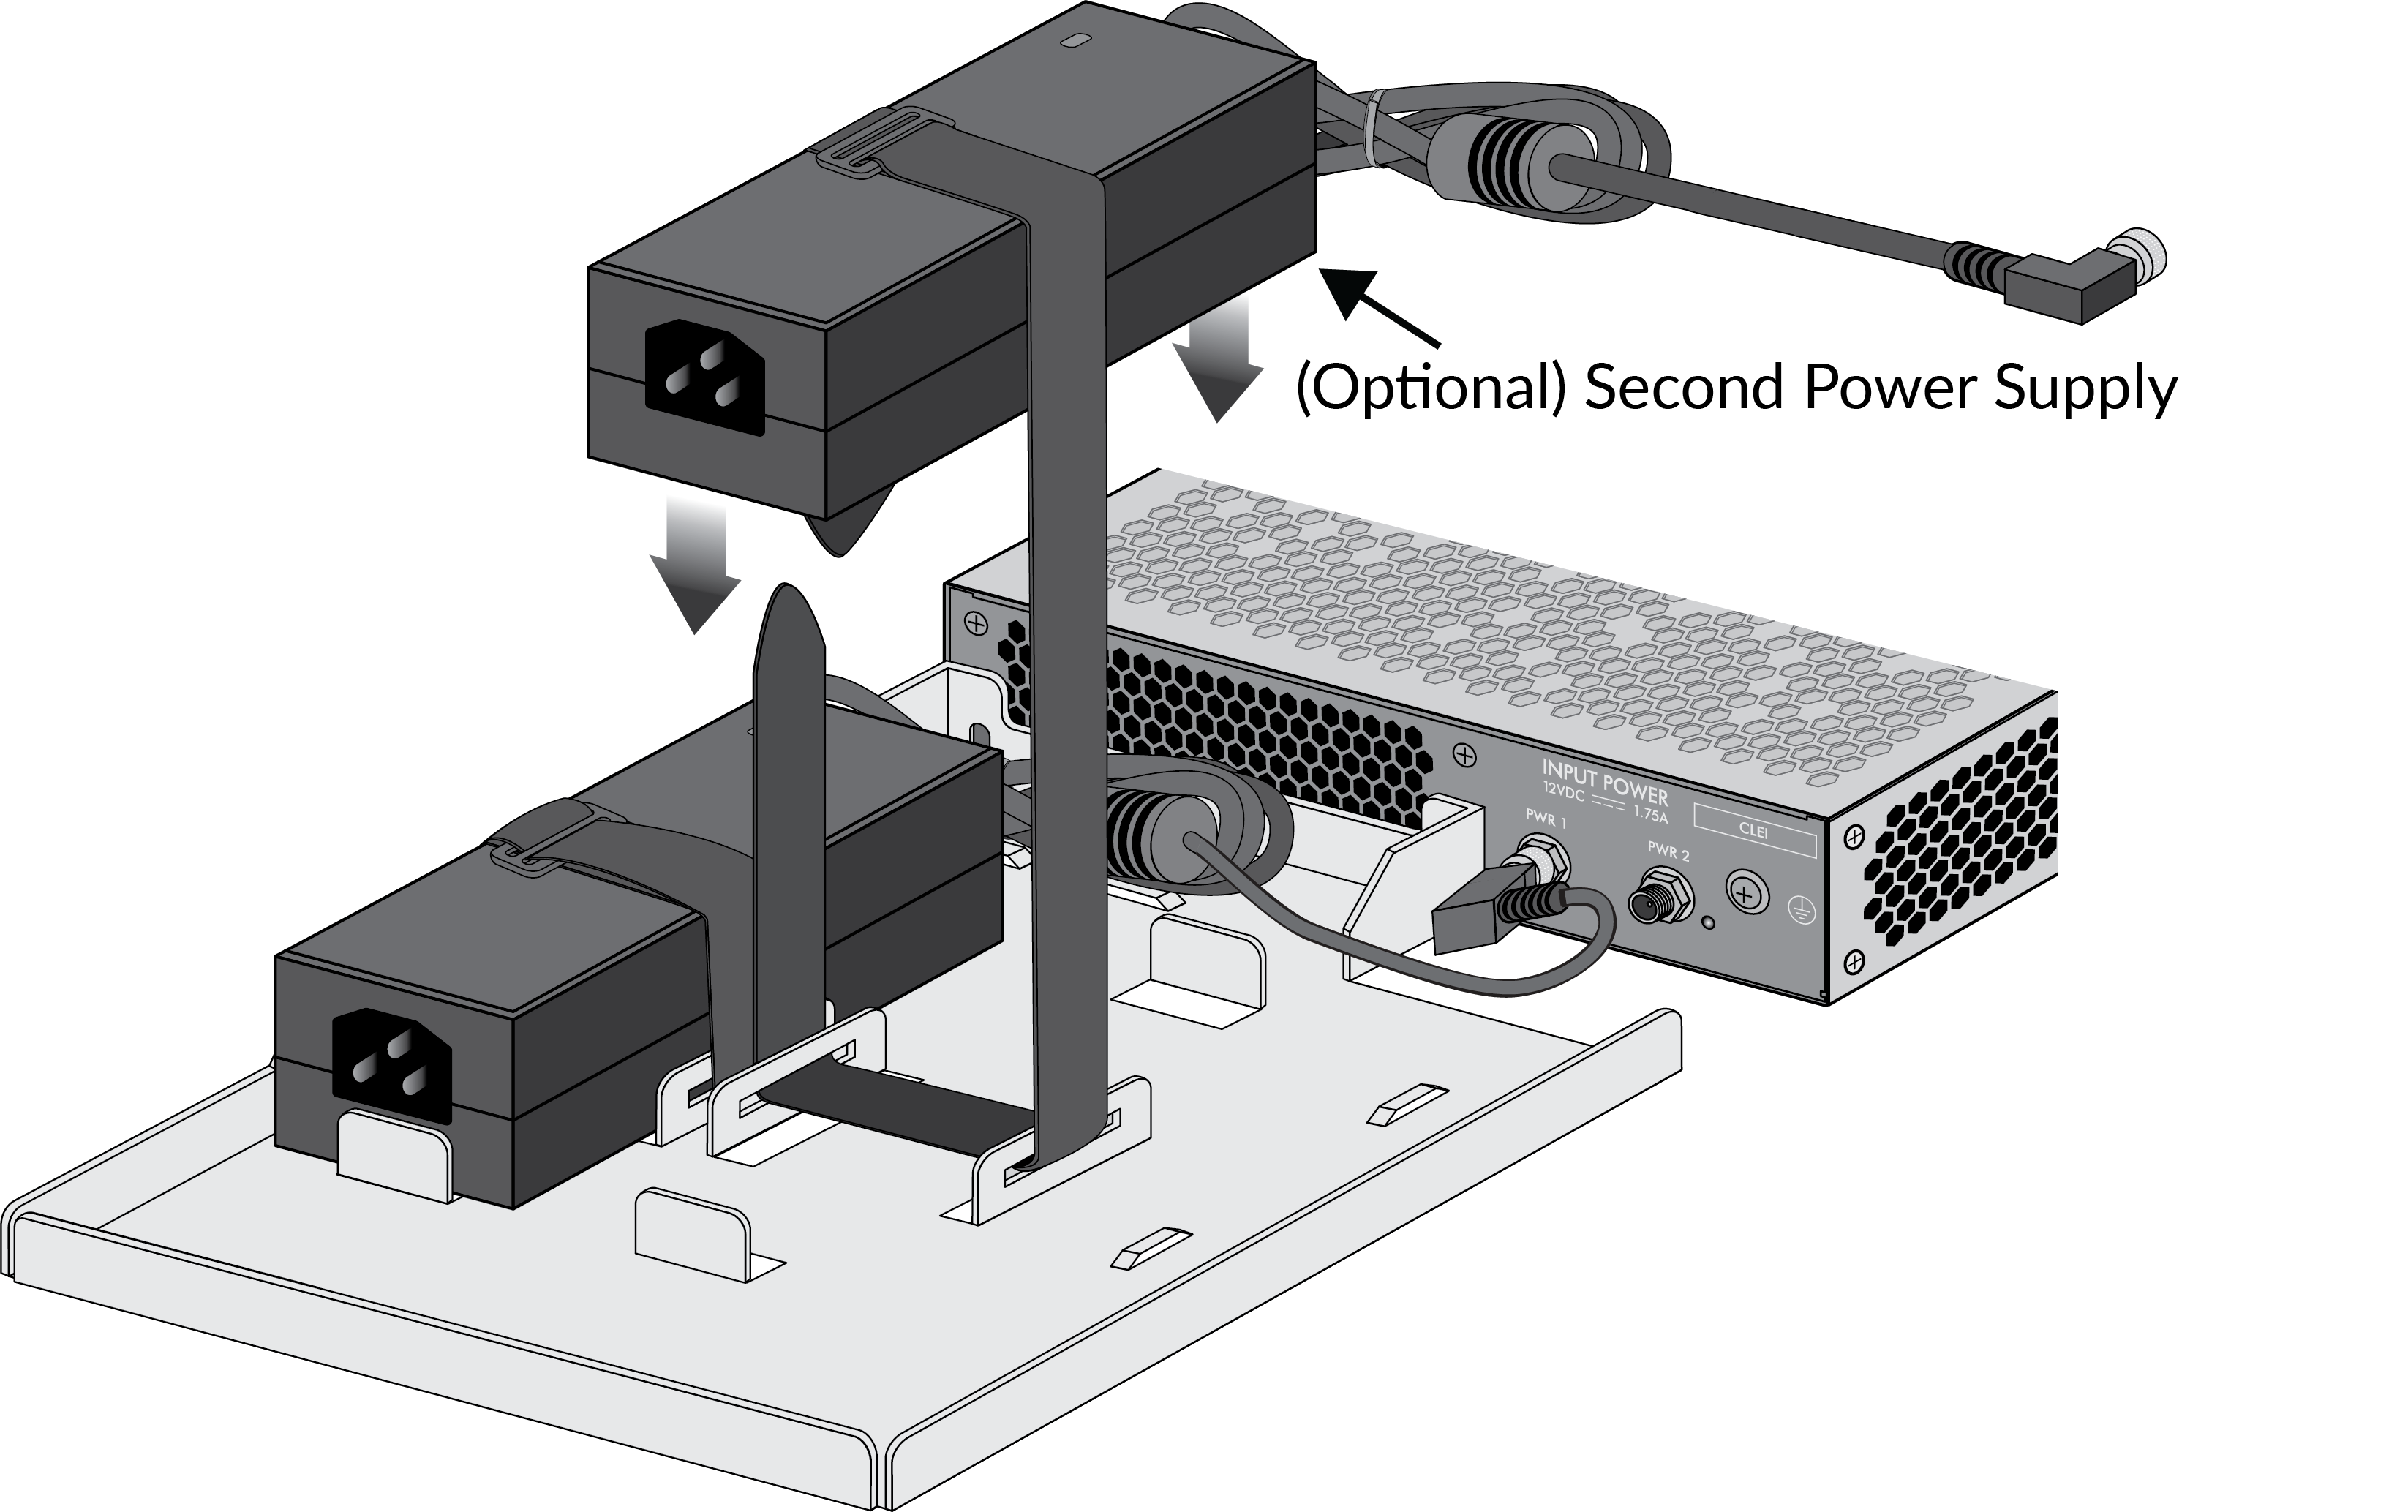
- Install the PA-220 power adapter in the power adapter
bracket and secure it with the Velcro strap.(Optional): Install a second power adapter for redundancy.
![]()
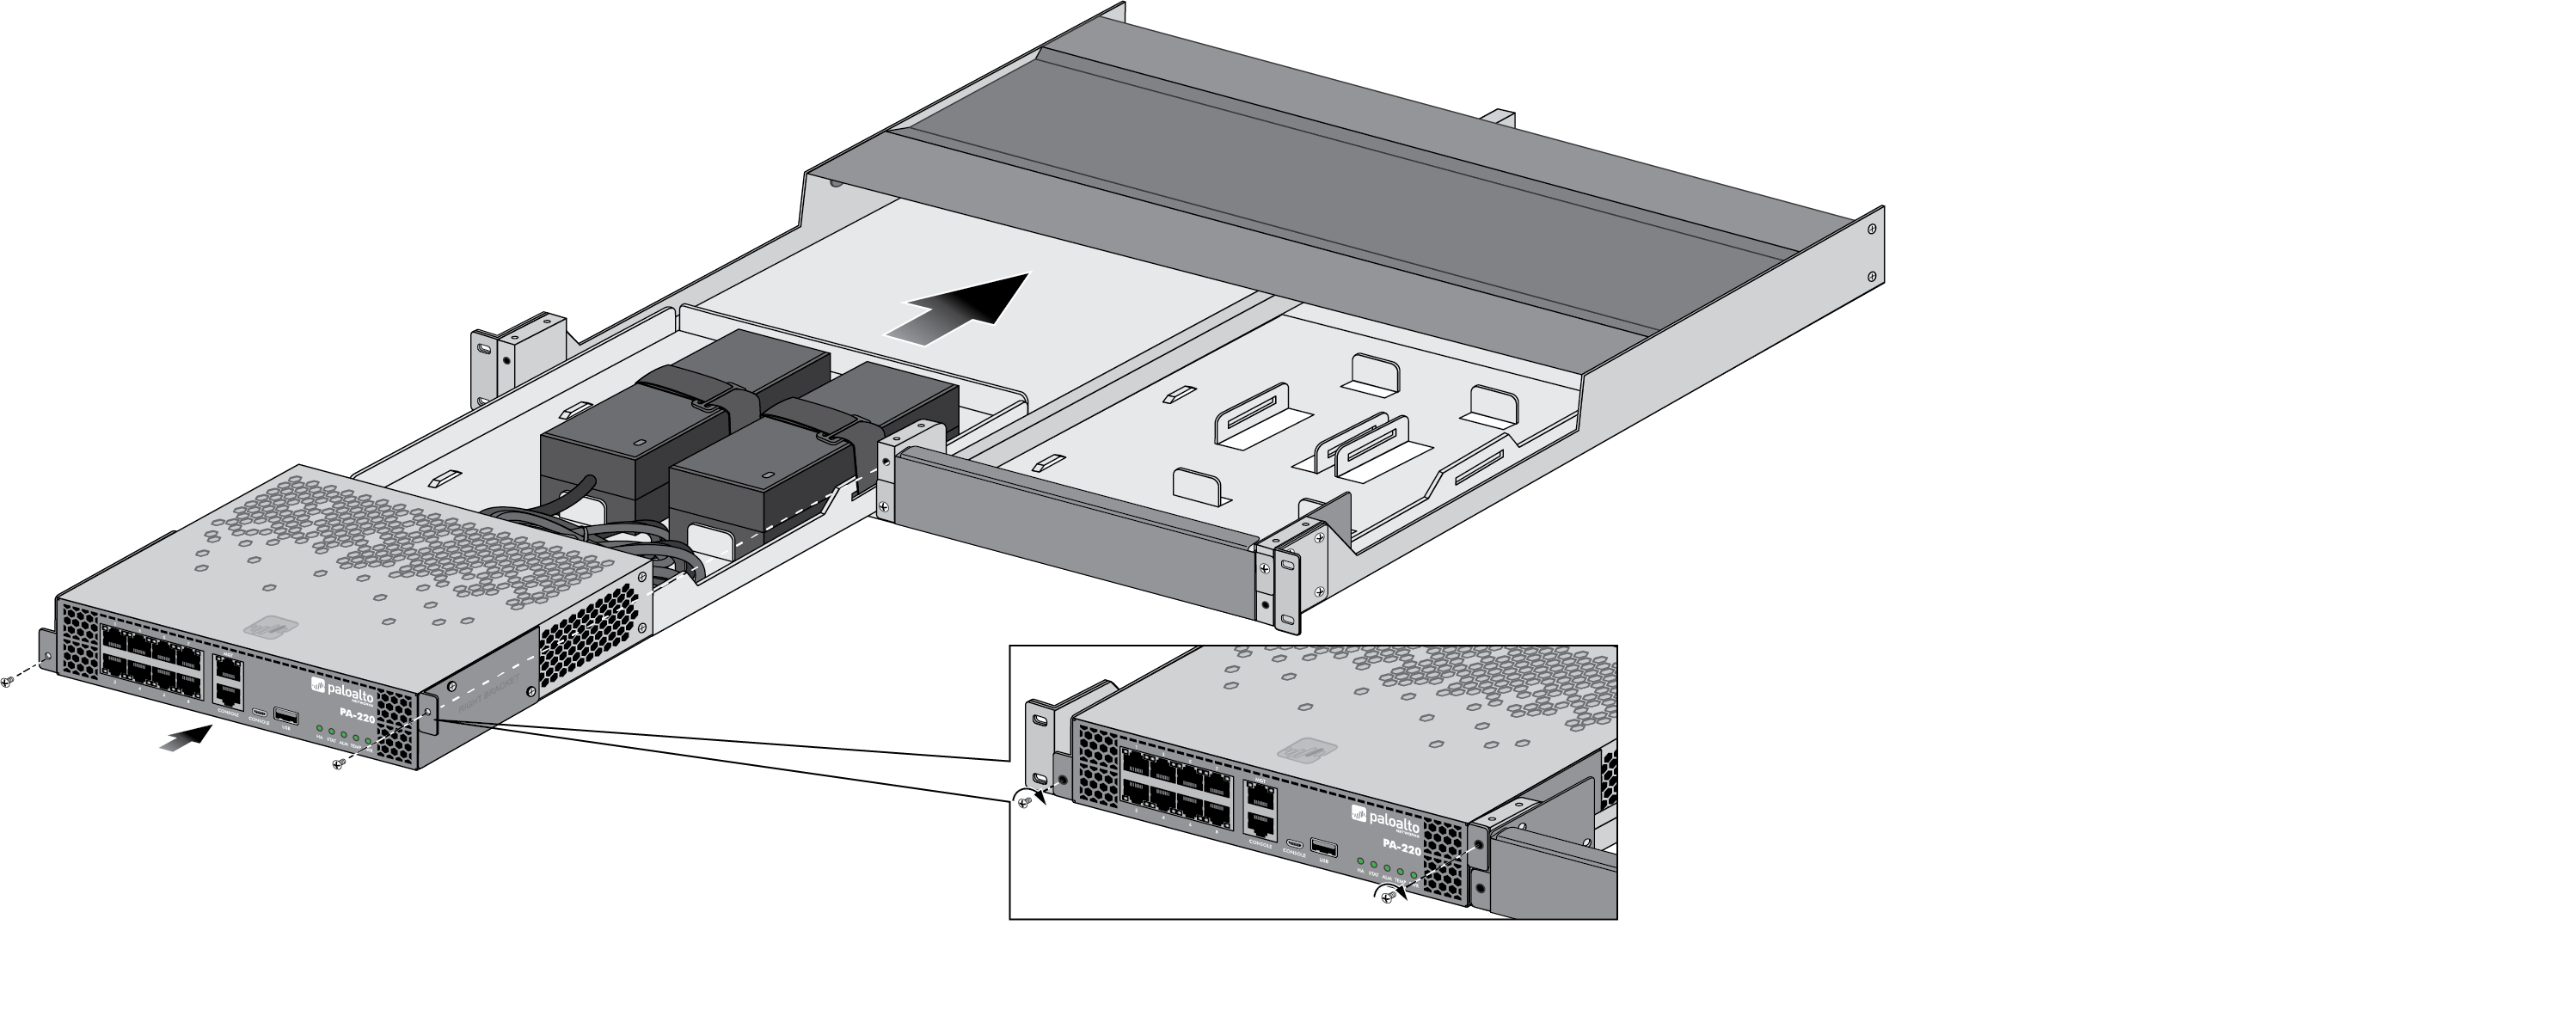
- Slide the
firewall (with power adapter bracket) into the rack tray and attach
the rack tray brackets to the rack tray using one 4-40 x 1/4” screw
for each bracket.
![]()
- (Optional) Install a second PA-220 firewall
into the right side of the rack tray:First remove the pre-installed rack tray installation hardware and set aside this hardware for use when you install the second firewall.
- Remove one 4-40 x 1/4” screw (located on each side of the front cover) from each rack tray bracket to detach the rack tray installation hardware from the rack tray.
- Slide the empty rack tray installation hardware assembly out of the equipment rack tray.
- Remove the two screws that secure the front cover to the power adapter bracket.
- Remove the two screws from each firewall rack tray bracket and remove the brackets from the front cover. Store the front cover for future use.
- Install the rack tray hardware for the second firewall (Step 1 through Step 4) and then install it in the right side of the rack tray.
![]()
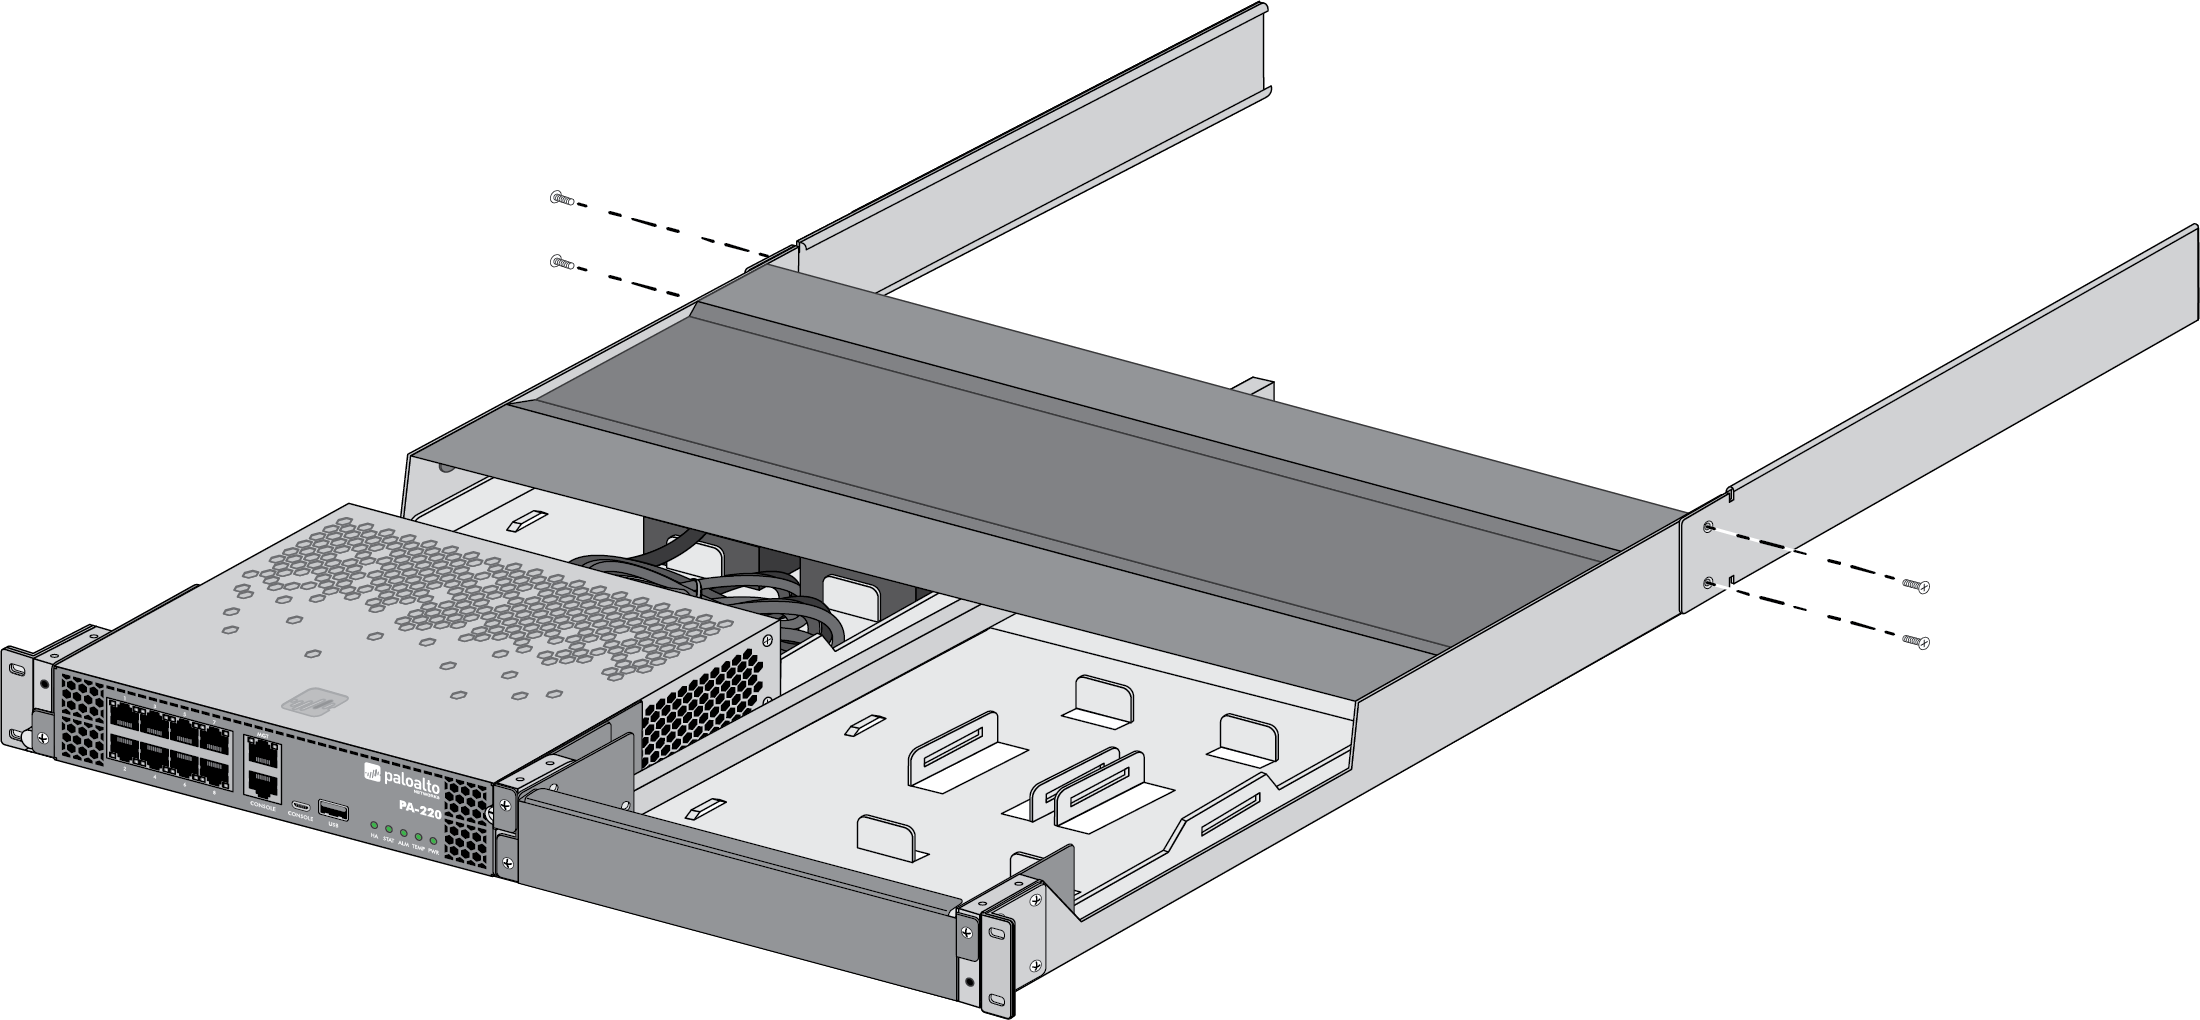
- (Four-post rack installation only) Install the
four-post rack kit (PAN-PA-1RU-RACK4) to provide additional support
to the back of the rack tray. First attach one rack-mount rail to
each side of the firewall using two #6-32 x 5/16” screws for each
rail and torque to 9 in-lbs (you will complete the installation
after you install the rack tray in the rack as described in the
next step).
![]()
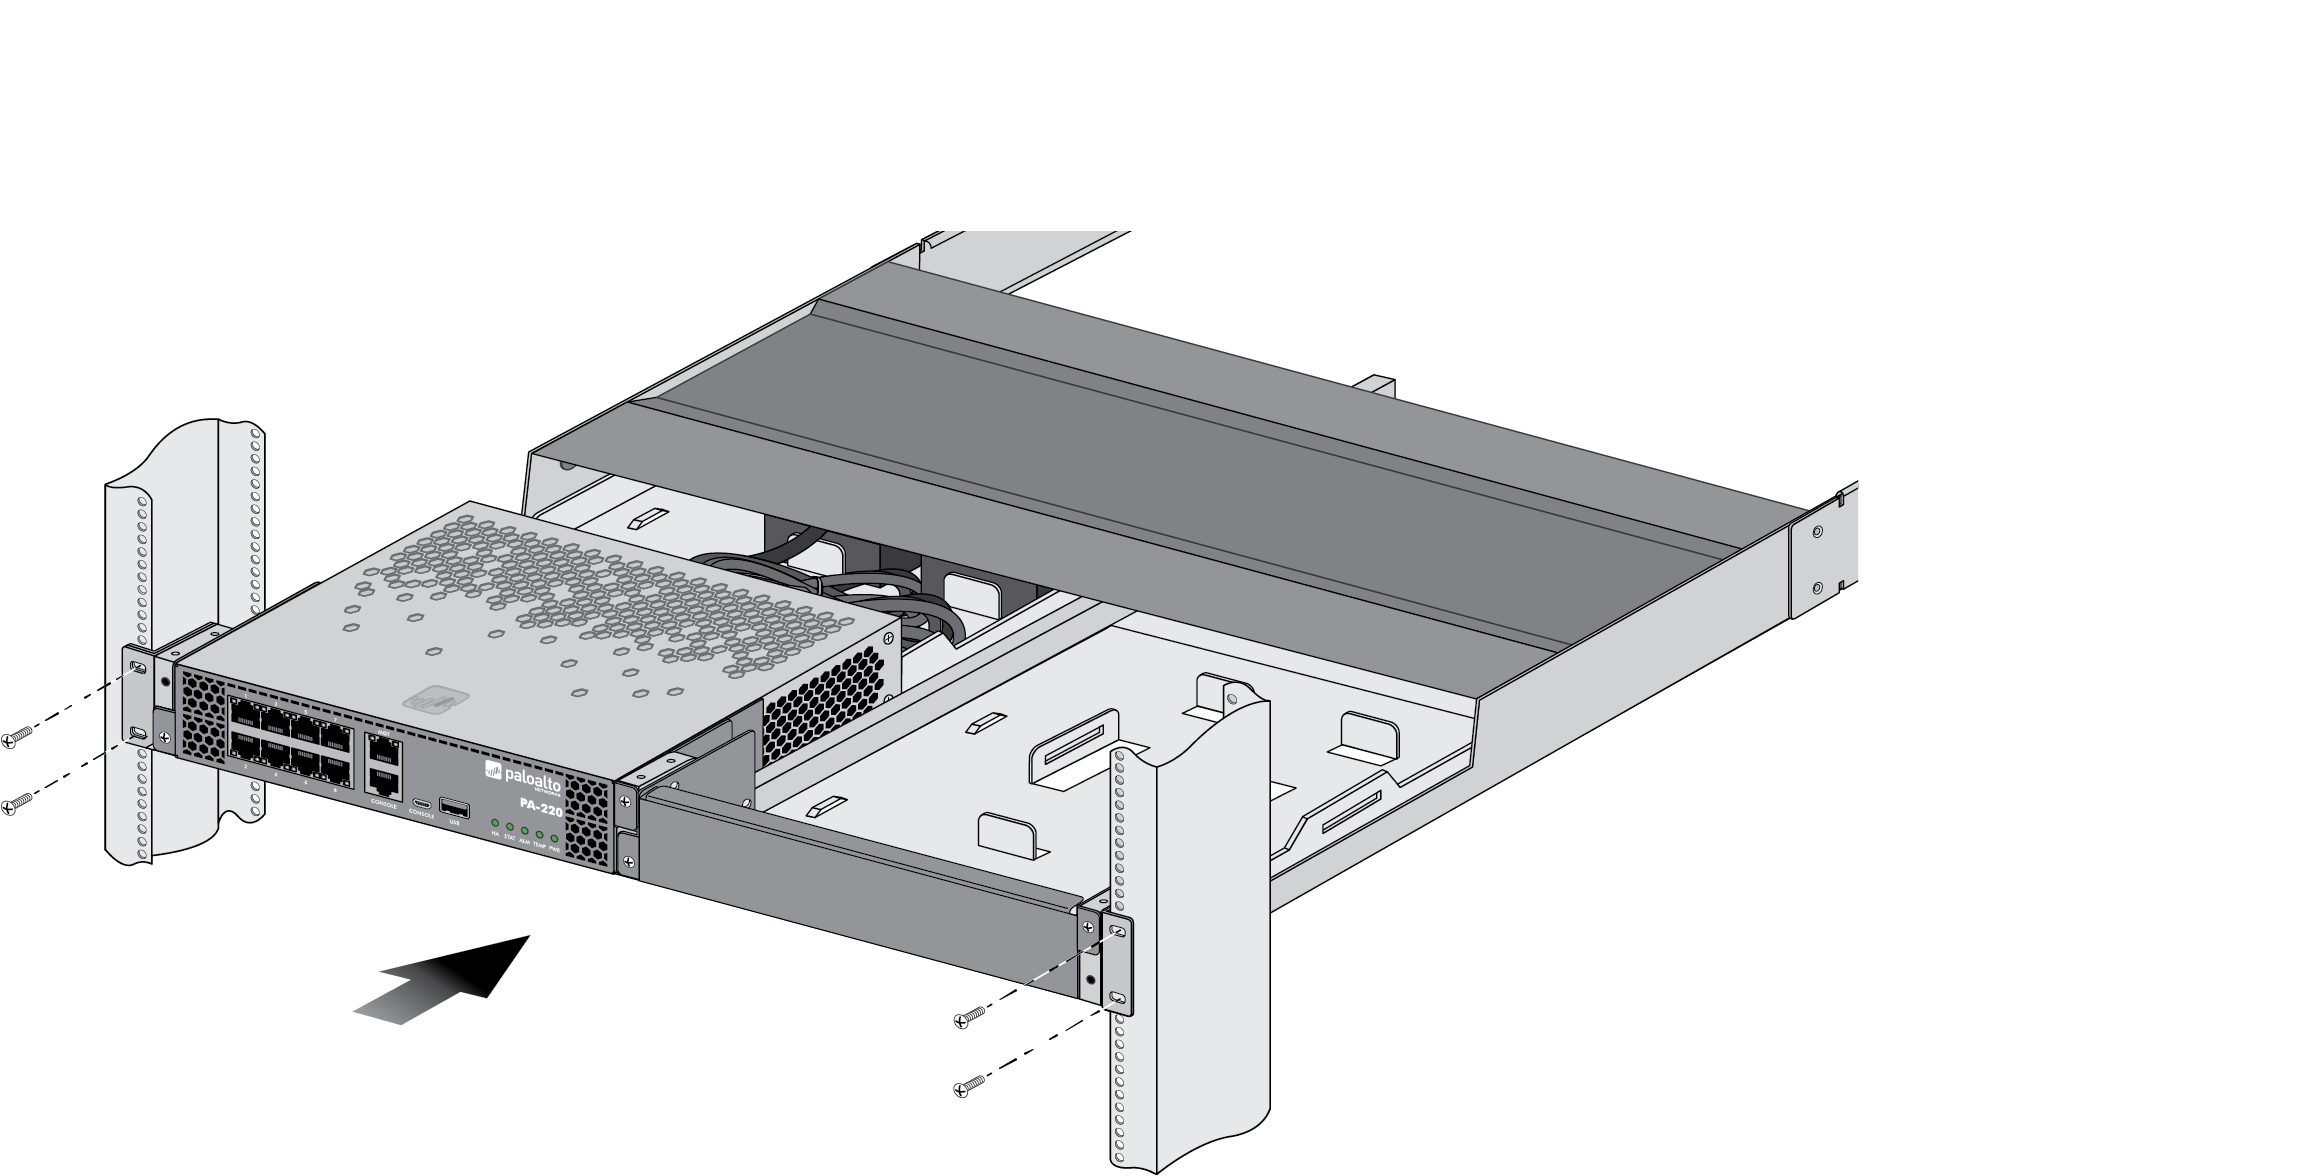
- With the help of another person, hold the assembled PA-220
firewall rack tray in place in the equipment rack and secure the
rack tray brackets to the front rack posts using a #2 Phillips-head
screwdriver. Use the appropriate screws (#10-32 x 3/4” or #12-24
x 3/4”) for your rack and torque to 25 in-lbs. Use cage nuts to
secure the screws if the rack has square holes.
![]()
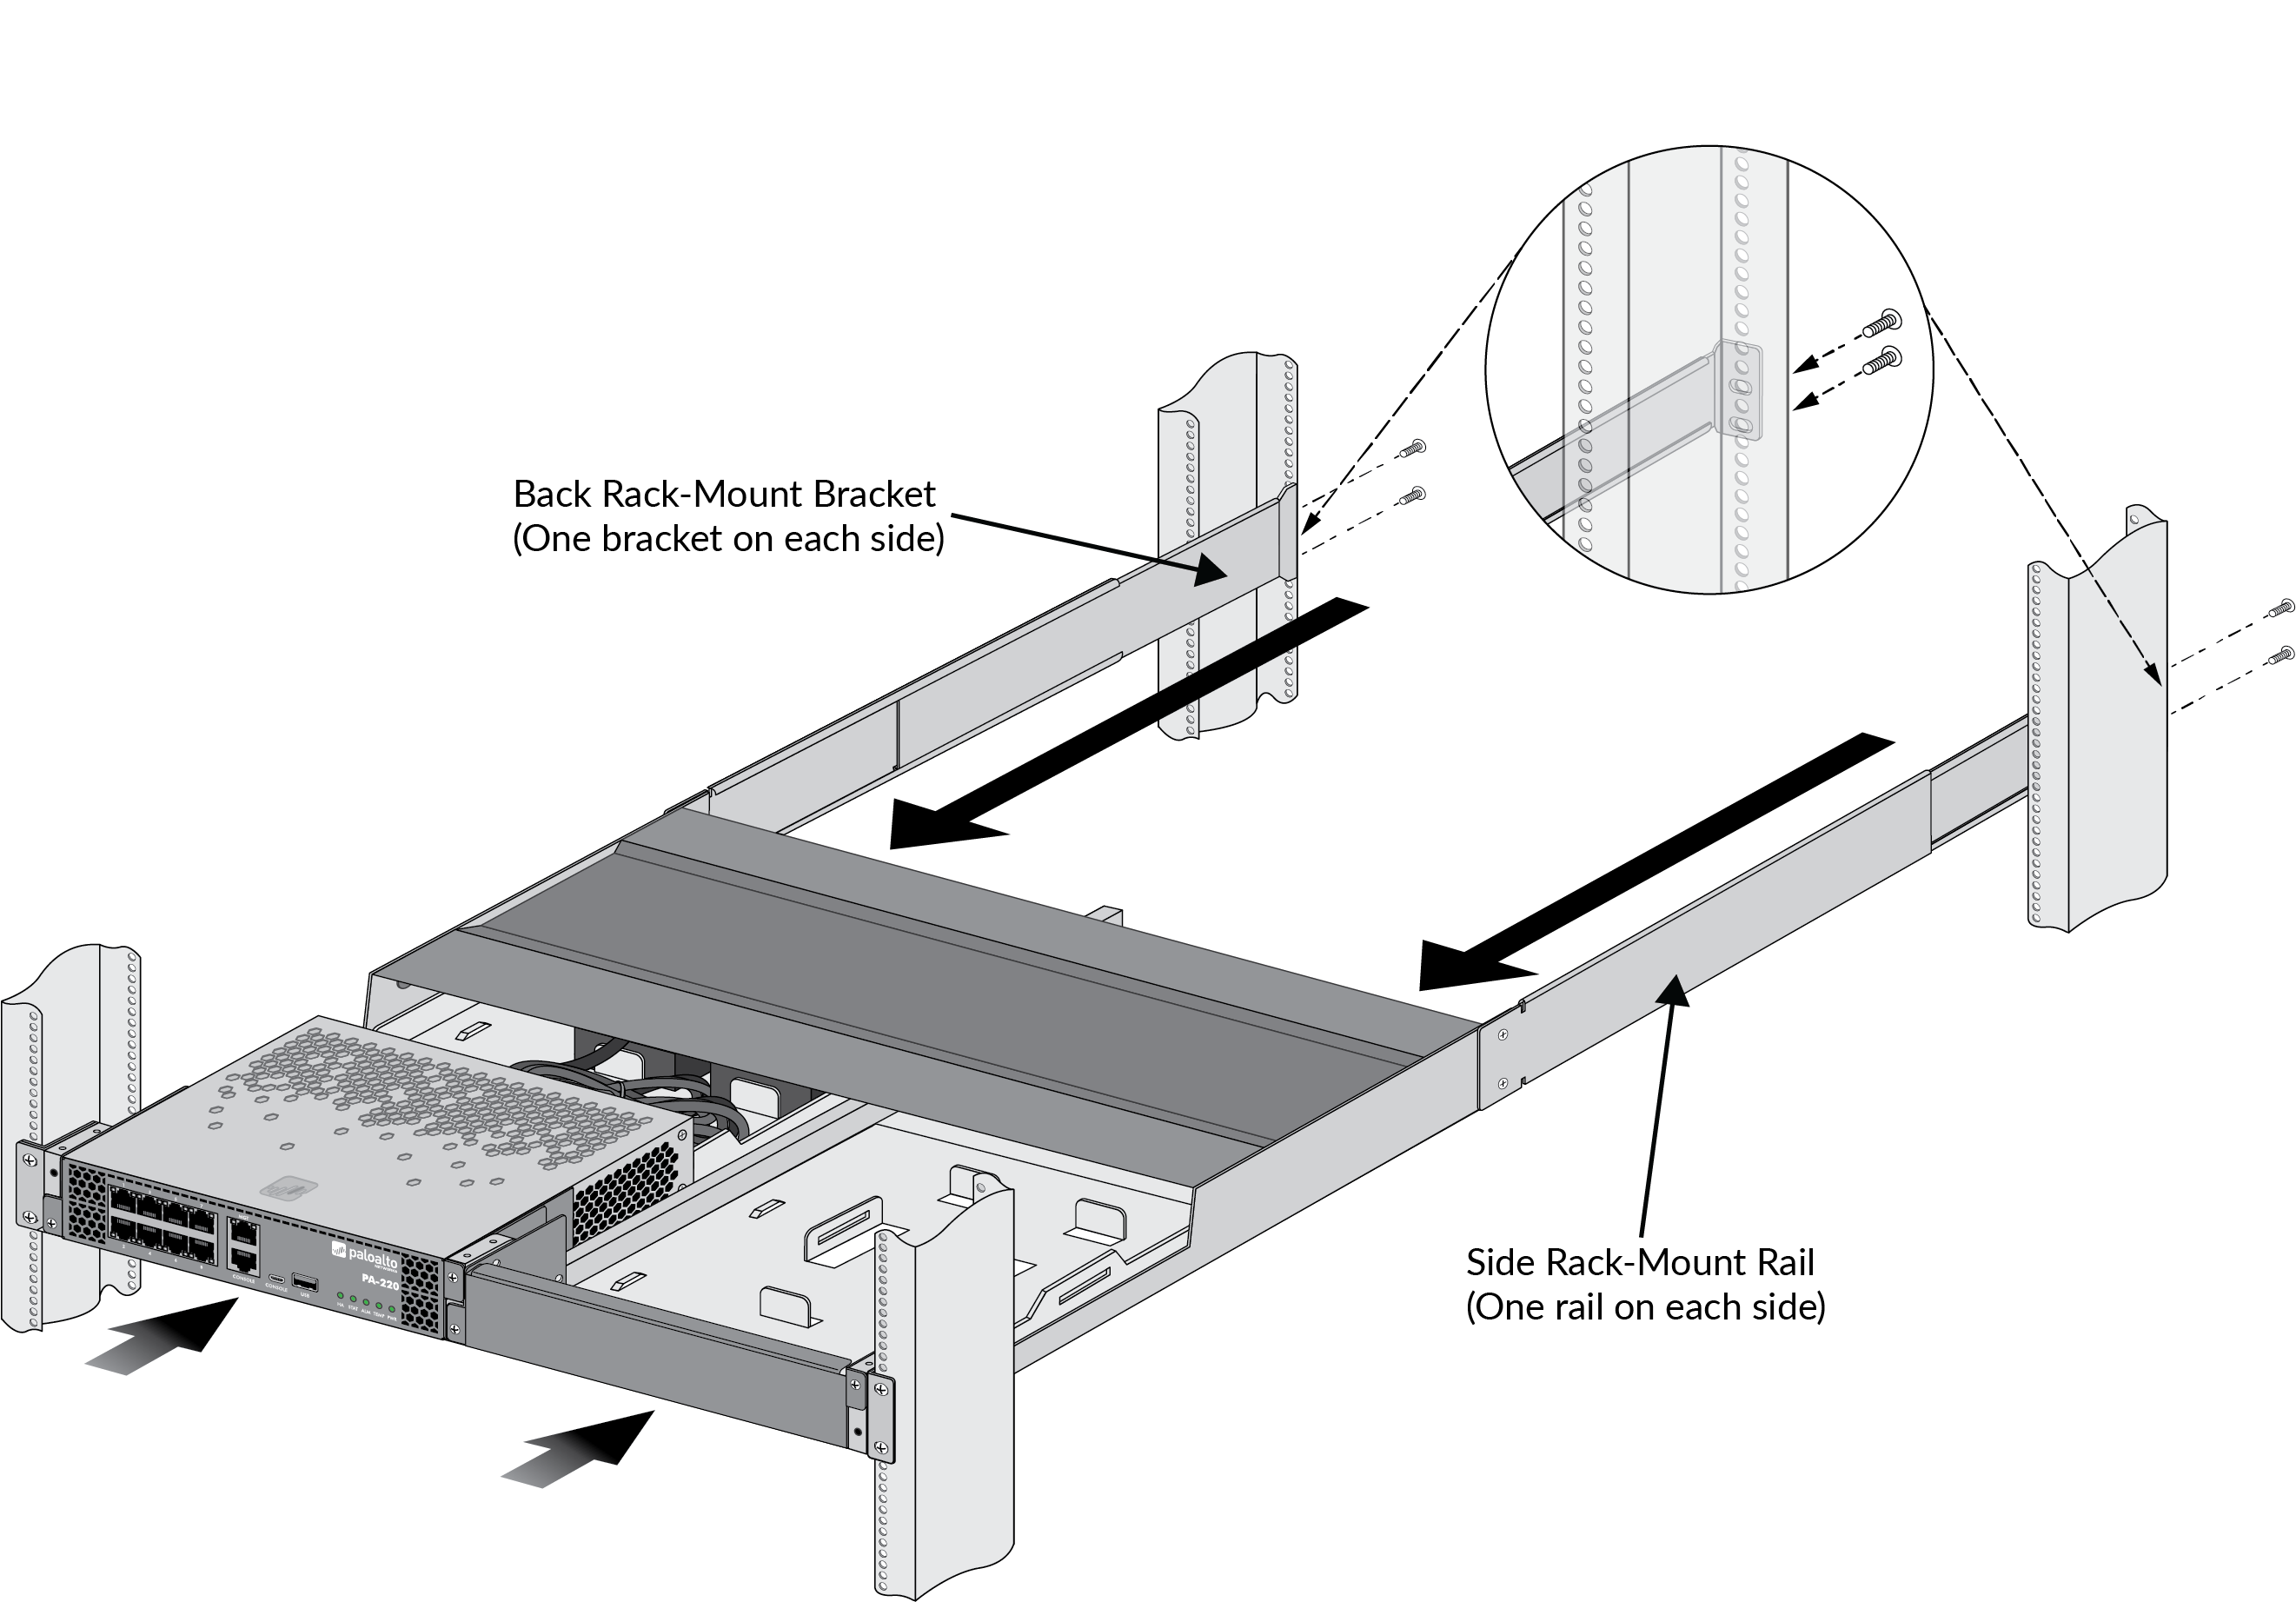
- (Four-post rack installation only) Slide one
back rack-mount bracket into each of the two previously installed
rack-mount rails and secure the brackets to the back-rack posts
using the appropriate screws for your rack (#10-32 x 3/4” or #12-24
x 1/2”) and torque to 25 in-lbs. Use cage nuts to secure the screws
if the rack has square holes.
![]()