Install the PA-220 Firewall on a Wall
Table of Contents
Install the PA-220 Firewall on a Wall
Learn how to install a PA-220 firewall on a wall using
the provided wall-mount kit.
Install a PA-220 firewall on a drywall or
plywood wall using the wall-mount kit as describe in the following
procedure.
- If the four rubber pads are installed on the bottom of the firewall, remove them.
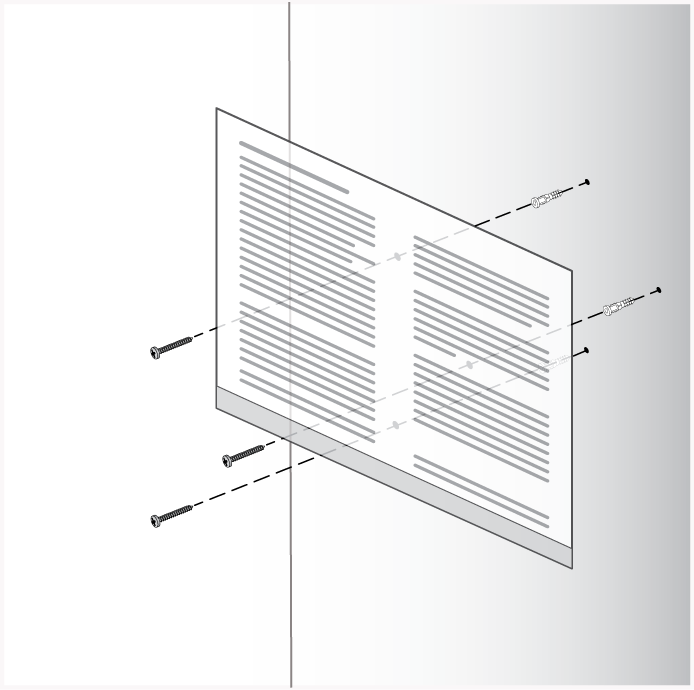
- Mark three locations on the wall that line up with the
wall mount holes on the bottom of the firewall.To ensure the wall mount screws line up with the firewall mount holes, use the PA-220 Quick Start Guide that ships with the firewall as a template. If you do not have a copy of the Quick Start, download and print it. When printing, select landscape and actual size in the print options to ensure the screw hole markers line up correctly.Ensure there are no building services (water, gas, or wiring) behind the wall where you intend to install the firewall.
![]()
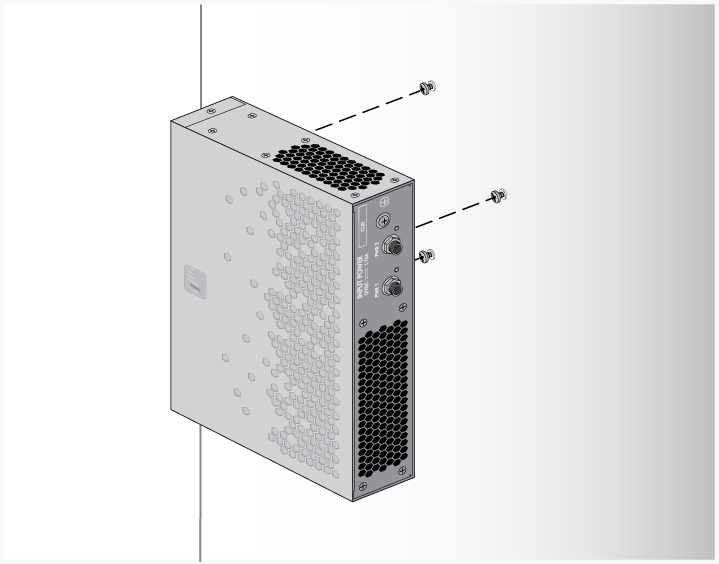
- Use a #1 Phillips-head screwdriver to install the appropriate
screws into each of the three marked locations:
- Drywall—Press a drywall anchor slightly into the center of a template mark. Then use your screwdriver to apply pressure while turning the anchor clockwise until the surface of the anchor is flush with the wall. After the drywall anchor is secure, install a 1.25” anchor screw into the anchor until the bottom of the screw head protrudes 1/4” (.6cm) from the wall. Repeat this step for the other two screw locations unless either is located over wood, in which case, use a .75” wood screw instead of a drywall anchor and screw.
- Plywood wall—Use your screwdriver to insert a .75” wood screw into the center of each template mark that is located over wood until the bottom of the screw heads protrude 1/4” (.6cm) from the wall.
- Align the three holes on the bottom of the firewall with
the three screws on the wall and hang the firewall on the screws.
Make sure the firewall is securely connected to each of the three
screws before you let go.
![]()
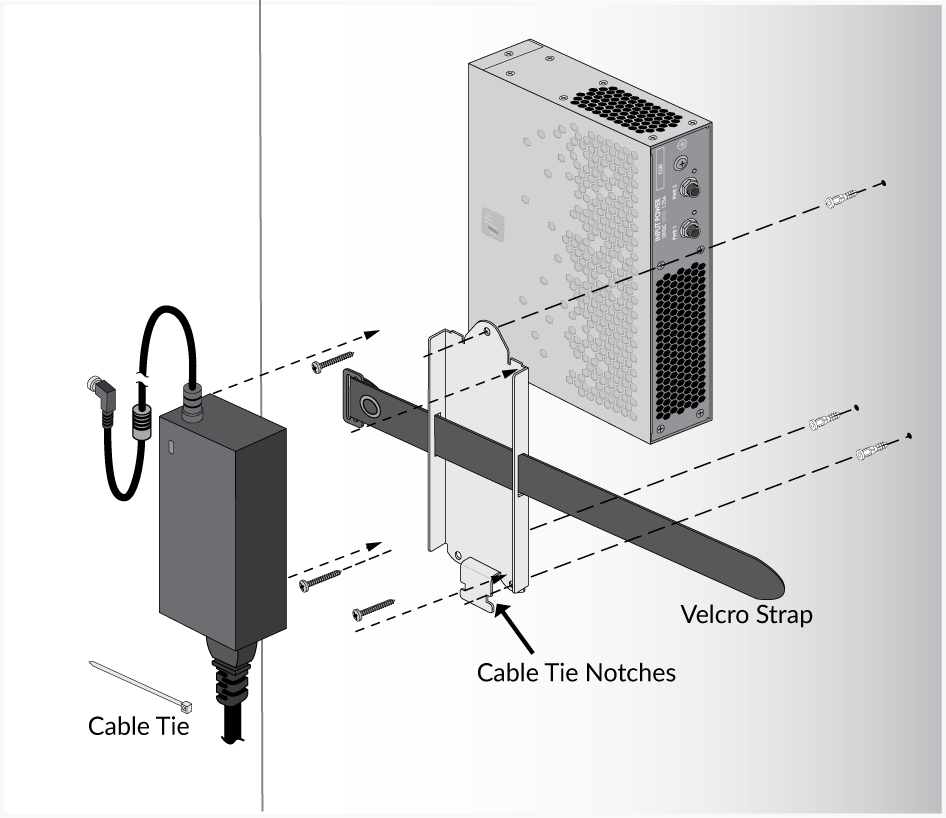
- Install the power adapter in the power adapter wall-mount
bracket using the Velcro strap and cable tie. Make sure to align
the cable tie with the notches in the bracket to prevent the power
cord from falling out.After you secure the power adapter to the bracket, mount the bracket next to the firewall using wood or drywall screws as appropriate. You can install an optional second power adapter next to the first power adapter.Connect the second power adapter through a different circuit breaker to provide power redundancy and allow for electrical circuit maintenance.
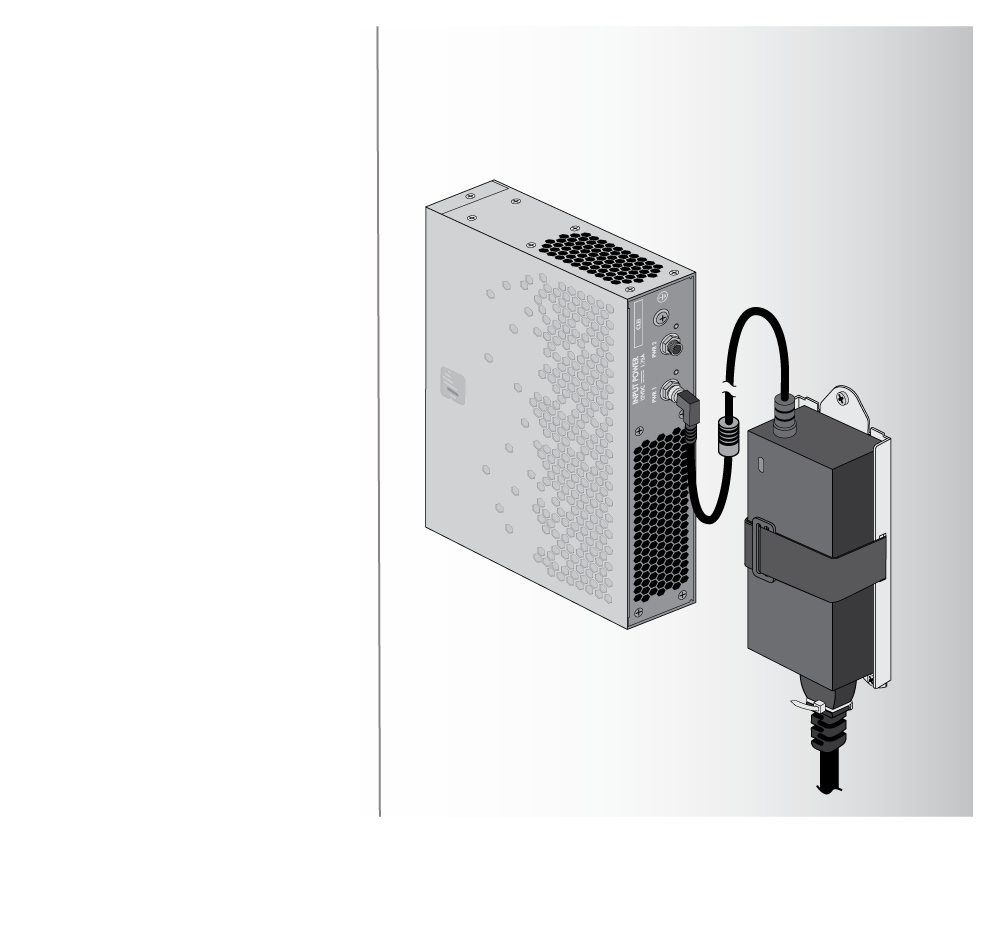
![]() The following image shows a completed installation for a PA-220 firewall with only a single power adapter.
The following image shows a completed installation for a PA-220 firewall with only a single power adapter.![]()