SD-WAN Support for Layer 3 Subinterfaces
Table of Contents
SD-WAN Support for Layer 3 Subinterfaces
SD-WAN supports Layer 3 subinterfaces for traffic segmentation.
Firewalls running PAN-OS 10.1 and SD-WAN Plugin
2.1.0 support SD-WAN on Layer 3 subinterfaces so that the firewall
can segment traffic using VLAN tags. The following task shows how
to create a Layer3 subinterface that uses a static IP address and
how to create one that uses DHCP to get its address. It shows how
to assign a VLAN tag to the subinterface and enable SD-WAN on the
subinterface. Create an SD-WAN interface profile to define each
ISP connection and assign the profile to the corresponding subinterface
(a virtual SD-WAN interface).
If you configure SD-WAN
Layer 3 subinterfaces on VM-Series firewalls, the VMware configuration
must have respective portgroups attached to those interfaces that allow
all VLANs.
- Log in to the Panorama Web Interface.
- Create an SD-WAN Interface Profile for each ISP connection (subinterface).
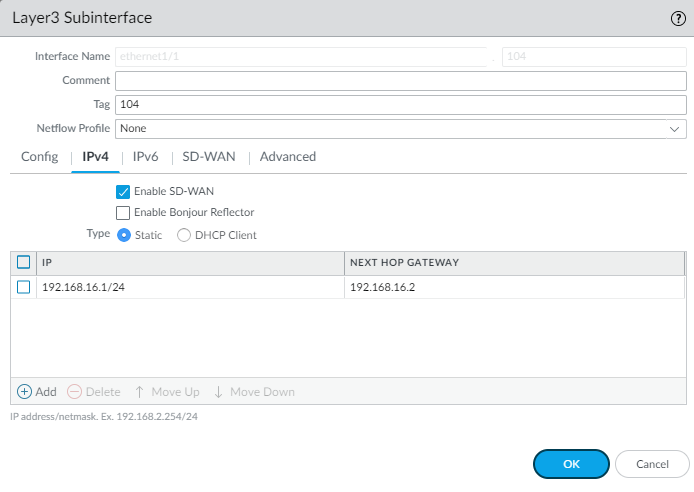
- Configure a Layer 3 subinterface that
uses a static IP address.
- Select and in the Template field, select a template.
- Select an interface.
- For Interface Type, select Layer3 and click OK.
- Highlight the interface and click Add Subinterface at the bottom of the screen.
- Continue to configure the subinterface.
![]()
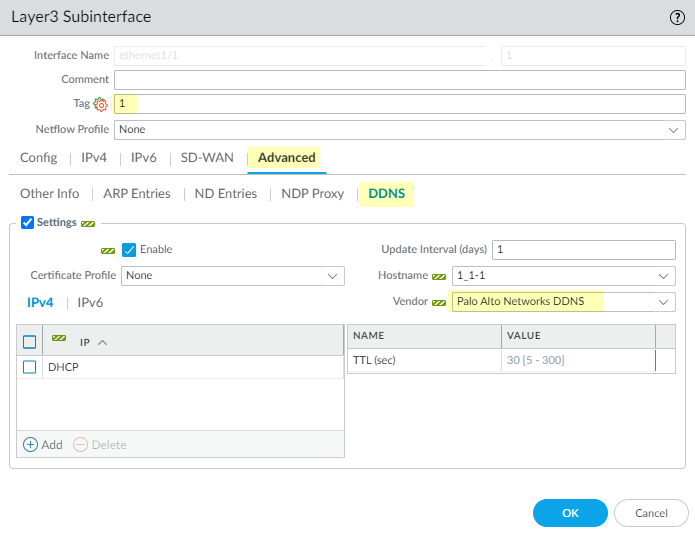
- Alternatively, Configure a Layer 3 subinterface that
uses DHCP to get its address.
- Select and in the Template field, select a template stack (not a template).
- Select an interface.
- For Interface Type, select Layer3 and click OK.
- Highlight the interface and click Add Subinterfaces at the bottom of the screen.
- Highlight the subinterface and click Override.
- Continue to configure the subinterface, selecting
the DDNS vendor as Palo Alto Networks DDNS.
![]()
- Apply an SD-WAN Interface Profile to the subinterface.
- Repeat the prior steps to add more subinterfaces to the interface.
- Commit.