Cloud Identity Engine
Table of Contents
10.1
Expand all | Collapse all
Cloud Identity Engine
The Cloud Identity Engine consists of two
components: Directory Sync, which provides user information, and
the Cloud Authentication Service, which authenticates users. For
a more comprehensive identity solution, Palo Alto Networks recommends
using both components, but you can configure the components independently.
The
Cloud Authentication Service uses a cloud-based service to provide
user authentication using SAML 2.0-based Identity Providers (IdPs). When the user attempts
to authenticate, the authentication request is redirected to the
Cloud Authentication Service, which redirects the request to the
IdP. After the IdP authenticates the user, the firewall maps the
user and applies the security policy.
By using a cloud-based
solution, you can reallocate the resources required for authentication
from the firewall or Panorama to the cloud. The Cloud Authentication
Service also allows you to configure the authentication source once instead
of for each authentication method you use (for example, Authentication Portal
or administrator authentication).
You can now also sync directory
changes to the Cloud Identity Engine, which quickly syncs only the
recent changes to your directory and takes much less time than a
full sync.
- Prepare to deploy the Cloud Identity Engine so
that it can provide user mappings to the firewall.
- If you have not already done so, install the device certificate for your firewall or Panorama.
- Activate the Cloud Identity Engine app.
- Configure Azure Active Directory, an on-premises Active Directory, or another cloud-based directory as your identity source in the Cloud Identity Engine app.
- Configure a Cloud Identity Engine profile on the firewall.The Cloud Identity Engine retrieves the information for your instance based on your device certificate and uses the Palo Alto Networks Services service route.
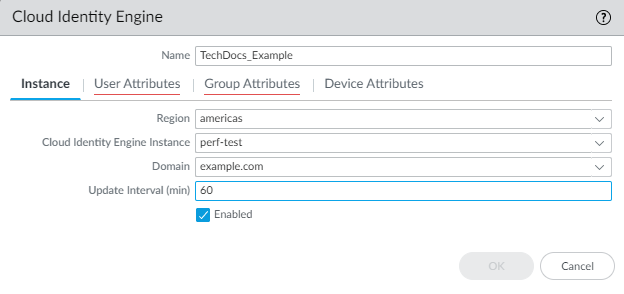
- On the firewall, select DeviceUser IdentificationCloud Identity Engine and Add a profile.
- For the Instance, specify each
of the following:
- Region—Select the regional endpoint
for your instance. The region you select must match the region you select when you activate your Cloud Identity Engine instance.
- Cloud Identity Engine Instance—If you have more than one instance, select the instance you want to use.
- Domain—Select the domain that contains the directories you want to use.
- Update Interval (min)—Enter the number of minutes that you want the firewall to wait between updates. The default is 60 minutes and the range is 1—1440.
![]()
- Region—Select the regional endpoint
for your instance.
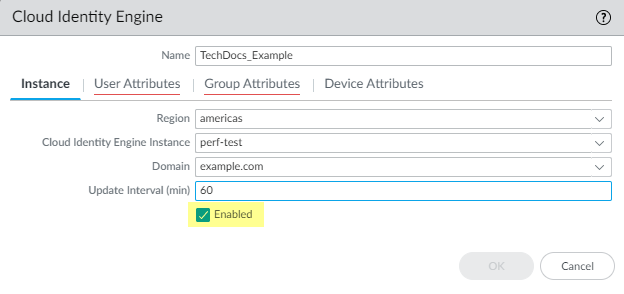
- Verify that the profile is Enabled.
![]()
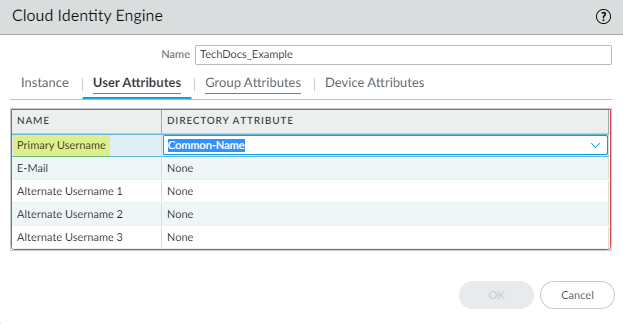
- For the User Attributes, select
the format for the Primary Username. You
can optionally select the formats for the E-Mail and
an Alternate Username. You can configure
up to three alternate username formats if your users log in using
multiple username formats.
![]()
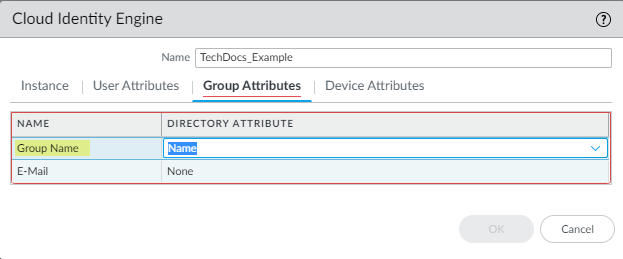
- For the Group Attributes, select
the format for the Group Name.
![]()
- For the Device Attributes,
select the Endpoint Serial Number. If you are using GlobalProtect and you have enabled Serial Number Check, select the Endpoint Serial Number option to allow the Cloud Identity Engine to collect serial numbers from managed endpoints. This information is used by the GlobalProtect portal to check if the serial number exists in the directory for verification that the endpoint is managed by GlobalProtect.
![]()
- Click OK then Commit your changes.
- Configure security policy rules for
your users (for example, by specifying one or more users or groups
that the firewall retrieves from the Cloud Identity Engine as the Source User).The firewall collects attributes only for the users and groups that you use in security policy rules, not all users and groups in the directory.
- Verify that the firewall has the mapping information
from the Cloud Identity Engine.
- On the client device, use the browser to access a web page that requires authentication.
- Enter your credentials to log in.
- On the firewall, use the show user ip-user-mapping all command to verify that the mapping information is available to the firewall.
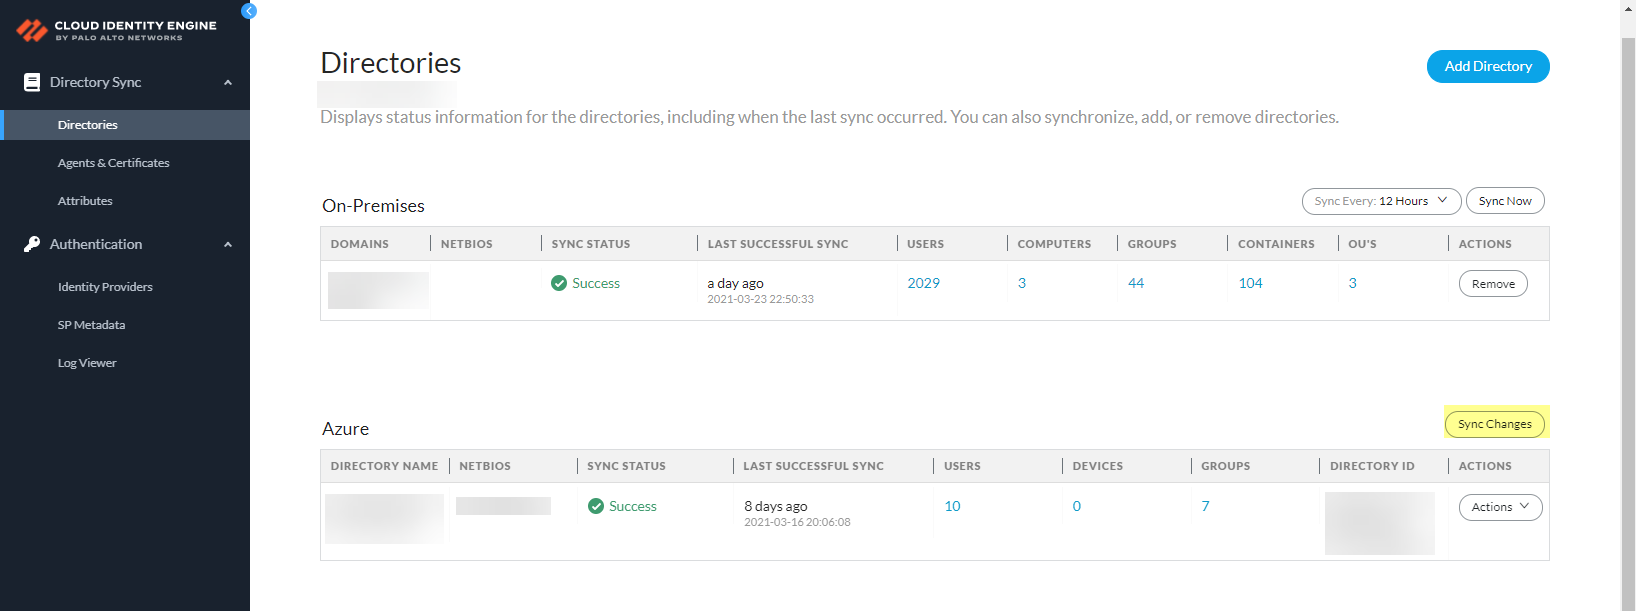
- If you make changes to the directory that you configure
in the Cloud Identity Engine, Sync Changes for
your directory. By default, the Cloud Identity Engine syncs changes every five minutes. If you want to instantly sync your directory updates, you can sync just the changes to your Azure Active Directory (Azure AD) or on-premises AD, which is much faster than a full sync of your directory.
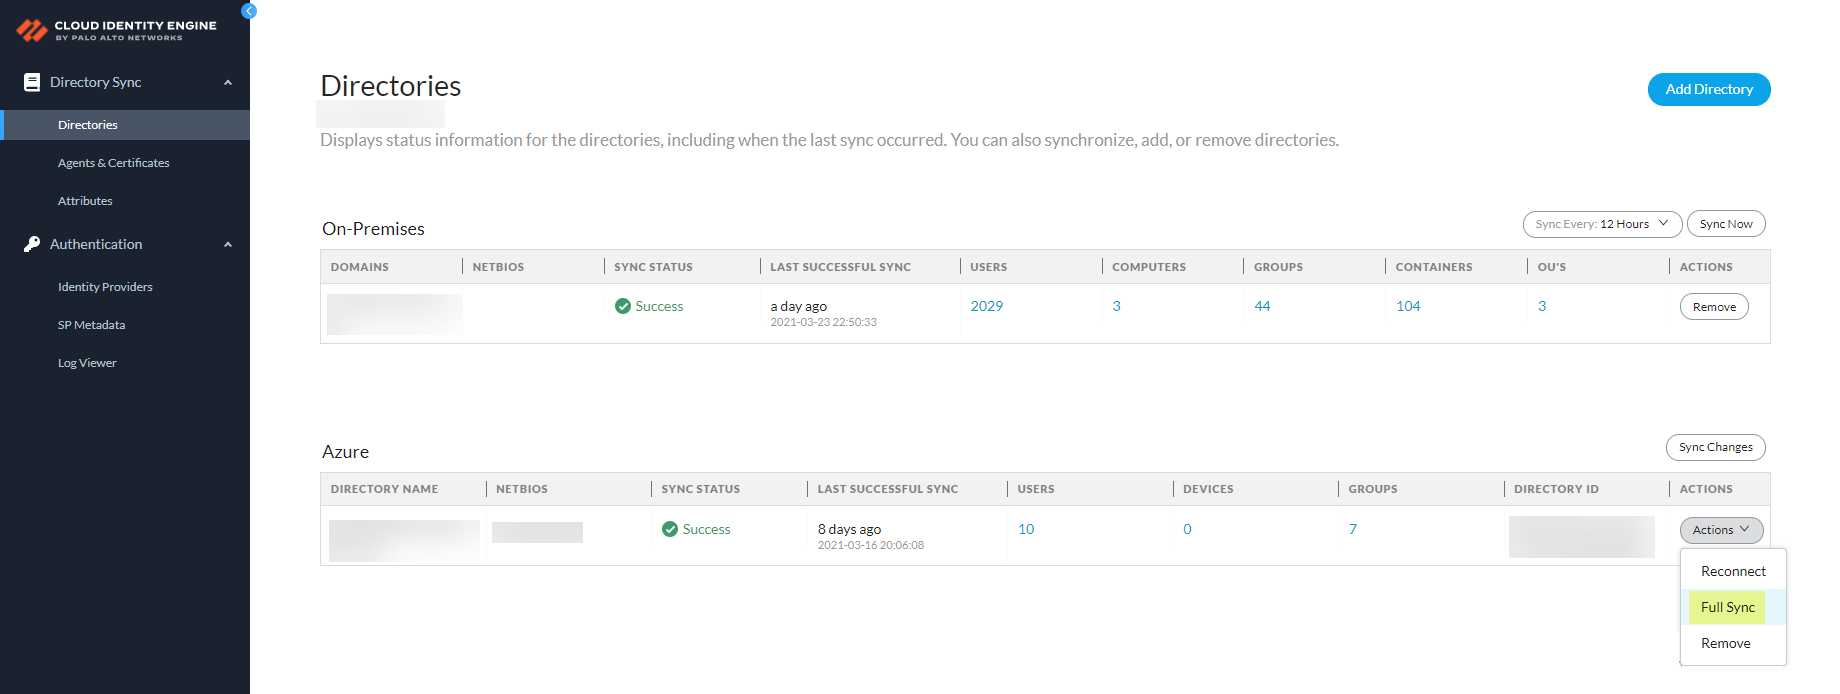
![]() Palo Alto Networks recommends a full sync of your directory if you lose connectivity or are experiencing issues. To sync the entire directory, select ActionsFull Sync. If a full sync is in progress, you cannot sync changes. After a full sync in the Cloud Identity Engine app, the firewall must also complete a full sync.
Palo Alto Networks recommends a full sync of your directory if you lose connectivity or are experiencing issues. To sync the entire directory, select ActionsFull Sync. If a full sync is in progress, you cannot sync changes. After a full sync in the Cloud Identity Engine app, the firewall must also complete a full sync.![]()
- Configure an identity provider (IdP) for the Cloud Identity Engine for user authentication.
- Configure an Authentication profile to use the Cloud Authentication Service.
- Configure an Authentication policy that uses this Authentication profile.
- Verify that the firewall redirects authentication requests
to the Cloud Authentication Service.
- On the client device, use the browser to access a web page that requires authentication.
- Enter your credentials to log in.
- Confirm that the access request redirects to the Cloud Authentication Service.
For more information on the Cloud Identity Engine, refer to the Cloud Identity Engine Getting Started guide and the Cloud Identity Engine release notes.

