Prisma Access
Transfer Or Update Your License
Table of Contents
Expand All
|
Collapse All
Prisma Access Docs
-
- 5.2 Preferred and Innovation
- 5.1 Preferred and Innovation
- 5.0 Preferred and Innovation
- 4.2 Preferred
- 4.1 Preferred
- 4.0 Preferred
- 3.2 Preferred and Innovation
- 3.1 Preferred and Innovation
- 3.0 Preferred and Innovation
- 2.2 Preferred
-
-
- 4.0 & Later
- 3.2 Preferred and Innovation
- 3.1 Preferred and Innovation
- 3.0 Preferred and Innovation
- 2.2 Preferred
- Prisma Access China
-
-
Transfer Or Update Your License
Learn how to transfer or update your Prisma Access license.
| Where Can I Use This? | What Do I Need? |
|---|---|
|
|
Use the following workflow if you need to transfer
Prisma Access licenses from one Panorama appliance to another, for
example:
- If you need to transfer production (paid) licenses from one Panorama appliance to another.
- If you are running an evaluation license on an evaluation Panorama appliance. After you upgrade the Prisma Access license to a paid license, you cannot transfer this license to a Panorama that has an evaluation license; in this case, you must transfer the production Prisma Access license from an evaluation to a production Panorama appliance.
When you renew your license, you must also perform these steps to retrieve the
new license key. Panorama does not retrieve the licenses after a renewal.
Prisma Access automatically preserves all instances and public and loopback IP addresses
during the license transfer.
Make a note of the following guidelines before starting this procedure:
- Make sure that both Panorama appliances use the same Tenant or Tenant Service Group (TSG) ID.
- If you are performing multiple license transfers, do not perform the license transfer one after the other. Wait at least 15 minutes before starting another transfer after the first has completed.
- ( Optional) Export a snapshot of your Panorama configuration to a host external to Panorama or to a firewall.While Prisma Access saves all its infrastructure settings, including public and loopback IP addresses, you need to transfer any Panorama-specific configuration to the new Panorama appliance. You can export your configuration after the license transfer process is complete, but we recommend exporting it before you transfer the licenses as a best practice.Log in to the Palo Alto Networks Customer Support Portal.Select AssetsDevices.Find the production Panorama appliance to which you will be transferring the production Prisma Access plugin and complete these steps:
- Verify that it has an active support license.Make a note of this serial number; you use it in a later step.Search for the current Panorama appliance you are using to run Prisma Access by using the serial number.The model name should be in the format PAN-PRA-25-E xx.
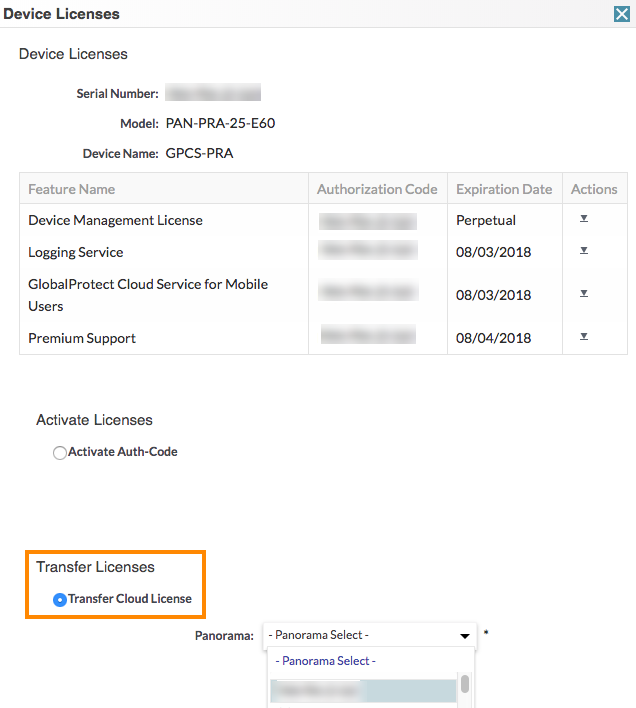
![]() Click the Actions icon for the current Panorama appliance.Select Transfer Licenses and choose the Panorama appliance to which you will be migrating.
Click the Actions icon for the current Panorama appliance.Select Transfer Licenses and choose the Panorama appliance to which you will be migrating.![]() Review the EULA and click Agree, then click Submit.Wait for a confirmation message in the Support Portal for a successful transfer.After the successful transfer of licenses, login to the administration console of your production Panorama appliance.Select PanoramaSupport and verify that the Panorama appliance has a valid support license.Click Dashboard and verify that the Panorama appliance is running the minimum supported software version. See Minimum Required Panorama Software Versions for details.Verify that the Panorama appliance is configured to use NTP by selecting PanoramaSetupServicesNTP and setting a value, such as pool.ntp.org, for the NTP Server.Download and install the Cloud Services plugin.See the Palo Alto Networks Compatibility Matrix for the Panorama versions that are supported with the Cloud Services plugin.You can either download the plugin from the Customer Support Portal, or you can check for plugin updates directly from Panorama.
Review the EULA and click Agree, then click Submit.Wait for a confirmation message in the Support Portal for a successful transfer.After the successful transfer of licenses, login to the administration console of your production Panorama appliance.Select PanoramaSupport and verify that the Panorama appliance has a valid support license.Click Dashboard and verify that the Panorama appliance is running the minimum supported software version. See Minimum Required Panorama Software Versions for details.Verify that the Panorama appliance is configured to use NTP by selecting PanoramaSetupServicesNTP and setting a value, such as pool.ntp.org, for the NTP Server.Download and install the Cloud Services plugin.See the Palo Alto Networks Compatibility Matrix for the Panorama versions that are supported with the Cloud Services plugin.You can either download the plugin from the Customer Support Portal, or you can check for plugin updates directly from Panorama.- To download and install the Cloud Services plugin by downloading it from the Customer Support Portal, complete the following steps.
- Log in to the Customer Support Portal and select Software UpdatesPanorama Integration Plug In.
- Find the Cloud Services plugin in the Panorama Integration Plug In section and download it.Do not rename the plugin file or you will not be able to install it on Panorama.
- Log in to the Panorama Web Interface of the Panorama you licensed for use with the Prisma Access, select PanoramaPluginsUpload and Browse for the plugin File that you downloaded from the CSP.
- Install the plugin.
- To download and install the Cloud Services plugin directly from Panorama, complete the following steps:
- Select PanoramaPlugins and click Check Now to display the latest Cloud Services plugin updates.
![]()
- Download the plugin version you want to install.
- After downloading the plugin, Install it.
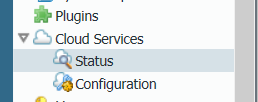
Installing a newer version of the Cloud Services plugin overwrites the previously installed version. If you are installing the plugin for the first time, after you successfully install, Panorama refreshes and the Cloud Services menu displays on the Panorama tab.![]() Select PanoramaLicenses and click Retrieve license keys from license server.This should refresh the screen with recently transferred Prisma Access and Strata Logging Service licenses you purchased. If the cloud service licenses do not appear, contact Palo Alto Networks Support for assistance.Complete the one-time password (OTP) verification procedure and verify the Panorama appliance.Migrate the configuration from the previous Panorama appliance to the current Panorama appliance.
Select PanoramaLicenses and click Retrieve license keys from license server.This should refresh the screen with recently transferred Prisma Access and Strata Logging Service licenses you purchased. If the cloud service licenses do not appear, contact Palo Alto Networks Support for assistance.Complete the one-time password (OTP) verification procedure and verify the Panorama appliance.Migrate the configuration from the previous Panorama appliance to the current Panorama appliance.- If the production Panorama appliance is completely new, export the configuration from the Panorama appliance you used during the evaluation (if you have not done so already) and import it to this Panorama appliance.
- If this is the Panorama appliance that you have been using to manage your existing VMs and devices, load a partial configuration to this Panorama appliance.
You can now use this Panorama appliance to configure and manage Prisma Access.


