SaaS Security
Begin Scanning a Microsoft Exchange App
Table of Contents
Expand All
|
Collapse All
SaaS Security Docs
Begin Scanning a Microsoft Exchange App
Use Data Security to scan and identify incidents found when scanning assets and
email attachments in your Microsoft Exchange app.
| Where Can I Use This? | What Do I Need? |
|---|---|
|
Or any of the following licenses that include the Data Security license:
|
As of July 2020, the Exchange integration on Data Security is now
updated to optimize the permissions required for cloud app features. To revoke
unnecessary permissions that you granted previously and that Data Security no longer needs it, reauthenticate the Exchange
app.
Supported Content
|
Support For
|
Details
|
|---|---|
|
Scan Content
| Email content, Attachments |
|
Backward Scan
|
No
|
|
Forward Scan
|
Yes
|
|
Rescan
|
No
|
|
Selective Scan
|
No
|
|
Exposure
|
Internal, External
|
|
Remediation Actions
|
|
|
Post-Remediation Actions (Actions after Admin
Quarantine):
You can delete, restore, or download a quarantined file
after performing a remediation action (for example
quarantine or incident generation).
|
|
|
Notifications
|
|
|
User Activities
|
|
|
Snippet Support
|
Yes
|
|
Known License and Version restrictions
|
Home and Frontline Workforce versions are not
supported.
|
|
Caveats and Notes
|
None
|
Onboard Microsoft Exchange App
For Data Security to scan assets, you must consent to the following
permissions during adding the Exchange app:
|
API
| Permission | Description |
|---|---|---|
|
Microsoft Graph API
|
Read all users' basic profiles
|
Retrieves basic user information such as display name, email
address, and User-ID to display user information on the
People page.
|
|
Read all users' full profiles
|
Enables Data Security to make a user API
call. Data Security uses this permission for both
Graph API and Outlook Legacy REST API.
Additionally, enables Data Security to retrieve
detailed user information (For example, user principle name
(UPN), job title, office location, phone number, etc.), but
Data Security discards all this information
except for UPN, which Data Security needs to
retrieve user mailbox settings.
| |
|
Read all user mailbox settings
|
Retrieves each user's mailbox settings (For example,
retention policy rule settings, email forward settings,
public folder access settings, and delegate rules settings),
and then determines if there is any security risk in those
settings.
| |
|
Read mail in all mailboxes
|
Retrieves and scan the user's email.
| |
|
Read all hidden memberships
|
Not currently used, but Data Security plans to use
this permission to detect memberships of hidden groups.
| |
|
Read all groups
|
Not currently used, but Data Security plans to use
this permission to scan group properties and detect the
members in the group.
| |
|
Read calendars in all mailboxes
|
Enables Data Security to access attachments in
calendar events.
| |
|
Use Exchange Web Services with full access to all
mailboxes
|
Retrieves each user's mailbox settings (For example, inbox
rules and eDiscovery search configuration), and then
determines if there is any security risk in those settings.
Data Security plans to use this permission to
determine if the user owns any public folders.
| |
|
Read directory data
|
Enables Data Security to retrieve and scan for a
list of users and groups. Data Security uses this
permission for both Azure Active Directory Legacy API and
Graph API.
| |
|
Read activity data for your organization
|
Enables Data Security to read and log activity data
to display activity data on the
Activities page.
|
- Prerequisites to be completed on Microsoft Exchange
- (Recommended) Add your Exchange domain as an internal domain.Log in to Microsoft Exchange or Office 365 using an account with privileges that will enable communication between Data Security and the Microsoft Exchange app.Before you can establish communication between Data Security and the Exchange app, you must:
- Go to http://portal.microsoftonline.com and log out of Exchange or Office 365.
- Log in to Exchange or Office 365 using an account that has the Global Admin role before adding the Exchange app to Data Security.
Next step: Add Microsoft Exchange App to Data Security.Add Microsoft Exchange App to Data Security- Log in to Strata Cloud Manager.Select ConfigurationSaaS SecurityData SecurityApplicationsAdd ApplicationMicrosoft Exchange.
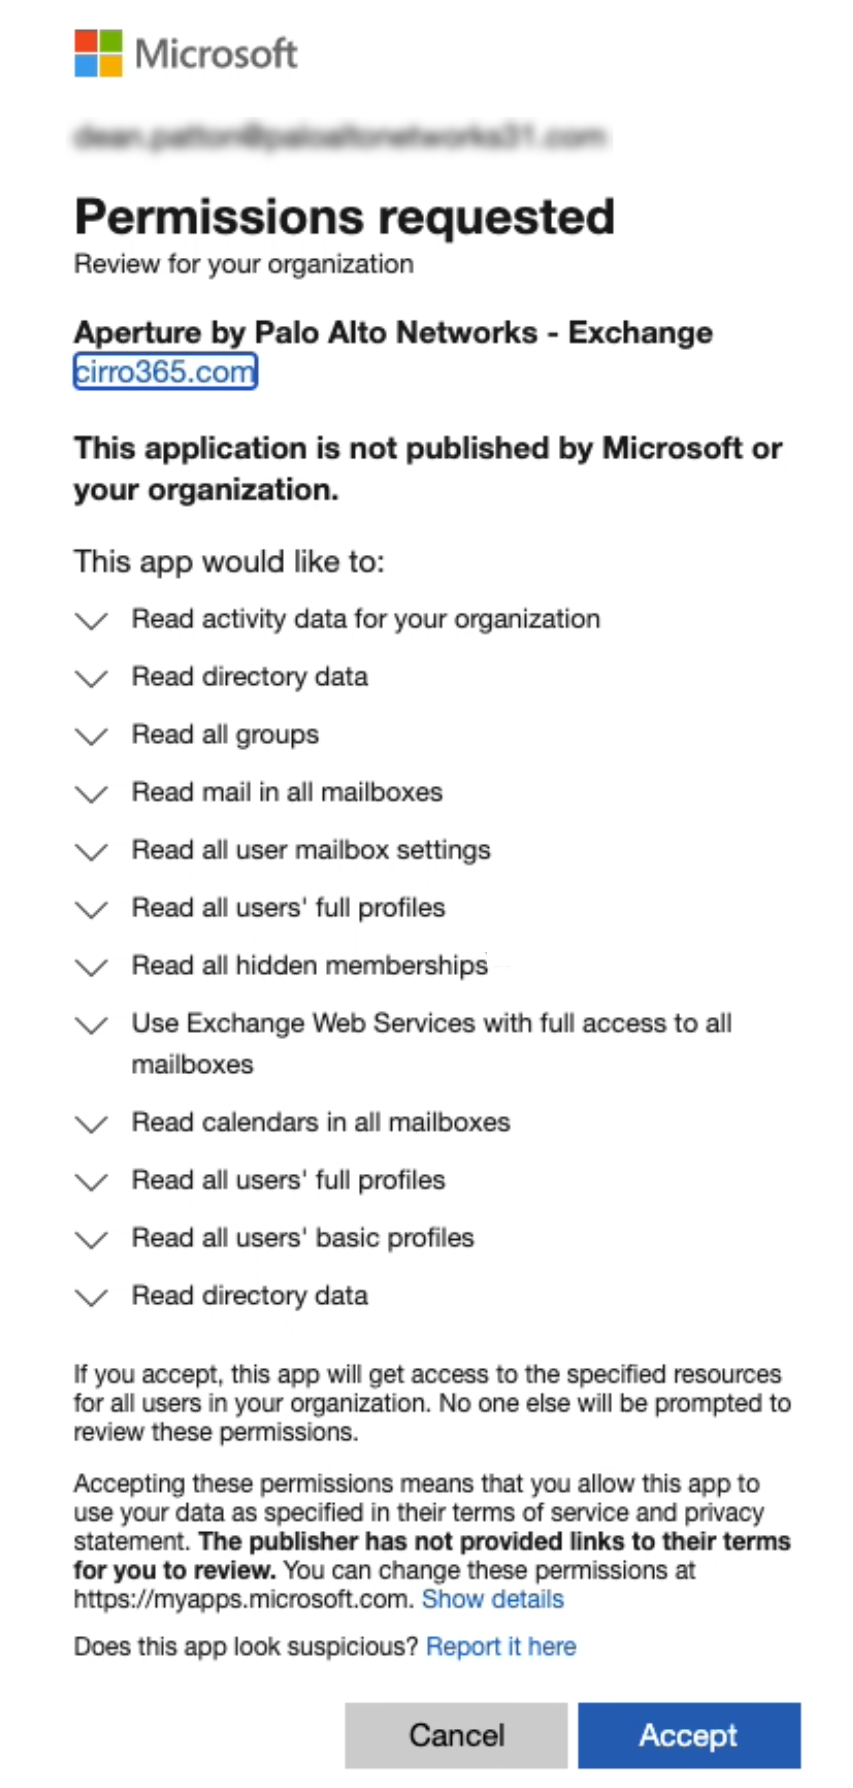
![]() Enter the login credentials for the account with Global Admin role privileges on the Microsoft online page to which Data Security redirects you.Review and Accept the changes that Data Security can perform on your assets in Microsoft Exchange.Data Security requires these permissions to scan your assets on the Exchange app.
Enter the login credentials for the account with Global Admin role privileges on the Microsoft online page to which Data Security redirects you.Review and Accept the changes that Data Security can perform on your assets in Microsoft Exchange.Data Security requires these permissions to scan your assets on the Exchange app.![]() On successful onboarding, the following message is displayed.
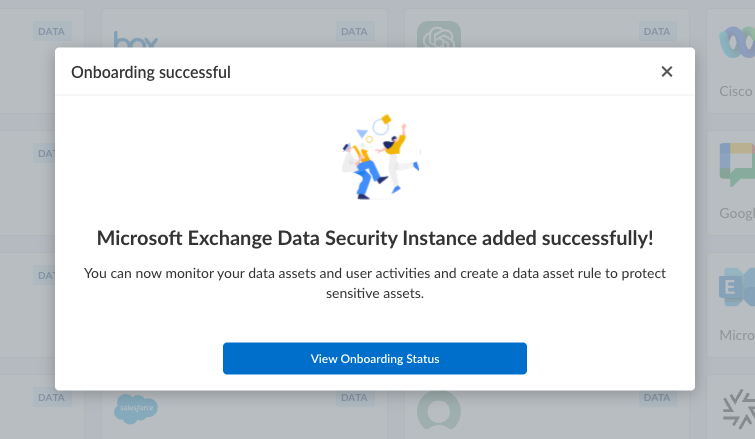
On successful onboarding, the following message is displayed.![]() Click View Onboarding Status to know if the validation checks have passed. You will be able to start scanning only after successful validation. A sample of successful validation is shown below:
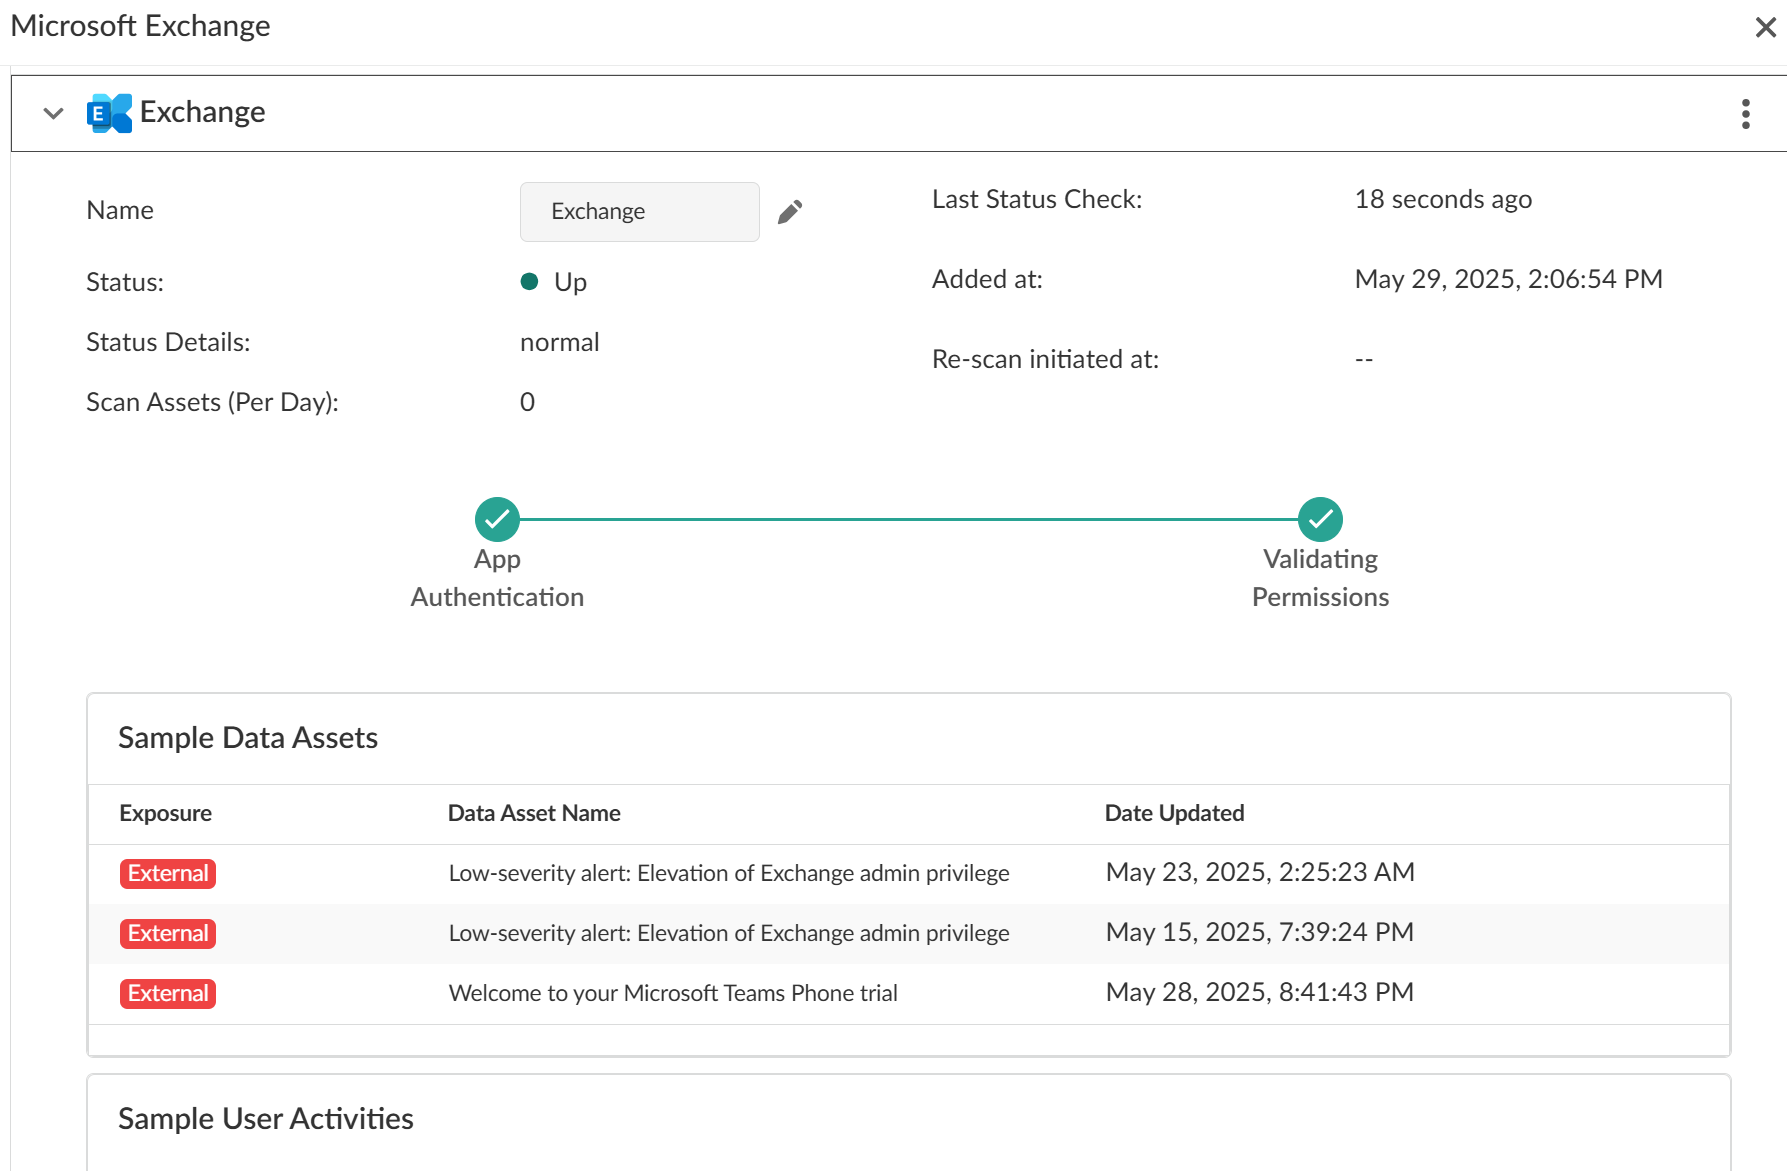
Click View Onboarding Status to know if the validation checks have passed. You will be able to start scanning only after successful validation. A sample of successful validation is shown below:![]() Optional Data Security adds the new Exchange app to the list of Cloud Apps as Microsoft Exchange n, where n is the number of Exchange app instances that you have connected to Data Security. For example, if you added one Exchange app, the name displays as Exchange 1.Next step: Proceed to Start Scanning Microsoft Exchange App.
Optional Data Security adds the new Exchange app to the list of Cloud Apps as Microsoft Exchange n, where n is the number of Exchange app instances that you have connected to Data Security. For example, if you added one Exchange app, the name displays as Exchange 1.Next step: Proceed to Start Scanning Microsoft Exchange App.Troubleshooting Onboarding for Microsoft Exchange App
To ensure that your app has onboarded correctly without any issues in authentication or permissions, Data Security performs validation checks between the onboarding and scanning process. You can start scanning only after a successful validation. For Microsoft Exchange, the following two validations happen:- App Authentication
- Validating Permissions
After the validation is successful, Data Security displays sample assets and sample activities.If you don't have any subscriptions, you will not see any User activities in the validation page. It might take up to 12 hours for the first content blobs to become available. For more information, see Office 365 Management Activity API reference.If the App Authentication or Validating Permissions check fails, try the following:- Ensure you have administrator permissions.
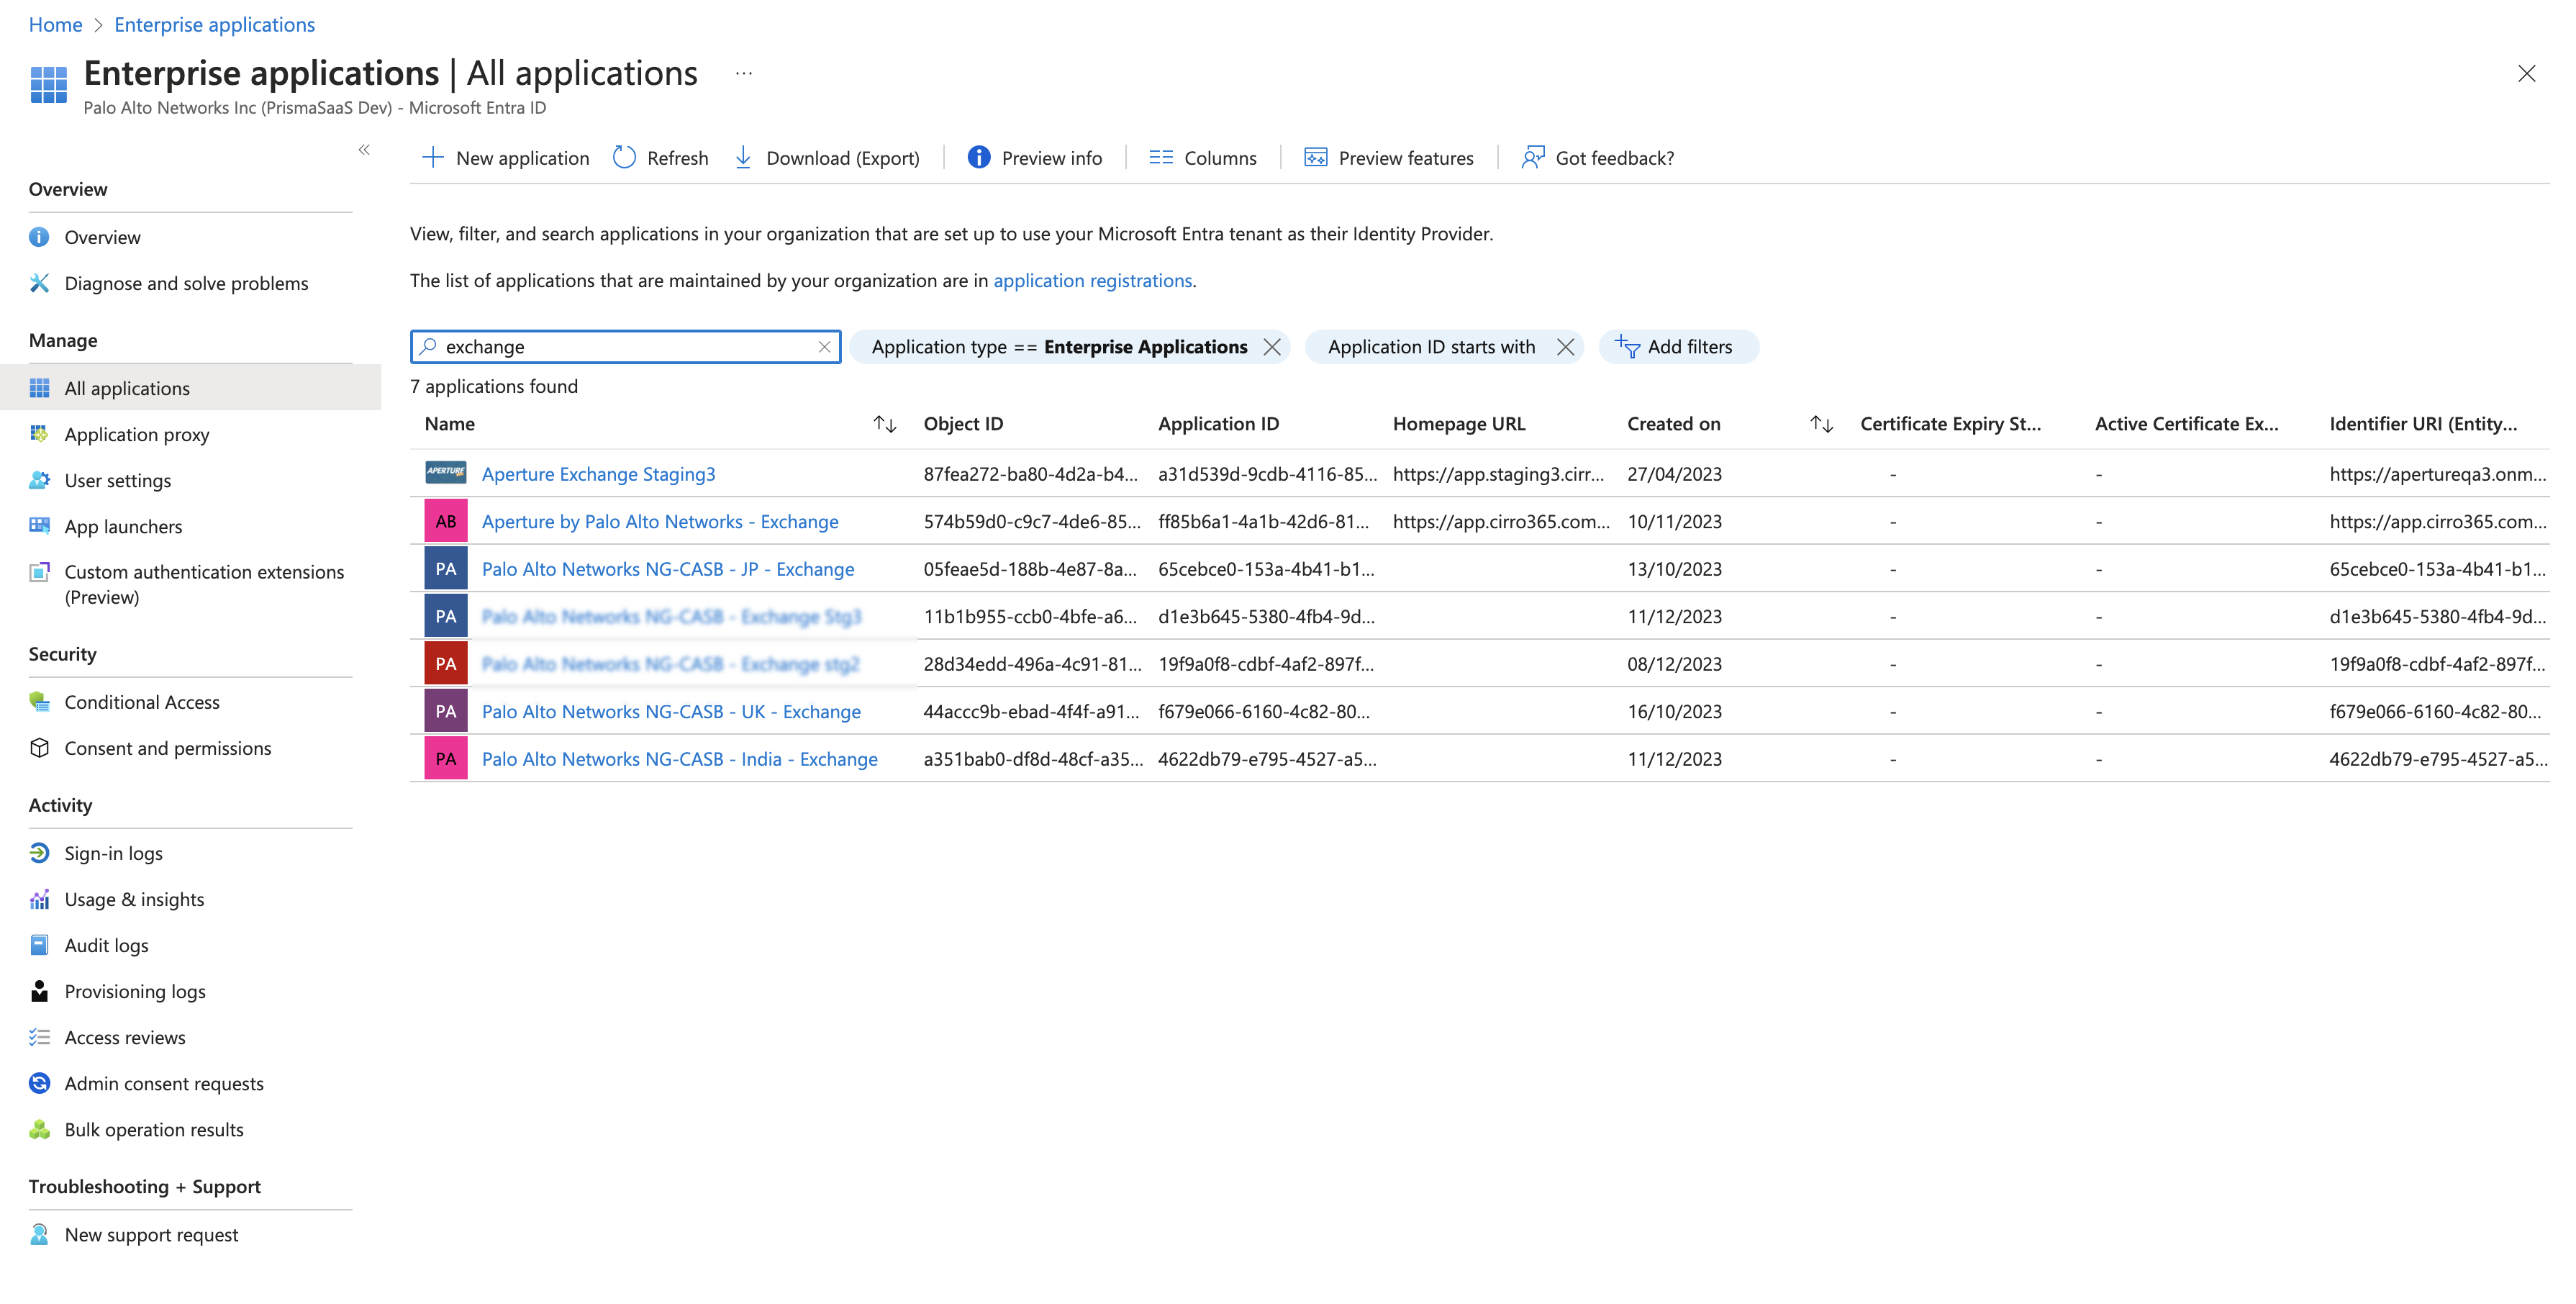
- Check if a Palo Alto Networks application is listed in the list of Enterprise
Applications. Following are the app names for specific regions:
- USA: Aperture by Palo Alto Networks - Exchange
- Japan: Palo Alto Networks NG-CASB - JP - Exchange
- EU: Aperture by Palo Alto Networks - Exchange
- India: Palo Alto Networks NG-CASB - India - Exchange
- APAC: Aperture by Palo Alto Networks - Exchange
- UK: Palo Alto Networks NG-CASB - UK - Exchange
- Australia: Palo Alto Networks NG-CASB - AUS - Exchange
![]()
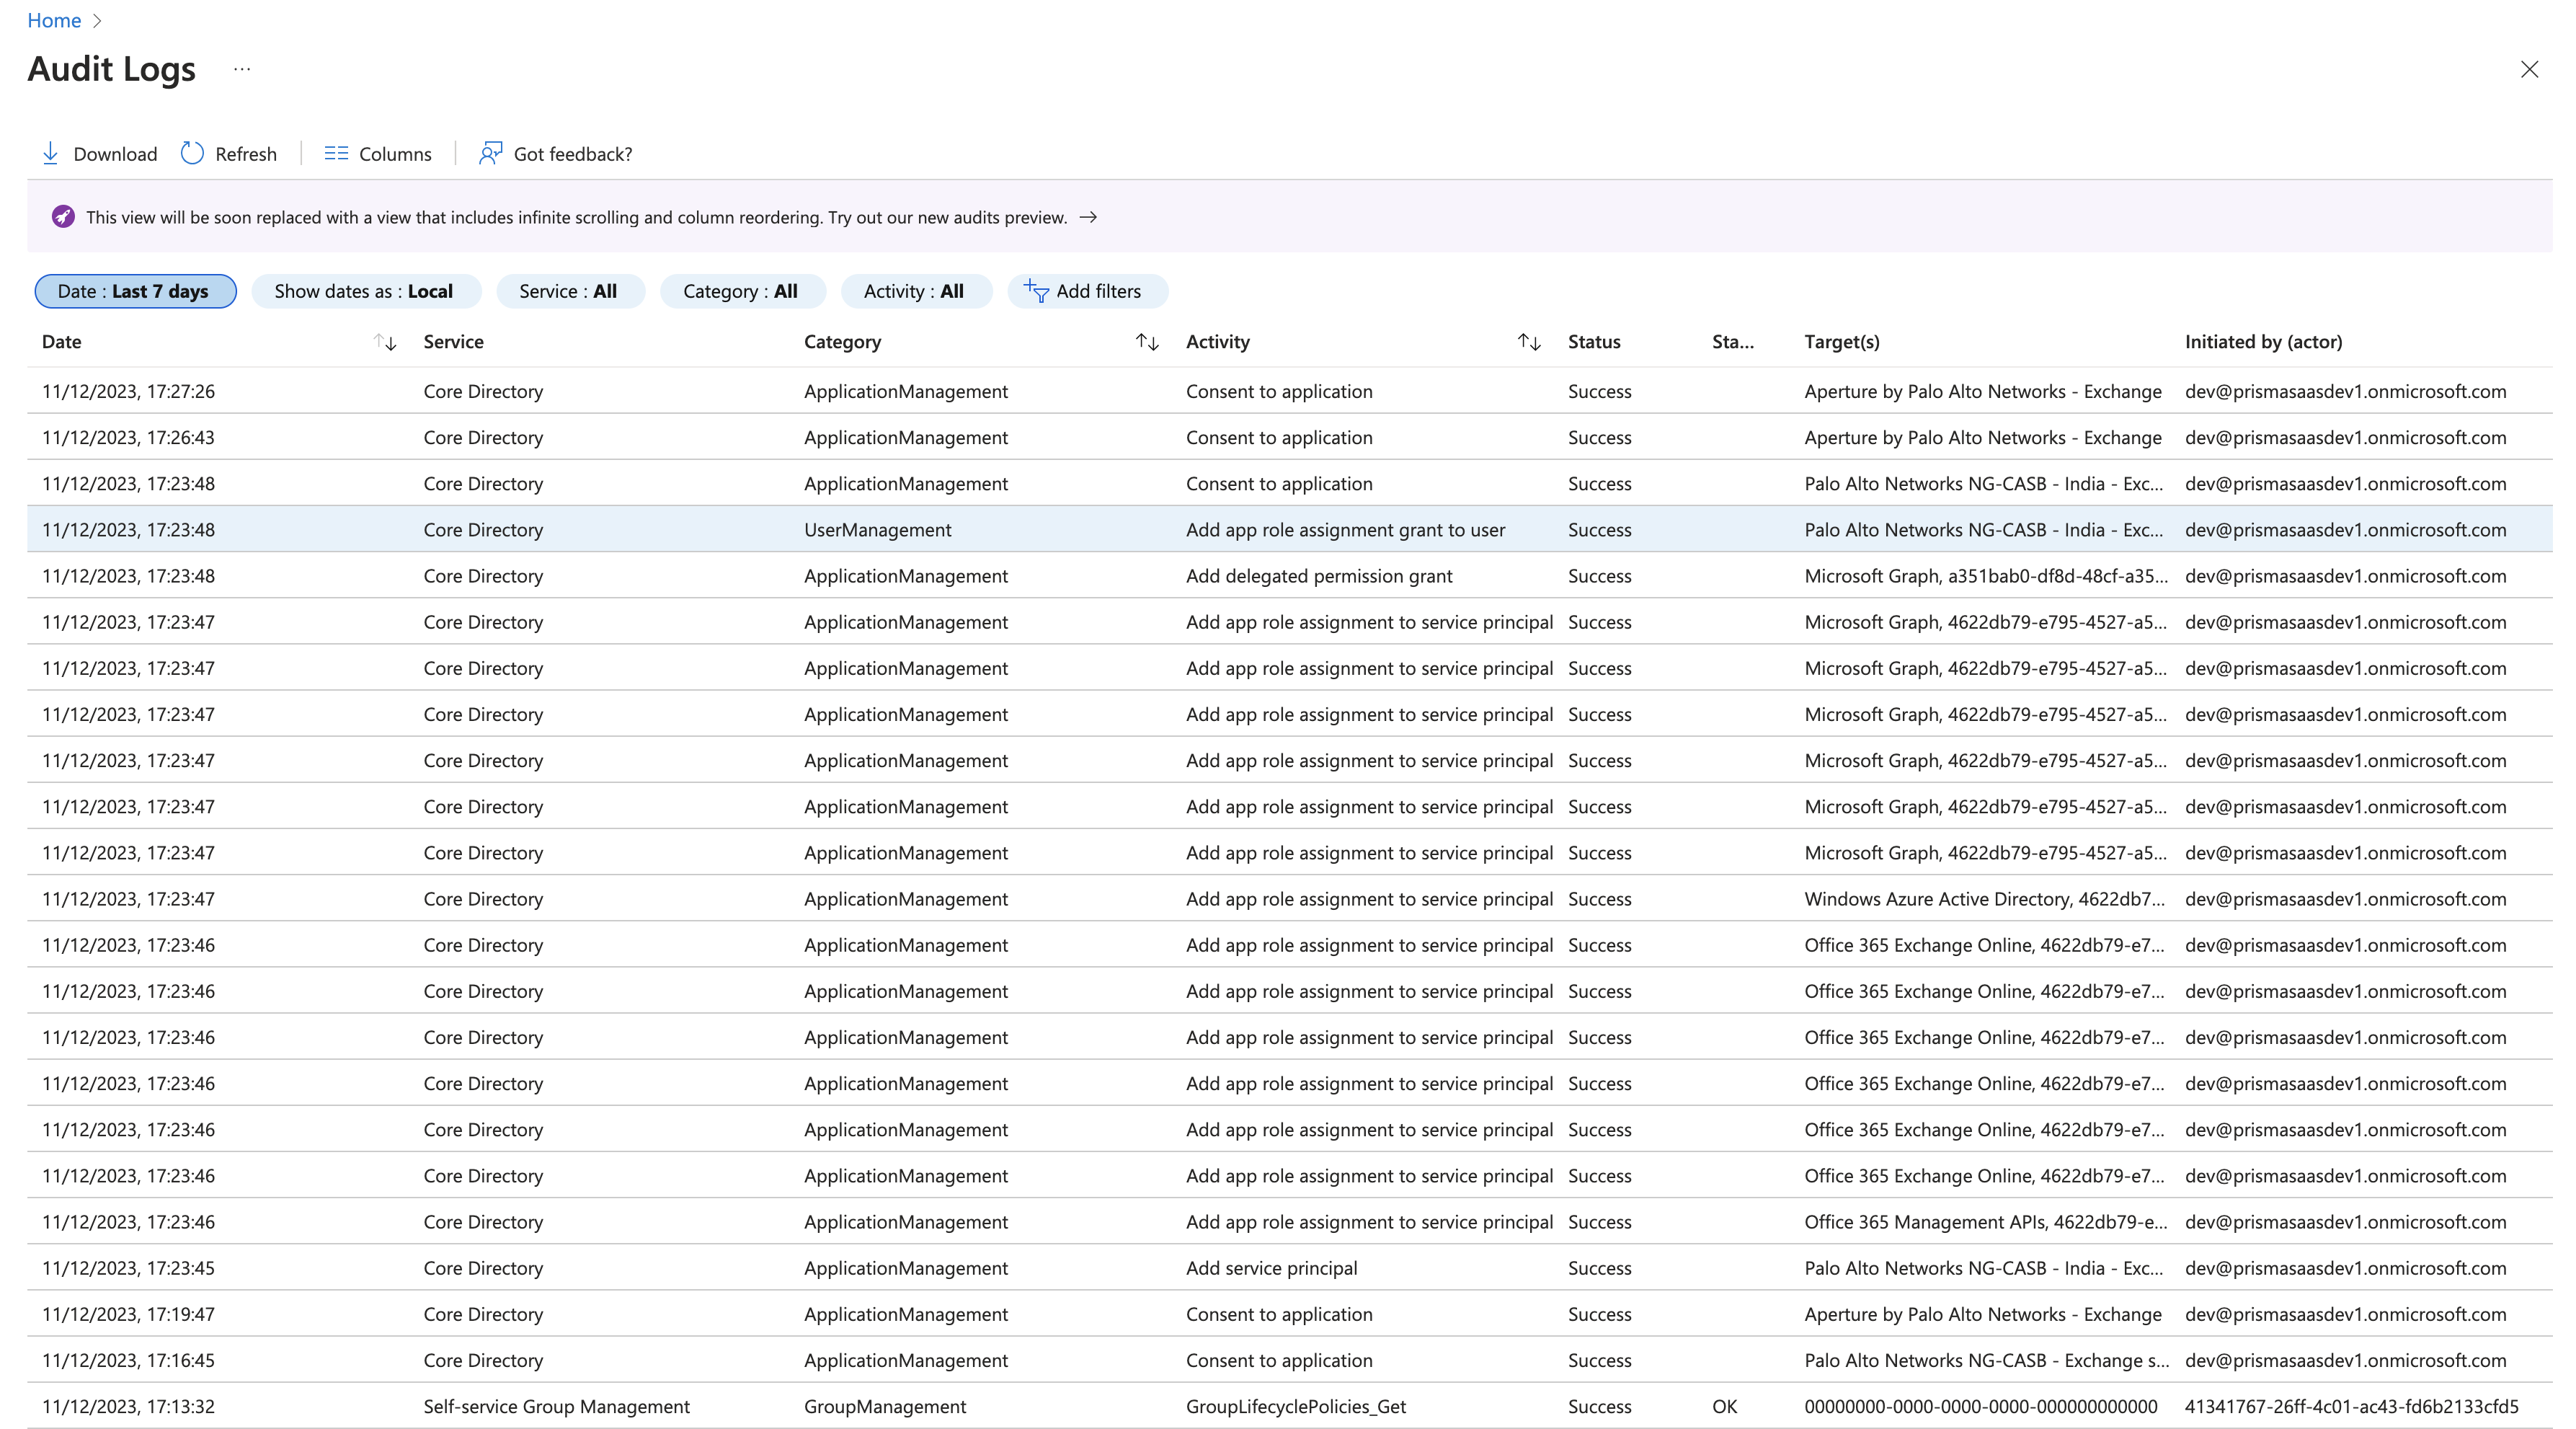
- If a Palo Alto Networks application is not listed, check if the Audit Logs
Activity displays as Consent to application, Target as
<app from the list given above>, and Status as
Success.
![]()
See the following table to understand the errors you are facing during validation.Error CodesDescriptionErrors in App Authenticationinvalid_requestRequest is invalid.invalid_grantInternal error encountered.unauthorized_clientThe installed app in the Marketplace was uninstalled manually from your cloud app.invalid_clientIssue related to Marketplace instance.temporarily_unavailableMicrosoft Exchange app issue on the server side. Please reinstall.Errors in fetching sample assets and activities (warning messages only)accessDeniedAccess is denied for ${user}.activityLimitReachedApp's API limit reached. Try after sometime.invalidRangeYou don't have any thing to get for this entity.invalidRequestRequest is invalid.itemNotFoundNo data associated with this entity.notAllowedAuthentication failure while retrieving the entity.notSupportedGetting entity with required information is no longer supported.serviceNotAvailableThe microsoft Exchange server is not responding.quotaLimitReachedQuota for app request has been exhausted for now.unauthenticatedMicrosoft Exchange app issue from server side.If the issue persists, contact SaaS Security Technical Support.Customize Microsoft Exchange App
- (Optional) Give a descriptive name to this app instance.
- Select the Exchangen link on the Cloud Apps list.Enter a descriptive Name to differentiate this instance of Exchange from other instances you're managing.Click Done to save your changes.Next step: Proceed to Start Scanning and Monitor Results.
Start Scanning and Monitor Results
When you add a new cloud app and enable scanning, Data Security automatically scans the cloud app against the default data patterns and displays the match occurrences. You can take action now to improve your scan results and identify risks.- To start scanning the new Microsoft Exchange app for risks, select ConfigurationSaaS SecurityData SecurityApplicationsMicrosoft ExchangeView Settings...Start Scanning.All email attachments in Exchange are scanned based on defined policy rules. Email content is scanned based on defined policy rules only if the sender or receiver of the email is from an external domain. Scanning only starts on installation, and assets without risks are not stored.Monitor the scan results.During the discovery phase, Data Security scans files and matches them against enabled default policy rules.Verify that your default policy rules are effective. If the results don’t capture all risks or you see false positives, improve the results.(Optional) Modify match criteria for existing policy rules.(Optional) Add new policy rules.Consider the business use of your cloud app, then identify risks unique to your enterprise. As necessary, add new:(Optional) Configure or edit a data pattern.You can Configure Data Patterns to identify specific strings of text, characters, words, or patterns to make it possible to find all instances of text that match a data pattern you specify.

