Strata Logging Service
Panorama
Table of Contents
Panorama
This is how you onboard firewalls to Strata Logging Service using
Panorama.
If you’re using Panorama™ to manage Prisma Access or on-premises firewalls, you
have some preliminary steps to onboard Panorama to Strata Logging Service
If you are onboarding a Panorama in high availability mode (HA), follow the steps for configuring an HA Panorama with
Prisma Access. Instead of the step where you install the Prisma Access components on Panorama, follow the steps for activating Strata Logging Service below.
Install and Register Panorama
- To set up Panorama, install the Panorama virtual appliance and perform initial configuration or set up an M-Series appliance.Register Panorama and activate the support license.
- Log in to the Customer Support Portal (CSP) and select .Select Register device using Serial Number or Authorization Code and then Submit.Enter the Panorama Serial Number provided in the email you received with your order fulfillment along with the required Location Information (as indicated by the asterisks) and then Agree and Submit the EULA.After you see the registration complete message, close the Device Registration dialog.Find the Panorama instance you just registered and click the corresponding edit (Actions column).To activate the Support license, select Activate Auth-Code and then enter the Support Authorization Code you received in your email and then Agree and Submit.
Enable Communication between Panorama and Strata Logging Service
- On your firewalls, allow access to the ports and FQDNs required to connect to Strata Logging Service. If you are using a proxy server, allow the same ports and FQDNs on the server without SSL decryption.Ensure that you are not decrypting traffic to Strata Logging Service.(Optional) To configure firewall to connect to Strata Logging Service through a proxy server:
- On firewall, select Strata Logging Service
- On Panorama, select Strata Logging Service
Configure NTP so that the firewall stays in sync with Strata Logging Service. Ignore this step if you have enabled proxy configuration.- On the firewall, select and set it to the same NTP Server Address you configured on Panorama. For example: pool.ntp.org.
By default, the management interface is used to forward logs to Strata Logging Service. If you choose not to use the management interface, use a data interface by configuring destination service routes for the following FQDNs: api.paloaltonetworks.com, apitrusted.paloaltonetworks.com, lic.lc.prod.us.cs.paloaltonetworks.com,certificatetrusted.paloaltonetworks.com, certificate.paloaltonetworks.com.- Select . Global on a firewall without multiple virtual system (multi-vsys) capability.
- Under Services Features, click Service Route Configuration and click Customize.
- Under Service, select the following:
- Palo Alto Networks Services
- CRL status
- DNS
- HTTP
- NTP
- Set Selected Service Routes.
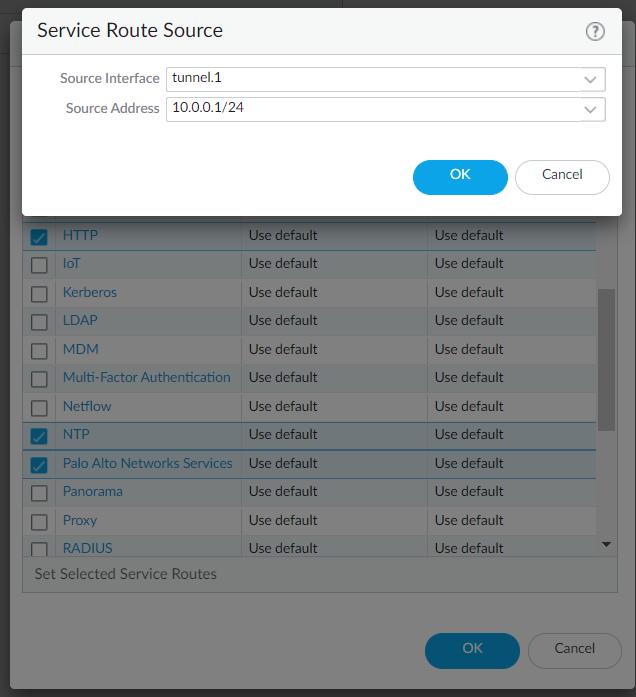
- Select the Source Interface you want to use for activation and then select a Source Address from that interface and click OK.
![]()
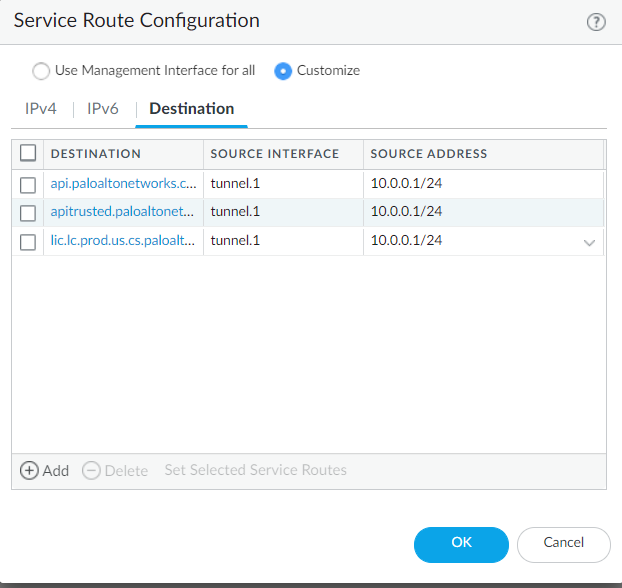
- Select Destination and Add a destination.
- Enter any of the FQDNs above as
Destination.
![]()
- Select the same Source Interface and Source Address that you selected for activation and click OK.
- Add two more destinations for the same
interface using the remaining two FQDNs.
![]()
- Click OK again to exit Service Route Configuration.
- Update the access rules required to connect to Strata Logging Service for the new interface IP address.
Install Device Certificate
- Install a device certificate for managed firewalls. If you're switching from Strata Logging Service certificate to device certificate, run the following command to restart the management server:
> debug software restart process management-server
- Restarting the management server process does not impact the packet forwarding except that the logged-in user will be signed out from the web interface and CLI.
- It's recommended to perform any process restart during nonpeak hours or during a maintenance window.
Add Panorama and Firewalls to Strata Logging Service
The procedure to add Panorama devices to your Strata Logging Service tenant depends on the device type and the Strata Logging Service license scheme you are using. You must have enough licenses to add devices to tenant.All the devices (except VM-Flex devices) are onboarded through the Device Associations page, which can be accessed in two ways:- From the standalone app Inventory menu
- From the Strata Cloud Manager System Settings > Device Associations menu.
Configure Panorama to Connect to Strata Logging Service
- Retrieve and push the Strata Logging Service licenses for managed firewalls. Ensure that you have subscribed to a valid support license of Strata Logging Service(90 days software warranty is not counted as a valid support license).
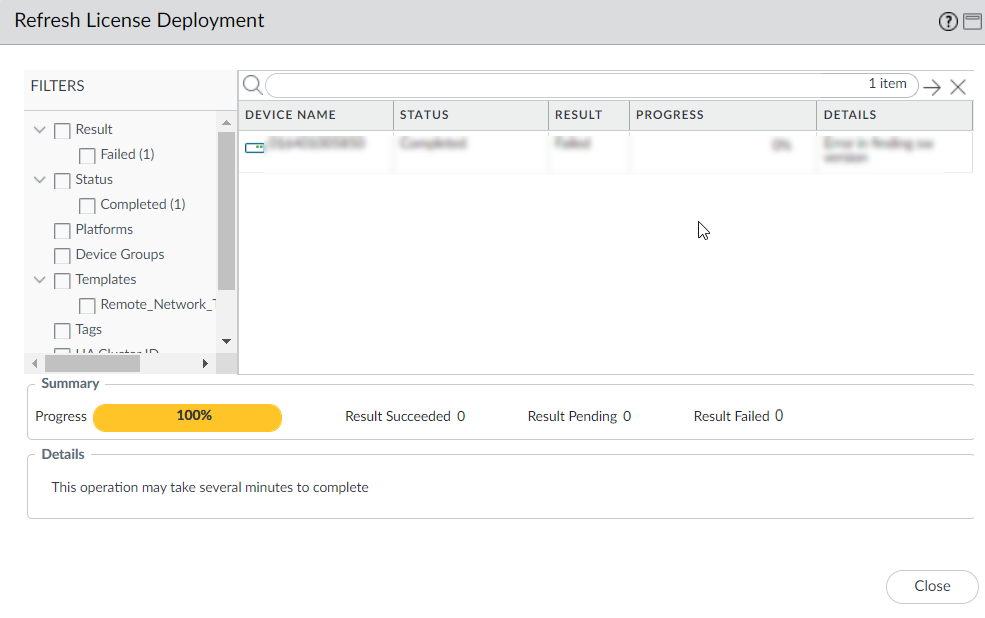
- From Panorama, select .First Refresh and then select the firewalls from the list. Panorama retrieves the licenses, deploys them to the selected firewalls, and updates the licensing status on the Panorama web interface. Make sure you see that Panorama successfully installed the Strata Logging Service license on the firewall.Do not Refresh again until the first refresh completes. When the refresh completes, you will see that Status shows Completed and Progress is 100%. There are also Details about whether the refresh succeeded.
![]() Download and install the Cloud Services plugin.You can either download the plugin from the CSP and then upload it to Panorama or you can check for plugin updates directly from Panorama as follows:
Download and install the Cloud Services plugin.You can either download the plugin from the CSP and then upload it to Panorama or you can check for plugin updates directly from Panorama as follows:- Select and Check Now to display the latest Cloud Services plugin updates.
- Download a supported plugin version.Plugin 1.0 versions 1.0.x are no longer supported on any version of Panorama.
- After downloading the plugin, Install it.
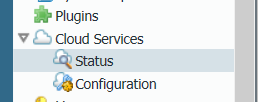
Installing a newer version of the Cloud Services plugin overwrites the previously installed version. If you are installing the plugin for the first time, after you successfully install the plugin, Panorama will refresh and the Cloud Services menu will display on the Panorama tab.![]() Generate an OTP from the page in the Strata Logging Service app and copy it to your clipboard.You have ten minutes to enter the OTP before it expires.
Generate an OTP from the page in the Strata Logging Service app and copy it to your clipboard.You have ten minutes to enter the OTP before it expires.- Go back to Panorama and select to display the Verify Account dialog.Paste the OTP you just generated and Verify it.If Verify is disabled, check that you have configured both a DNS server and an NTP server ().(Optional) If you have not created a template and a device group, from Panorama create a template and a device group to push log forwarding settings to the firewalls from which you want to forward logs to Strata Logging Service.Enable the firewalls in the template to send logs to Strata Logging Service and select the region where you want the logs stored.
- If some firewalls in your deployment are sending logs to dedicated Log Collectors or to Panorama with a local Log Collector, only firewalls that belong to the template with the Enable Strata Logging Service option selected can send logs to Strata Logging Service.
- You cannot onboard firewalls to send logs to Strata Logging Service hosted in China region.
- Select .Select the Template that contains the firewalls from which you want to forward logs to Strata Logging Service.Edit the Strata Logging Service settings.
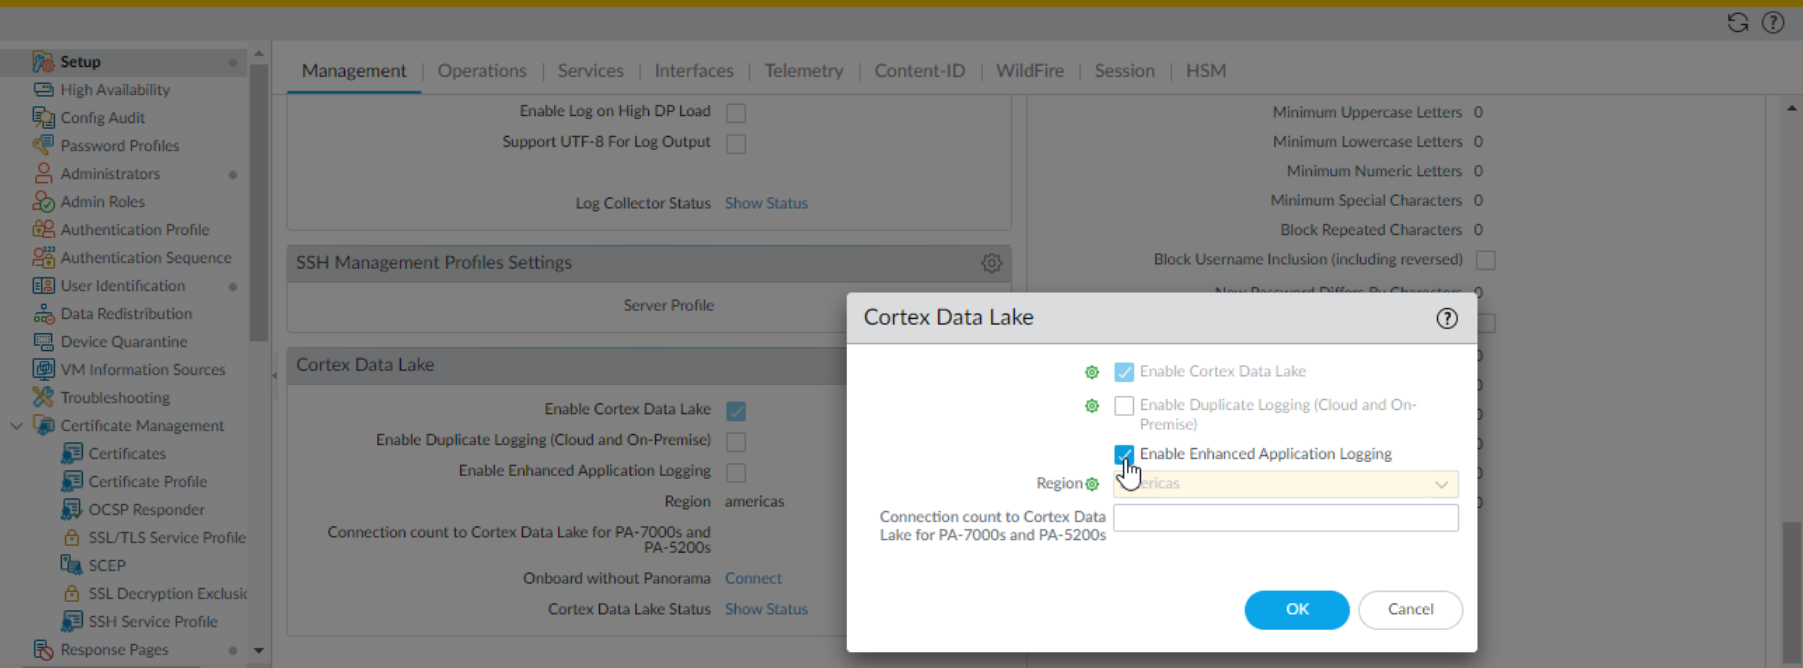
![]() Edit the Cloud Logging settings. Enable either of the two following options:
Edit the Cloud Logging settings. Enable either of the two following options:- Enable cloud logging—Send and save logs to Strata Logging Service only. With this option, use Explore or Panorama to see and interact with your log data.
- Enable duplicate logging (cloud and on-premise)—You can send and save logs both to Strata Logging Service and to your Panorama and log collection setup. Firewalls save a copy of all log data to both Panorama and Strata Logging Service except for system and config logs, which are sent to Panorama only.
To forward logs to Strata Logging Service with duplicate logging enabled, you must add the firewalls with the option enabled to a Collector Group.(Optional)Enable Enhanced Application Logging to allow the firewall to collect data for apps running the Palo Alto Networks Cloud Services environment. These logs provide Palo Alto Networks Cloud services apps increased visibility into network activity and, in some cases, are required to support app features.Select the Region where you want to forward logs for the firewalls associated with this template and then click OK.This region is not necessarily where your firewalls are located but the location of the Strata Logging Service instance. They will send logs to the region of the instance to which you onboarded them.The option to Onboard Without Panorama is used only for firewalls that are not managed by Panorama; there’s no need to populate it when you’re enabling Panorama-managed firewalls to forward logs to Strata Logging Service.Specify the Connection count to Strata Logging Service for PA-7000s and PA-5200s.Specify the number of connections that are established between the firewalls and Strata Logging Service for forwarding logs to Strata Logging Service (range is 1 to 20; default is 5).(Optional) Configure interfaces and zones in the template.Commit and push the configuration to the firewalls.Verify the Connection Status
- Firewall fetches a certificate automatically after pushing the configuration. To check the certificate status:
- On Panorama, click Panorama > Managed Devices > Troubleshooting > Test Cloud Logging Service Status.
- On firewall, click Device > Setup > Management and find the Cloud Logging > Show Status to check Strata Logging Service status.
- Run the command locally:
request logging-service-forwarding statusIf a certificate was not fetched for a firewall, run this command locally to fetch a certificate:request logging-service-forwarding certificate fetchVerify the connection status between Panorama and Strata Logging Service.You can use the Panorama CLI or the Panorama web interface with the Cloud Services plugin to verify that the connection is successful.
- Use the following CLI command:
admin@Panorama> request plugins cloud_services logging-service status
pass{"@status": "success", ..... - Select and view details to verify that Panorama was able to successfully retrieve the Strata Logging Service certificate, fetch the Customer Identification number and the region in which your Strata Logging Service instance is deployed, and confirm that the Panorama appliance is connected to Strata Logging Service. If any of these checks fail, the Status is reported as an Error.
On the hub, View Strata Logging Service Status to verify that Strata Logging Service is provisioned successfully.