Prisma Access
Activate a License for Prisma Access (Managed by Strata Cloud Manager) and Add-Ons Through Common Services
Table of Contents
Expand All
|
Collapse All
Prisma Access Docs
-
- 5.2 Preferred and Innovation
- 5.1 Preferred and Innovation
- 5.0 Preferred and Innovation
- 4.2 Preferred
- 4.1 Preferred
- 4.0 Preferred
- 3.2 Preferred and Innovation
- 3.1 Preferred and Innovation
- 3.0 Preferred and Innovation
- 2.2 Preferred
-
-
- 4.0 & Later
- 3.2 Preferred and Innovation
- 3.1 Preferred and Innovation
- 3.0 Preferred and Innovation
- 2.2 Preferred
- Prisma Access China
-
-
Activate a License for Prisma Access (Managed by Strata Cloud Manager) and Add-Ons Through Common Services
Learn how to activate your Prisma Access (Managed by Strata Cloud Manager) tenants through .
| Where Can I Use This? | What Do I Need? |
|---|---|
|
|
After you receive an email from Palo Alto Networks identifying the license you're
activating, including all your add-ons and capacities, use the activation link to
begin the activation process. The service will help you with the process of claiming
your license, creating your tenant, and managing your users.
Select Activate Subscription in your email.
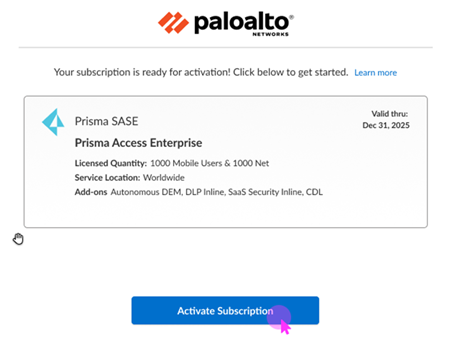
Use one of the following options:
First Time Prisma Access (Managed by Strata Cloud Manager) and Add-Ons Activation - One CSP
Learn how to activate your Prisma Access (Managed by Strata Cloud Manager) tenants through
Common Services for the first time if you have only one Customer Support Portal
account.
If you have only one Customer Support Portal account, follow these steps for
first-time Prisma Access (Managed by Strata Cloud Manager) and add-ons license activation.
- Log in with your email address.
- If you have a Palo Alto Networks Customer Support account, then enter the email address you used when you registered for that account and select Next.
- If you do not have a Palo Alto Networks Customer Support account, then Create a New AccountPasswordNext.
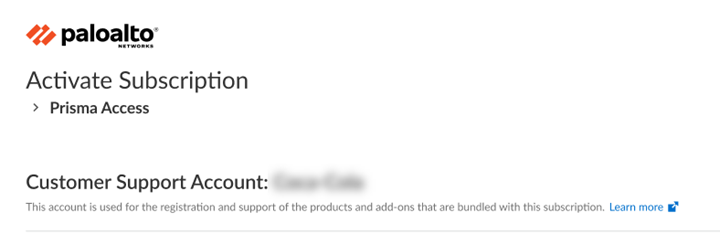
The service uses this email address for the user account assigned to the tenant that you use for this license. This tenant, and any others created by this email address, will have the Superuser role.Because you have only one Customer Support Portal account associated with your user name, the Customer Support Account is pre-populated.![]() Choose Cloud management for your setup and management method.
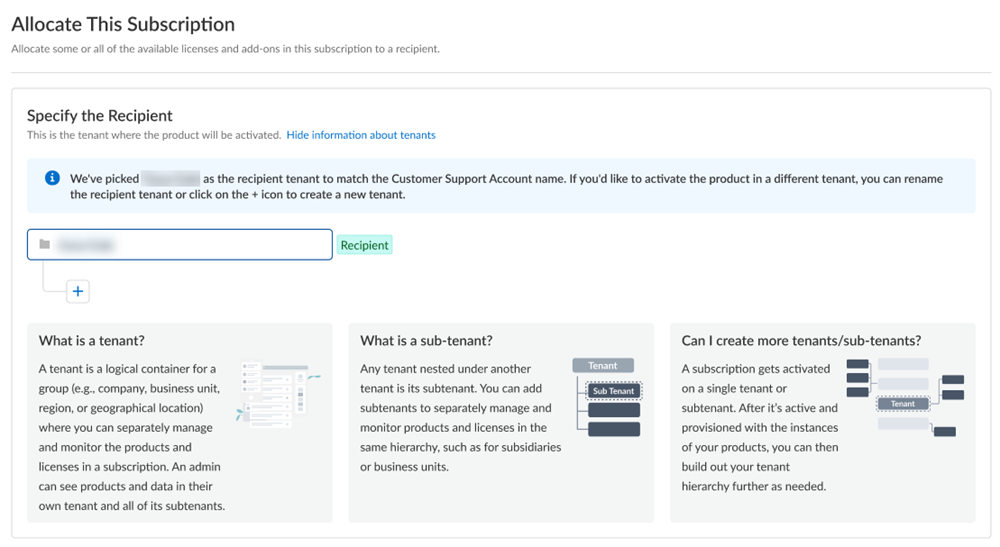
Choose Cloud management for your setup and management method.![]() Allocate the subscription to the recipients of your choice.You can allocate your entire license to one recipient or you can share it with multiple recipients in a tenant hierarchy. What is a tenant?
Allocate the subscription to the recipients of your choice.You can allocate your entire license to one recipient or you can share it with multiple recipients in a tenant hierarchy. What is a tenant?- If you need just one tenant, use or rename the tenant provided. The name provided matches your Customer Support Portal account for convenience.
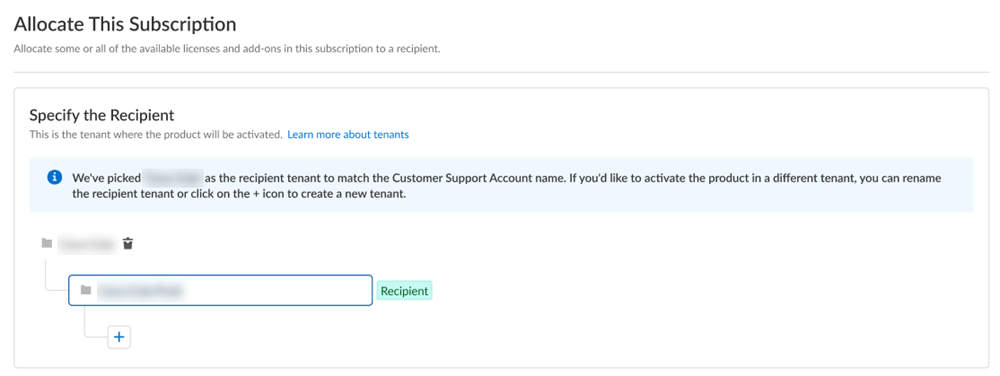
![]() (Optional) This step applies if you are a managed security service provider (MSSP), a distributed enterprise customer, or need multiple tenants. After you create the first tenant, you can Allocate to subtenant and use or rename the tenant provided.
(Optional) This step applies if you are a managed security service provider (MSSP), a distributed enterprise customer, or need multiple tenants. After you create the first tenant, you can Allocate to subtenant and use or rename the tenant provided.![]() A subscription gets allocated on a tenant or a sub-tenant. This step is for choosing a tenant where you want to allocate a license, not for building a complete tenant hierarchy. You can create only a tenant and subtenant here, and you can choose to allocate a license to that subtenant.After activation, you can build out your tenant hierarchy as needed through tenant management. You can create your tenant hierarchy to reflect your existing organizational structure. You can also consider identity and access inheritance when creating the hierarchy, in addition to tenant hierarchy limits.After you create a tenant hierarchy, you can share a license.Select Done.After first time or return visit license activation, continue with the following steps:
A subscription gets allocated on a tenant or a sub-tenant. This step is for choosing a tenant where you want to allocate a license, not for building a complete tenant hierarchy. You can create only a tenant and subtenant here, and you can choose to allocate a license to that subtenant.After activation, you can build out your tenant hierarchy as needed through tenant management. You can create your tenant hierarchy to reflect your existing organizational structure. You can also consider identity and access inheritance when creating the hierarchy, in addition to tenant hierarchy limits.After you create a tenant hierarchy, you can share a license.Select Done.After first time or return visit license activation, continue with the following steps:
First Time Prisma Access (Managed by Strata Cloud Manager) and Add-Ons Activation - Multiple CSPs
Learn how to activate your Prisma Access (Managed by Strata Cloud Manager) tenants through Common Services for the first time.If you have multiple Customer Support Portal accounts, follow these steps for first-time Prisma Access (Managed by Strata Cloud Manager) and add-ons license activation.- Log in with your email address.
- If you have a Palo Alto Networks Customer Support account, then enter the email address you used when you registered for that account and select Next.
- If you do not have a Palo Alto Networks Customer Support account, then Create a New AccountPasswordNext.
The service uses this email address for the user account assigned to the tenant that you use for this license. This tenant, and any others created by this email address, will have the Superuser role.If you have multiple Customer Support Portal accounts, choose the Customer Support Account number that you want to use to claim the license.![]() Choose Cloud management for your setup and management method.
Choose Cloud management for your setup and management method.![]() Allocate the subscription to the recipients of your choice.You can allocate your entire license to one recipient or you can share it with multiple recipients in a tenant hierarchy. What is a tenant?
Allocate the subscription to the recipients of your choice.You can allocate your entire license to one recipient or you can share it with multiple recipients in a tenant hierarchy. What is a tenant?- If you need just one tenant, use or rename the tenant provided. The name provided matches your Customer Support Portal account for convenience.
![]() (Optional) This step applies if you are a managed security service provider (MSSP), a distributed enterprise customer, or need multiple tenants. After you create the first tenant, you can Allocate to subtenant and use or rename the tenant provided.
(Optional) This step applies if you are a managed security service provider (MSSP), a distributed enterprise customer, or need multiple tenants. After you create the first tenant, you can Allocate to subtenant and use or rename the tenant provided.![]() A subscription gets allocated on a tenant or a sub-tenant. This step is for choosing a tenant where you want to allocate a license, not for building a complete tenant hierarchy. You can create only a tenant and subtenant here, and you can choose to allocate a license to that subtenant.After activation, you can build out your tenant hierarchy as needed through tenant management. You can create your tenant hierarchy to reflect your existing organizational structure. You can also consider identity and access inheritance when creating the hierarchy, in addition to tenant hierarchy limits.After you create a tenant hierarchy, you can share a license.Select Done.After first time or return visit license activation, continue with the following steps:
A subscription gets allocated on a tenant or a sub-tenant. This step is for choosing a tenant where you want to allocate a license, not for building a complete tenant hierarchy. You can create only a tenant and subtenant here, and you can choose to allocate a license to that subtenant.After activation, you can build out your tenant hierarchy as needed through tenant management. You can create your tenant hierarchy to reflect your existing organizational structure. You can also consider identity and access inheritance when creating the hierarchy, in addition to tenant hierarchy limits.After you create a tenant hierarchy, you can share a license.Select Done.After first time or return visit license activation, continue with the following steps:
Return Visit Prisma Access (Managed by Strata Cloud Manager) and Add-Ons Activation
Learn how to activate your Prisma Access (Managed by Strata Cloud Manager) tenants through Common Services for repeat visits.Follow these steps if you have already completed first time Prisma Access and add-ons license activation, you have already created your tenant hierarchy through tenant management, and you are returning to activate another license in your existing hierarchy.- Log in with your email address.Choose the Customer Support Account number that you want to use to claim the license.
![]() Choose Cloud management for your setup and management method.
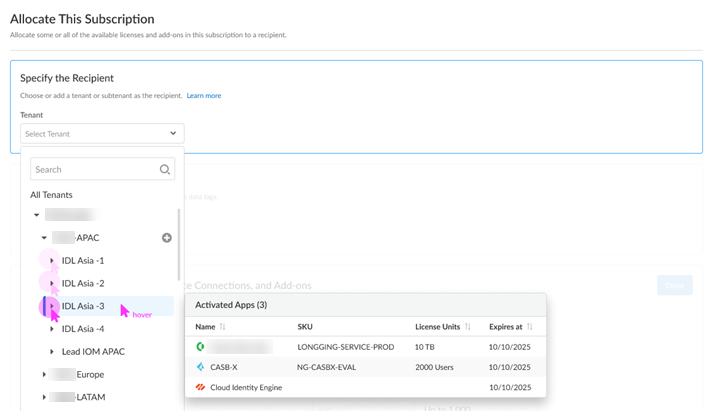
Choose Cloud management for your setup and management method.![]() Allocate the subscription to the recipient tenant of your choice.You can hover over each tenant to see which apps you already activated.
Allocate the subscription to the recipient tenant of your choice.You can hover over each tenant to see which apps you already activated.![]() After first time or return visit license activation, continue with the following steps:
After first time or return visit license activation, continue with the following steps:

