Install ION 3200 and ION 3200H in a Rack
Table of Contents
Install ION 3200 and ION 3200H in a Rack
Learn to install the ION 3200 device in a rack.
Mount
the ION device in a 19” equipment rack using the racktray. The mounting
equipment requires 1 RU of rack space.
The racktray kit enables
you to install an ION 3200 device in a 19" rack. The installation
hardware consists of a metal base and two rails. To ease installation,
first install the device in the racktray and then install the assembled
racktray into the equipment rack.
The rack kits PAN-ION-RACKTRAY- ION 3200 and
PAN-1RU-SMALL-RACK4- ION 3200H and ION 3200H 5G are not included with the
device and must be purchased separately.
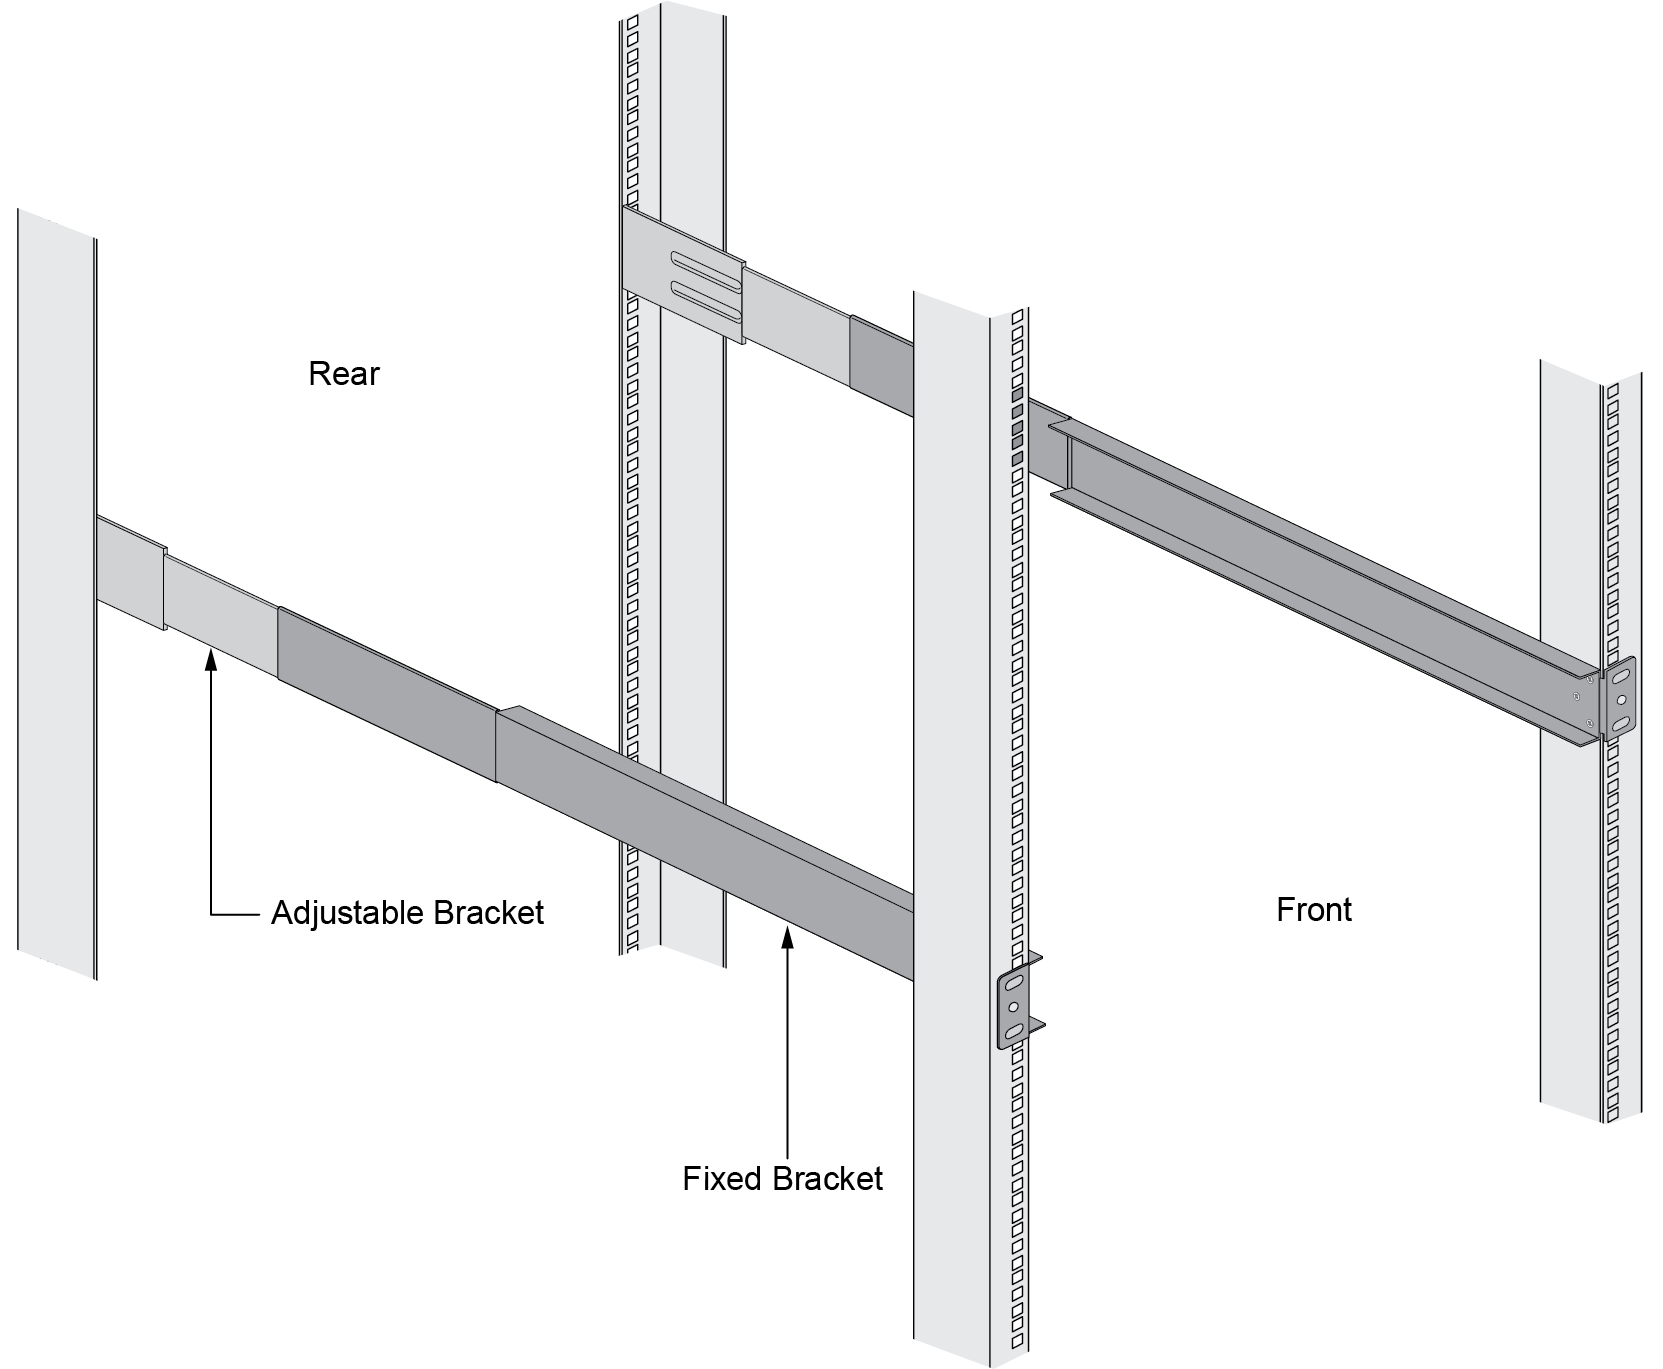
- Slide one of the adjustable mounting brackets into one of the fixed mounting brackets to create a mounting rail. Repeat for the second mounting rail. The adjustable and fixed brackets are the same for the left and right side.
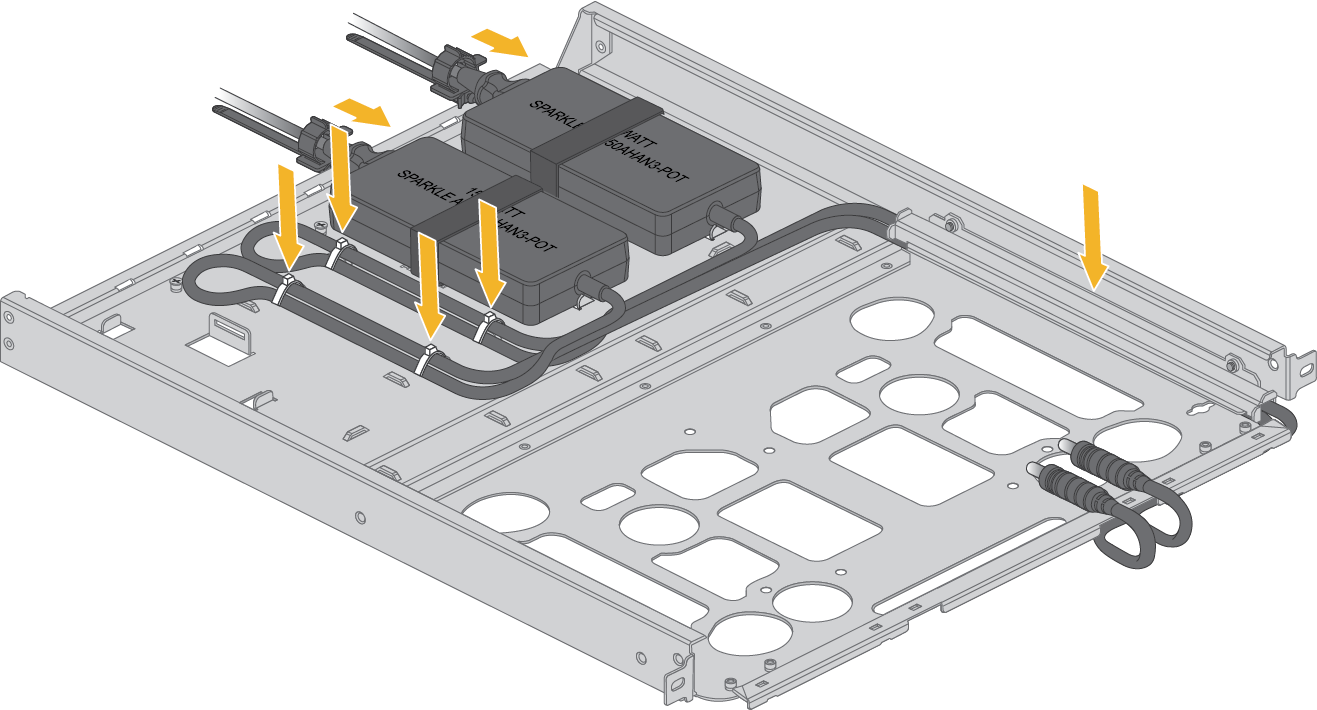
![]() Align the bottom edge of the mounting rails to the bottom of the 1 RU rack space reserved for the device. Align the slotted holes in the adjustable mounting bracket to the holes on the rear of the equipment frame.The mounting rails are designed for equipment frames that are 26” to 32” deep.Secure the rails to the equipment frame with mounting screws (not provided) compatible with your equipment frame. Tighten the screws to their recommended torque value.Slide the power adapter into the marked position and attach the AC cord, route the AC cord to the right side of the tray sidewall and underneath the front tray “C” channel.
Align the bottom edge of the mounting rails to the bottom of the 1 RU rack space reserved for the device. Align the slotted holes in the adjustable mounting bracket to the holes on the rear of the equipment frame.The mounting rails are designed for equipment frames that are 26” to 32” deep.Secure the rails to the equipment frame with mounting screws (not provided) compatible with your equipment frame. Tighten the screws to their recommended torque value.Slide the power adapter into the marked position and attach the AC cord, route the AC cord to the right side of the tray sidewall and underneath the front tray “C” channel.![]() ION 3200 device comes with only one power adapter. The second power adapter as shown in the image is an optional power adapter.Attach the power cord routing cover to the tray sidewall and install AC retaining clamp.
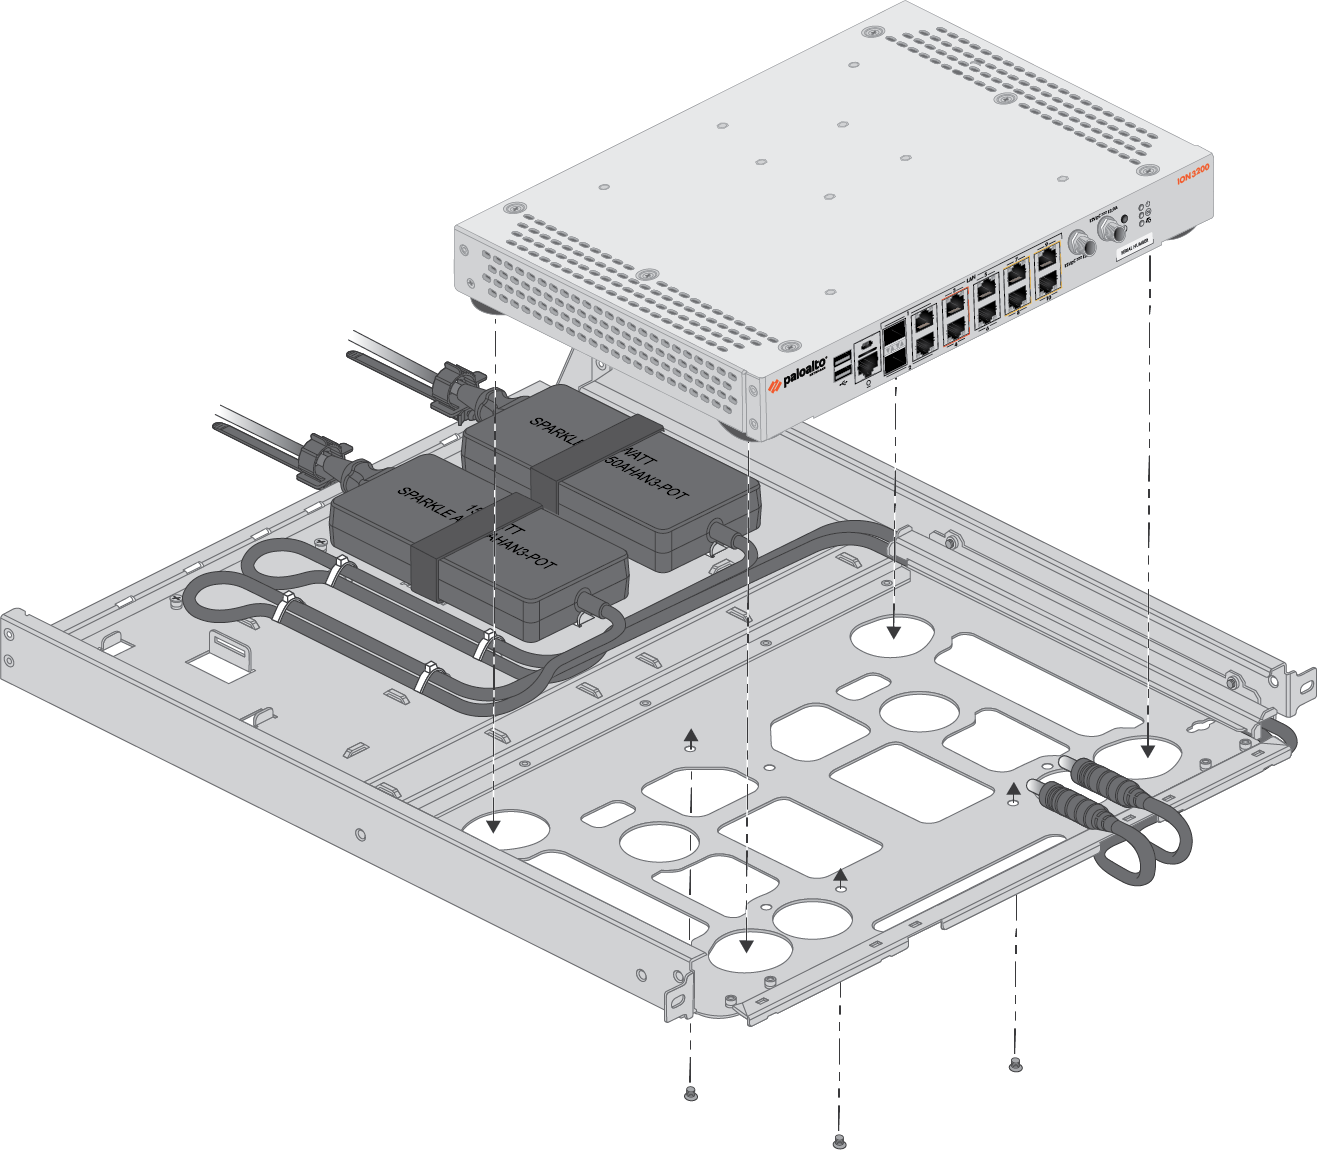
ION 3200 device comes with only one power adapter. The second power adapter as shown in the image is an optional power adapter.Attach the power cord routing cover to the tray sidewall and install AC retaining clamp.![]() Plug the power supply connector into the back of the device. Using the provided tie-wraps, bind and secure the power supply cable toward the back end of the tray using the sheet-metal lances toward the center of the tray.
Plug the power supply connector into the back of the device. Using the provided tie-wraps, bind and secure the power supply cable toward the back end of the tray using the sheet-metal lances toward the center of the tray.![]() With the front of the device facing forward, align the four rubber feet on the bottom of the device to the slotted holes in the provided mounting tray. Secure the device in place using two provided #6-32 x 3/16” Long Flathead screws.
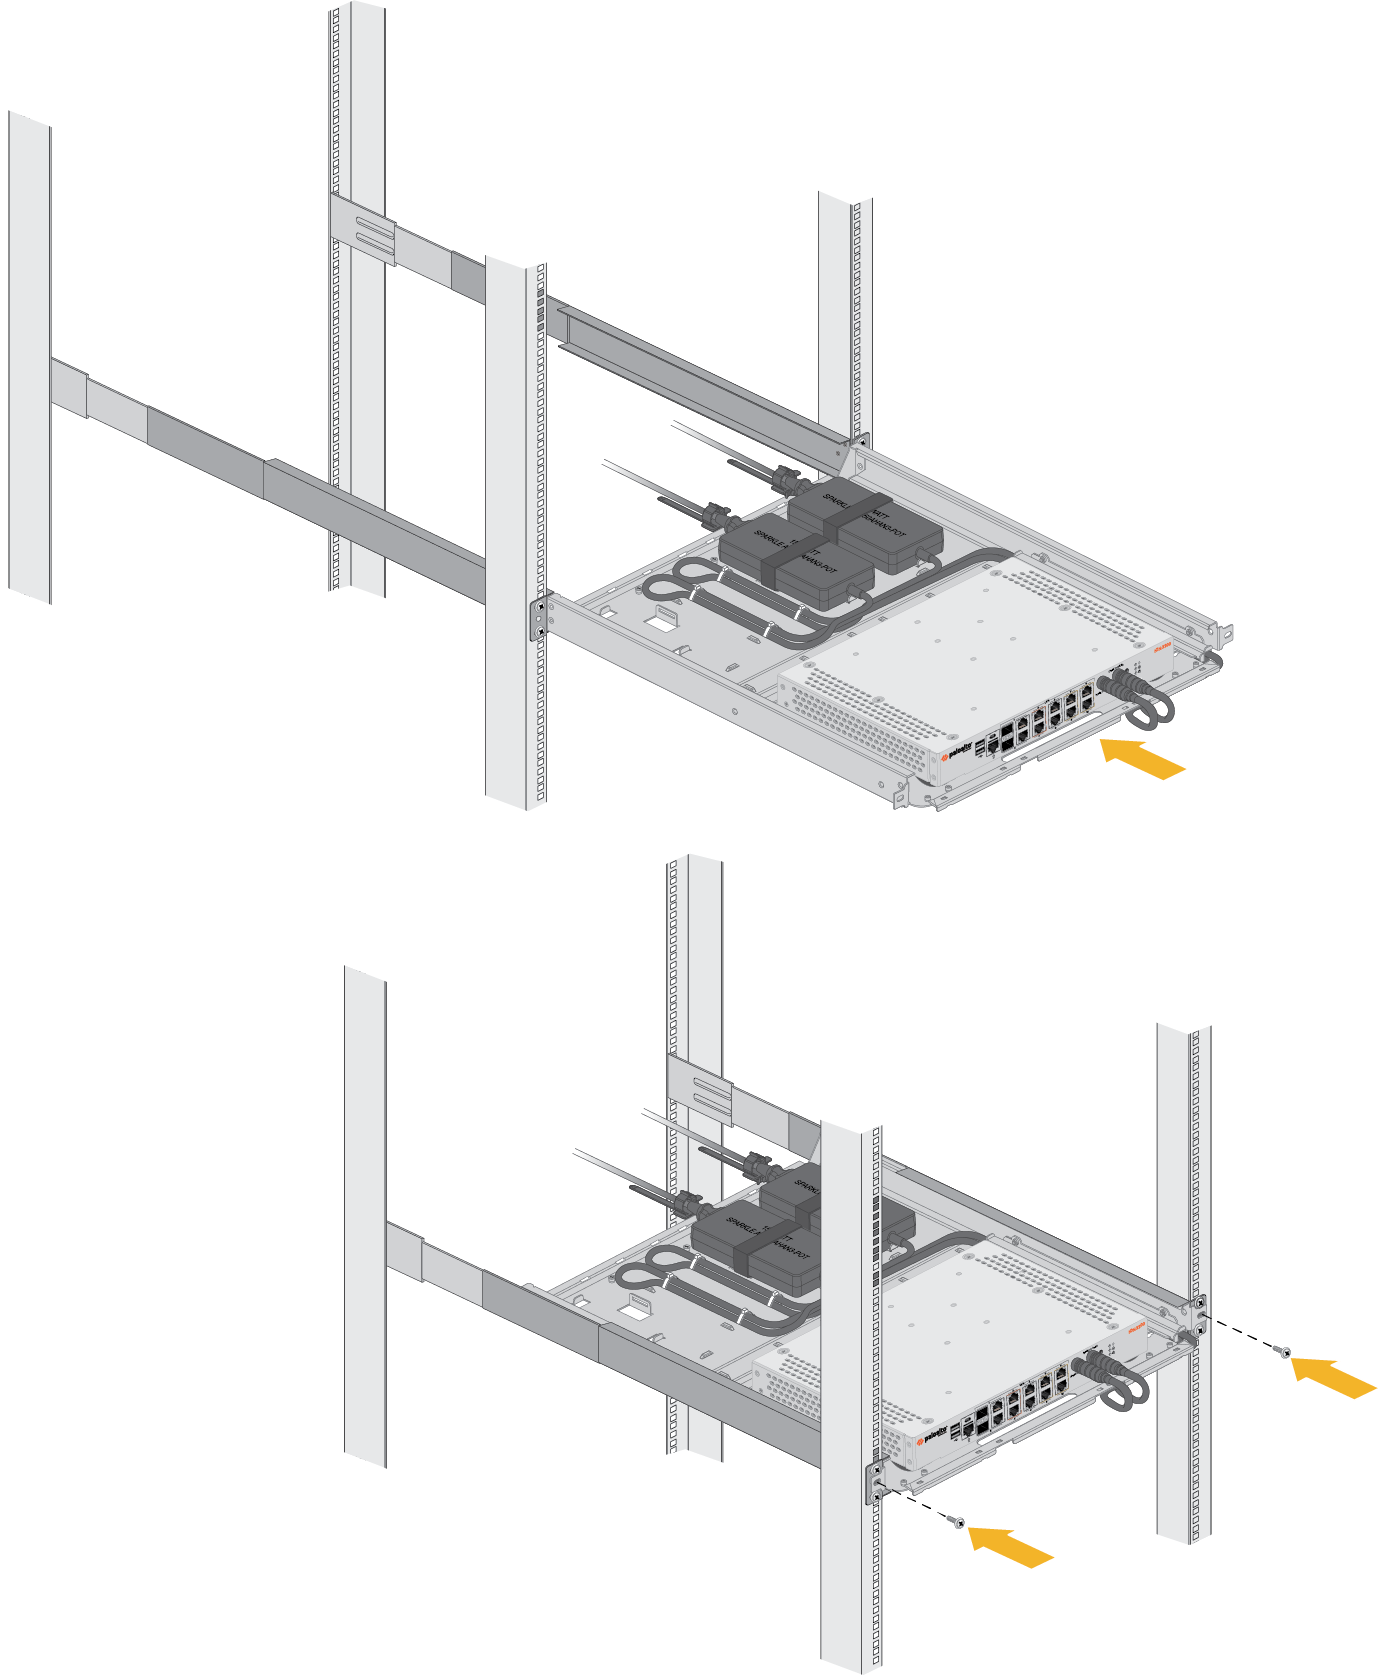
With the front of the device facing forward, align the four rubber feet on the bottom of the device to the slotted holes in the provided mounting tray. Secure the device in place using two provided #6-32 x 3/16” Long Flathead screws.![]() After assembling the device to the tray and connecting the power cable to the device, tie-wrap the power cord to the "C" channel.Slide the mounting tray into the rails previously fixed to the equipment rack. Stop when the front flange on the mounting tray is flush with the front of the rail.Align the slotted holes in the mounting tray to the holes in the equipment frame. Secure the mounting tray to the equipment frame on both sides using 3 screws each (not provided). The screws must be compatible with your equipment frame.
After assembling the device to the tray and connecting the power cable to the device, tie-wrap the power cord to the "C" channel.Slide the mounting tray into the rails previously fixed to the equipment rack. Stop when the front flange on the mounting tray is flush with the front of the rail.Align the slotted holes in the mounting tray to the holes in the equipment frame. Secure the mounting tray to the equipment frame on both sides using 3 screws each (not provided). The screws must be compatible with your equipment frame.![]() Proceed to Power on the ION 3200 and ION 3200H.
Proceed to Power on the ION 3200 and ION 3200H.