Replace a PA-1500 Series Firewall Power Supply
Table of Contents

Replace a PA-1500 Series Firewall Power Supply
Learn how to replace a power supply on the PA-1500 Series Firewall.
The following instructions describe how to replace an AC or DC power supply in a
PA-1500 Series firewall.
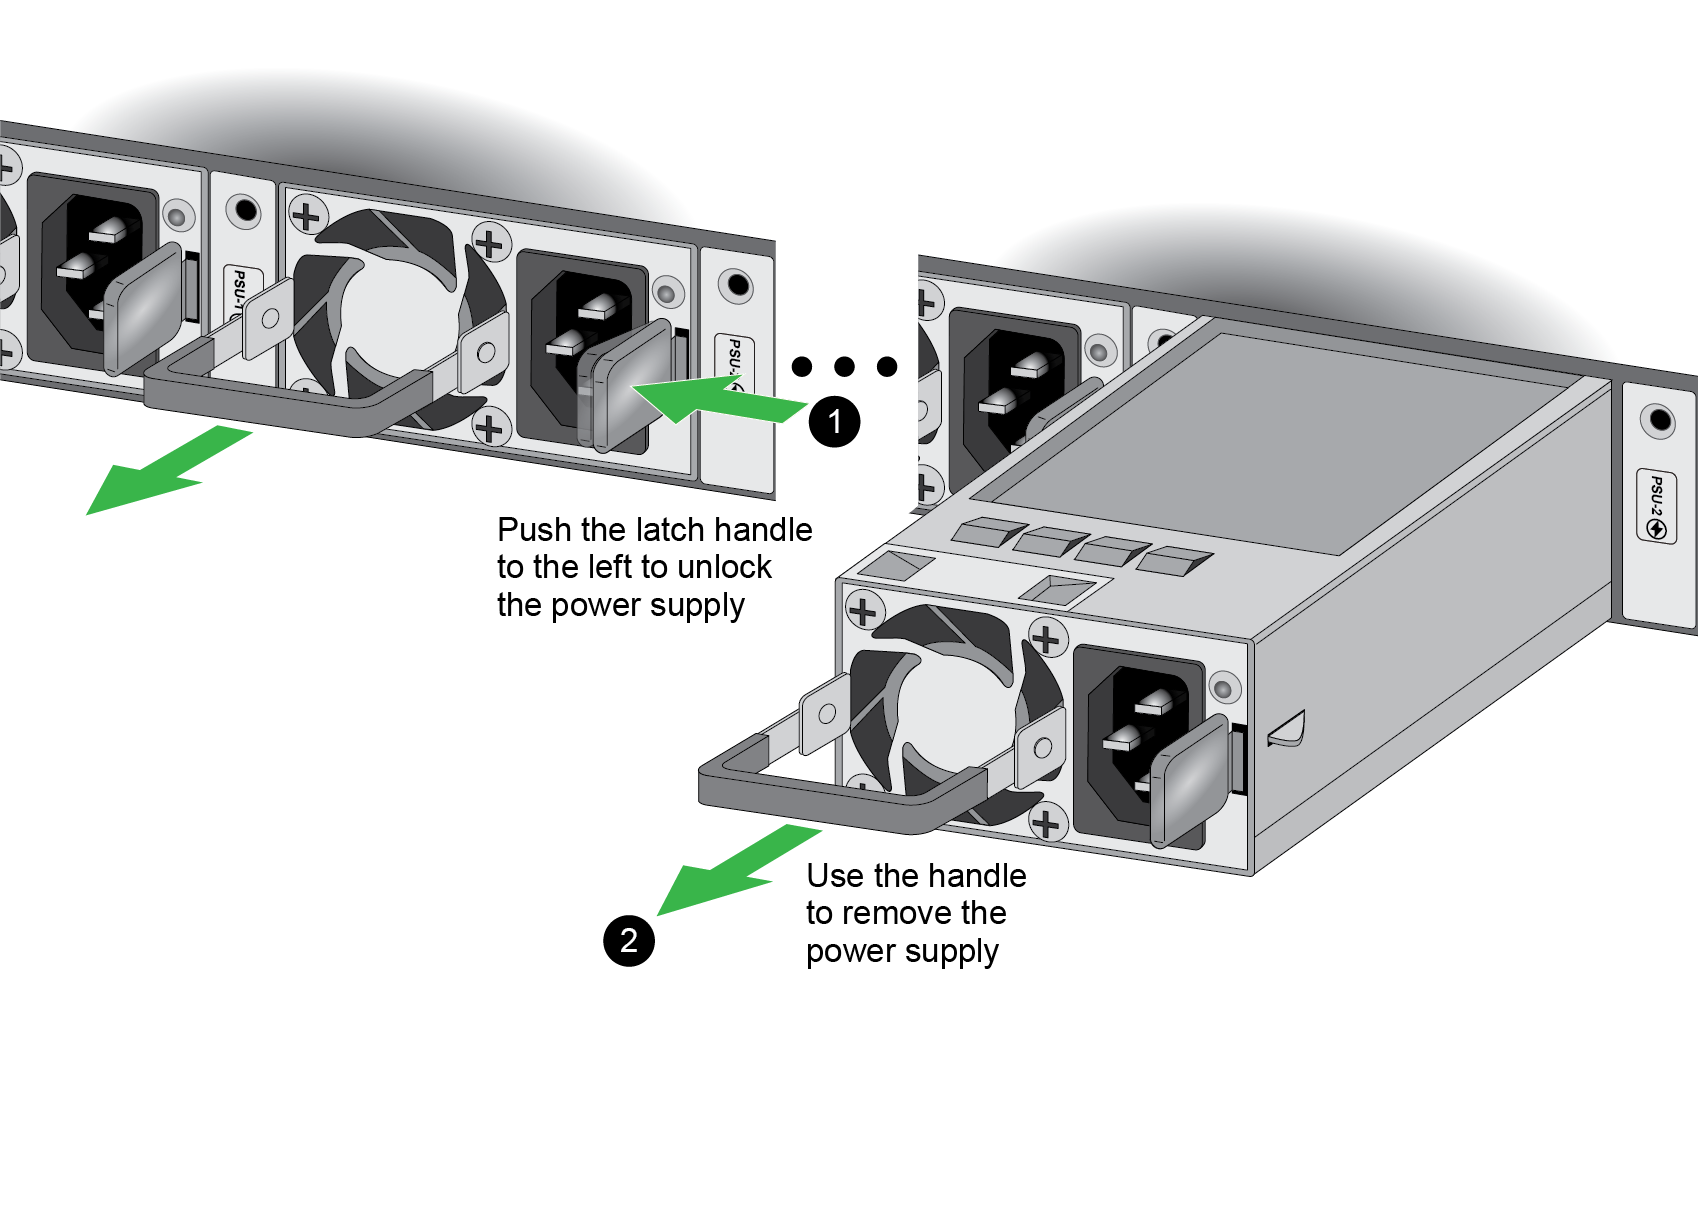
- Put the provided ESD wrist strap on your wrist ensuring that the metal contact is touching your skin. Then attach (snap) one end of the ground cable to the wrist strap and remove the alligator clip from the banana clip on the other end of the ESD grounding cable. Plug the banana clip end into one of the ESD ports located on the back of the appliance before handling ESD sensitive hardware.Locate the failed power supply by viewing the system logs or by viewing the LED on the front panel of the device. A yellow or off LED indicates a failed power supply.Alternatively, you can use the CLI command show system environmentals to identify the failed power supply.Shut off power to the failed power supply.(AC power supply) Unplug and remove the power cord (leaving the cord in place can cause arcing inside the appliance).(DC power supply) Power off the DC power source that is connected to the failed power supply.Facing the rear side of the appliance, push the power supply latch handle to the left to disengage the latch from the appliance. With the latch still pushed to the left, pull out the power supply.
![]() Remove the replacement power supply from the packaging.Install the new AC or DC power supply into the empty power supply slot. Pull on the metal handle to ensure that the power supply latch is fully engaged and the power supply is locked into the appliance.Turn on power to the new power supply. Once the power supply powers on, the input and output LEDs on the power supply turn green. Similarly, the power LED and the power supply LED (1 or 2) on the front of the firewall turn green.
Remove the replacement power supply from the packaging.Install the new AC or DC power supply into the empty power supply slot. Pull on the metal handle to ensure that the power supply latch is fully engaged and the power supply is locked into the appliance.Turn on power to the new power supply. Once the power supply powers on, the input and output LEDs on the power supply turn green. Similarly, the power LED and the power supply LED (1 or 2) on the front of the firewall turn green.