Connect DC Power to a PA-220R Firewall
Table of Contents
Connect DC Power to a PA-220R Firewall
Learn how to connect DC power to a PA-220R firewall.
The following procedure describes how to connect
DC power to a PA-220R firewall. Before you connect power, read the PA-220R Electrical
Specifications and Prepare
to Connect DC Power to a PA-220R Firewall. The DC terminal
block for connecting the DC power cables to the firewall is included
in the PA-220R accessories kit.
To
avoid injury to yourself or damage to your Palo Alto Networks® hardware
or the data that resides on the hardware, read the Product Safety Warnings.
Power off the DC power sources that you
will connect to the power supplies before you continue.
- Verify that the DC power source that will power
the firewall is powered off.In the following procedure, connect the DC power cables—and ground cable if you do not use the screw-on ground point—to the DC terminal block before you attach the DC terminal block to the firewall.
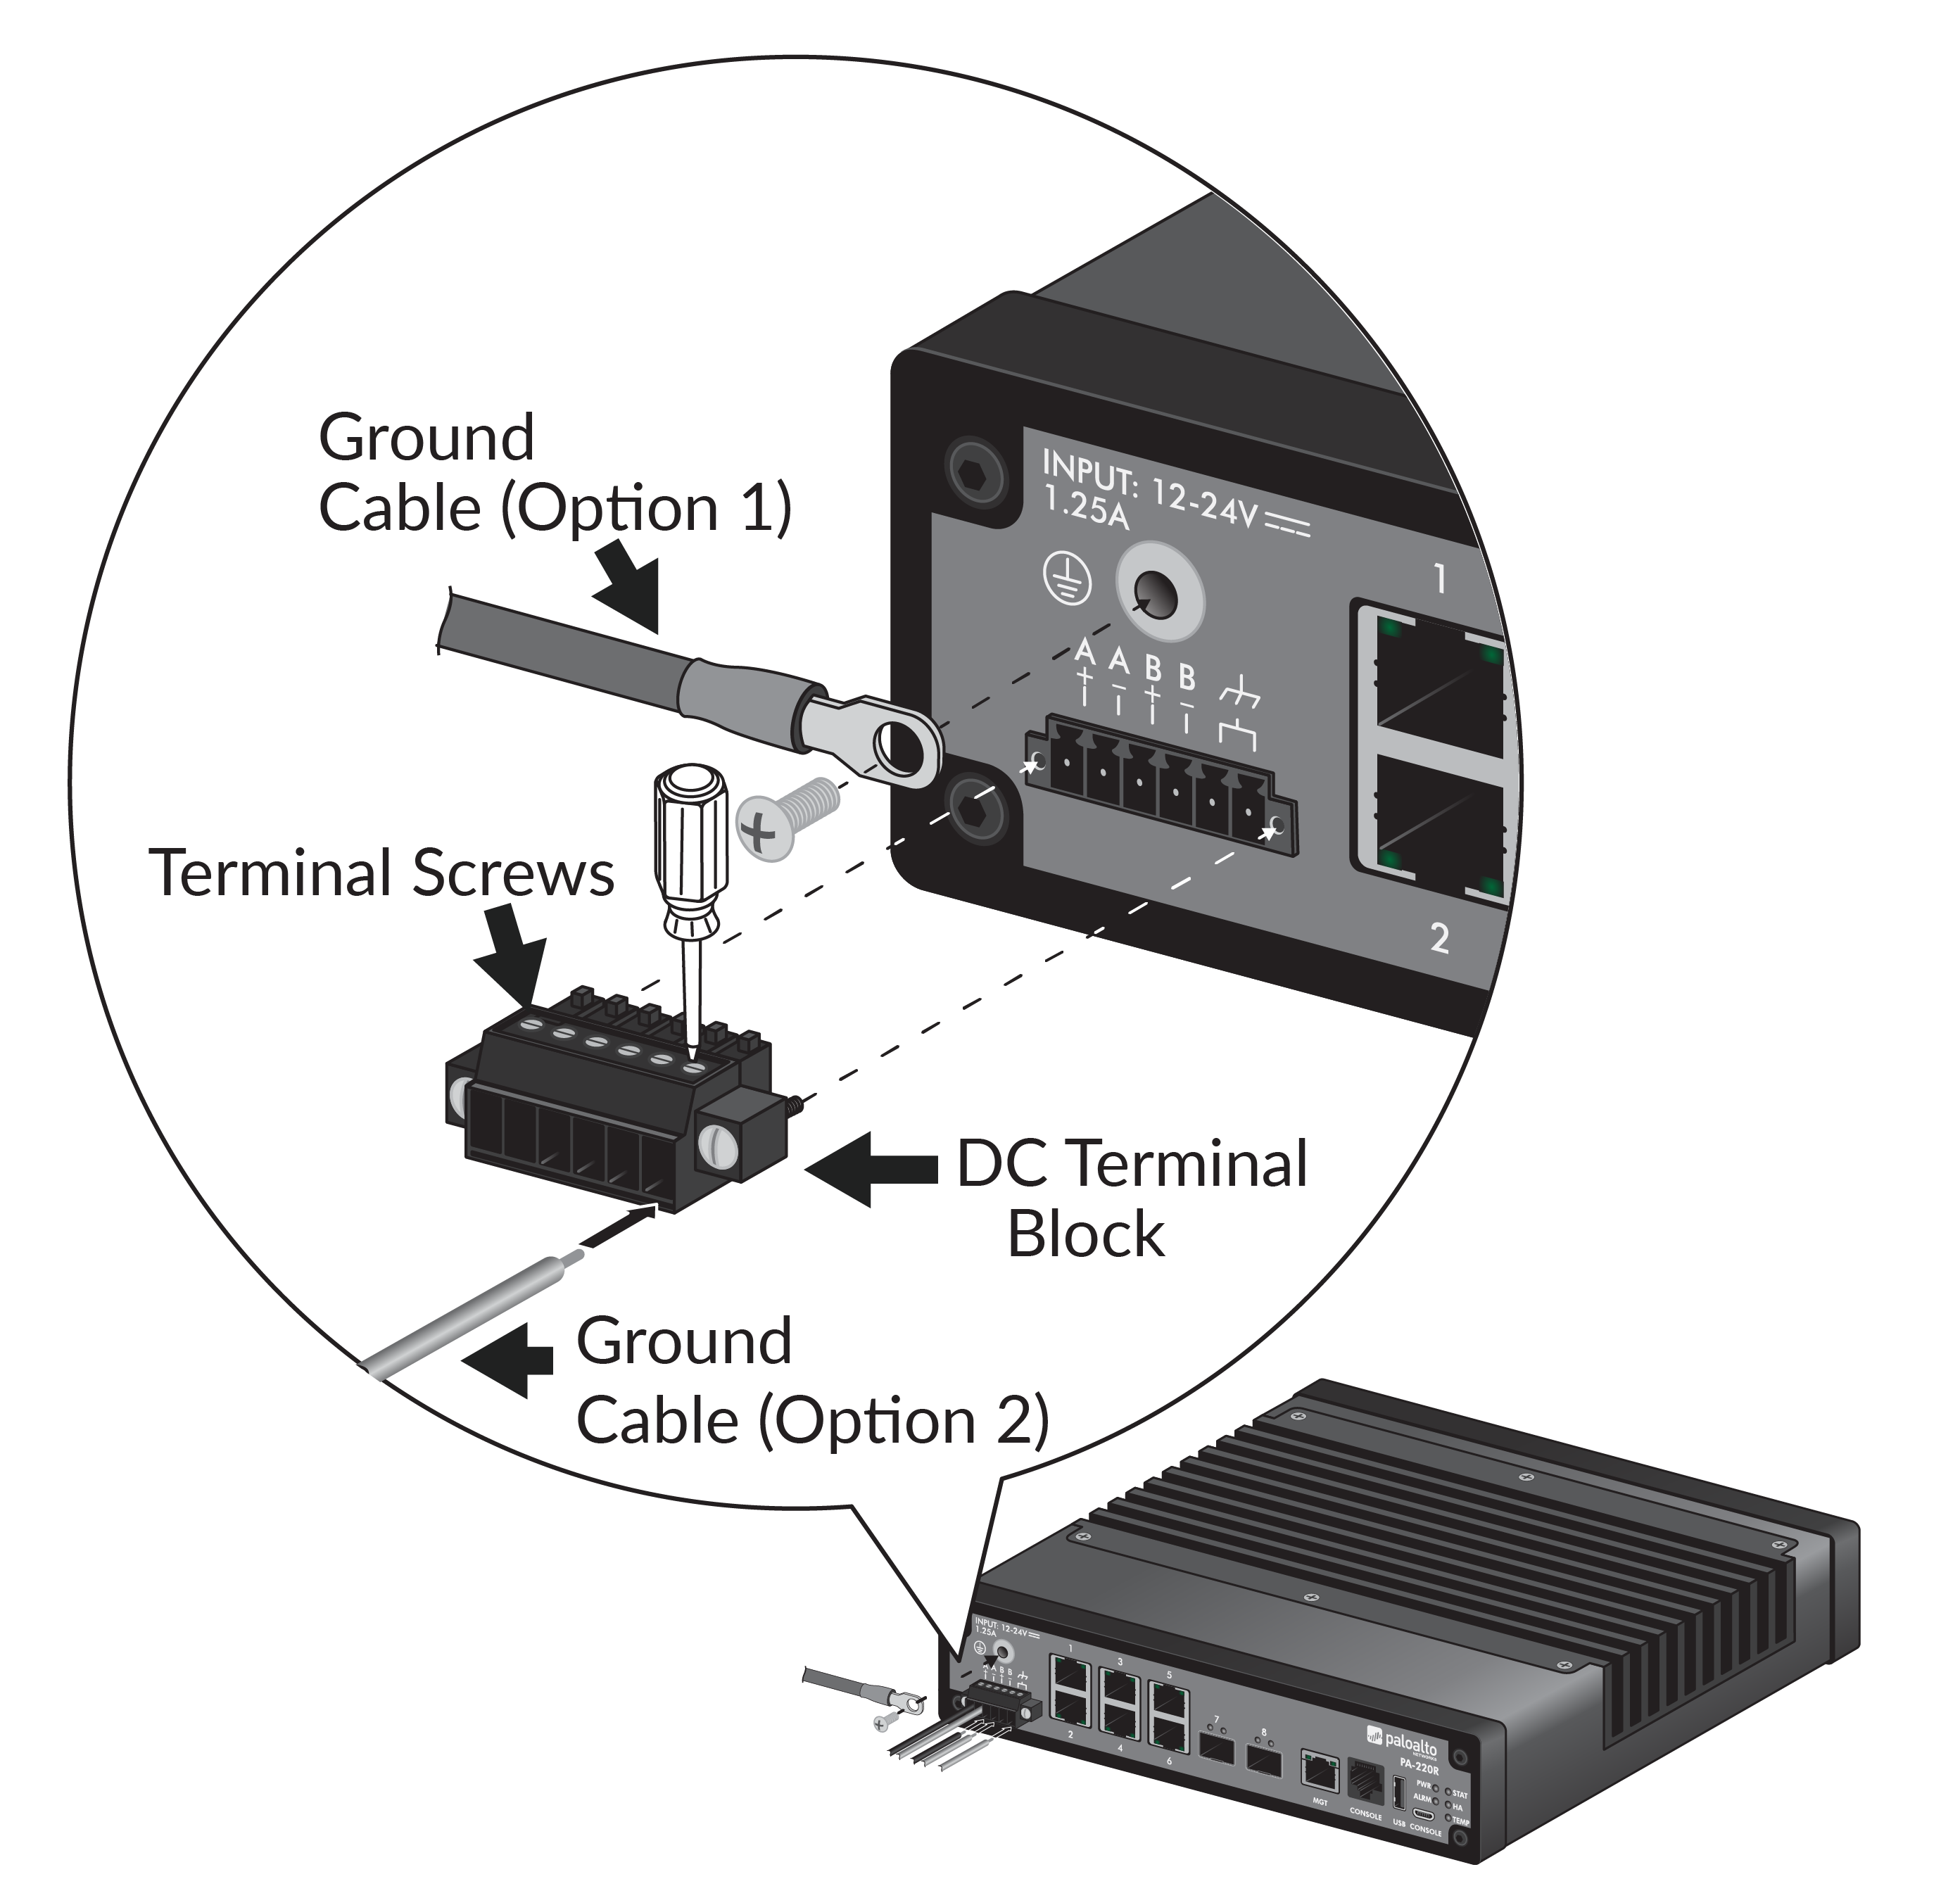
- Connect one end of a 16-22AWG ground cable to the firewall
and connect the other end to earth ground. There are three ground
locations on the firewall: one screw-on ground point above the DC
power inputs and two ground inputs on the DC terminal block (last
two inputs to the right of the DC inputs); use only one of the three
ground locations even if you will connect a second set of DC power
cables for redundancy.
- Screw-on ground point (Option 1)—Remove the ground screw from the screw-on ground point, hold the 6-32 ring lug (that you previously attached to the ground cable) over the screw hole, and then re-attach the screw to secure the cable to the firewall. Do not torque the screw to more than 6 in-lbs.
- DC terminal block ground inputs (Option 2)—Insert the cable into one of the two ground input terminals and then secure the cable by turning the flat-head terminal screw clockwise. Do not torque the terminal screws to more than 2 in-lbs.
![]()
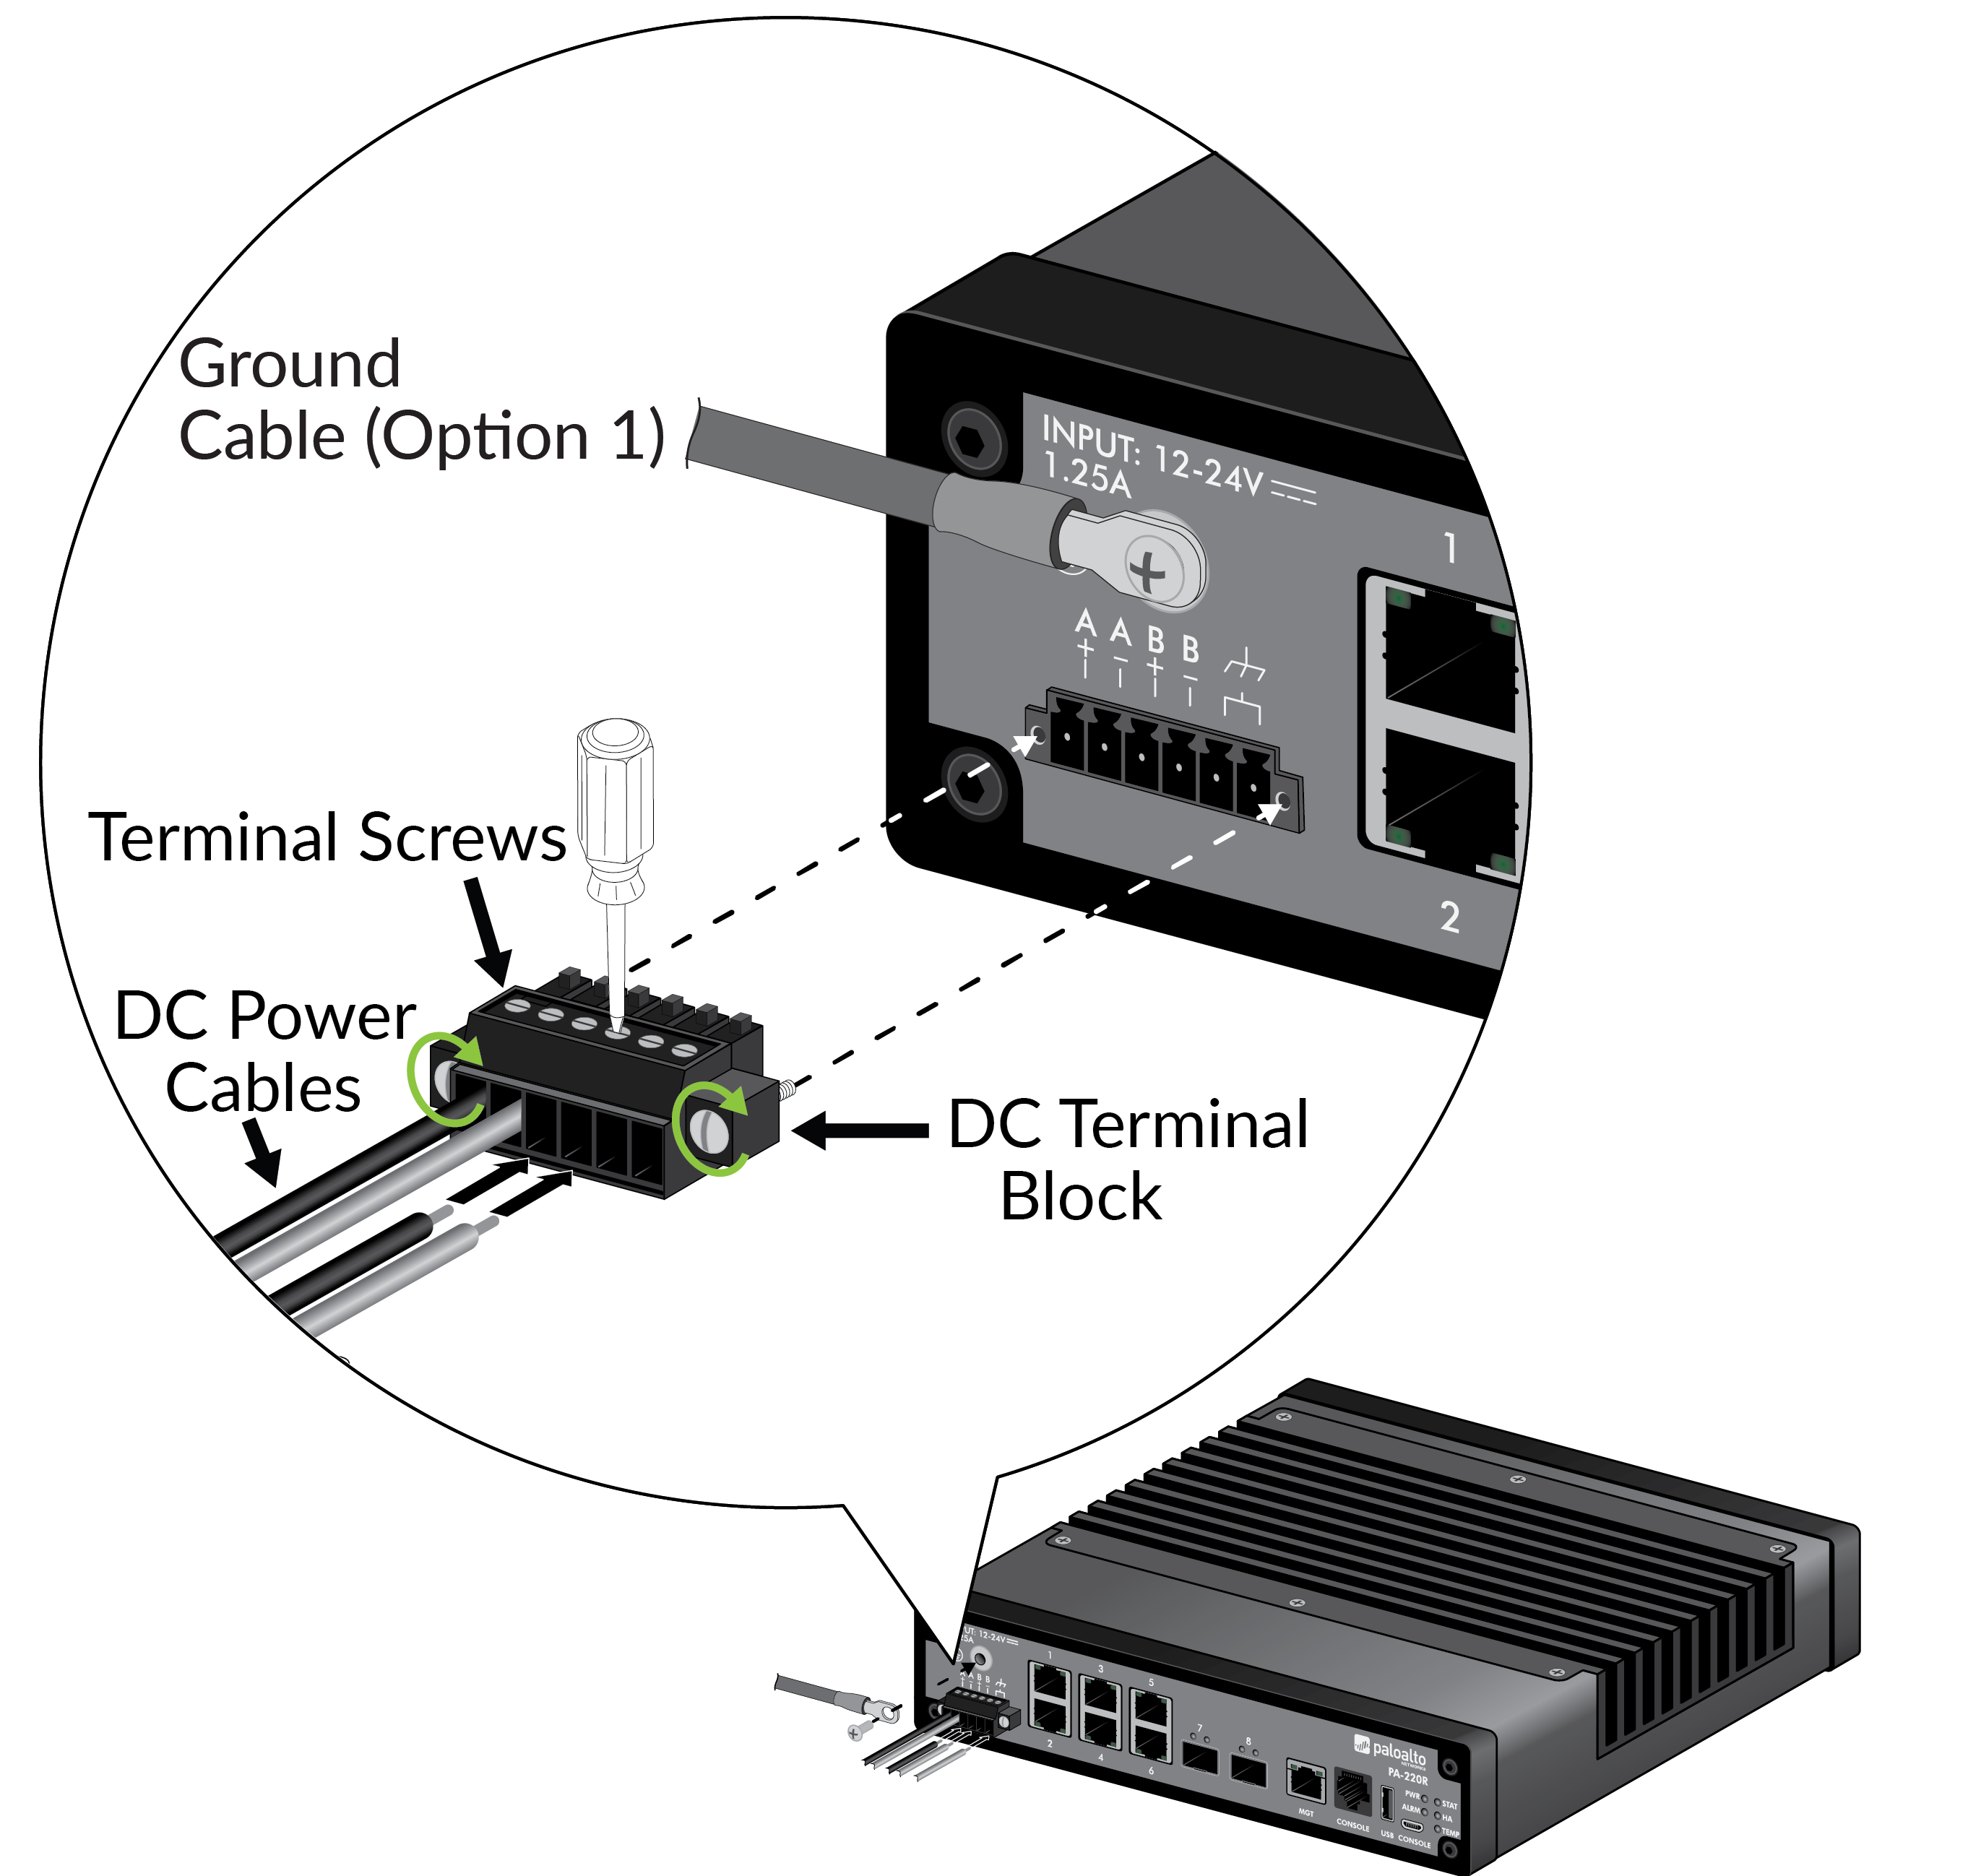
- Insert the positive DC cable into terminal A+ and secure the cable by turning the flat-head terminal screw clockwise until tight. Insert the negative cable into terminal A- and secure the cable using the terminal screw. Do not torque the terminal screws to more than 2 in-lbs.
- (Optional) Repeat step 3 to connect a second DC power source to terminals B+ and B-.
- Plug the cabled DC terminal block into the DC inputs
on the firewall. Secure the terminal block by turning the two screws
on each side of the block clockwise and torque to 3 in-lbs.
![]()
- Power on the DC power source to power on the firewall. The firewall powers on and the power (PWR) LED turns green.