Install the PA-220R Firewall on a Wall
Table of Contents
Install the PA-220R Firewall on a Wall
Learn how to install a PA-220R firewall on a wall using
the provided wall-mount kit.
The following procedure describes how to install
the PA-220R firewall on a wall using the wall-mount kit.
You
can purchase the wall-mount kit separately from the Palo Alto Networks Sales Department or an authorized reseller.
- Identify the location where you will install the firewall and ensure there are no building services (water, gas, or wiring) behind the wall.
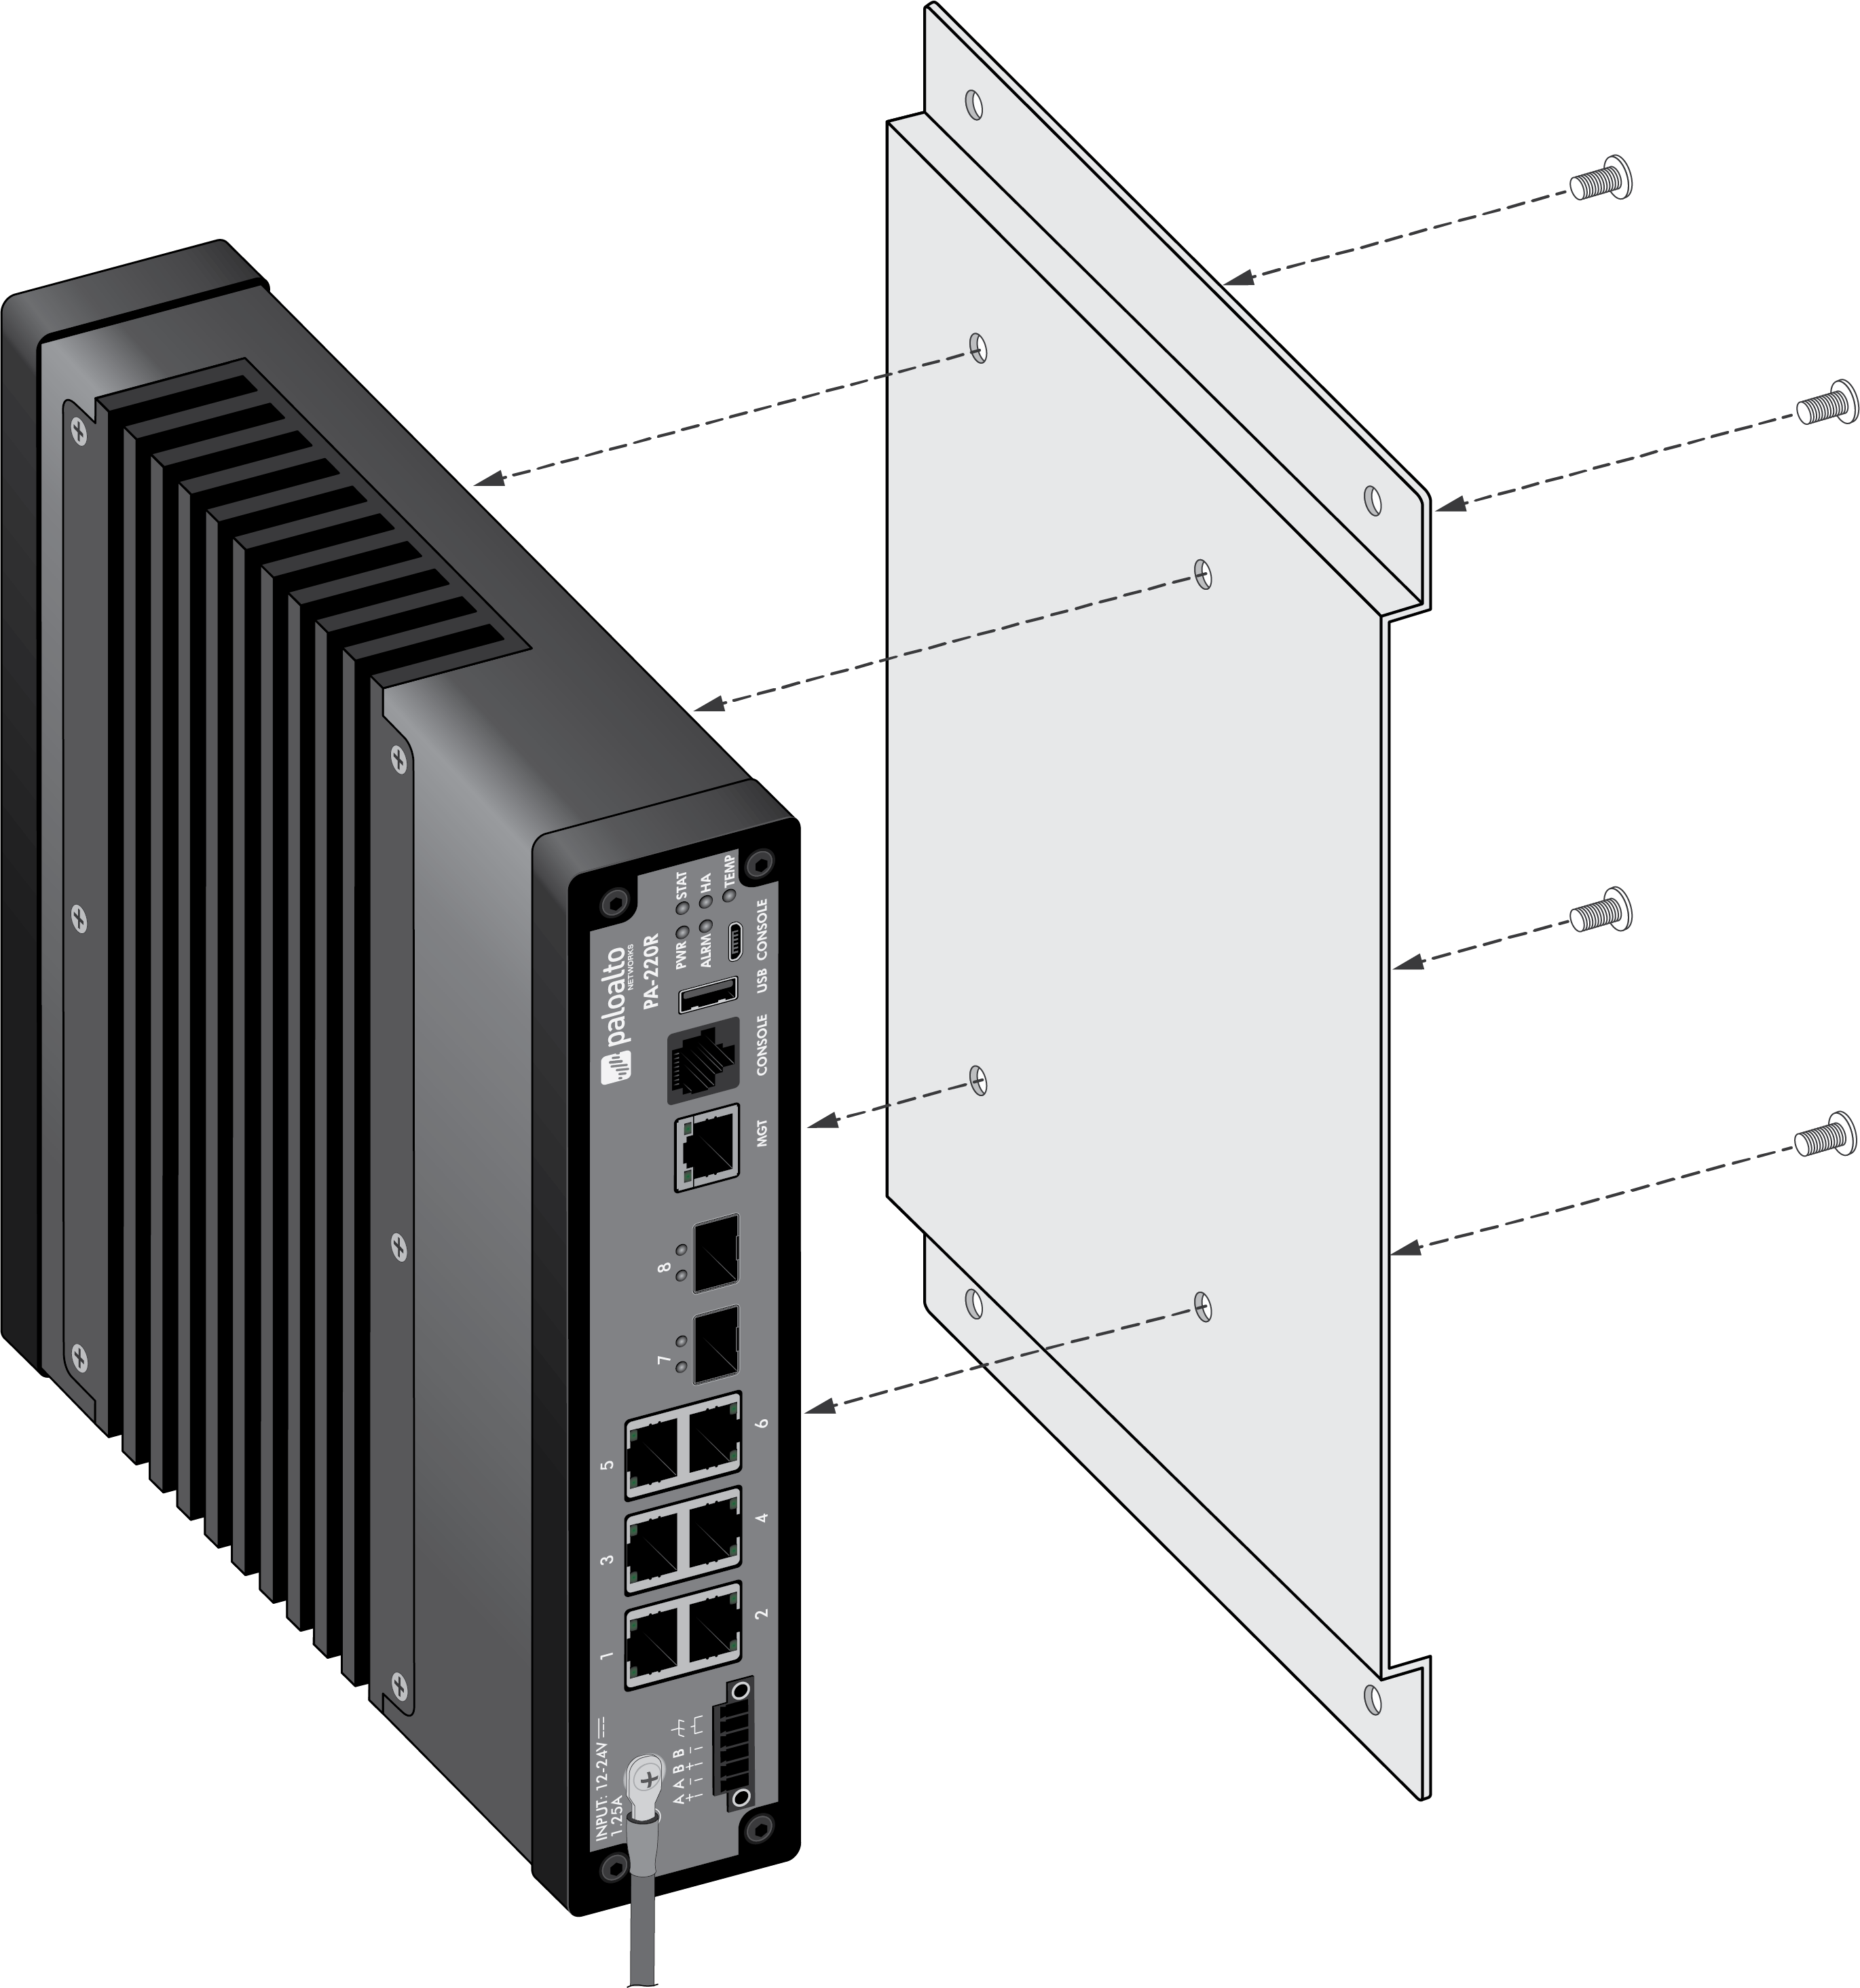
- Attach the wall-mount bracket to the bottom of the firewall
using four 6-32 x 1/4” Phillips-head screws and torque each screw
to 9 in-lbs.
![]()
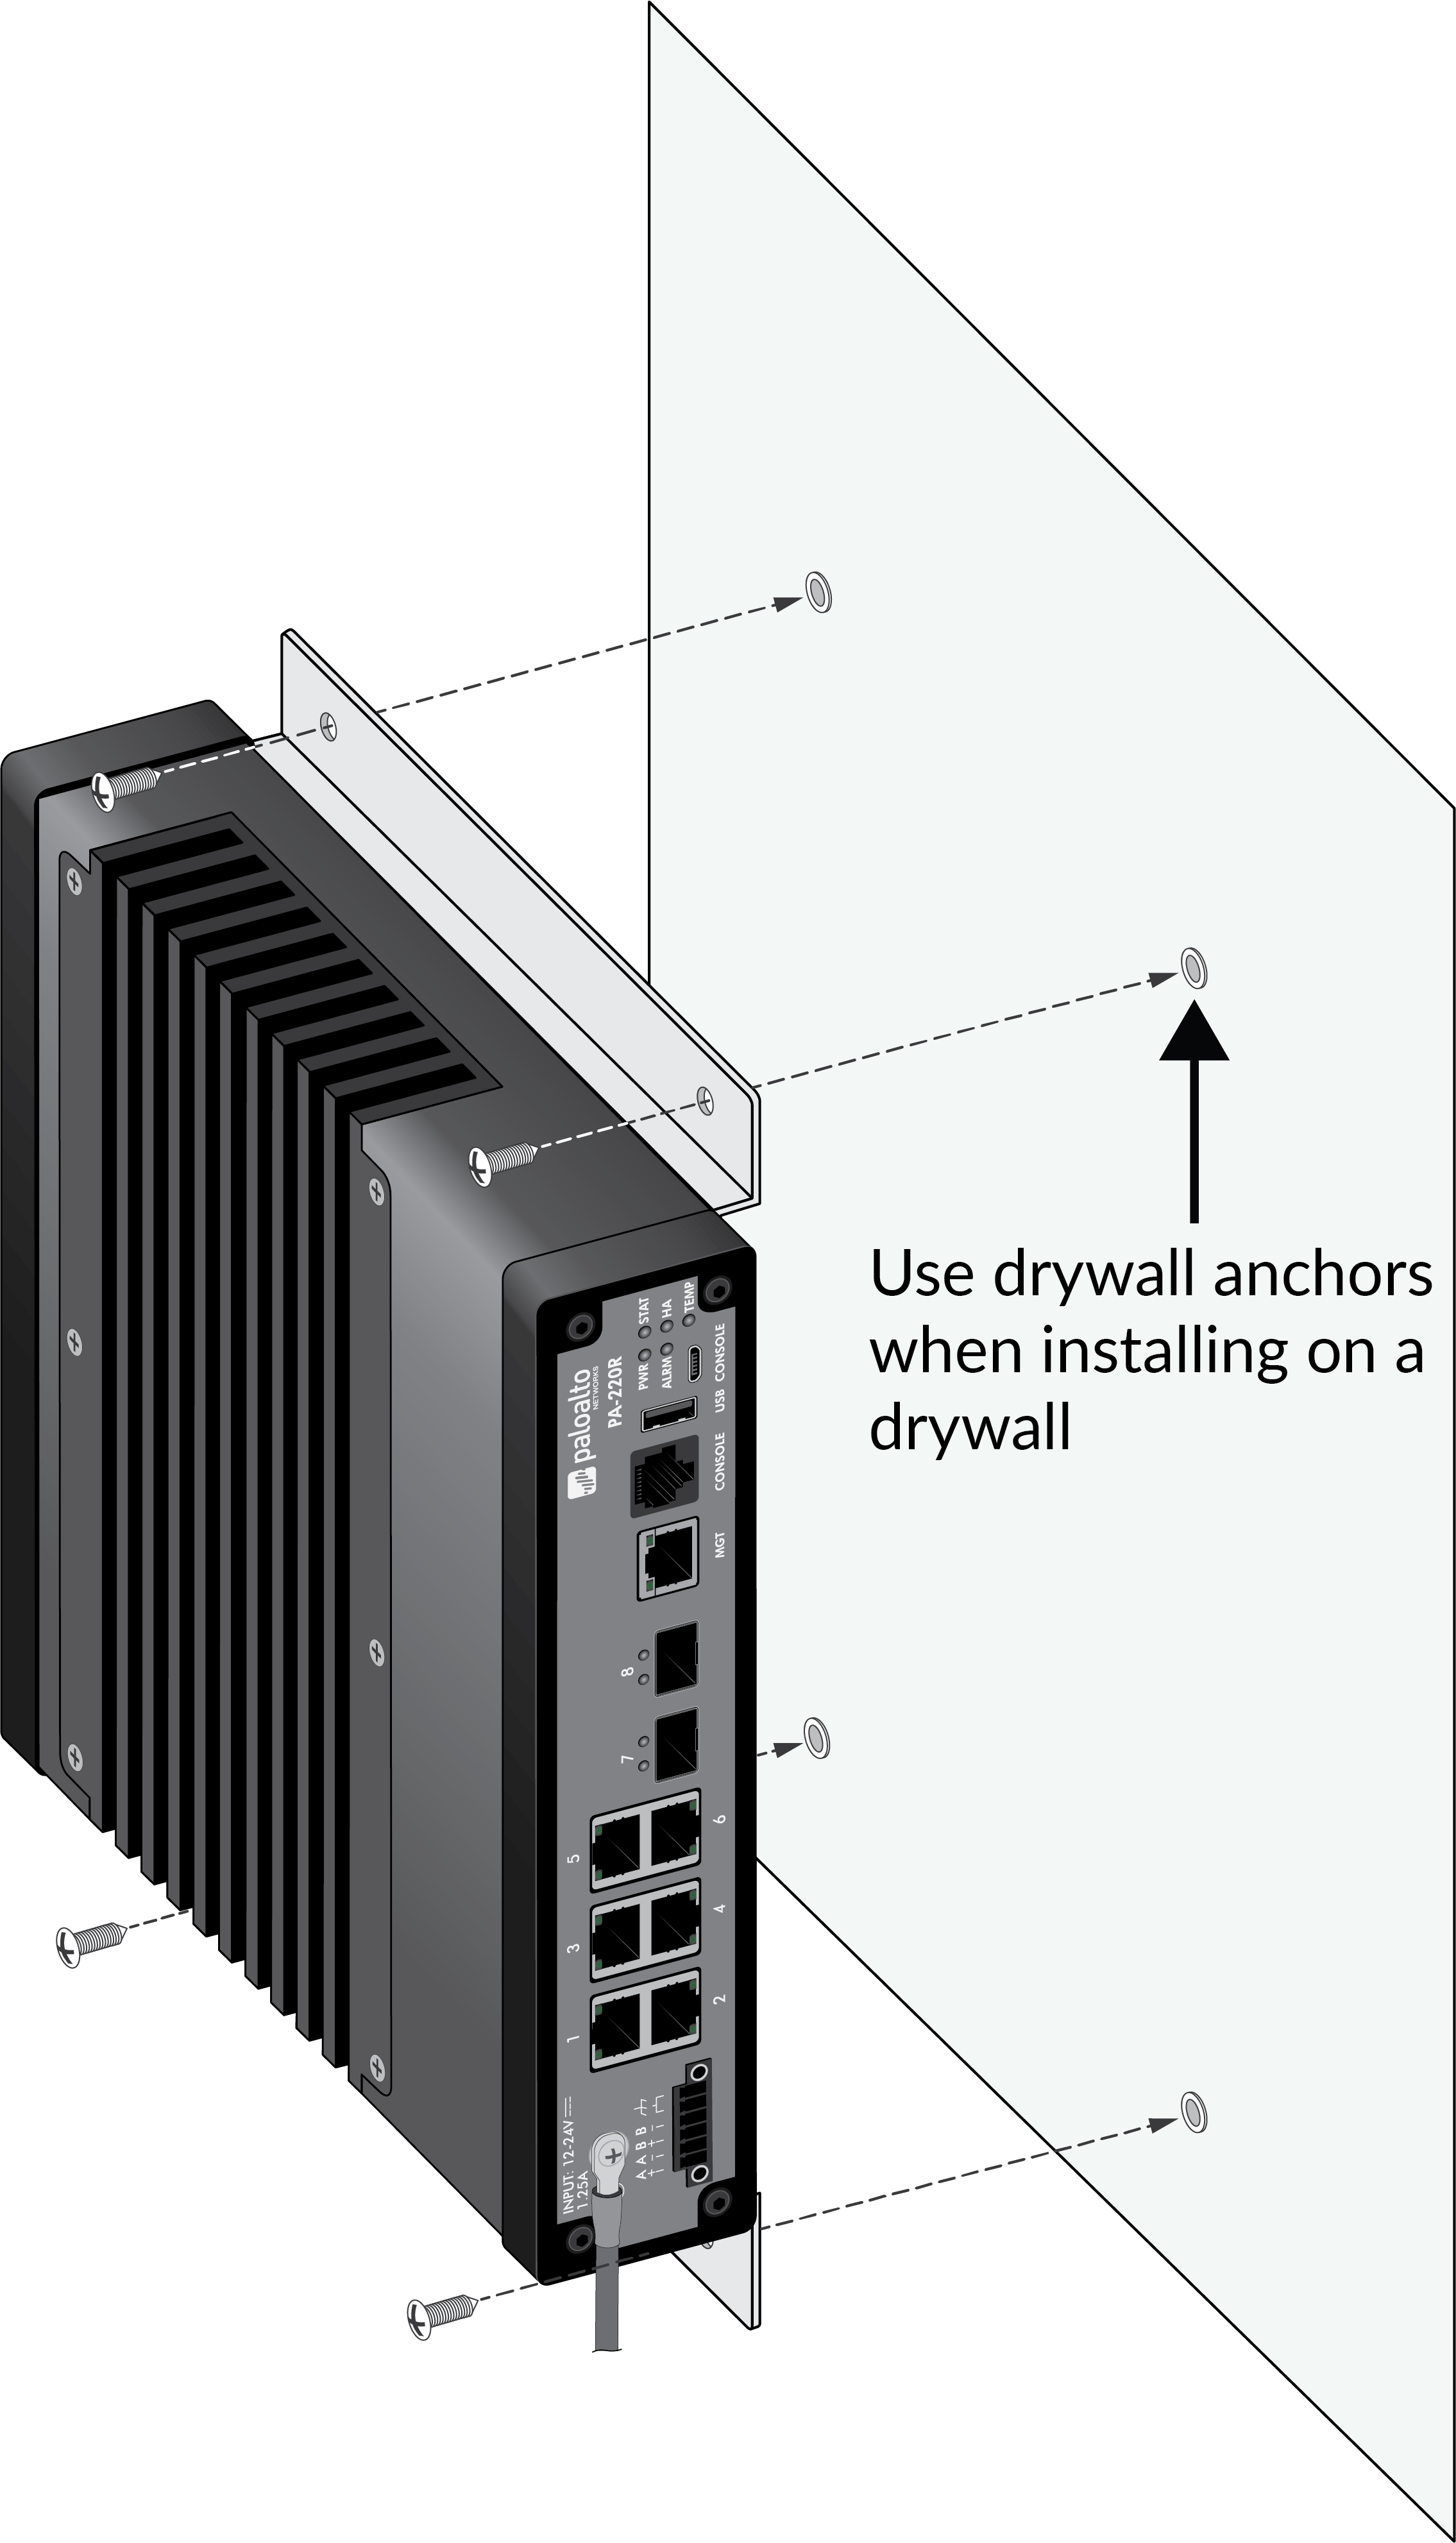
- Use a Phillips-head screwdriver to install the appropriate
hardware to mount the firewall to the wall based on the wall type:To ensure proper heat dissipation, install the firewall so that the front panel (with ports and LEDs) faces either left or right.
- Drywall—First hold the firewall up to the wall where you will install it and use a sharp object to mark the wall behind the center of each of the four wall-mount bracket holes. Remove the firewall and press a drywall anchor into the center of each of the four locations you marked and use your screwdriver to apply pressure while turning the anchor clockwise until the surface of the anchor is flush with the wall. Mount the firewall to the wall using four anchor screws.
- Plywood—Hold the firewall up to the wall where you will install it and then use a Phillips-head screwdriver to mount the bracket to the wall using four 3/4” plywood screws.
![]()