Install the PA-220R Firewall in a 19-inch Equipment Rack
Table of Contents
Install the PA-220R Firewall in a 19-inch Equipment Rack
Learn how to install a PA-220R firewall in an equipment
rack using the optional 19-inch rack-mount kit.
The following procedure describes how to install
the PA-220R firewall in a two-post or four-post equipment rack using
the 19-inch rack-mount kit.
You can purchase the 19-inch rack-mount
kit separately from the Palo Alto Networks Sales Department or
an authorized reseller. Refer to SKU PAN-PA-220R-RACK4 when ordering.
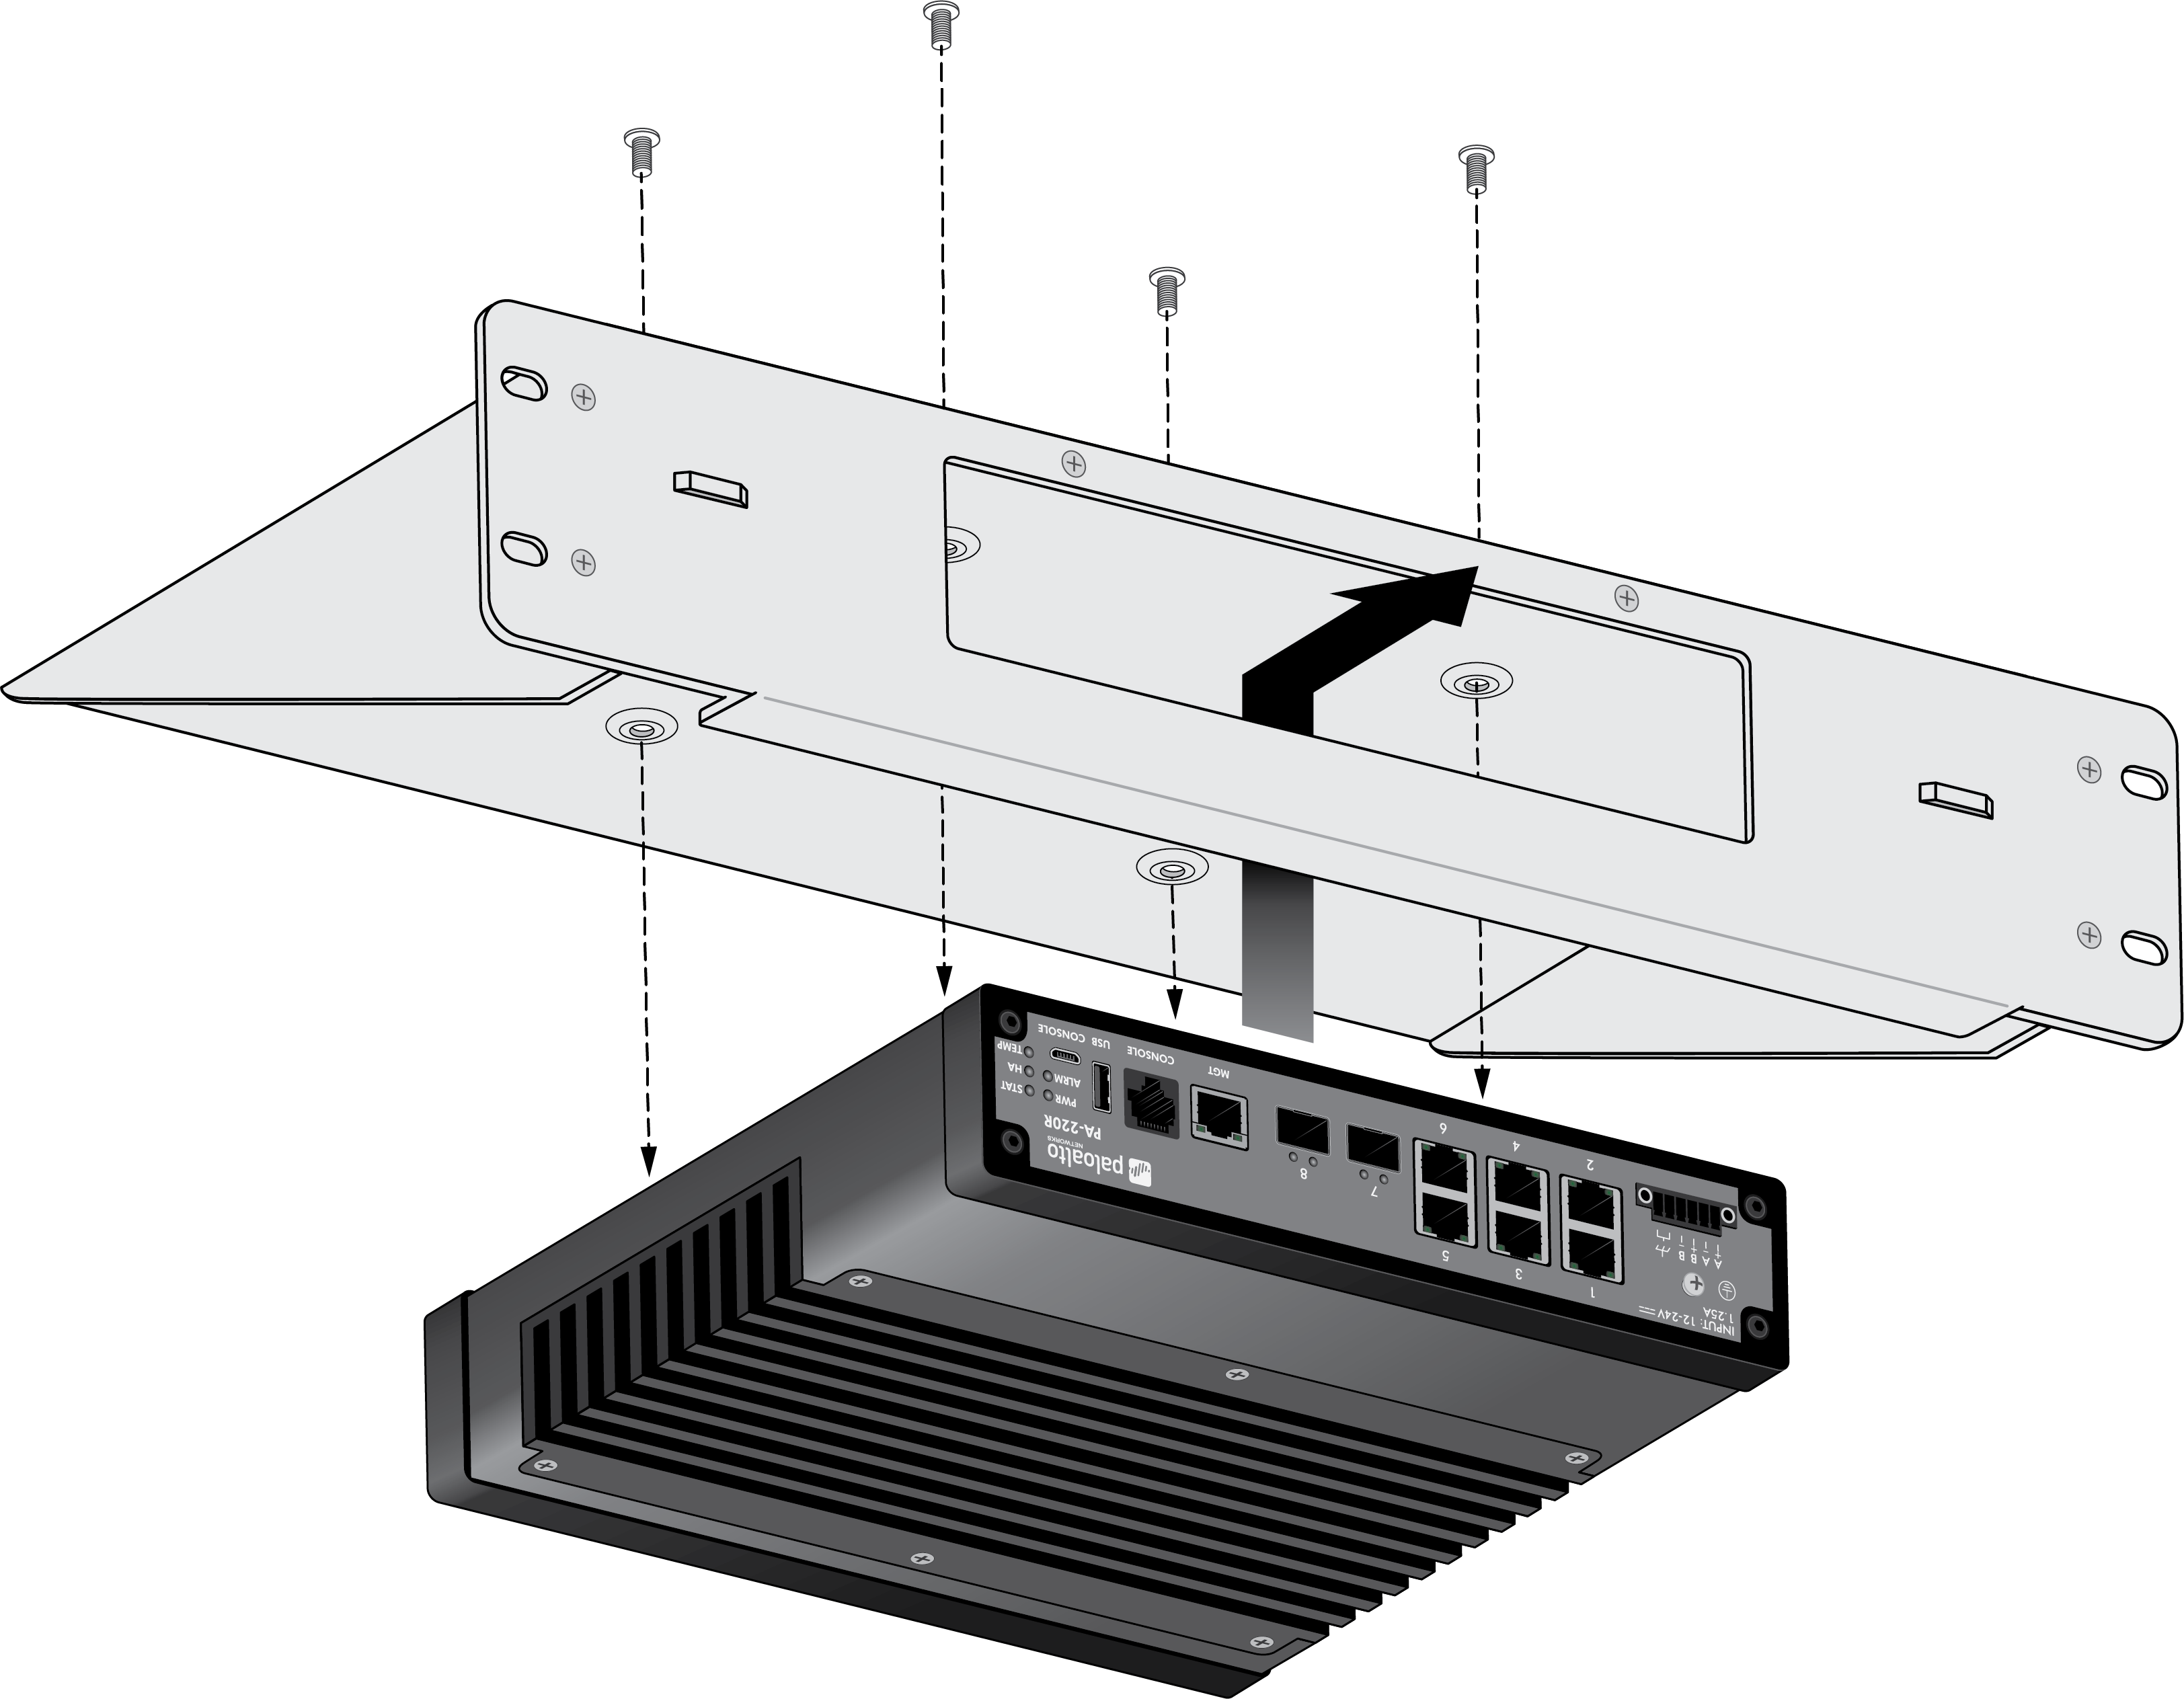
- Place the firewall upside-down on a table with the front of the firewall hanging off the edge of the table by about three inches.
- Place the shelf upside down on top of the firewall and align the four holes on the bottom of the shelf with the four screw holes on the bottom of the firewall. The front bezel of the firewall protrudes out of the front opening of the shelf.
- Secure the shelf to the firewall using four 6-32 x 1/4”
Phillips-head screws and torque each screw to 9 in-lbs.
![]()
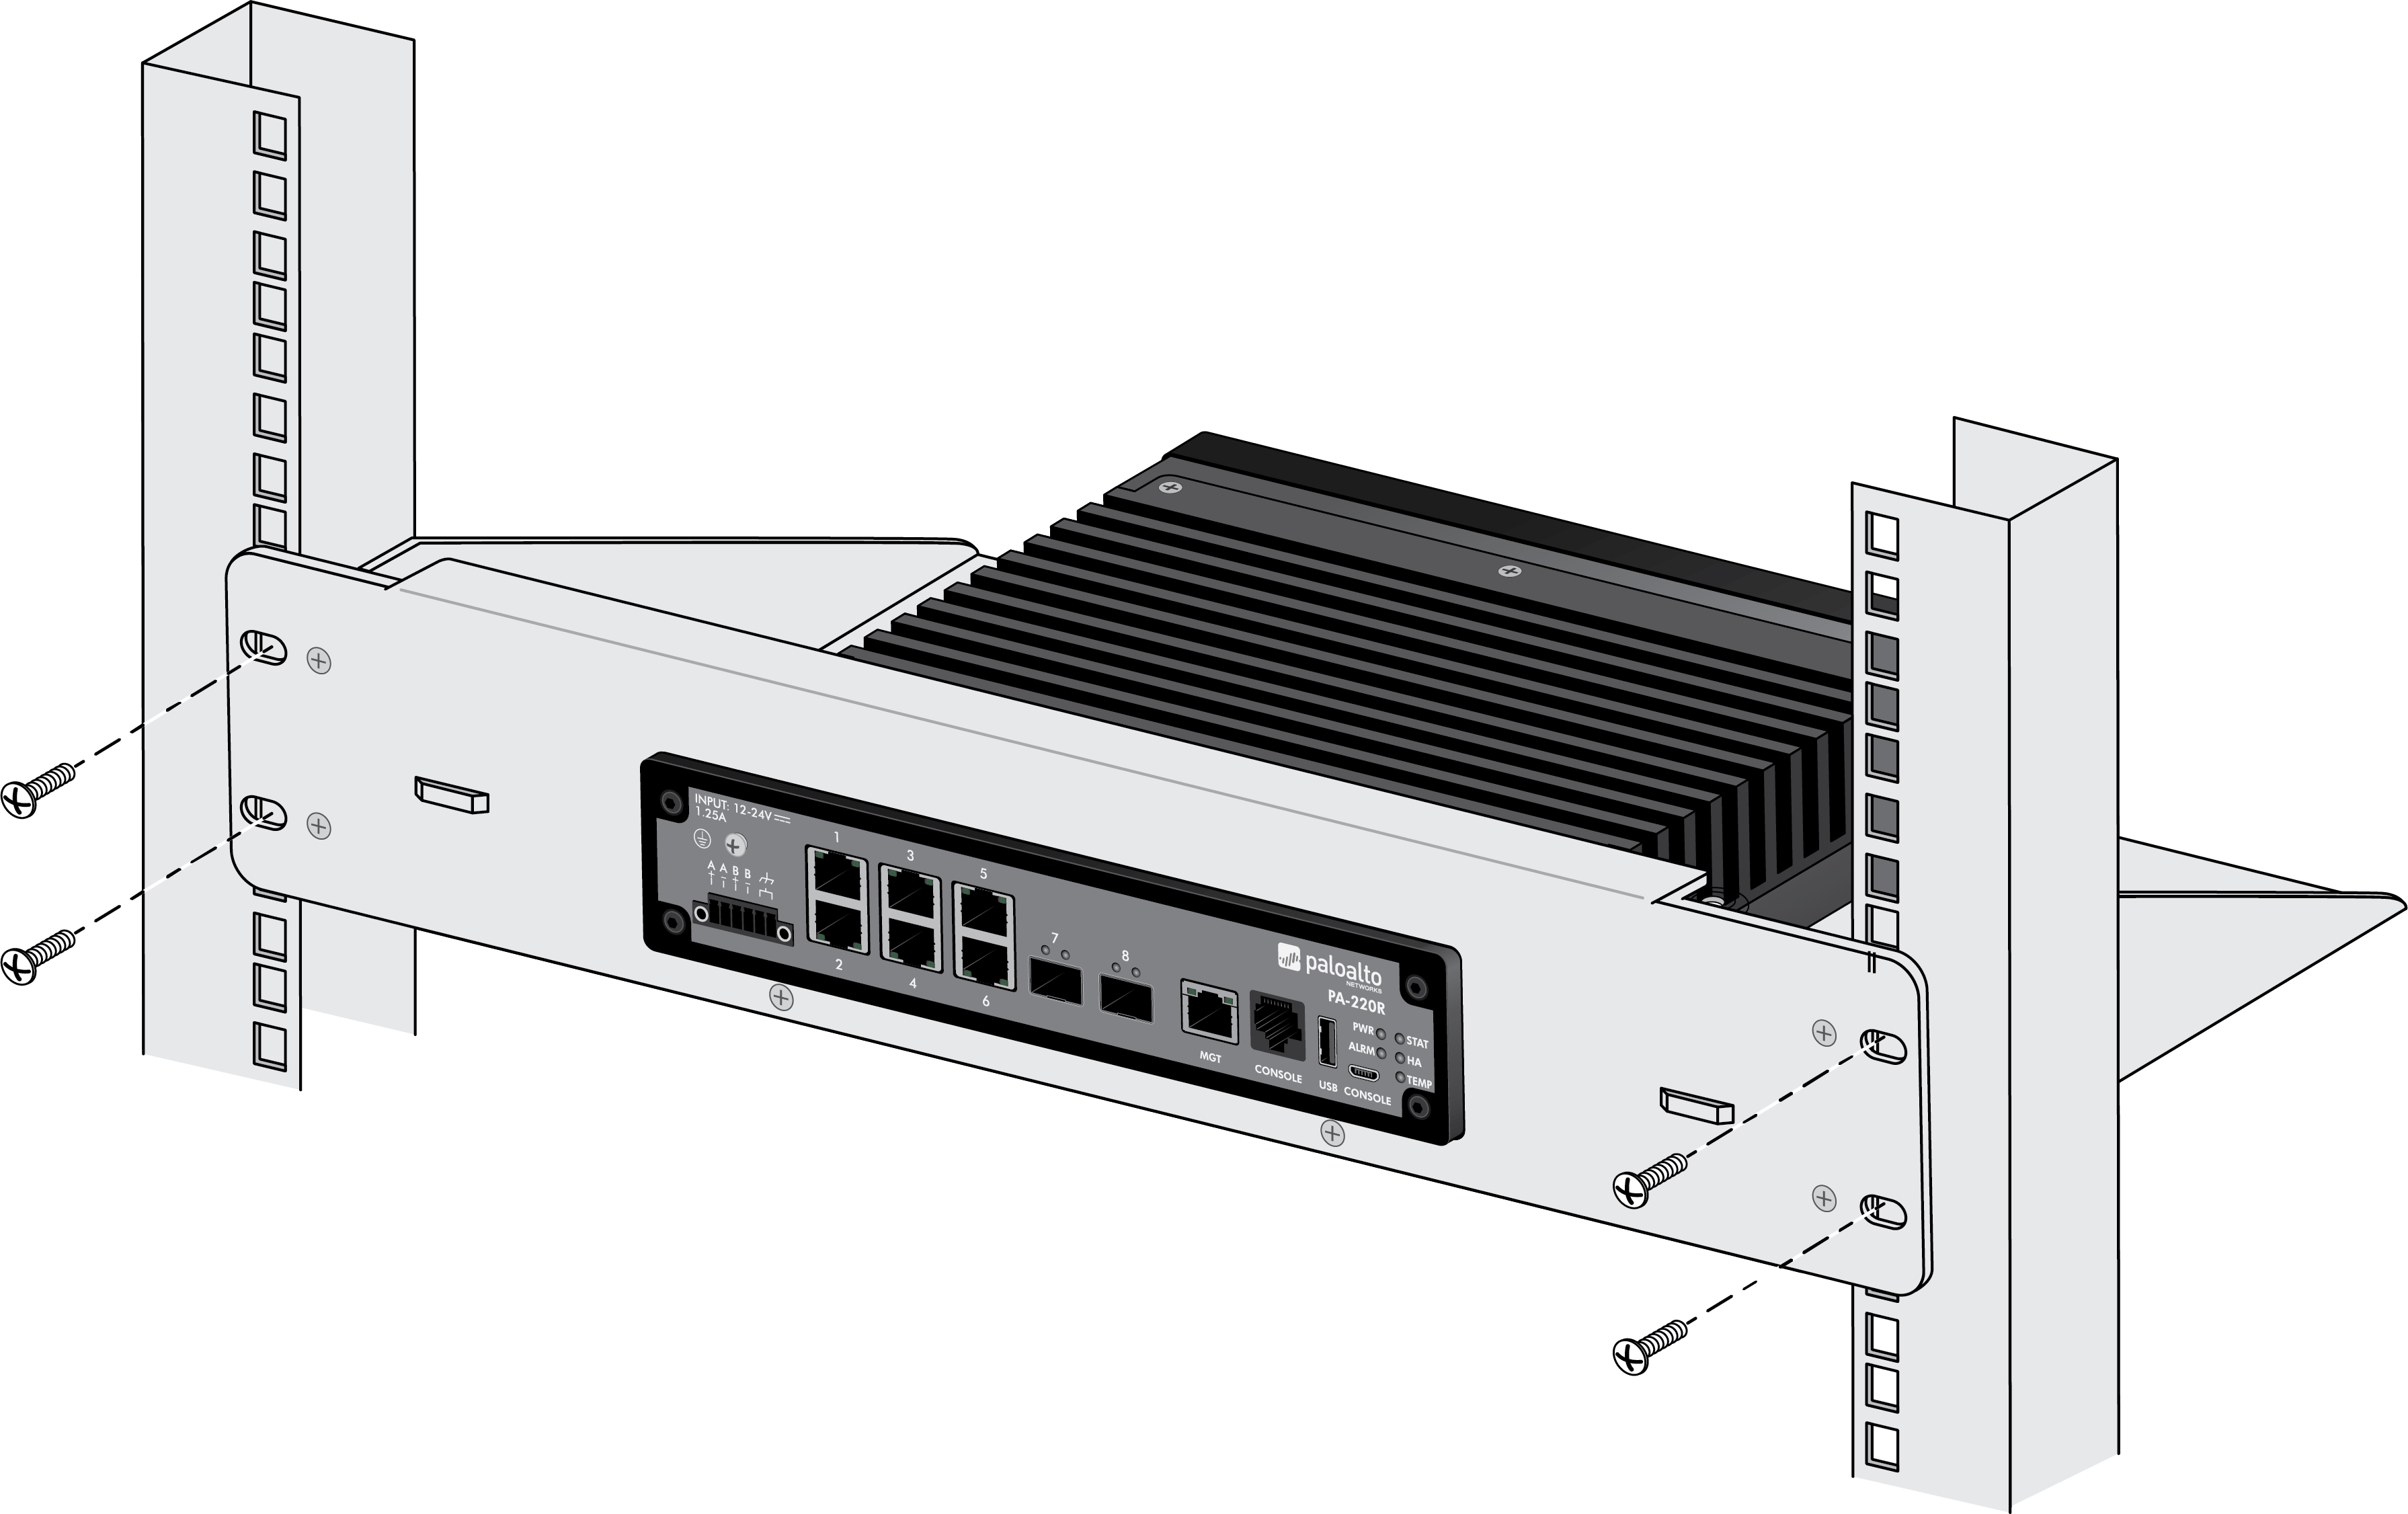
- Hold the shelf (with the firewall attached) right-side
up in the rack and secure the shelf to the rack using two screws
for each side of the shelf. Use the appropriate screws (#10-32 x
3/4” or #12-24 x 1/2”) for your rack and torque to 25 in-lbs. Use
cage nuts (not provided) to secure the screws if the rack has square
holes.
![]()
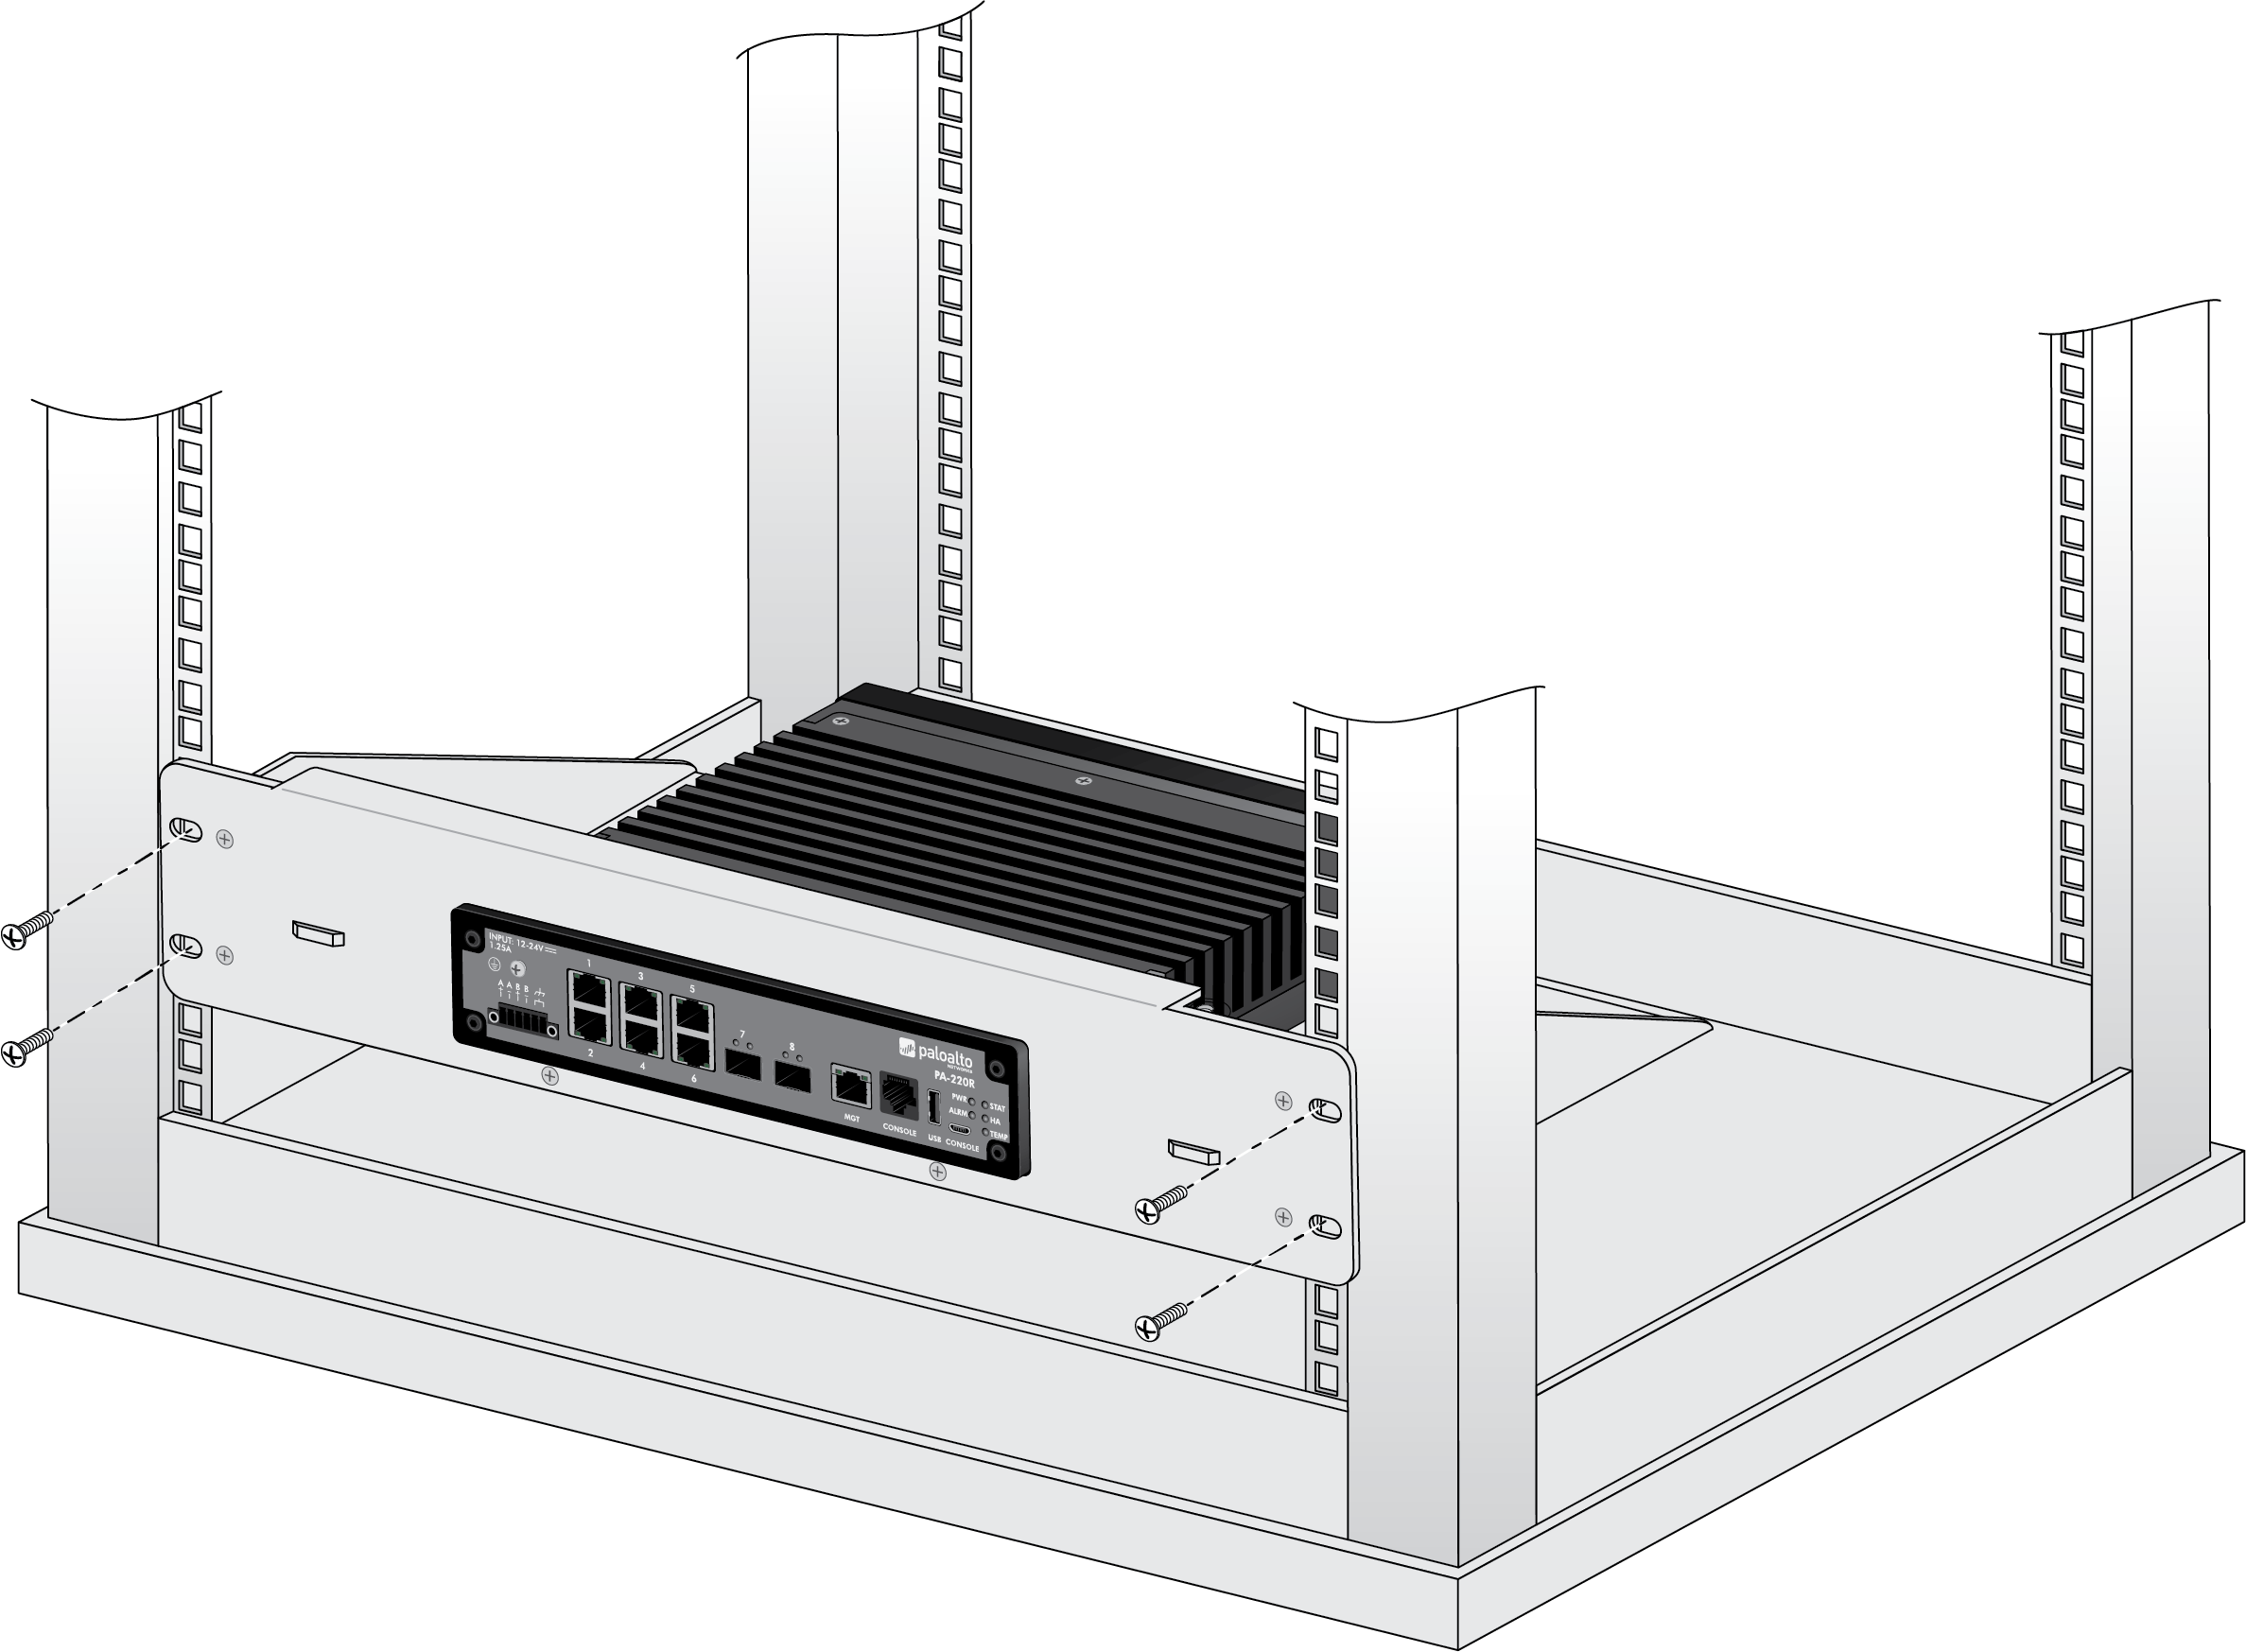
![]() The weight of the product is not enough to require mounting to the rear posts of the four-post rack.
The weight of the product is not enough to require mounting to the rear posts of the four-post rack.