Prisma Access
Integrate Cloud Identity Engine with Prisma Access
Table of Contents
Expand All
|
Collapse All
Prisma Access Docs
-
- 6.1 Preferred and Innovation
- 6.0 Preferred and Innovation
- 5.2 Preferred and Innovation
- 5.1 Preferred and Innovation
- 5.0 Preferred and Innovation
- 4.2 Preferred
- 4.1 Preferred
- 4.0 Preferred
- 3.2 Preferred and Innovation
- 3.1 Preferred and Innovation
- 3.0 Preferred and Innovation
- 2.2 Preferred
-
-
- 4.0 & Later
- Prisma Access China
-
-
Integrate Cloud Identity Engine with Prisma Access
Integrate the Cloud Identity Engine to implement Directory Sync with Prisma
Access.
| Where Can I Use This? | What Do I Need? |
|---|---|
|
|
Integrate Cloud Identity Engine with Prisma Access (Strata Cloud Manager)
Integrate Cloud Security Engine with Prisma Access Strata Cloud Manager.
Cloud Identity Engine (Directory Sync)
gives Prisma Access read-only access to your Active Directory information,
so that you can easily set up and manage security and decryption policies for users
and groups.
Cloud Identity Engine works with both on-premises Active Directory and Azure Active
Directory.
To set up Cloud Identity Engine with Prisma Access, start by going to the
hub to activate Cloud Identity Engine and to add it to Prisma Access. Then
go to Prisma Access to validate that Prisma Access is able to
access directory data.
- Activate Cloud Identity EngineCloud Identity Engine can share Active Directory information with any supported app on the hub. It’s free and does not require an auth code to get started. Cloud Identity Engine setup includes activating the Cloud Identity Engine app on the hub, configuring the Cloud Identity Engine agent to gather Active Directory mappings, and configuring mutual authentication between Cloud Identity and and the agent.Make sure to deploy the Cloud Identity Engine instance in the same region that you deployed Prisma Access and Strata Logging Service.Enable Cloud Identity Engine for Prisma Access.You can associate Prisma Access with Cloud Identity Engine when you’re first activating Prisma Access or anytime after:
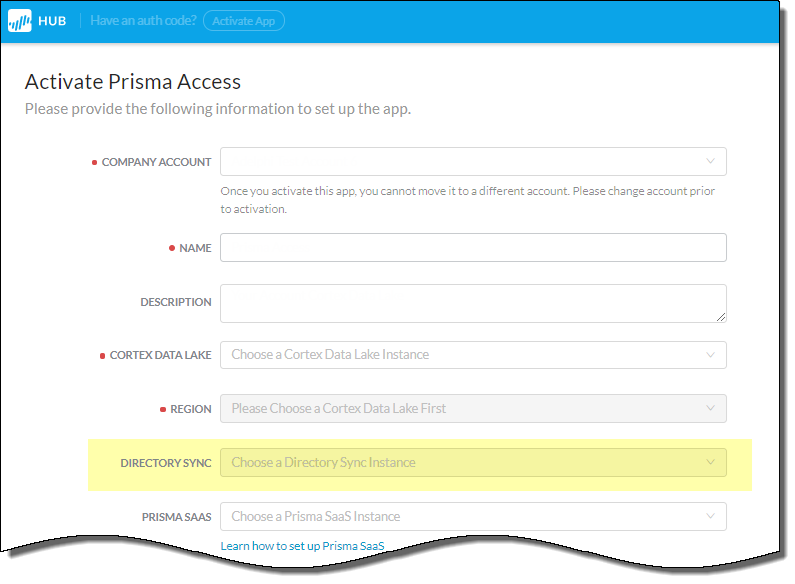
- While you’re activating Prisma Access: When you first activate Cloud Managed Prisma Access, you can choose a Cloud Identity Engine instance for Prisma Access to use. Make sure to select an instance that is deployed in the same region as Prisma Access.
![]()
- After you’ve activated Prisma Access: To enable Cloud Identity Engine for an existing Prisma Access instance, log in to the hub. From the hub settings dropdown (see the gear on the top menu bar), select Manage Apps. Find the Prisma Access instance you want to update, and select the Cloud Identity Engine instance you want Prisma Access to use.
Integrate Cloud Identity Engine with Prisma Access (Panorama)
Integrate Cloud Security Engine with Prisma Access Panorama.
Prisma Access retrieves user and group information from your organization’s cloud
directory or Active Directory (AD), to enforce user- and group-based policy.
Optionally, Prisma Access retrieves user behavior-based risk signals from some cloud
directory vendors, such as Azure Active Directory, to enforce automated security
actions. You can simplify the retrieval of user and group information by using the
Cloud Identity Engine.
In addition to simplifying user and group information retrieval, integrating the
Cloud Identity Engine with Prisma Access can free up the bandwidth and load on your
cloud directory or AD.
You can use the Cloud Identity Engine to retrieve user and group information for
Prisma Access for mobile users, remote networks, or both, by completing the
following steps.
The Cloud Identity Engine integration with Prisma Access has the following
implementation restrictions:
- Make sure that the groups you use with Cloud Identity Engine do not have any of the following special characters, because Prisma Access does not support the use of following special characters in groups and commit operations will fail:
- " (Double quotes)
- ' (Apostrophe)
- < (less than sign)
- > (greater than sign)
- & (ampersand)
- If you associate Cloud Identity Engine with Prisma Access, your user names must use the NetBIOS format that includes the domain. You can specify usernames in email format (username@domain), NetBIOS\sAMAccountName format, or User Principal Name (UPN) format (username@domain.com).
- Enter group names in the distinguishedName format (for example, CN=Users,CN=Builtin,DC=Example,DC=com).
- Cloud Identity Engine does not apply any settings you specify in the group include list (DeviceUser IdentificationGroup Mapping SettingsGroup Include List); instead, it retrieves user and group information from your entire configuration, including groups used in all device groups and templates.
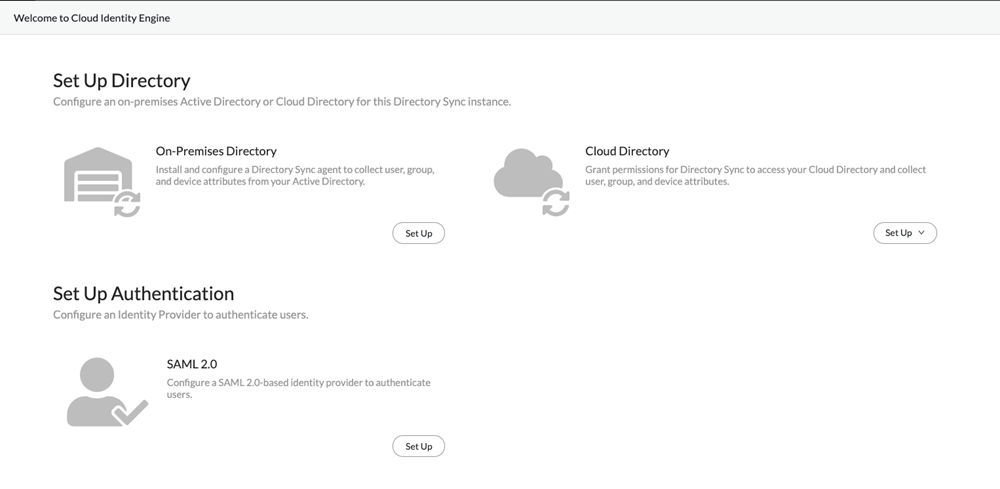
- Create a Cloud Identity Engine instance for Prisma Access, and make a note of the instance name.When you activate the Cloud Identity Engine, it creates an instance. You use the instance name when you associate the Cloud Identity Engine with Prisma Access in a later step. Optionally, if you need to create a separate instance for Prisma Access, create it and make a note of the instance name.Configure the Cloud Identity Engine to retrieve your directory data.
![]() (Deployments with on-premises Active Directory only) If you use an on-premises Active Directory, Install and configure the Cloud Identity Agent to communicate with your on-premises AD and configure mutual authentication between the Cloud Identity Engine service and the agent.Enable the Cloud Identity Engine on Prisma Access.
(Deployments with on-premises Active Directory only) If you use an on-premises Active Directory, Install and configure the Cloud Identity Agent to communicate with your on-premises AD and configure mutual authentication between the Cloud Identity Engine service and the agent.Enable the Cloud Identity Engine on Prisma Access.- On the Panorama that manages Prisma Access, select the username-to-user group mapping setting tab.
- For a Mobile Users—GlobalProtect deployment, select PanoramaCloud ServicesConfigurationMobile Users—GlobalProtect, select the gear icon to edit the settings, then select Group Mapping Settings.
- For a Mobile Users—Explicit Proxy deployment, select PanoramaCloud ServicesConfigurationMobile Users—Explicit Proxy, select the gear icon to edit the settings, then select Group Mapping Settings.
- For a remote network deployment, select PanoramaCloud ServicesConfigurationRemote Networks, select the gear icon to edit the settings, then select Group Mapping Settings.
Select Enable Directory Sync Integration to enable Cloud Identity Engine with Prisma Access.Enter the following information:- Enter the Primary Username. This field is required.The Primary Username attribute controls the formatting that is used in logs and reporting. If the primary username attribute is userPrincipalName (UPN), all the log and reporting entries display the source user in that format. Many deployments use a format of either UPN, sAMAccountName, or mail. If your organization uses another attribute, you can specify it here to ensure consistency for logging and reporting across your organization.If you configure Azure AD or Okta Directory as the identity provider (IdP) in the Cloud Identity Engine, specify the Primary Username as userPrincipalName. Prisma Access supports the userPrincipalName (UPN) attribute that is used with Azure AD and Okta Directory.
- (Optional) Enter the E-Mail attribute (such as mail).
- (Optional) If you use alternate name attributes for the user, enter them. You can enter up to three alternate user names (Alternate User Name 1, Alternate User Name 2, and Alternate User Name 3).
Click OK when complete.Commit and push (CommitCommit and Push) your changes.


