SaaS Security
Begin Scanning a Zoom App
Table of Contents
Begin Scanning a Zoom App
Authorize Data Security to connect to Zoom to scan
all content shared within the app.
| Where Can I Use This? | What Do I Need? |
|---|---|
|
Or any of the following licenses that include the Data Security license:
|
Support for automated remediation
capabilities varies by SaaS application.
Supported Content
|
Support For
|
Details
|
|---|---|
|
Scan Content
| Chats, Messages, Transcripts Scan support
for messages including private and public channels and
direct messages within Team Chat. Support for
cloud-recorded, zoom meeting voice transcripts when
related settings are enabled on Zoom. |
|
Backward Scan
|
No
|
|
Forward Scan
|
Yes
|
|
Rescan
|
No
|
|
Selective Scan
|
No
|
|
Exposure
|
No
|
|
Remediation Actions
|
|
|
Post-Remediation Actions (Actions after Admin
Quarantine):
You can delete, restore, or download a quarantined file
after performing a remediation action (for example
quarantine or incident generation).
|
|
|
Notifications
|
|
|
User Activities
|
|
|
Snippet Support
|
Yes
|
|
Known License/Version restrictions
|
Supported Versions
|
|
Caveats/Notes
|
None
|
Onboard Zoom App
For Data Security to scan assets, you must consent to specific
permissions during adding the Zoom app.
- Prerequisites to be completed on Zoom
- Ensure that you have a Zoom account with Administrator role.Enable audio transcription on Zoom.Zoom supports audio transcript when you record on Cloud, not Local.
![]() (Recommended) Add your Zoom domain as an internal domain.Sign out of all Zoom accounts.Doing so ensures that you sign in under the correct account. Additionally, Chrome caches credentials. Log in using an Incognito window to avoid applying those cached credentials.
(Recommended) Add your Zoom domain as an internal domain.Sign out of all Zoom accounts.Doing so ensures that you sign in under the correct account. Additionally, Chrome caches credentials. Log in using an Incognito window to avoid applying those cached credentials.![]() Onboard Zoom App to Data Security
Onboard Zoom App to Data Security- Log in to Strata Cloud Manager.Select .
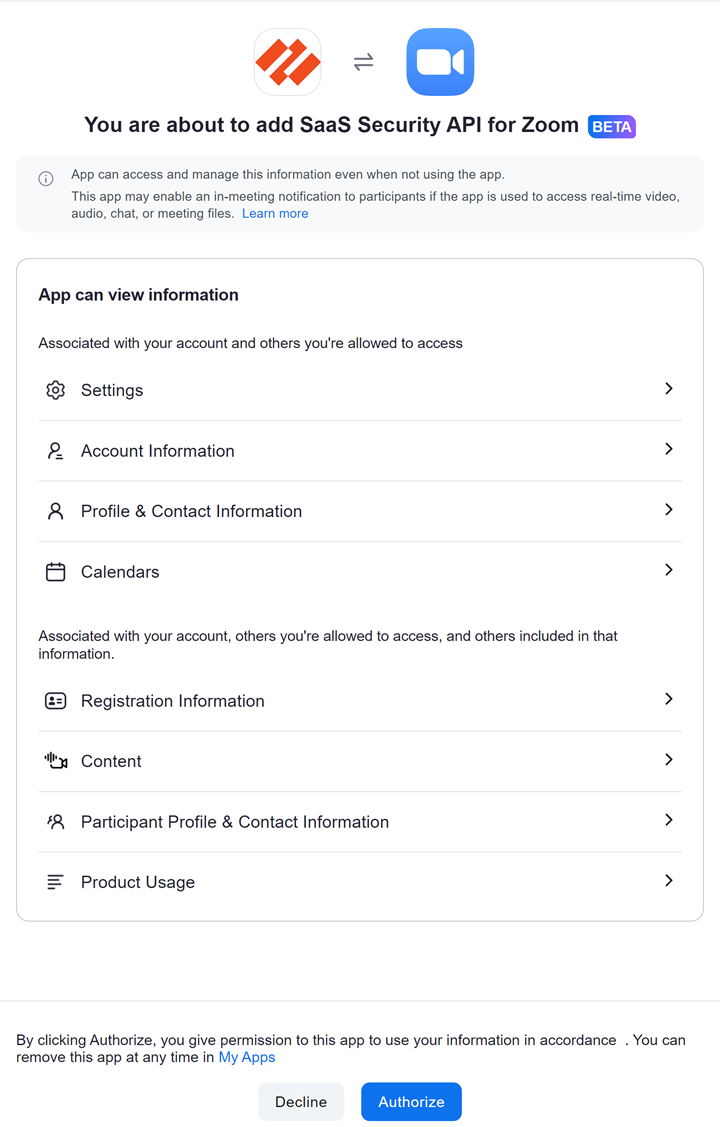
![]() Select Connect to Zoom Account.Enter your team’s Zoom domain, then Continue.Sign in to Zoom account with Administrator role.Review and Authorize the requested permissions.Data Security requires these permissions to scan your assets on Zoom.
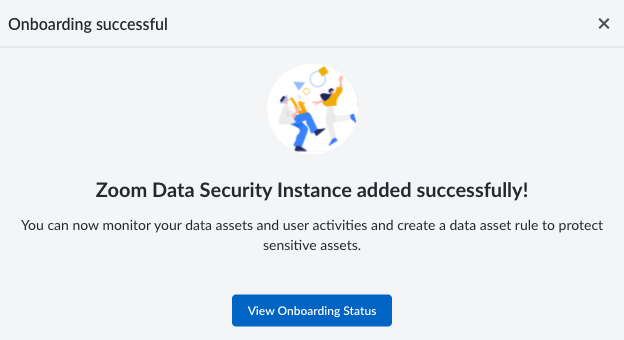
Select Connect to Zoom Account.Enter your team’s Zoom domain, then Continue.Sign in to Zoom account with Administrator role.Review and Authorize the requested permissions.Data Security requires these permissions to scan your assets on Zoom.![]() On successful onboarding, the following message is displayed.
On successful onboarding, the following message is displayed.![]() Post Onboarding Steps
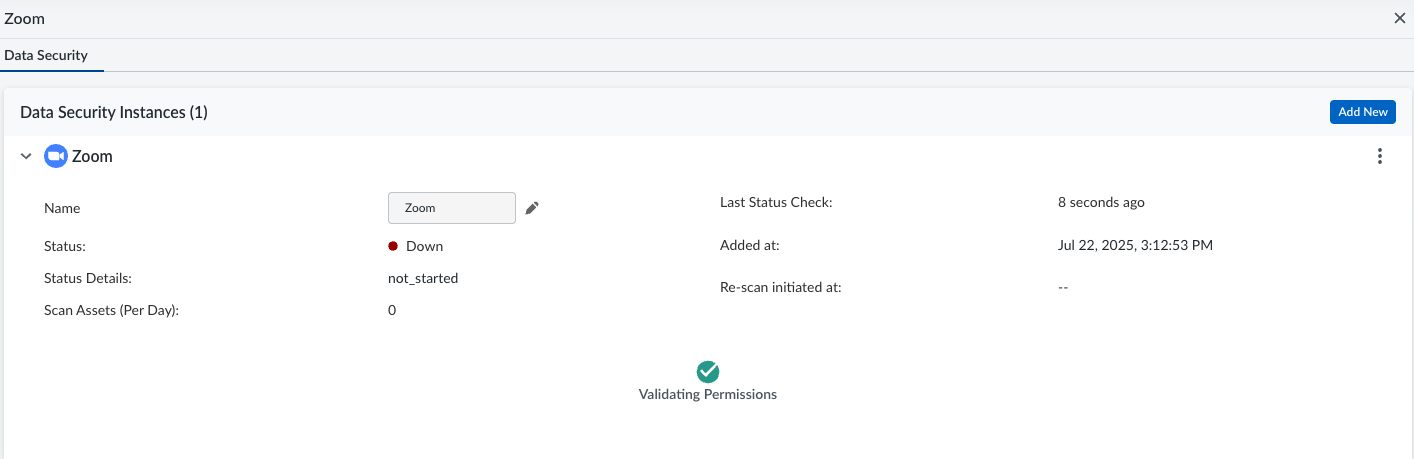
Post Onboarding Steps- Click View Onboarding StatusThe various details about the onboarded Zoom App are displayed.
![]() (Optional) Give a descriptive name to the Zoom instance to differentiate this instance of Zoom from other instances.Add policy rules.When you add a cloud app, Data Security automatically scans the app against the default data patterns and displays any match occurrences. As a best practice, consider the business use of your app to determine whether you want to Add a New Data Asset Policy Rule to look for incidents unique to Zoom.Configure or edit a data pattern.You can Configure Data Patterns to identify specific strings of text, characters, words, or patterns to make it possible to find all instances of text that match a data pattern you specify.Start Scanning Zoom App.To start scanning the new Zoom app for risks, select .Data Security scans all assets in the associated Zoom App and identifies incidents. Depending on the number of Zoom users and assets, it might take some time for Data Security to complete the process. However, you can Monitor Scan Results on the Dashboard and begin to Assess Incidents. Monitoring the progress of the scan during the discovery phase enables you to Fine-Tune Policy rules to modify the match criteria and ensure better results.
(Optional) Give a descriptive name to the Zoom instance to differentiate this instance of Zoom from other instances.Add policy rules.When you add a cloud app, Data Security automatically scans the app against the default data patterns and displays any match occurrences. As a best practice, consider the business use of your app to determine whether you want to Add a New Data Asset Policy Rule to look for incidents unique to Zoom.Configure or edit a data pattern.You can Configure Data Patterns to identify specific strings of text, characters, words, or patterns to make it possible to find all instances of text that match a data pattern you specify.Start Scanning Zoom App.To start scanning the new Zoom app for risks, select .Data Security scans all assets in the associated Zoom App and identifies incidents. Depending on the number of Zoom users and assets, it might take some time for Data Security to complete the process. However, you can Monitor Scan Results on the Dashboard and begin to Assess Incidents. Monitoring the progress of the scan during the discovery phase enables you to Fine-Tune Policy rules to modify the match criteria and ensure better results.Troubleshooting Onboarding for Zoom App
To ensure that your app has onboarded correctly without any issues in authentication or permissions, Data Security performs validation checks between the onboarding and scanning process. You can start scanning only after a successful validation. For Zoom, the following validation happens:- Validating Permissions
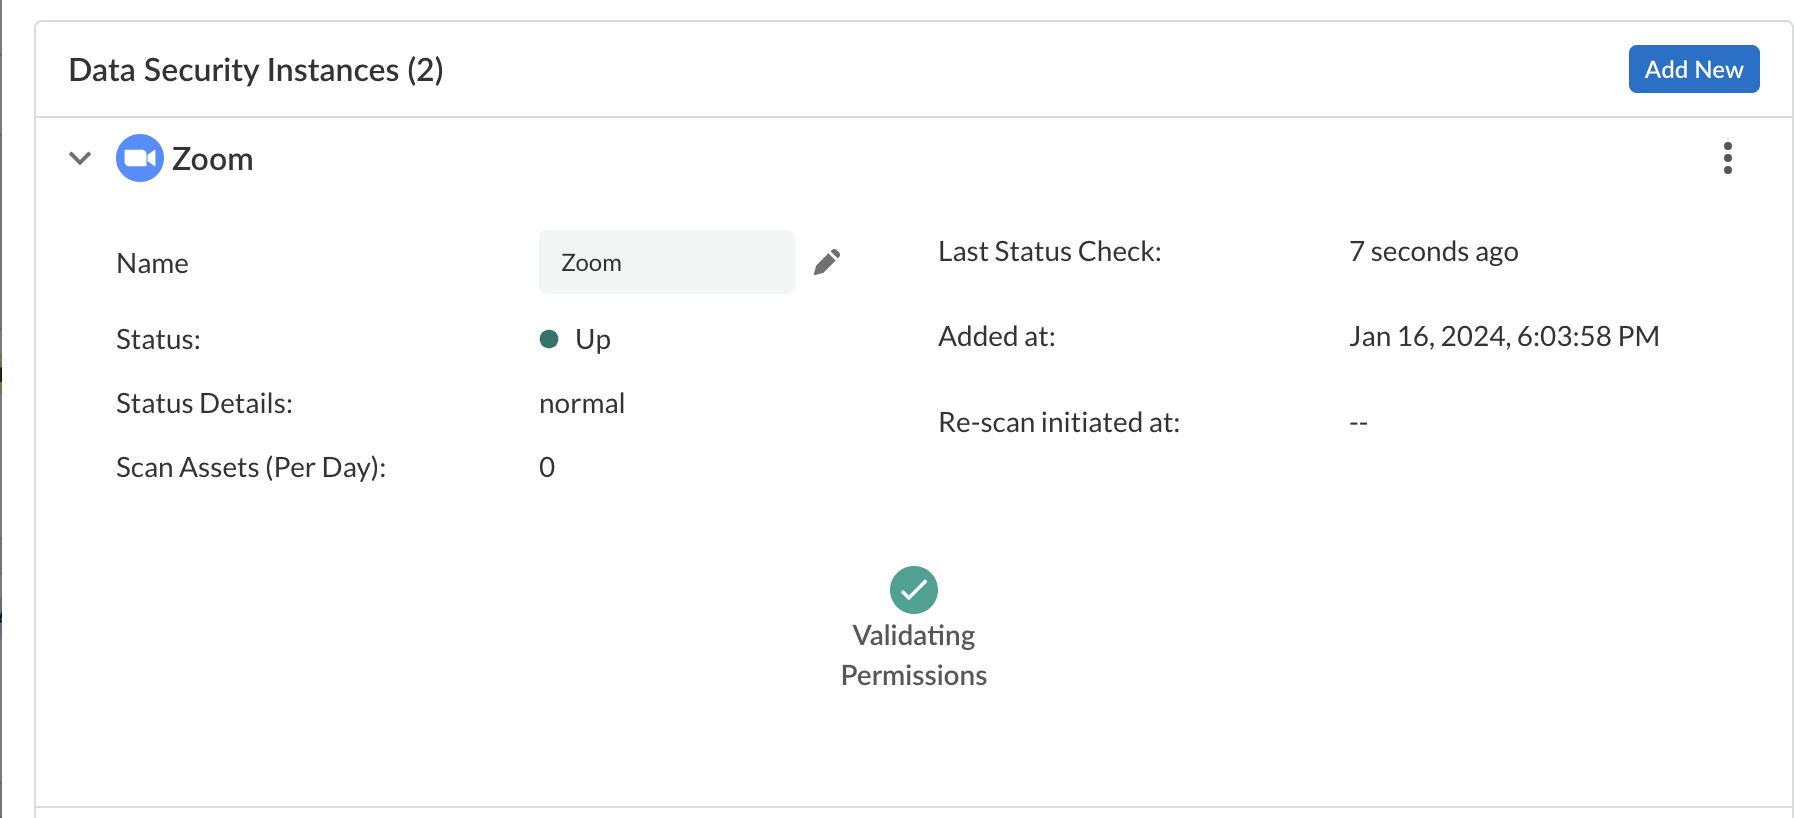
After the validation is successful, Data Security displays the following:![]() If the Validating Permissions check fails, try the following:
If the Validating Permissions check fails, try the following:- Ensure you have administrator permissions.
- Go to your Zoom app directory and check
if your Palo Alto Networks application is listed in the list of installed apps.
Following are the app names for specific regions:
- India region: SAAS Security API for Zoom - IN
- Australia region: SaaS Security API for Zoom -AUS
- Japan region: Palo Alto Networks NG-CASB - JP
- UK region: Palo Alto Networks NG-CASB - UK
- EU region: SaaS Security API for Zoom EU
- APAC region: SaaS Security API for Zoom - APEC
- US region: SaaS Security API for Zoom - US
![]()
Handling ErrorsThe most common issue related to onboarding a Zoom App is given in the following table:SymptomExplanationSolutionAudio transcript (.VTT) assets don't display in SaaS Security web interface.Data Security can't detect audio transcripts if you don’t have audio transcript enabled on Zoom.Enable audio transcript as outlined in prerequisites.If the issue persists, contact SaaS Security Technical Support.