Work with the Search
Table of Contents
Work with the Search
Use the search to perform both simple and
complex searches based on threat indicators or identifiers. The
search has a range of features for customizing and executing searches.
For details on navigating and using the search results (including
adding identifiers to your search as you go), refer to Drill
Down in Search Results.
- Open the Search editor
on the navigation pane and select a search type.
- Indicators—Search based on threat indicators, artifacts that have been ascertained by security experts as exhibiting signs of a compromised network. These artifacts include: File hashes, domains, URLS, and IP addresses.
- Sample—Search based on samples sent to WildFire for analysis by various connected appliances and services. WildFire receives samples from the following sources: Firewalls, WildFire, Traps, Traps Android, Magnifier, Proofpoint, Prima SaaS, manual uploads, partner integrations, and other industry sources.
- Session—Search based on the session data provided by samples during sample submission. This allows you to search based on various context details, such as the time stamp, upload source, application, file URL, and more. The session data displayed in the search results include all relevant data submitted to WildFire through your organization's various product integrations.
![]()
- See the following topics for details on using the AutoFocus search:
- Start an indicator search.
- Select Search > Indicators to begin a new indicator search.
- Enter a valid threat indicator value. You can select
from the following types: Domain, URL, IP addresses (IPv4 or IPv6),
and file hashes. When switching the search context from Indicators to WildFire or Activity, AutoFocus reapplies the search term using a valid artifact type into an advanced search mode. This allows you to quickly pivot for more information about a particular indicator.
![]()
- Start a sample or session simple
mode search.To begin a new simple mode search, select Search > Sample or Session (based on the type of search you with to perform). If the search is in advanced mode, switch to Simple Mode.AutoFocus defaults to the last search mode used by the user.
![]() Create a simple mode search by selecting the relevant conditions from the drop-down menus. Should you need to run a search using other variables, you must define the scope and value in the Advanced search:
Create a simple mode search by selecting the relevant conditions from the drop-down menus. Should you need to run a search using other variables, you must define the scope and value in the Advanced search:- Configure your search by selecting the desired
search variables from the drop-down menus. You can select from the
following categories: Verdict, First
Seen | Time, Source, Tag,
and IOC (indicators of compromise).AutoFocus automatically refreshes after each variable is selected or modified.
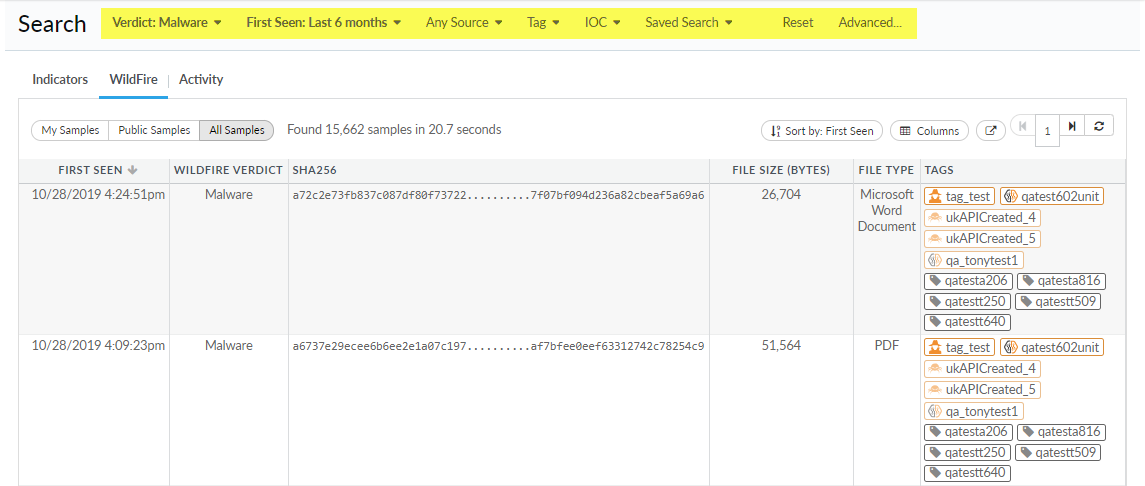
- Search by Verdict—Select from Malware, Grayware, Benign, Phishing, and Any Verdict to search the data set based on a verdict.
- Search by First Seen and Time—First configure the search to include samples based on when it was First Seen (the time stamp of when the sample was first forwarded or uploaded to WildFire for analysis) or by Time (the time stamp of when the session started), then set the search to display data for the last 1, 7, 30, 90, 180, or 365 days.The time setting does not filter the scope (My Samples, (private), Public Samples, or All Samples (private and public samples)) of the sample data set.
- Search by Source—Select from Firewall, Proofpoint, Traps, Magnifier, Manual API, Traps Android, WF Appliance, Prisma SaaS, Prisma Access, Cortex XDR, and Any Source to filter the data set based on the upload source.
- Search by Tag—Select from a list of tags, tag classes, or tag groups. Alternatively, you can filter the list of tags by entering a keyword to search for samples associated with a tag.
- Search by IOC—Search based on the following indicators of compromise: Hash, IP Address, Domain, URL, User Agent, Email Address, and Filename.
- Apply a Saved Search—Select a Saved Search setting to quickly execute a search based on preconfigured saved search conditions.
![]()
- If you want to add other conditions to the search,
you can switch to Advanced mode. Switching
to advanced mode retains the condition values selected from the
simple search mode. From here, you can add additional search conditions
that are not available in simple search mode. For more details on
using the advanced mode search, refer to Begin
a new advanced search.If you add search conditions that are not available in Simple mode, you will be prompted to reset your search.
- Configure your search by selecting the desired
search variables from the drop-down menus. You can select from the
following categories: Verdict, First
Seen | Time, Source, Tag,
and IOC (indicators of compromise).
- Start a sample
or session advanced mode search.To begin a new advanced mode search, select Search > Sample or Session (based on the type of search you with to perform). If the search is in simple mode, switch to Advanced mode.AutoFocus defaults to the last search mode used by the user.
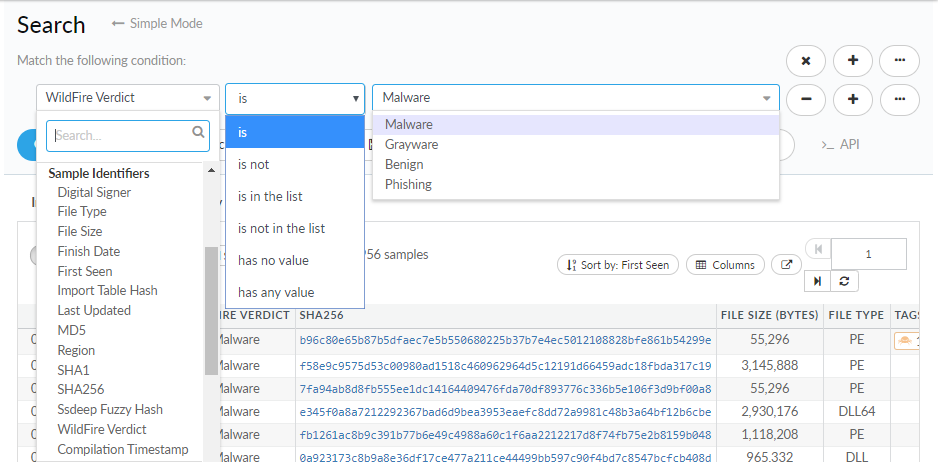
![]() To create a search condition, choose the type of artifact you want to find and define the scope and value:
To create a search condition, choose the type of artifact you want to find and define the scope and value:![]()
- Select one of the Artifact
Types from the drop-down to perform a search of global threat
data based on that artifact type.Start typing the name of the artifact type to narrow down the list of options.
- Select an operator for the search condition.The operator determines the scope of search results; you can use the operator to limit or expand potential results, or to return exact match results. Search Operators and Values vary depending on the type of artifact you select.You can use the operator to create negative search conditions. Use negative operators such as is not or is not in the list to return more granular search results that exclude samples or sessions that match the negative condition.
- Enter or select a value to define the search condition.
Depending on the artifact type and operator selected, you may be
able to choose from predefined values, or you might be required
to enter an exact value to perform the search.Learn more about Search Operators and Values.If you are attempting to select a value from a pre-populated drop-down, and the drop-down appears to be loading for a long period of time, try clearing your browser cache.
- Select one of the Artifact
Types from the drop-down to perform a search of global threat
data based on that artifact type.
- Add more search conditions.
![]()
- Add conditions to your search.
![]() You can add up to 300 search conditions to a single search.
You can add up to 300 search conditions to a single search. - Remove conditions from your search.
![]()
- Narrow or broaden your search.
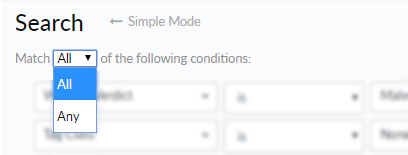
![]() Match results to all or any of the defined search conditions:
Match results to all or any of the defined search conditions:- Narrow search results by selecting All. Search results are only returned for samples that match all conditions.
- Broaden search results by selecting Any. Search results are returned for samples that match one or more conditions.
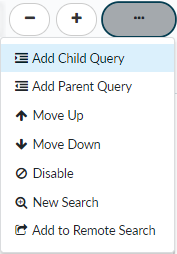
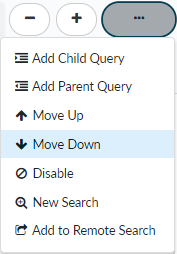
- Add a child query.
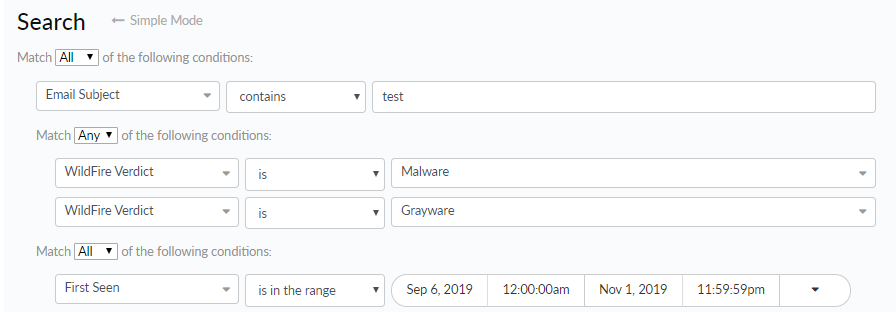
![]() A child query is a condition or a set of conditions nested within and used to qualify a parent query. A child query is evaluated only against the parent query to which it is added. Add a child query to return more granular search results, where the results must match both the parent query and the child query.The example search below shows a child query added to the Email Subject condition. Search results will be returned for samples where the following is true:
A child query is a condition or a set of conditions nested within and used to qualify a parent query. A child query is evaluated only against the parent query to which it is added. Add a child query to return more granular search results, where the results must match both the parent query and the child query.The example search below shows a child query added to the Email Subject condition. Search results will be returned for samples where the following is true:- The sample was first seen before March 13, 2015.
- The email subject for the sample file contained the word test and received a WildFire verdict of either malware or grayware.
![]()
You can only add up to 4 levels of child queries nested under parent queries. - Add a parent query.
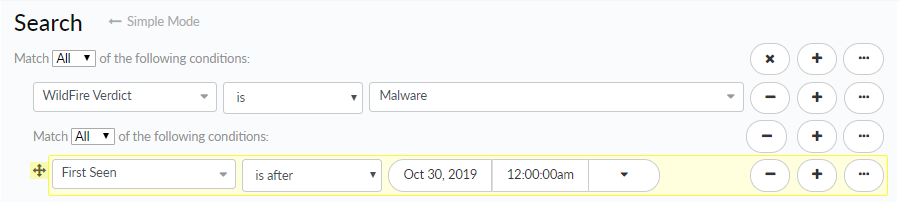
![]() Click Add Parent Query to nest a search condition under the preceding condition. AutoFocus then only evaluates the nested search condition against the parent condition.In the example below, click Add Parent Query to nest the First Seen condition under the WildFire Verdict condition. Search results will be returned for samples where any of the following conditions is true:
Click Add Parent Query to nest a search condition under the preceding condition. AutoFocus then only evaluates the nested search condition against the parent condition.In the example below, click Add Parent Query to nest the First Seen condition under the WildFire Verdict condition. Search results will be returned for samples where any of the following conditions is true:- The sample received a WildFire verdict of malware and was first seen before July 1, 2016.
- The sample is an Adobe Flash file.
![]()
- Adjust search condition placement.
![]() Move Up or Move Down search conditions to move conditions to or from a child query. Depending on the placement of a condition, you can move it up or down to include it in a child query. You can also move a condition up or down to remove it from a child query so that it is no longer a nested condition.Alternatively, you can move a search condition using the keyboard. Placing the cursor over the left edge of a condition displays a directional icon. Click on the icon next to the condition or condition group you want to move and then use the keyboard arrows to change the placement. Depending on the location of the condition, you can also create child and parent queries by pressing the right arrow key. Exit the keyboard movement mode by pressing the escape key or by clicking the selected condition.
Move Up or Move Down search conditions to move conditions to or from a child query. Depending on the placement of a condition, you can move it up or down to include it in a child query. You can also move a condition up or down to remove it from a child query so that it is no longer a nested condition.Alternatively, you can move a search condition using the keyboard. Placing the cursor over the left edge of a condition displays a directional icon. Click on the icon next to the condition or condition group you want to move and then use the keyboard arrows to change the placement. Depending on the location of the condition, you can also create child and parent queries by pressing the right arrow key. Exit the keyboard movement mode by pressing the escape key or by clicking the selected condition.![]()
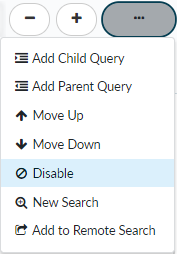
- Disable a search condition.
![]() Disable a condition to temporarily remove it from a search. This option provides the flexibility to temporarily adjust your search parameters, and then quickly and easily add the condition back to your search if necessary.Disabled search conditions are grayed out:
Disable a condition to temporarily remove it from a search. This option provides the flexibility to temporarily adjust your search parameters, and then quickly and easily add the condition back to your search if necessary.Disabled search conditions are grayed out:![]() To enable a search condition that was previously disabled, select the ellipses icon for that condition and select Enable:
To enable a search condition that was previously disabled, select the ellipses icon for that condition and select Enable:![]()
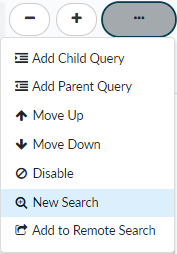
- Start a new search from your current search.
![]() Start a New Search for any of the search conditions of an existing search. The new search launches in a separate browser window.
Start a New Search for any of the search conditions of an existing search. The new search launches in a separate browser window. - Add a search
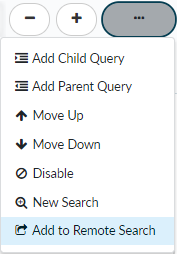
condition to a remote search.
![]() This is one way to add search conditions that define which artifacts to find remotely in a Palo Alto Networks® next-generation firewall, Panorama, or third-party log management system when you Set Up Remote Search.This option is only available for SHA256 hash, IP address, user agent, filename, or URL search conditions.
This is one way to add search conditions that define which artifacts to find remotely in a Palo Alto Networks® next-generation firewall, Panorama, or third-party log management system when you Set Up Remote Search.This option is only available for SHA256 hash, IP address, user agent, filename, or URL search conditions. - Add recent or frequently-used conditions to a search.
![]() Select the Show Search History icon and add Recently used or Most used search conditions to your search.
Select the Show Search History icon and add Recently used or Most used search conditions to your search.![]()
- Save a search.
![]() Save searches that you might be performing on a regular basis, or to quickly recreate useful search settings:Click the Save Search icon, enter a name and description to identify the saved search when using it later, and save the search.
Save searches that you might be performing on a regular basis, or to quickly recreate useful search settings:Click the Save Search icon, enter a name and description to identify the saved search when using it later, and save the search. - Use a saved
search.
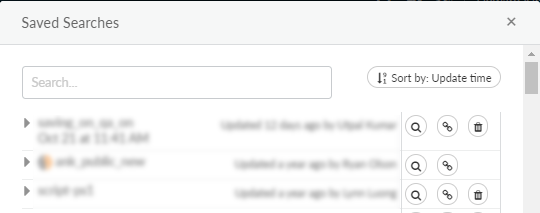
![]() Open Saved Search to view an alphabetical list of previously saved searches, and click the spyglass icon to add a saved search to the search editor.
Open Saved Search to view an alphabetical list of previously saved searches, and click the spyglass icon to add a saved search to the search editor.![]()
- Tag a search.
![]() Click Tag Results to create a tag based on search conditions. Tags can be used to define a set of conditions that indicate an important network event or a possible or known threat.Tag a search so you can easily identify and track any existing or future samples that match the search.When you Create a Tag, give the tag a recognizable name and description. Select Tags on the navigation pane to manage tags you have created and to view all tags.
Click Tag Results to create a tag based on search conditions. Tags can be used to define a set of conditions that indicate an important network event or a possible or known threat.Tag a search so you can easily identify and track any existing or future samples that match the search.When you Create a Tag, give the tag a recognizable name and description. Select Tags on the navigation pane to manage tags you have created and to view all tags. - Export a search.
![]() You can export a search to share the search between support accounts or with another AutoFocus security expert.
You can export a search to share the search between support accounts or with another AutoFocus security expert.- After setting up a search and viewing search results, select Export Search.
- Copy the search filters.
- Paste the search filters to a local file send the filters to another user.
- Import
a search.
![]() Click Import Search to paste and import a previously exported query or a query shared by another AutoFocus security expert.
Click Import Search to paste and import a previously exported query or a query shared by another AutoFocus security expert. - Start a remote search.
![]() Start a Remote Search to look for artifacts in a Palo Alto Networks firewall, Panorama, or third-party log management system. View more details on how to Set Up Remote Search.This feature is supported with firewalls running PAN-OS 7.1 or later release versions.
Start a Remote Search to look for artifacts in a Palo Alto Networks firewall, Panorama, or third-party log management system. View more details on how to Set Up Remote Search.This feature is supported with firewalls running PAN-OS 7.1 or later release versions. - View the API request for a sample or session search.
![]() Click the >_API link in the WildFire or Activity tab of the search editor to view the API request for initiating the current search. The API request is formatted in Curl URL Request Library (cURL) and Python (see more information about using the AutoFocus API to perform a search).
Click the >_API link in the WildFire or Activity tab of the search editor to view the API request for initiating the current search. The API request is formatted in Curl URL Request Library (cURL) and Python (see more information about using the AutoFocus API to perform a search). - Choose from the following next steps:
- Click Search to view samples matched to your search conditions. Select the Indicators, WildFire, and Activity tabs to Drill Down in Search Results.
- Assess AutoFocus Artifacts found in your search.
- Export AutoFocus Artifacts found in your search.