The Cloud Identity Engine service is free; however, the
enforcement points utilizing directory data may require specific
licenses. Click here for more
information.
The Cloud Identity Engine can integrate Okta Directory information. When you
configure your Okta Directory as part of the Cloud Identity Engine, the Cloud
Identity Engine uses Okta Directory to collect user and group attribute information
for Security policy enforcement and for visibility into the users who access your
network.
You must create a separate OpenID Connect (OIDC) app integration to configure an
Okta directory for the Cloud Identity Engine, even if you’ve configured Okta as
an identity provider for SAML.
If you try to use the SAML app to configure an Okta directory instead of
creating a new OIDC app, the initial sync might be successful, but any
subsequent syncs fail because the refresh token from the gallery application
does not support this configuration.
You can select one of two methods for the Cloud Identity Engine to use to connect to
your Okta Directory:
The Auth Code Flow, which requires you to log in to make changes to the
directory configuration in the Cloud Identity Engine.
(Recommended) The Client Credential Flow, which initially requires
additional permissions but does not require you to log in to change the
directory configuration in the Cloud Identity Engine.
For an Okta directory, the Cloud Identity Engine retrieves updates from the directory
using the following schedule:
Users, Groups, and Devices—When the Cloud Identity Engine syncs
changes.
Apps—Every x hours (where x is
either a maximum of three hours or the duration necessary to complete the
previous apps sync).
Learn about configuring your Okta directory using the auth code deployment
method.
Deploying the Auth Code Flow for Okta Directory requires
you to log in using administrator privileges to change the configuration for the Okta
directory in the Cloud Identity Engine and that you reconnect the Okta directory every 90 days to avoid sync failure.
If you have not already done so, activate the Cloud Identity Engine and
obtain the Sign-in redirect URI for Okta.
After activating the Cloud Identity Engine, log in to the hub and
select the Cloud Identity Engine app.
Copy the URL for your Cloud Identity Engine tenant and edit it to
obtain the Sign-in redirect URI that Okta requires. To edit the URL,
replace the text after the domain with
/authorize. For example, if your Cloud Identity
Engine tenant URL is
https://directory-sync.us.paloaltonetworks.com/directory?instance=<InstanceId>,
your Redirect URL is
https://directory-sync.us.paloaltonetworks.com/authorize.
Using the Okta Administrator Dashboard, prepare to add your Okta Directory in
the Cloud Identity Engine.
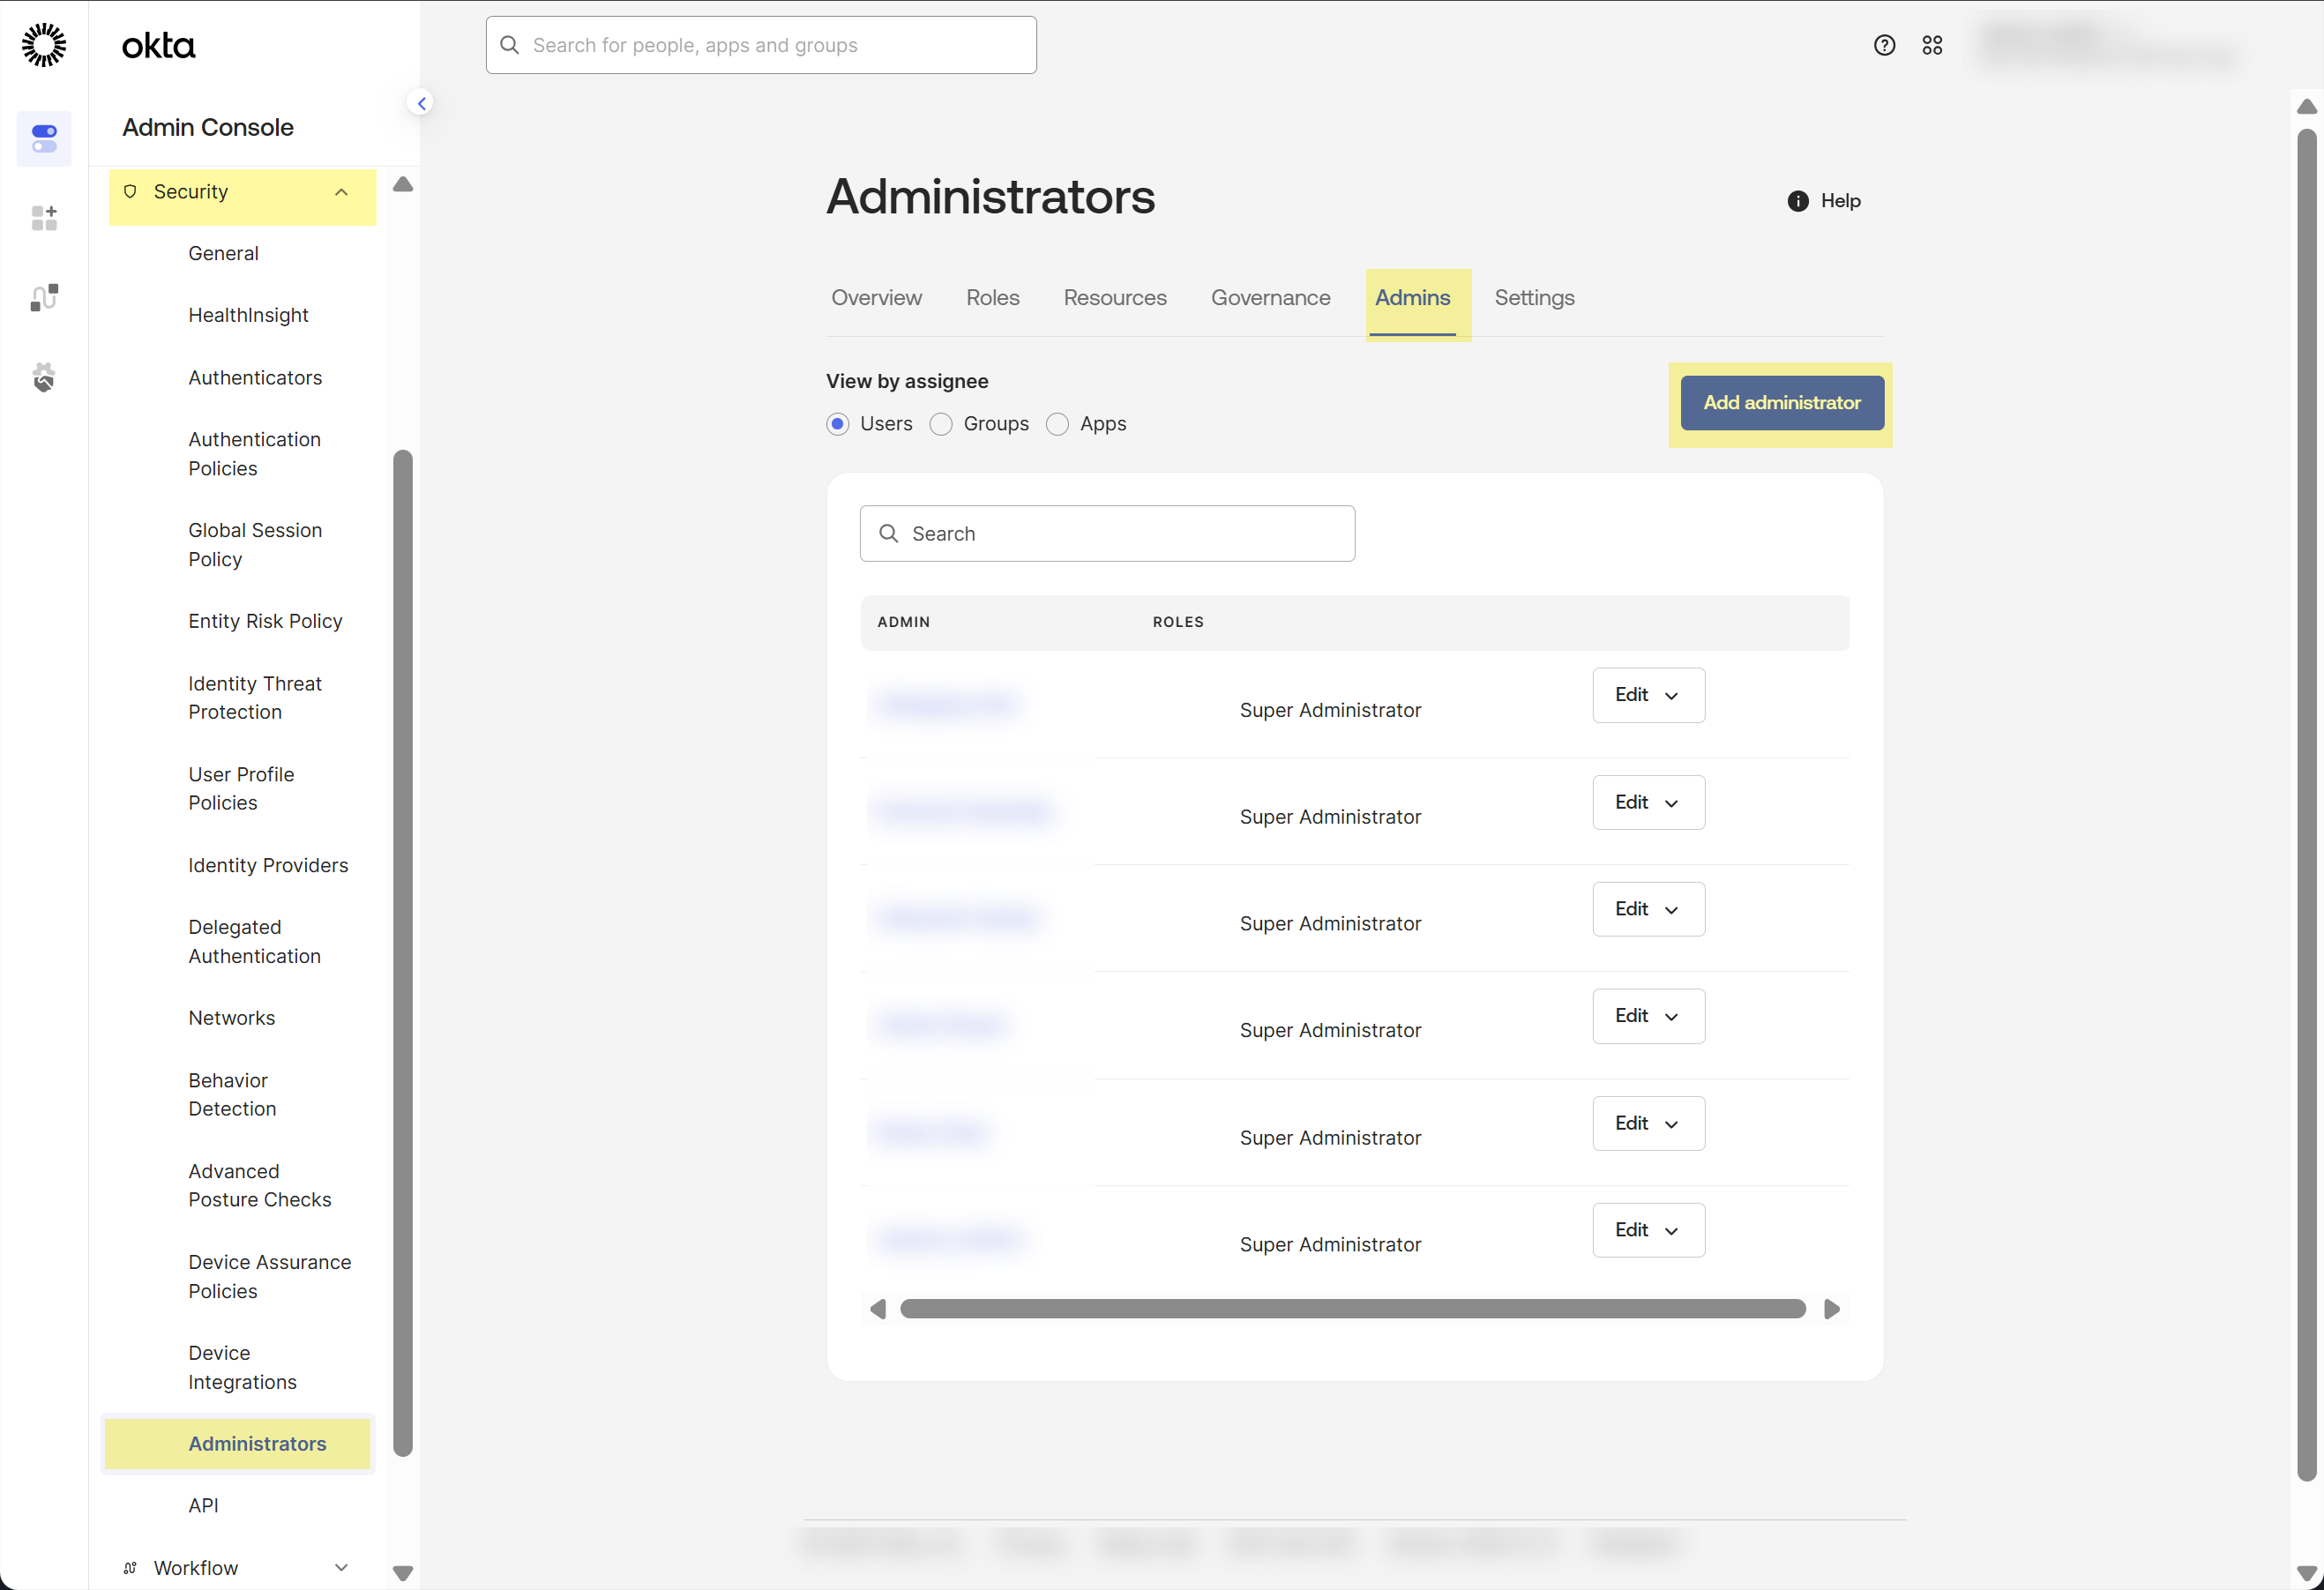
To set up an Okta Directory in the Cloud Identity
Engine, you must create a user then assign Admin
Roles to that user to grant privileges for the Okta
Directory in the Okta Administrator Dashboard (SecurityAdministratorsAdminsAdd Administrator).
This is the account you’ll assign to the app in step 2.6. This is also
the same account you'll use to log in for step 8 when using the Auth Code
Flow for your Okta Directory.
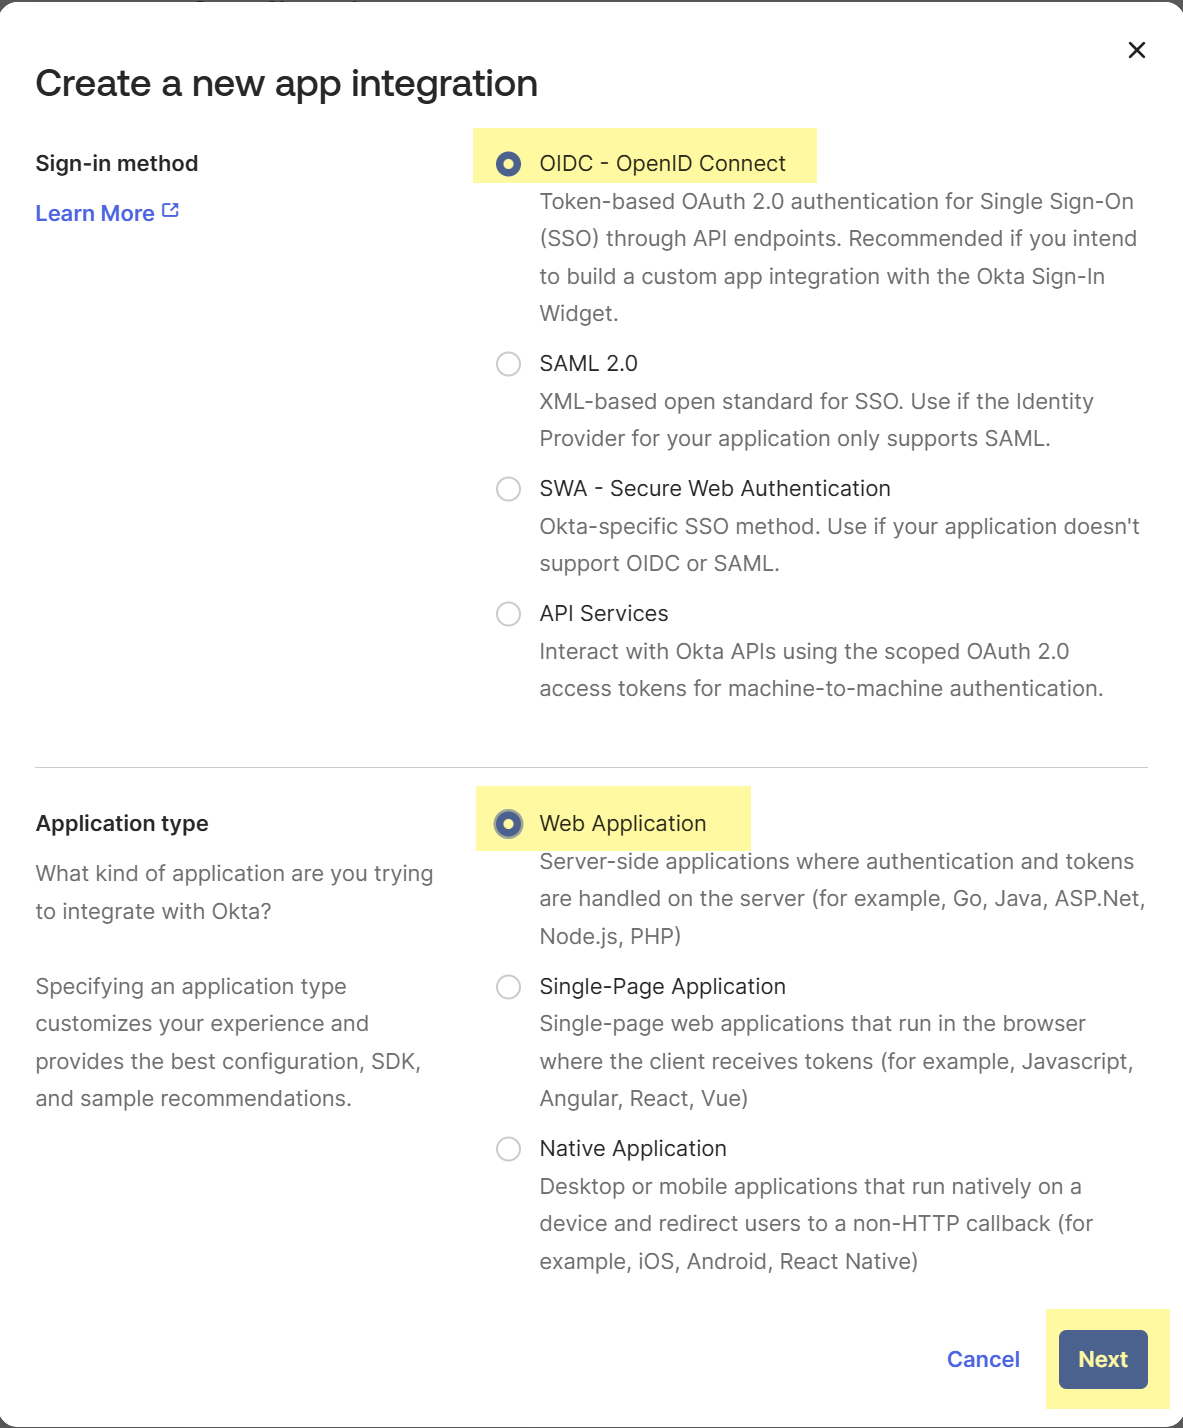
Select OIDC - OpenID Connect as the
Sign-in method.
Select Web Application as the
Application type then click
Next.
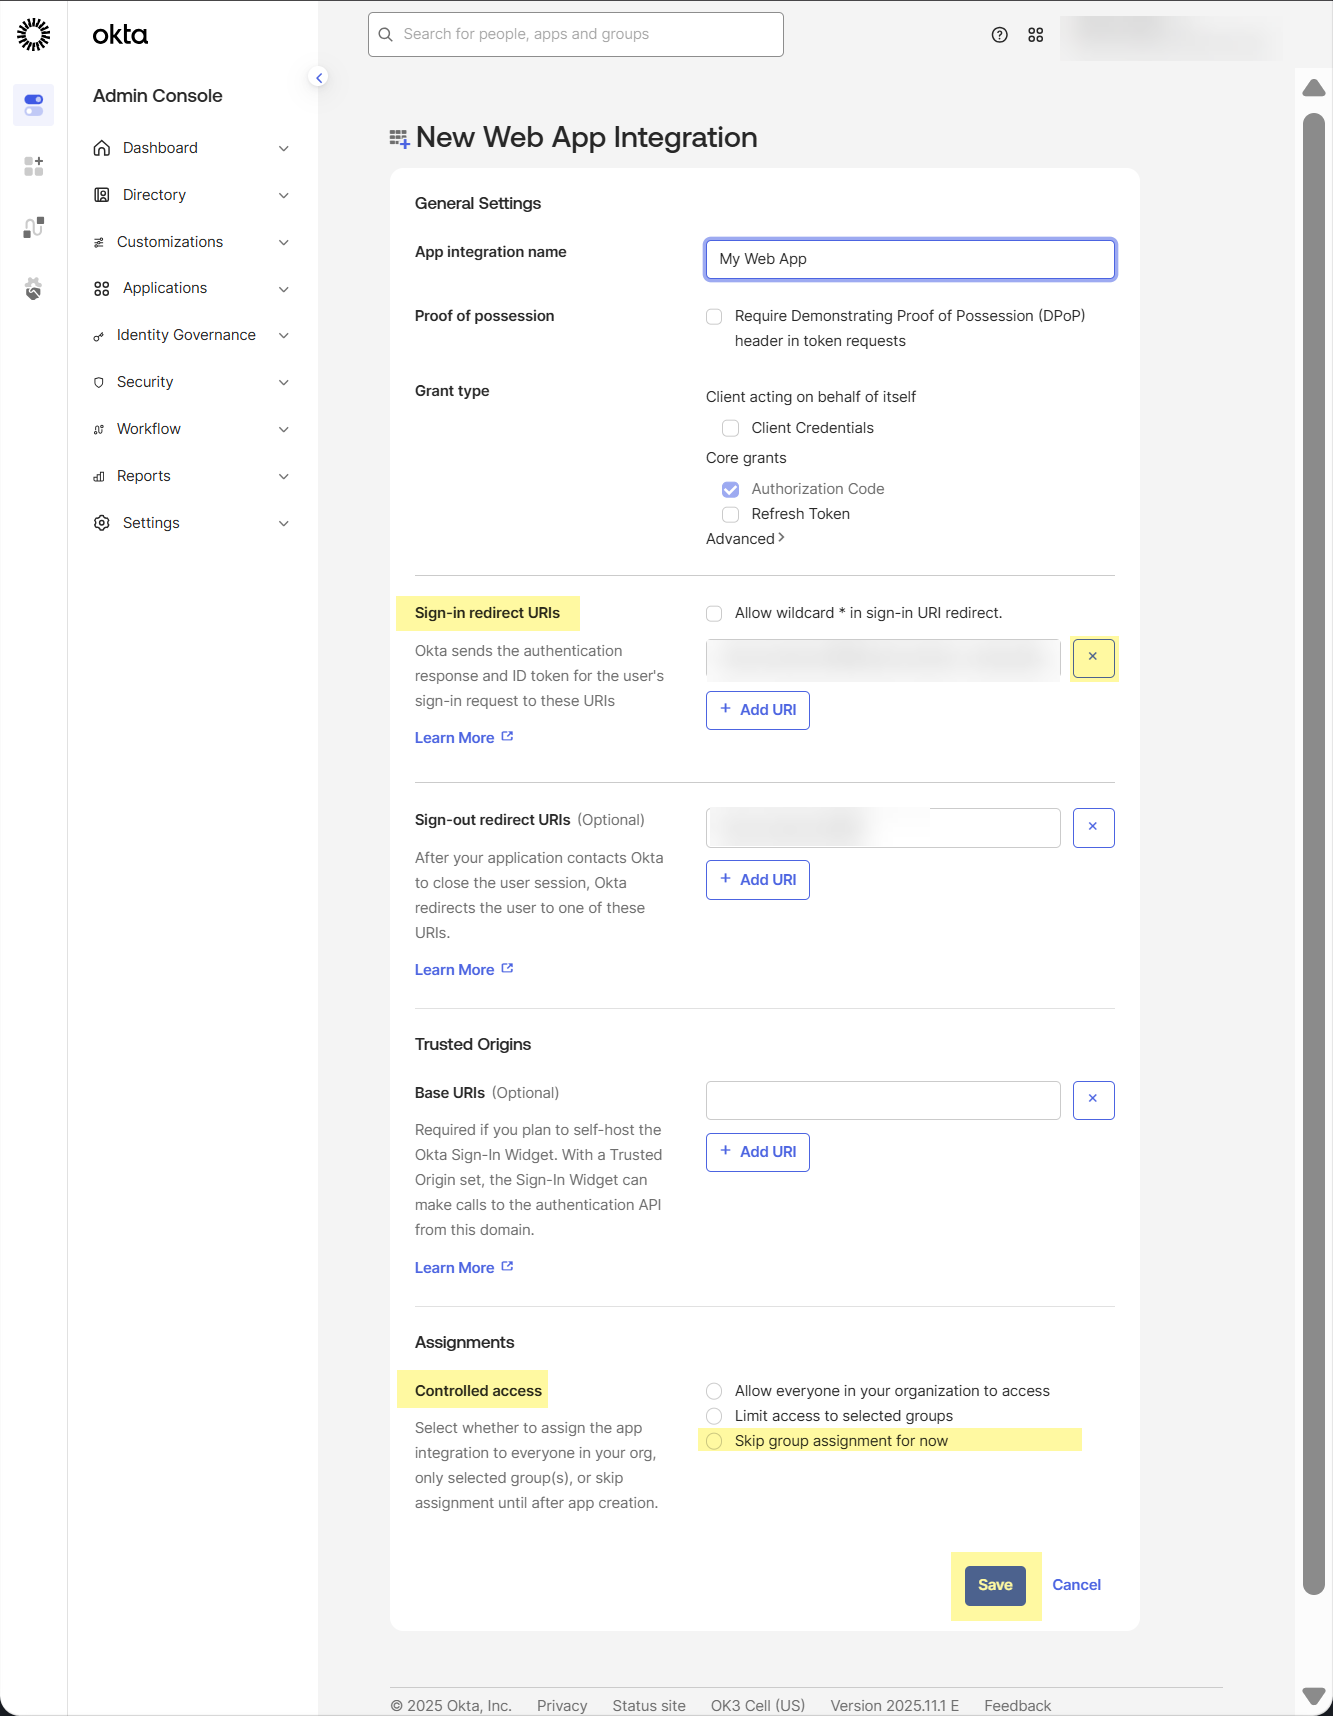
Click the X button to clear the current entry
and replace the existing Sign-in redirect URIs
with the edited URL from step 1.2.
Palo Alto Networks recommends separating regions by aligning
region-specific tenants with region-specific Okta accounts.
However, for testing, if you have Cloud Identity Engine tenants
in more than one region, add Sign-in redirect URIs for each
region where you have a tenant.
Skip the steps for Sign-out redirect URIs and
Base URIs as these aren't required.
Since you will assign Controlled Access later in
this procedure, Skip group assignment for now
then Save the configuration.
When you assign the app in
step 5.a, be sure to assign the app only to
the administrator you created in the first step.
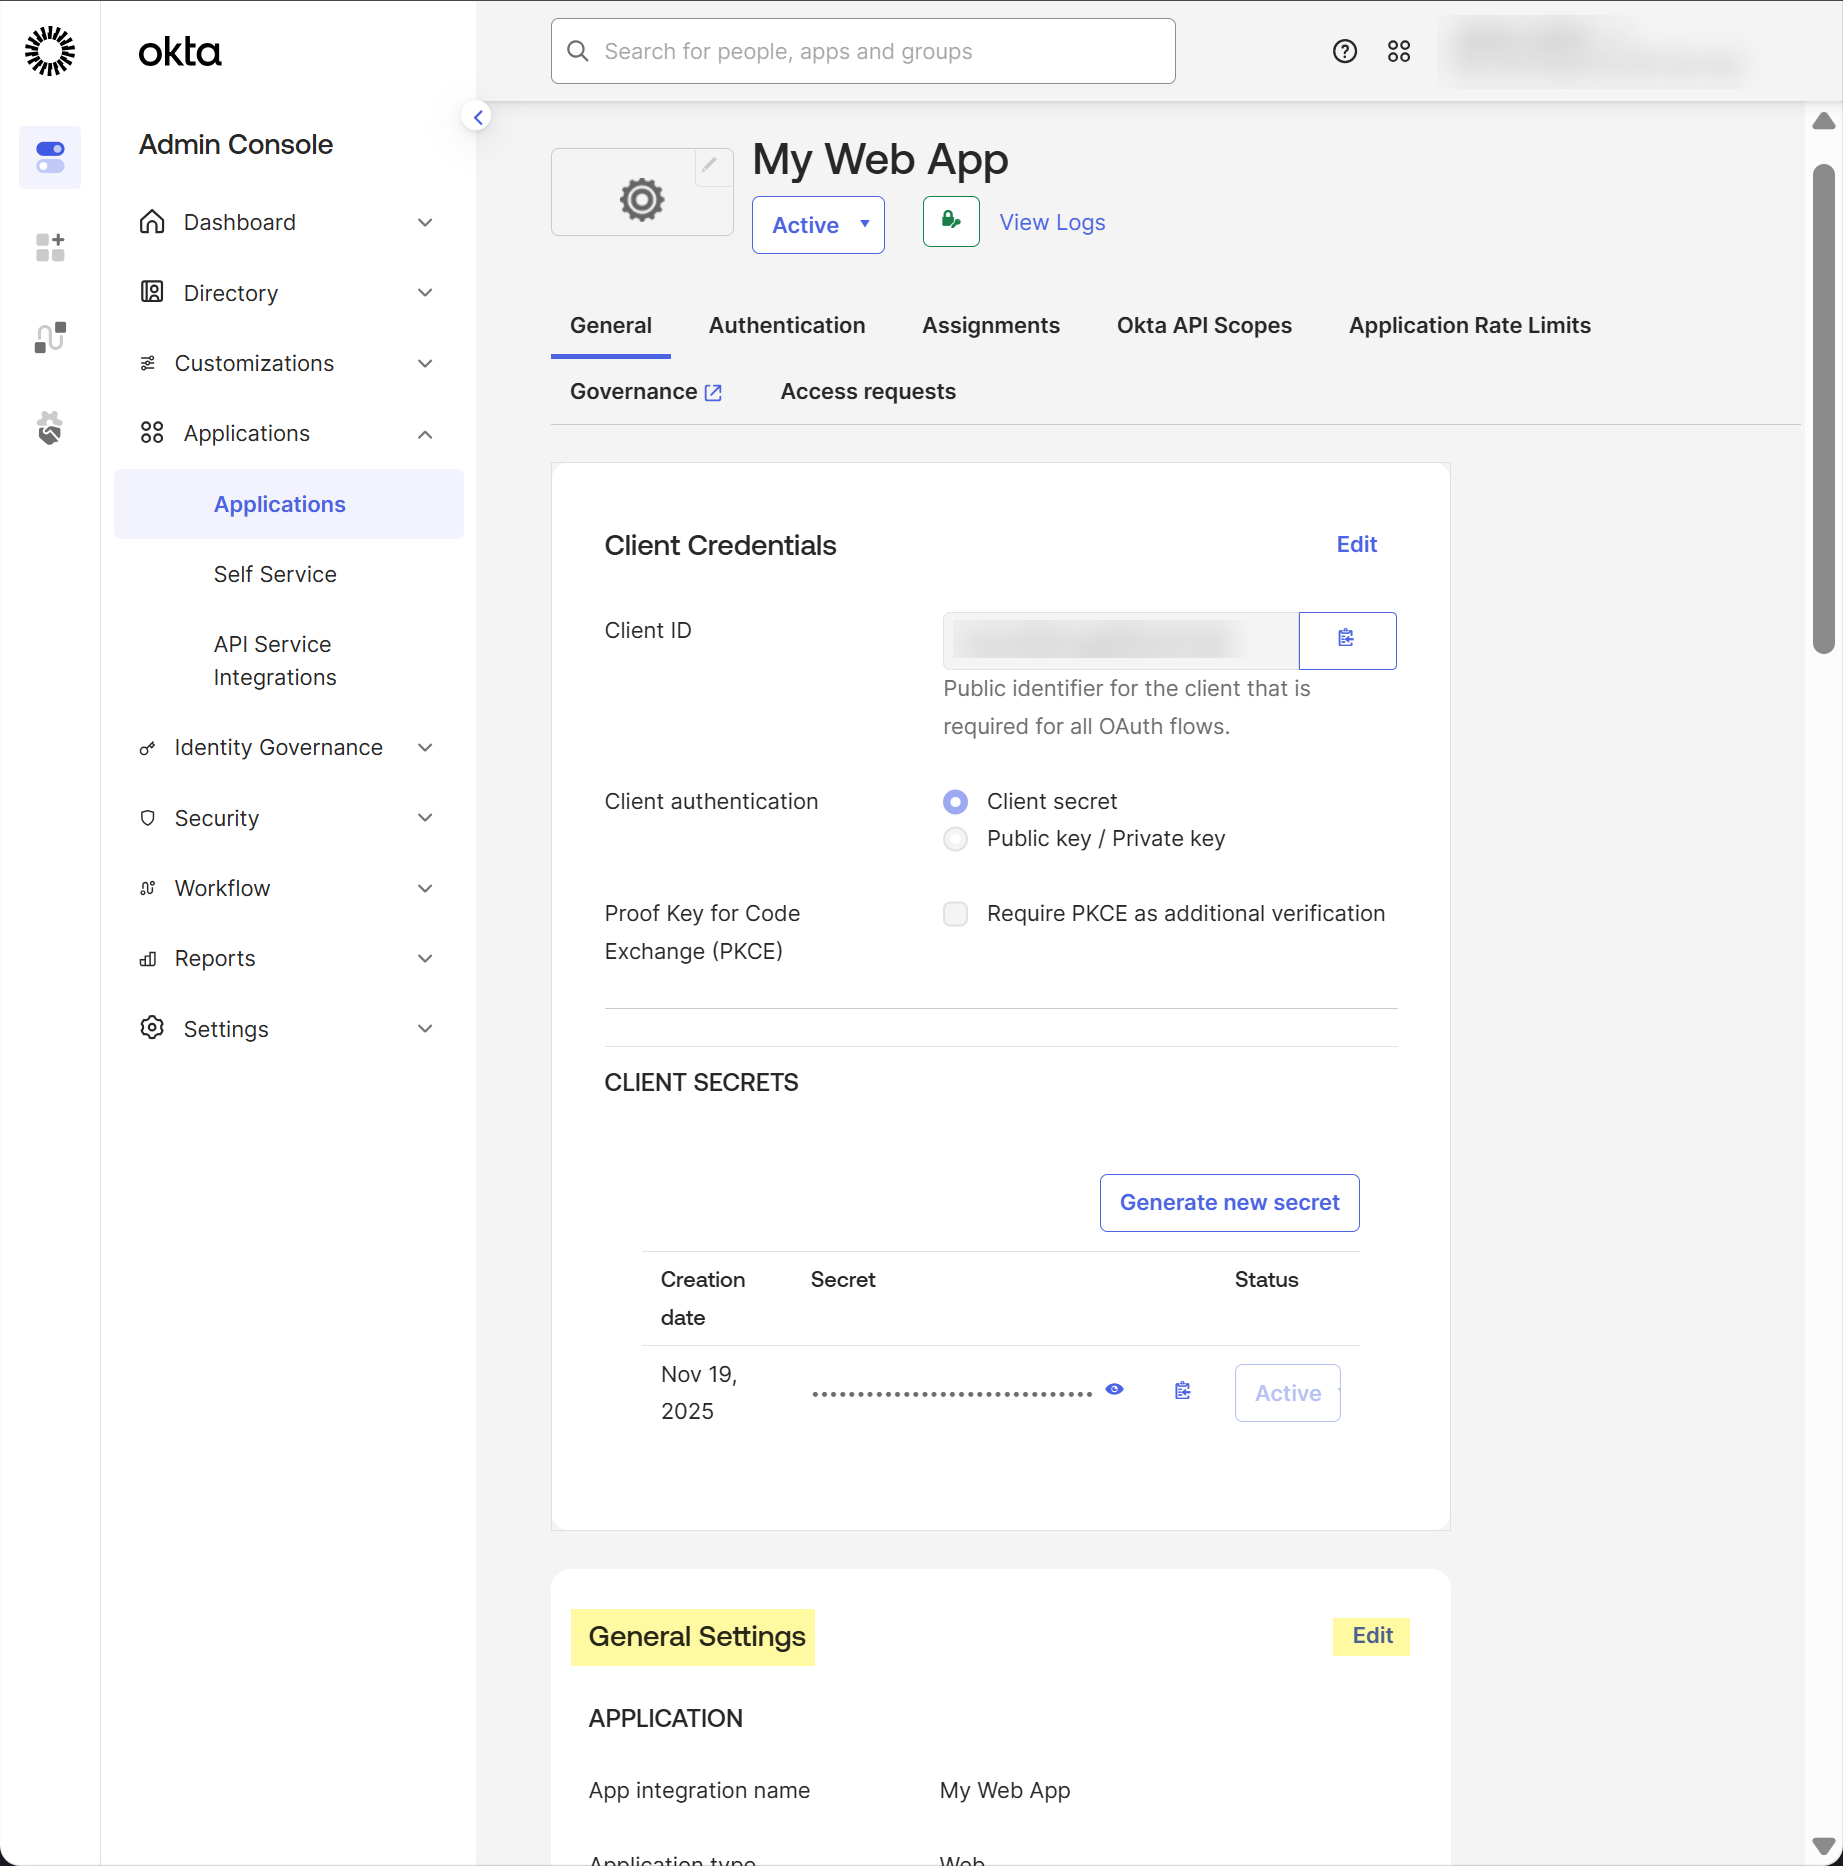
Configure the Okta app integration.
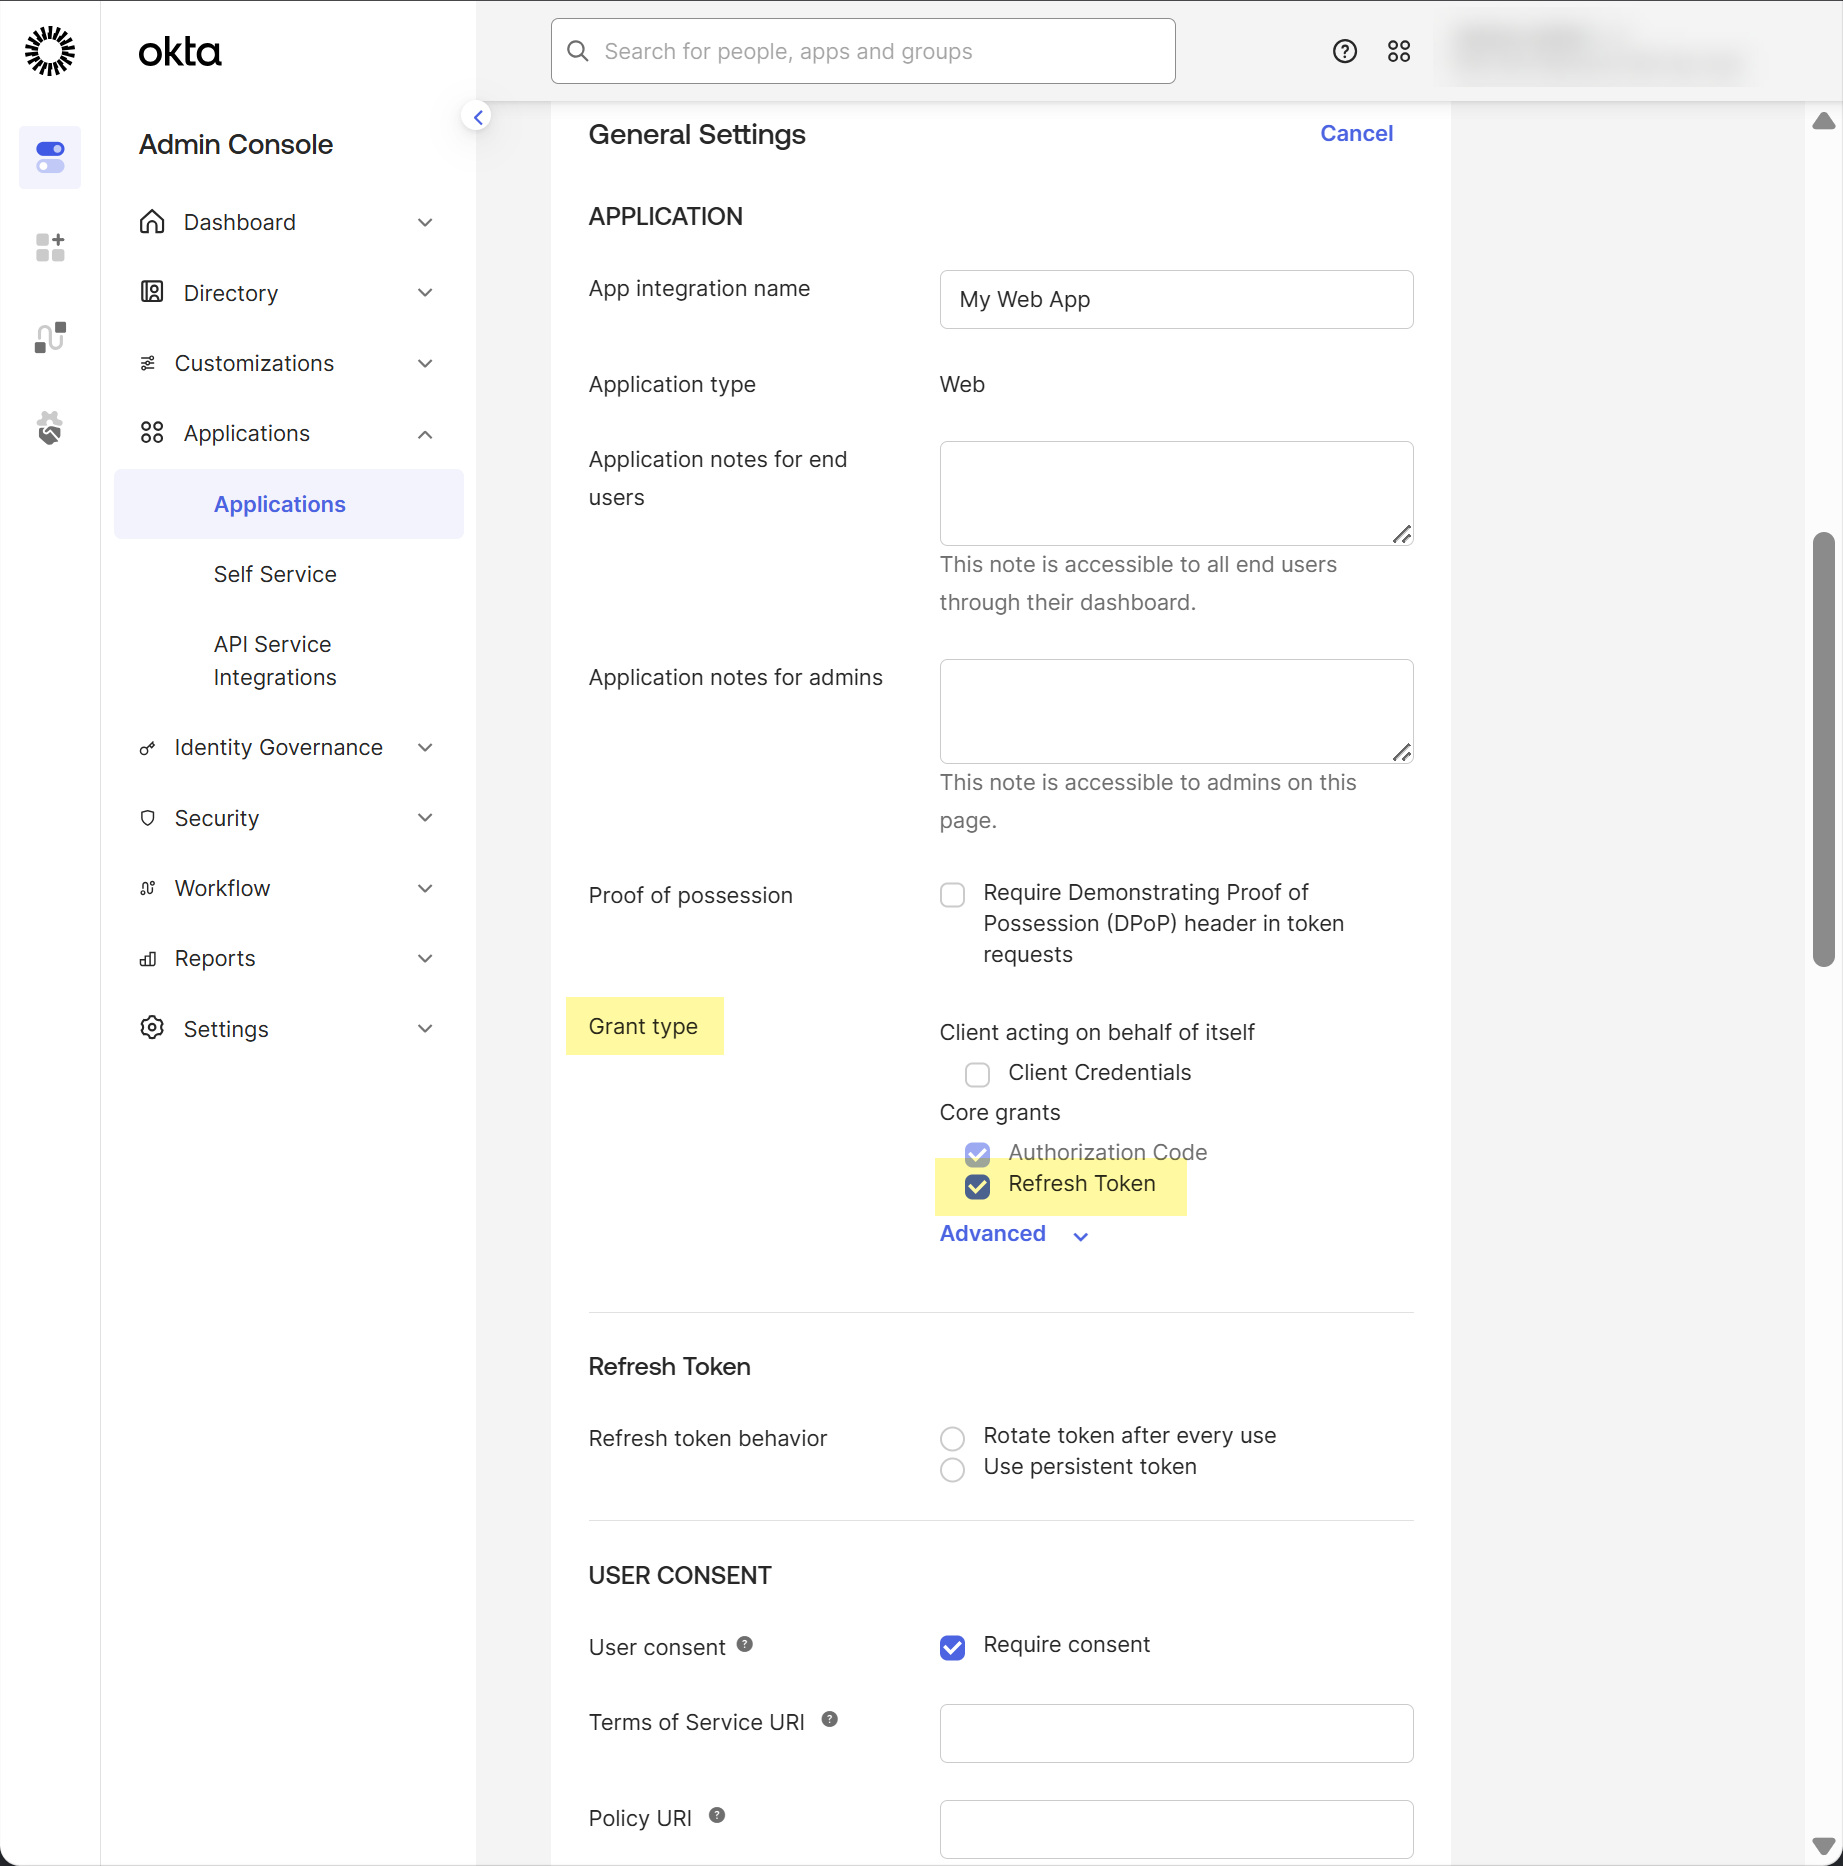
Edit the General Settings
for the app you just created.
Select Refresh token as the Grant
type.
Using the refresh token is
mandatory.
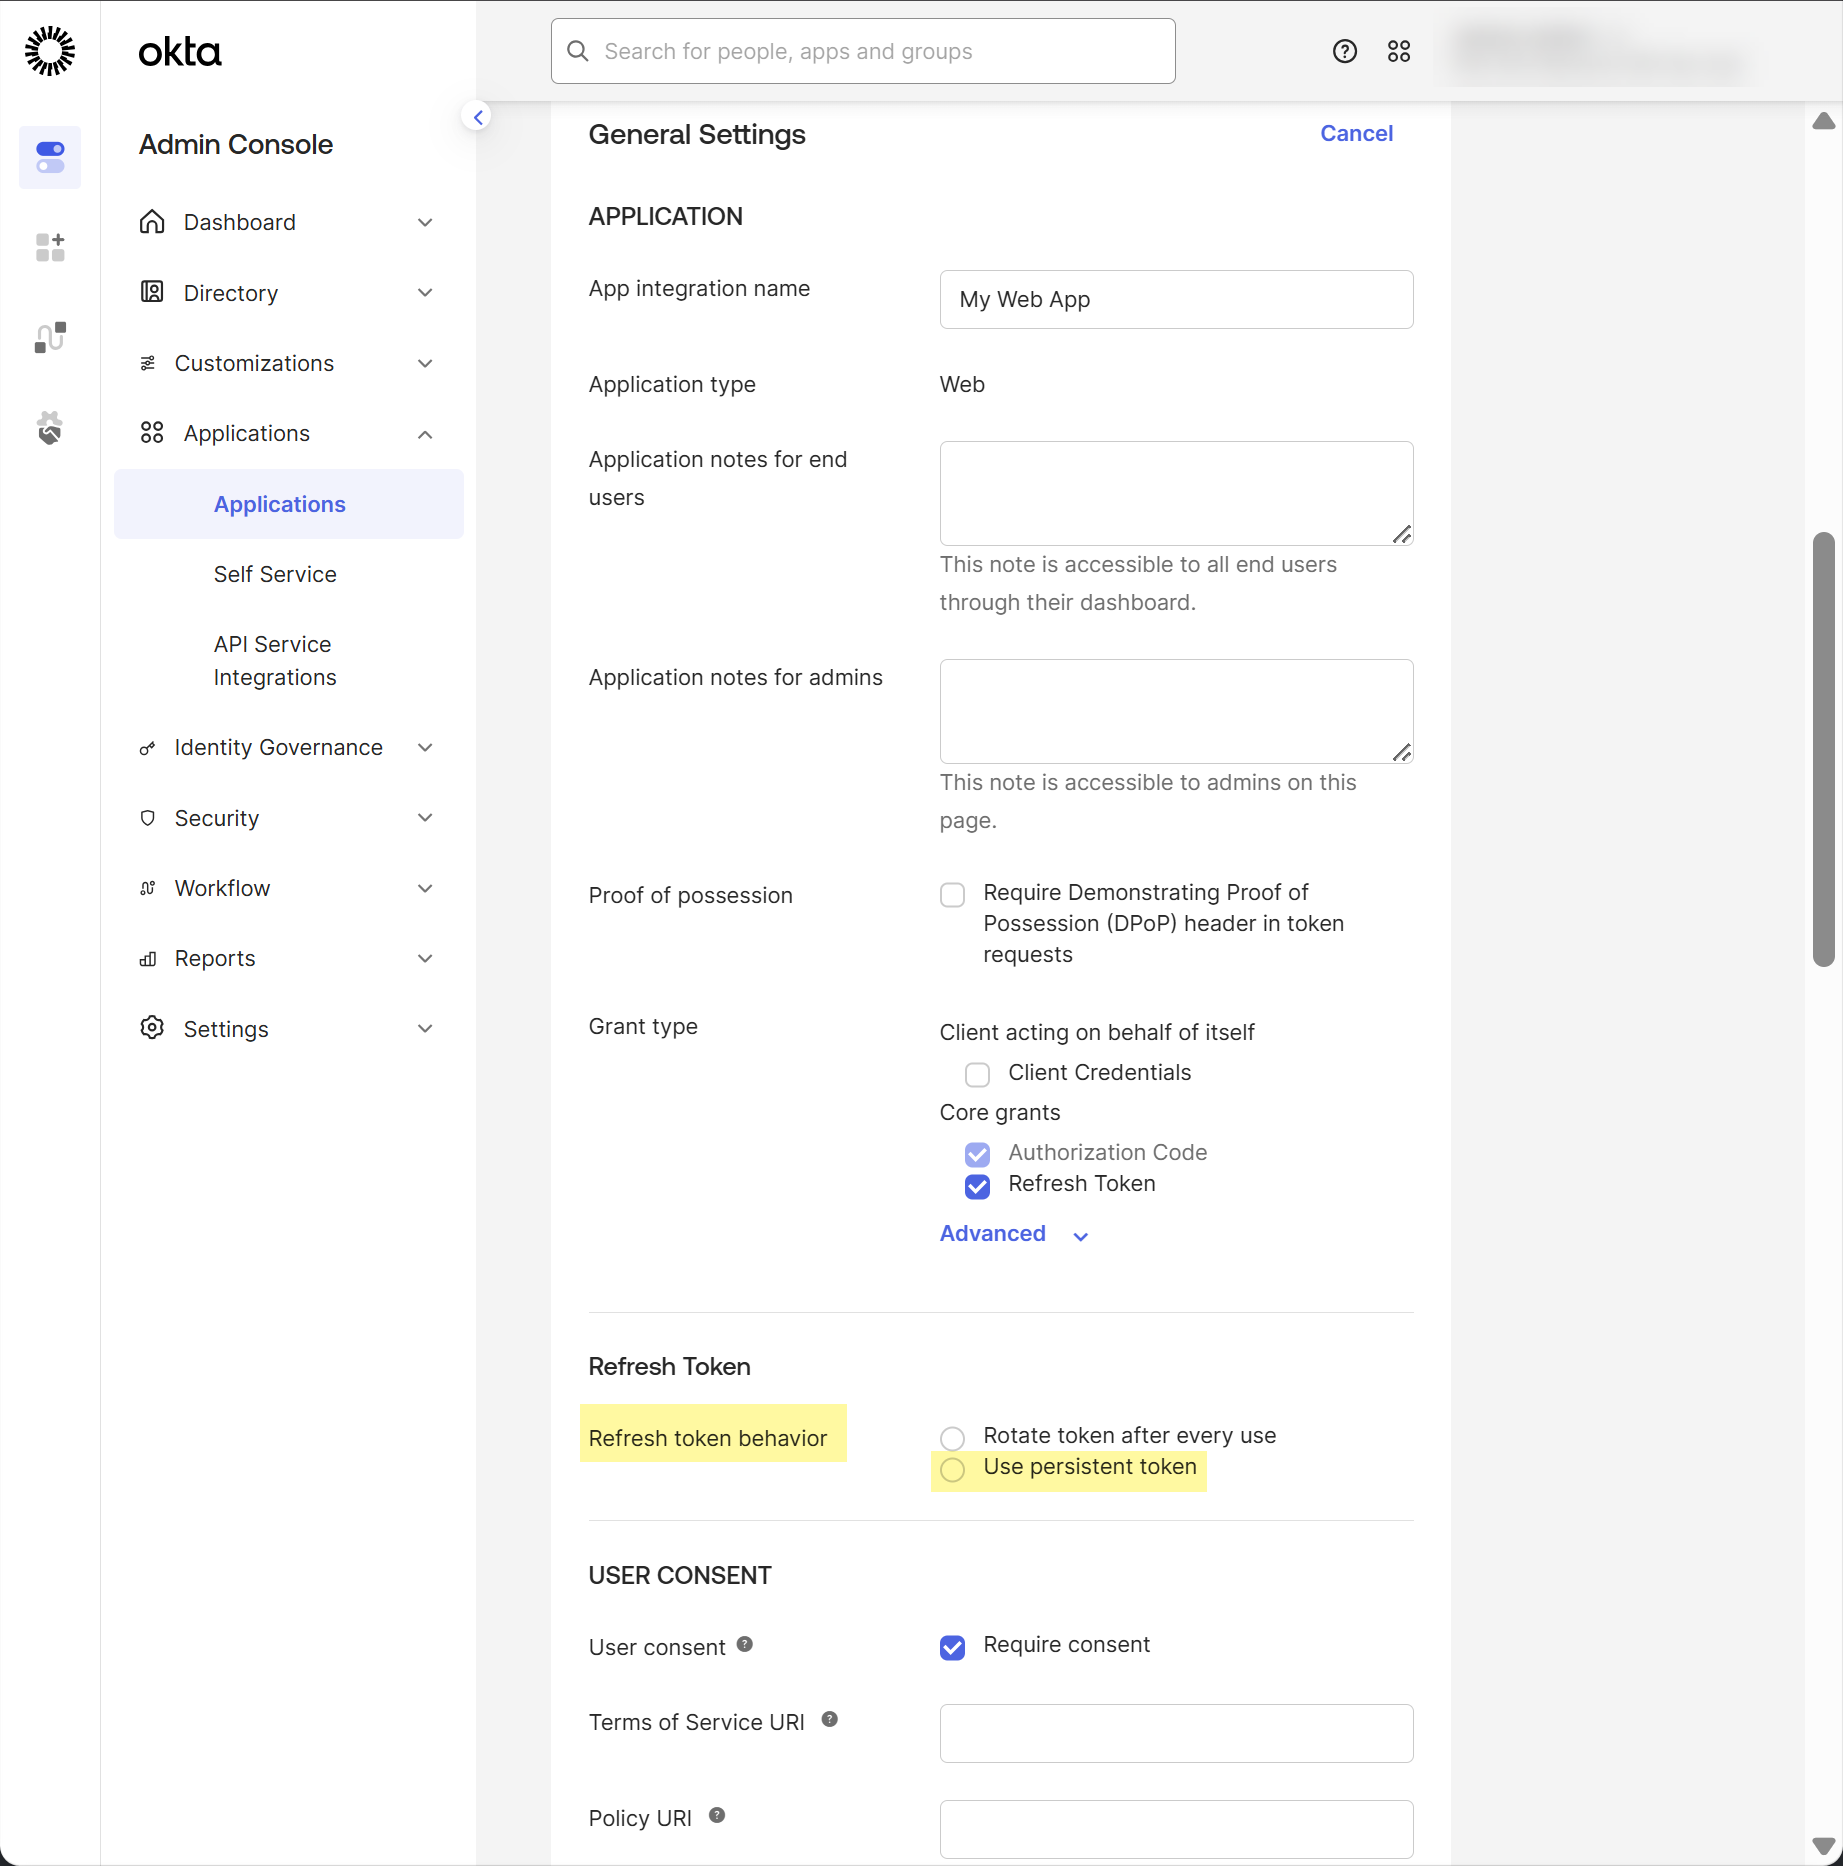
Select Use persistent token.
If you select the Auth Code
Flow configuration, you must reconnect the Okta directory every 90 days
to prevent sync failure. If you don't want to reconnect the Okta
directory every 90 days, reconnect the directory and select the
Client Credential
Flow option.
Save your changes.
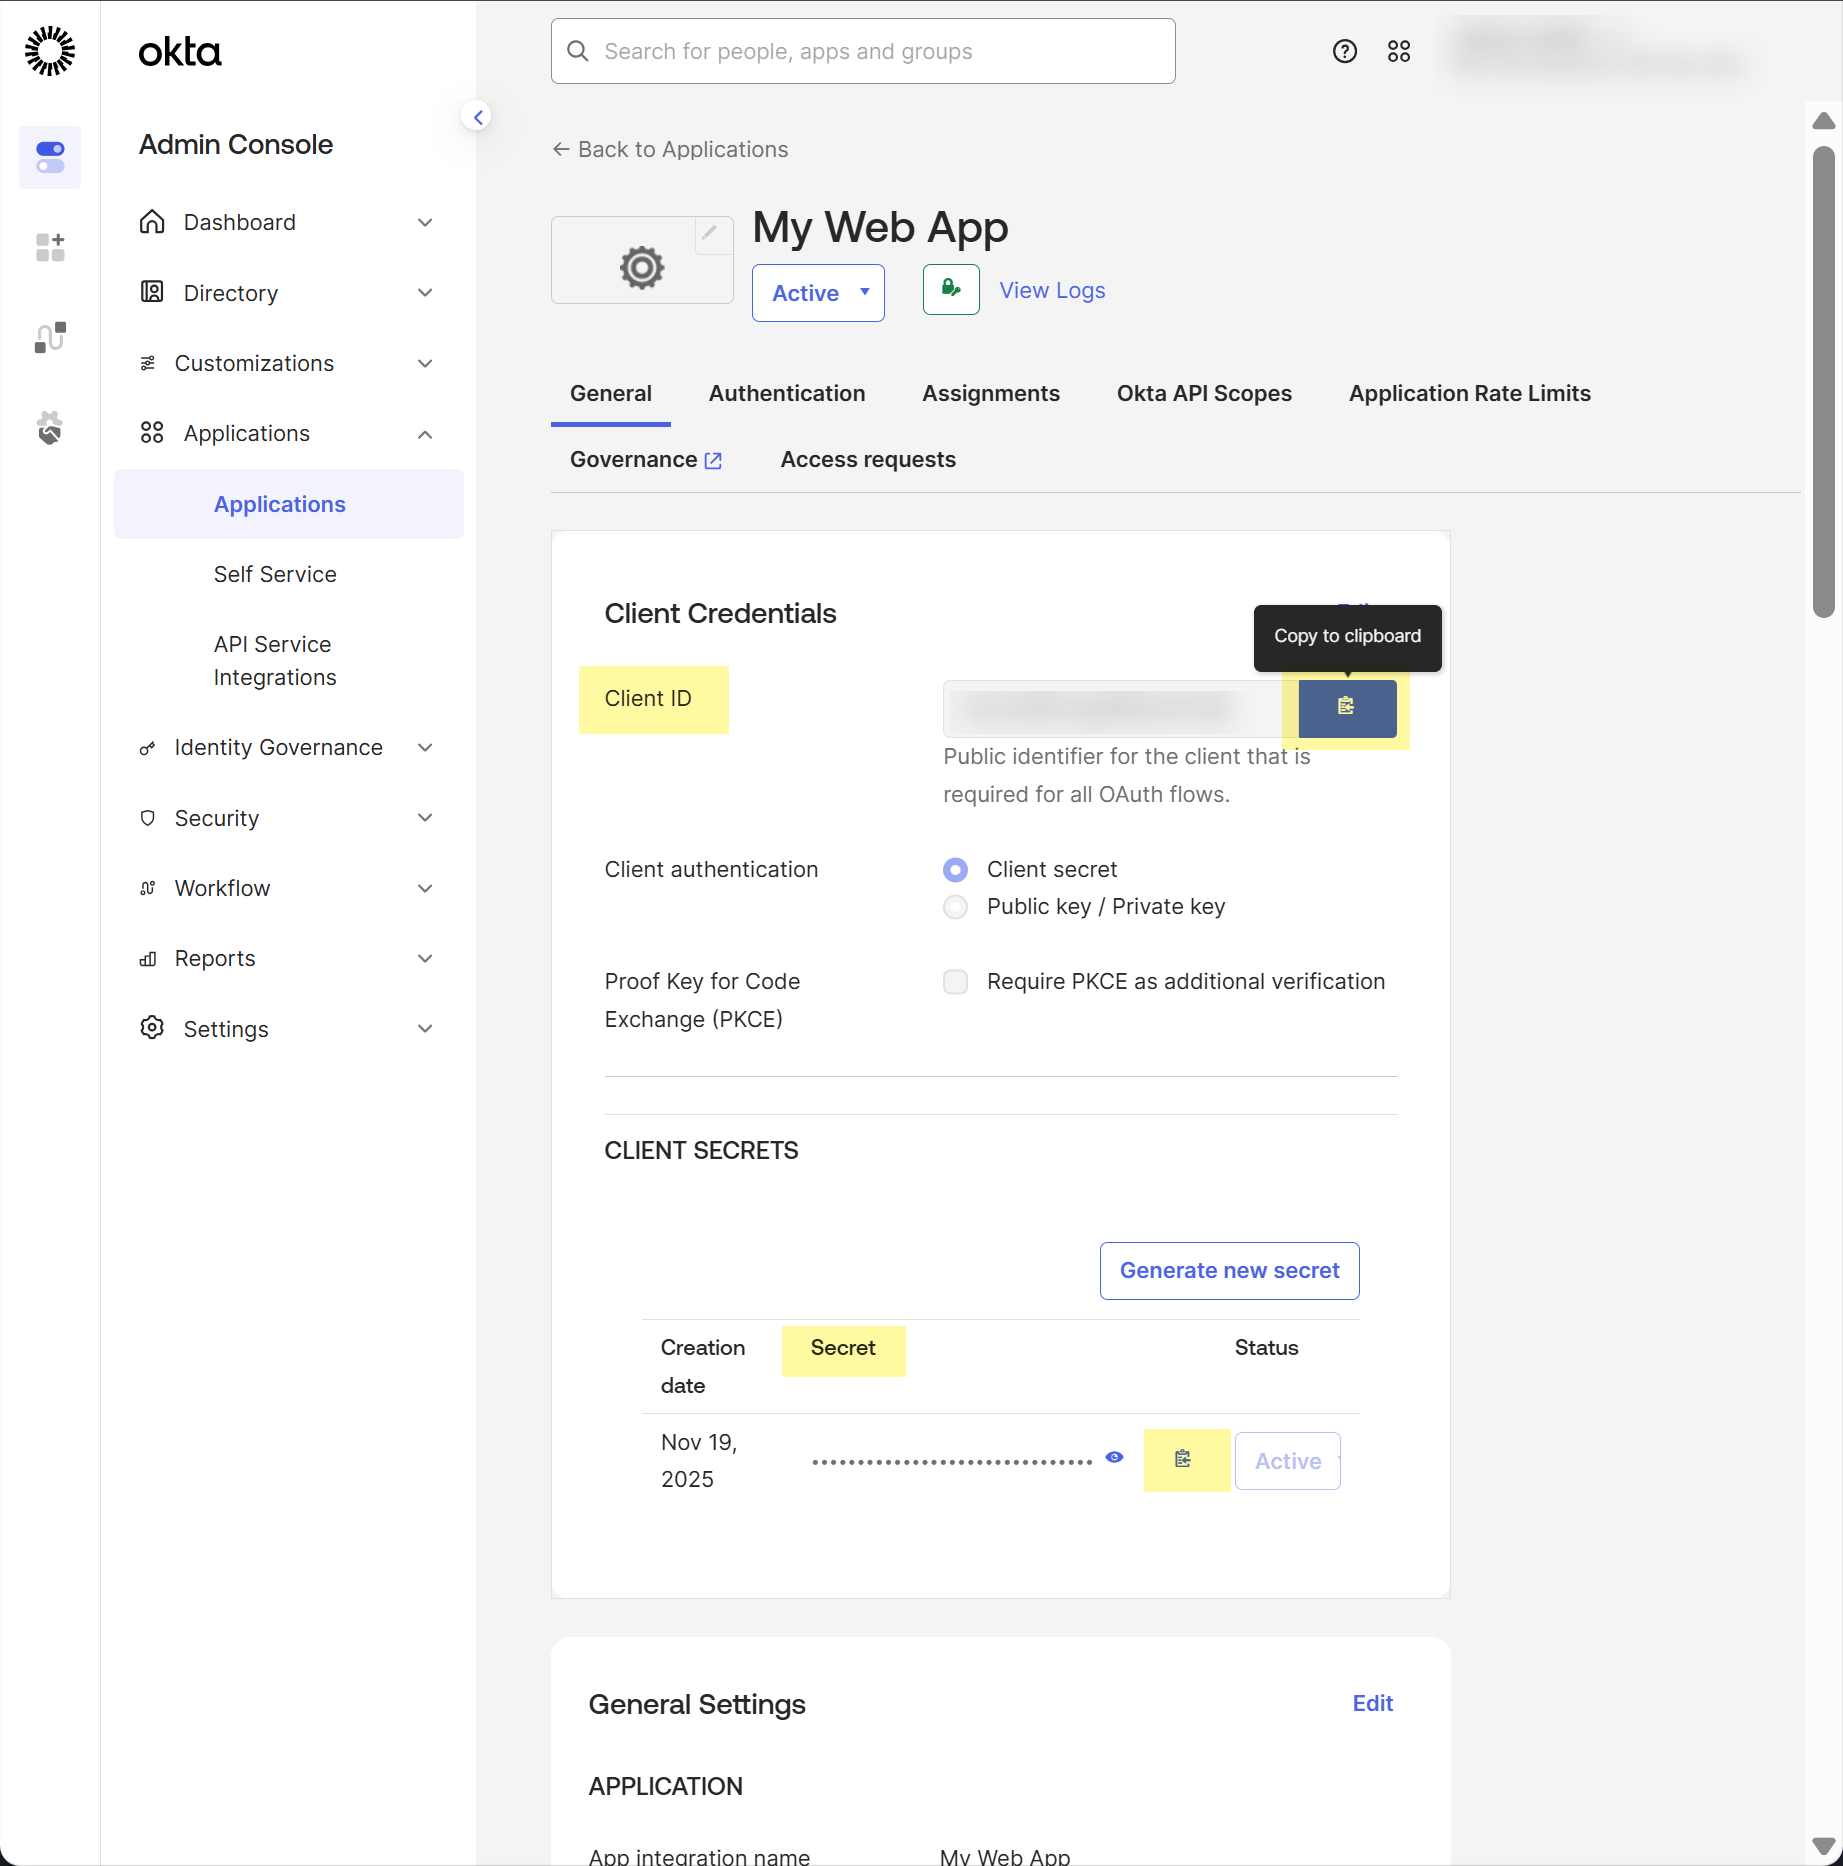
Obtain the information about your Okta app integration that you need to
configure in the Cloud Identity Engine.
At the top of the page, select
General (if it is not already selected), then
copy your Client
ID and Secret.
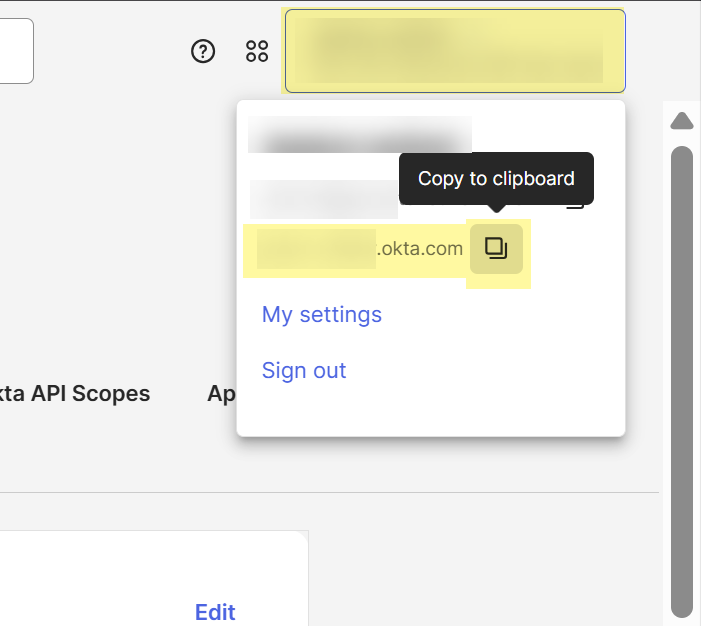
Select your username in the upper right to copy your Okta domain.
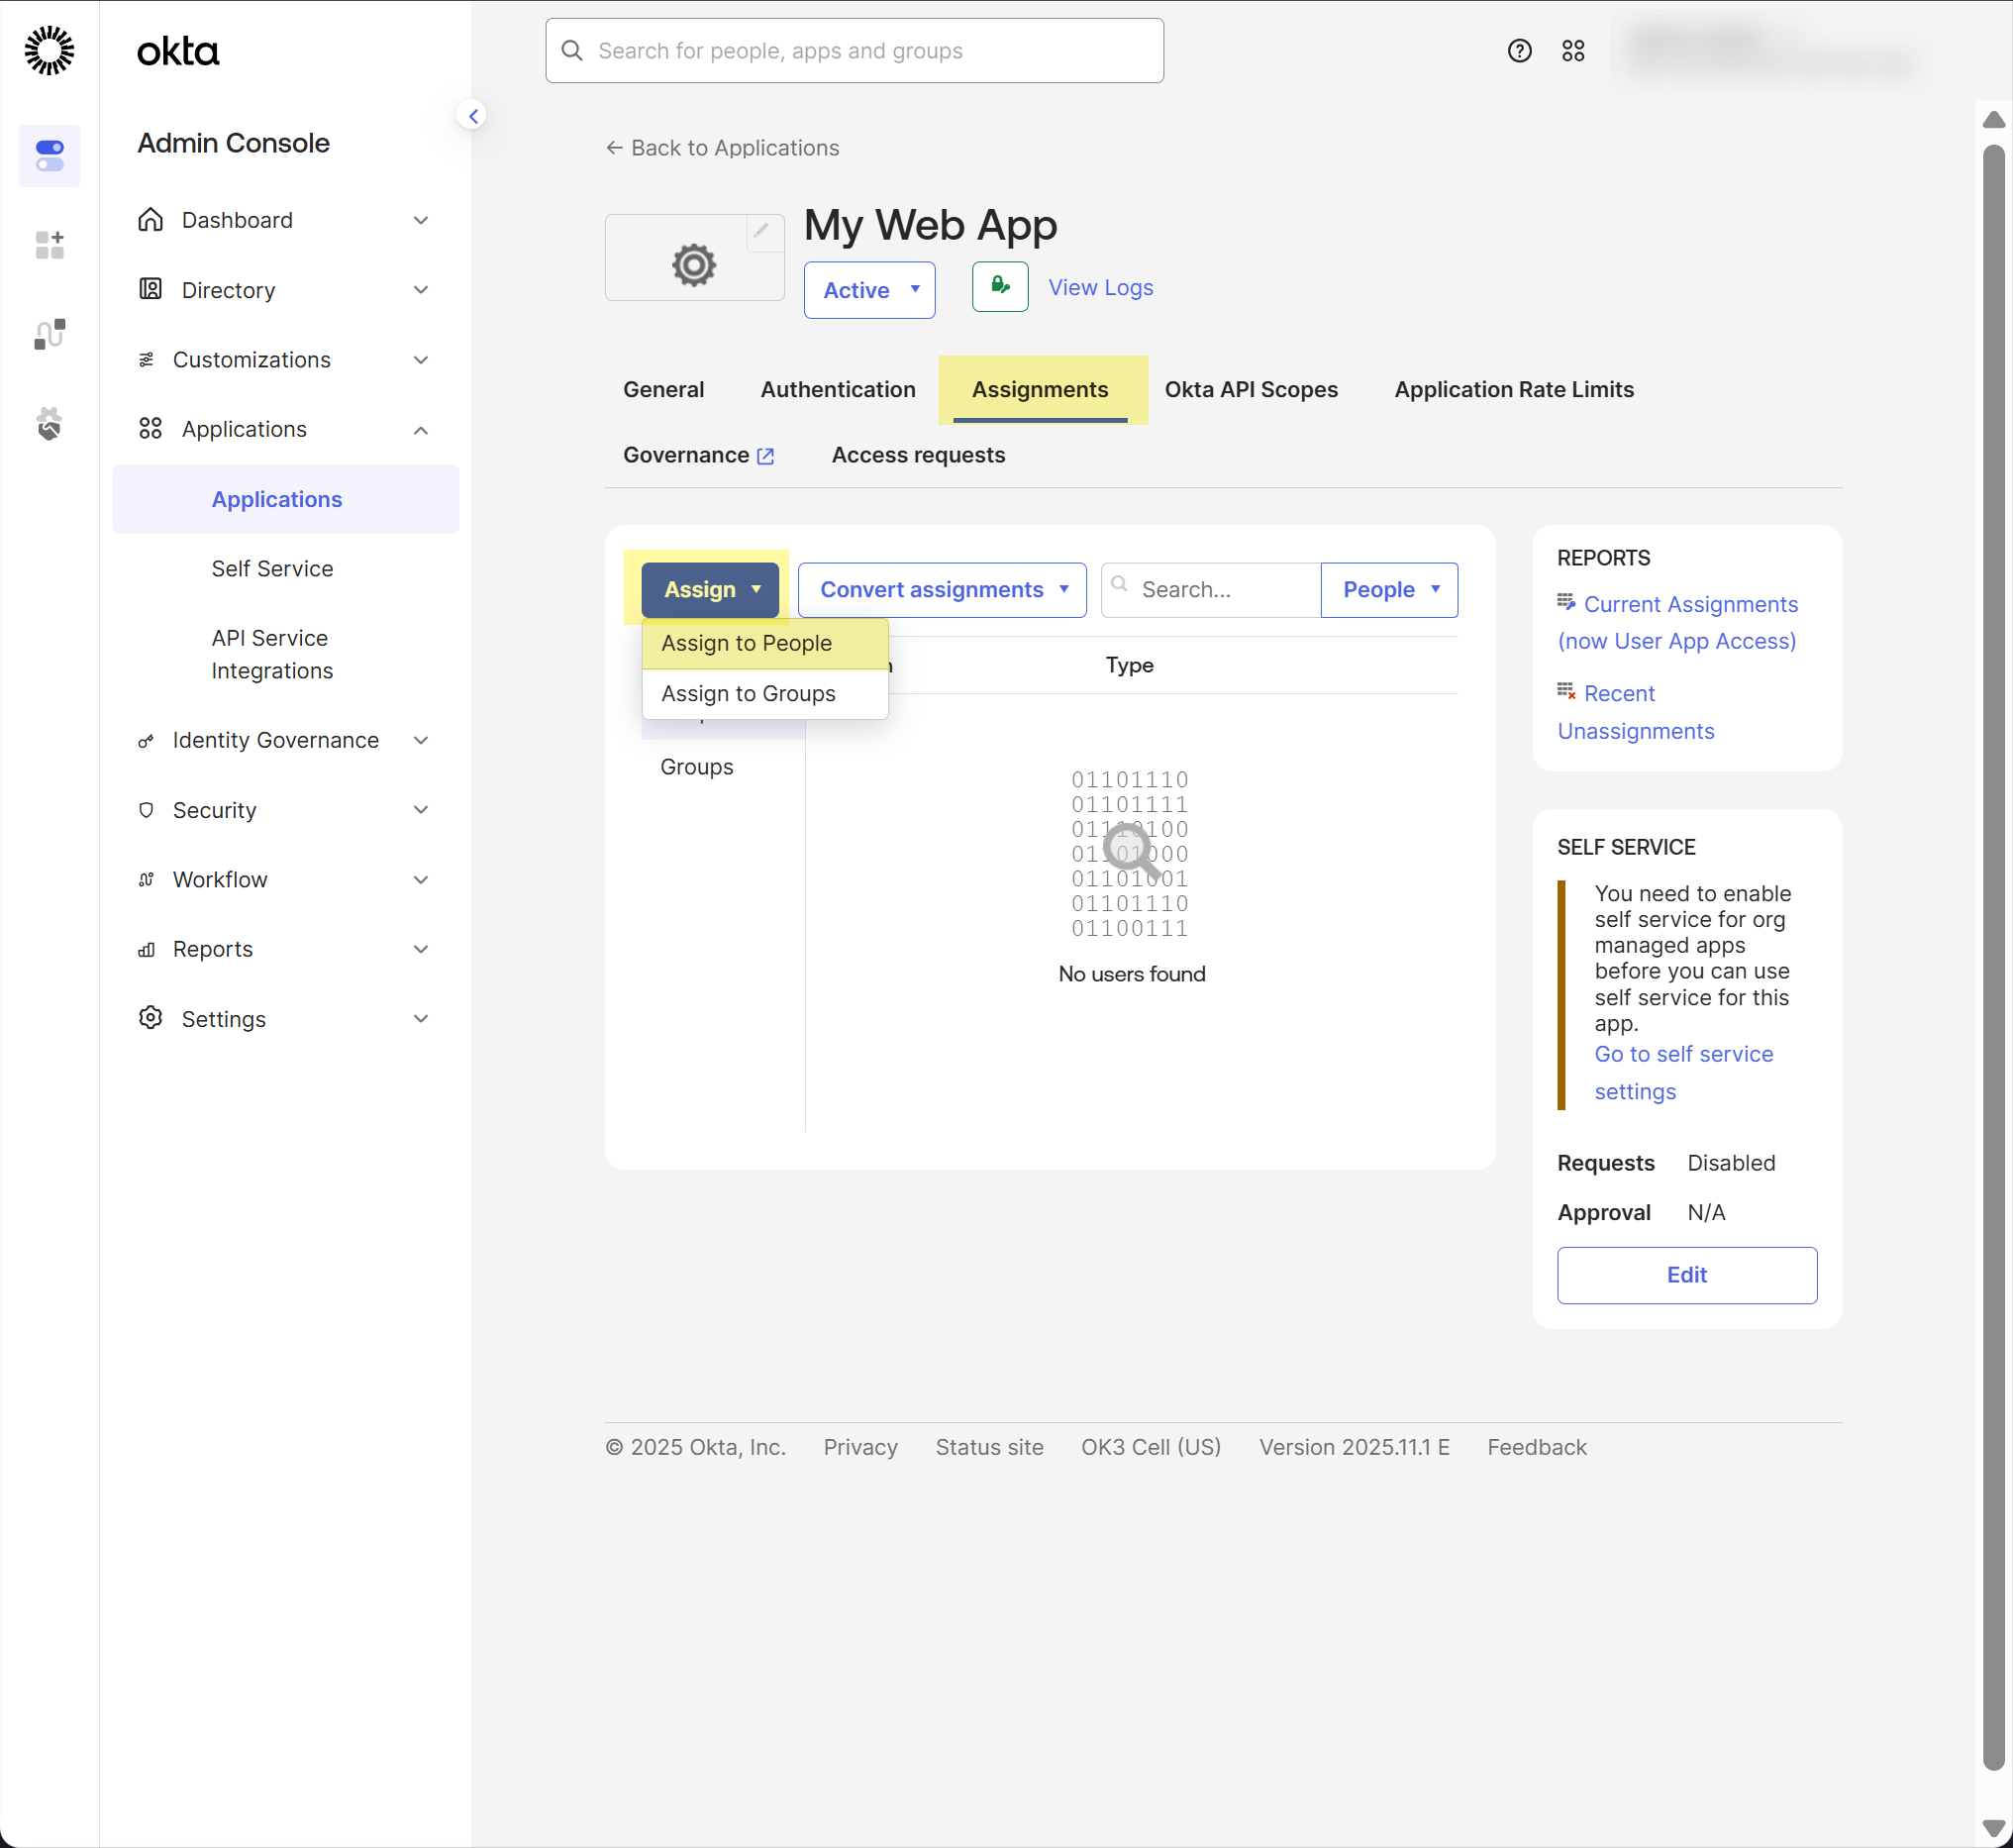
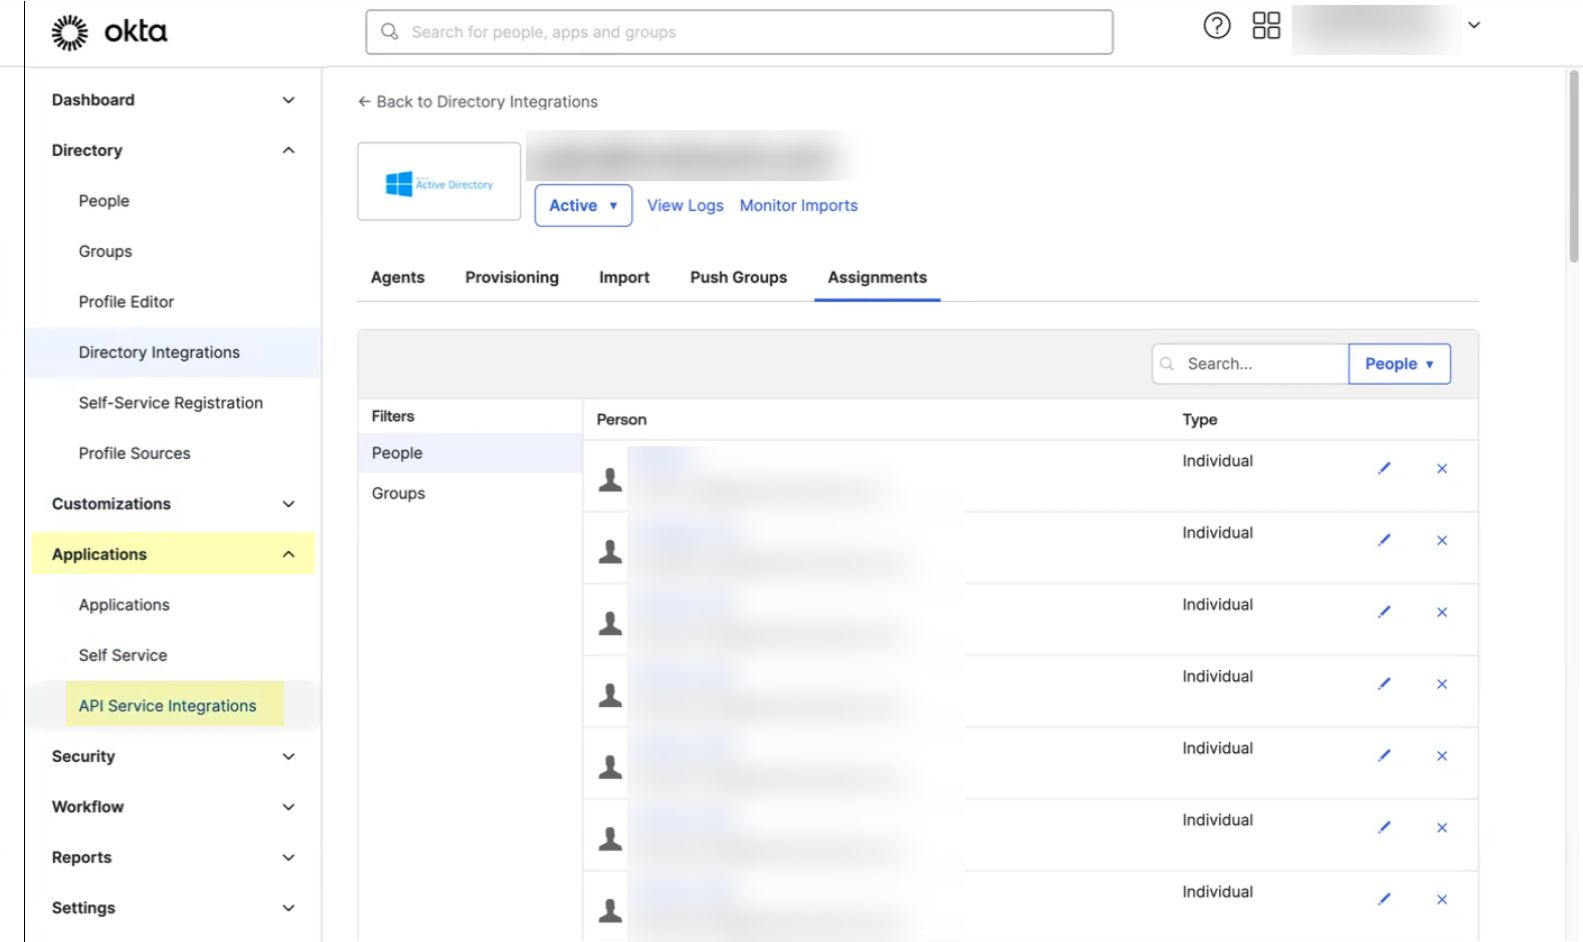
Assign the app and grant the required permissions for the Cloud Identity Engine
to access your Okta directory information.
Select Assignments, then assign the Cloud Identity
Engine app to the administrator who configures the Okta integration in
the Cloud Identity Engine.
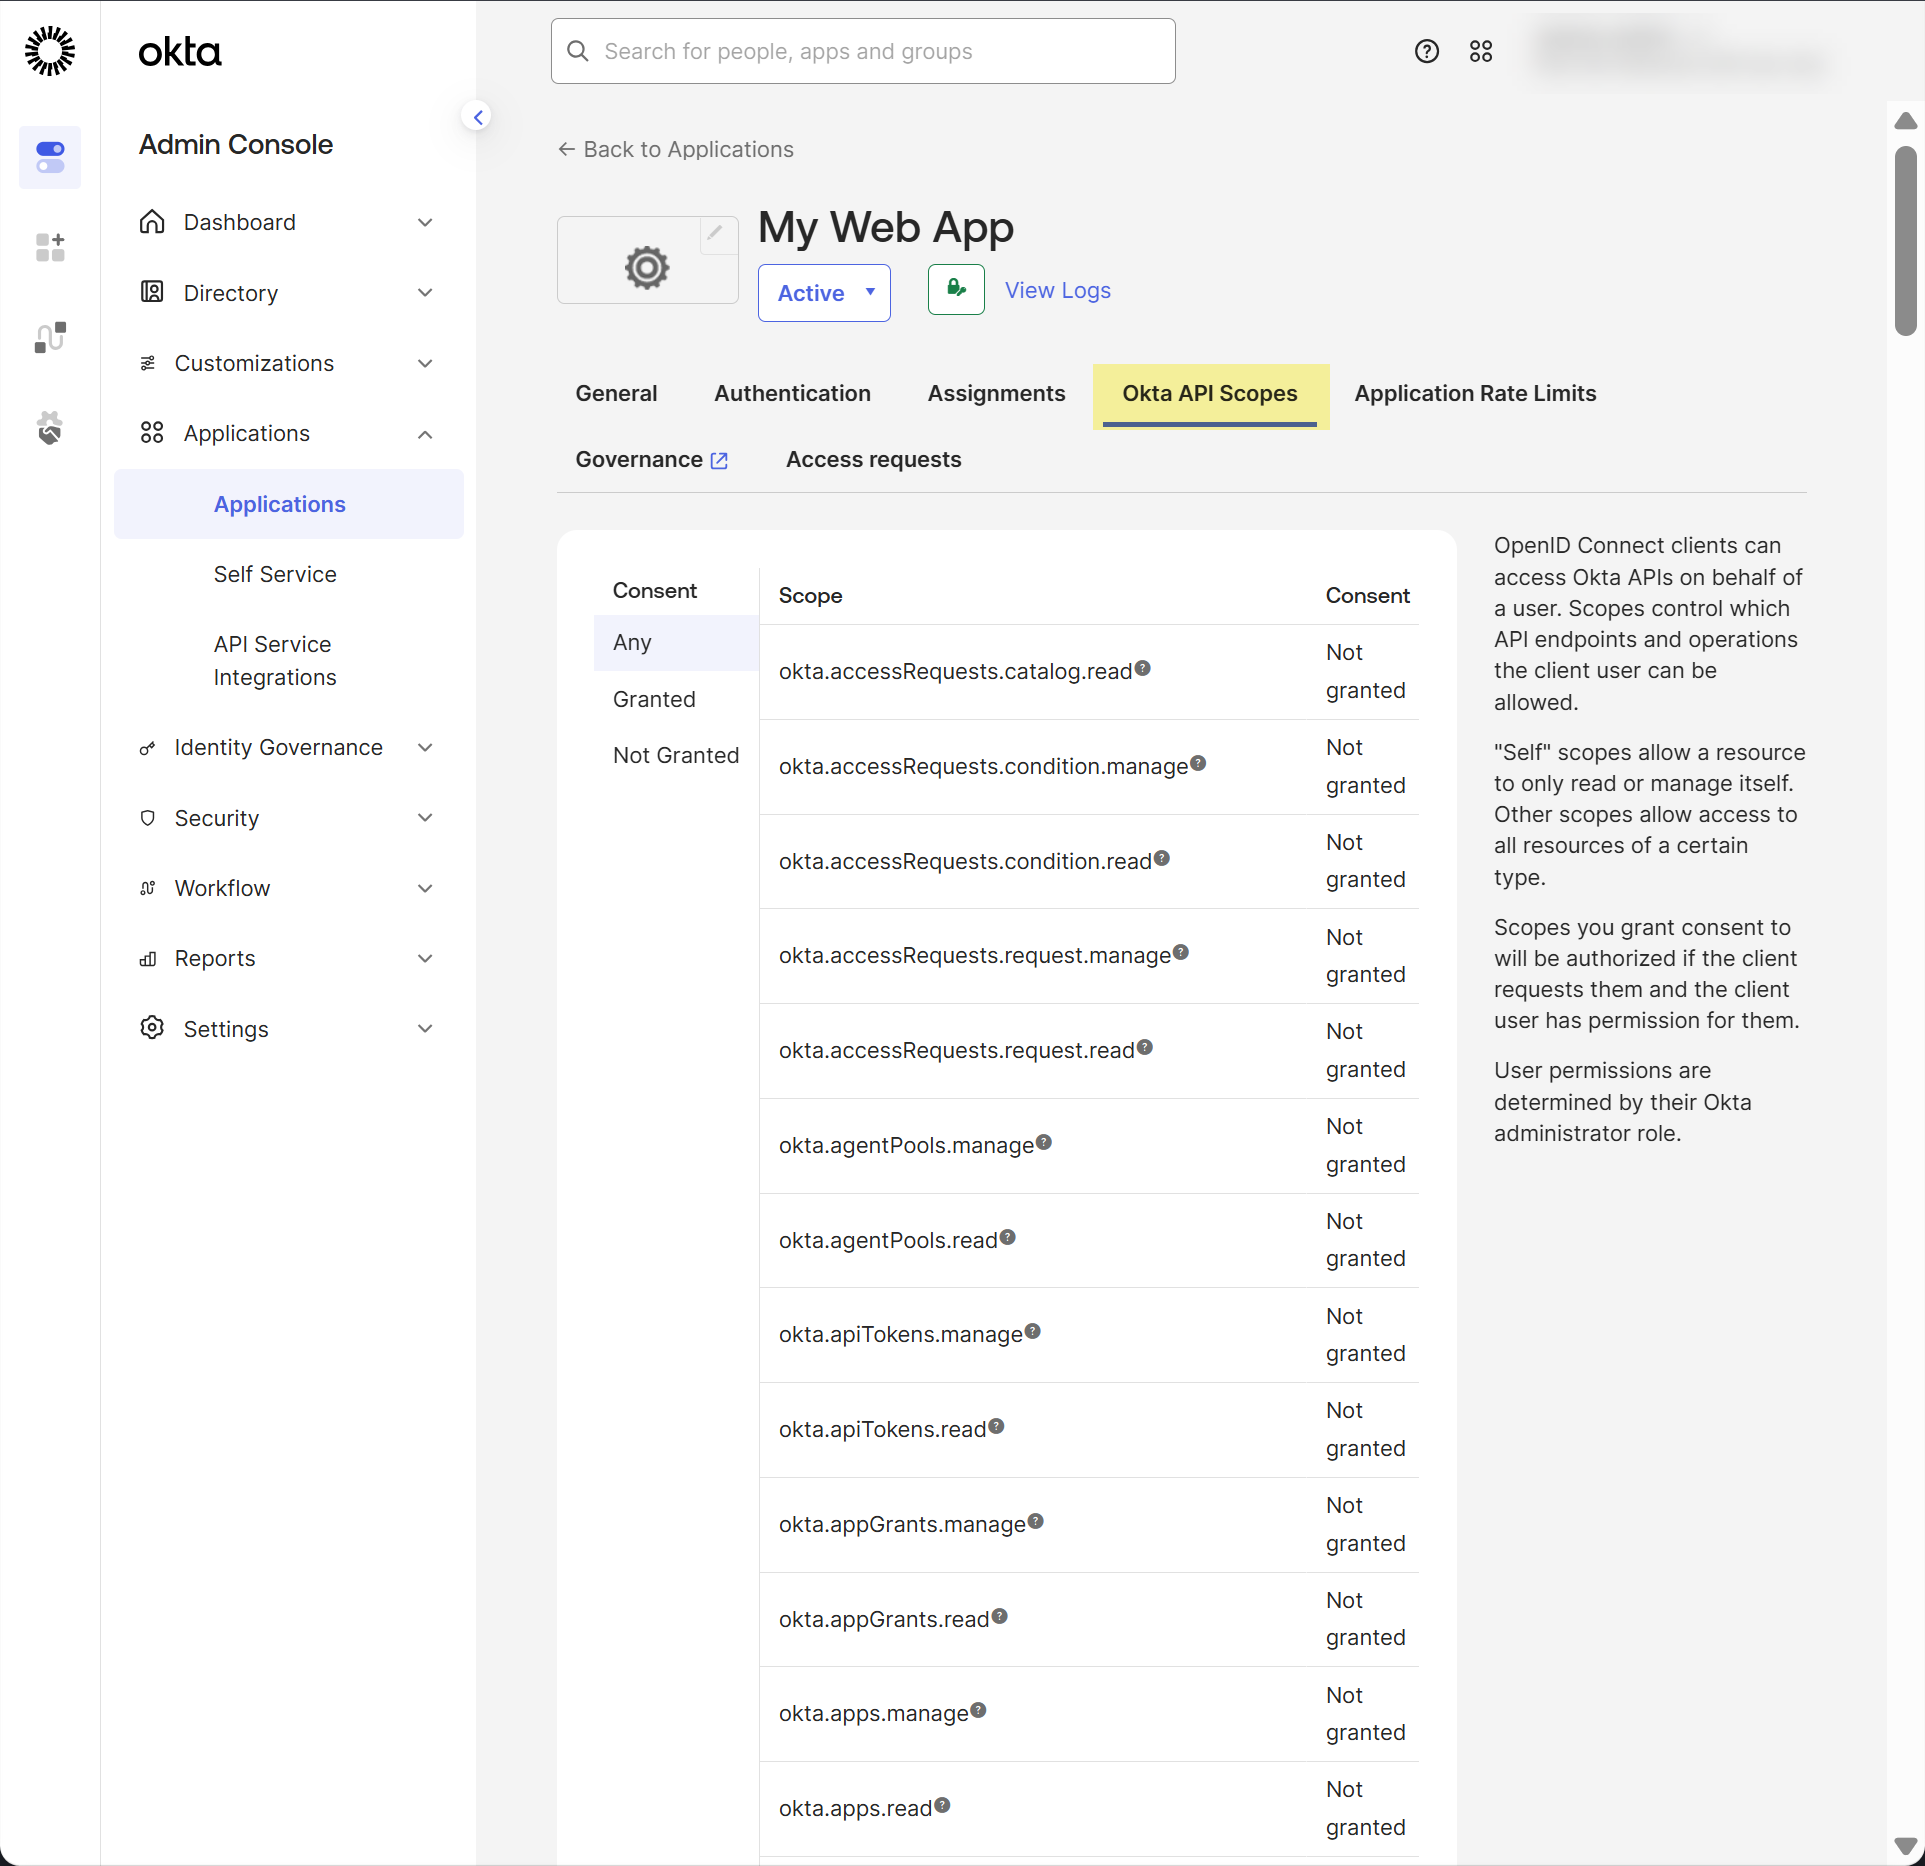
Select Okta API Scopes and grant consent to the following
scopes:
okta.authorizationServers.read(Required only if you have more than one Okta authorization
server)
okta.groups.read
okta.logs.read
The Cloud Identity Engine requires this scope to read the
following log events only:
user.lifecycle.delete.initiated
group.lifecycle.delete
user.lifecycle.activate
user.lifecycle.deactivate
The Cloud Identity Engine uses a filter to retrieve
only these events, it does not receive any other events for
this scope.
okta.users.read
okta.users.read.self
If you want the Cloud Identity Engine to
collect enterprise application data so that it is included when you
View Directory Data, you must grant consent to the
okta.apps.read scope before you select
the option in step 9.
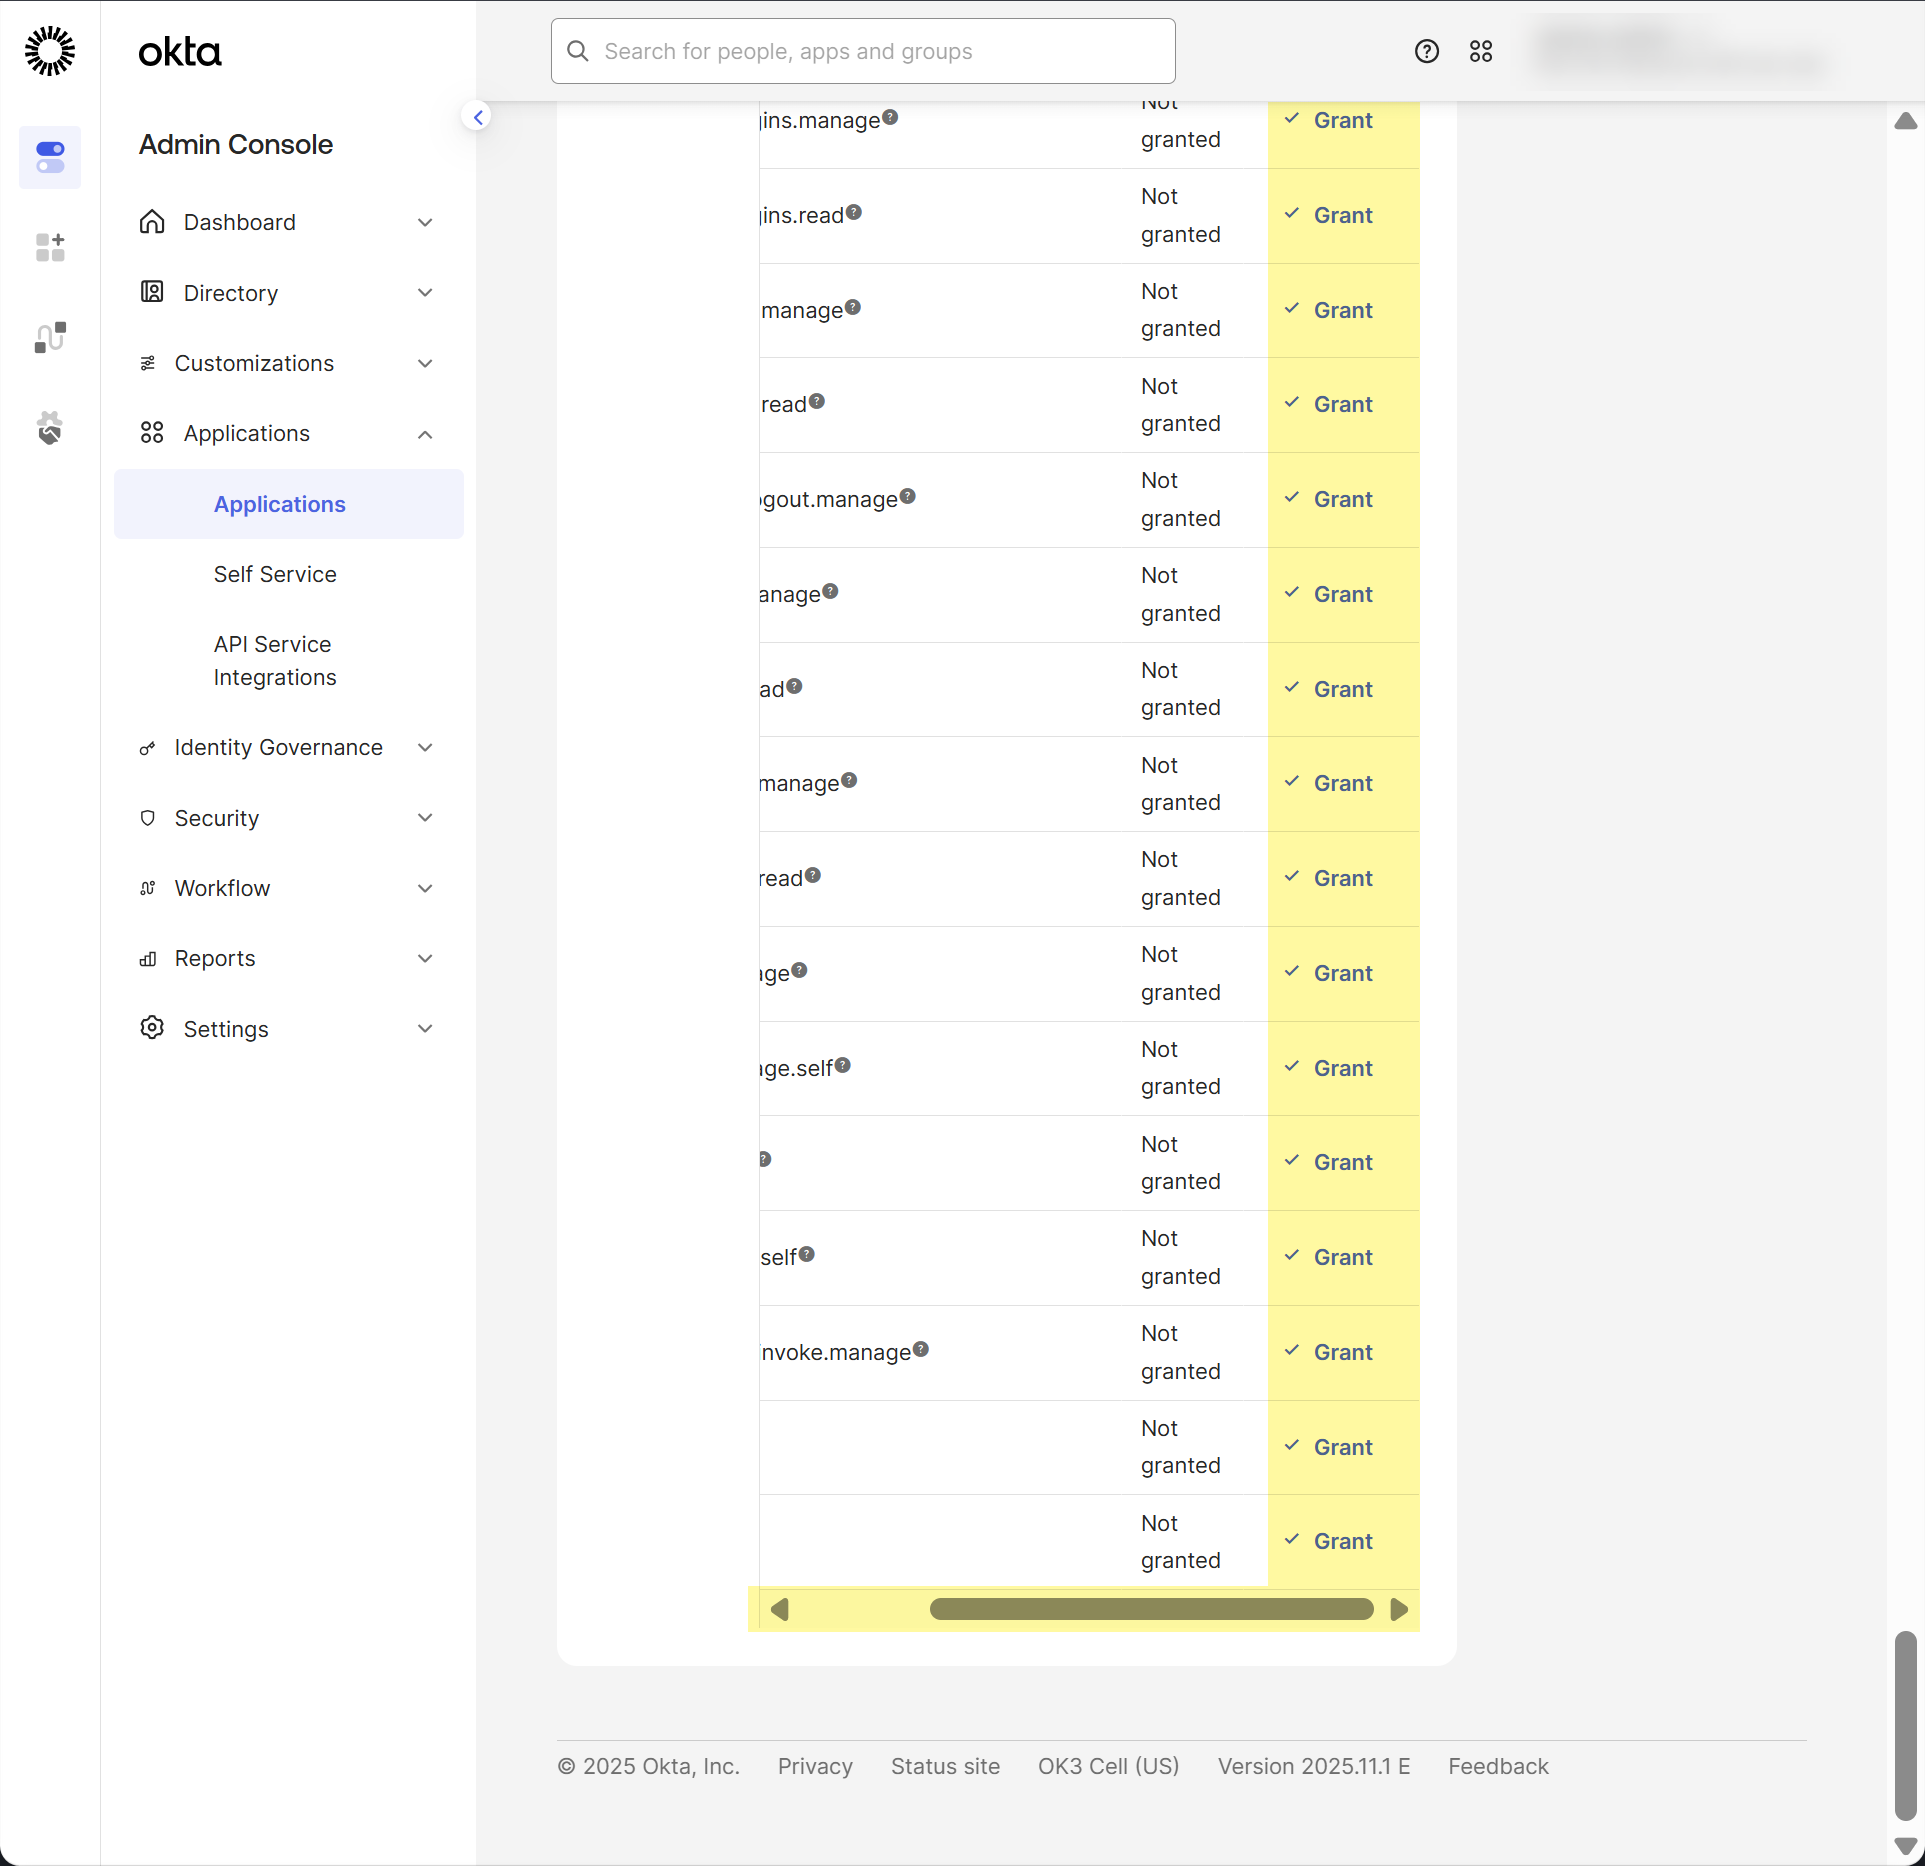
If all the scopes display Not
granted and you cannot view the Grant
option, scroll to the bottom of the page and scroll
over within the table to view the option.
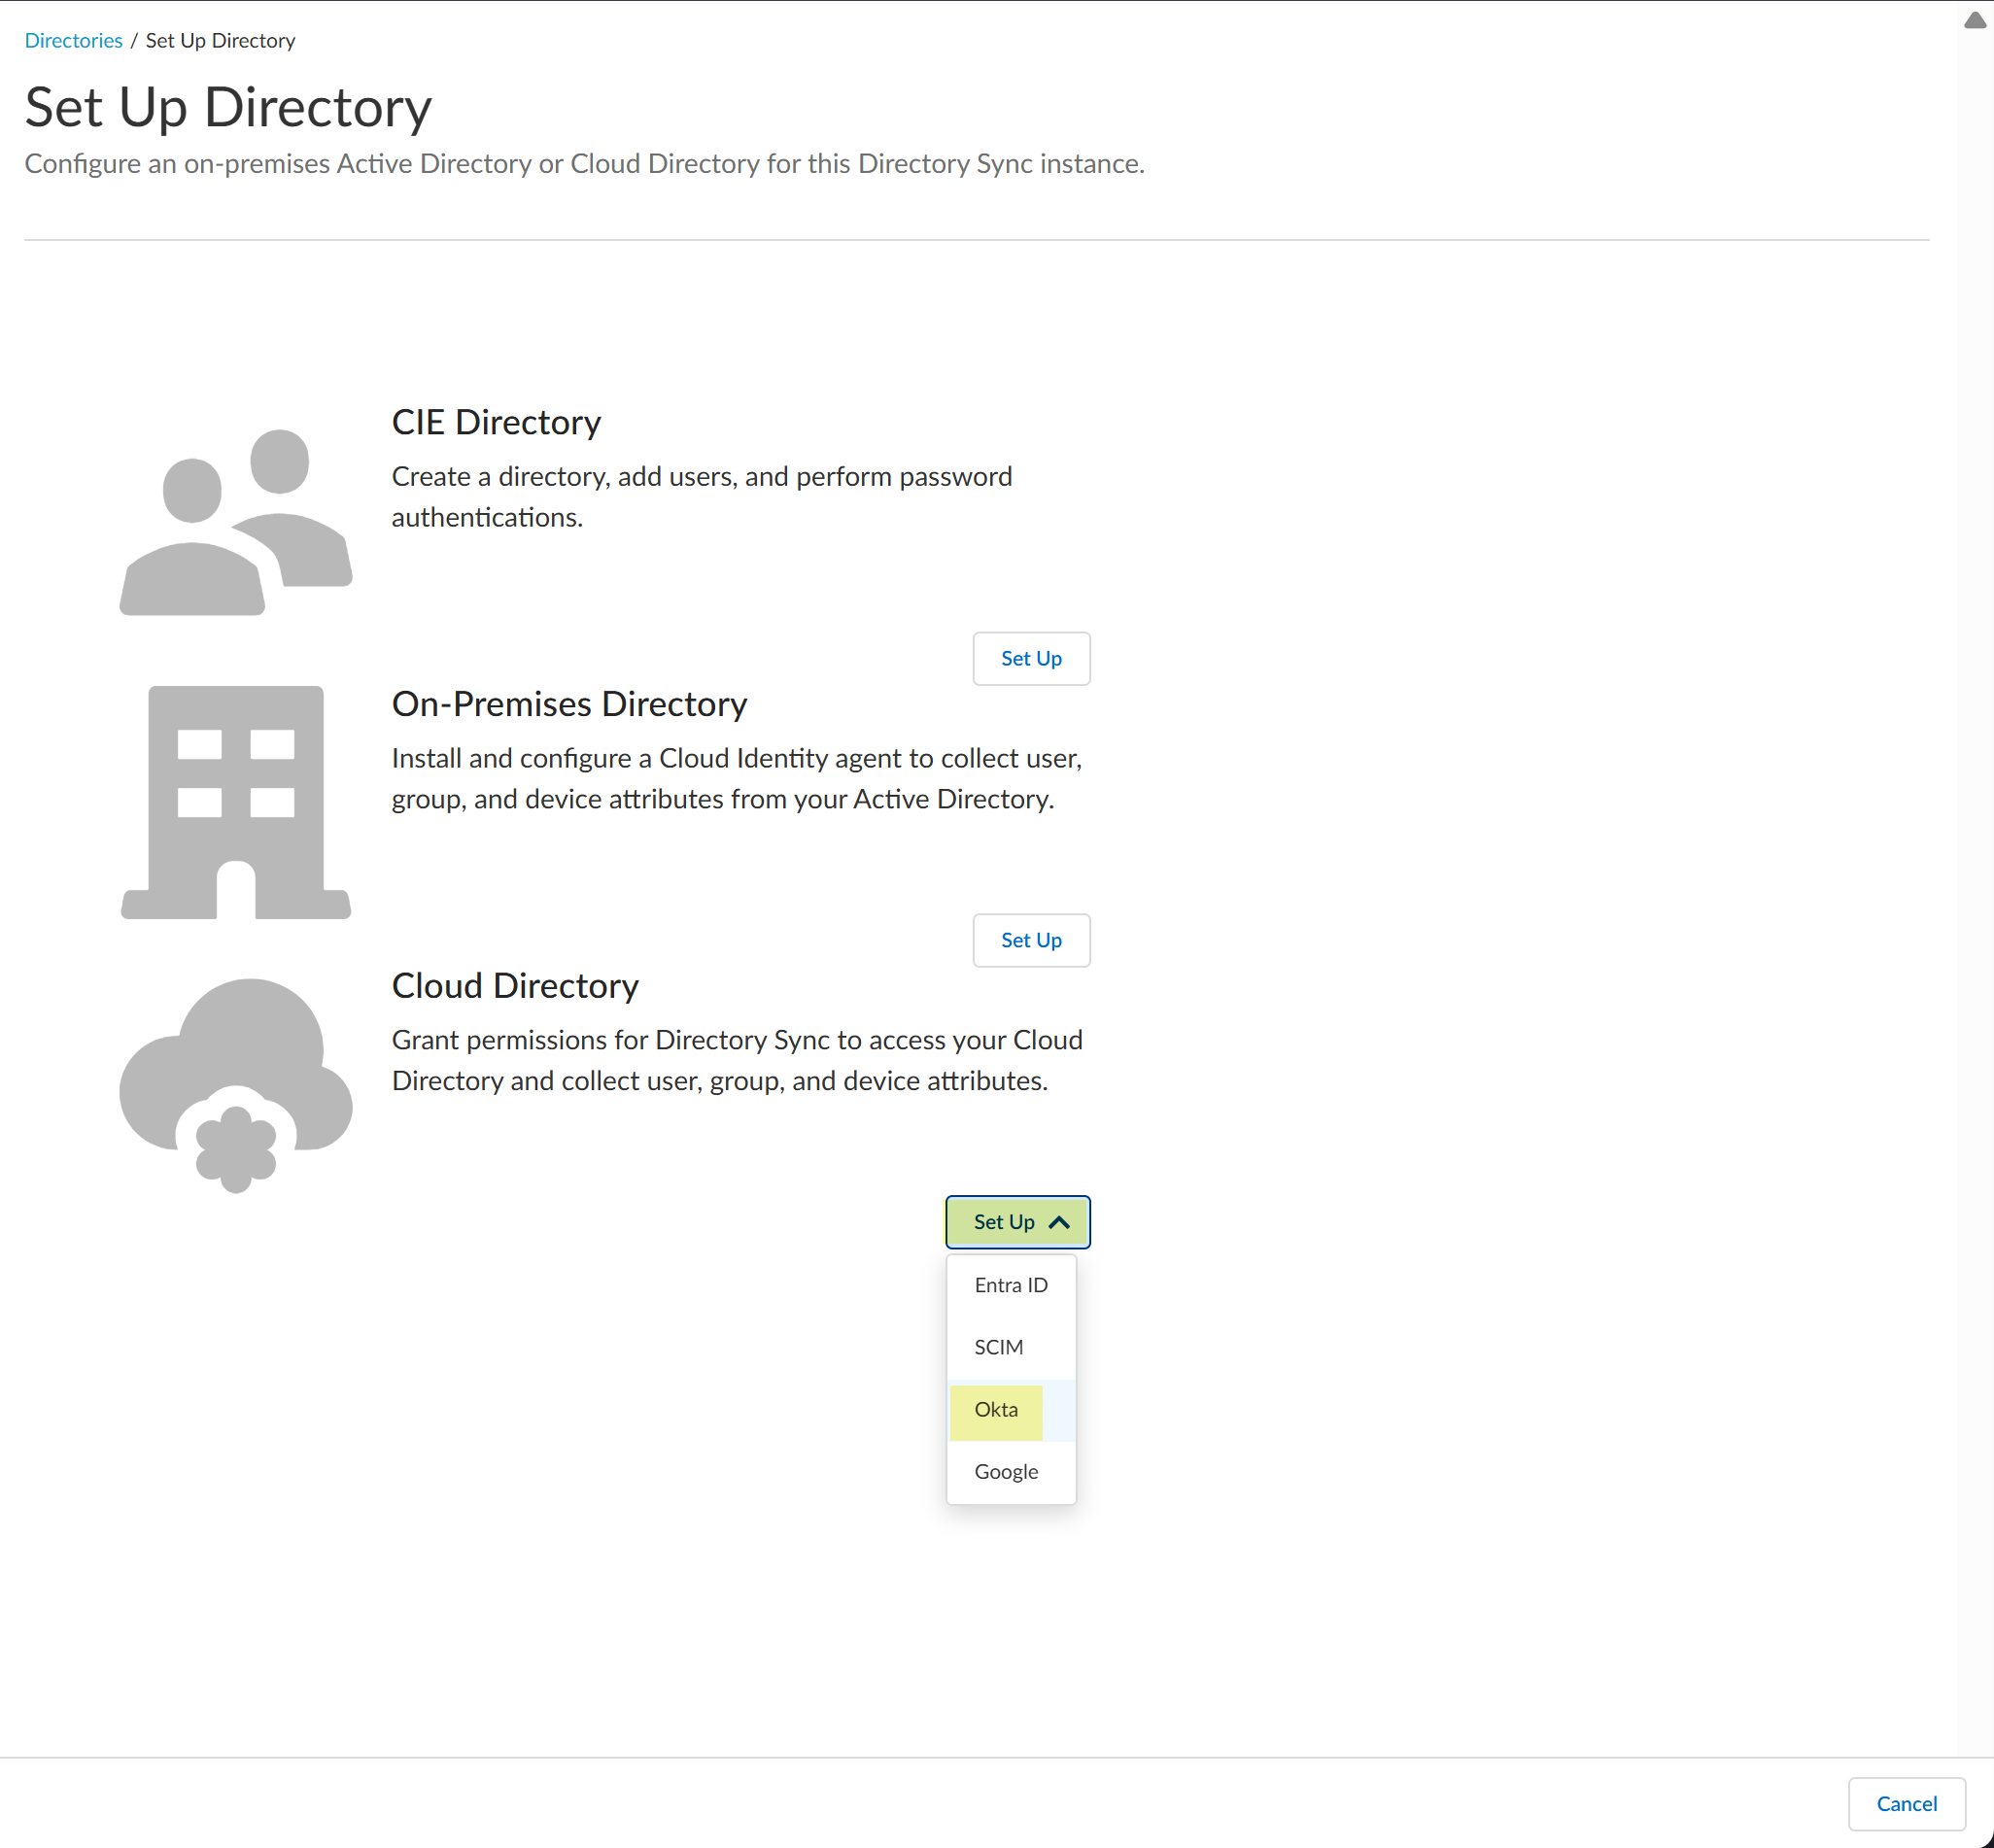
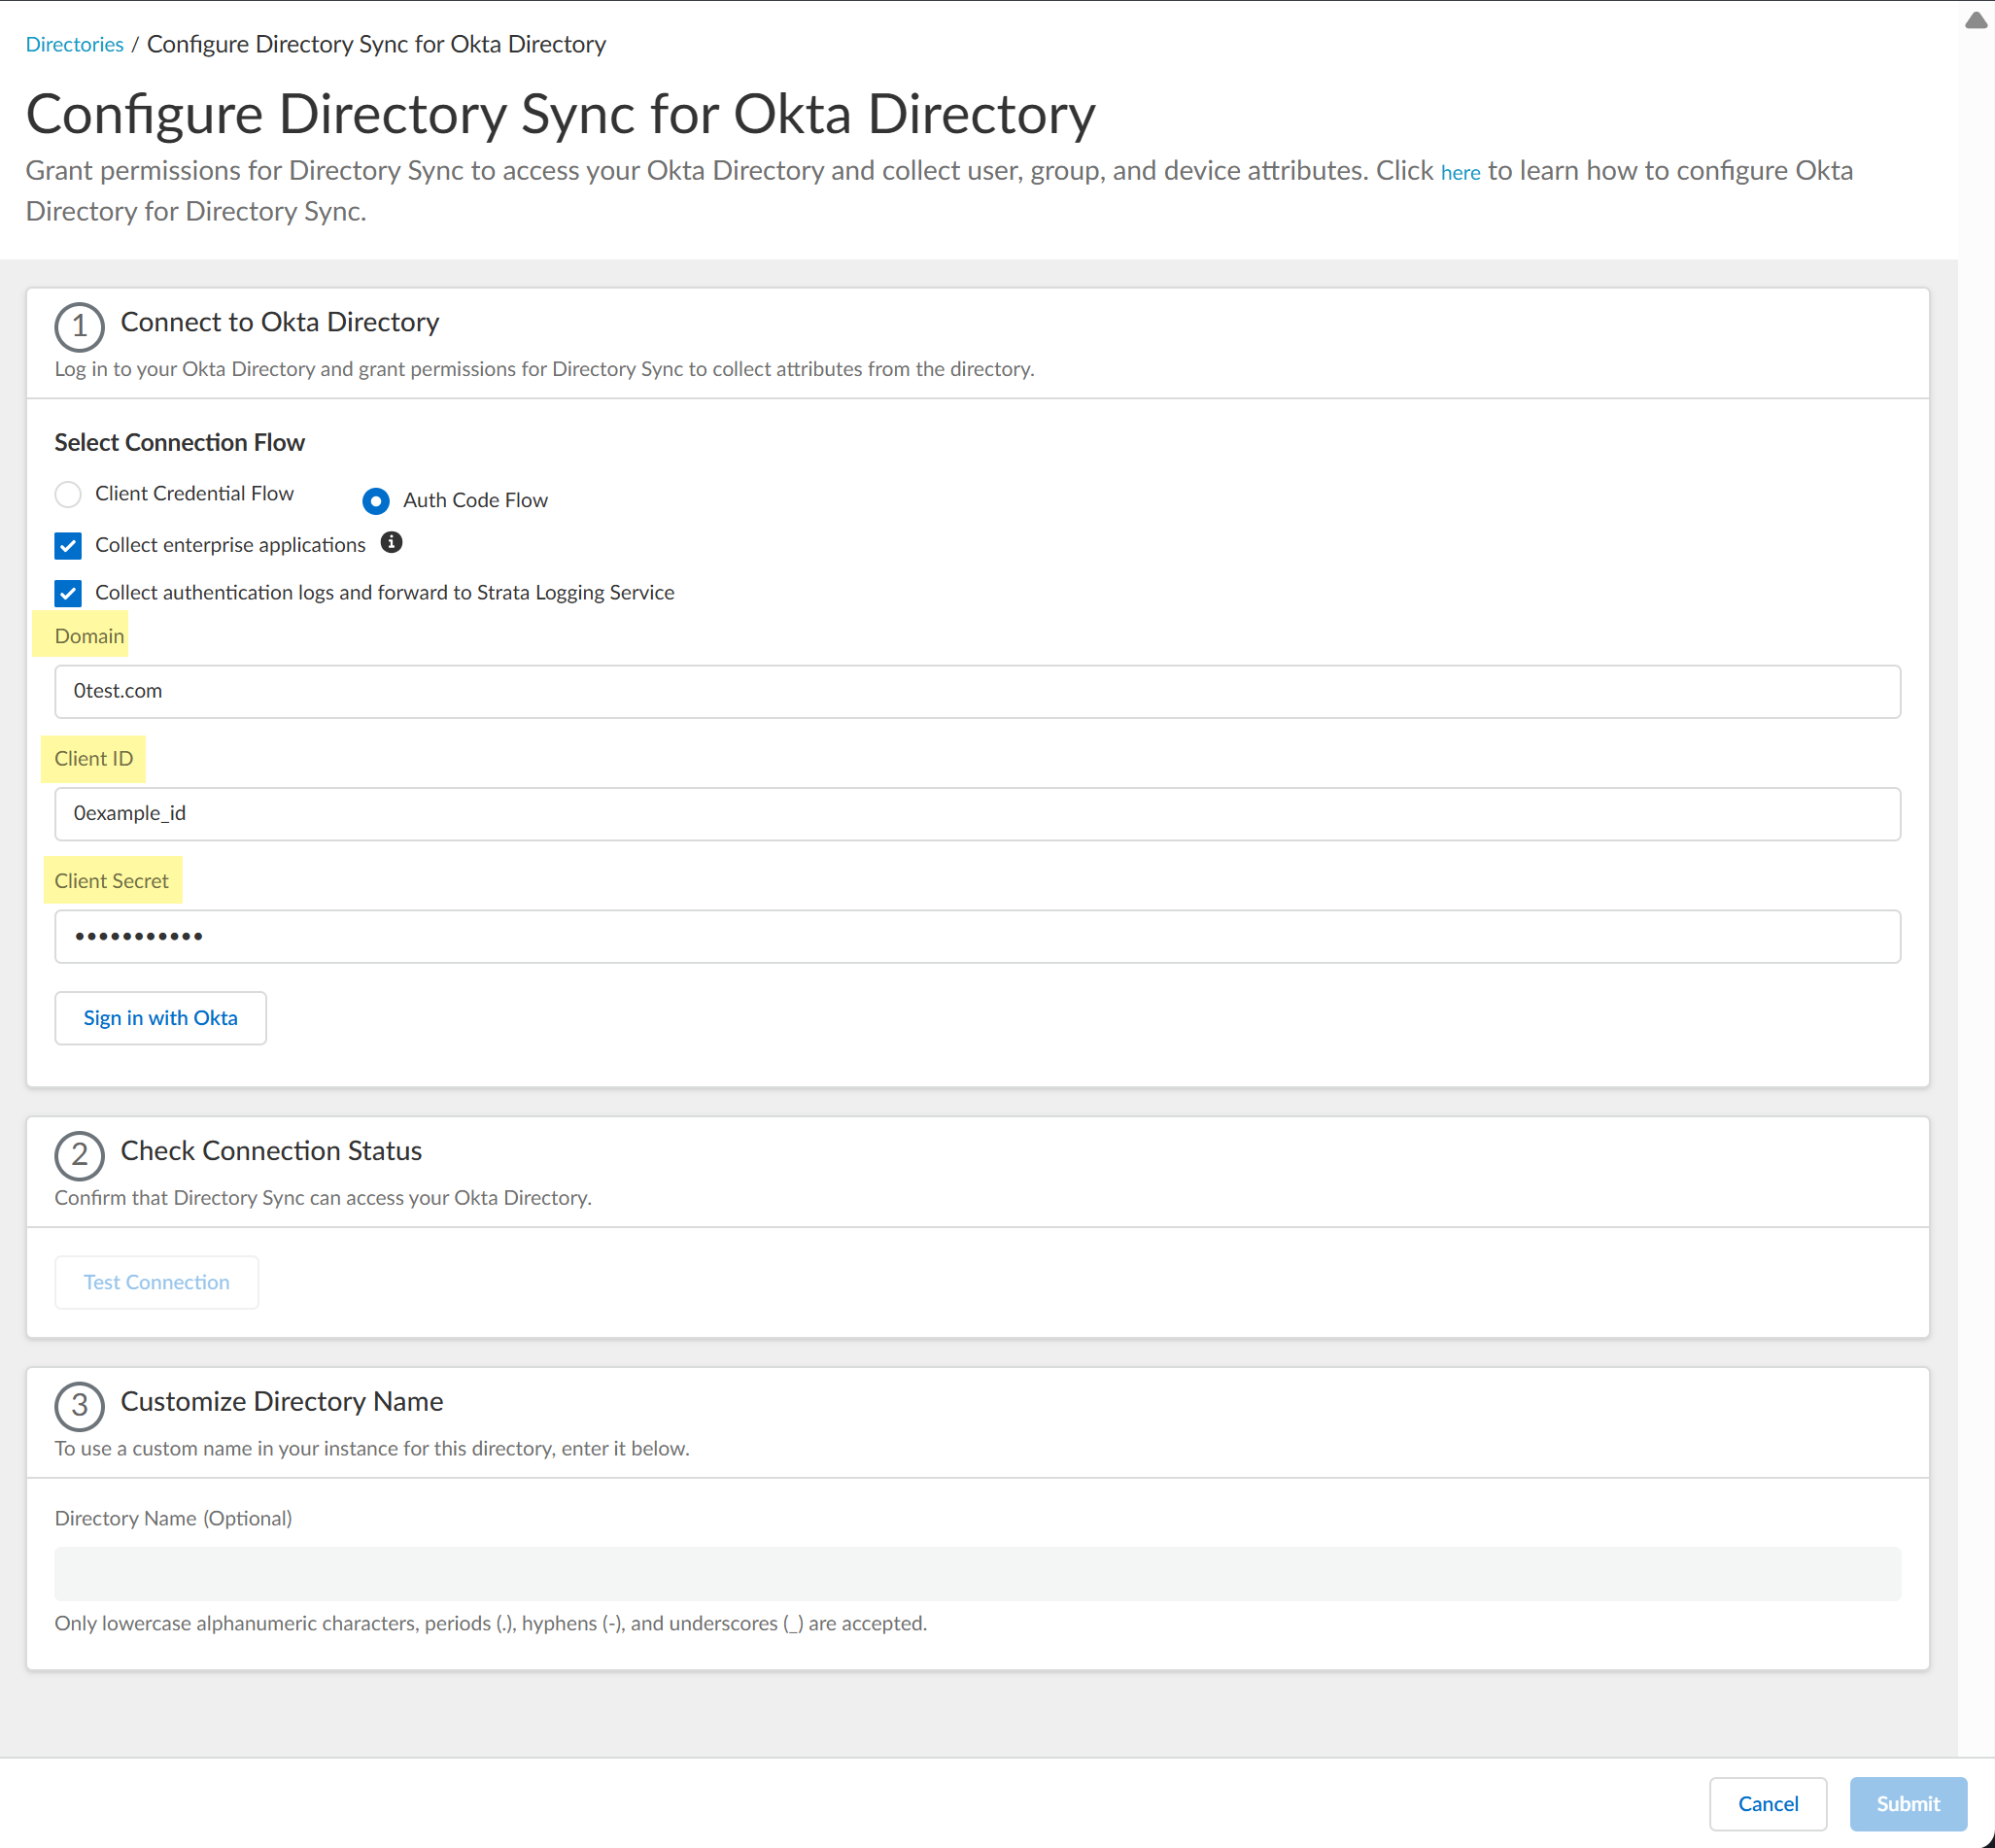
In the Cloud Identity Engine app, select DirectoriesAdd Directory.
Set Up a Cloud Directory and
select Okta.
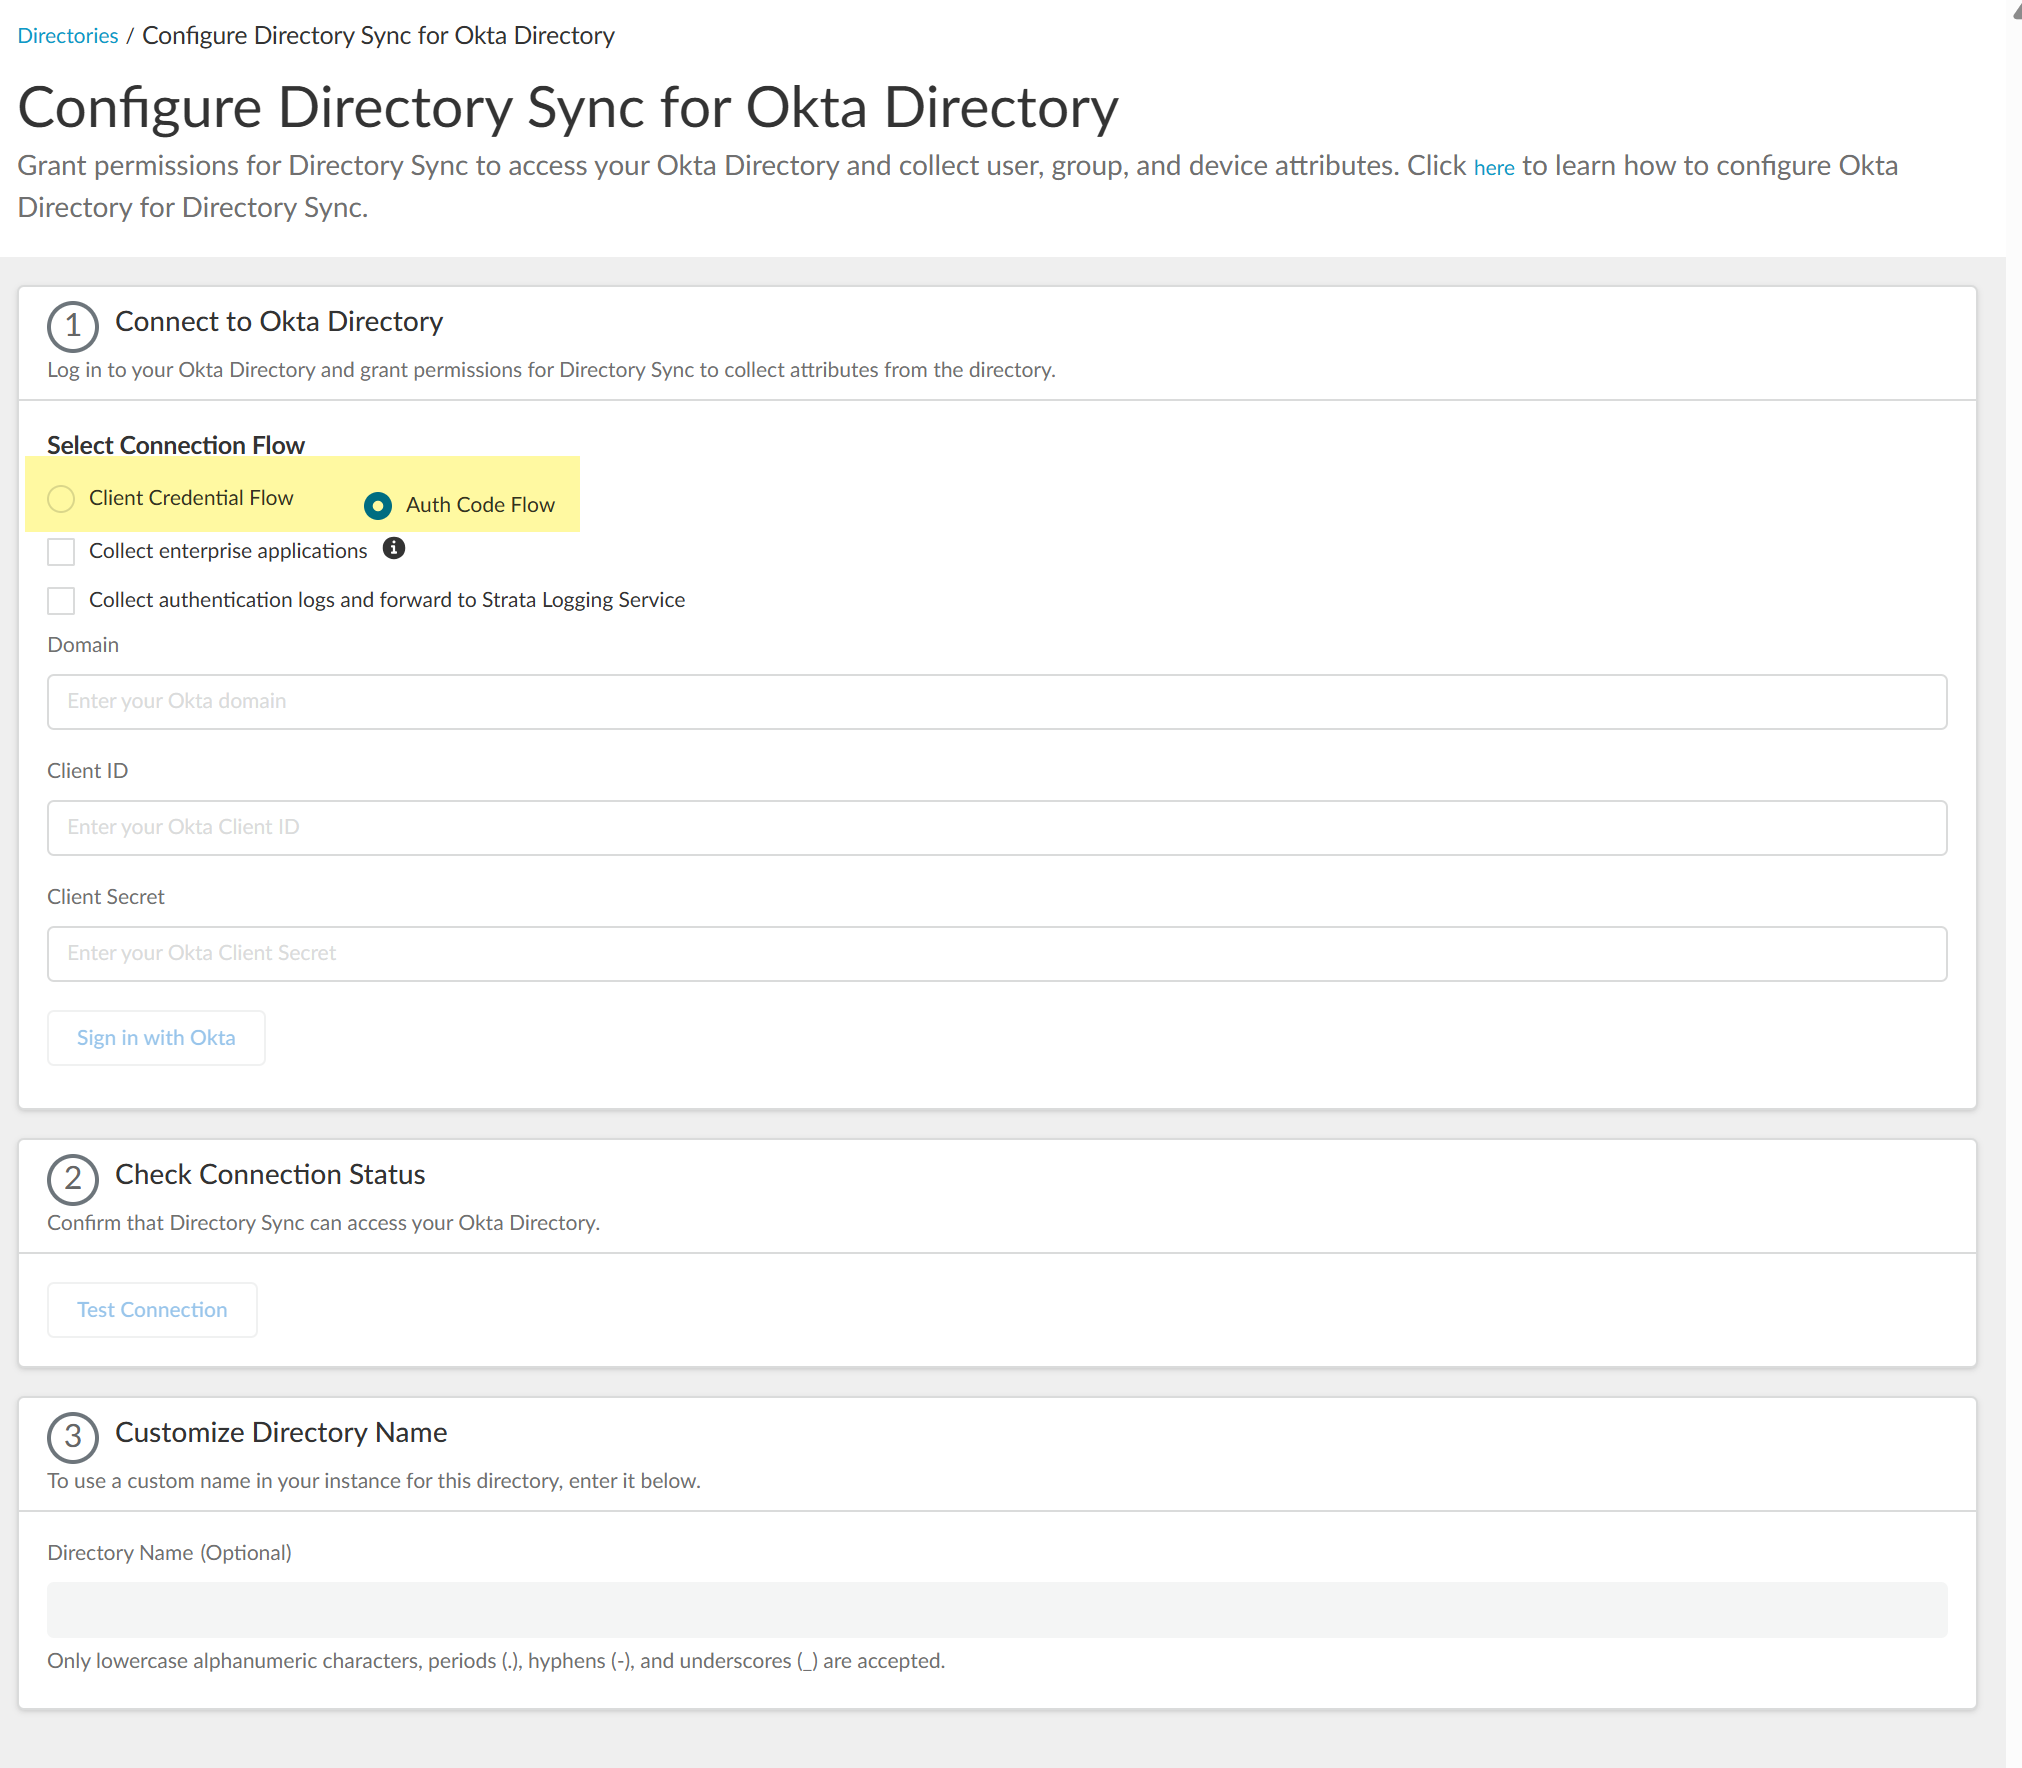
Select Auth Code Flow as the method you want to use to
log in to the Okta directory.
Select whether you want to Collect enterprise
applications data so that it displays when you View Directory Data.
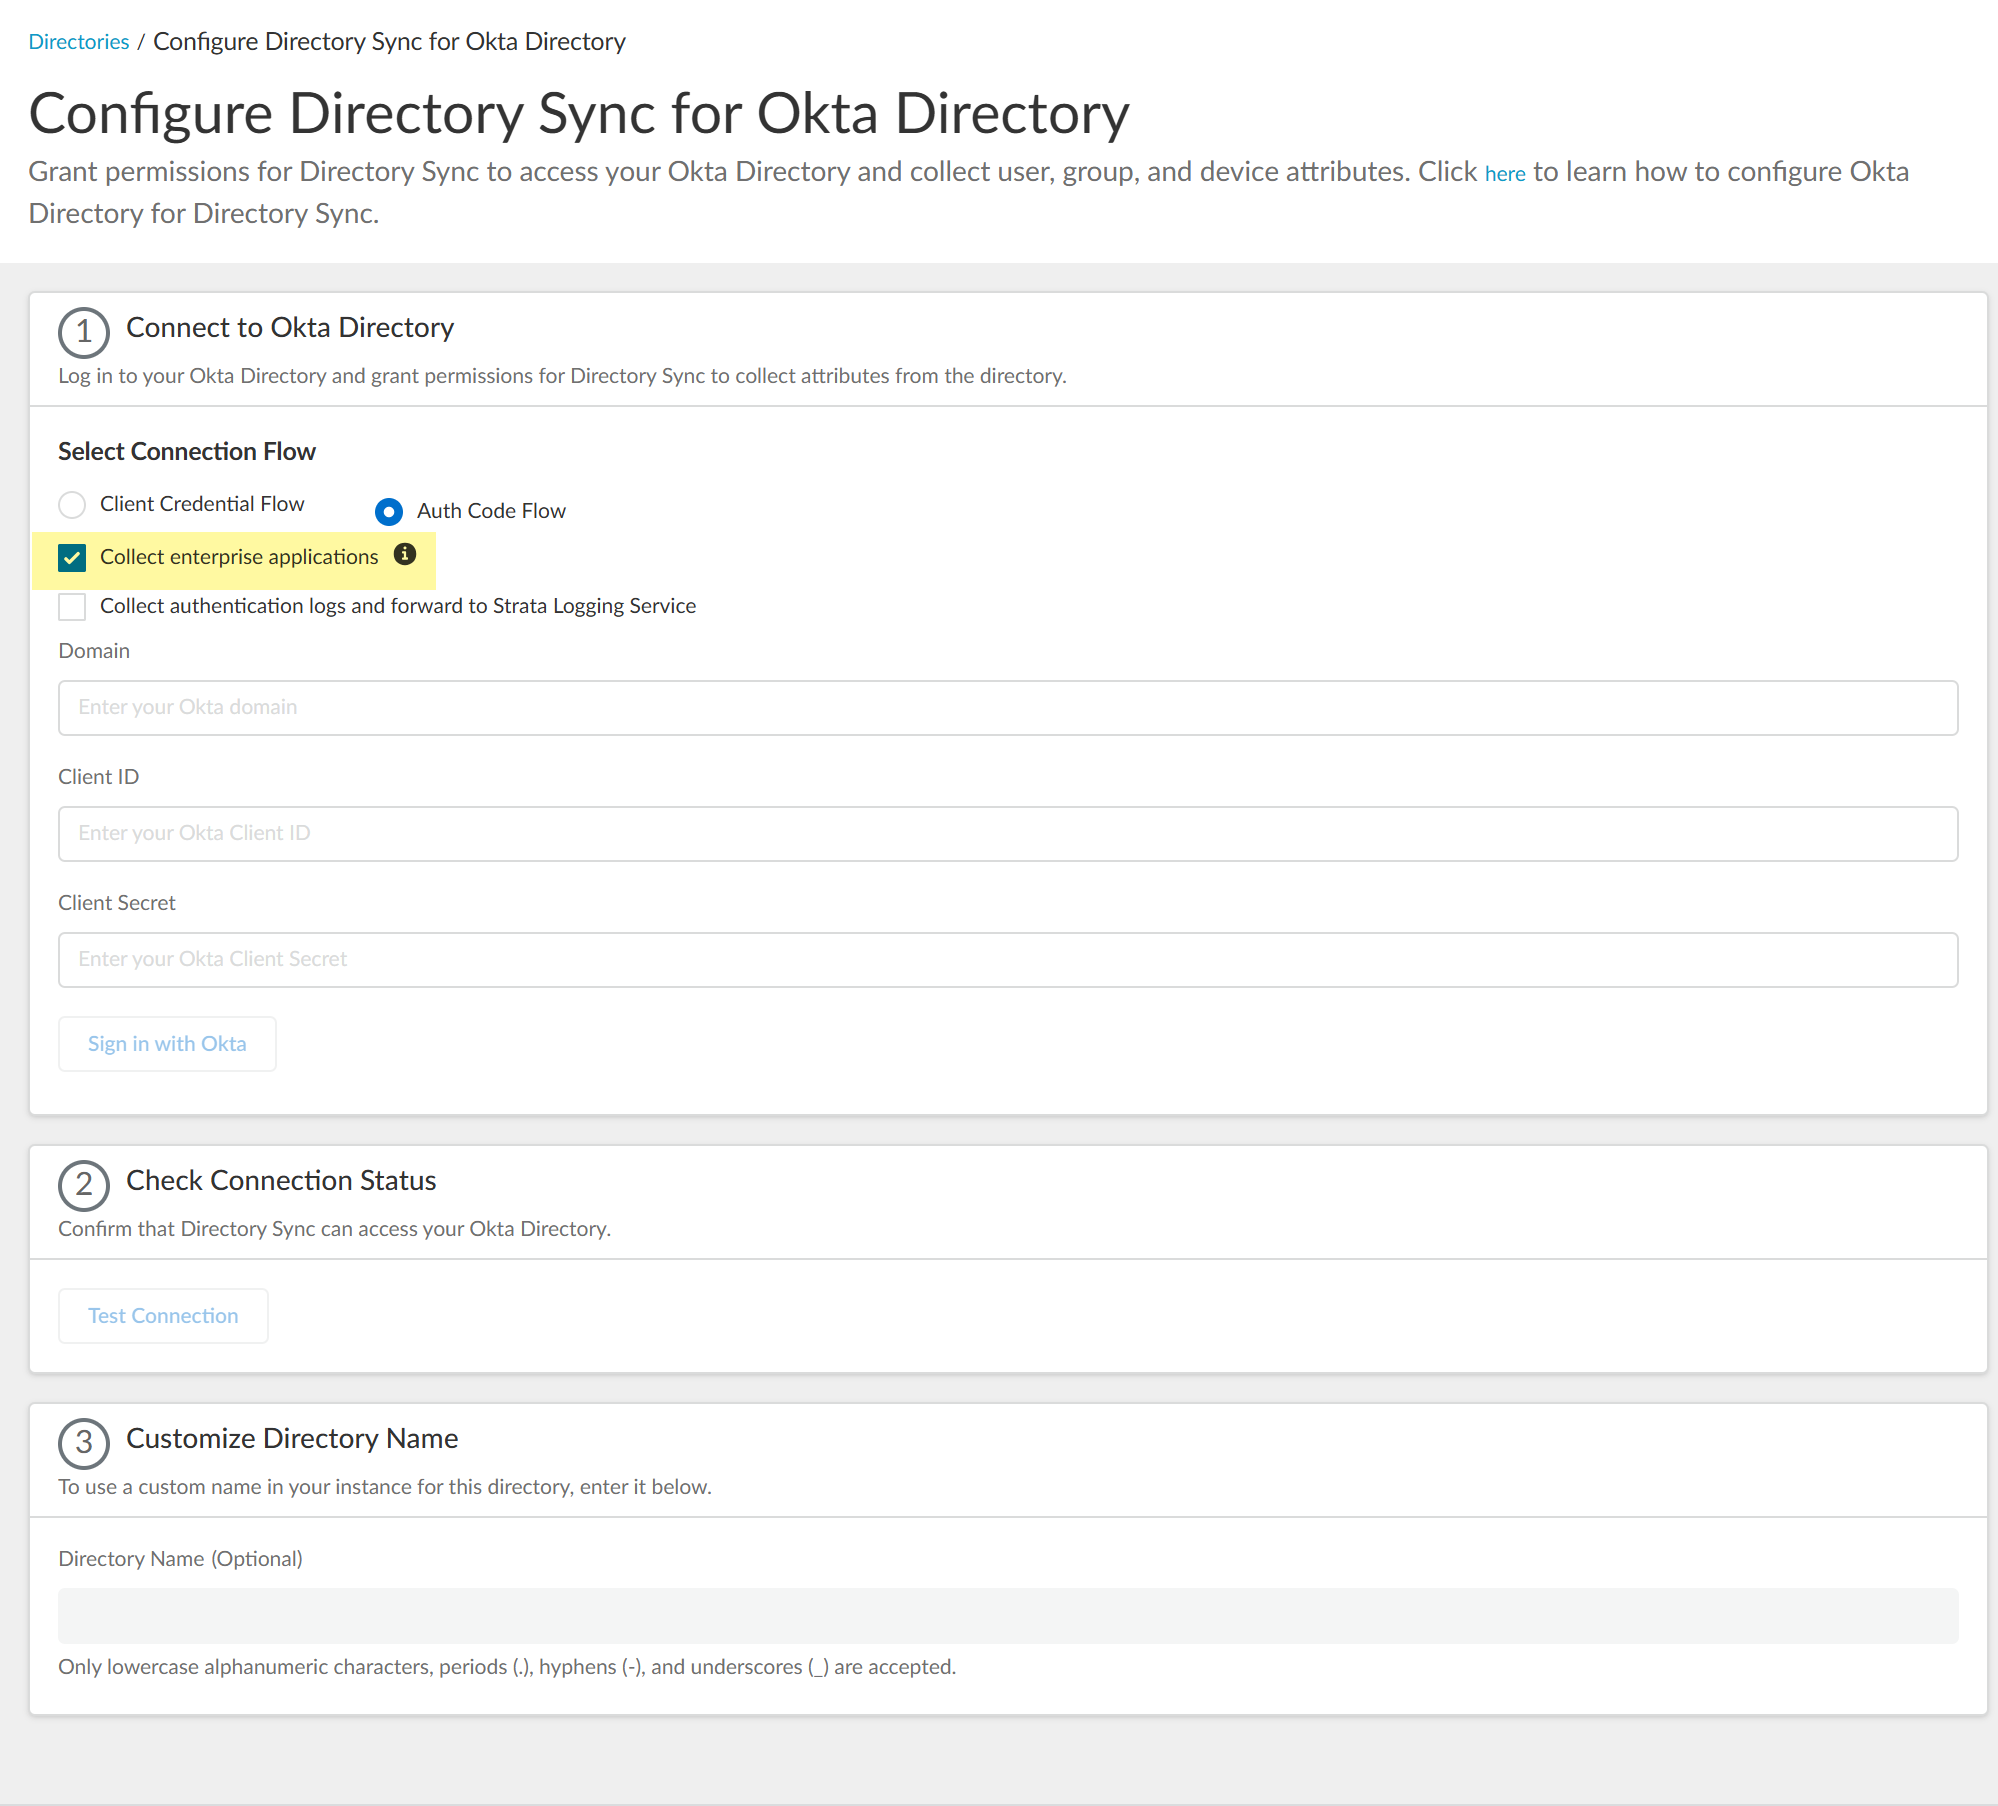
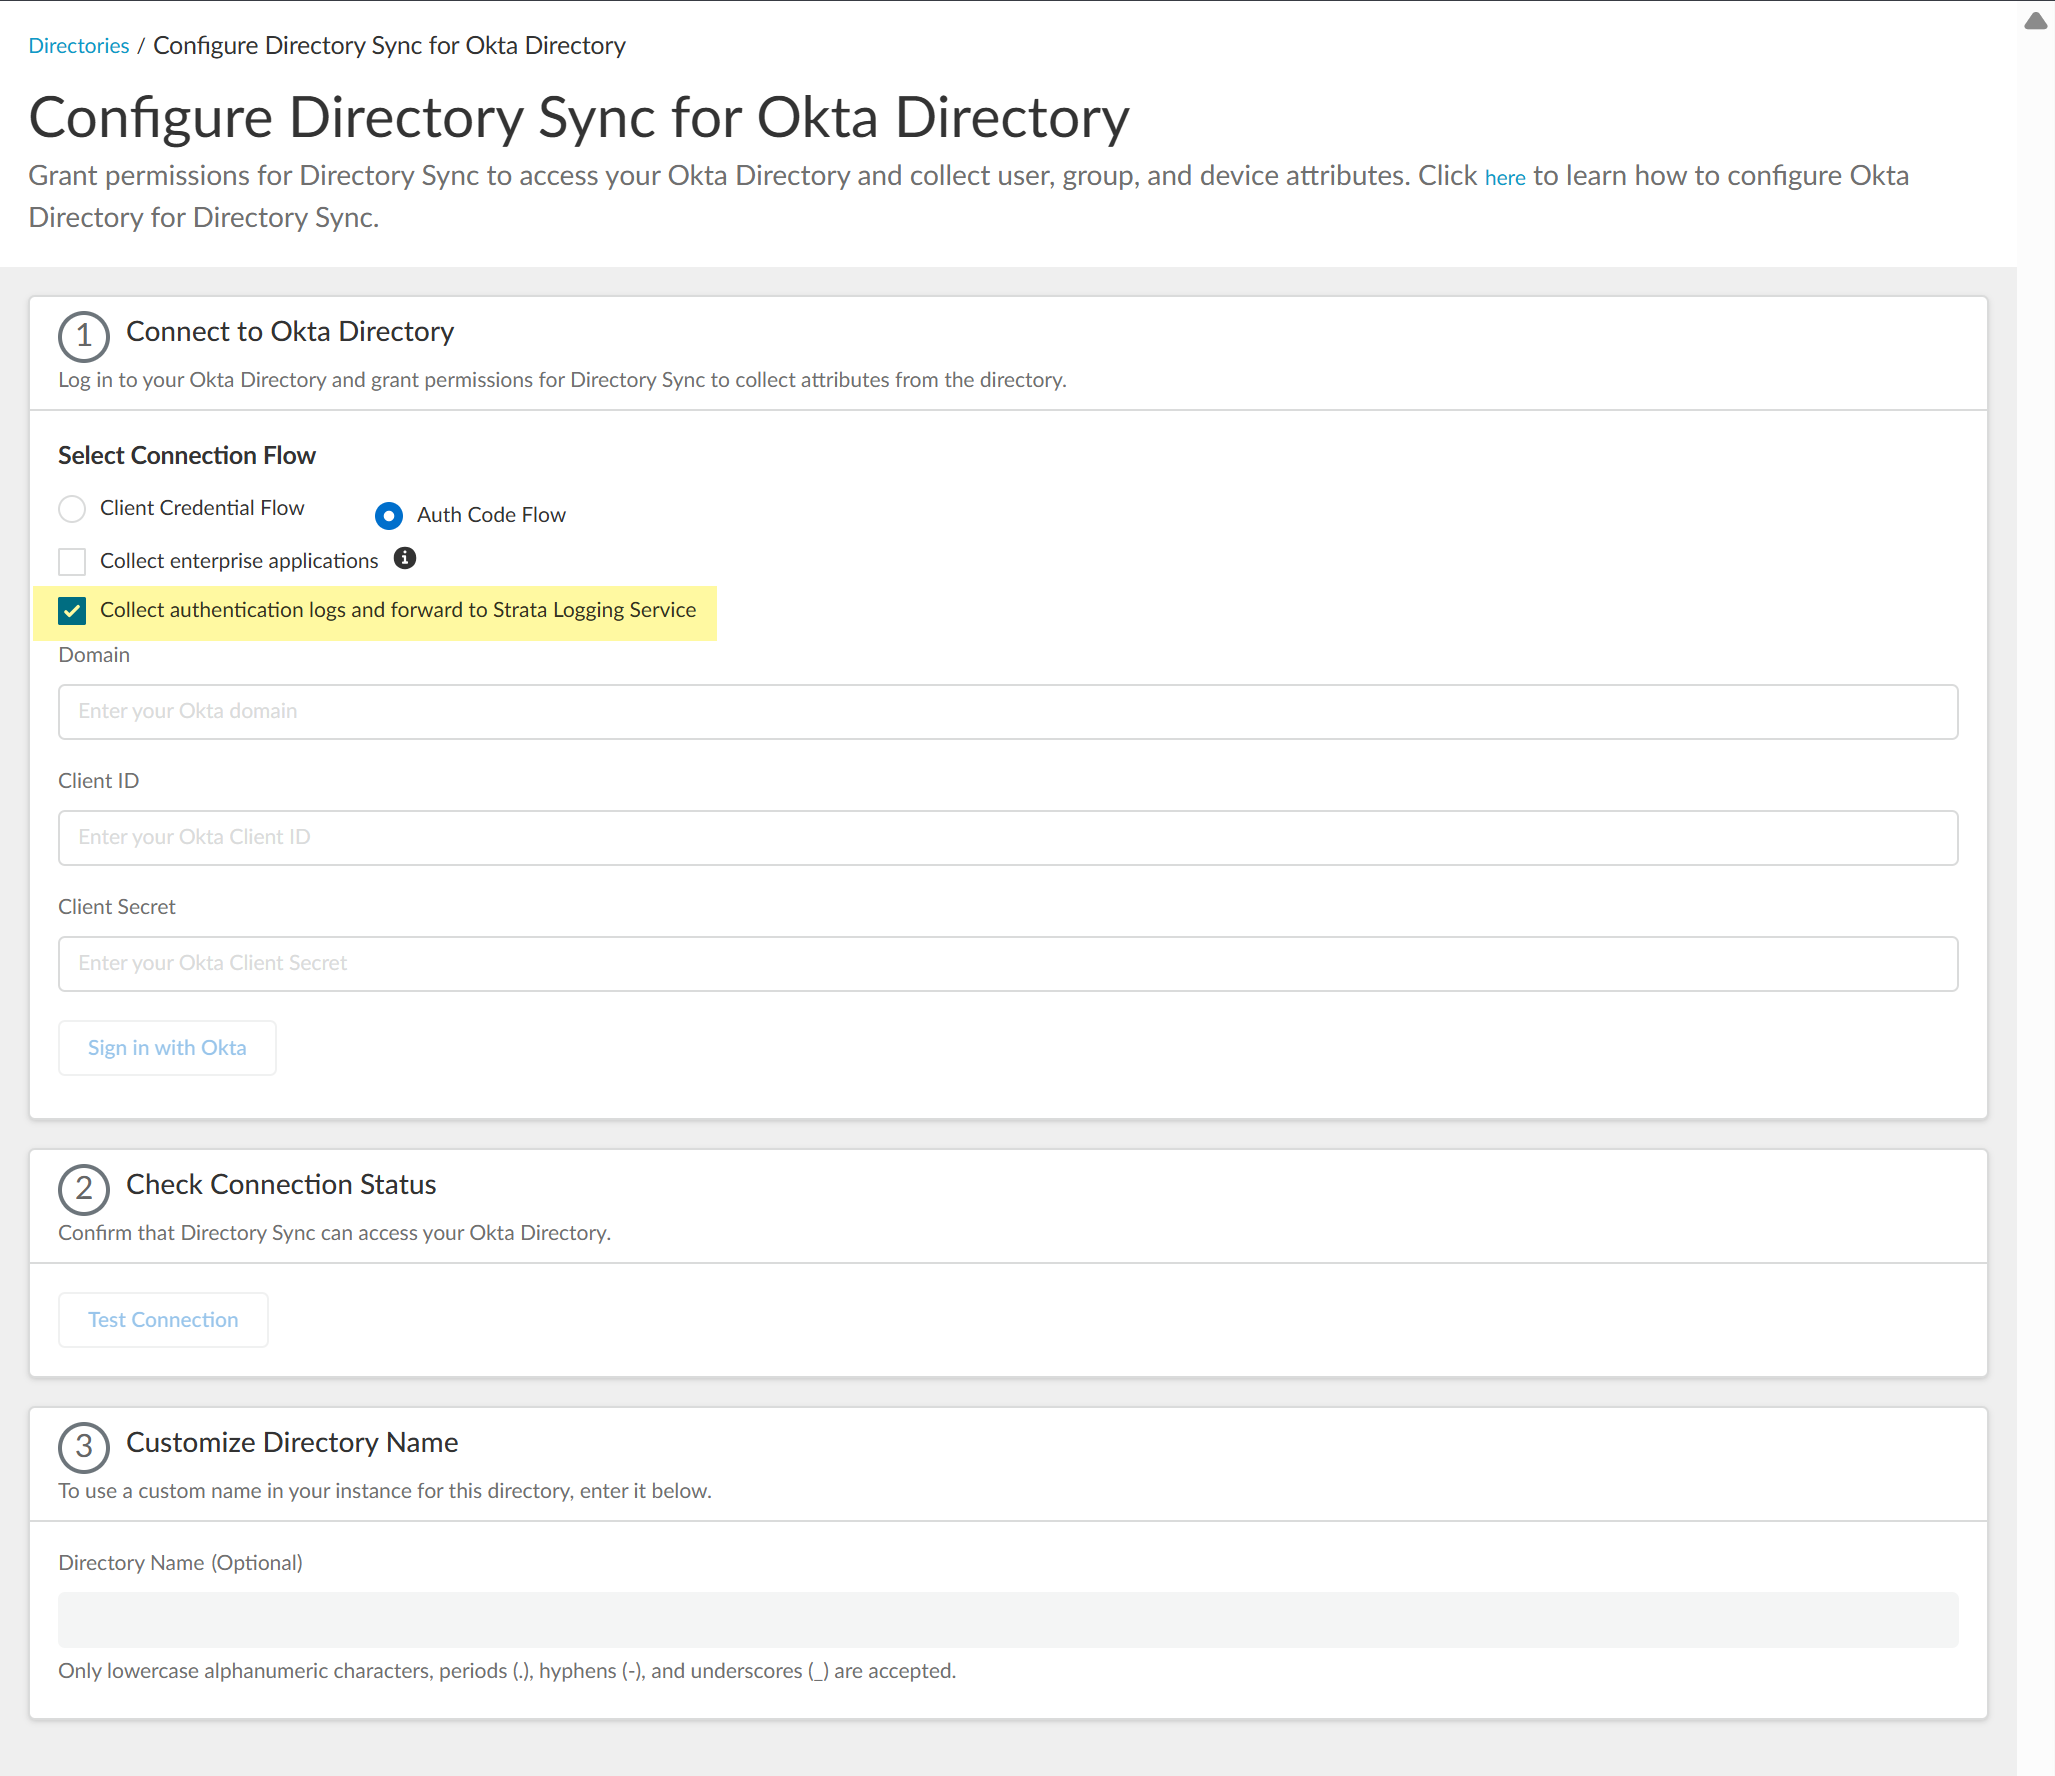
(Strata Logging Service only) Select whether you want to
Collect authentication logs and forward to Strata Logging
Service.
Specify your Okta Directory information to allow the Cloud Identity Engine to
connect to your Okta Directory.
Paste your Okta Directory Domain that you copied
in step 4.2.
Paste your Okta Directory Client ID and
Client Secret that you copied in step 4.1.
The Client
ID must begin with 0.
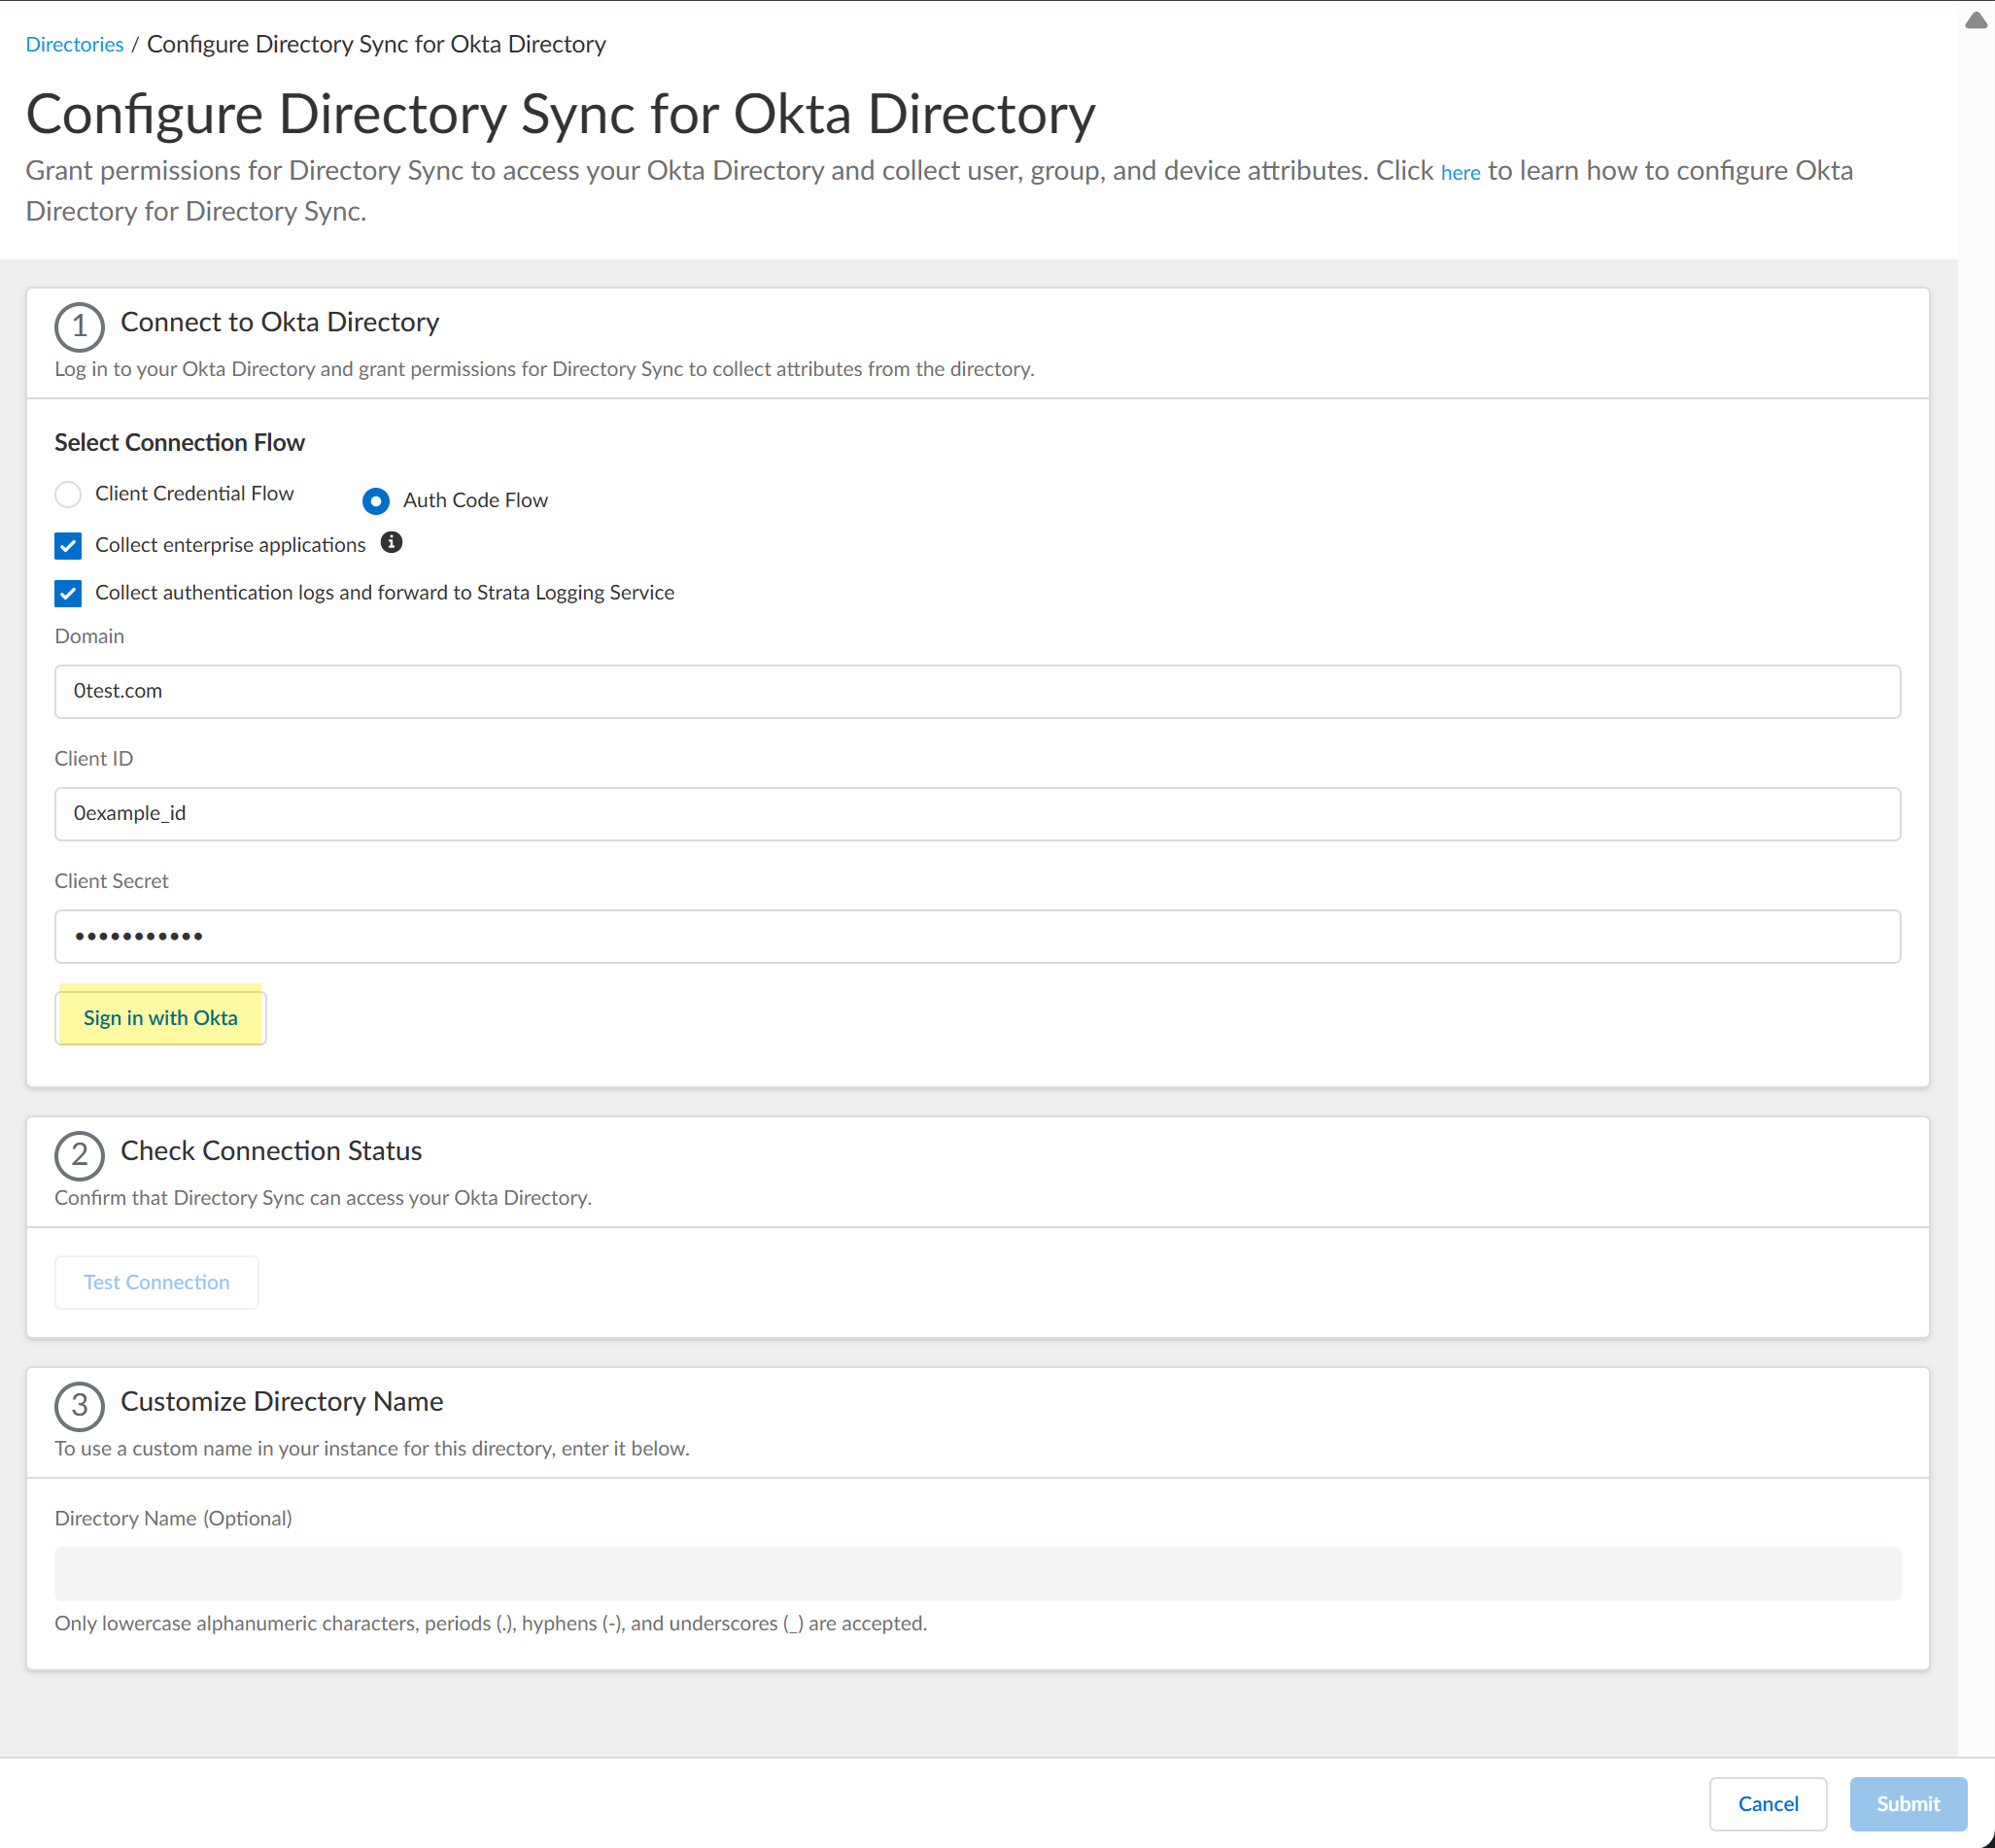
Click to Sign in with Okta and enter your Okta Directory
credentials.
When the login is successful, Logged In displays. Palo
Alto Networks recommends using the built-in authorization server. If you have
more than one Okta authorization server, repeat the previous steps for each
additional Okta Directory you want to add.
Click Test Connection to verify your configuration.
When the test is successful, Success displays.
(Optional) Customize the name the Cloud Identity Engine displays for your Okta
Directory.
By default, the Cloud Identity Engine uses the default domain name.
You can use up to 15 lowercase alphanumeric characters
(including hyphens, periods, and underscores) for the directory name in the
Cloud Identity Engine. You don't need to change the name of the directory
itself, only the name of the directory in the Cloud Identity Engine app.
Submit the configuration.
You can now use information from your Okta Directory in the Cloud Identity
Engine when you configure a user- or group-based Security policy rule or with
other Palo Alto Networks applications.
For optimal
performance, the Cloud Identity Engine does not support the default Okta
group "Everyone" because Okta does not
recommend using this group to define policy rules.
By granting a few read-only permissions for
your Okta directory in advance, the Client Credential Flow option
for Okta in the Cloud Identity Engine allows you to use a service account
to log in to your Okta directory in the Cloud Identity Engine. Using
a service account is strongly recommended, as this is a more secure
method for directory access and does not require the account to
be associated with a specific user.
You must obtain a
new client ID and secret if you have an existing Okta directory
configuration. The client ID and secret for the Okta directory auth
code flow (the existing method) are not compatible with the API
service integration that the client credential flow method uses.
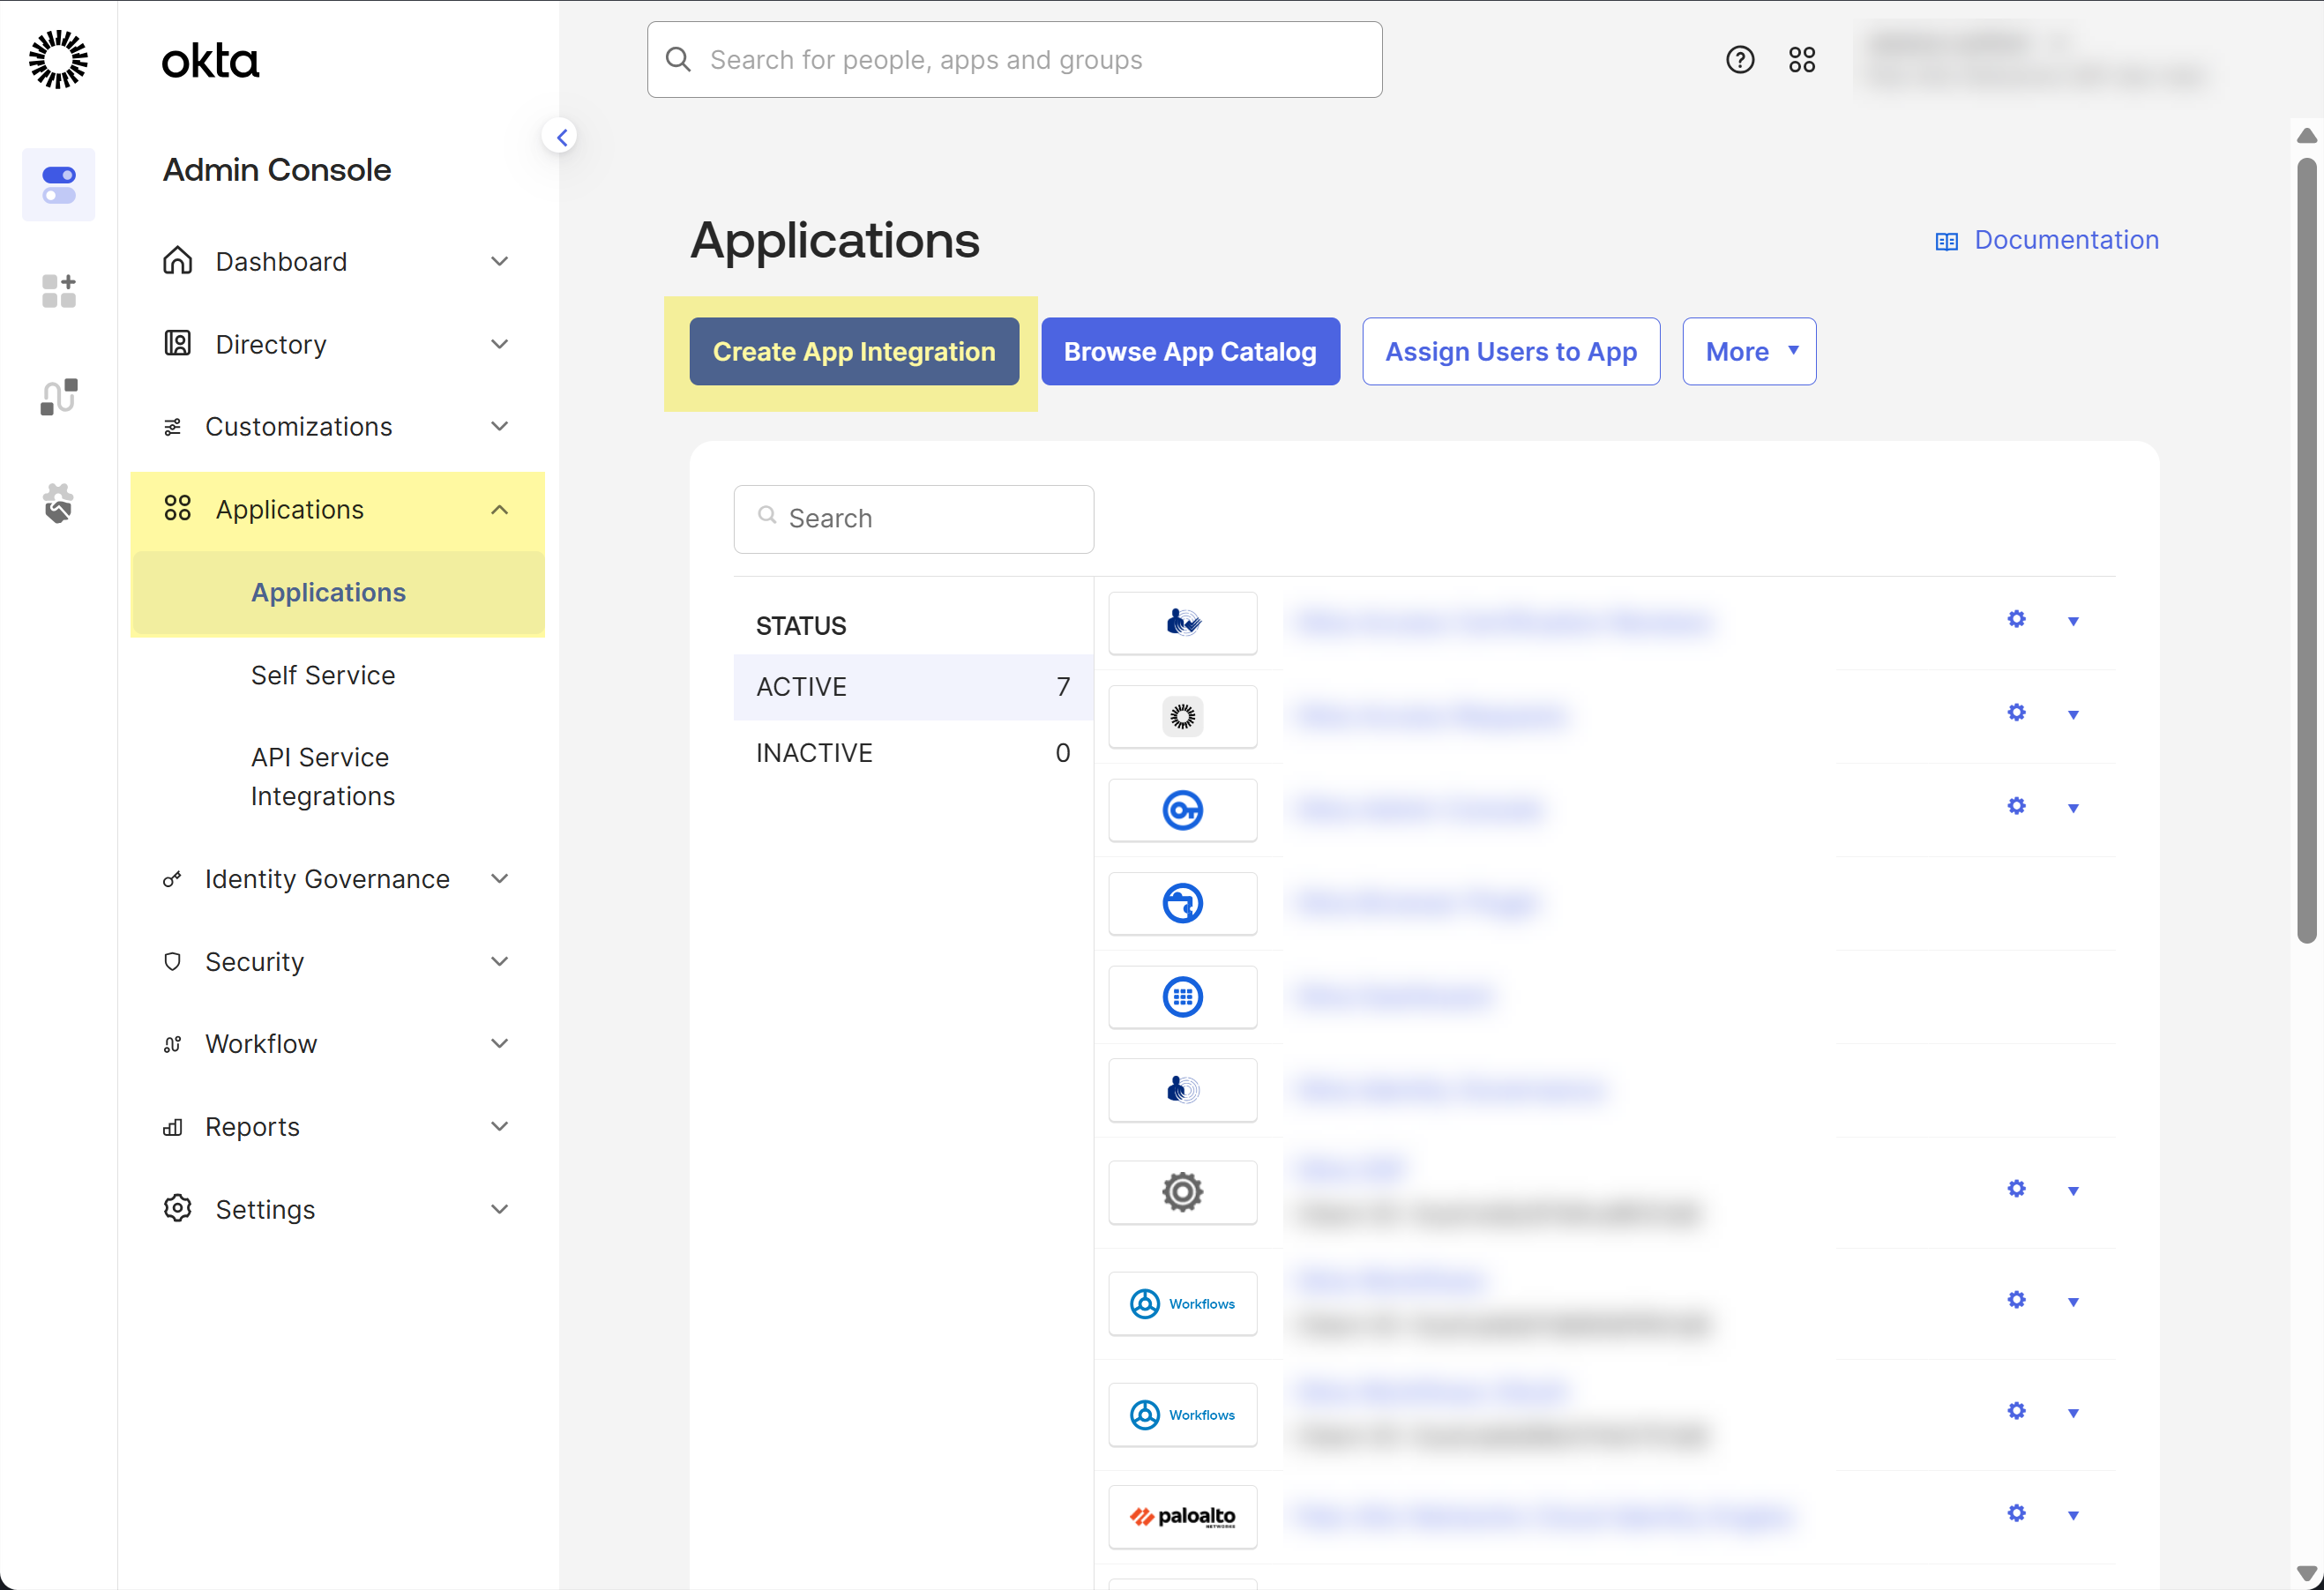
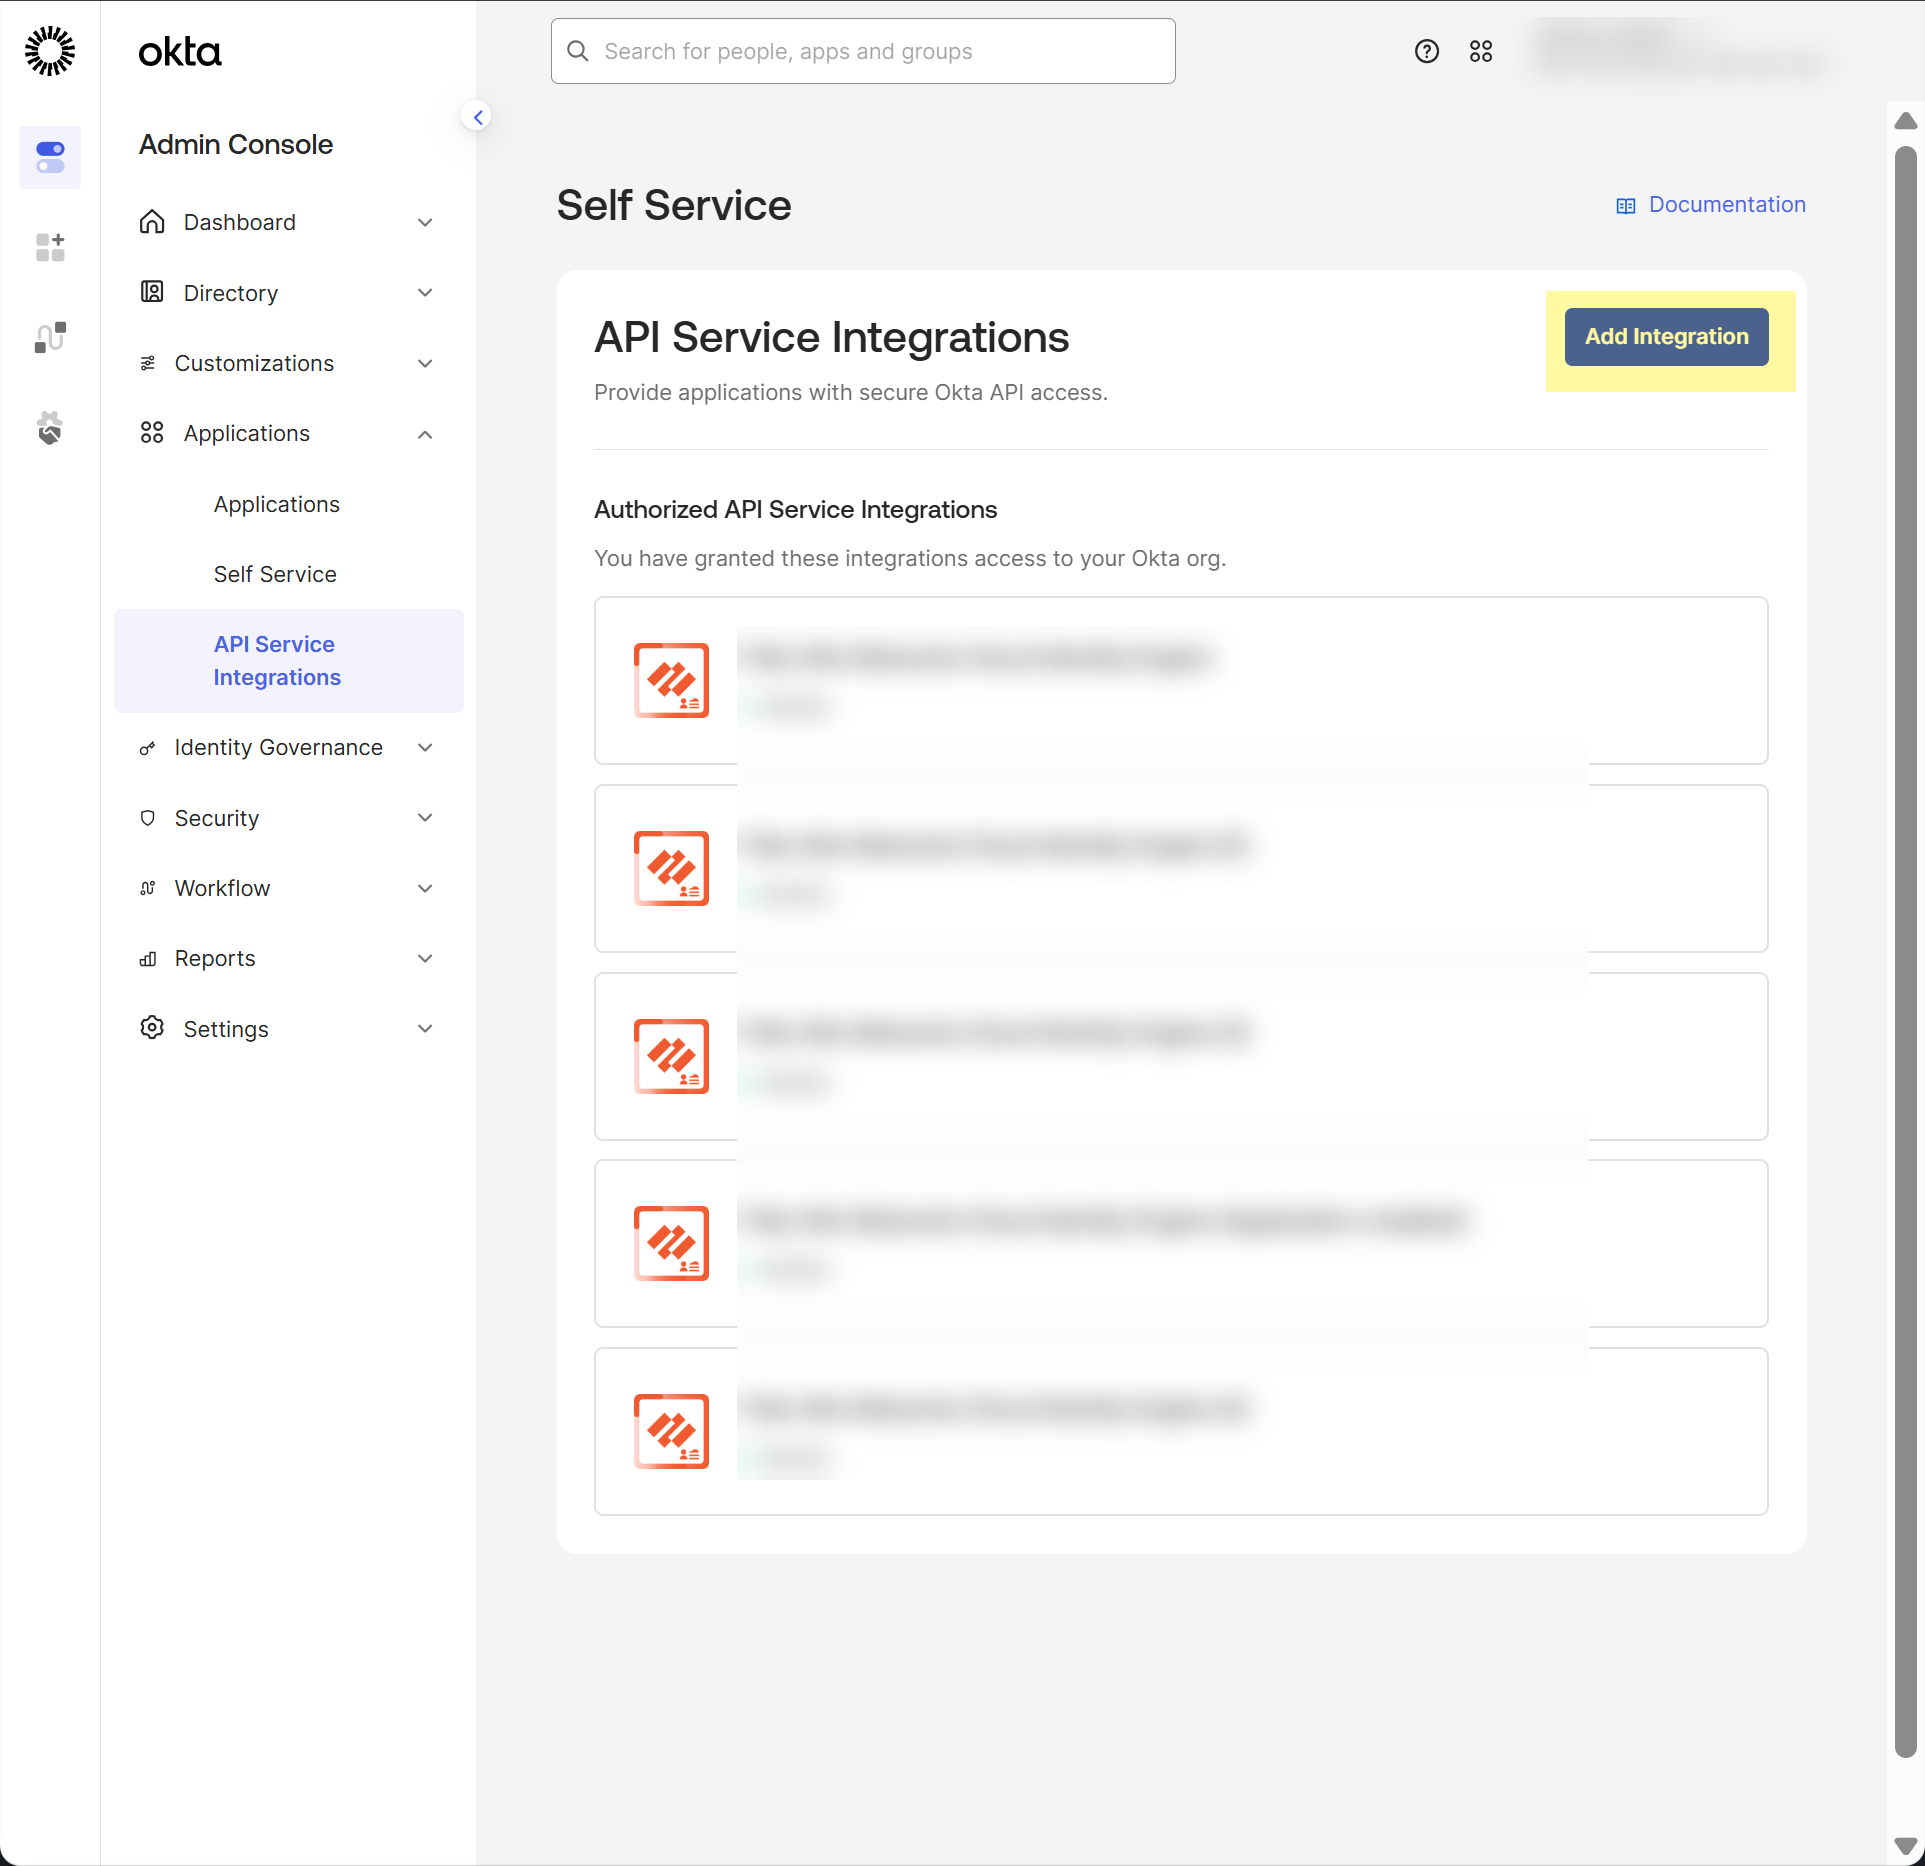
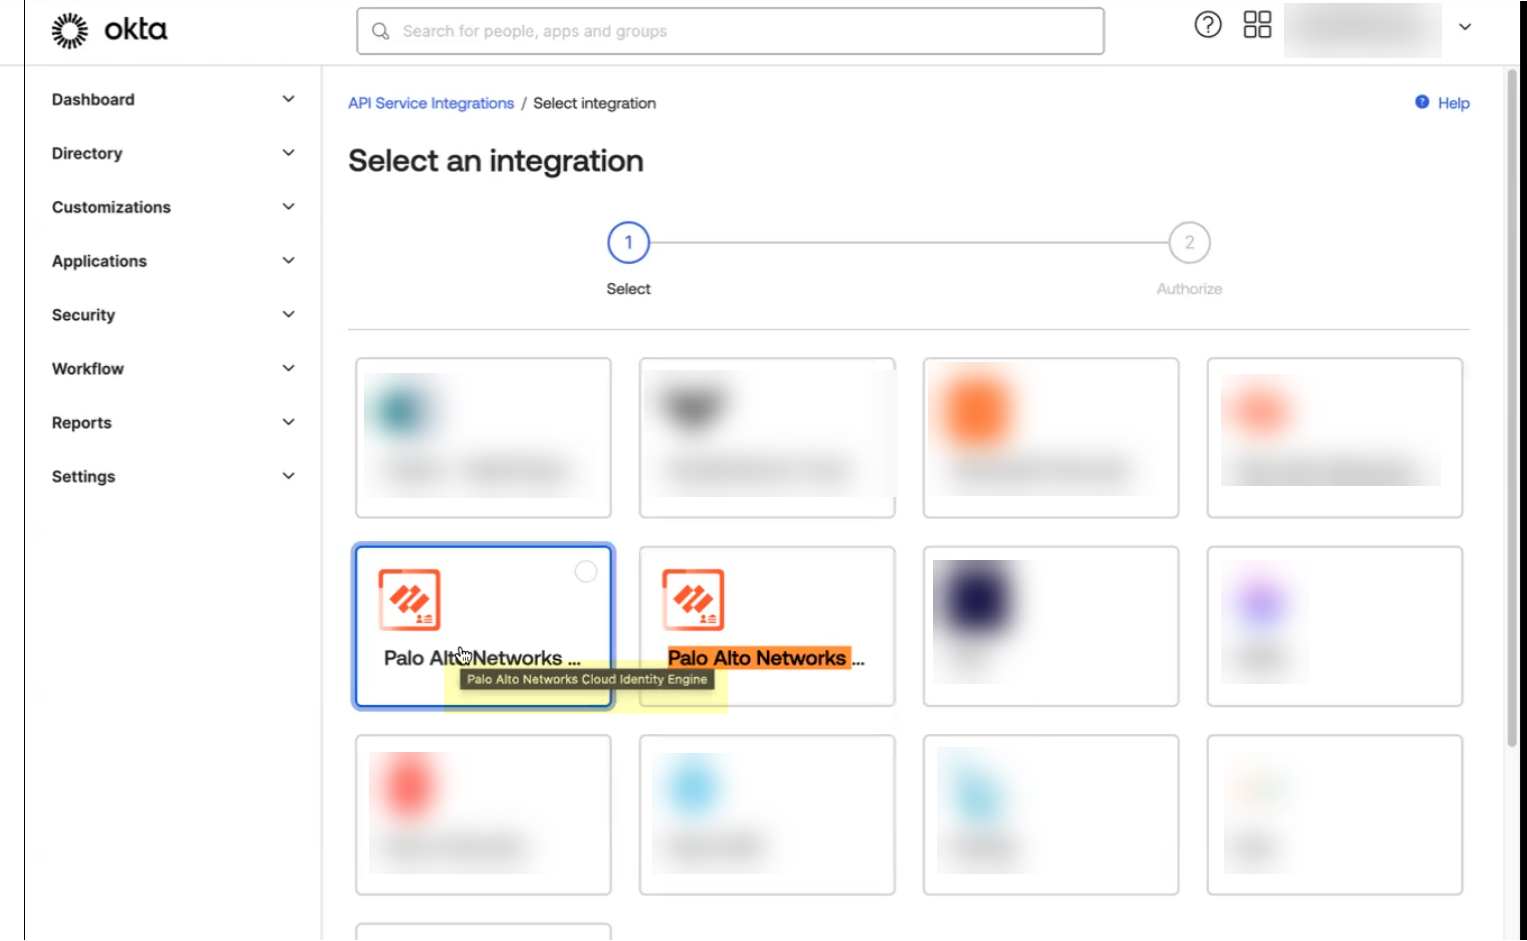
In the Okta Administrator Portal, select Applications API Service Integrations.
Click Add Integration.
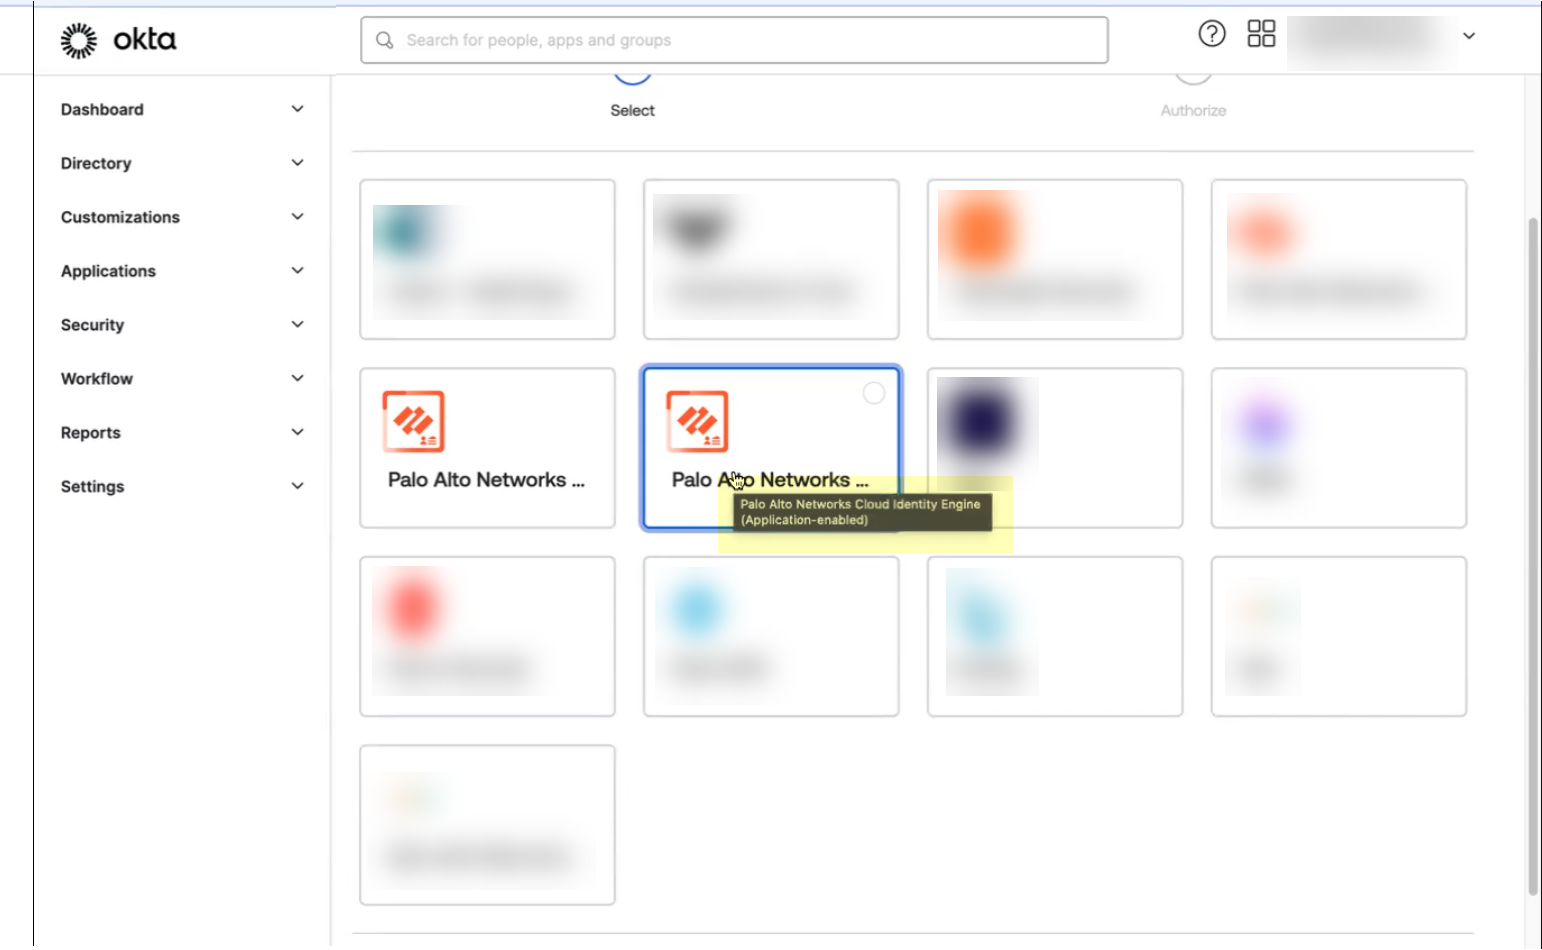
Search for Palo Alto Networks Cloud Identity
Engine.
Select the app integration you want to use based on whether you want to
enable app data and click Next.
To ensure that you select
the correct app, either use Find in your
browser (Ctrl+ F) to
search for the app you want to use or hover over the app to display
the full app name.
If you use application data in your security policy, select the
Palo Alto Networks Cloud Identity Engine
(Application-enabled) app. For more information
on collecting application data, see Step 9 in Configure Okta Directory.
If you do not use application data in your security policy,
select the Palo Alto Networks Cloud Identity
Engine app.
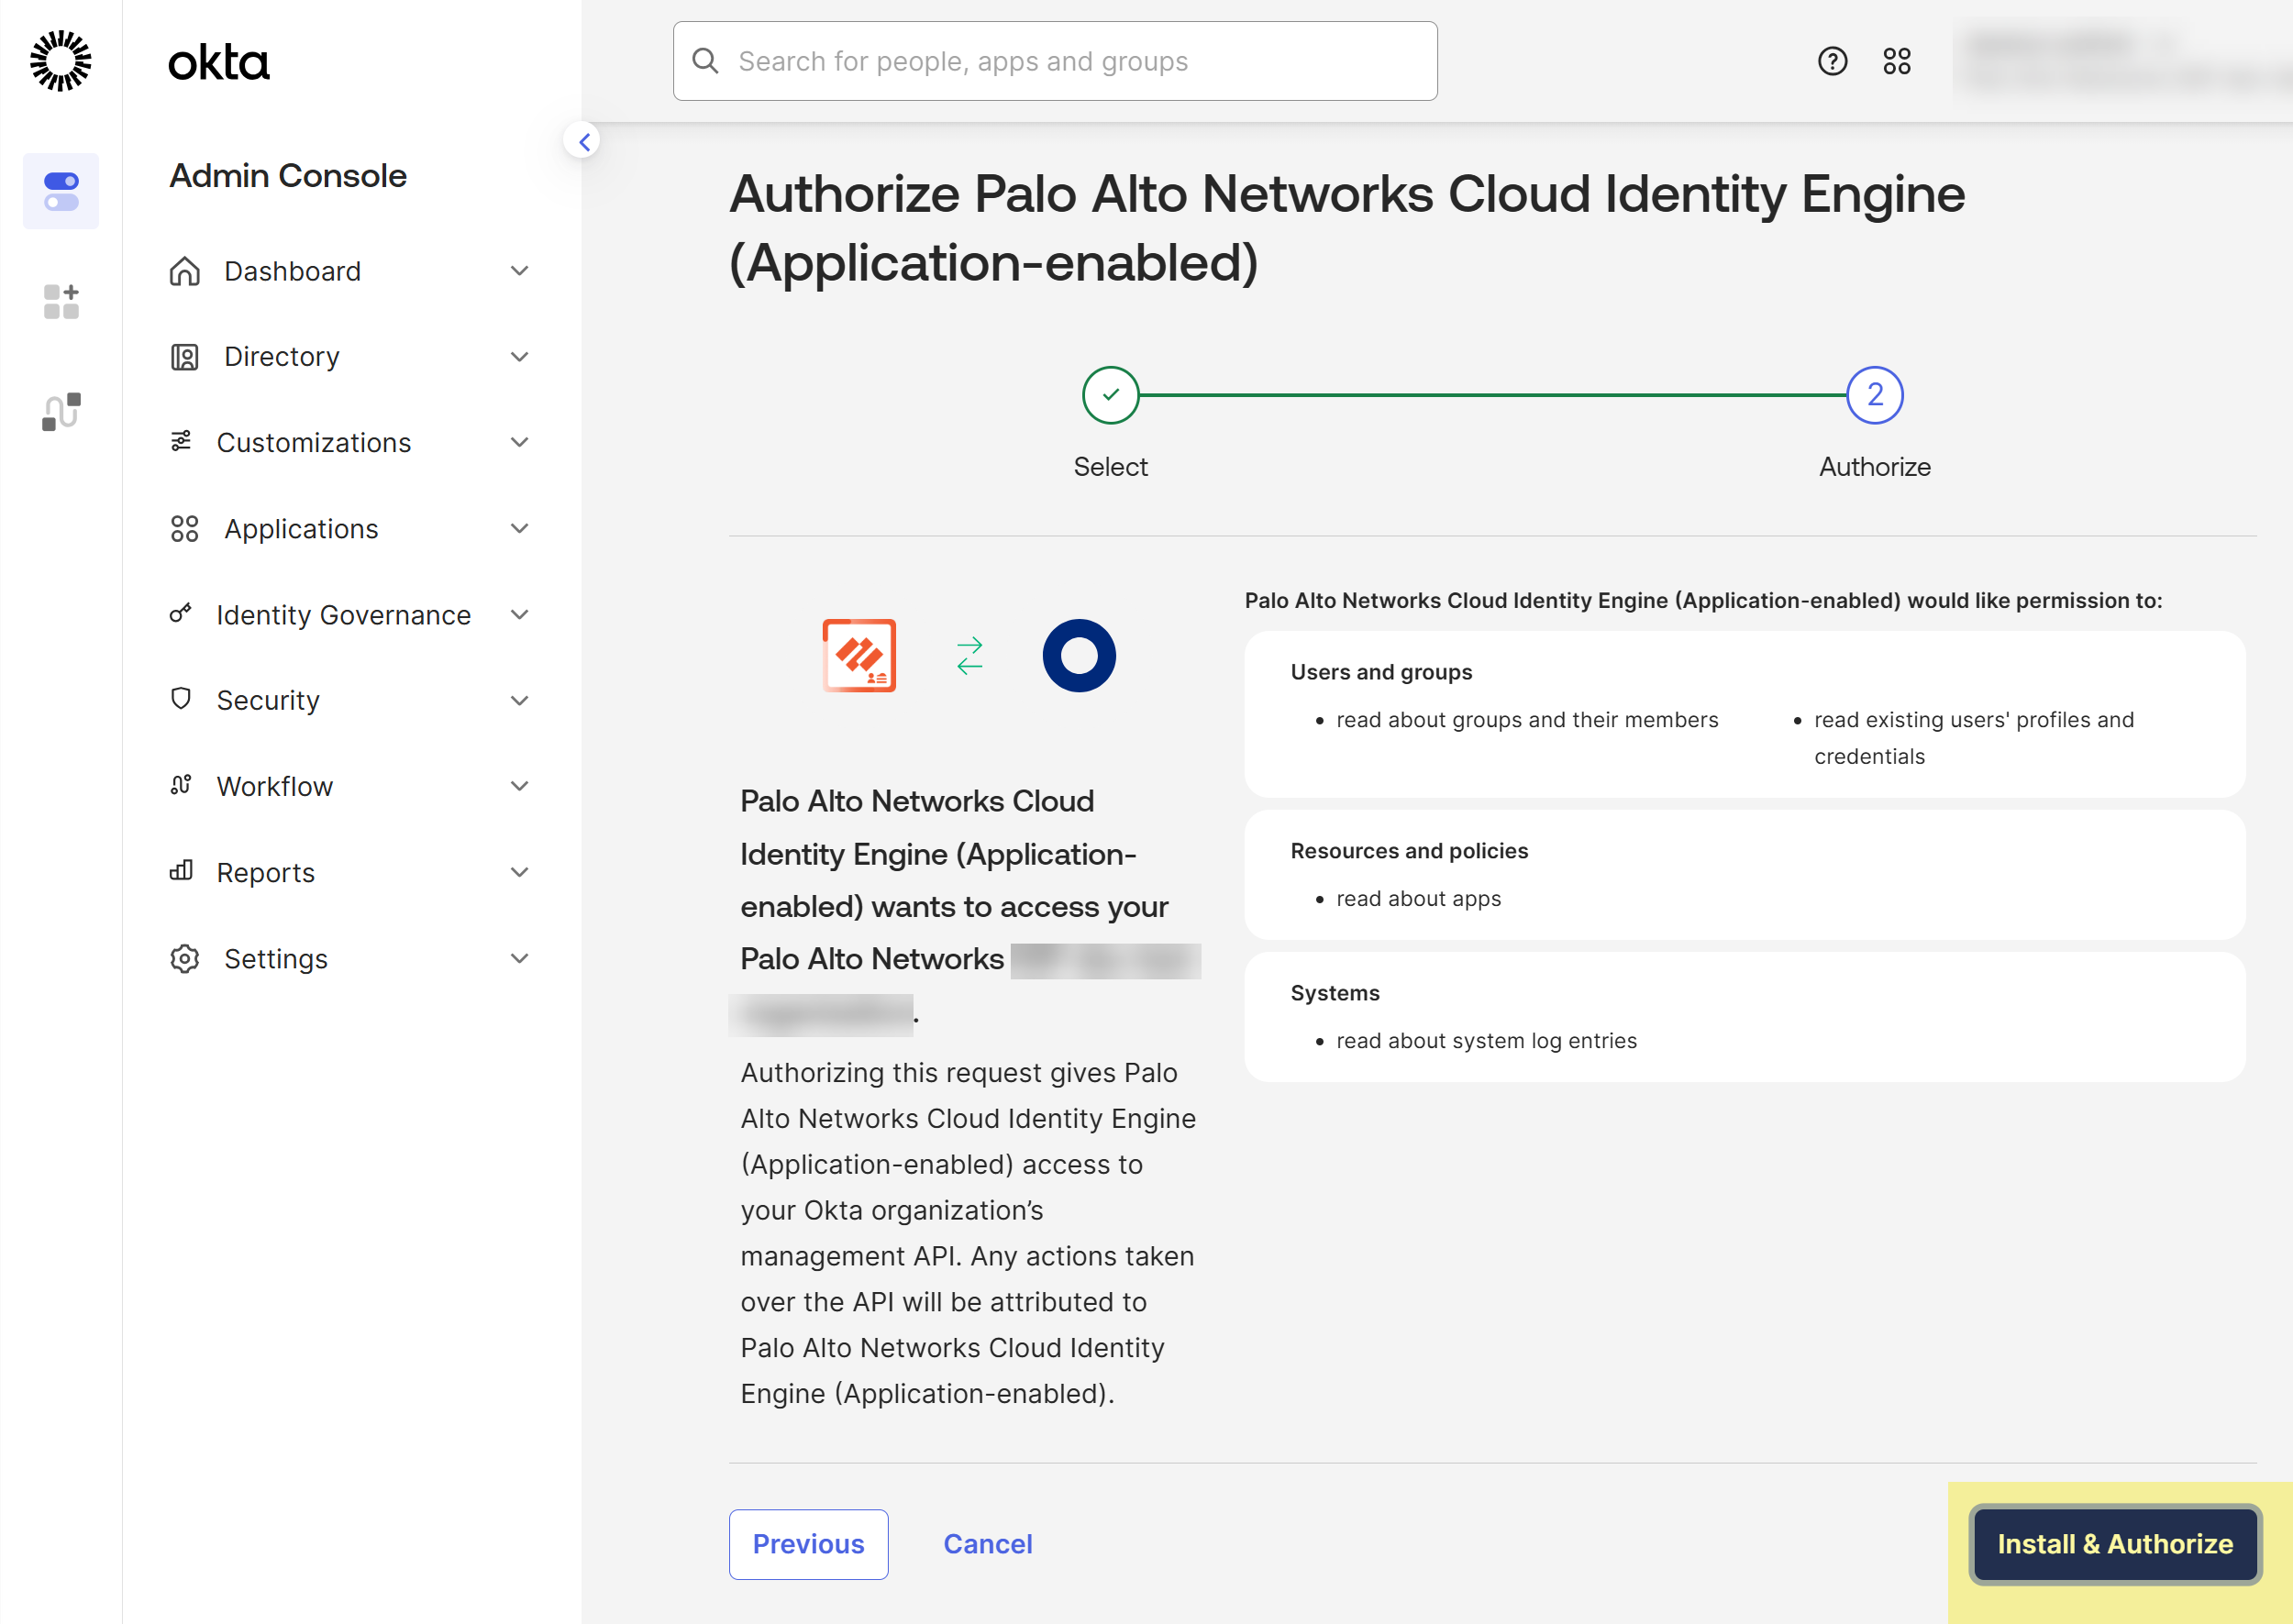
Install and configure the API service integration.
Install & Authorize the API
service integration.
The
Okta API service integration automatically configures the following
required API scopes:
Users and groups—Read existing users’ profiles and credentials. Read
about groups and their members. Read the signed-in user's profile and
credentials.
Authorization servers—Read about authorization
servers.
(Application-enabled app
only)Apps—Read about apps.
Logs—Read about system log entries.
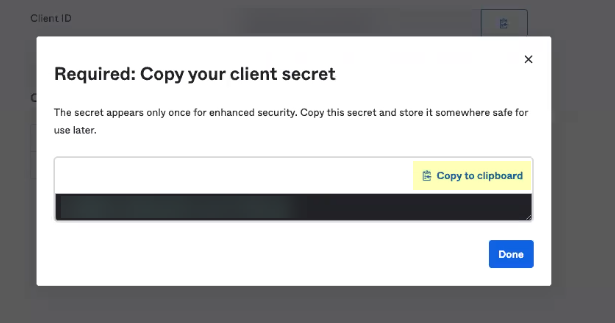
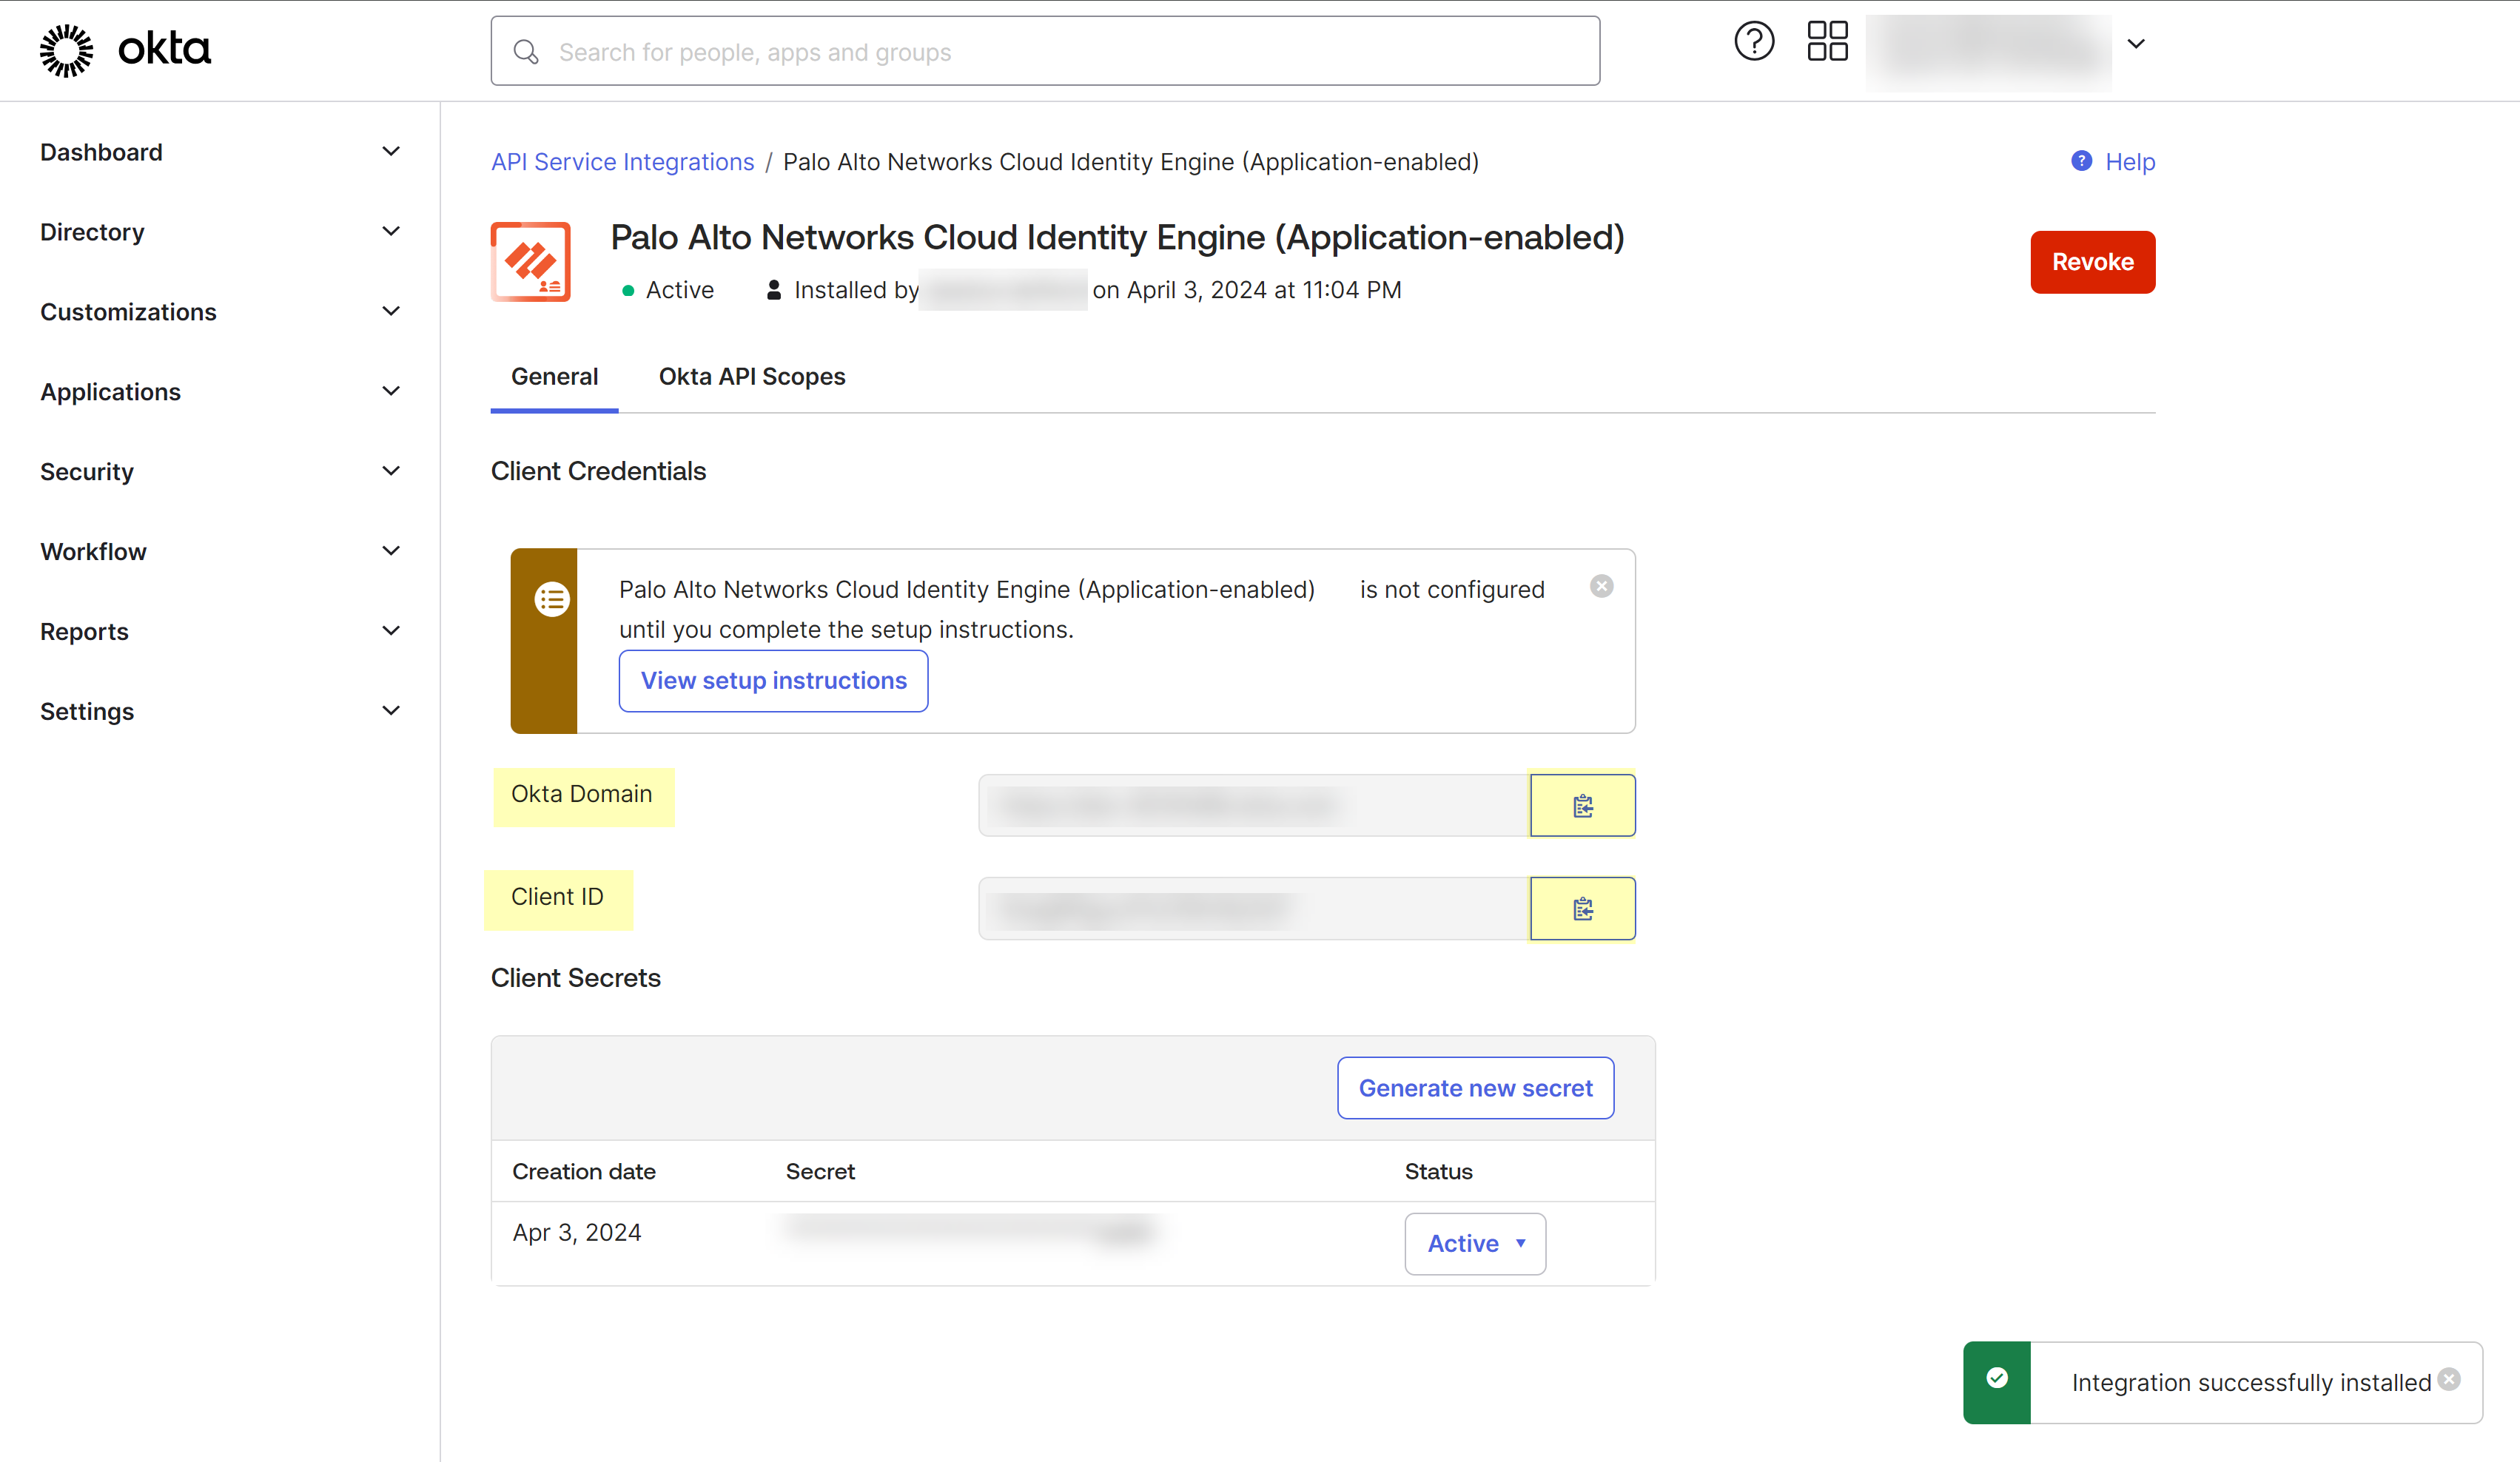
Click Copy to clipboard to copy the client secret and
store it in a secure location, then click Done.
The client secret displays only once,
so make sure to copy it and store it securely before clicking
Done.
Copy the Okta Domain and the Client
ID and store them in a secure location.
You must edit the domain by removing
the https:// before pasting it.
If you have not already done so, activate your Cloud Identity
Engine tenant.
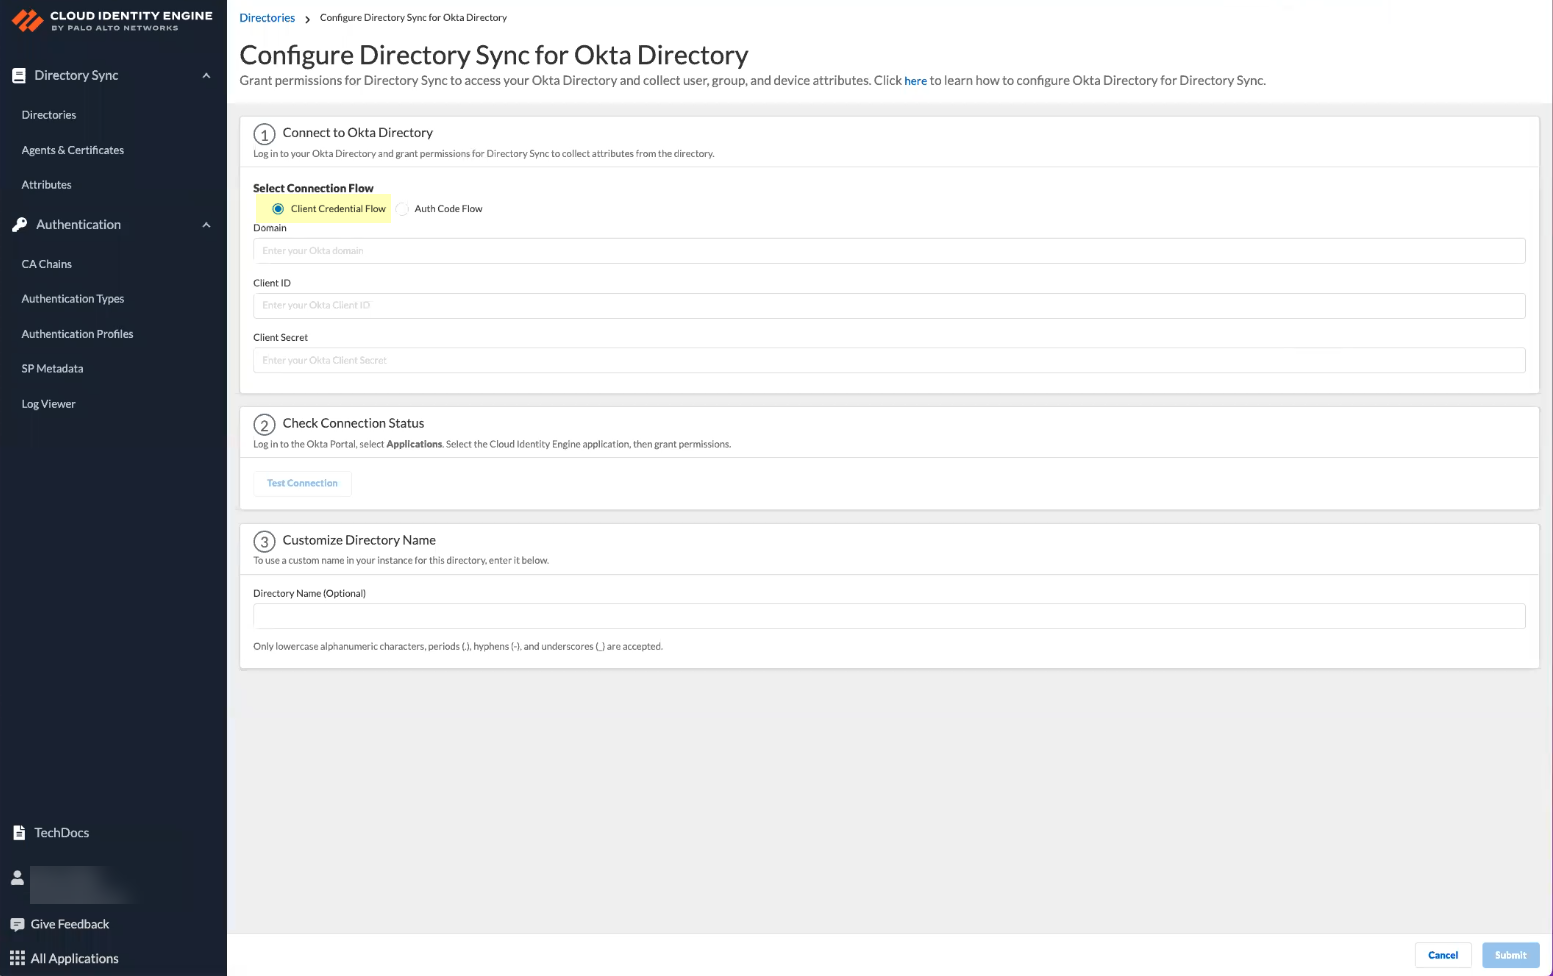
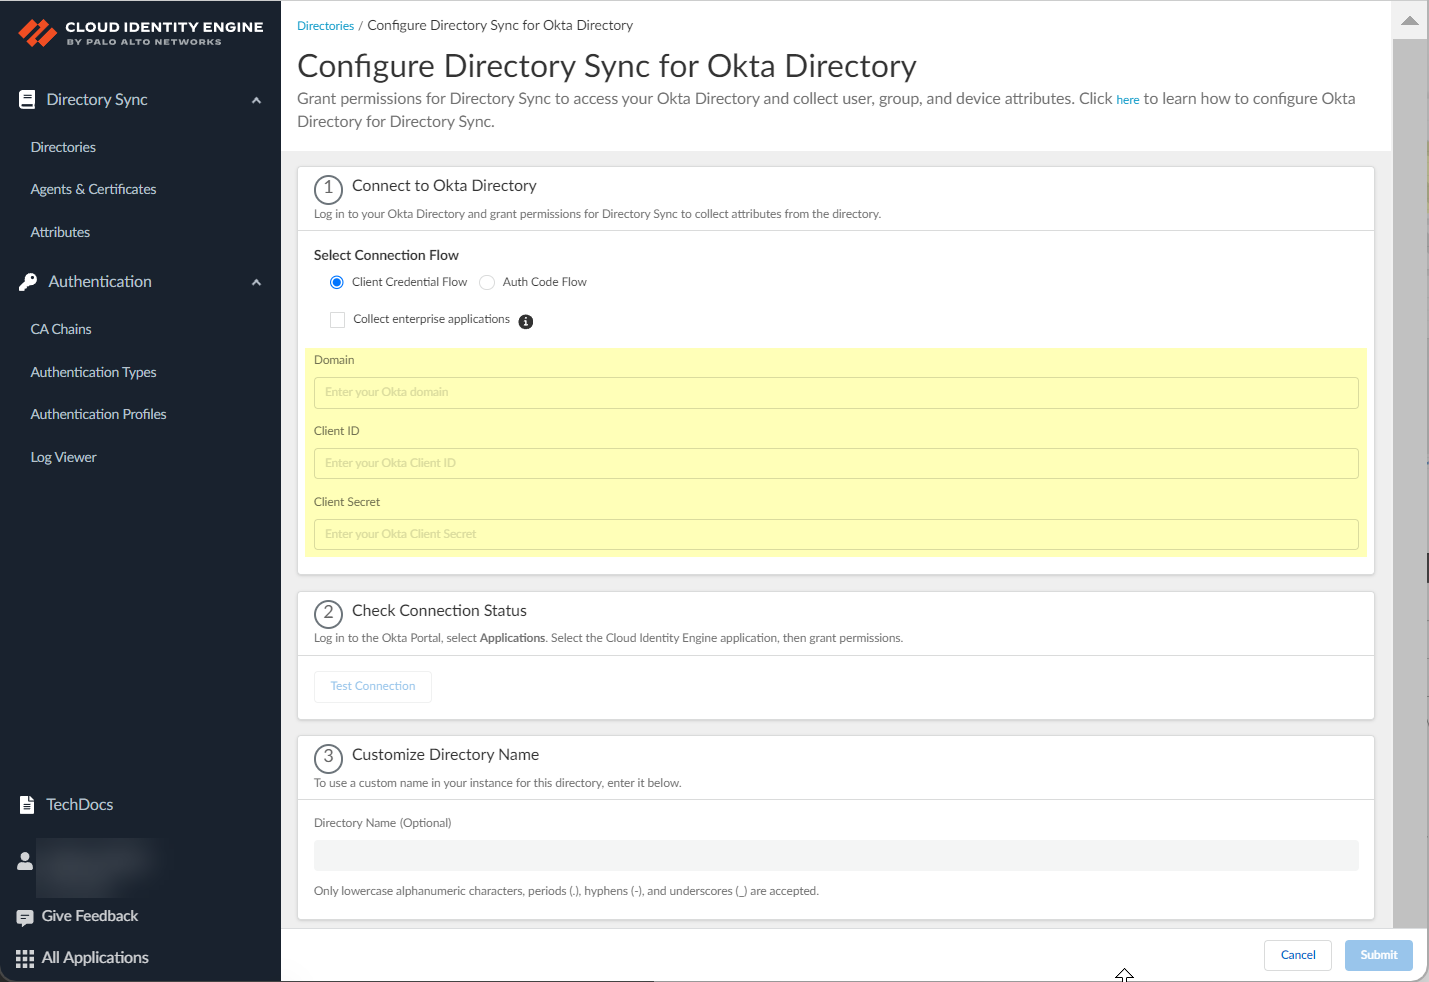
Set up a Cloud Directory and
select Okta.
Under Select Connection Flow,
select Client Credential Flow.
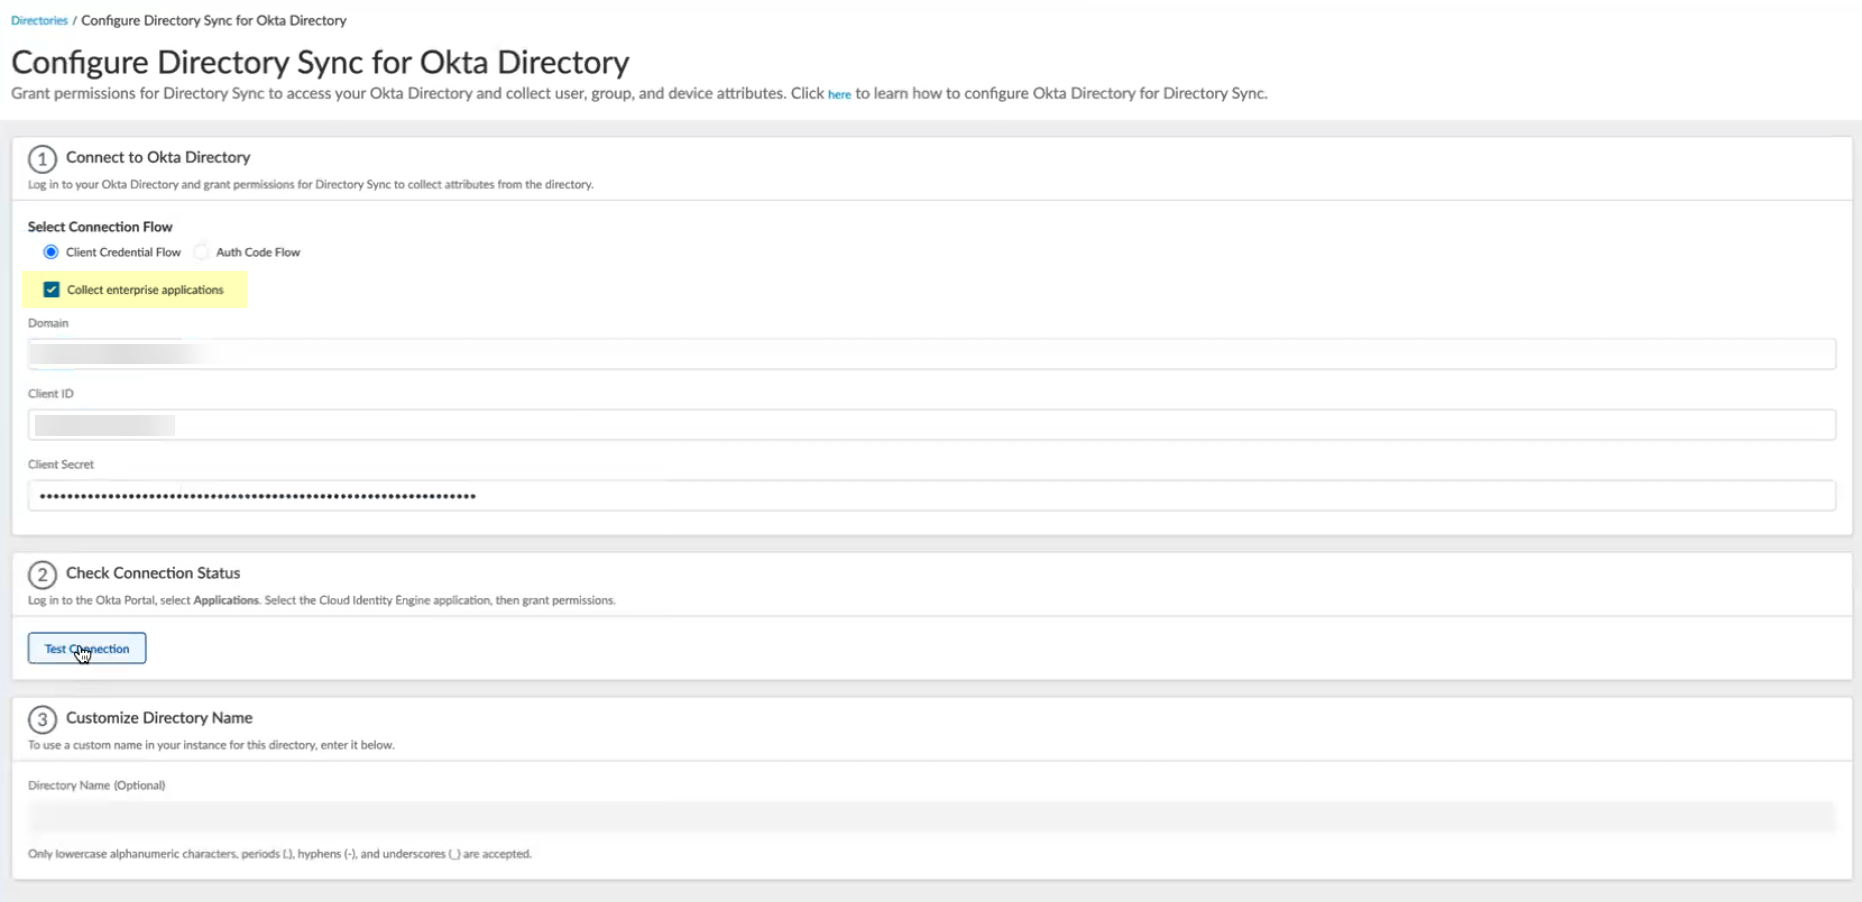
Select Collect enterprise applications to display
application data when you view directory data.
If you select this option, you must
use the Palo Alto Networks Cloud Identity Engine
(Application-enabled) app to ensure the correct permissions.
For more information, see step 1.d.
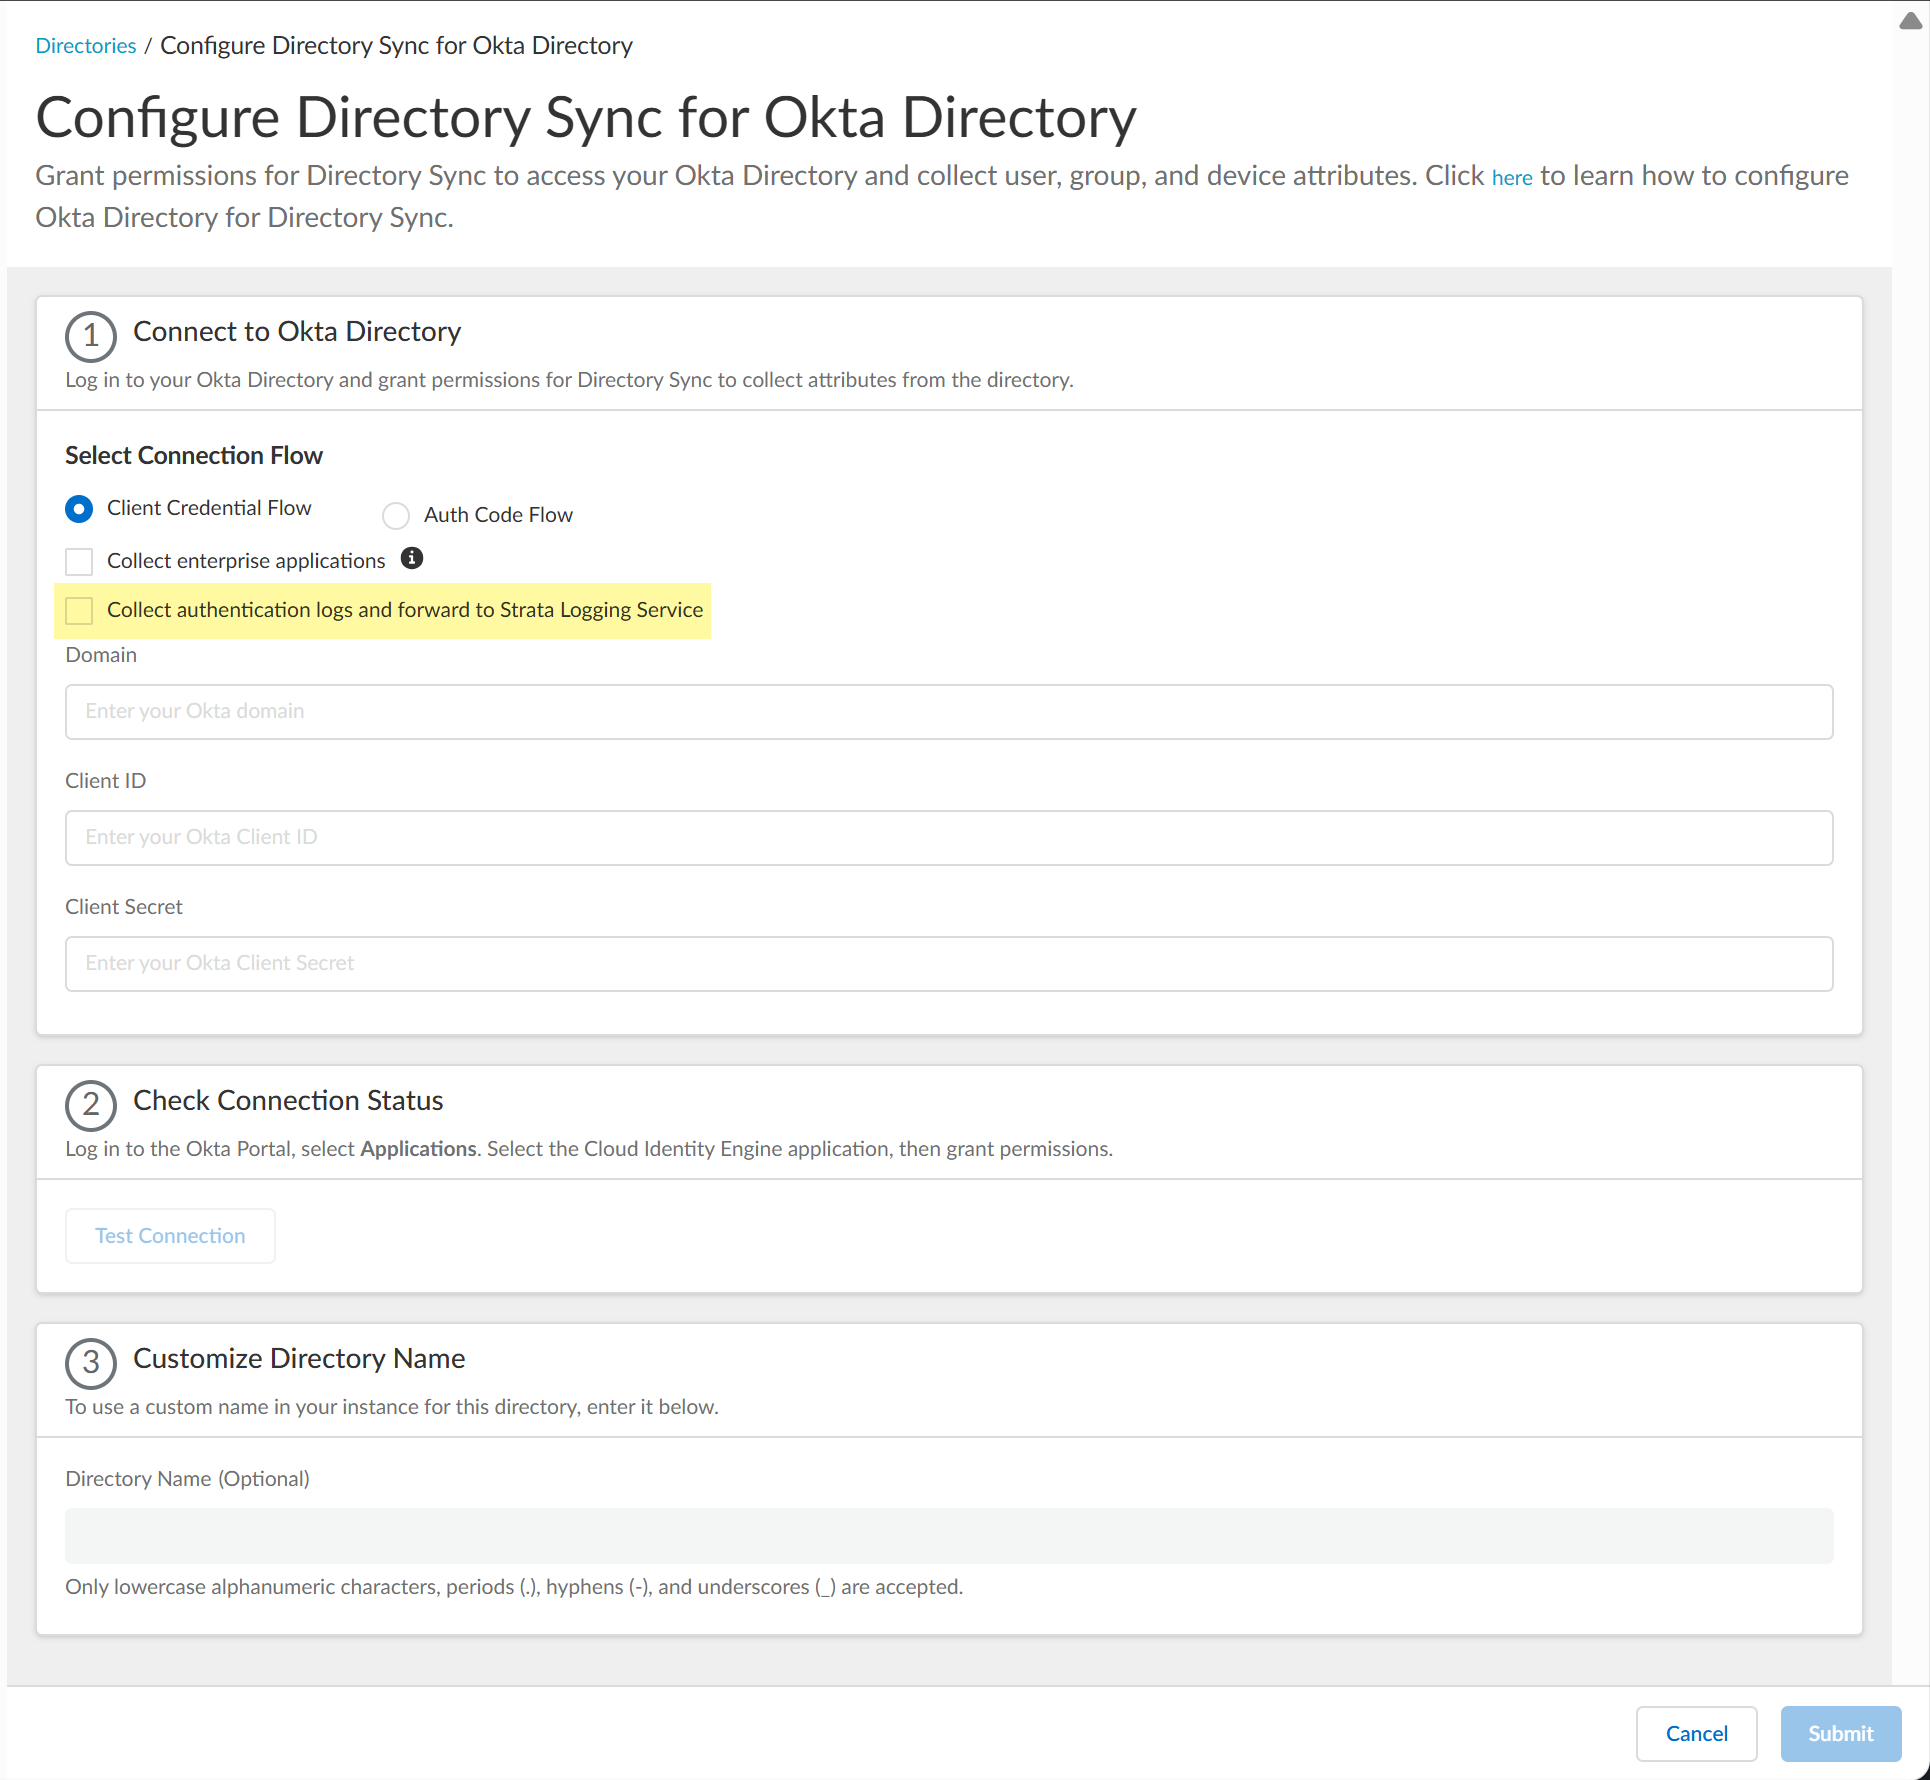
(Strata Logging Service only) Select whether you want to
Collect authentication logs and forward to Strata Logging
Service for retention and further analysis.
Paste the information you copied from the Okta management console into the
fields as indicated in the following table.
Okta Managment Console Field
Cloud Identity Engine App Field
Okta Domain
Domain
Client ID
Client ID
Client Secret
Client Secret
Click Test Connection to verify
the Cloud Identity Engine can successfully communicate with your
Okta directory.
You must test the connection to submit the configuration.
(Optional) Customize the name of the directory that displays
in the Cloud Identity Engine.
If you want to use a custom name for this directory in
the Cloud Identity Engine, enter the custom name as the Directory
Name (Optional).
Submit your changes and verify
your directory information when the Directories page
displays. Next Steps: