Configure a SAML 2.0-Compliant IdP in the Cloud Identity Engine
Table of Contents
Expand all | Collapse all
-
- Cloud Identity Engine Attributes
- Collect Custom Attributes with the Cloud Identity Engine
- View Directory Data
- Cloud Identity Engine User Context
- Create a Cloud Dynamic User Group
- Configure Third-Party Device-ID
- Configure an IP Tag Cloud Connection
- View Mappings and Tags
- Configure Dynamic Privilege Access in the Cloud Identity Engine
- Send Cortex XDR Risk Signals to Okta
- Configure SSF Okta Receiver as a Risk Connection
- Configure the Secrets Vault
-
- Set Up Password Authentication
-
- Configure Azure as an IdP in the Cloud Identity Engine
- Configure Okta as an IdP in the Cloud Identity Engine
- Configure PingOne as an IdP in the Cloud Identity Engine
- Configure PingFederate as an IdP in the Cloud Identity Engine
- Configure Google as an IdP in the Cloud Identity Engine
- Configure a SAML 2.0-Compliant IdP in the Cloud Identity Engine
- Set Up a Client Certificate
- Configure an OIDC Authentication Type
- Set Up an Authentication Profile
- Configure Cloud Identity Engine Authentication on the Firewall or Panorama
- Configure the Cloud Identity Engine as a Mapping Source on the Firewall or Panorama
- Configure Dynamic Privilege Access in the Cloud Identity Engine
- Get Help
Configure a SAML 2.0-Compliant IdP in the Cloud Identity Engine
Learn how to configure a SAML 2.0-compliant identity provider as an authentication
type in the Cloud Identity Engine.
To use a SAML 2.0-compliant identity provider (IdP) that is not listed as an
Identity Provider Vendor, you can configure the IdP using
the Others
- Obtain the information from your SAML 2.0-compliant IdP that you need to configure in the Cloud Identity Engine.
- Copy the following information from your IdP:
- Identity Provider ID
- Identity Provider Certificate
- Identity Provider SSO URL
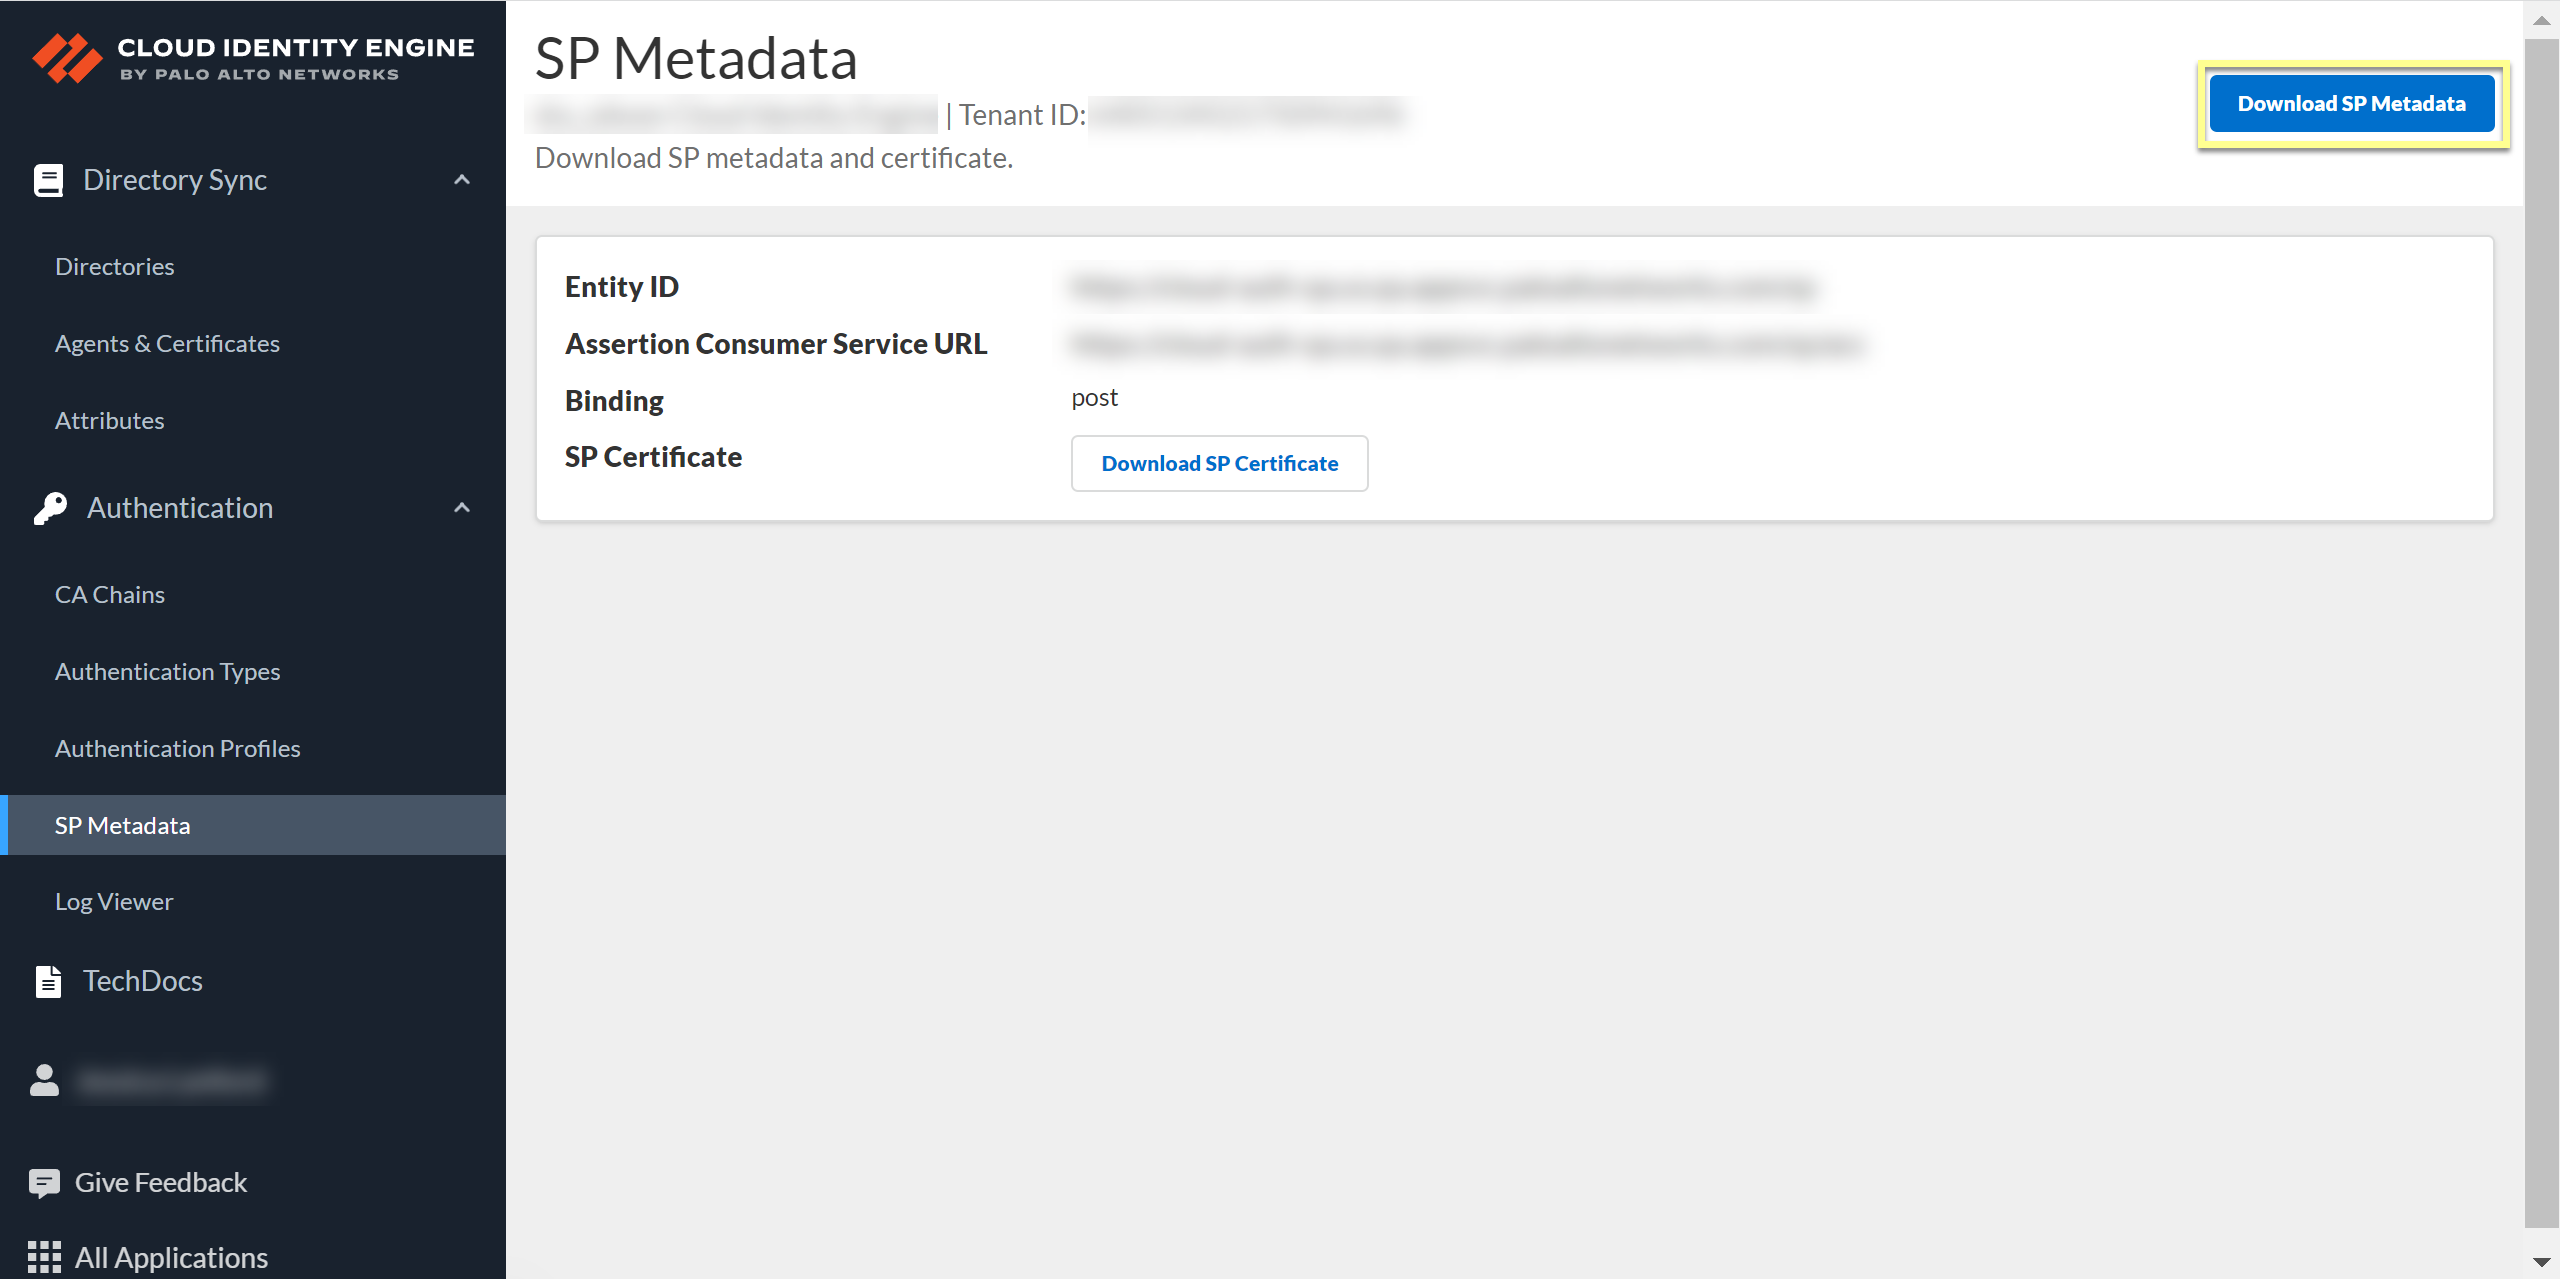
- In the Cloud Identity Engine app, select AuthenticationSP MetadataDownload SP Metadata and Save the metadata in a secure location.
![]() Configure the IdP in the Cloud Identity Engine.
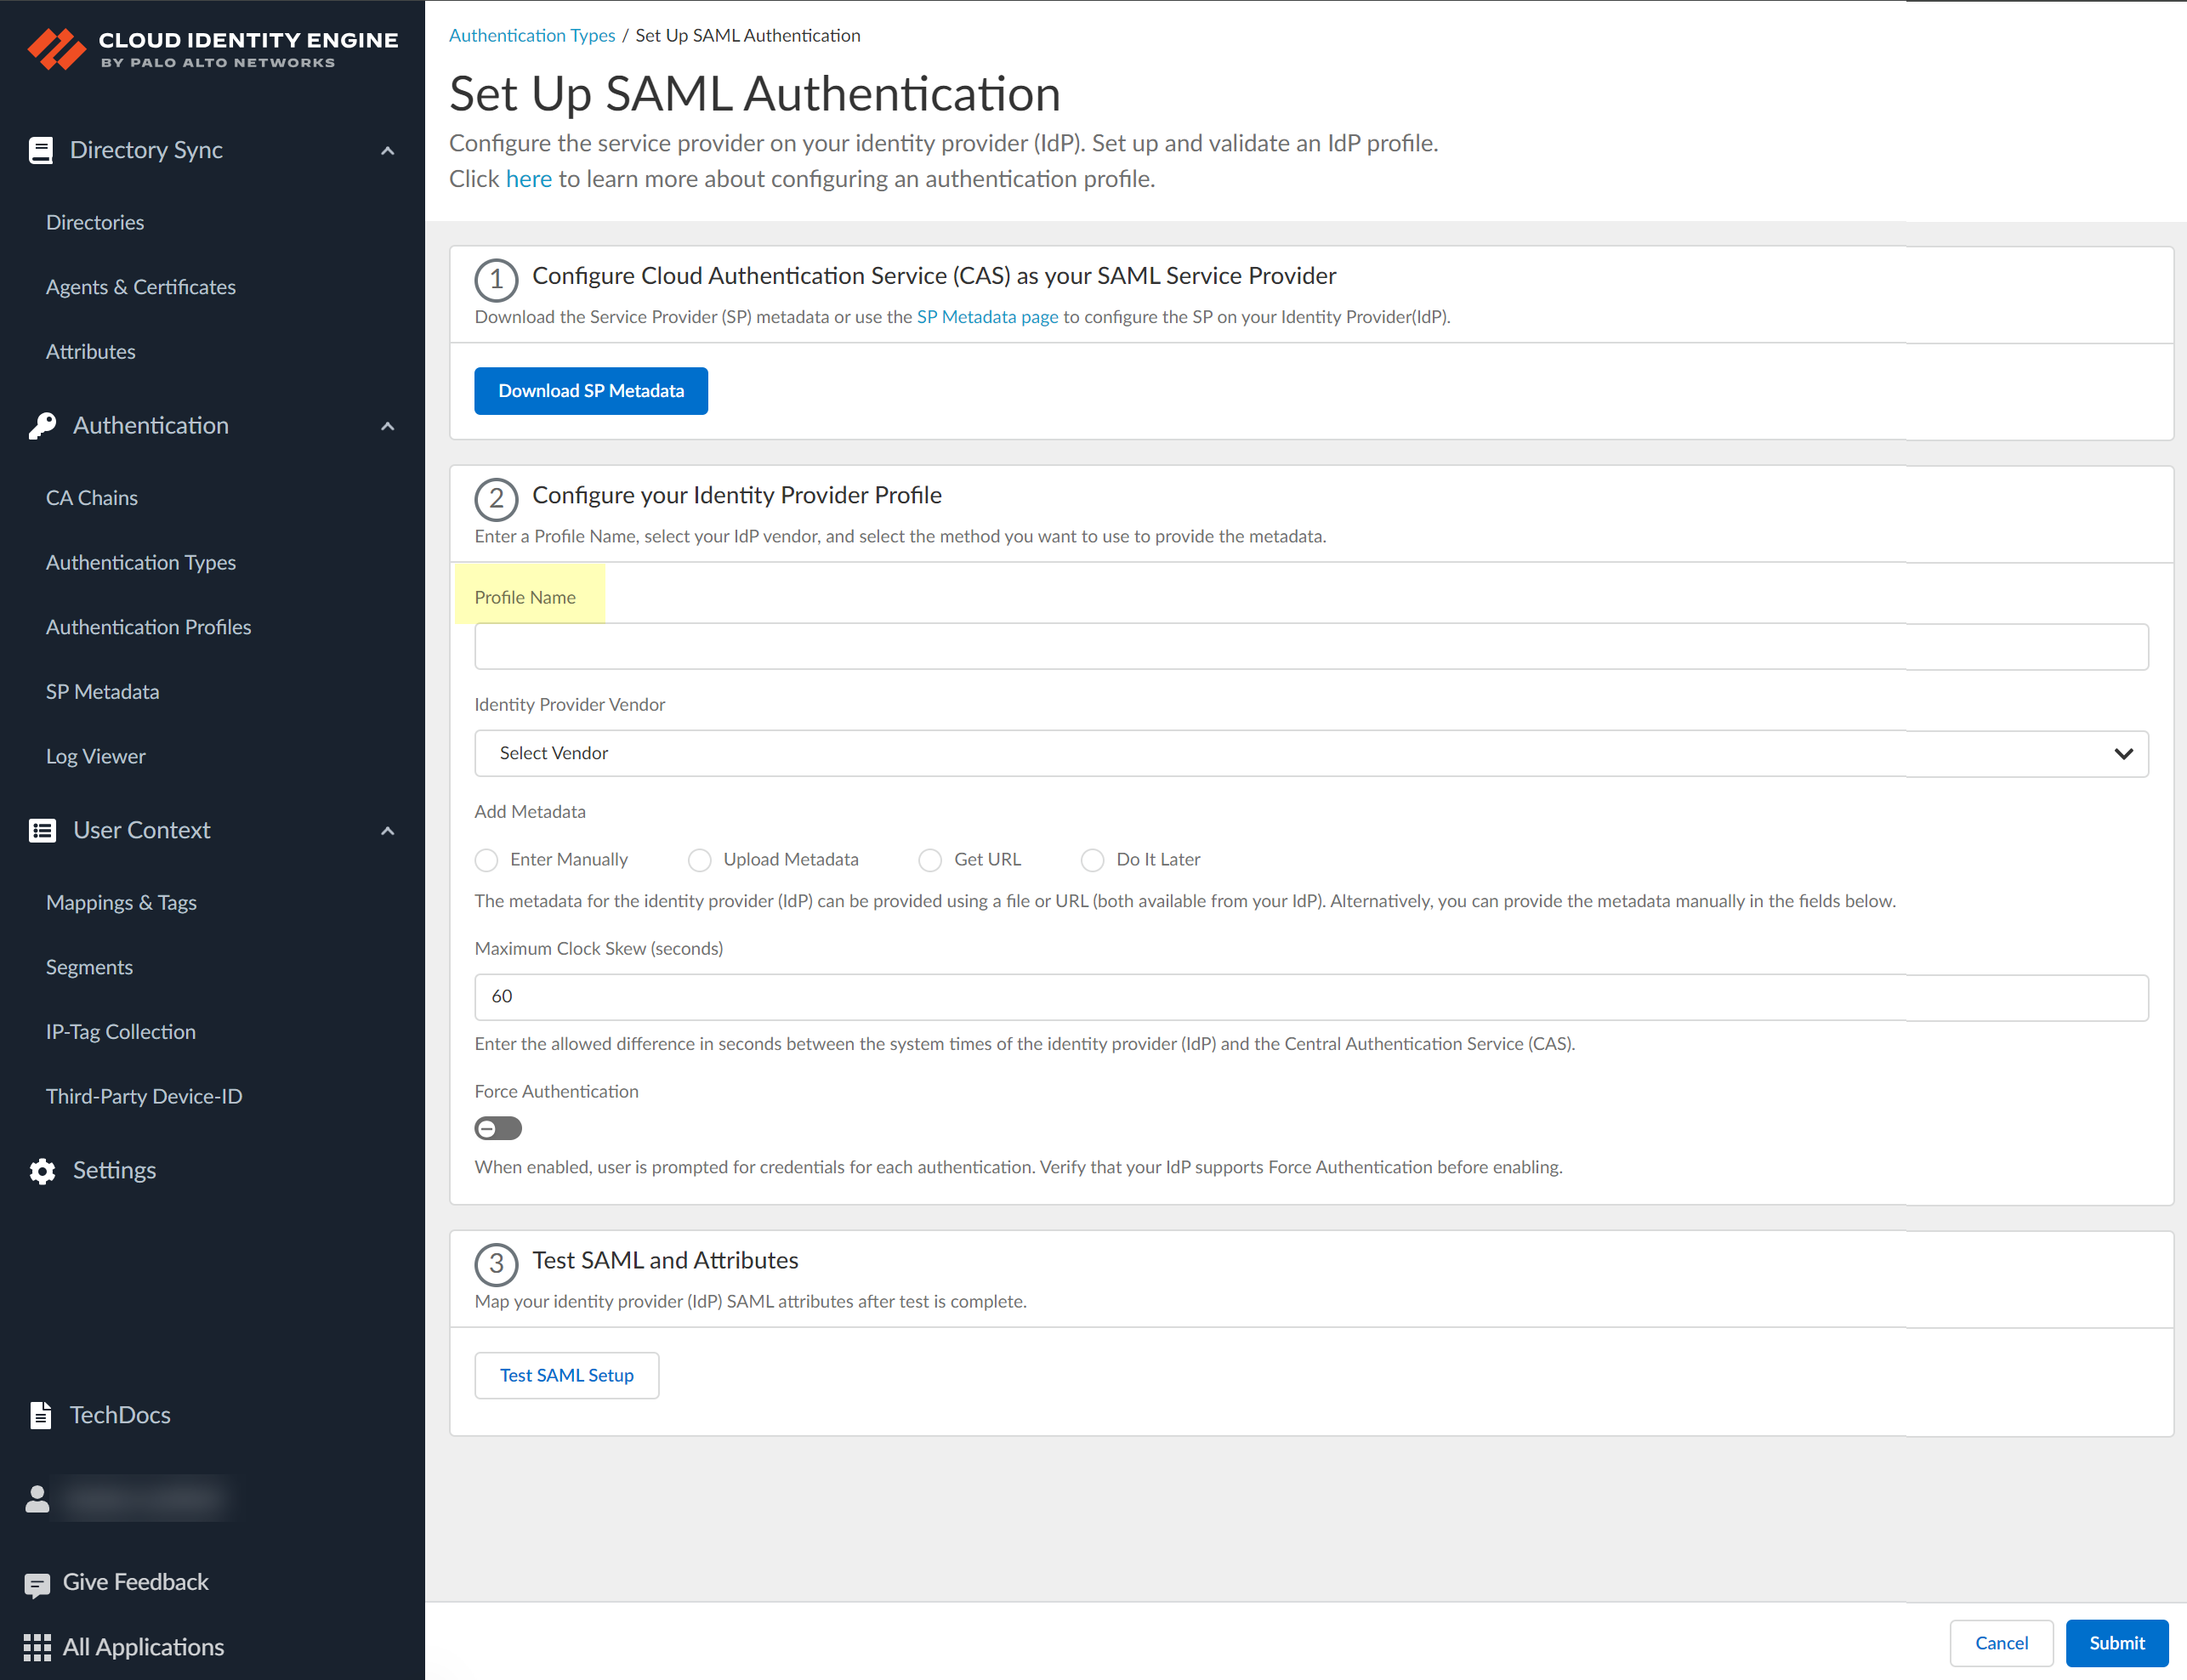
Configure the IdP in the Cloud Identity Engine.- Select Authentication Types and click Add New Authentication Type.
![]() Set Up a SAML 2.0 authentication type.
Set Up a SAML 2.0 authentication type.![]() Enter a Profile Name.
Enter a Profile Name.![]() Select Others as your Identity Provider Vendor.Select the method you want to use to Add Metadata.
Select Others as your Identity Provider Vendor.Select the method you want to use to Add Metadata.- If you want to enter the information manually, obtain the necessary
information from your IdP then enter the information in the Cloud
Identity Engine.
- Copy or download the following information from your IdP and
enter it in the Cloud Identity Engine app:
- Identity Provider ID
- Identity Provider Certificate
- Identity Provider SSO URL
- Select the HTTP Binding for SSO Request to
IdP method you want to use for the SAML binding
that allows the firewall and IdP to exchange request and
response messages:
- HTTP Redirect—Transmit SAML messages through URL parameters.
- HTTP Post—Transmit SAML messages using base64-encoded HTML.
- Copy or download the following information from your IdP and
enter it in the Cloud Identity Engine app:
- If you want to upload a metadata file, download the metadata file from
your IdP management system.
- Download the metadata from your IdP.
- In the Cloud Identity Engine app, click Browse files to select the metadata file then Open the metadata file.
- If you want to use a URL to retrieve the metadata, copy the URL from your IdP. Enter it as the Identity Provider Metadata URL in the Cloud Identity Engine and click Get URL to obtain the metadata.
- If you don't want to enter the configuration information now, you can Do it later. This option allows you to submit the profile without including configuration information. However, you must edit the profile to include the configuration information to use the authentication type in an authentication profile.
Specify the Maximum Clock Skew (seconds), which is the allowed difference in seconds between the system times of the IdP and the firewall at the moment when the firewall validates IdP messages (default is 60; range is 1–900). If the difference exceeds this value, authentication fails.To require users to log in using their credentials to reconnect to GlobalProtect, enable Force Authentication.Test SAML setup to verify the profile configuration.This step is necessary to confirm that your firewall and IdP can communicate.Select the SAML attributes you want the firewall to use for authentication and Submit the IdP profile.- In the IdP, edit as necessary the attributes you want to use to authenticate users.
- In the Cloud Identity Engine app, select the Username Attribute and optionally, the Usergroup Attribute, Access Domain, User Domain, and Admin Role.
![]()


