Learn how to set up Google Directory in the Cloud Identity Engine for user identification
and Security policy enforcement.
Where Can I Use This?
What Do I Need?
NGFW
Prisma Access
The Cloud Identity Engine service is free; however, the
enforcement points utilizing directory data may require specific
licenses. Click here for more
information.
When you configure your Google Directory in the Cloud Identity Engine, the Cloud Identity Engine
can access your Google Directory information to identify users and enforce Security
policy.
If you haven’t already done so, activate the Cloud Identity Engine.
Grant the necessary administrator rights in the Google
Admin console for the Cloud Identity Engine.
In the Google Admin console, select Admin roles.
Select a role then click Privileges.
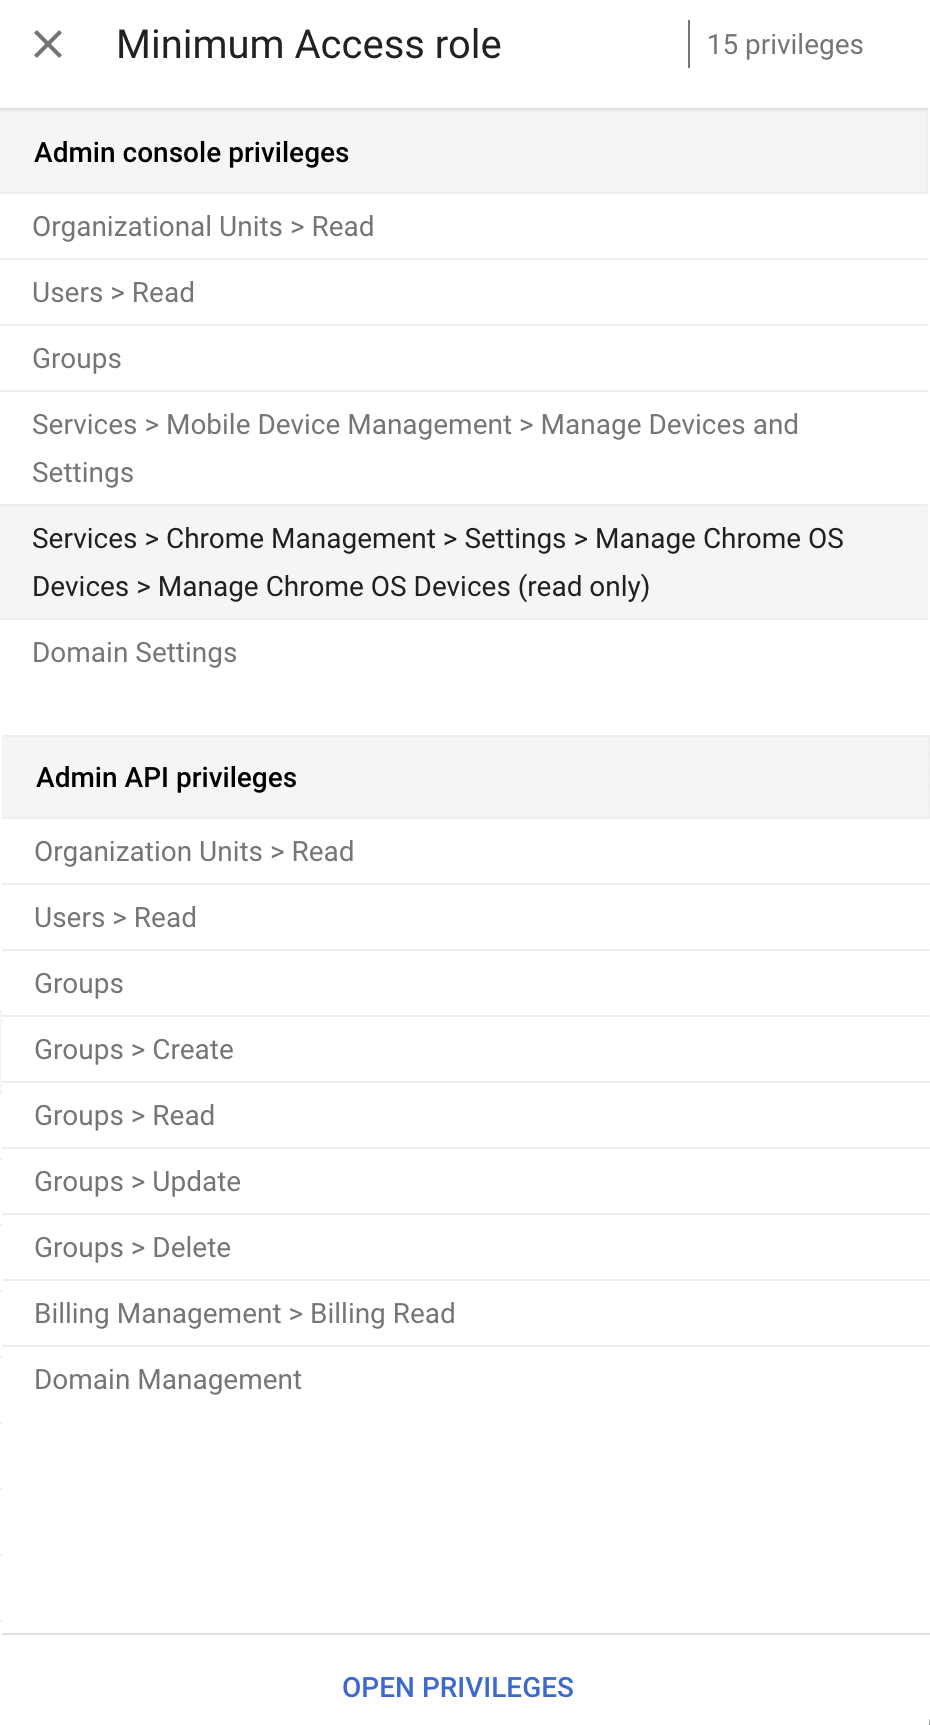
Select the following privileges then Save your changes:
Admin console privileges
Organizational
Units > Read
Users > Read
Groups
Services > Mobile Device Management > Manage Devices and Settings
Services > Chrome Management > Settings > Manage Chrome OS > Devices > Manage Chrome OS Devices
(read-only)
Domain Settings
Admin API privileges
Organization Units > Read
Users > Read
Groups
Groups > Create
Groups > Read
Groups > Update
Groups > Delete
Billing Management > Billing Read
Domain Management
Log in to the Google Admin console and configure the
Cloud Identity Engine app in the Google Admin console.
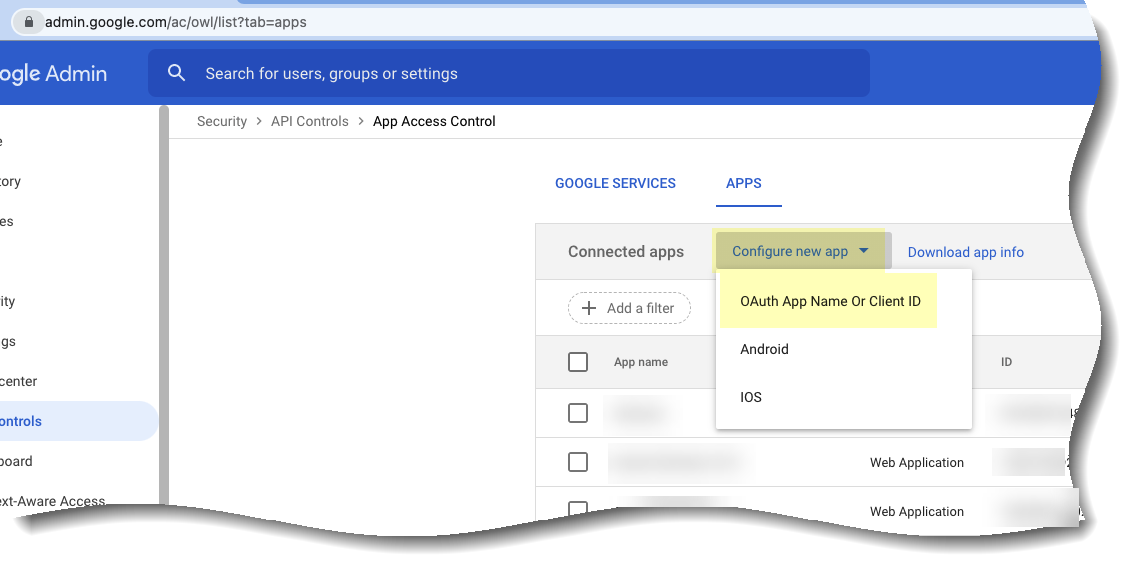
Select SecurityAPI controls and click Manage
Third-Party App Access.
Select Configure new appOAuth App Name Or Client ID.
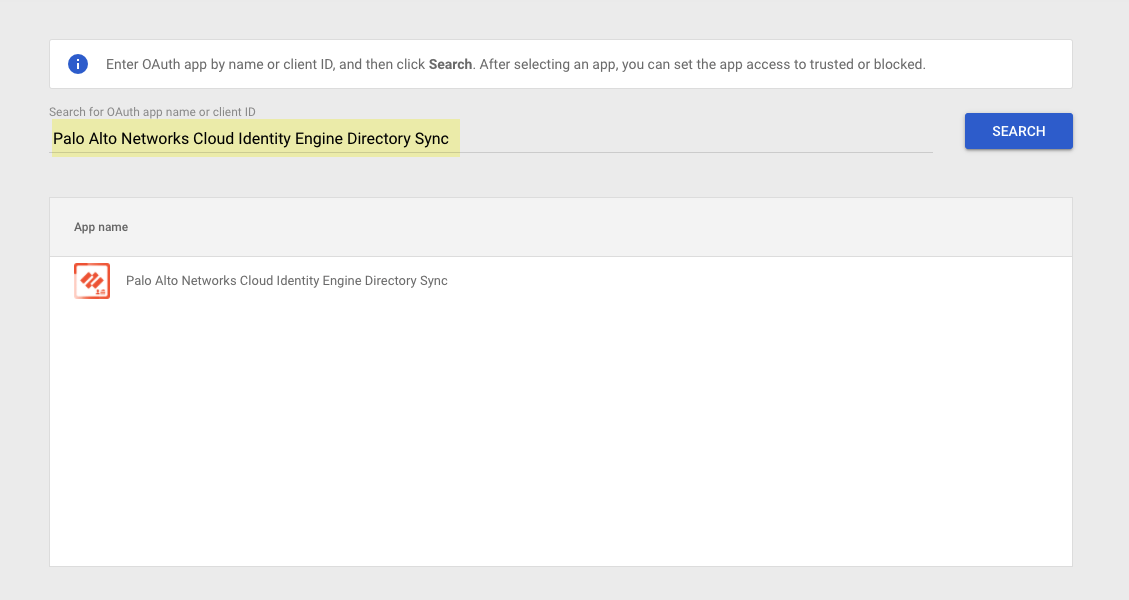
Enter Palo Alto Networks Cloud Identity Engine Directory Sync and
click Search.
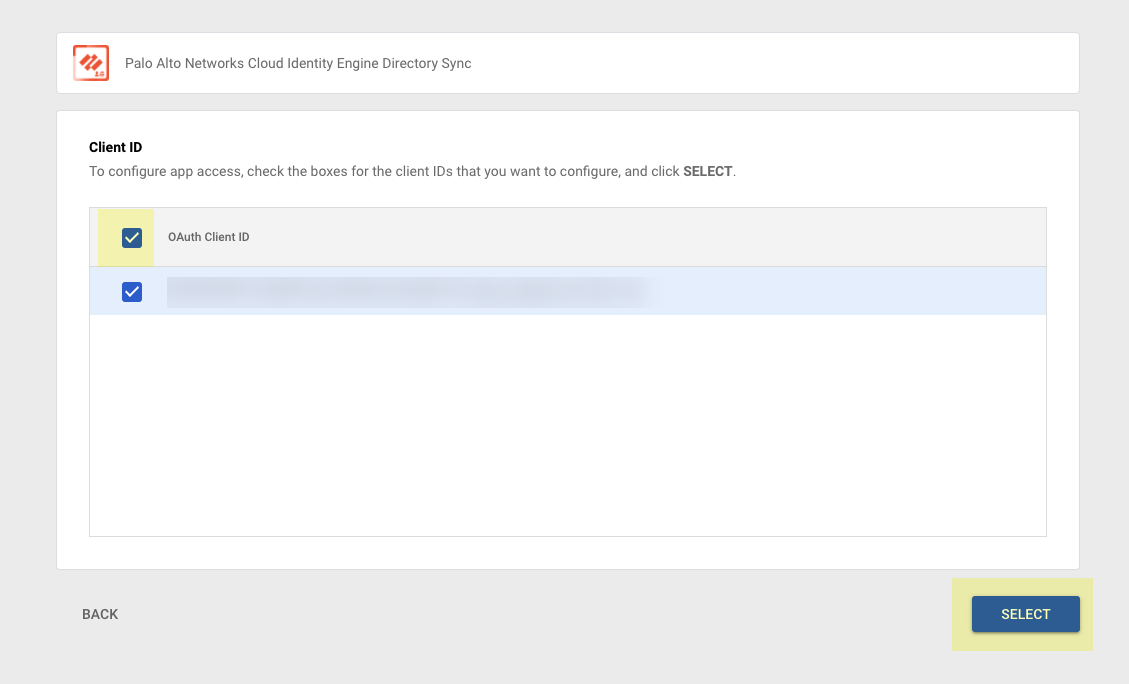
Select the OAuth Client ID option if it isn’t
already selected then click Select.
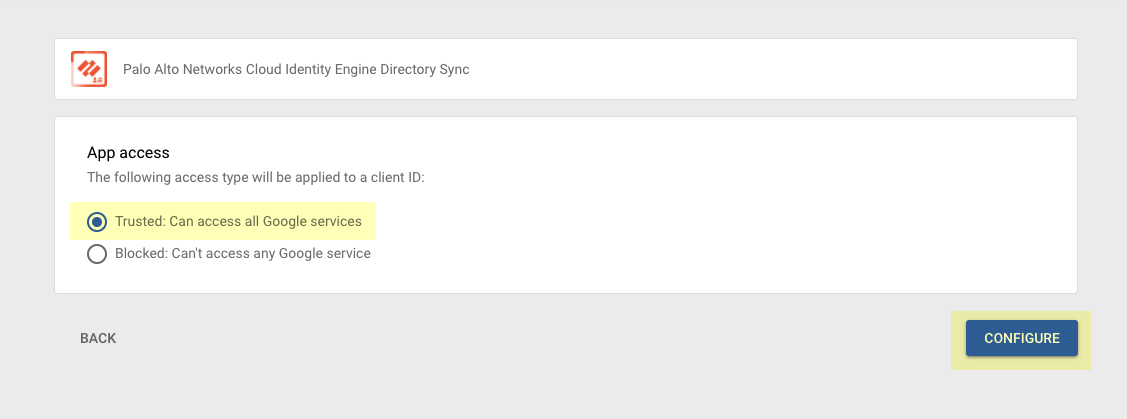
Select Trusted: Can access all Google services as
the App access option then Configure the
app.
Collect the necessary information from the Google Admin console to configure
the Google Directory in the Cloud Identity Engine.
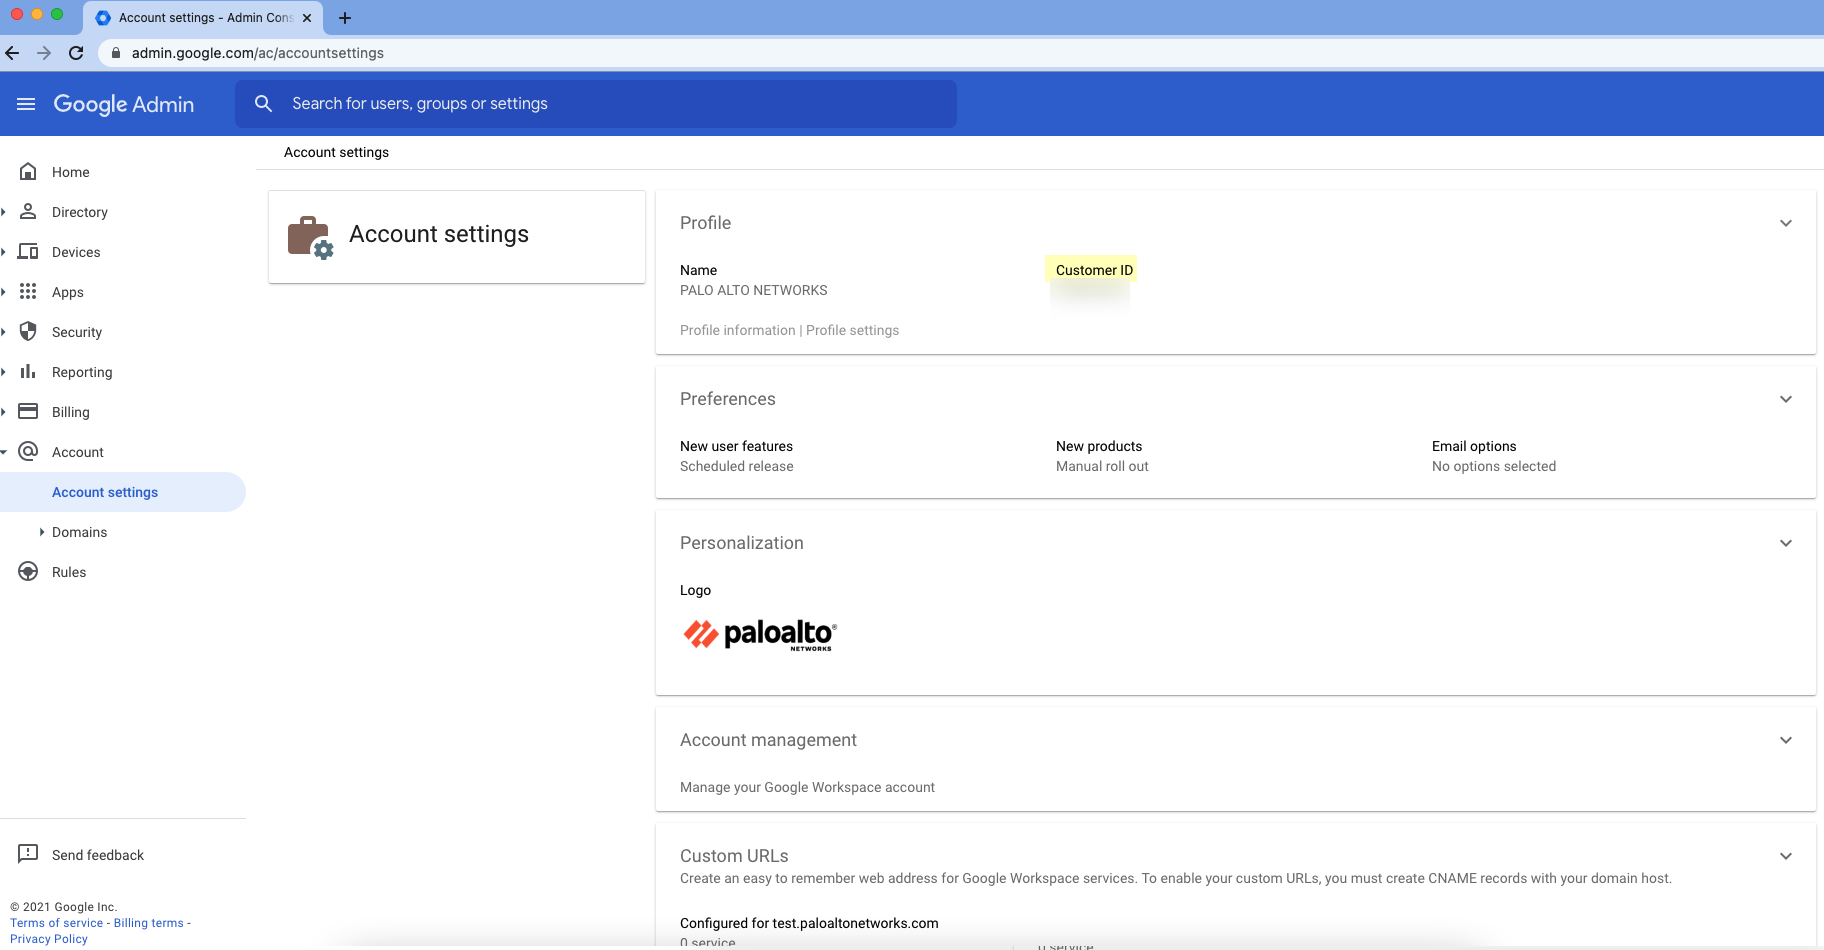
Select AccountAccount Settings.
Copy the Customer ID and store it in a secure
location.
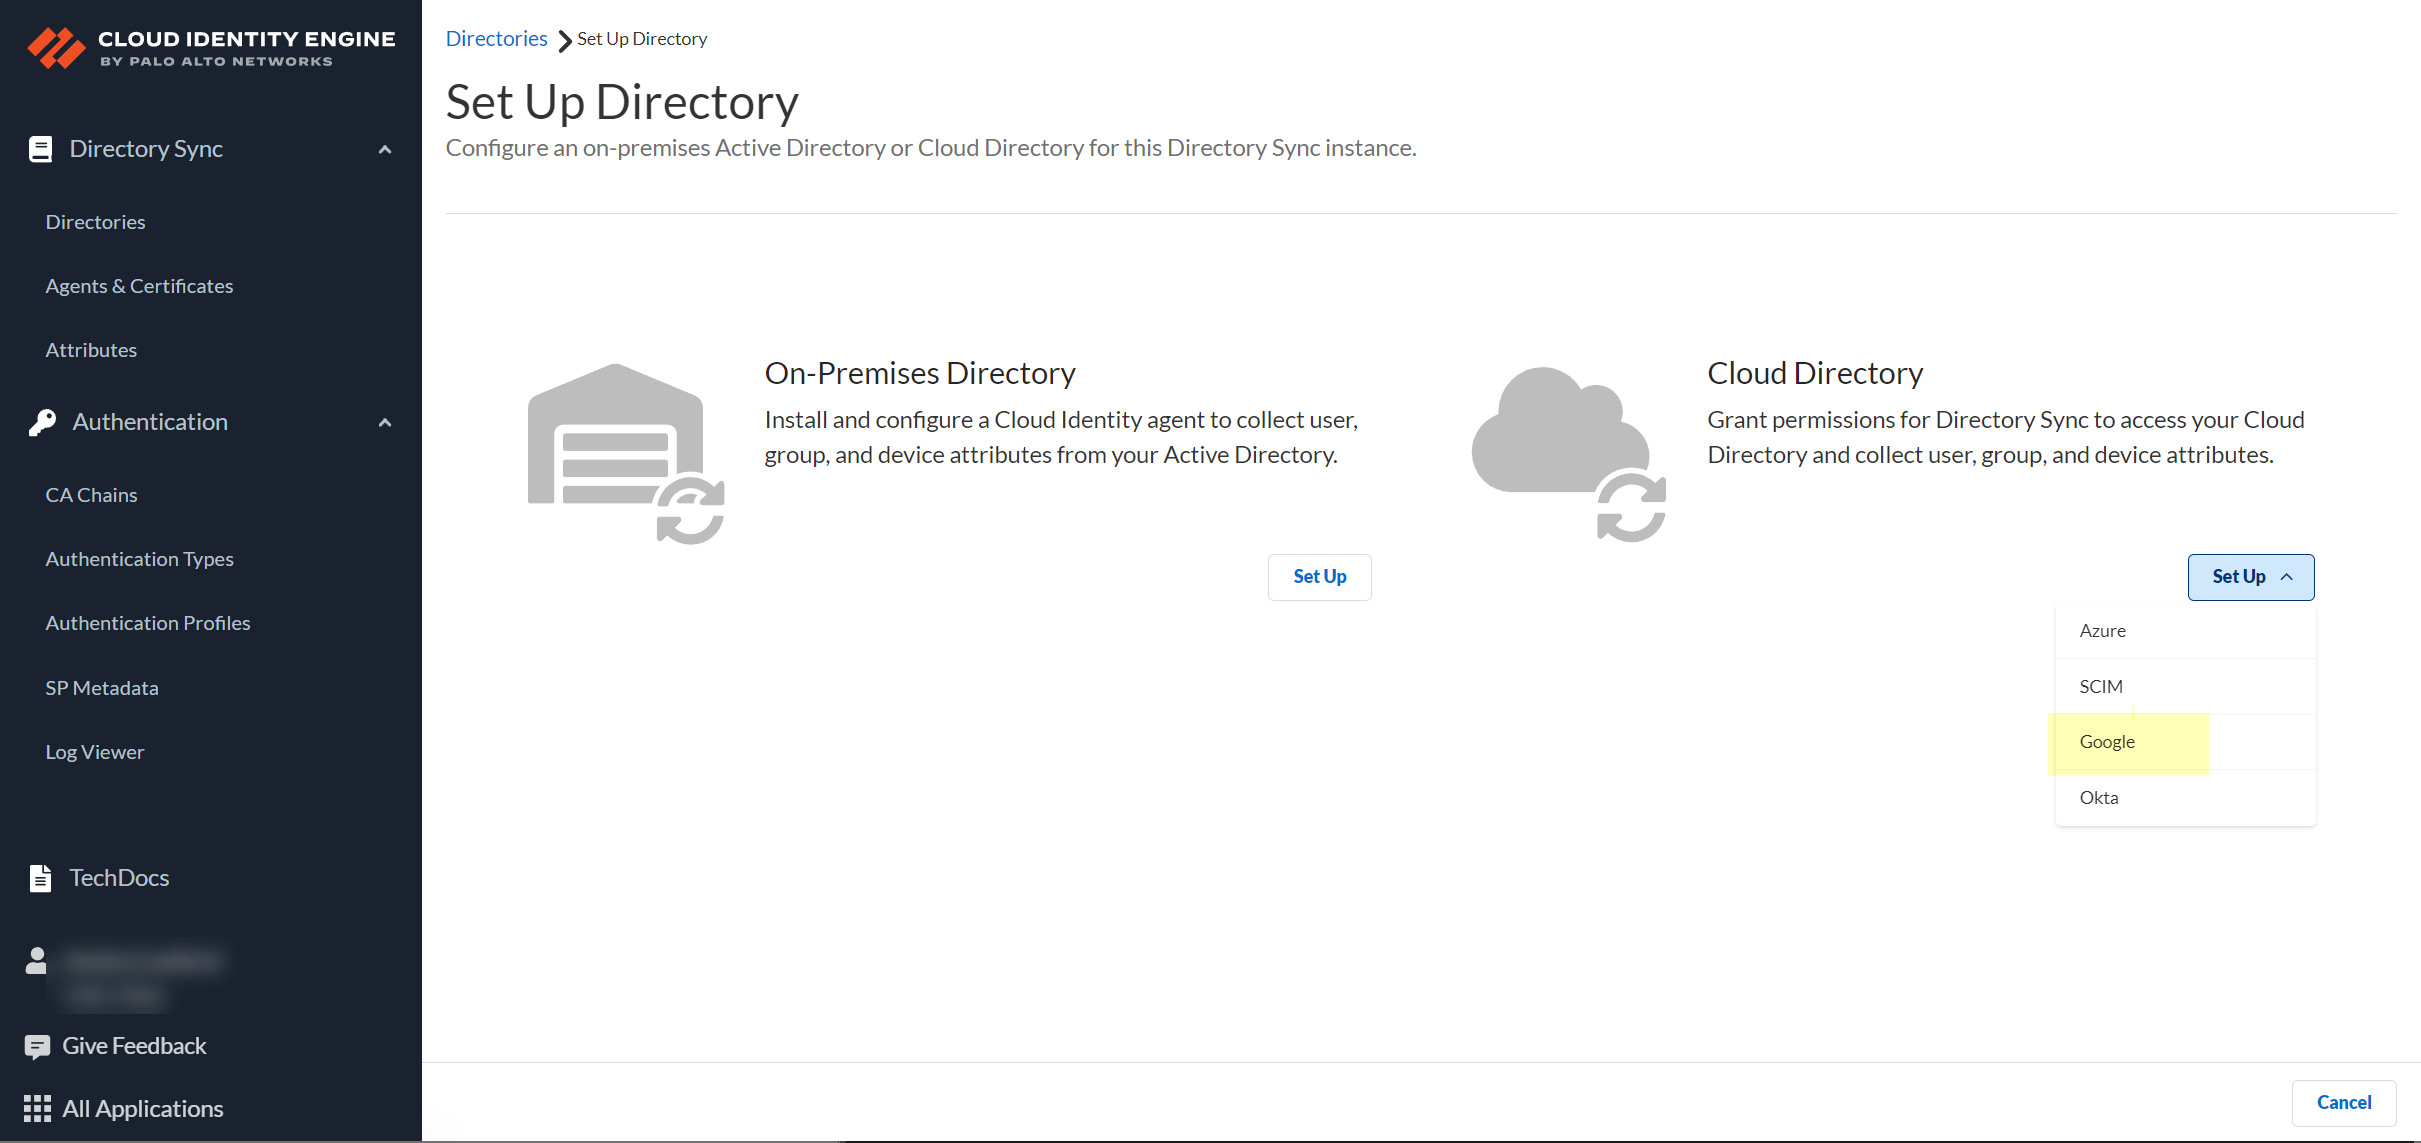
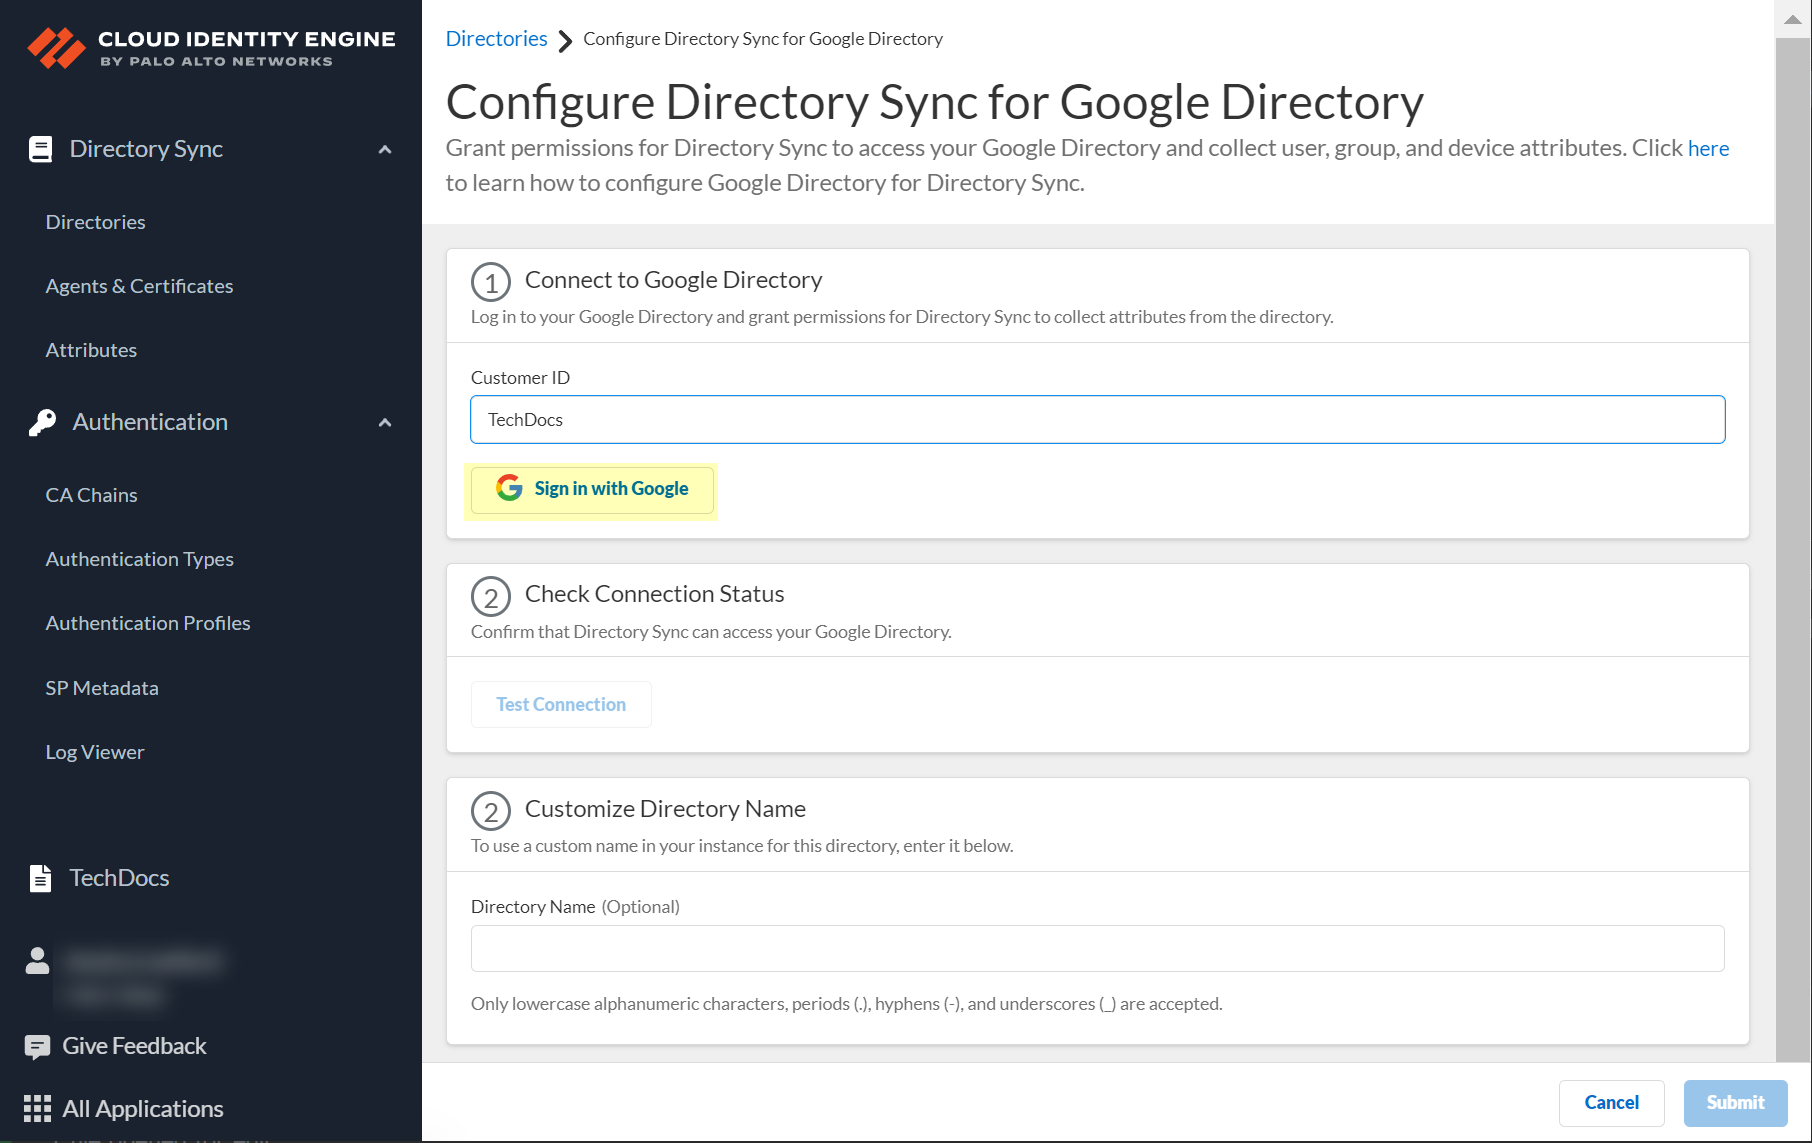
In the Cloud Identity Engine app, select DirectoriesAdd Directory.
Set Up a Cloud Directory and
select Google.
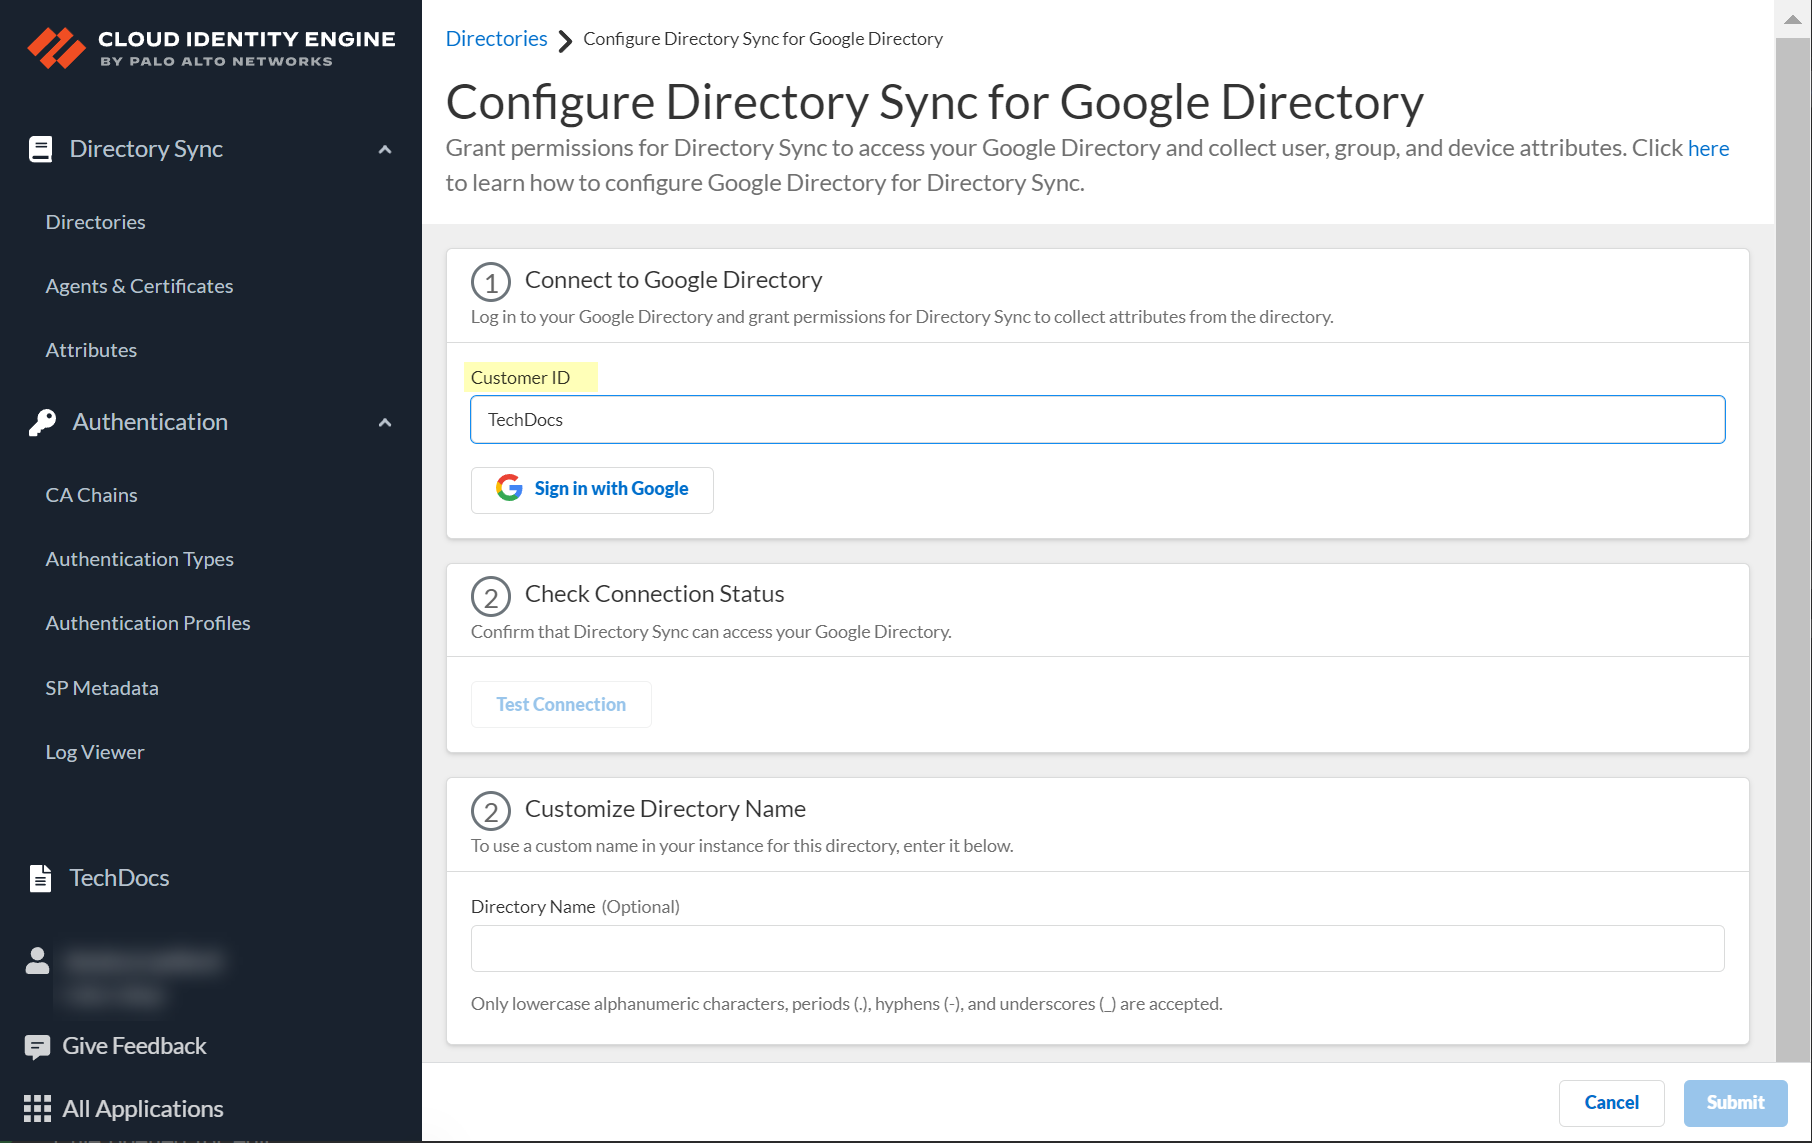
Enter your Customer ID that you copied in step 4.
Sign in with Google by entering
the Google Admin credentials for the account associated with the
Customer ID.
When the
login is successful, Signed In displays.
Click Test Connection to verify
your configuration.
When the test is successful, Success displays.
(Optional) Customize the name the Cloud Identity Engine
displays for your Google Directory.
By default, the Cloud Identity Engine uses the default domain name.
You can use up to 15 lowercase alphanumeric characters
(including hyphens, periods, and underscores) for the directory name in the
Cloud Identity Engine.
Submit the configuration.
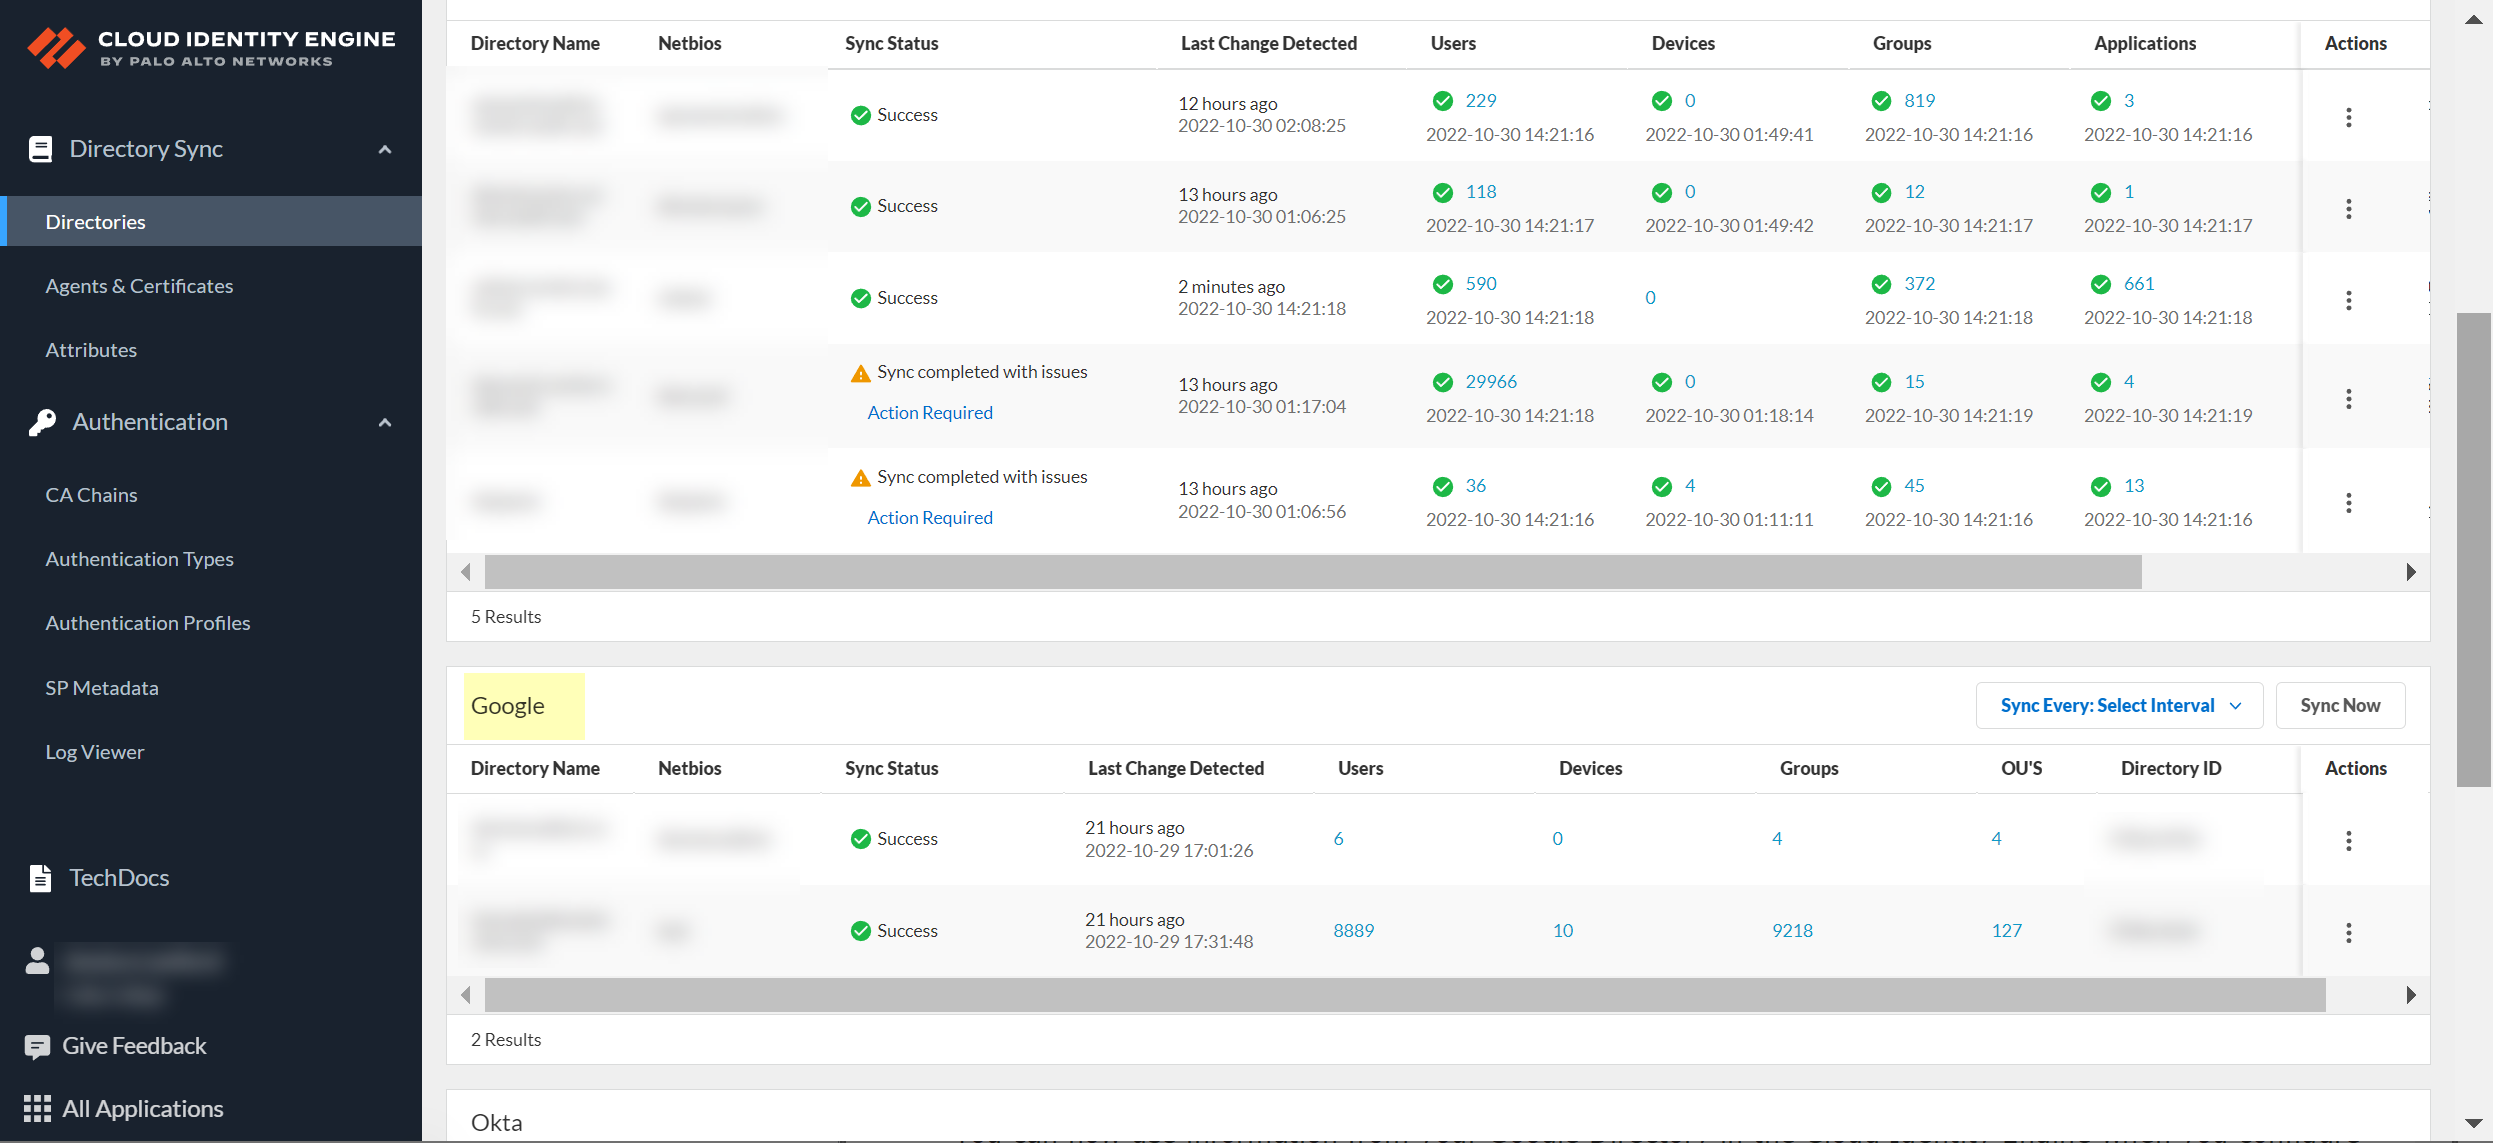
When you submit the configuration successfully, the Cloud Identity Engine displays the
Directories page.
You can now use information from your Google Directory in the Cloud
Identity Engine when you configure a user- or group-based security policy rule
or with other Palo Alto Networks applications.