Configure SSF Okta Receiver as a Risk Connection
Table of Contents
Configure SSF Okta Receiver as a Risk Connection
Protect your network from compromised credentials by using Cloud Identity Engine to
receive third-party risk signals and use them in security policies.
If there is a possibility of compromise for user credentials in your network,
attackers can gain access to your network resources because the firewall can’t
detect that the account has been compromised. The Cloud Identity Engine (CIE)
Security Signal Framework (SSF) Receiver enables you to receive risk signals from
third-party identity providers such as Okta and use these signals in risk-based
security rules on your next-generation firewalls and Prisma® Access. By configuring
the SSF Receiver, you can detect events such as session revocation or credential
changes, and then automatically take security actions like terminating sessions or
enforcing multi-factor authentication.
When you configure an SSF Okta Receiver risk connection, CIE automatically receives
risk signals that you implement into your Conditional Dynamic User Groups (CDUGs).
These groups can then be used in firewall security rules to implement adaptive
access controls. For example, when Okta detects that a user's session has been
revoked, you can automatically terminate their active network sessions or require
additional authentication.
You can monitor stream health and activity using the Cloud Identity Engine, where you
can view the status of connections, check event logs, and troubleshoot any issues
that might arise. The Cloud Identity Engine provides clear error messages and
remediation steps when problems occur with SSF streams, ensuring you can quickly
address any connectivity issues. As your security needs evolve, you can modify or
delete streams; the system warns you about changes with potential impacts to
existing security policy rules.
The CIE SSF Receiver feature strengthens your security posture by adding real-time
identity risk context to your security rules, enabling you to automatically respond
to potential account compromises before attackers can exploit them. This integration
between your identity providers and network security controls creates a more
comprehensive and responsive security environment that adapts to changing risk
conditions.
- Create the Okta app configuration. Configure an Configure Okta as an IdP in the Cloud Identity Engine and Choose Your Directory Type.If you already have an existing Okta app configuration, you must create a new app configuration. You can't reuse the same app to onboard the directory and to create an SSF receiver risk connection.
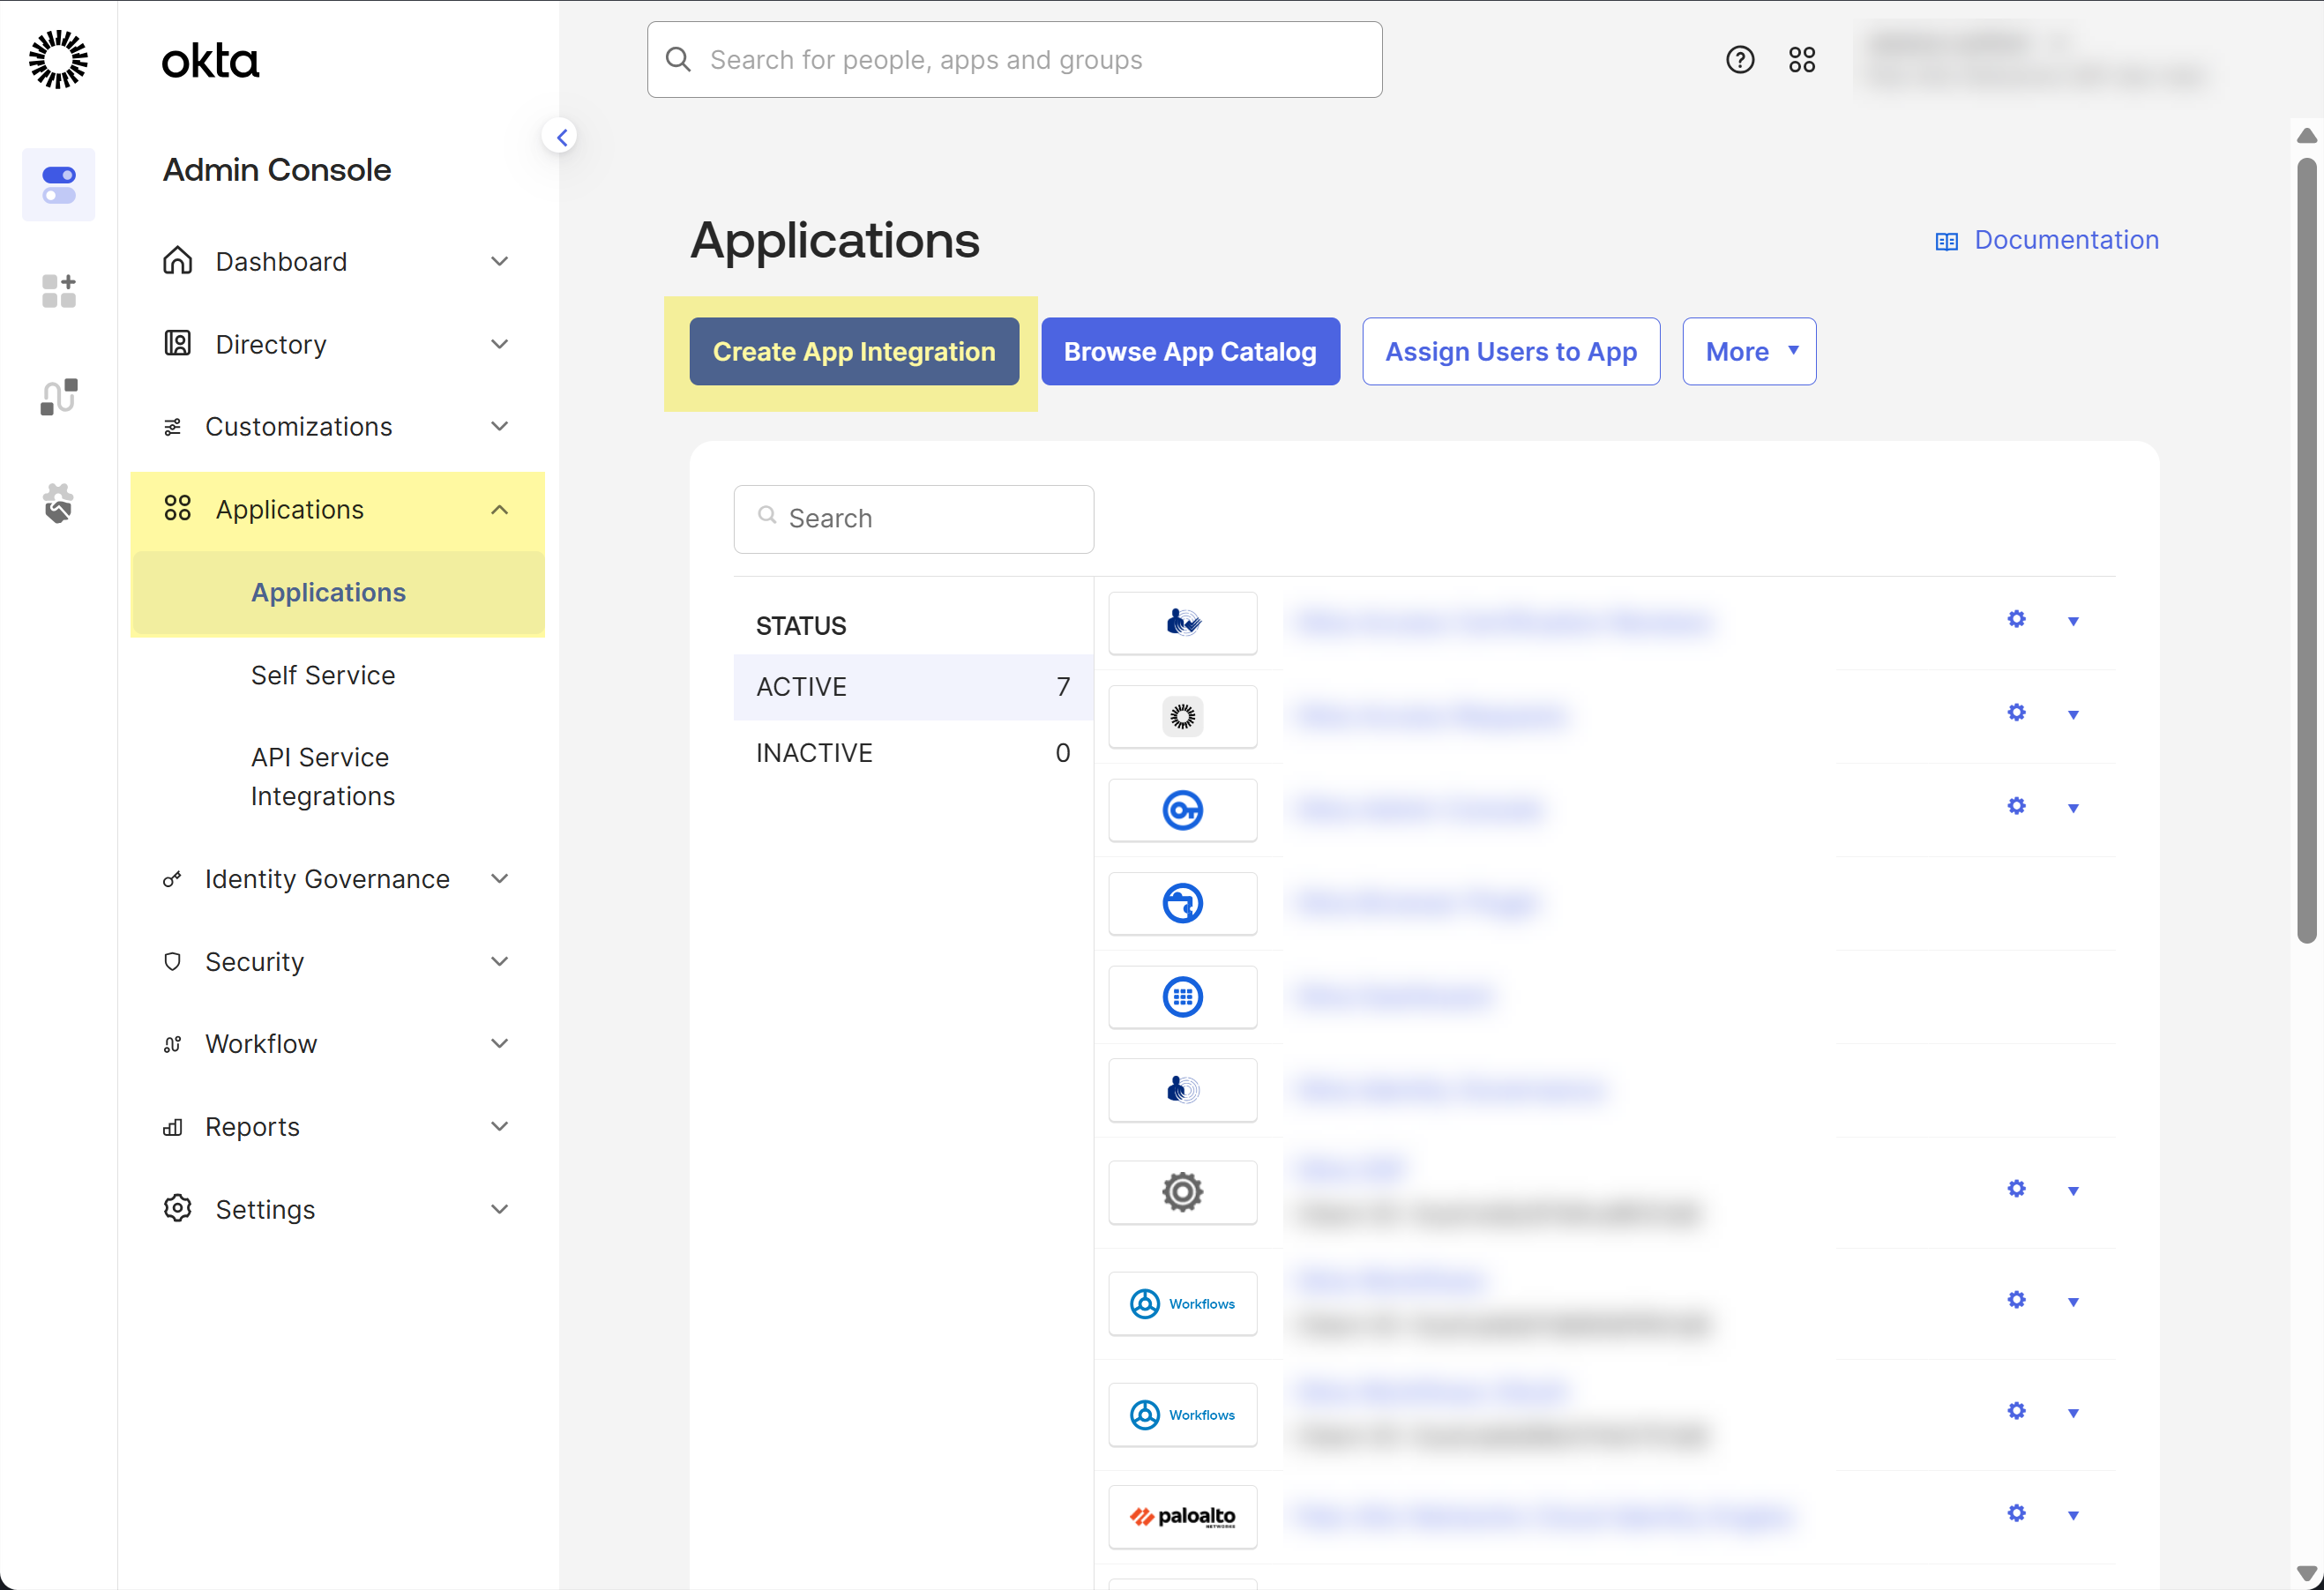
- Copy the URL for your Cloud Identity Engine tenant and edit it to obtain the Sign-in redirect URI that Okta requires. To edit the URL, replace the text after the domain with /authorize. For example, if your Cloud Identity Engine tenant URL is https://directory-sync.us.paloaltonetworks.com/directory?instance=<InstanceId>, your Redirect URL is https://directory-sync.us.paloaltonetworks.com/authorize.Create an app integration for the Cloud Identity Engine app in Okta.
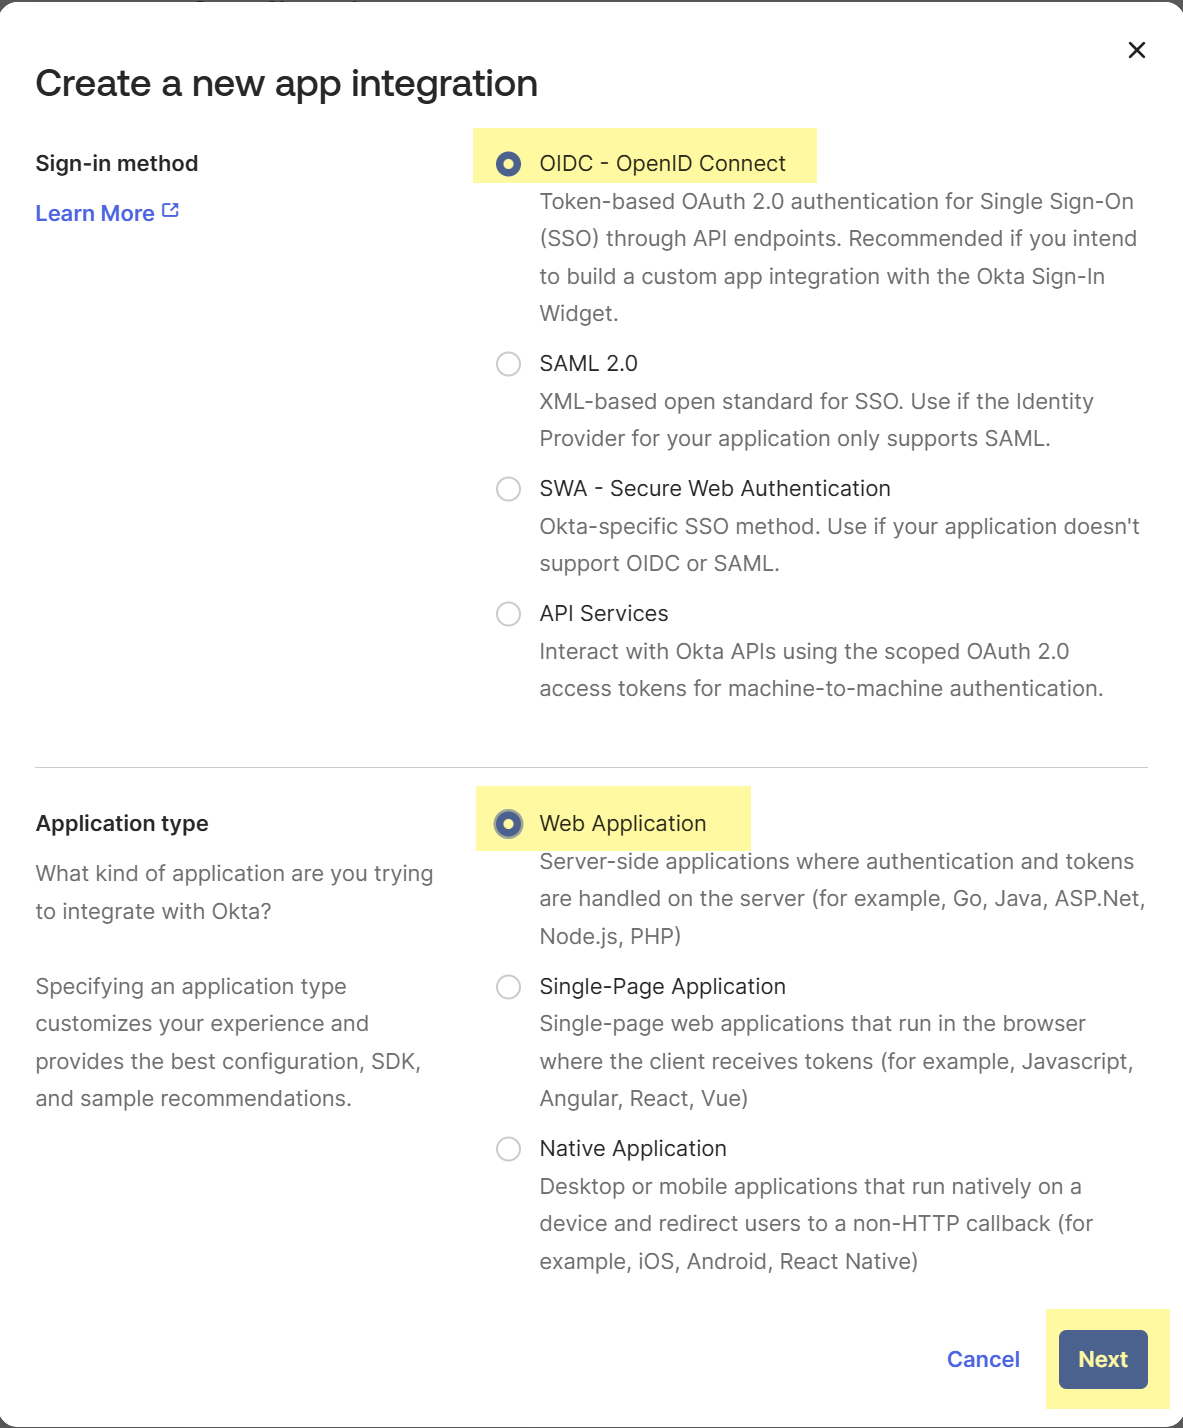
![]() Select OIDC - OpenID Connect as the Sign-in method.Select Web Application as the Application type then click Next.
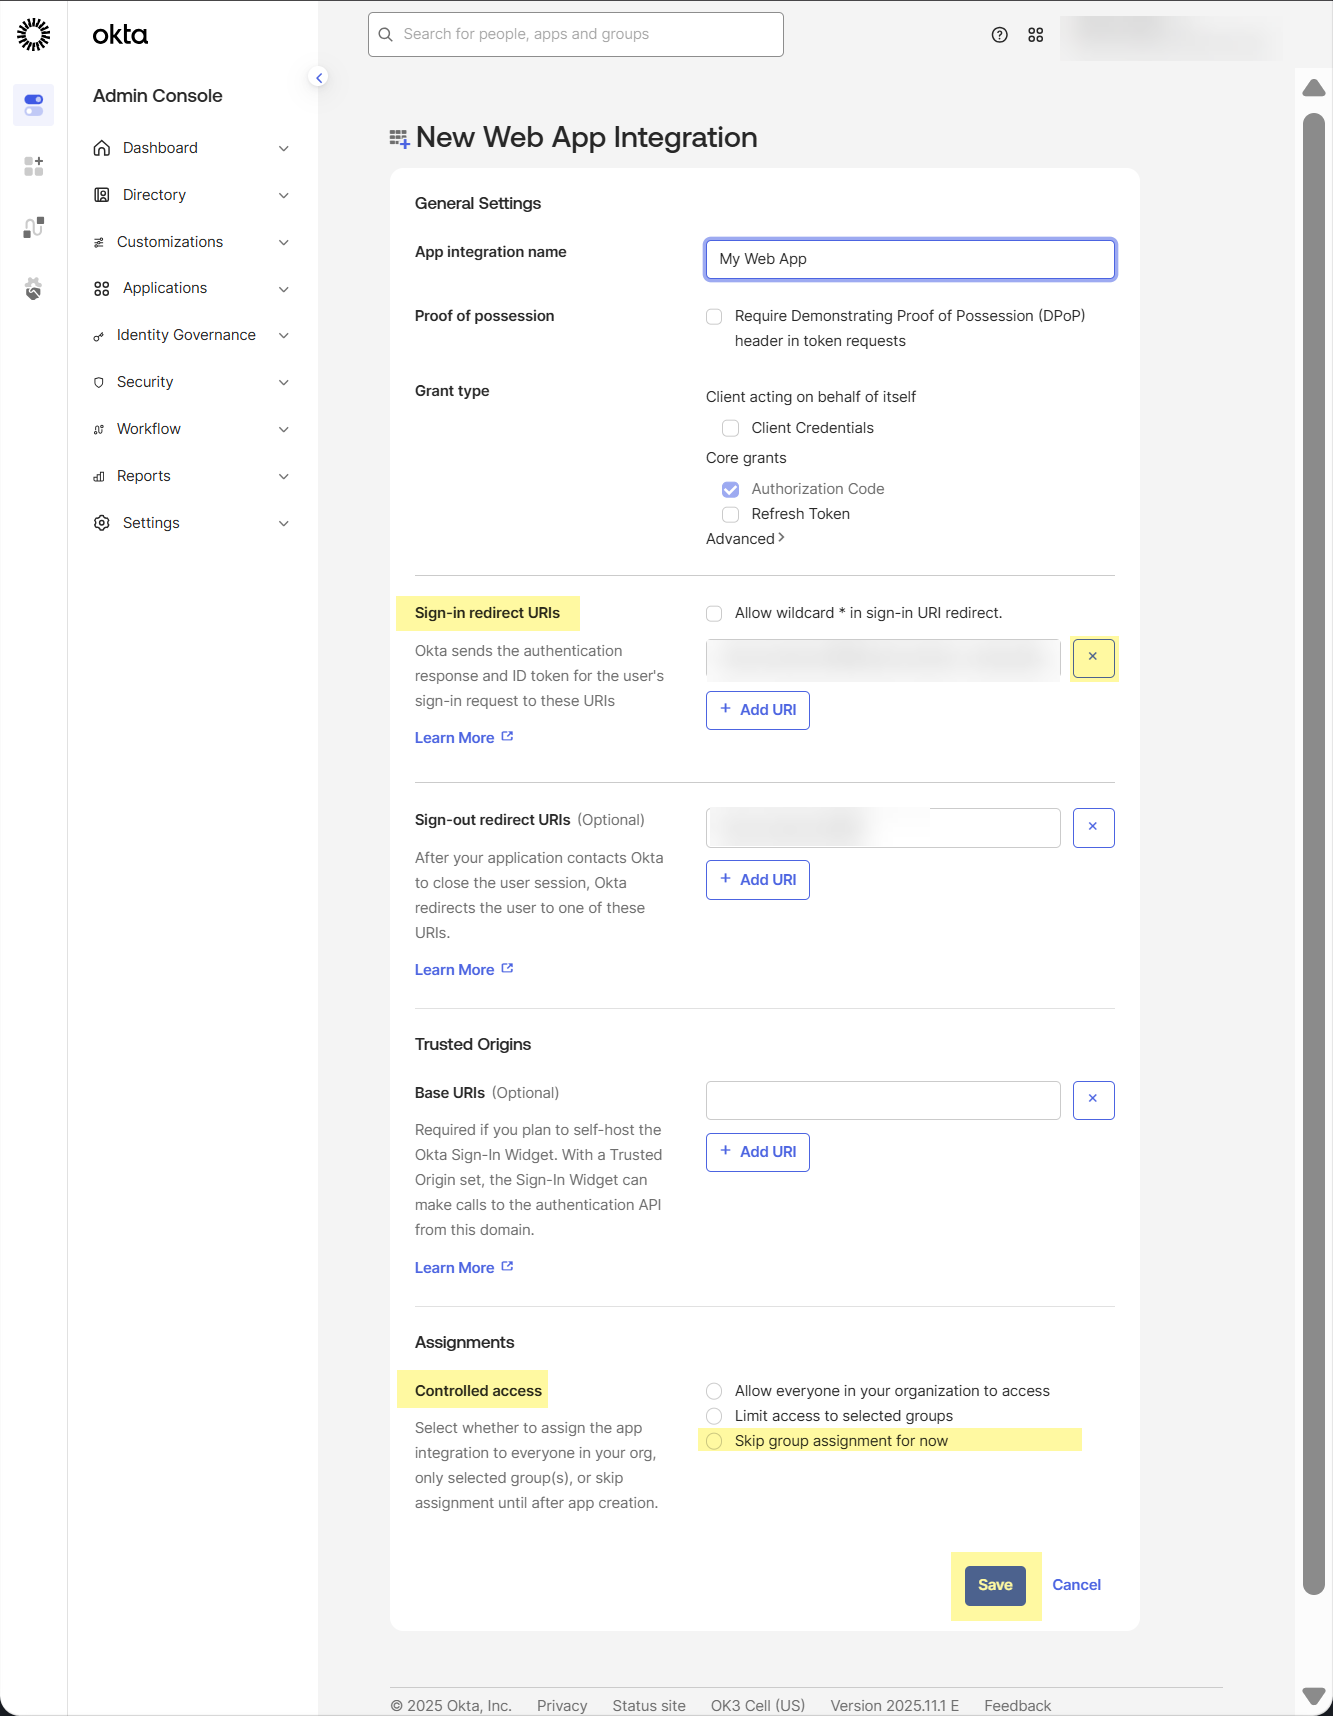
Select OIDC - OpenID Connect as the Sign-in method.Select Web Application as the Application type then click Next.![]() Click the X button to clear the current entry and replace the existing Sign-in redirect URIs with the edited URL from step 1.a.
Click the X button to clear the current entry and replace the existing Sign-in redirect URIs with the edited URL from step 1.a.![]() Palo Alto Networks recommends separating regions by aligning region-specific tenants with region-specific Okta accounts. However, for testing, if you have Cloud Identity Engine tenants in more than one region, add Sign-in redirect URIs for each region where you have a tenant.Edit the General Settings for the app you just created.
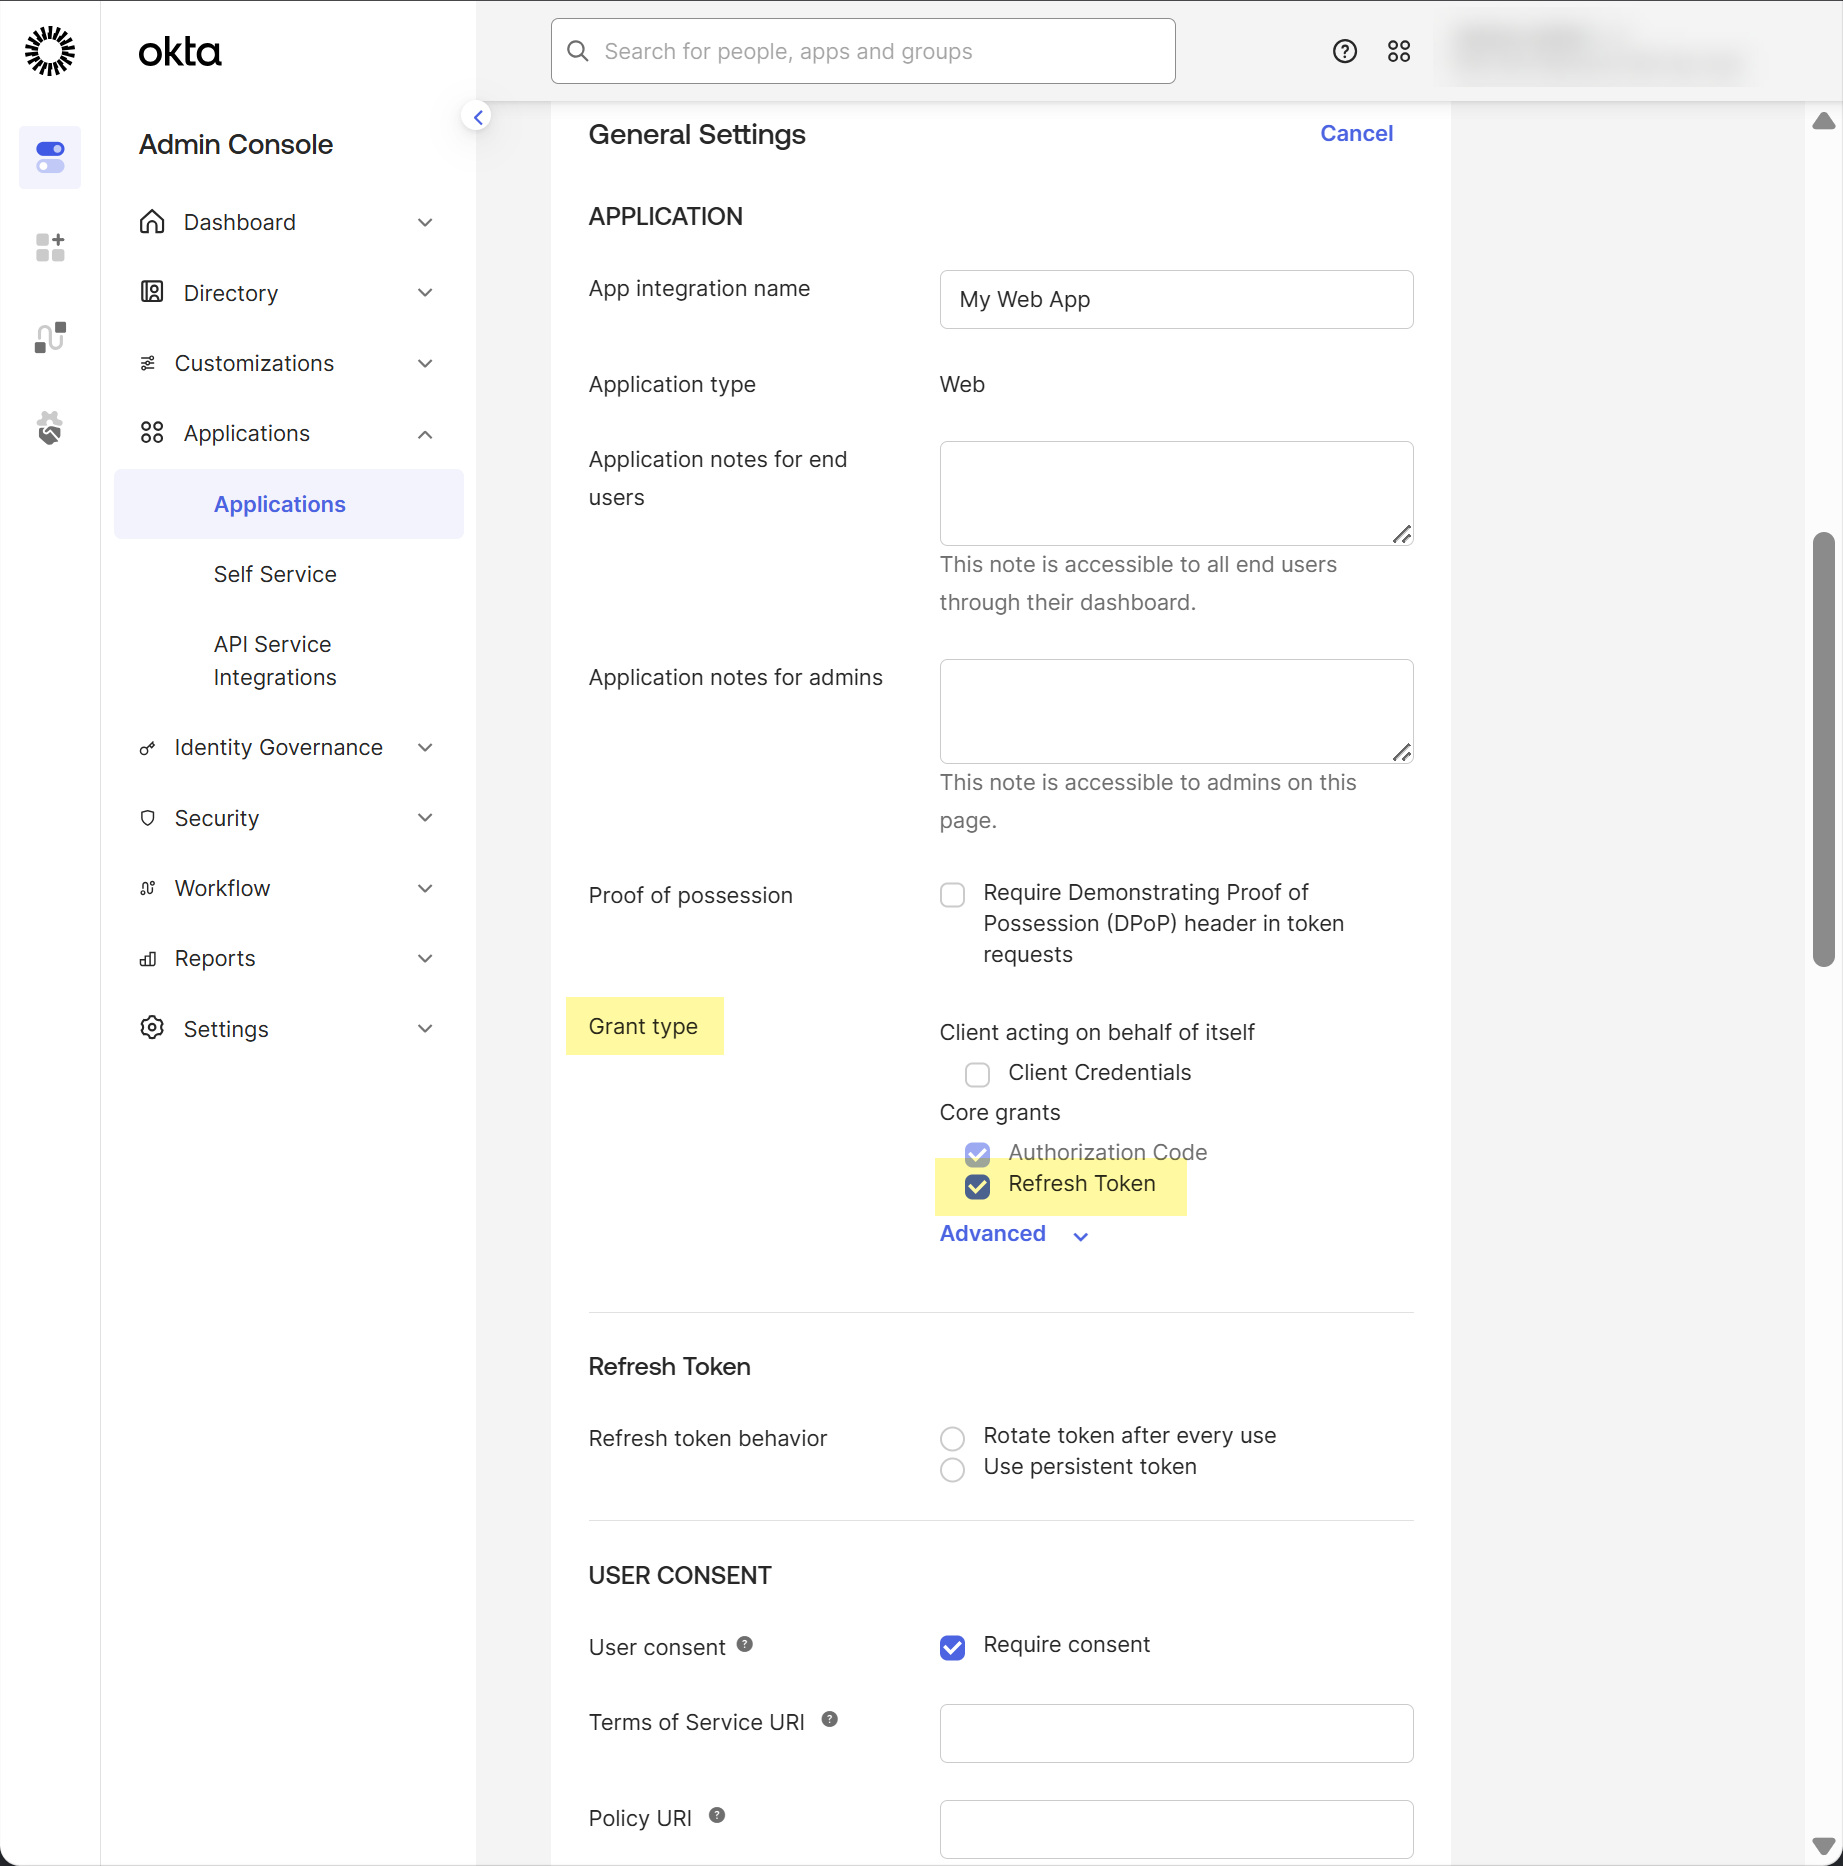
Palo Alto Networks recommends separating regions by aligning region-specific tenants with region-specific Okta accounts. However, for testing, if you have Cloud Identity Engine tenants in more than one region, add Sign-in redirect URIs for each region where you have a tenant.Edit the General Settings for the app you just created.![]() Select Refresh token as the Grant type.Using the refresh token is mandatory.
Select Refresh token as the Grant type.Using the refresh token is mandatory.![]() Select Okta API Scopes and grant consent to the following scopes:
Select Okta API Scopes and grant consent to the following scopes:- ssf.manage
- ssf.read
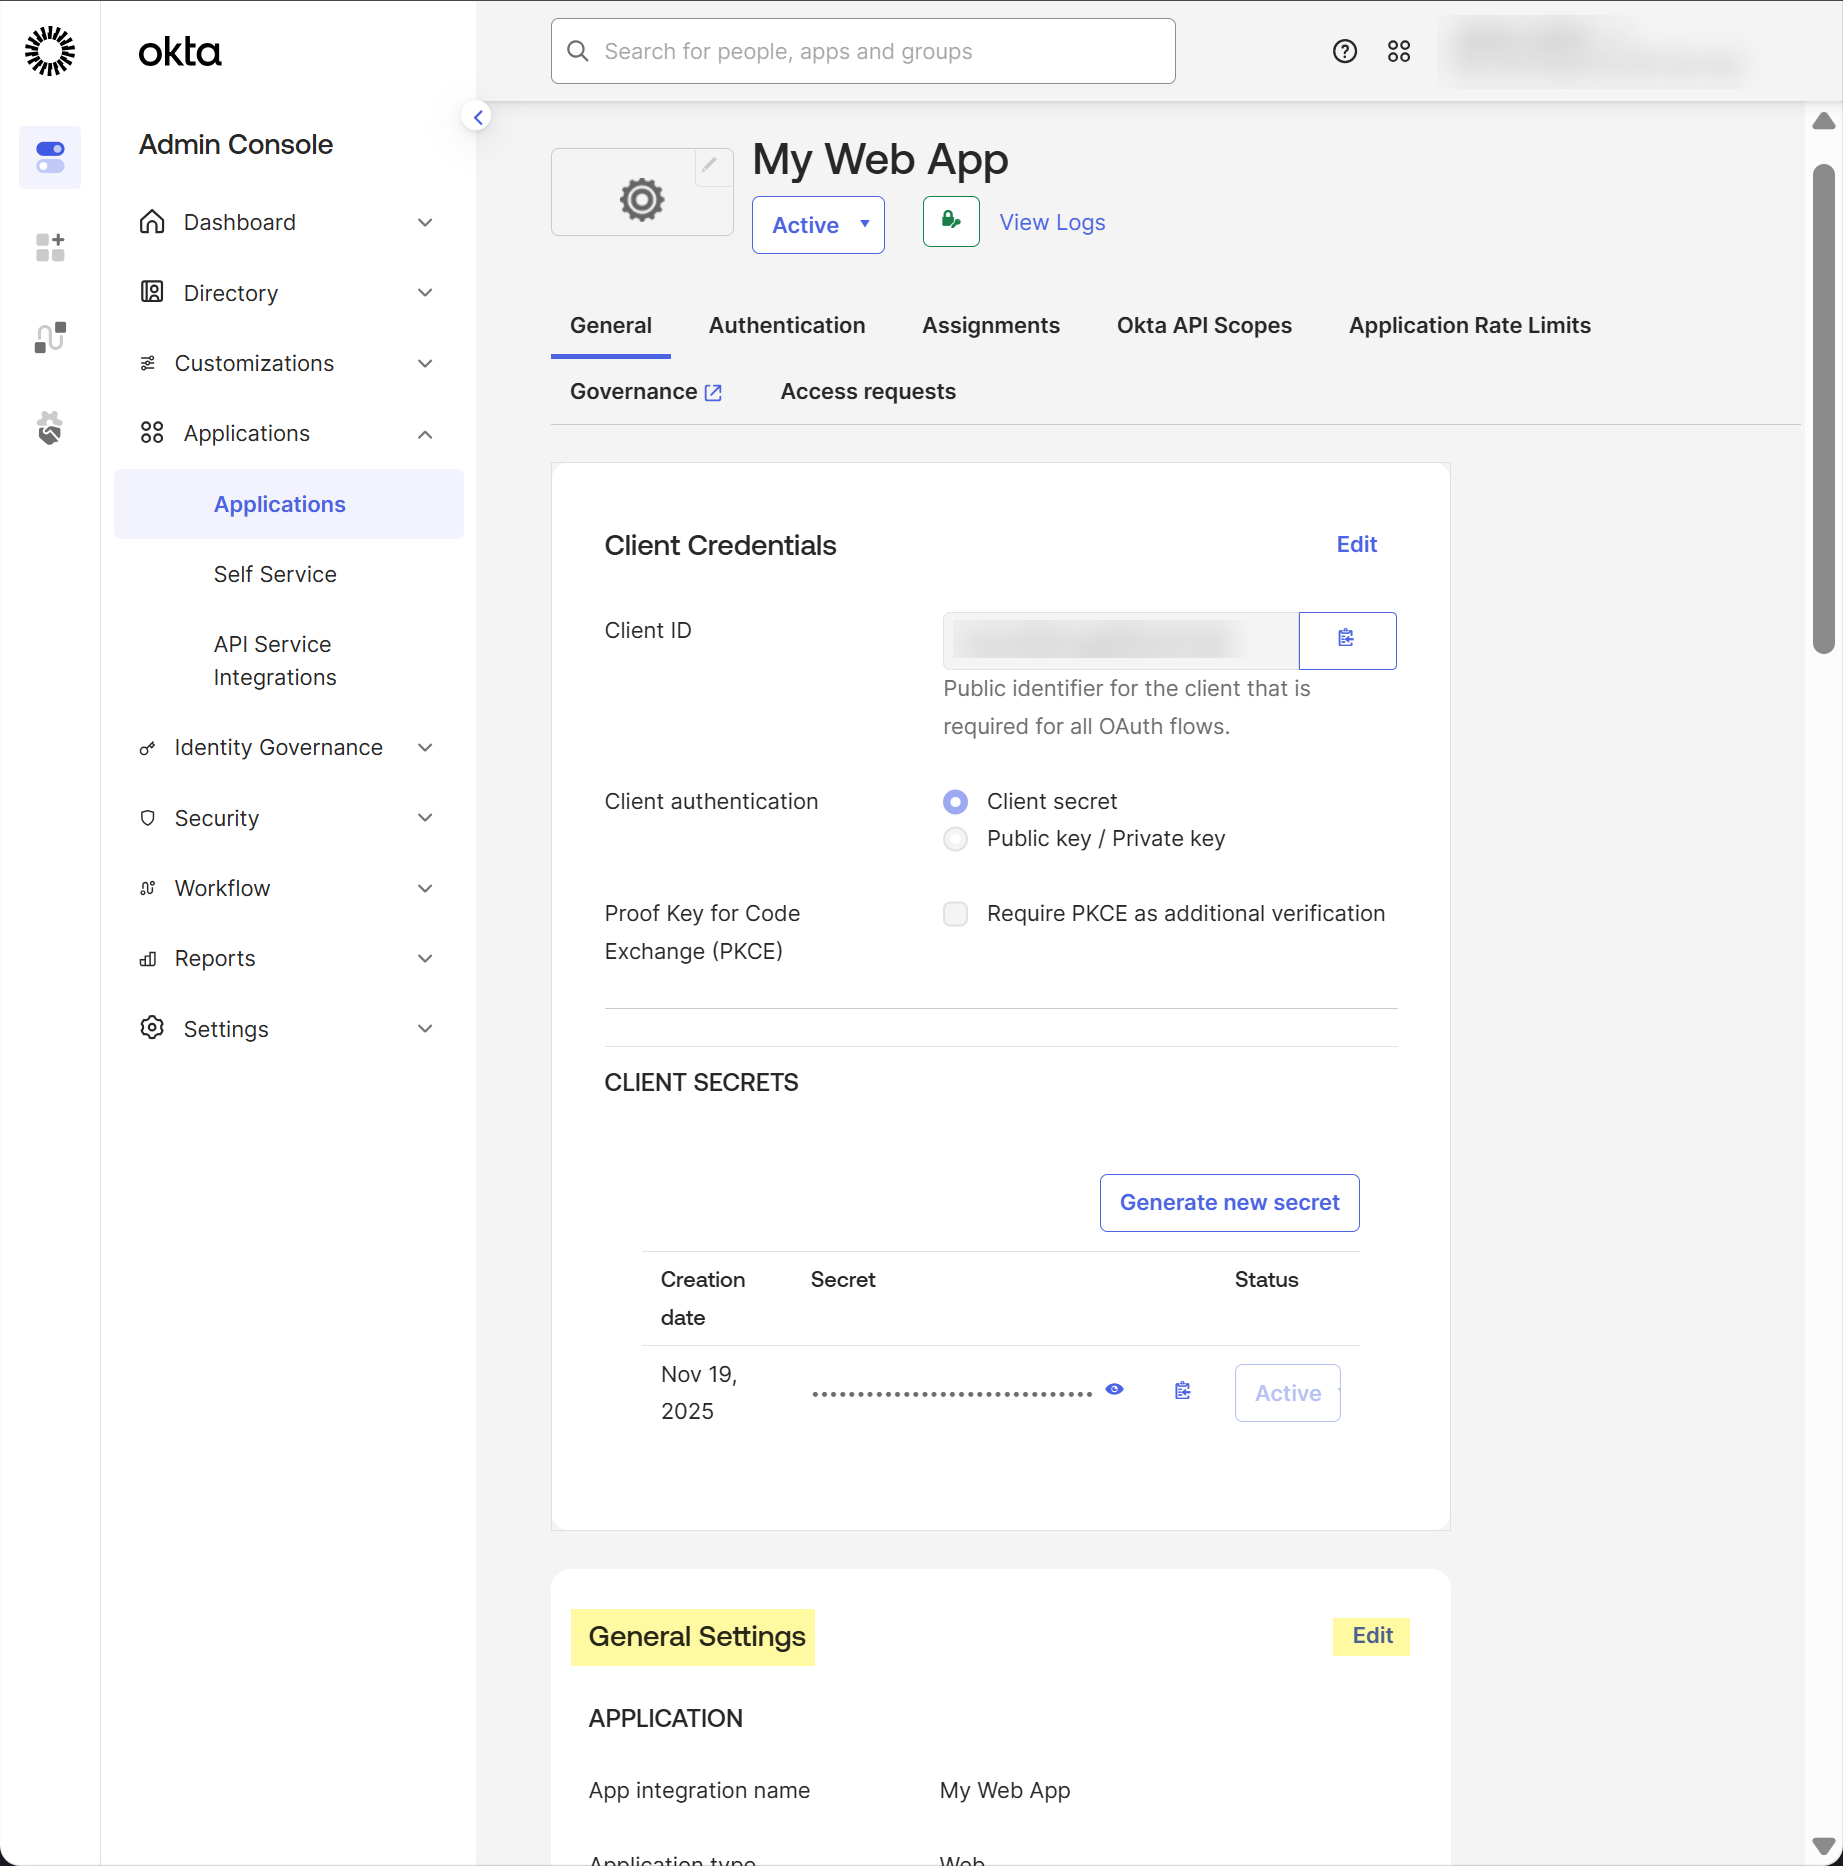
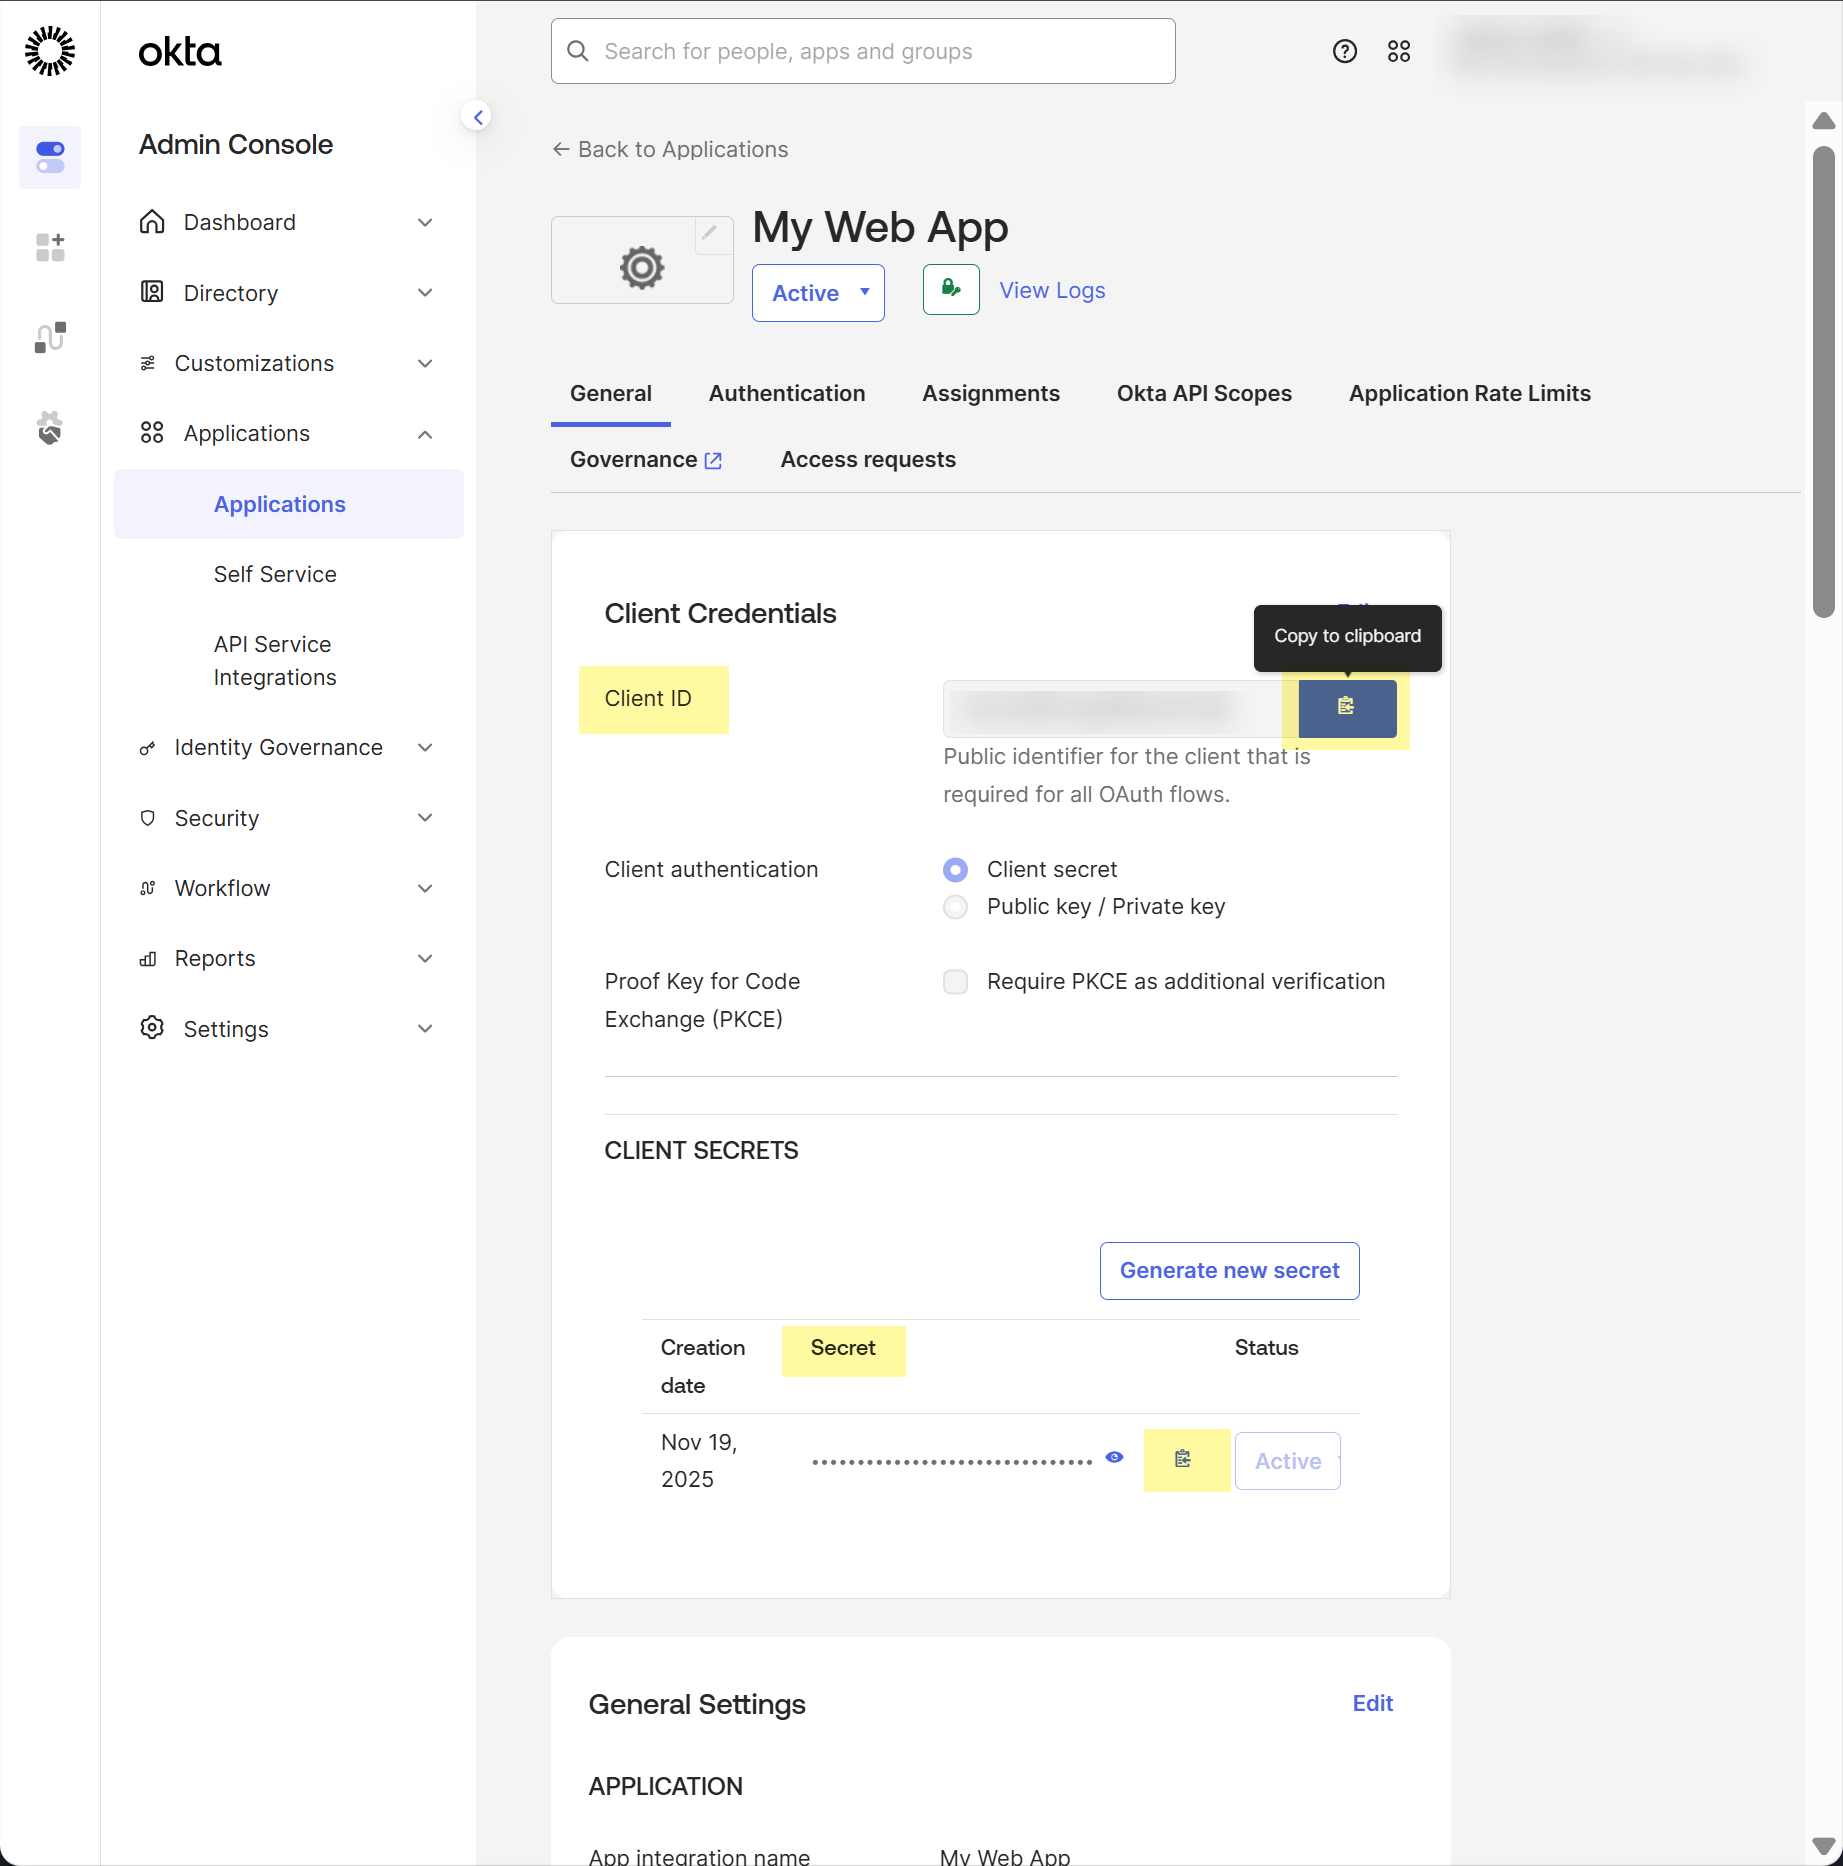
At the top of the page, select General (if it is not already selected), then copy your Client ID and Secret.![]() Add SSF Okta Receiver as a risk connection.
Add SSF Okta Receiver as a risk connection.- Select .
![]() Add a SSF Okta Receiver risk connection.
Add a SSF Okta Receiver risk connection.![]() Configure Shared Signals Framework (SSF) Okta Receiver as a risk connection.
Configure Shared Signals Framework (SSF) Okta Receiver as a risk connection.- Enter the Receiver Name.
![]() Select the Associated Directory.Enter the Client ID and Client Secret for your Okta source that you copied in step 1.i.Click Create Stream.Log in to Okta using your administrator credentials when prompted.After you log in successfully, the Cloud Identity Engine displays Stream created successfully.
Select the Associated Directory.Enter the Client ID and Client Secret for your Okta source that you copied in step 1.i.Click Create Stream.Log in to Okta using your administrator credentials when prompted.After you log in successfully, the Cloud Identity Engine displays Stream created successfully.![]() Submit the configuration.Create a Cloud Dynamic Group for the SSF Okta Receiver risk connection.
Submit the configuration.Create a Cloud Dynamic Group for the SSF Okta Receiver risk connection.- Select and then select the SSF Okta Receiver directory from the list.
![]() Click Create New Risky User Group.Select Risky User as the category.Select the Context and Attributes that you want to use for the group and Submit the configuration when the changes are complete.Manage your SSF Okta Receiver risk connection.From the Actions column, select the following options as needed.
Click Create New Risky User Group.Select Risky User as the category.Select the Context and Attributes that you want to use for the group and Submit the configuration when the changes are complete.Manage your SSF Okta Receiver risk connection.From the Actions column, select the following options as needed.- View your SSF Okta Receiver risk connection info.
![]()
- Select Full Sync to perform a complete
synchronization of the SSF Okta Receiver risk connection information.
![]()
- Select Delta Sync to synchronize only the changes
since the last complete or delta sync.
![]()
- Select Delete and confirm the deletion to remove
an SSF Okta Receiver risk connection.
![]()
Next Steps: - Send Cortex XDR Risk Signals to Okta to further leverage your Cortex® integration.
- Create a Cloud Dynamic User Group to help automatically remediate security actions for your Okta users.