Configure the Secrets Vault
Table of Contents
Expand all | Collapse all
-
- Cloud Identity Engine Attributes
- Collect Custom Attributes with the Cloud Identity Engine
- View Directory Data
- Cloud Identity Engine User Context
- Create a Cloud Dynamic User Group
- Configure Third-Party Device-ID
- Configure an IP Tag Cloud Connection
- View Mappings and Tags
- Configure Dynamic Privilege Access in the Cloud Identity Engine
- Send Cortex XDR Risk Signals to Okta
- Configure SSF Okta Receiver as a Risk Connection
- Configure the Secrets Vault
-
- Set Up Password Authentication
-
- Configure Azure as an IdP in the Cloud Identity Engine
- Configure Okta as an IdP in the Cloud Identity Engine
- Configure PingOne as an IdP in the Cloud Identity Engine
- Configure PingFederate as an IdP in the Cloud Identity Engine
- Configure Google as an IdP in the Cloud Identity Engine
- Configure a SAML 2.0-Compliant IdP in the Cloud Identity Engine
- Set Up a Client Certificate
- Configure an OIDC Authentication Type
- Set Up an Authentication Profile
- Configure Cloud Identity Engine Authentication on the Firewall or Panorama
- Configure the Cloud Identity Engine as a Mapping Source on the Firewall or Panorama
- Configure Dynamic Privilege Access in the Cloud Identity Engine
- Get Help
Configure the Secrets Vault
Learn how to configure the password vault in the Cloud Identity Engine.
Early in computing history, sensitive information (such as passwords and
cryptographic keys) was usually stored in easily accessible locations, such as
plaintext files or in the code itself. In addition, passwords were often reused in
multiple locations and shared with colleagues using unencrypted methods. These
behaviors could expose organizations to significant security risks by leaving
sensitive data vulnerable to theft and misuse. When cyberattacks such as data
breaches and hacking became more advanced and frequent, organizations needed to
provide better security measures to protect their data.
One method of protecting this critical information is by using secrets vaults. A
secrets vault:
- Provides a centralized and secure storage method for sensitive information that can integrate with security and engineering processes.
- Encrypts data for security.
- Uses granular access to control who can view or change the information.
- Logs activity for auditing purposes.
Using secrets vaults helps organizations reduce their attack surface, ensure
compliance with regulations, and manage sensitive information more easily.
- Configure user roles for the vault.A superuser has full privileges for the secrets vault, including initialization, adding secrets and collections, and vault deletion.
- Configure roles for users as needed.
- Vault Administrator—Grants all secrets vault access privileges to the user, including initialization, adding secrets and collections, and vault deletion.
- Vault View Only Administrator—Grants view-only secrets vault privileges to the user, enabling them to view all secrets vault data.
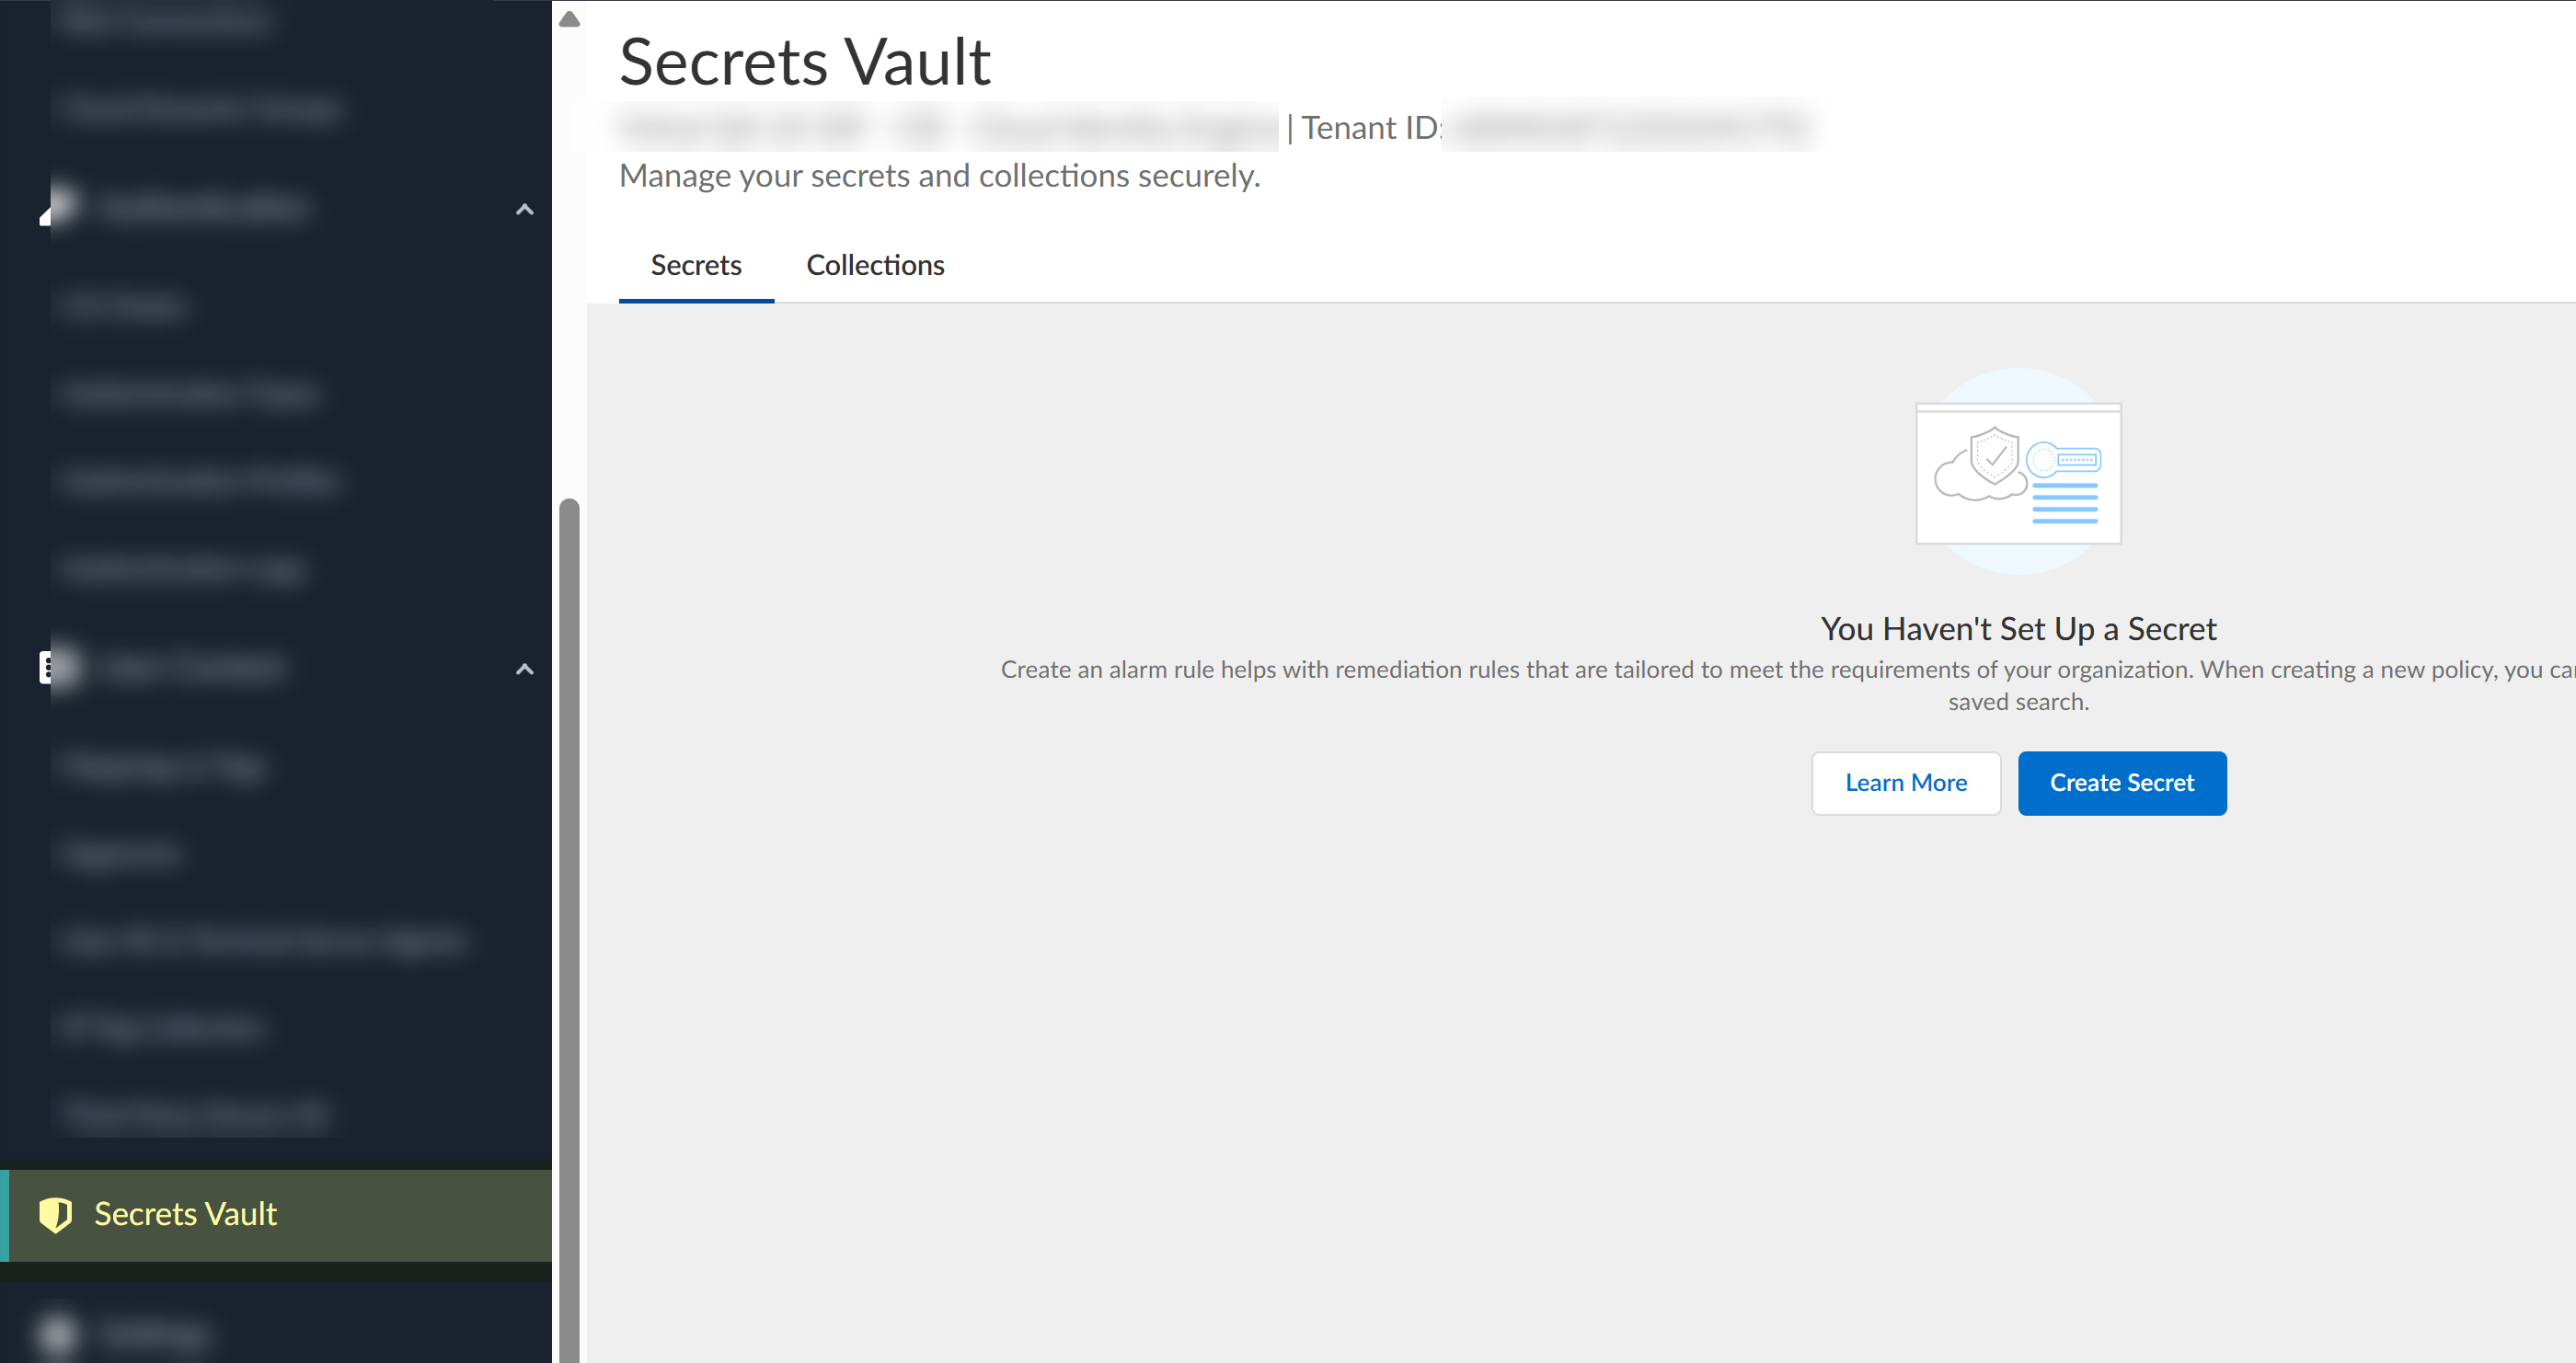
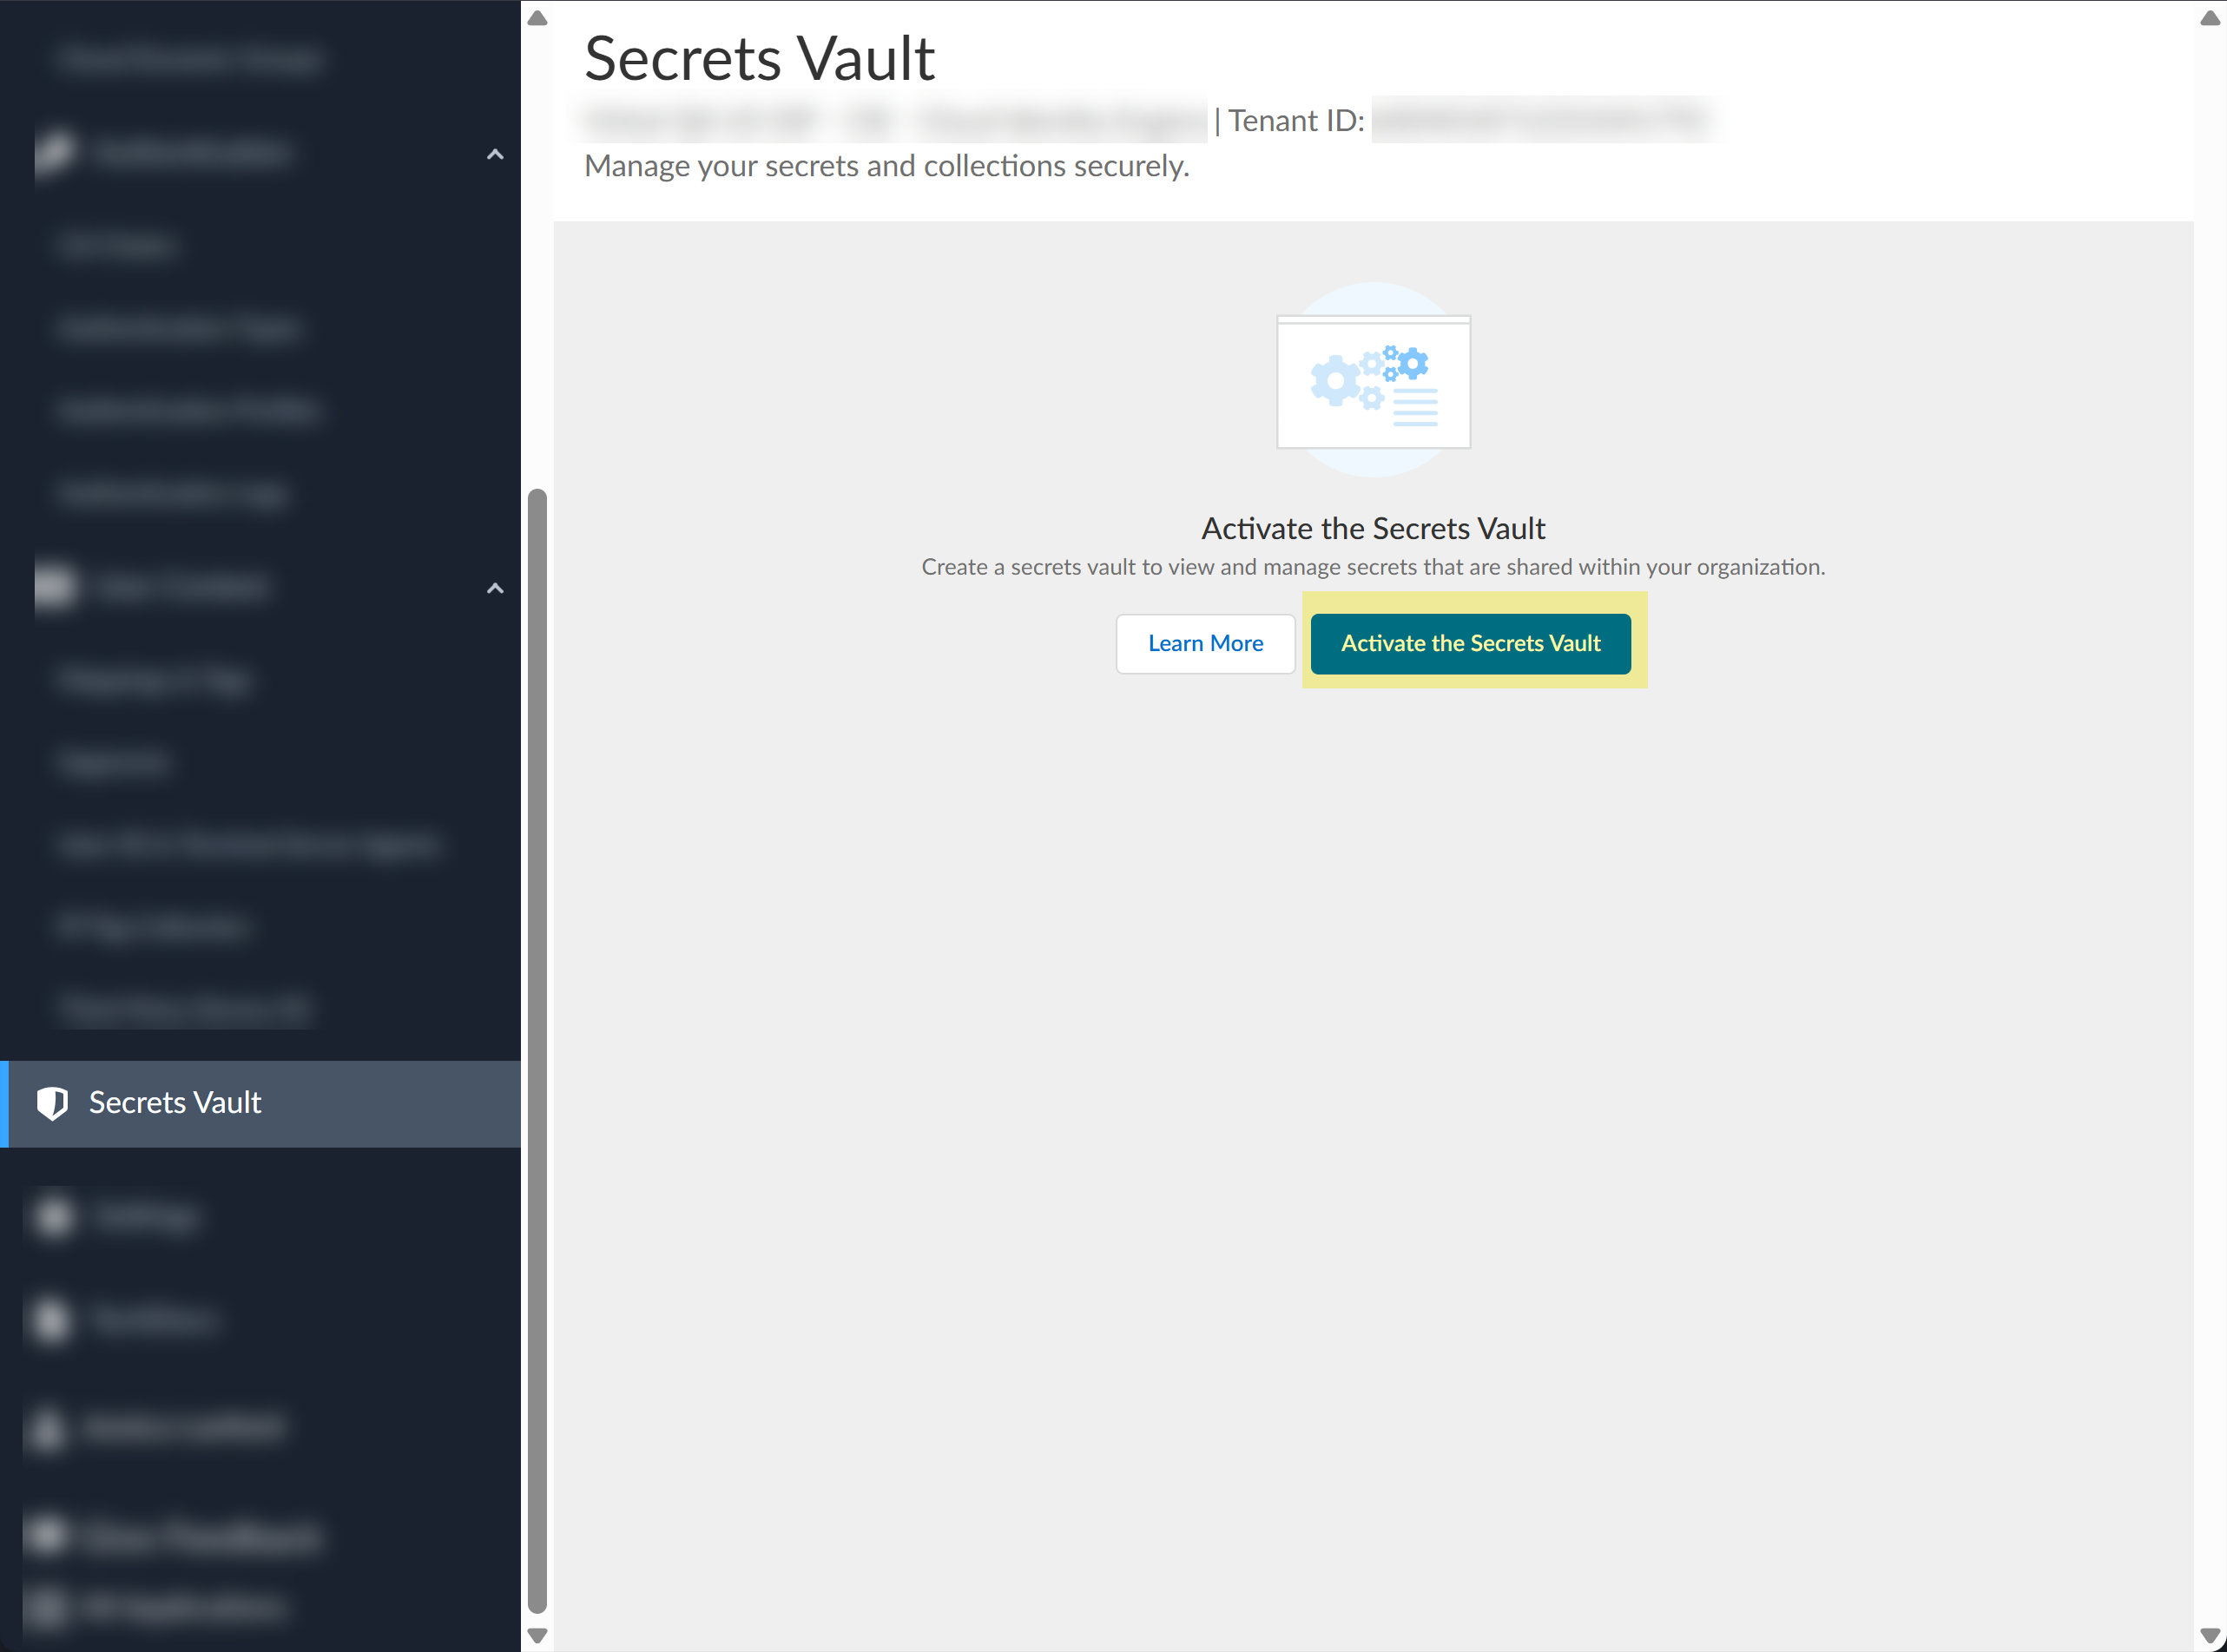
Vault roles are add-on roles to the existing Common Services roles. You must configure them in combination with current roles. A standalone vault role can’t log in to the Cloud Identity Engine.As you add new users, configure roles as necessary.Log in to the Cloud Identity Engine.If you have not already done so, configure users and groups using the following methods:Select Secrets Vault.![]() If this is the first time using the secrets vault, complete the initial configuration.
If this is the first time using the secrets vault, complete the initial configuration.- Click Activate the Secrets Vault.
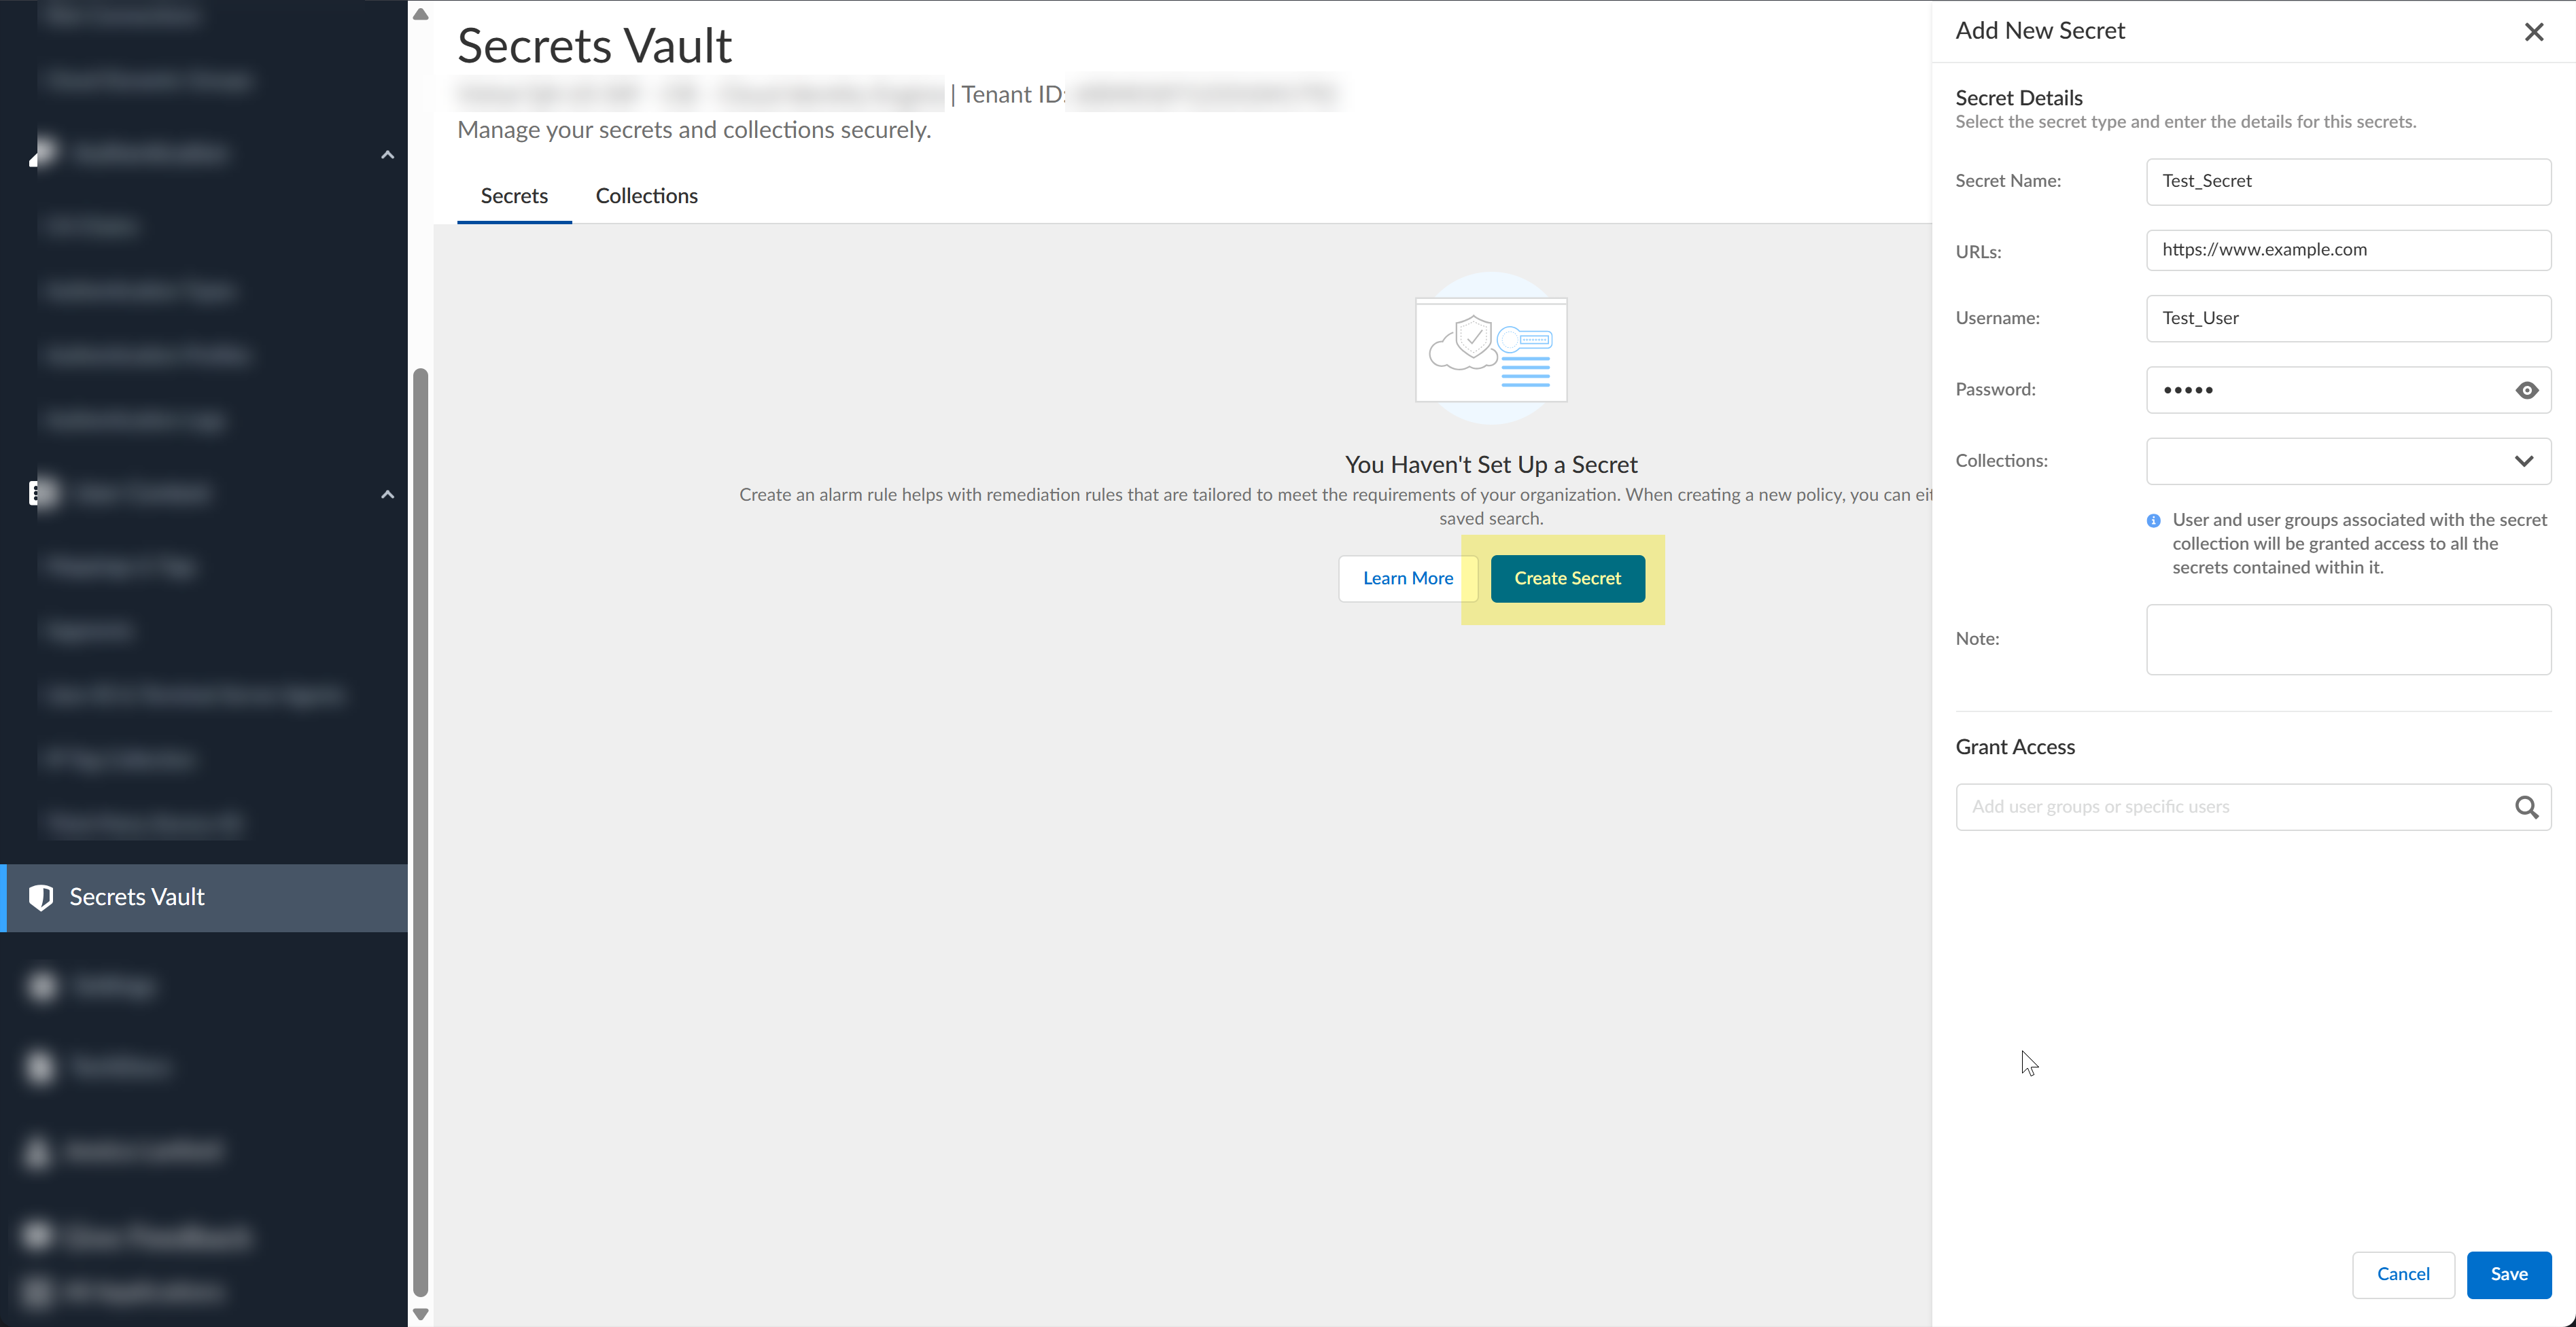
![]() Click Create Secret.
Click Create Secret.![]() Configure a secret.
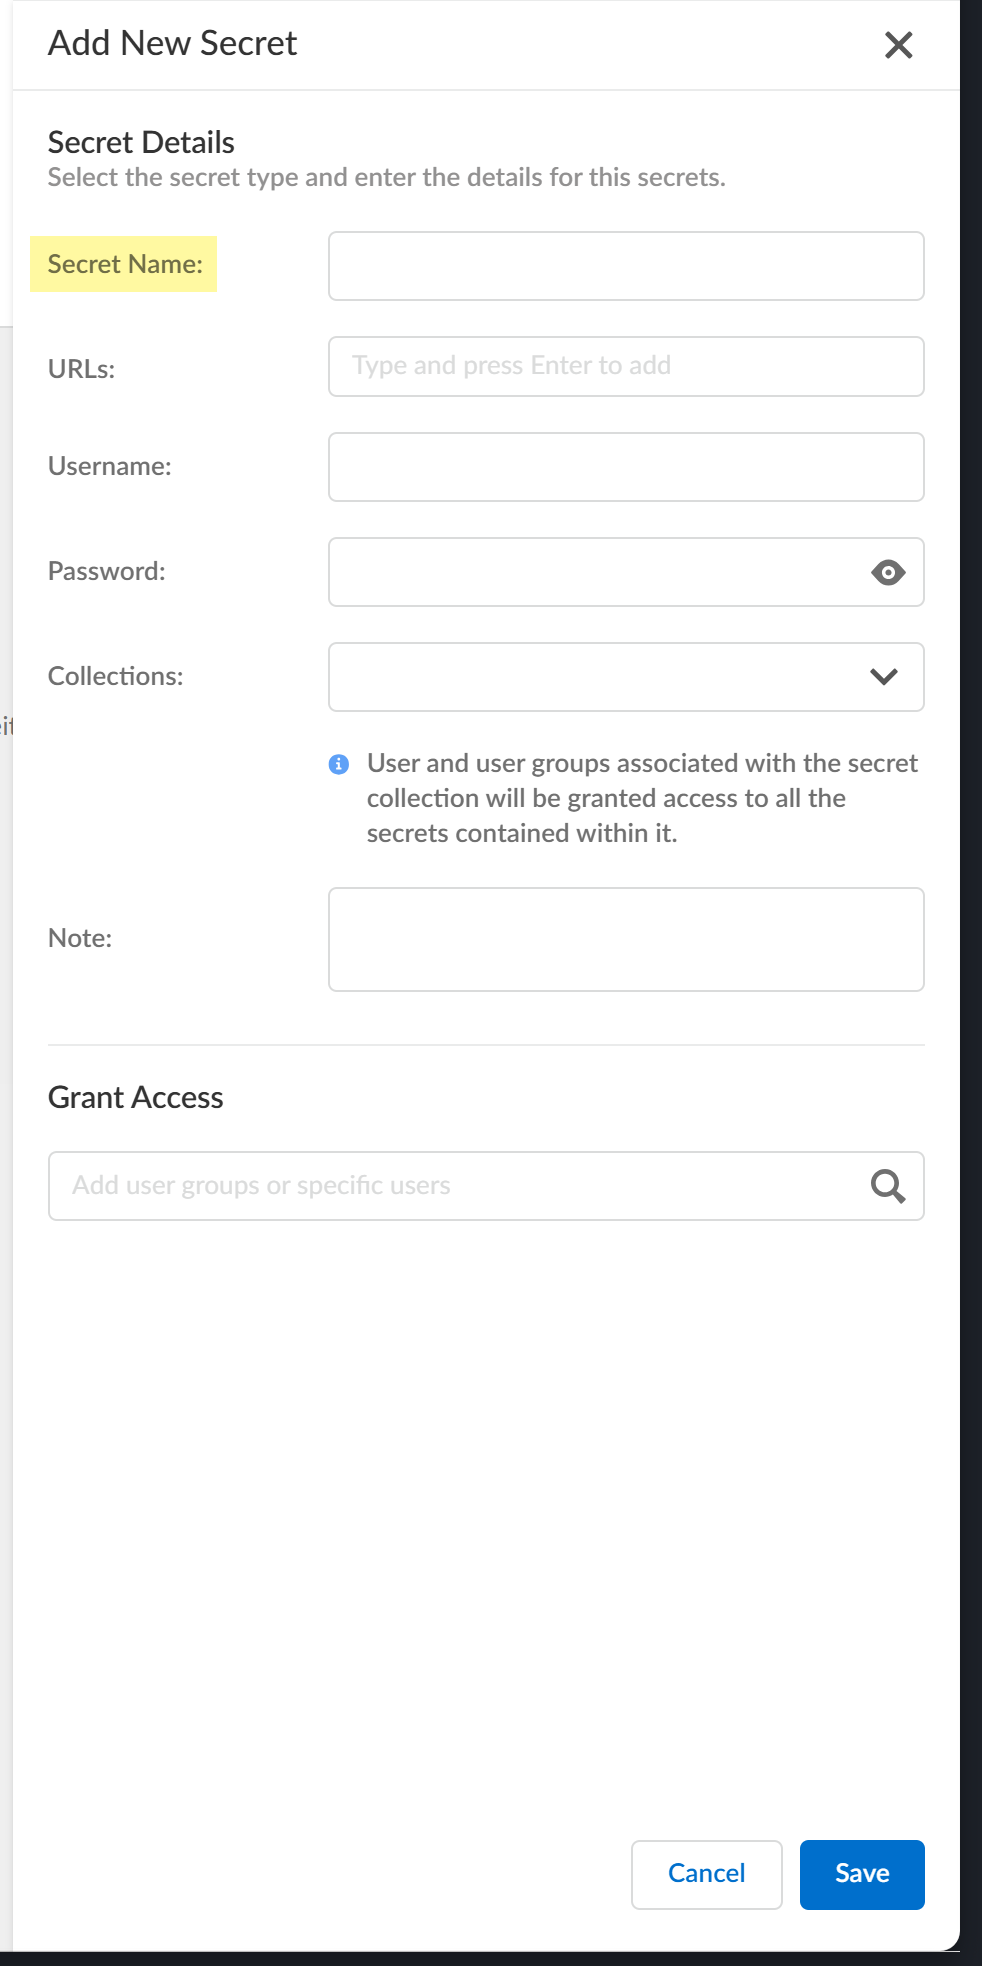
Configure a secret.- Enter the Secret Name.
![]() Enter the URLs that require this secret.Enter the URLs in standard RFC 3986 URI format (for example, https://www.example.com). You can configure up to 100 URLs for a single secret.Enter the Username.Enter the Password.Click the View Password () button to toggle visibility for the password.
Enter the URLs that require this secret.Enter the URLs in standard RFC 3986 URI format (for example, https://www.example.com). You can configure up to 100 URLs for a single secret.Enter the Username.Enter the Password.Click the View Password () button to toggle visibility for the password.![]()
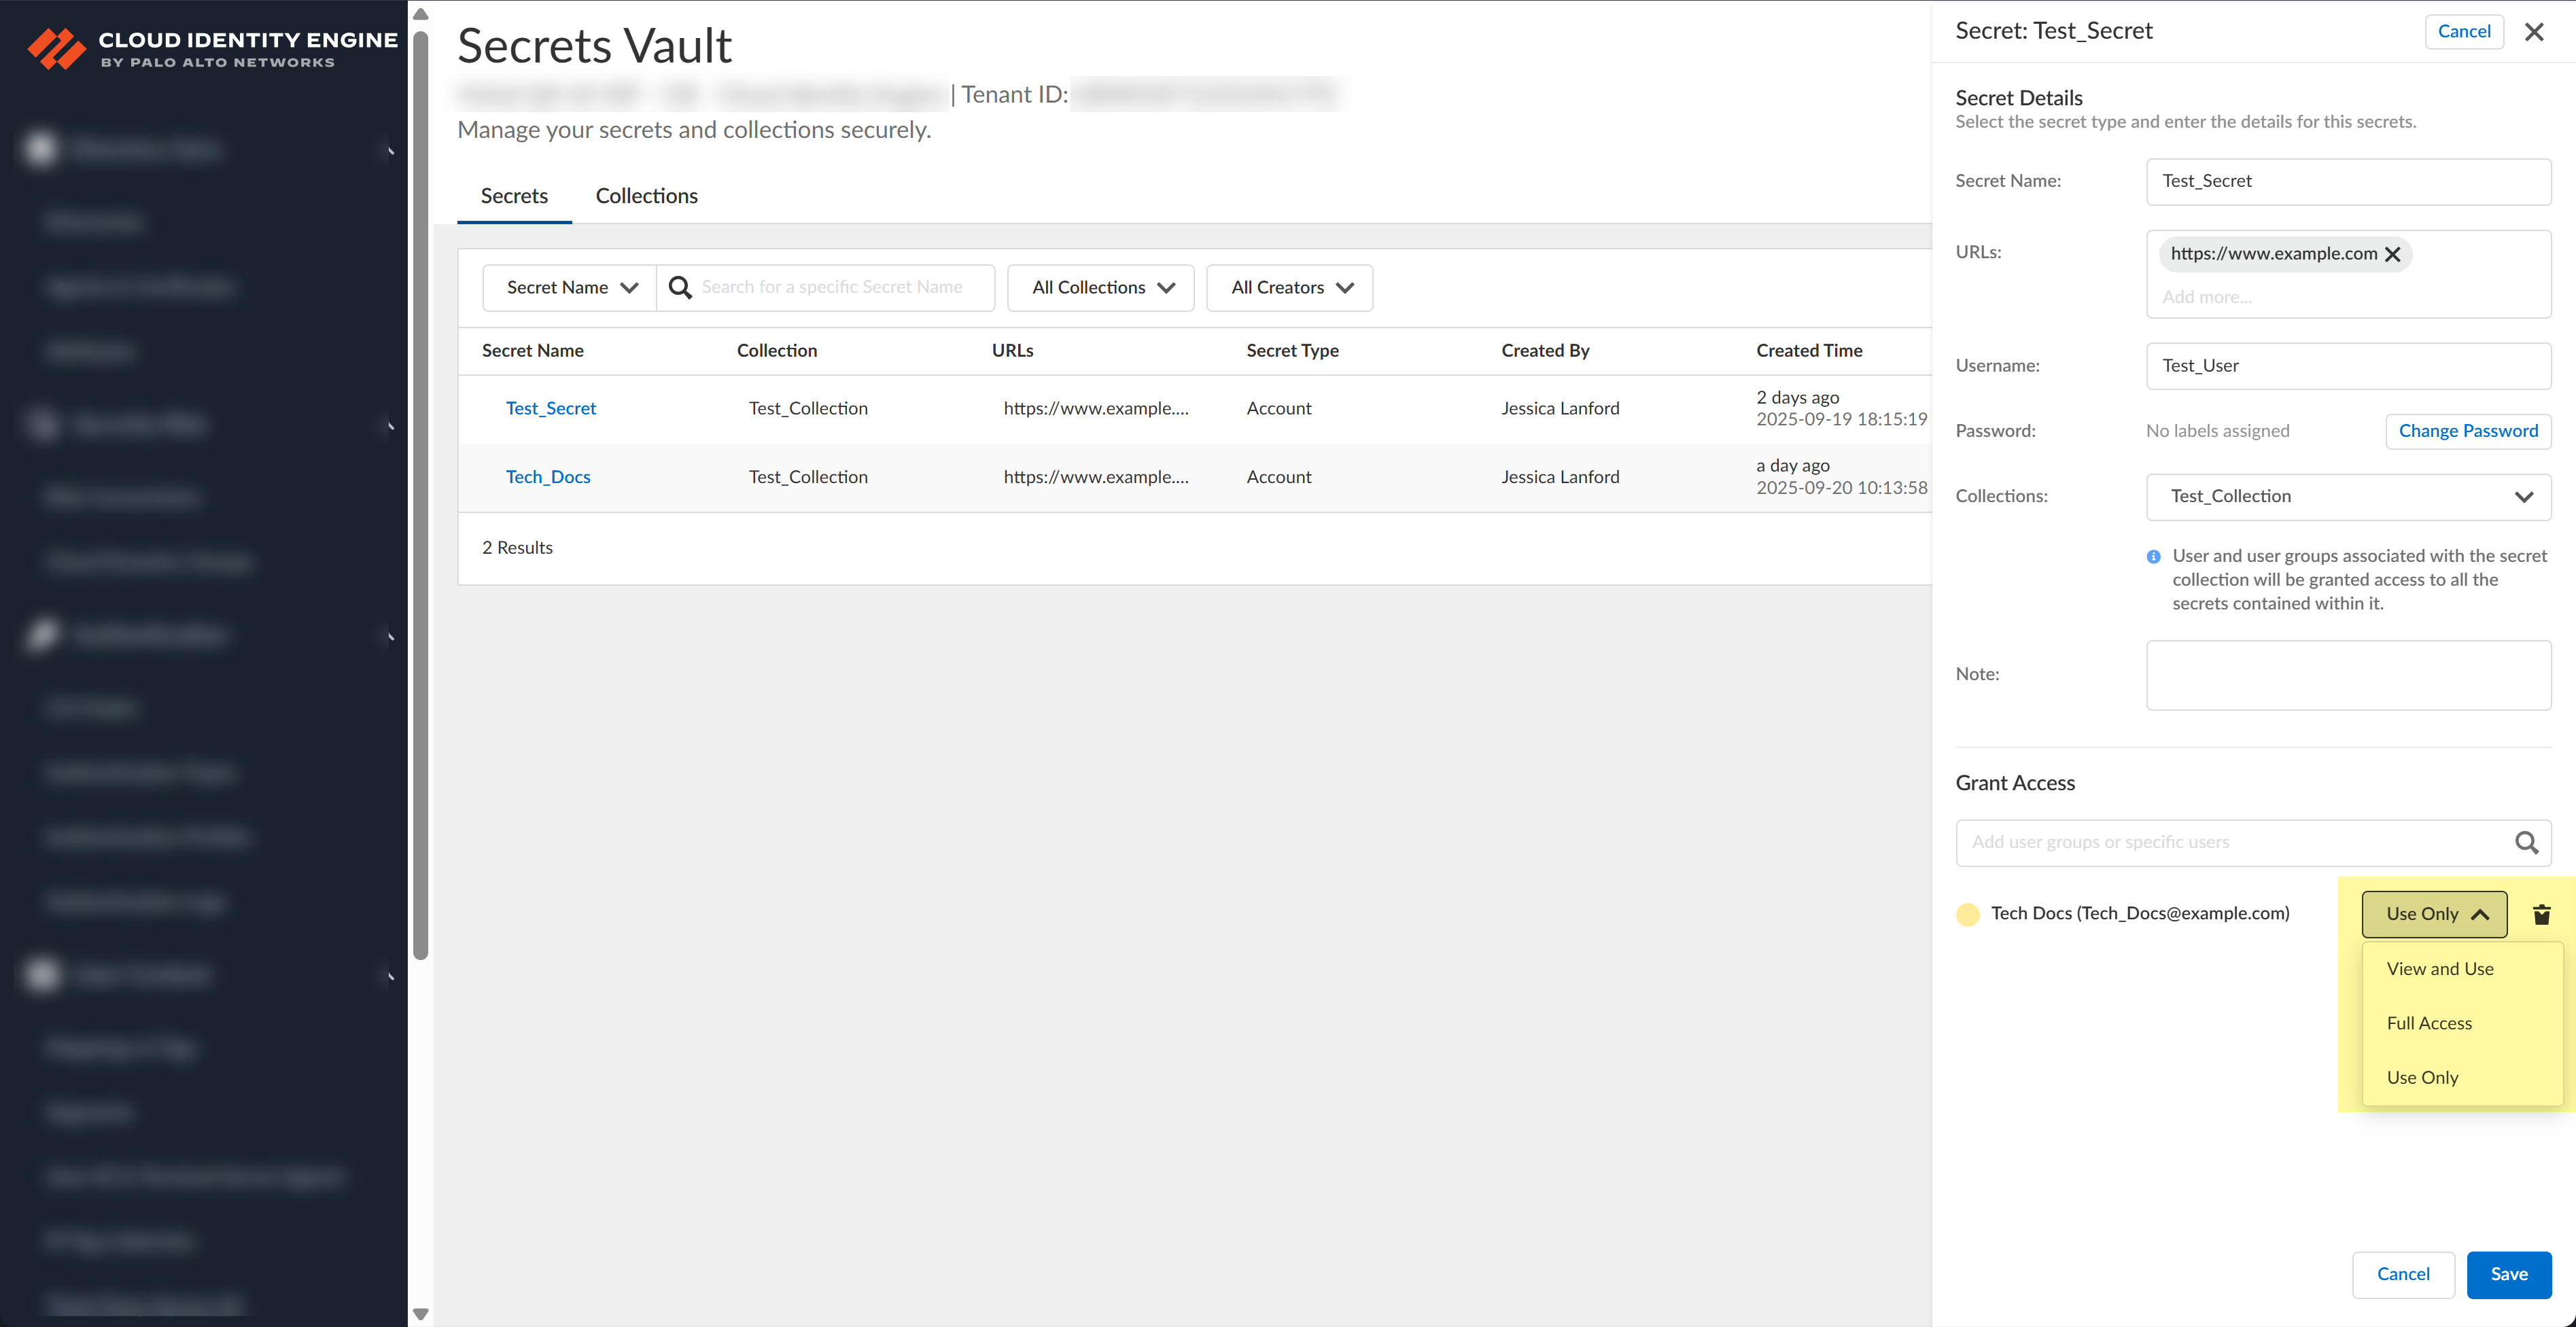
![]() Select the Collections if you have configured them.If you have not configured any collections, you can do so in the next step.(Optional) Enter a Note.You can enter up to 1,000 characters for the note.Grant Access to specific users or groups by specifying a user and access level.
Select the Collections if you have configured them.If you have not configured any collections, you can do so in the next step.(Optional) Enter a Note.You can enter up to 1,000 characters for the note.Grant Access to specific users or groups by specifying a user and access level.![]()
- View and Use—Users can view and use the secret.
- Full Access—Users can add, edit, or delete the secret.
- Use Only—Users can use the secret.
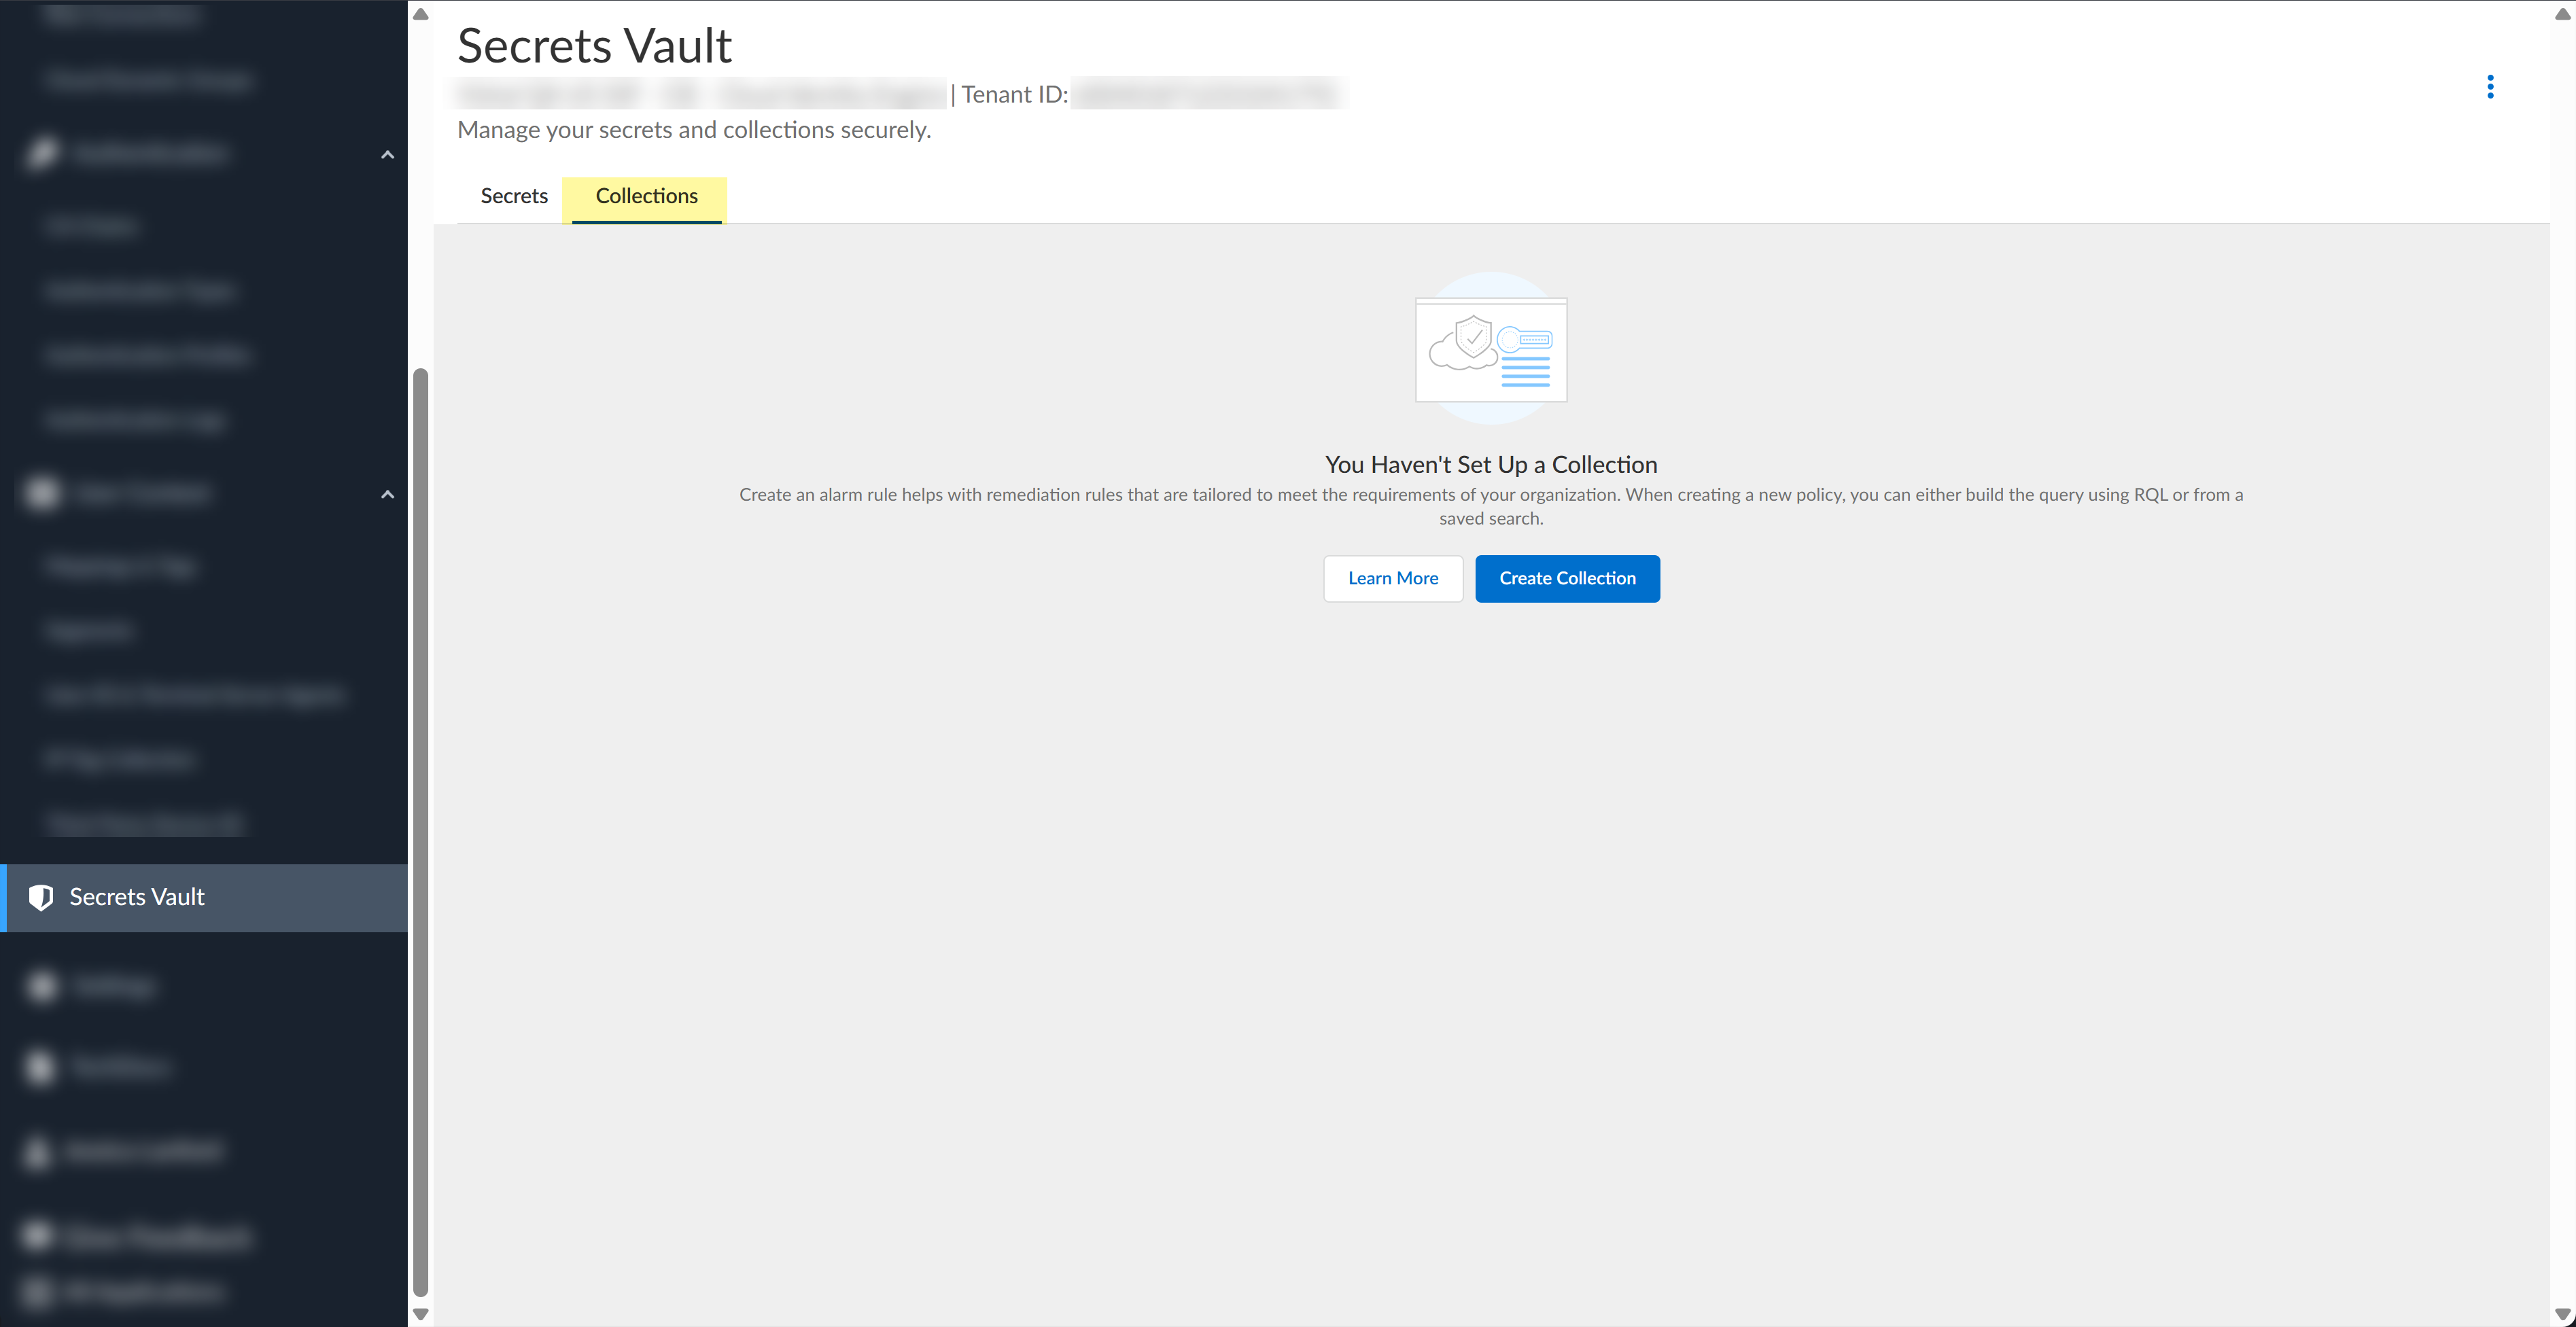
Click Save.(Optional) Configure a collection.A collection lets you share secrets with specific users and groups.- Select the Collections tab.
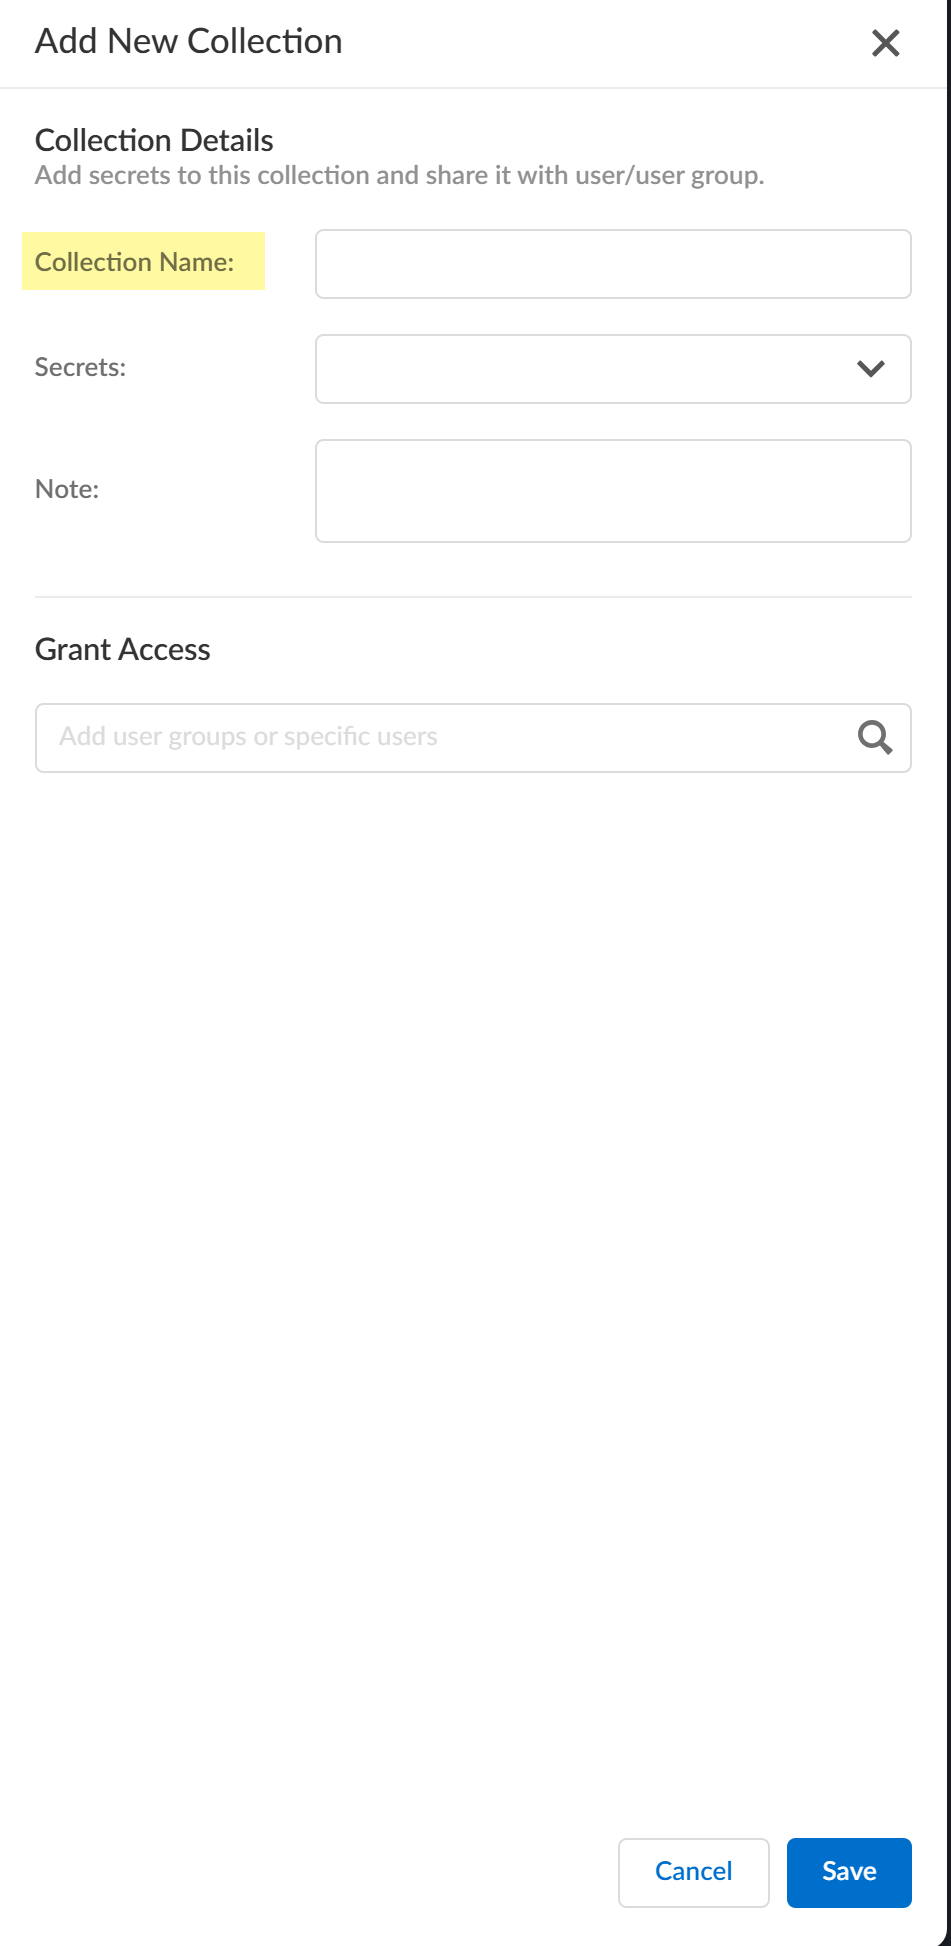
![]() If you have not created a collection before, click Create Collection. Otherwise, click Add Collection.Enter the Collection Name.
If you have not created a collection before, click Create Collection. Otherwise, click Add Collection.Enter the Collection Name.![]() Select the Secrets you want to include in the collection.You can configure up to 500 secrets for a collection.(Optional) Enter a Note with additional information.Grant Access by specifying users or groups and selecting the access type.Click Save.Associate a secret with a collection.
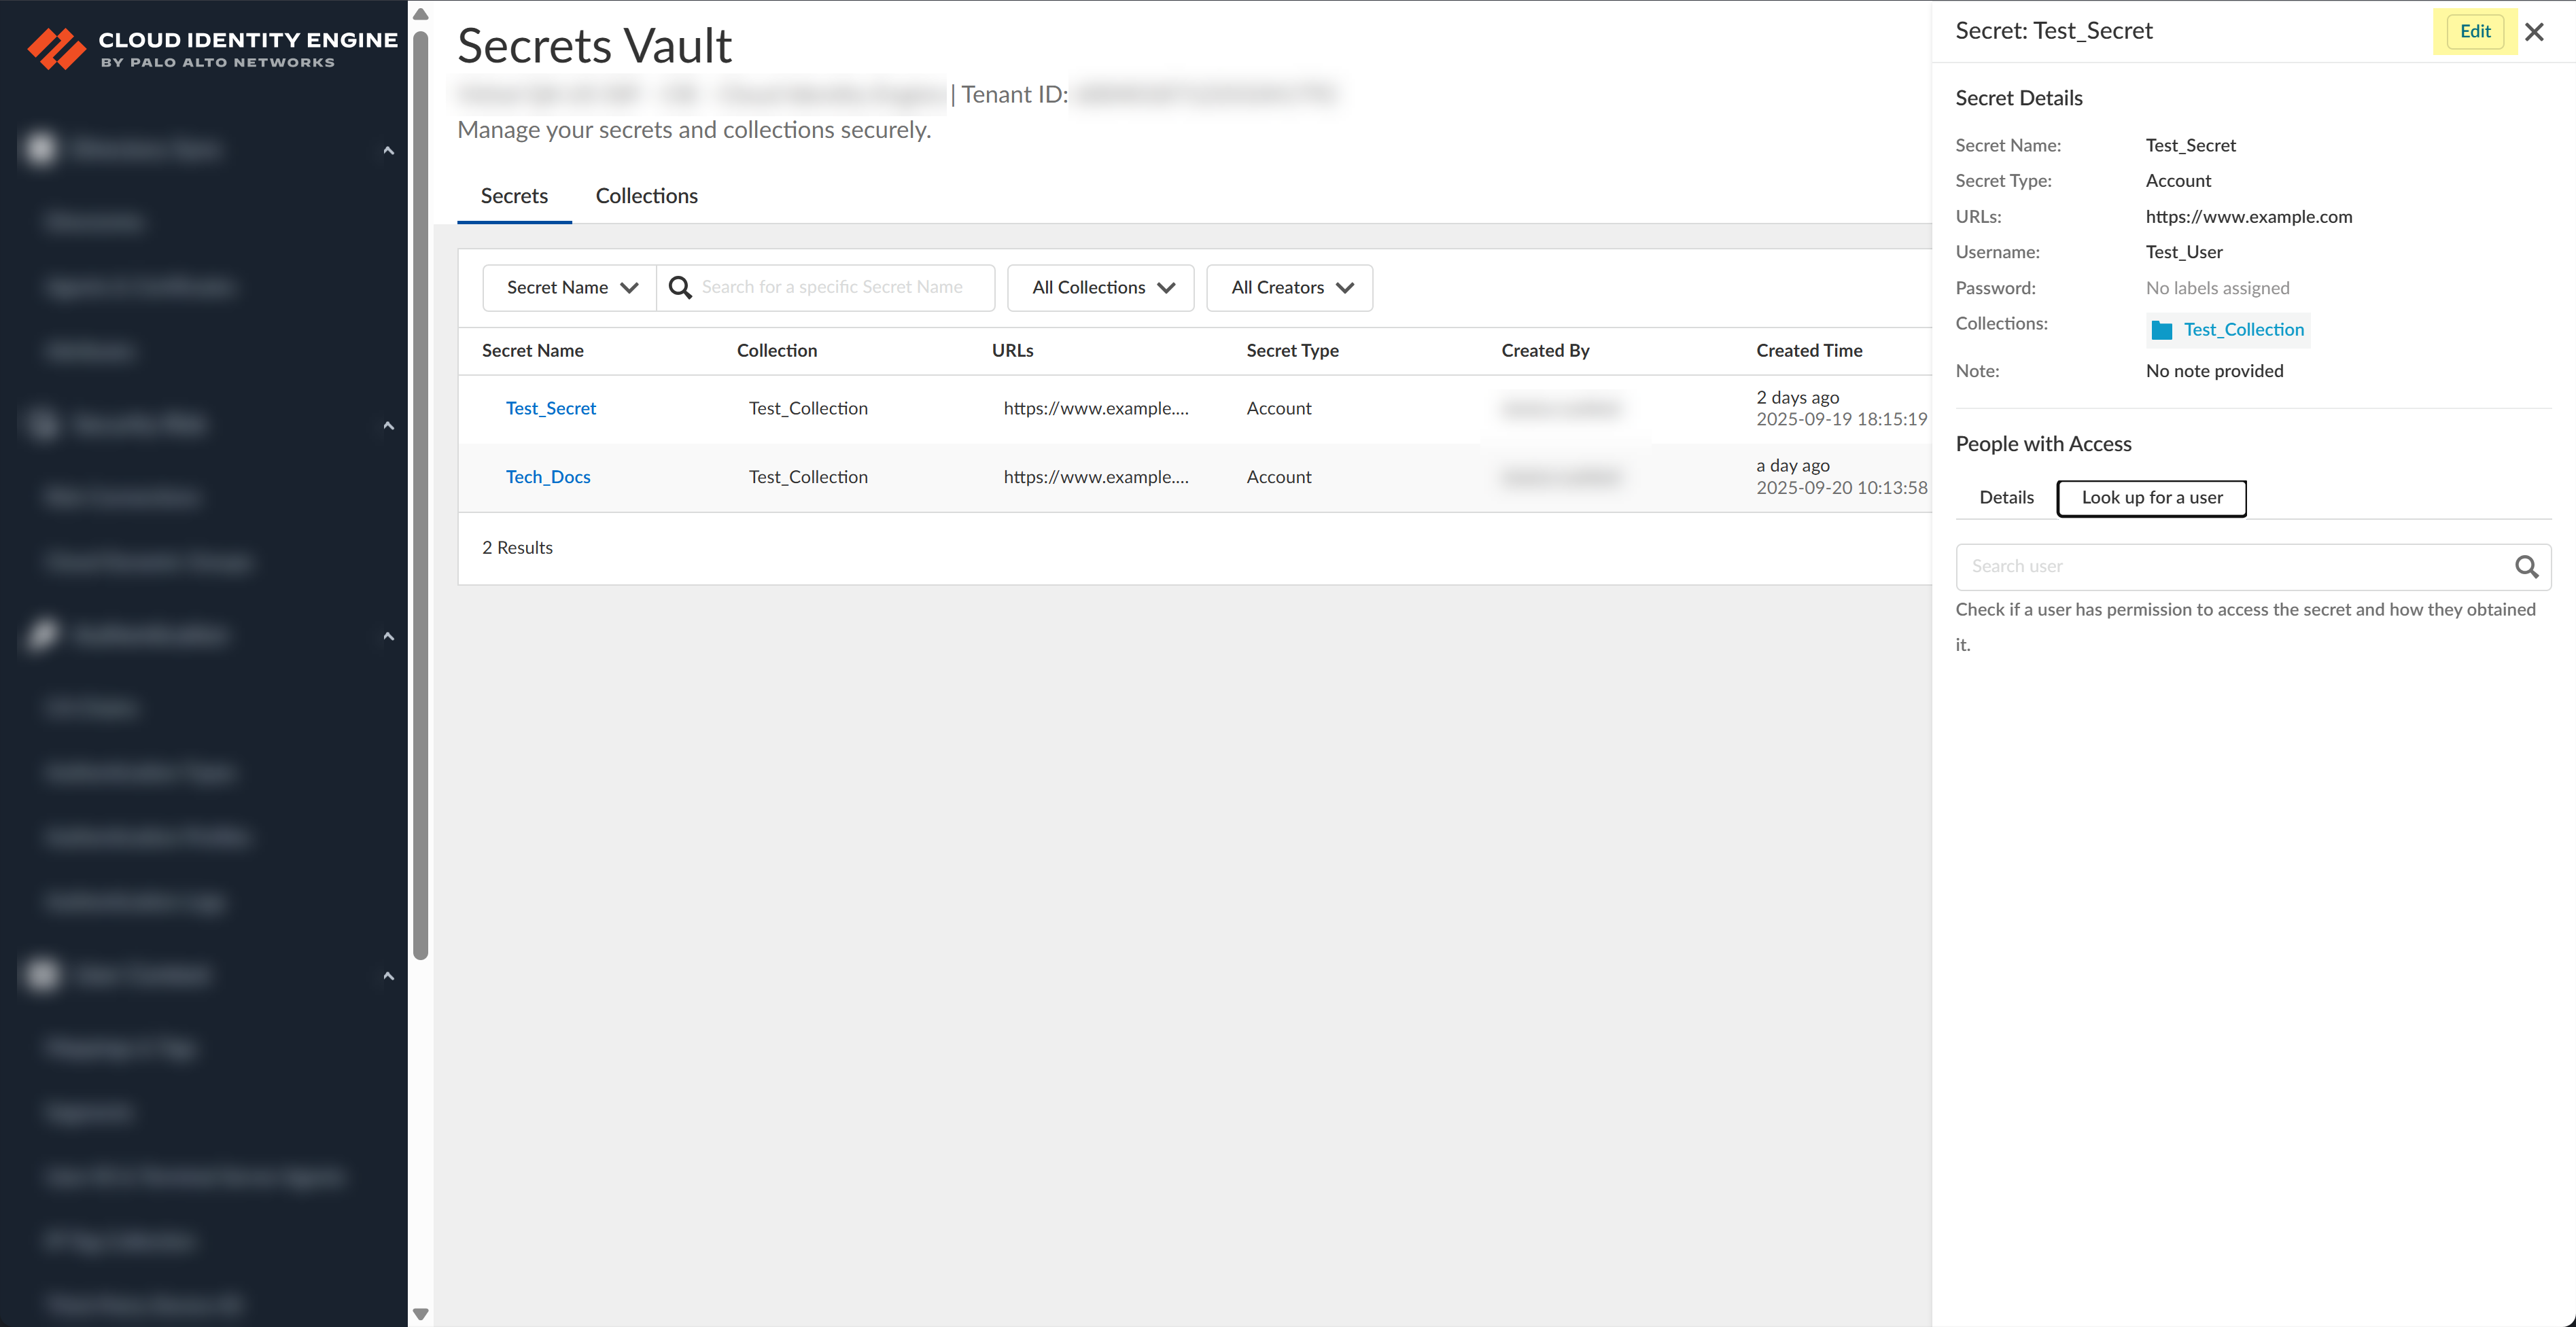
Select the Secrets you want to include in the collection.You can configure up to 500 secrets for a collection.(Optional) Enter a Note with additional information.Grant Access by specifying users or groups and selecting the access type.Click Save.Associate a secret with a collection.- Select the secret.Click Edit.
![]() Select the Collections you want to associate with the secret.Click Save.Find more information about secrets and collections.
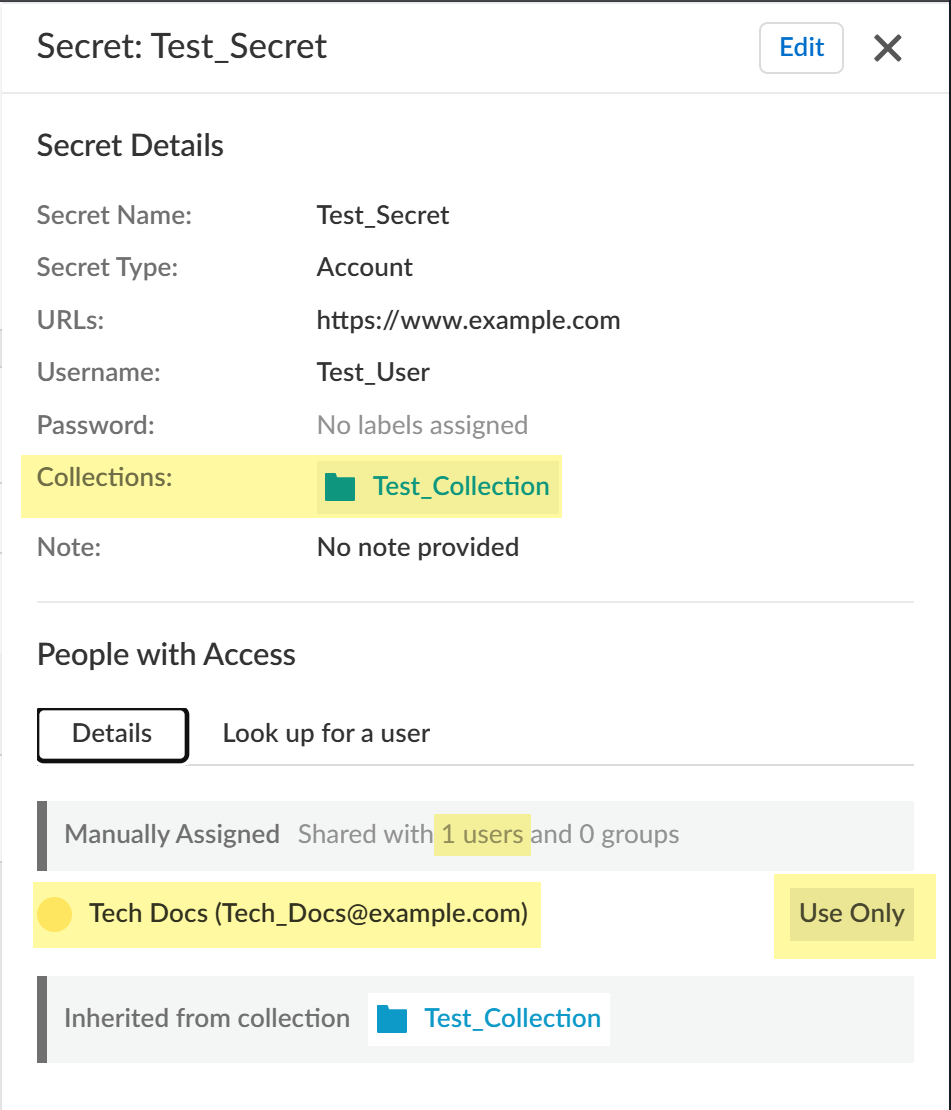
Select the Collections you want to associate with the secret.Click Save.Find more information about secrets and collections.- Select a secret and click the Details tab to see
associated collections, users and groups that can access the secret, and
what type of access they have.
![]()
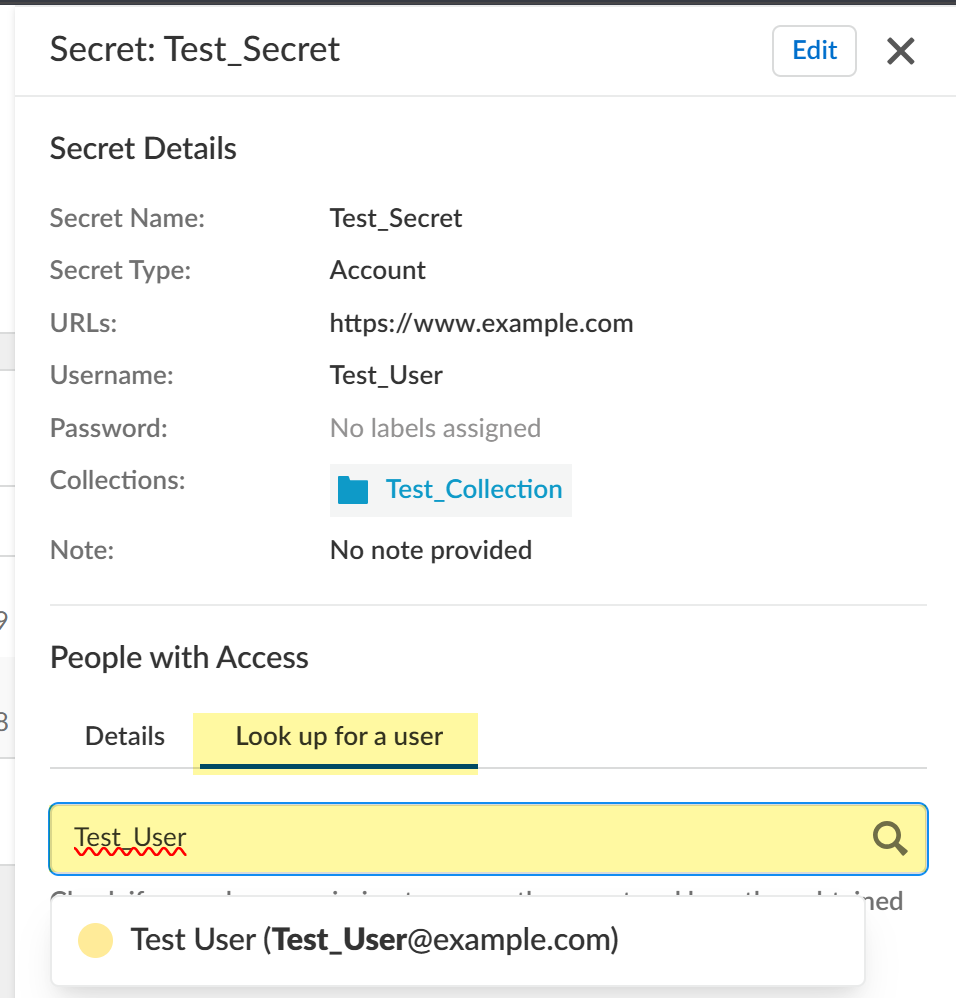
- Click the Look up for a user tab to enter a
search query for a specific user who has access to the selected secret.
![]()
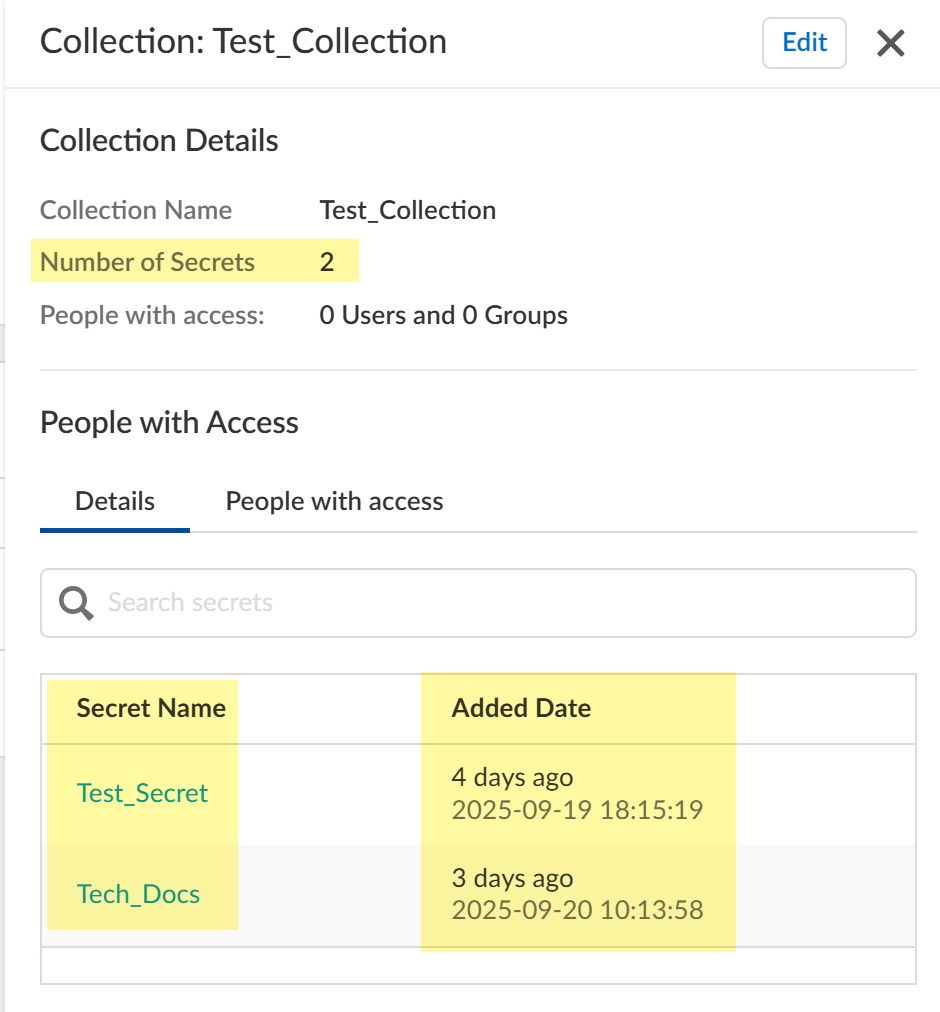
- Click the Collections tab and select a collection
to view Details for the collection, including the
number and names of associated secrets and when the secrets were added.
![]()
- View People with access to this collection by
entering a search query and selecting a user.
![]()
Manage the secrets vault.- Search the secrets vault by entering the search query. You can use
filters to search by secret name, URL, or username. You can also specify
which collections to search or search by creator name.
![]()
- Edit a secret by clicking the Edit () button. You can also select the secret then click Edit.
![]()
- Delete a secret by clicking the Delete () button and confirming the deletion.
![]()
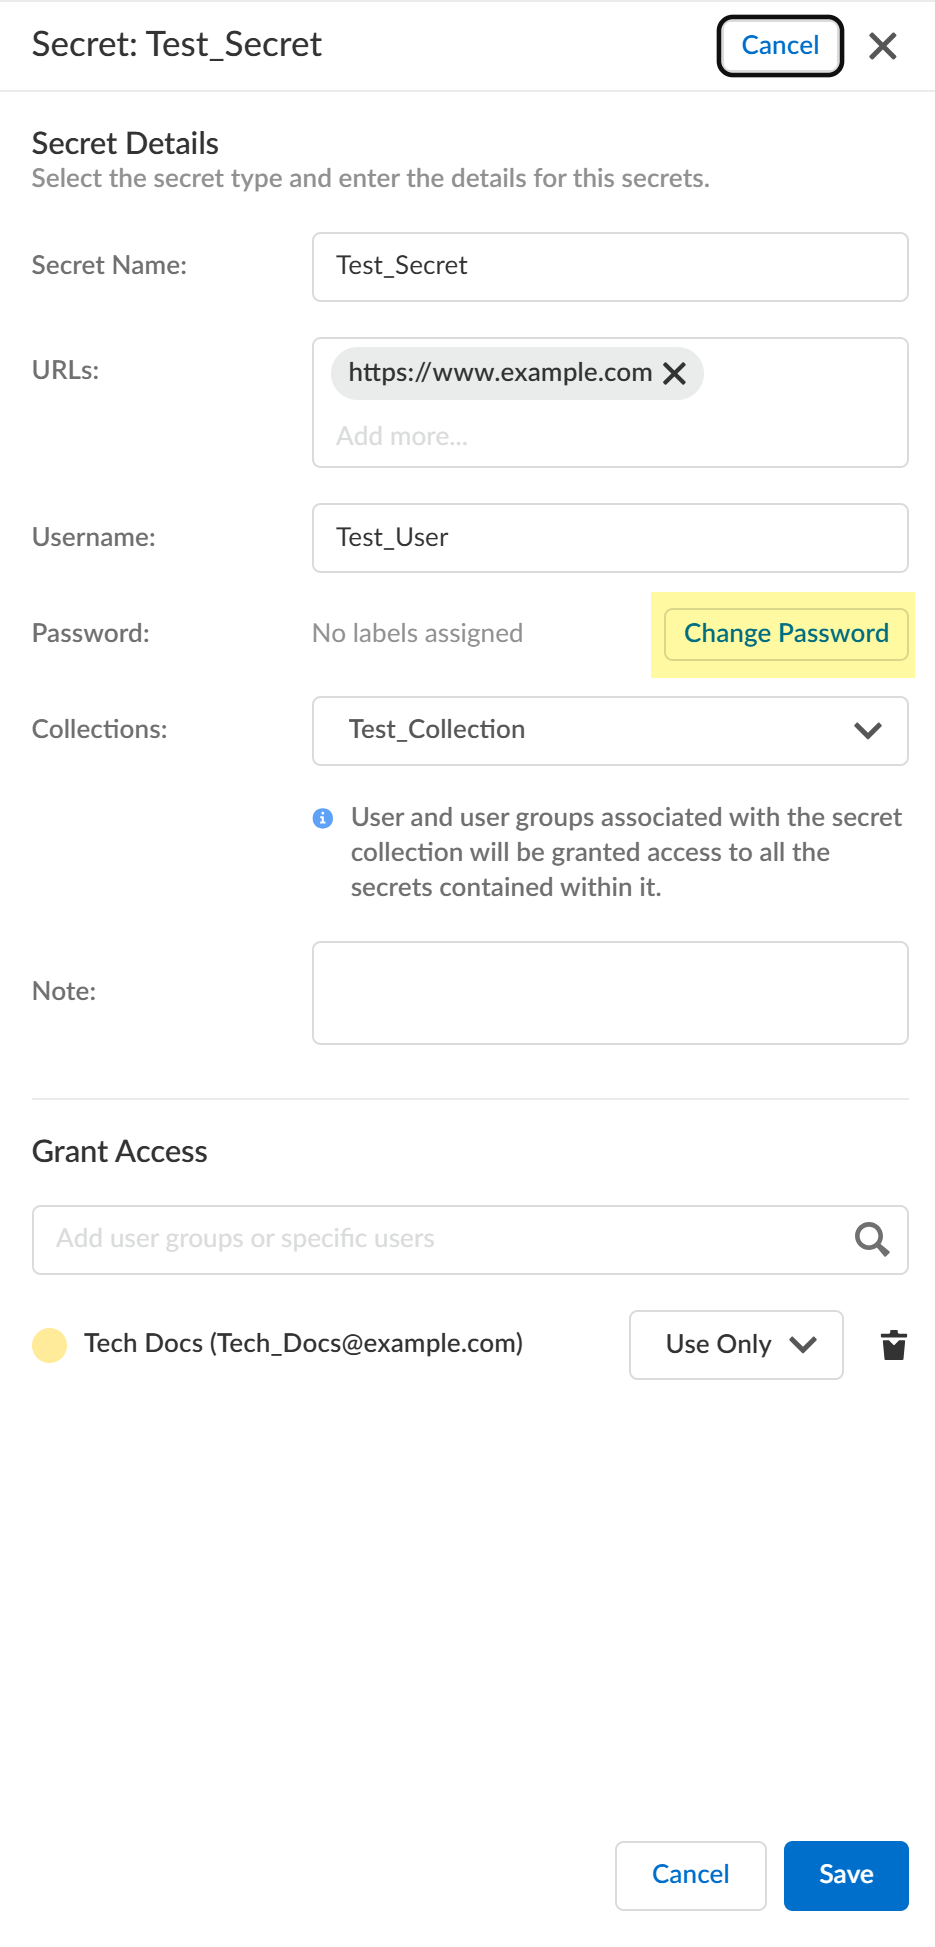
- Change the password for a secret by selecting the secret, clicking
Edit, and then, clicking Change
Password. Enter the new password and click
Save.
![]()
- Delete the secrets vault by clicking the Options button, selecting
Delete Vault, and confirming the deletion.
This action deletes the entire vault, including secrets and collections. To ensure continuation of services, verify that you have configured an alternate authentication method for any secrets vault users before completing this action.
![]()
Manage the collections.- Search the collections by entering the search query. You can use
filters to search by collection name or search by creator name.
![]()
- Edit a collection by clicking the Edit () button. You can also select the collection then click Edit.
![]()
- Delete a collection by clicking the Delete () button and confirming the deletion.
![]()

