Identity
Manage Your Okta Directory
Table of Contents
Manage Your Okta Directory
Learn about managing your Okta directory for CIE.
| Where Can I Use This? | What Do I Need? |
|---|---|
| The Cloud Identity Engine service is free; however, the enforcement points utilizing directory data may require specific licenses. Click here for more information. |
Managing your Okta directory involves maintaining the secure connection established
via the Okta Integration Network to ensure continuous user attribute
synchronization. If your deployment utilizes the Auth Code Flow, you must
reconnect the directory every 90 days to refresh authentication tokens
and prevent synchronization failures. Alternatively, reconfiguration to the Client
Credential Flow allows you to use a service account, which eliminates the need for
frequent re-authentication and is recommended for long-term stability.
You can also edit your configuration to enable advanced features, such as forwarding
authentication logs to the Strata Logging Service or collecting enterprise
application data for broader visibility. To permanently remove the directory,
you must first delete the Cloud Identity Engine integration from the Okta Admin
Dashboard to revoke privileges, and then remove the directory from the Cloud
Identity Engine tenant.
Reconnect Okta Directory
If there’s a connection loss between the Cloud Identity Engine and your Okta Directory,
follow these steps to reconnect your directory.
If the connection between your Okta directory and the Cloud Identity Engine isn’t active or if
you want to make changes to your Okta directory configuration, you can reconnect
your Okta directory to the Cloud Identity Engine.
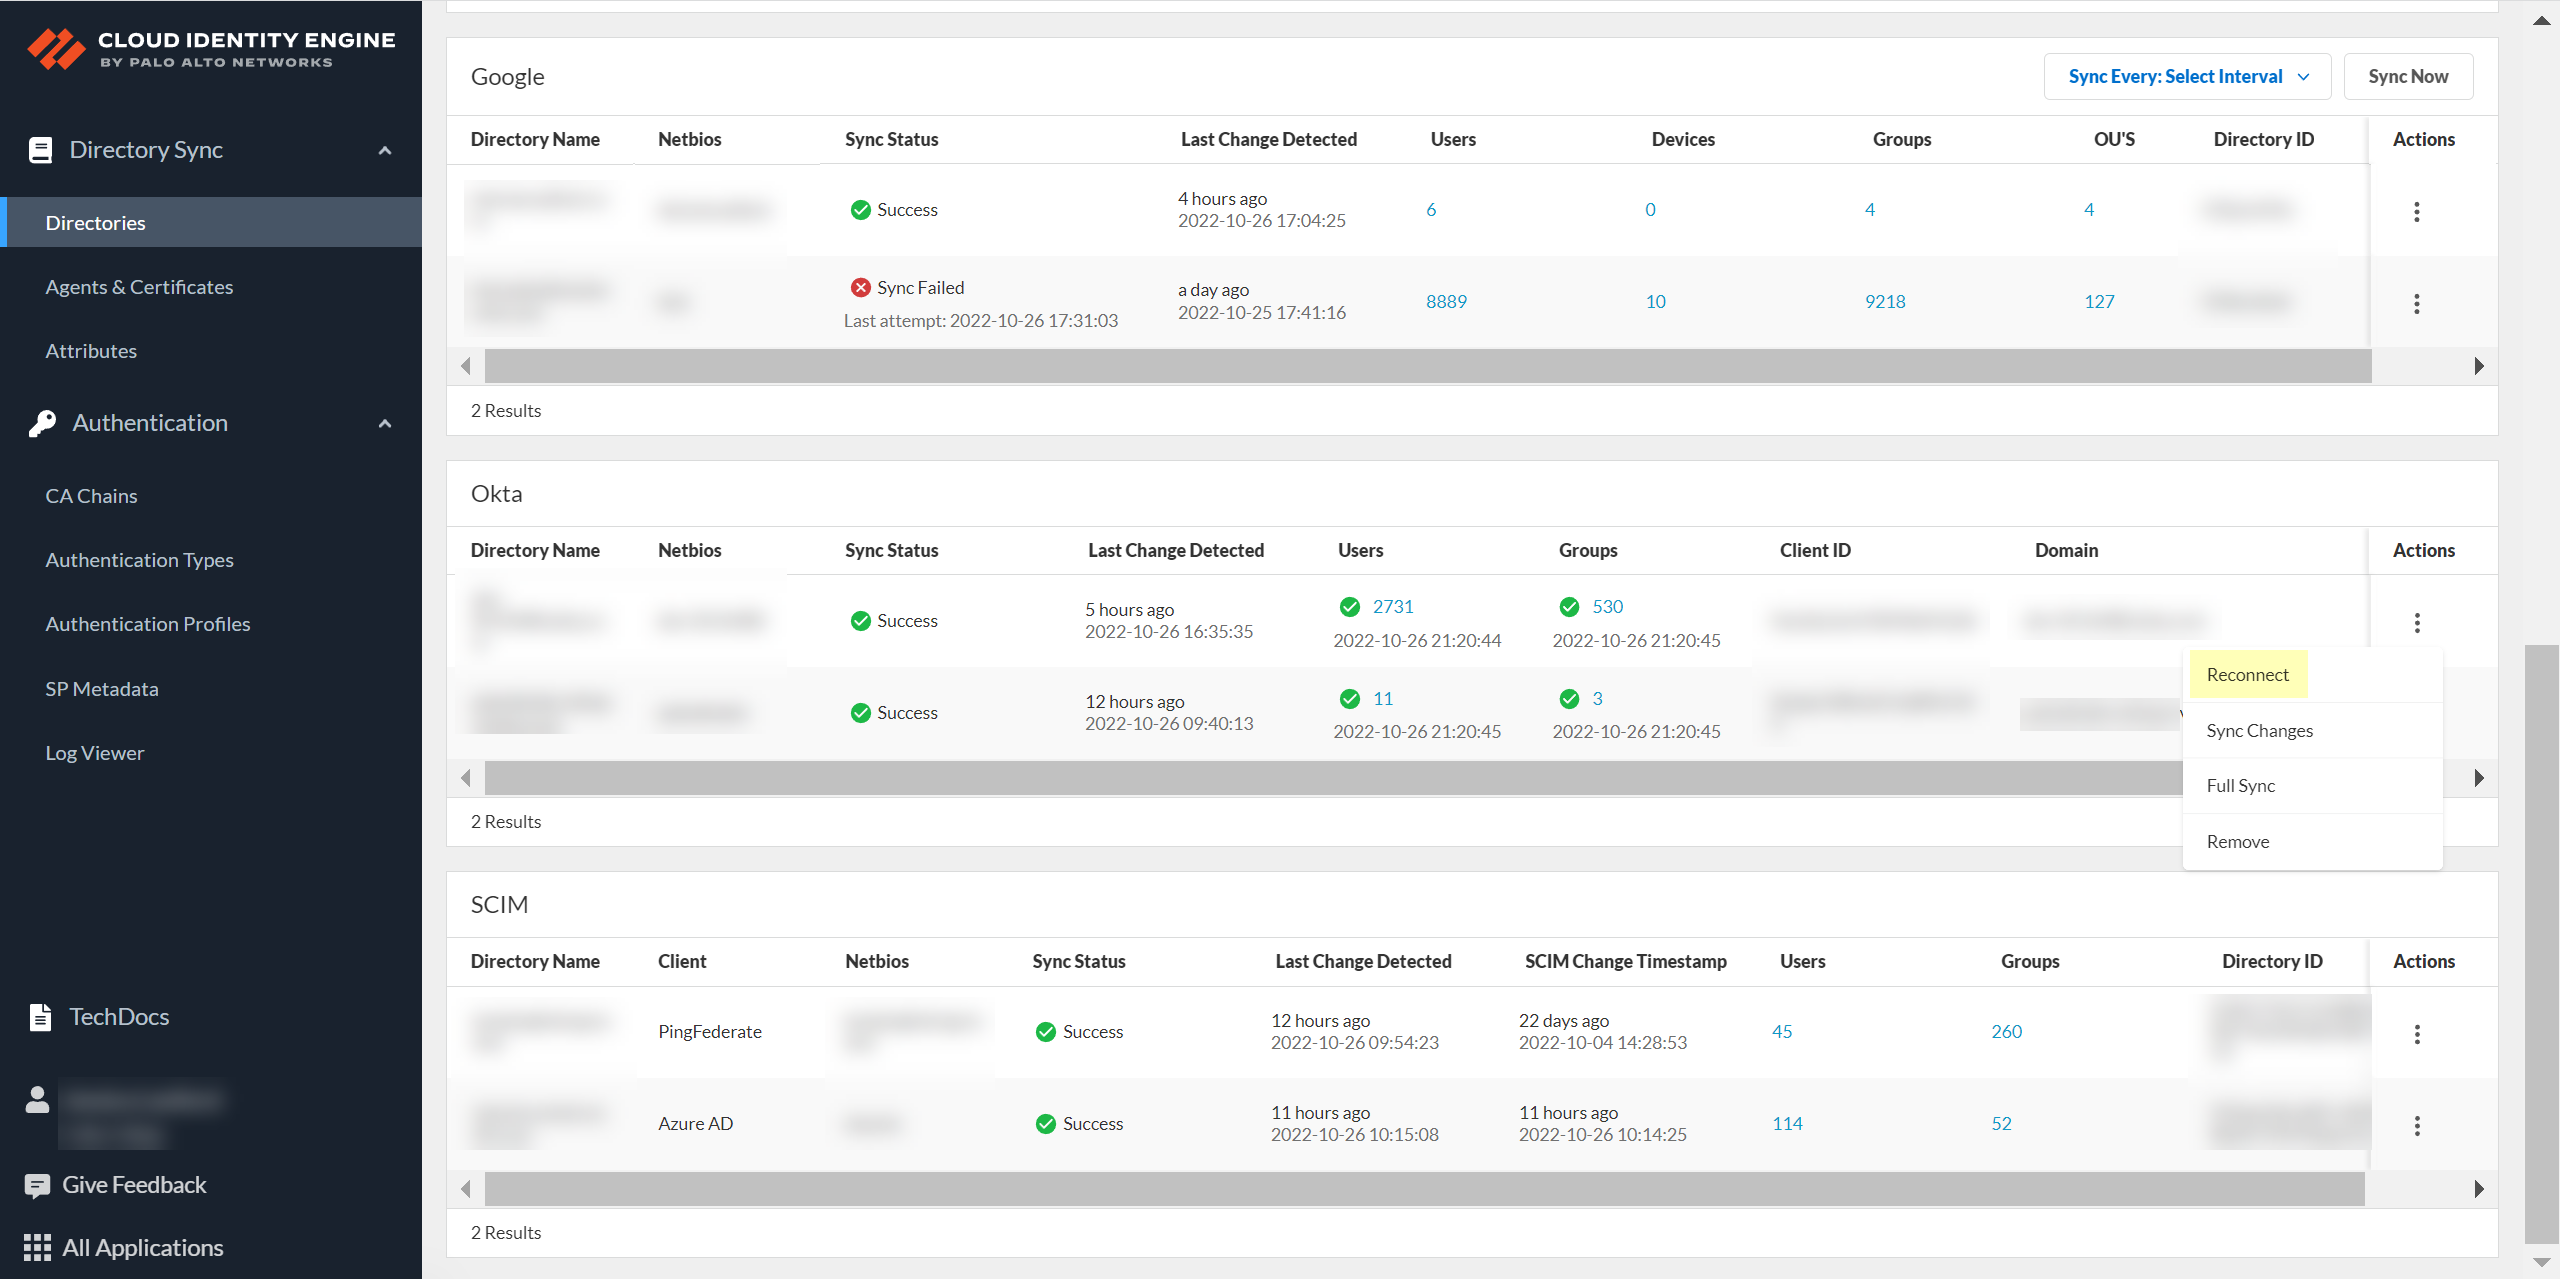
- Log in to the hub and select the Cloud Identity Engine tenant that contains the Okta directory you want to reconnect.Select Directories.Select for the directory you want to reconnect.
![]() Select whether you want to make any changes to your configuration.
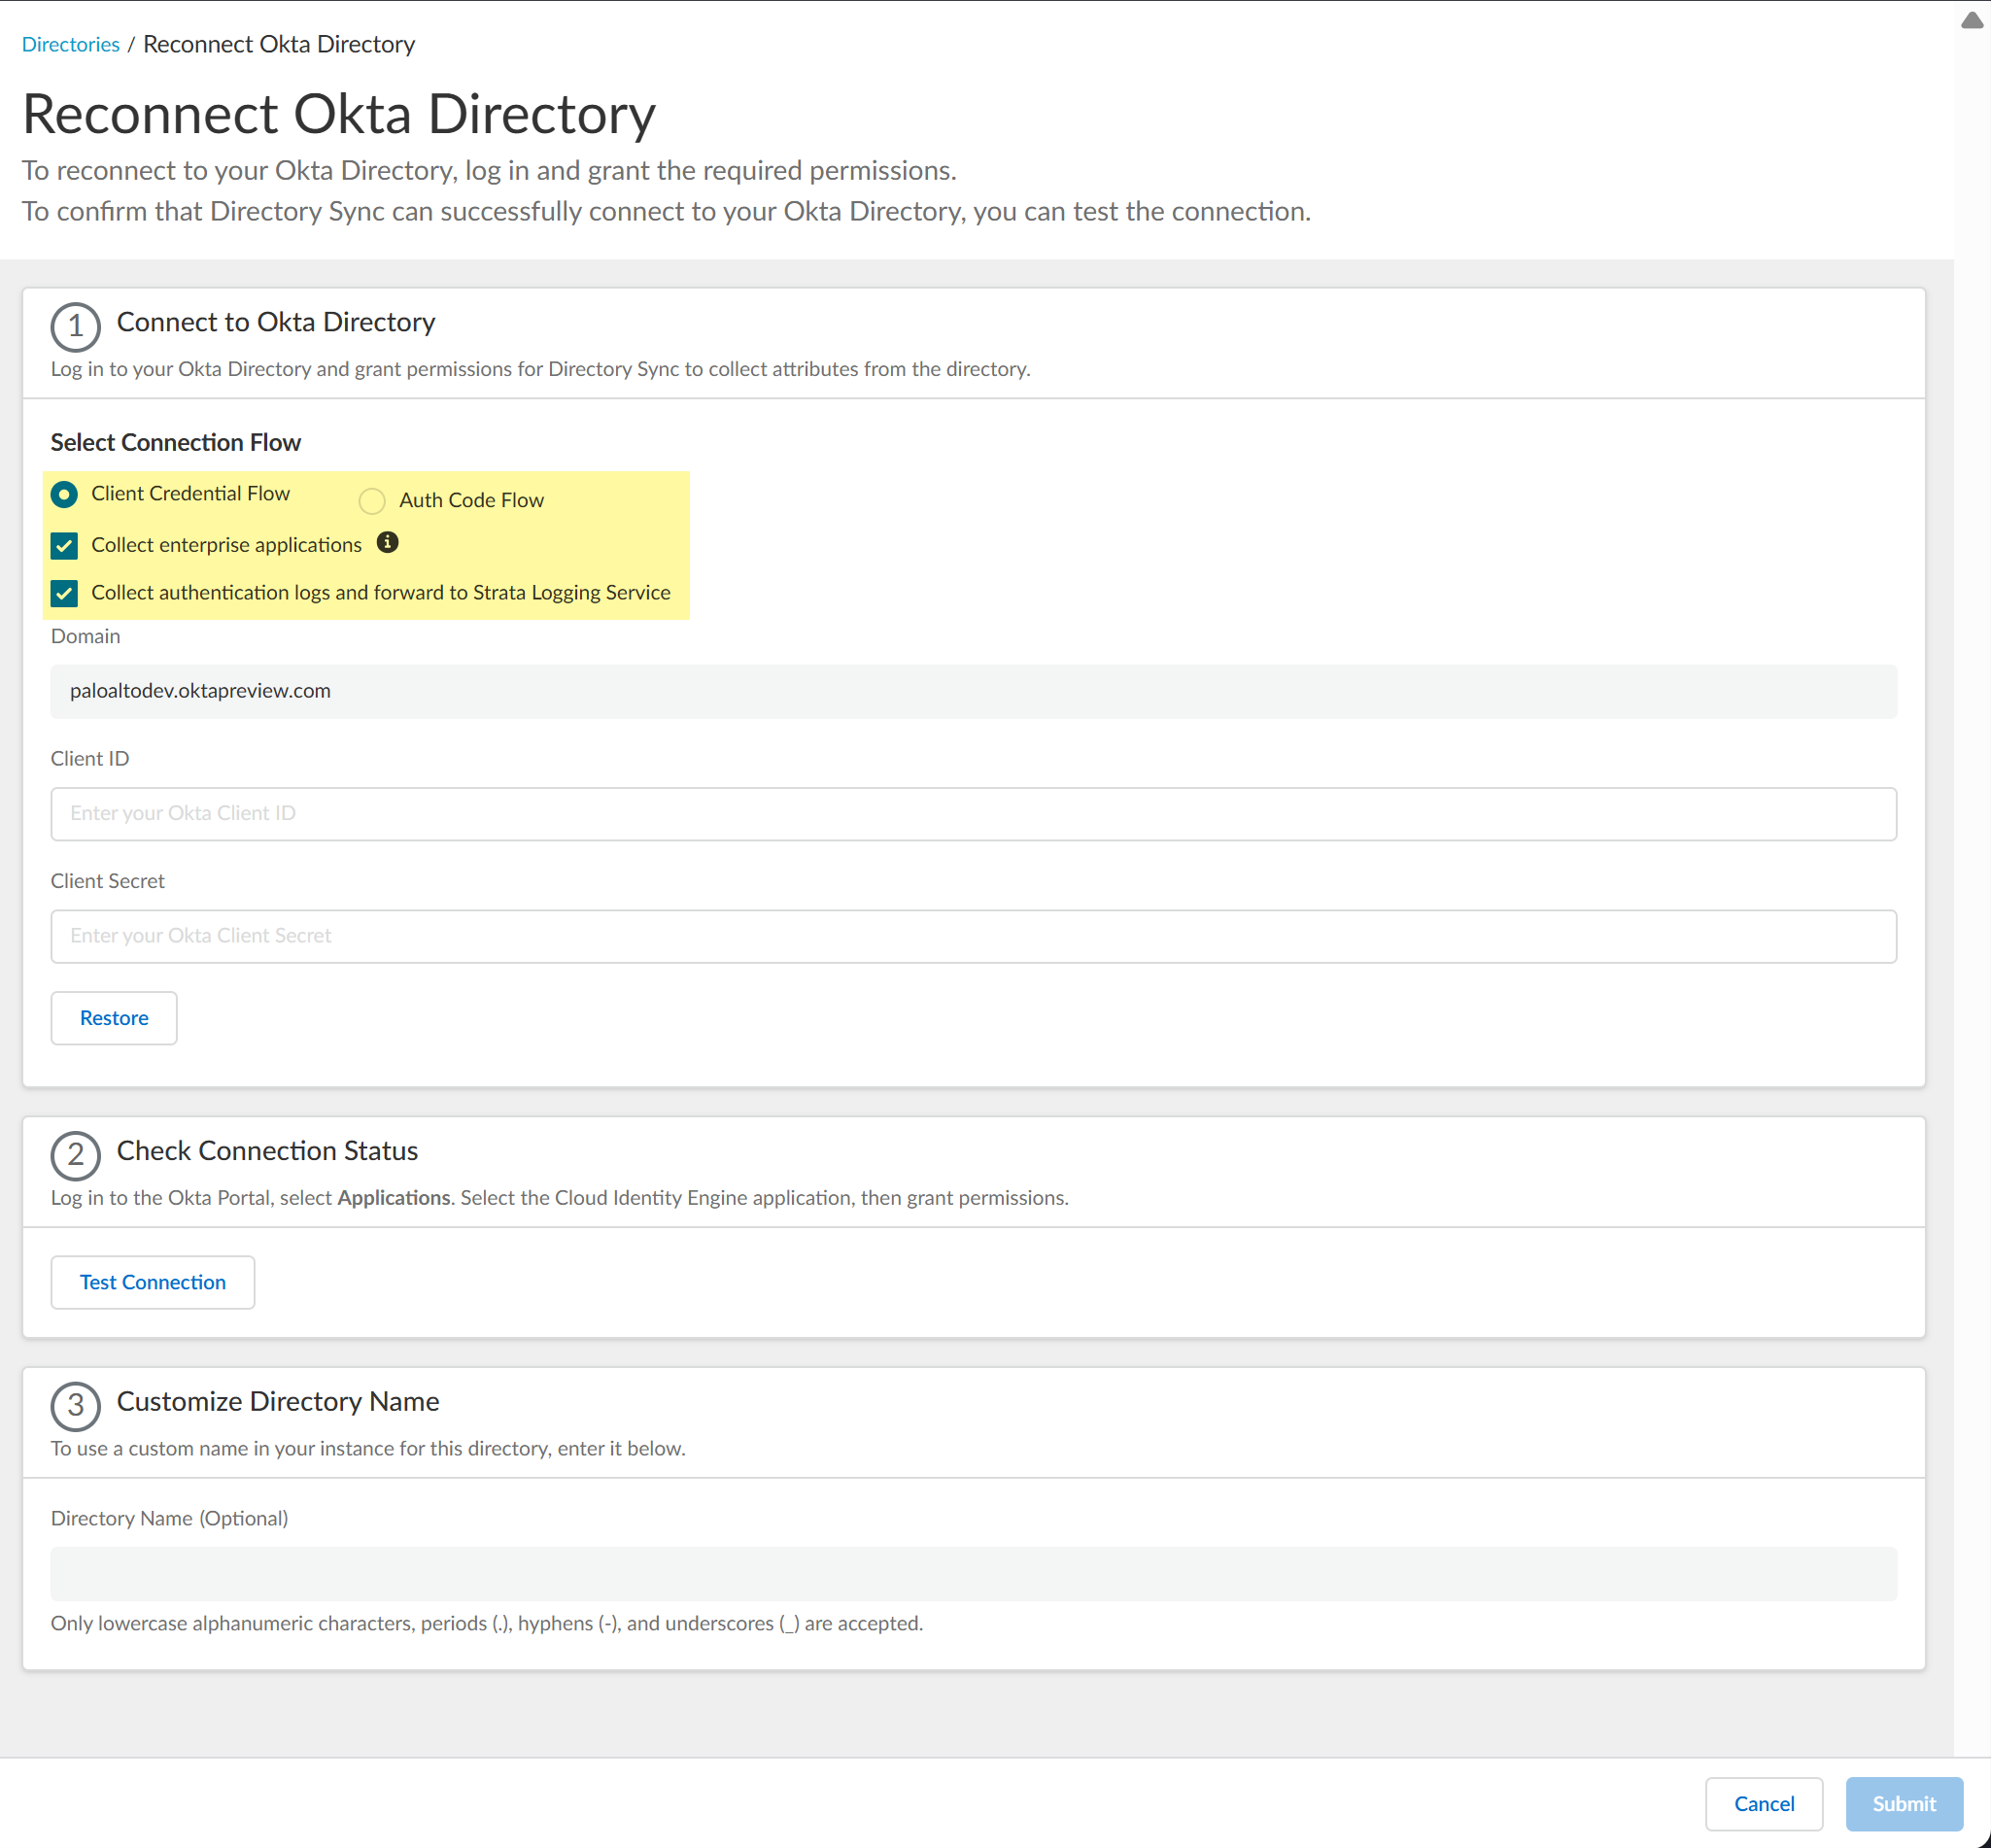
Select whether you want to make any changes to your configuration.- If you want to use a service account to log in to the Okta directory, select the Client Credential Flow. For more information, refer to Deploy Client Credential Flow for Okta.
- If you want the Cloud Identity Engine to Collect enterprise applications data so that it is included when you View Directory Data, select the checkbox. If you don't use enterprise application data in your security policy or you don't want to collect the data, deselect the checkbox.
- If you want the Cloud Identity Engine to Collect authentication logs and forward to Strata Logging Service, select the checkbox. If you don't want to forward logs or you don't use Strata Logging Service, deselect the checkbox.
![]() (Auth Code Flow only) Sign in with Okta using your Okta administrator credentials and grant permissions for the Cloud Identity Engine to access the directory information.(Client credential flow only) Enter the Client ID and Client Secret (or click Restore to restore the current client secret).You cannot change the Domain. If you need to change the domain, you must create a new Okta directory configuration in the Cloud Identity Engine.Click Test Connection to confirm the Cloud Identity Engine can access your Okta directory.(Optional) Customize Directory Name if you want to change the name that the Cloud Identity Engine displays for this directory in your tenant.You can use up to 15 lowercase alphanumeric characters (including hyphens, periods, and underscores) for the directory name in the Cloud Identity Engine. You don't need to change the name of the directory itself, only the name of the directory in the Cloud Identity Engine app. If your directory name contains more than 15 characters, you must change the directory name to contain a maximum of 15 characters.Submit your configuration.
(Auth Code Flow only) Sign in with Okta using your Okta administrator credentials and grant permissions for the Cloud Identity Engine to access the directory information.(Client credential flow only) Enter the Client ID and Client Secret (or click Restore to restore the current client secret).You cannot change the Domain. If you need to change the domain, you must create a new Okta directory configuration in the Cloud Identity Engine.Click Test Connection to confirm the Cloud Identity Engine can access your Okta directory.(Optional) Customize Directory Name if you want to change the name that the Cloud Identity Engine displays for this directory in your tenant.You can use up to 15 lowercase alphanumeric characters (including hyphens, periods, and underscores) for the directory name in the Cloud Identity Engine. You don't need to change the name of the directory itself, only the name of the directory in the Cloud Identity Engine app. If your directory name contains more than 15 characters, you must change the directory name to contain a maximum of 15 characters.Submit your configuration.Remove Okta Directory
If you no longer need to sync your Okta Directory, learn how to remove it from the Cloud Identity Engine.If you no longer need to sync your Okta Directory with the Cloud Identity Engine, you can remove it from the Cloud Identity Engine. - Remove the Cloud Identity Engine integration from Okta.
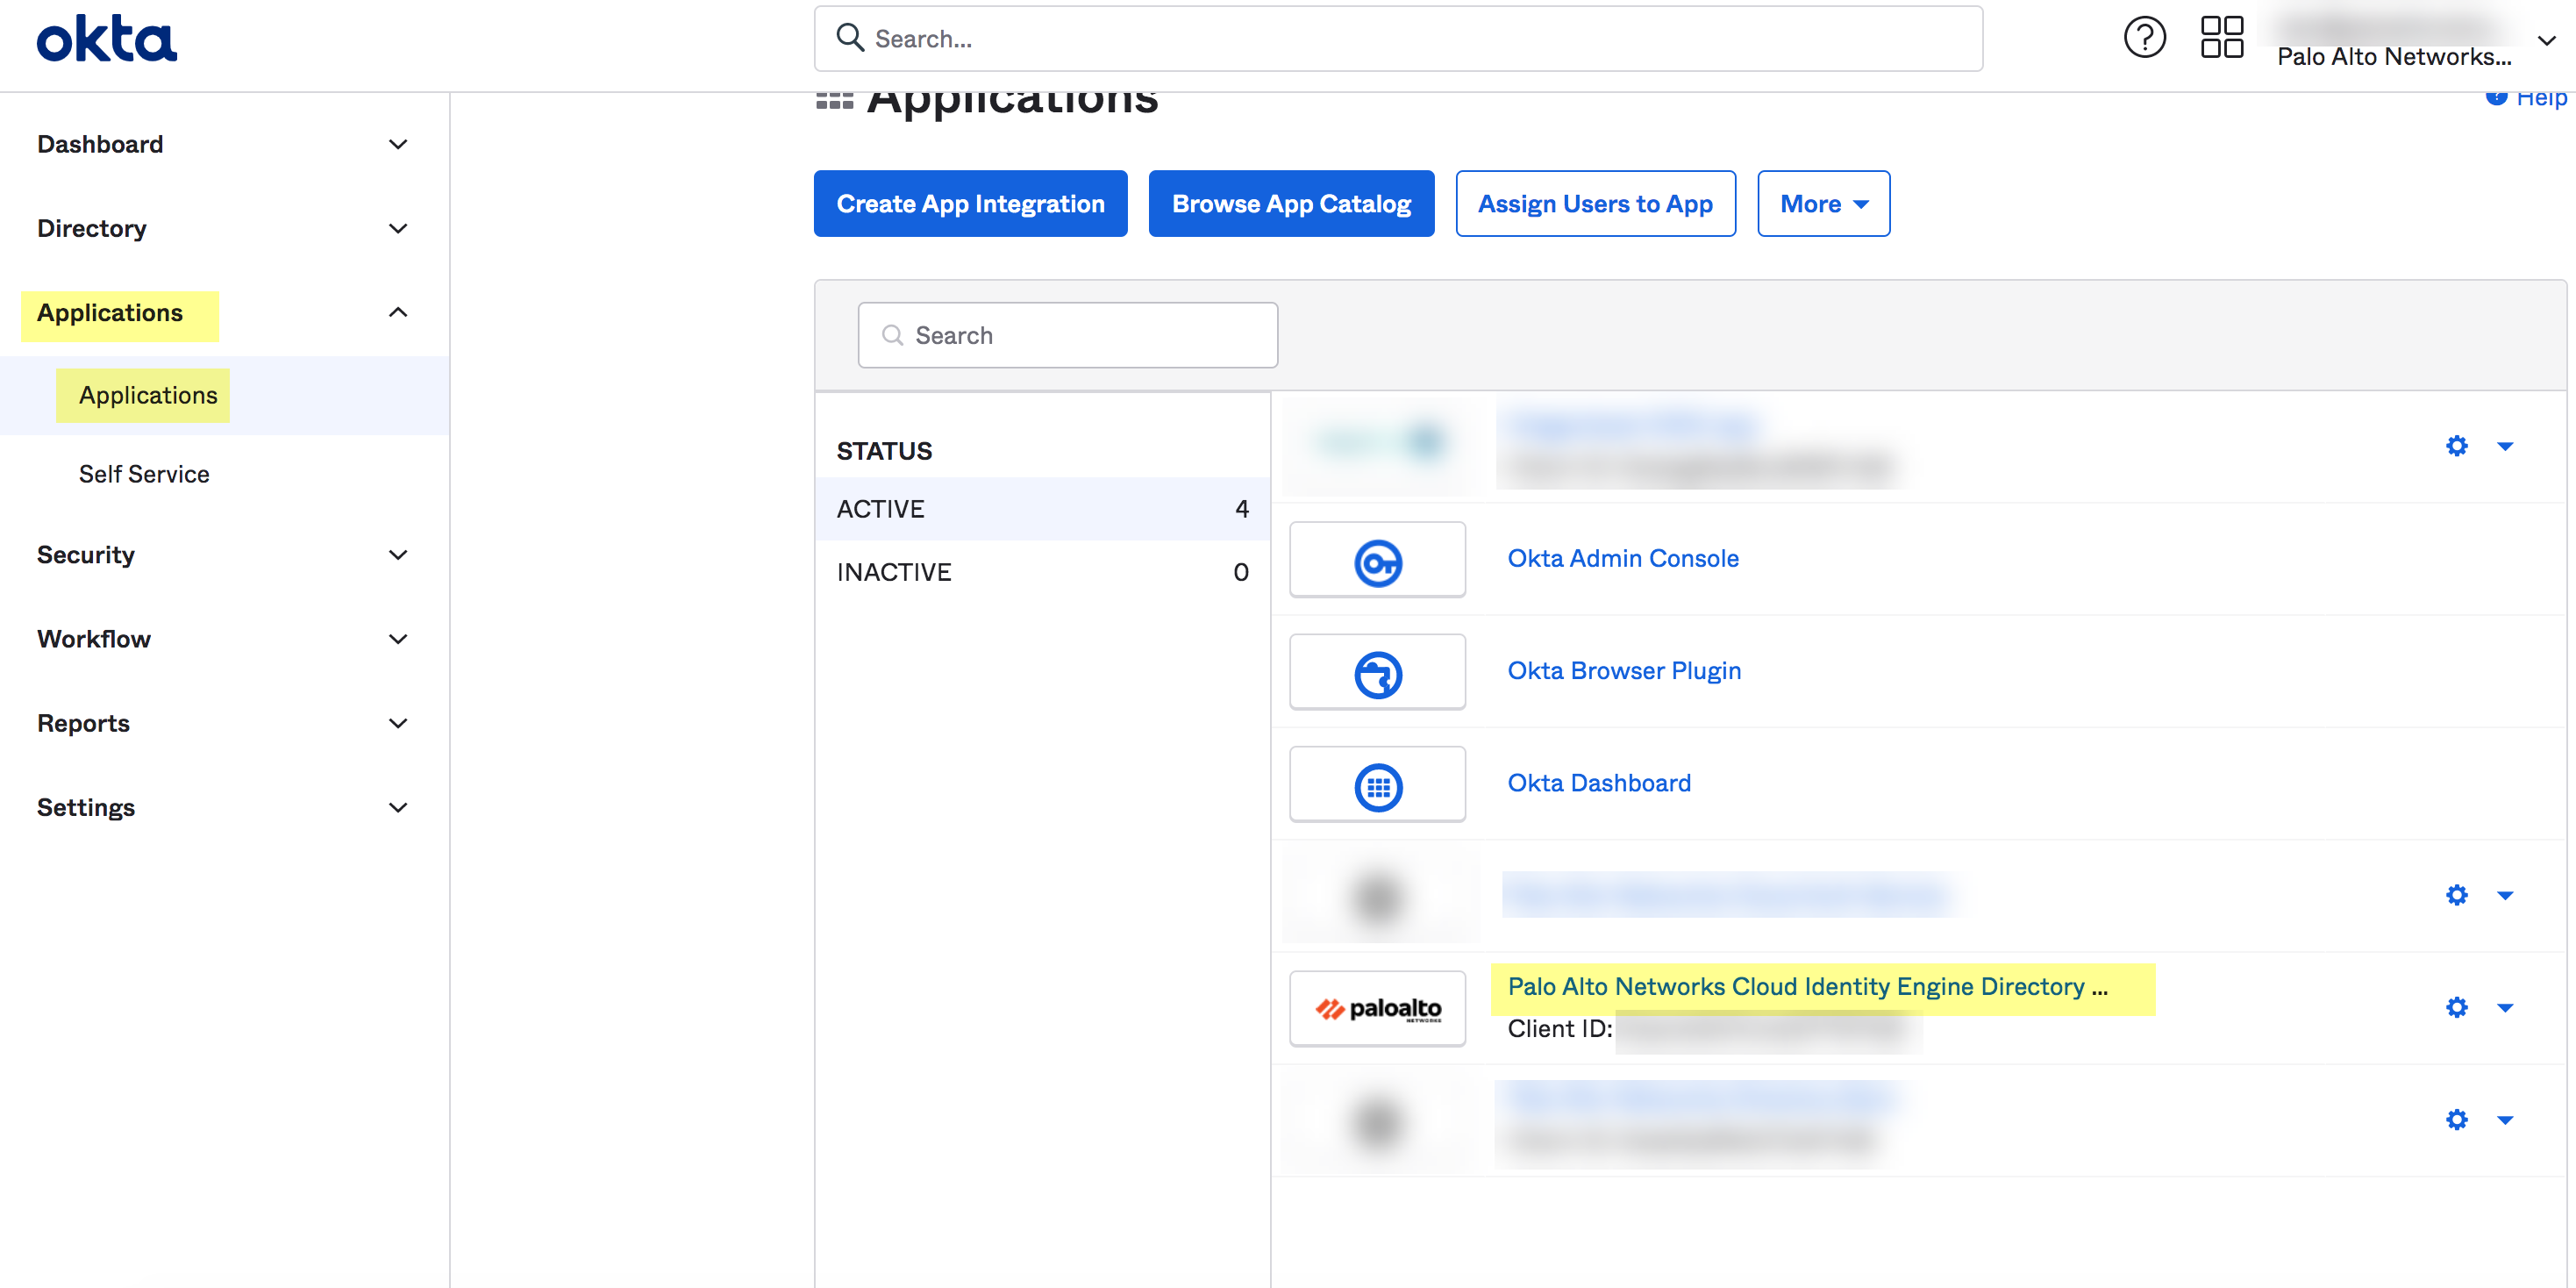
- Log in to the Okta Admin Dashboard.Select .
![]() Select the Cloud Identity Engine integration you want to remove.Select .
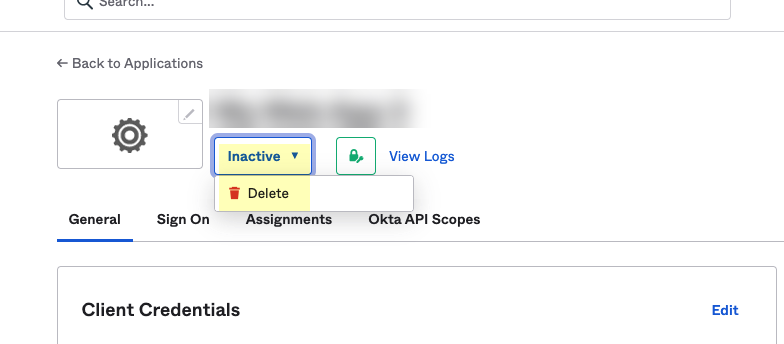
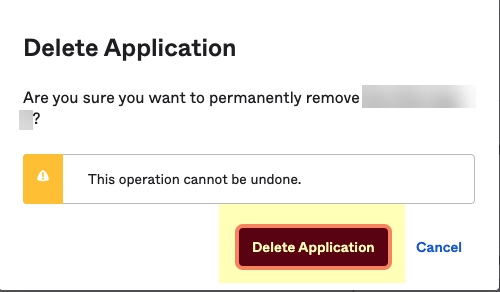
Select the Cloud Identity Engine integration you want to remove.Select .![]() Click Delete Application to confirm that you want to remove the Cloud Identity Engine integration from Okta.
Click Delete Application to confirm that you want to remove the Cloud Identity Engine integration from Okta.![]() Remove the Okta Directory from the Cloud Identity Engine app.
Remove the Okta Directory from the Cloud Identity Engine app.- In the Cloud Identity Engine app, select Directories.Select .
![]() Click Yes to confirm removal of the directory.
Click Yes to confirm removal of the directory.