Set Up a Connection to the Firewall
Table of Contents
Expand all | Collapse all
Set Up a Connection to the Firewall
Set up and launch the PA-400 Series firewall in either
Zero Touch Provisioning (ZTP) mode or Standard mode depending on
your deployment needs.
On first startup, the PA-400 Series firewall
boots into Zero Touch Provisioning (ZTP) mode by default. ZTP mode
allows you to automate the provisioning process of a new firewall
that is added to a Panorama™ management server. To learn more about
ZTP, see ZTP Overview. You can
also bring the PA-400 Series firewall online in standard mode. See
the instructions below to learn how to boot in ZTP or standard mode.
If you have already booted up the firewall
and selected the wrong mode, you must perform a factory reset or
private-data-reset before continuing.
- Reset the Firewall to Factory Default Settings describes how to do a factory reset.
- To use the private-data-reset command, you must access the firewall CLI and enter the command request system private-data-reset. This command will remove all logs and restore the default configuration.
Before
you can successfully add a ZTP firewall to Panorama, you must ensure
that a Dynamic Host Configuration Protocol (DHCP) server is deployed on
the network. A DHCP server is required to successfully onboard a
ZTP firewall to Panorama. The ZTP firewall is unable to connect
to the Palo Alto Networks ZTP service to facilitate onboarding without
a DHCP server.
ZTP mode is disabled
if FIPS-CC mode is enabled. If the firewall boots with FIPS-CC mode
enabled, the firewall will automatically boot in standard mode.
- Use an RJ-45 Ethernet cable to connect the device to the correct port. The port(s) connected will depend on which mode you intend the firewall to run in.
- (Standard mode) Connect the Ethernet cable from the MGT port on the firewall to the RJ-45 port of your network switch.
- (ZTP mode) Connect the Ethernet cable from the ZTP port (Ethernet port 1) on the firewall to your network switch.
Confirm that the connection to the MGT port or Ethernet port 1 has an active network switch.An active switch allows the firewall to trigger a “link up” state on the port you connected to for your desired boot mode.(Standard mode only) If you intend to boot the firewall in standard mode, you will need access to the firewall CLI to respond to a prompt during bootup. Connect a console cable from the firewall console port to your computer. Once the firewall is powered on, use a terminal emulator such as PuTTY to access the CLI. See Access the CLI for more information.Power on the firewall. See Connect Power to a PA-400 Series Firewall to learn how to connect power to the firewall.- (Standard mode) Using your terminal emulator, watch for the following CLI prompt as the firewall boots:
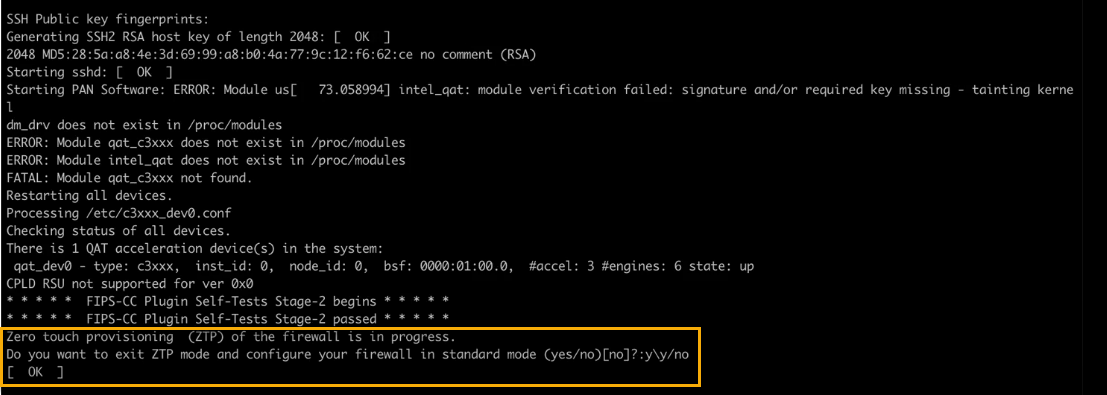
Do you want to exit ZTP mode and configure your firewall in standard mode (yes/no)[no]?
Enter yes. The system will then ask you to confirm. Enter yes again to boot in standard mode.![]() If you miss the above CLI prompt, you can also change your boot mode using the web interface. Go to the firewall login screen at any point before or during the startup process. A prompt will ask if you wish to continue booting in ZTP mode or if you would like to switch to standard mode. Select Standard Mode and the firewall will begin rebooting in standard mode.
If you miss the above CLI prompt, you can also change your boot mode using the web interface. Go to the firewall login screen at any point before or during the startup process. A prompt will ask if you wish to continue booting in ZTP mode or if you would like to switch to standard mode. Select Standard Mode and the firewall will begin rebooting in standard mode. - (ZTP mode) Stand by as the firewall boots up.
Set up the firewall manually if using standard mode. If using ZTP mode, the device group and template configuration defined on the Panorama management server are automatically pushed to the firewall by the ZTP service.- (Standard mode) Change the IP address on your computer to an address in the 192.168.1.0/24 network, such as 192.168.1.2. From a web browser, go to https://192.168.1.1. When prompted, log in to the web interface using the default username and password (admin/admin).
- (ZTP mode) Follow the instructions provided by your Panorama administrator to register your ZTP firewall. You will have to enter the serial number (12-digit number identified as S/N) and claim key (8-digit number). The claim key is required to add a ZTP firewall to the Panorama management server. These numbers are stickers attached to the back of the device.

