SaaS Security
Begin Scanning an Amazon S3 App
Table of Contents
Begin Scanning an Amazon S3 App
Secure your AWS S3 accounts and protect them from data exfiltration and malware
propagation while adhering to AWS best practices for your security monitoring.
| Where Can I Use This? | What Do I Need? |
|---|---|
|
Or any of the following licenses that include the Data Security license:
|
Supported Content
|
Support For
|
Details
|
|---|---|
|
Scan Content
| Buckets, Files |
|
Backward Scan
|
Yes
|
|
Forward Scan
|
Yes
|
|
Rescan
|
No
|
|
Selective Scan
|
No
|
|
Exposure
|
Internal, External, Public
|
|
Remediation Actions
|
|
|
Post-Remediation Actions (Actions after Admin Quarantine):
You can delete, restore, or download a quarantined file after
performing a remediation action (for example quarantine or
incident generation).
|
|
|
Notifications
|
|
|
User Activities
|
|
|
Snippet Support
|
Yes
|
|
Known License/Version restrictions
|
None
|
|
Caveats/Notes
|
None
|
To connect an Amazon S3 app and begin scanning assets, you need to:
In addition to the Data Security license, you must have an Evident
Storage license for Data Security to scan for AWS S3 assets.
- Learn how Data Security excludes S3 buckets.
- Set up on Amazon S3 for single account:
- Add the Amazon S3 App when your scan setup is complete.
- Exclude Amazon S3 Buckets from Scans
As you prepare to scan your Amazon S3 account, take note of the following values in the
worksheet provided, as they are required to complete the setup of the Amazon S3 app on
Data Security:
| Item | Description |
|---|---|
|
AWS account ID
|
Required to enable the Amazon S3 Bucket created in CloudTrail.
|
|
Access key ID
|
Grants Data Security permission to access Amazon S3.
|
|
Secret access key
|
The administrator root access key used to configure the IAM
services.
|
|
CloudTrail bucket name (or full path if the CloudTrail feature is
already enabled)
|
Enables the Amazon S3 app to log management and data events to a
CloudTrail bucket of your choice.
|
|
Region
|
A configured area in CloudTrail that is scanned.
|
|
Role
|
When scanning multiple AWS S3 accounts, each IAM role defines a set
of permissions that grant access to actions and resources in
AWS.
|
Scan a Single Amazon S3 Account
Learn how Data Security scans S3 buckets for a single
AWS account.
To enable scanning of S3 buckets for a single AWS account, you must configure AWS IAM policy,
user, role, and CloudTrail logging before you can add the Amazon S3 app to Data Security.
- Log in to your AWS Console aws.amazon.com.Select .Configure the Data Security policy used to connect to the Amazon S3 app.
- Select and then select Create Your Own Policy.In the Specify Permissions page, select JSON.Copy and paste the following configuration into the Policy editor section and click Next.
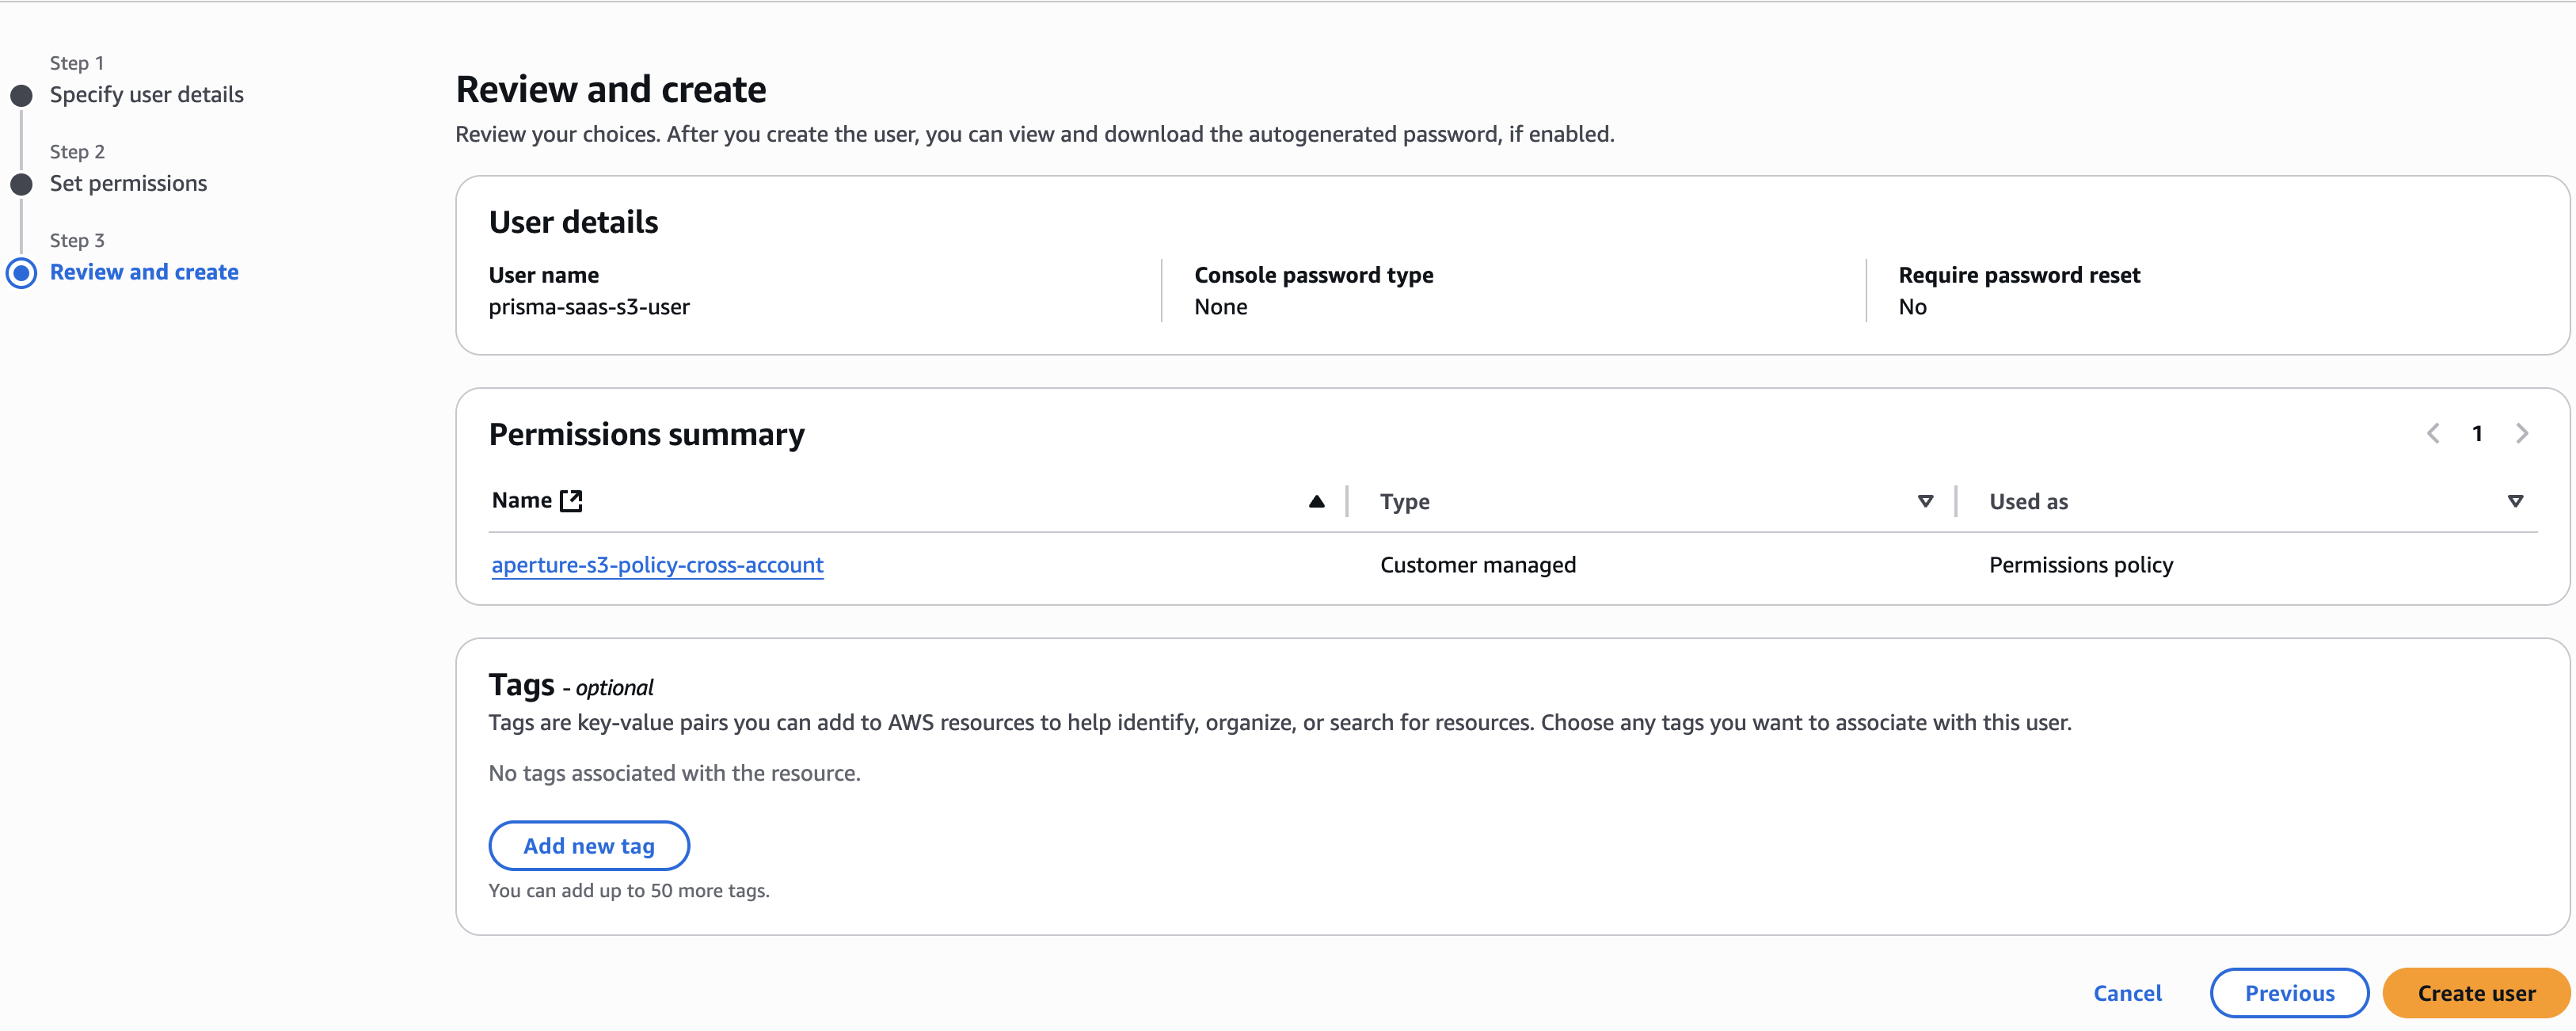
{ "Version": "2012-10-17", "Statement": [ { "Effect": "Allow", "Action": [ "s3:Get*", "s3:List*", "s3:Put*", "s3:Delete*", "s3:CreateBucket", "iam:GetUser", "iam:GetRole", "iam:GetUserPolicy", "iam:ListUsers", "cloudtrail:GetTrailStatus", "cloudtrail:DescribeTrails", "cloudtrail:LookupEvents", "cloudtrail:ListTags", "cloudtrail:ListPublicKeys", "cloudtrail:GetEventSelectors", "ec2:DescribeVpcEndpoints", "ec2:DescribeVpcs", "config:Get*", "config:Describe*", "config:Deliver*", "config:List*" ], "Resource": "*" } ]}Enter the Policy Name as prisma-saas-s3-policy and provide an optional description of the policy.Create Policy.Configure the account that Data Security will use to access the Amazon S3 logs:- Select .Enter the user name as prisma-saas-s3-user.Create an access key for an IAM user.Note your Access key ID and Secret access key.Select Next.Select Attach existing policies directly.Search for and select the check box next to the prisma-saas-s3-policy you created in the previous step.Select .
![]() Configure CloudTrail logging, if you have not already done so.CloudTrail logging enables the Amazon S3 app to log management and data events to the CloudTrail buckets of your choice.
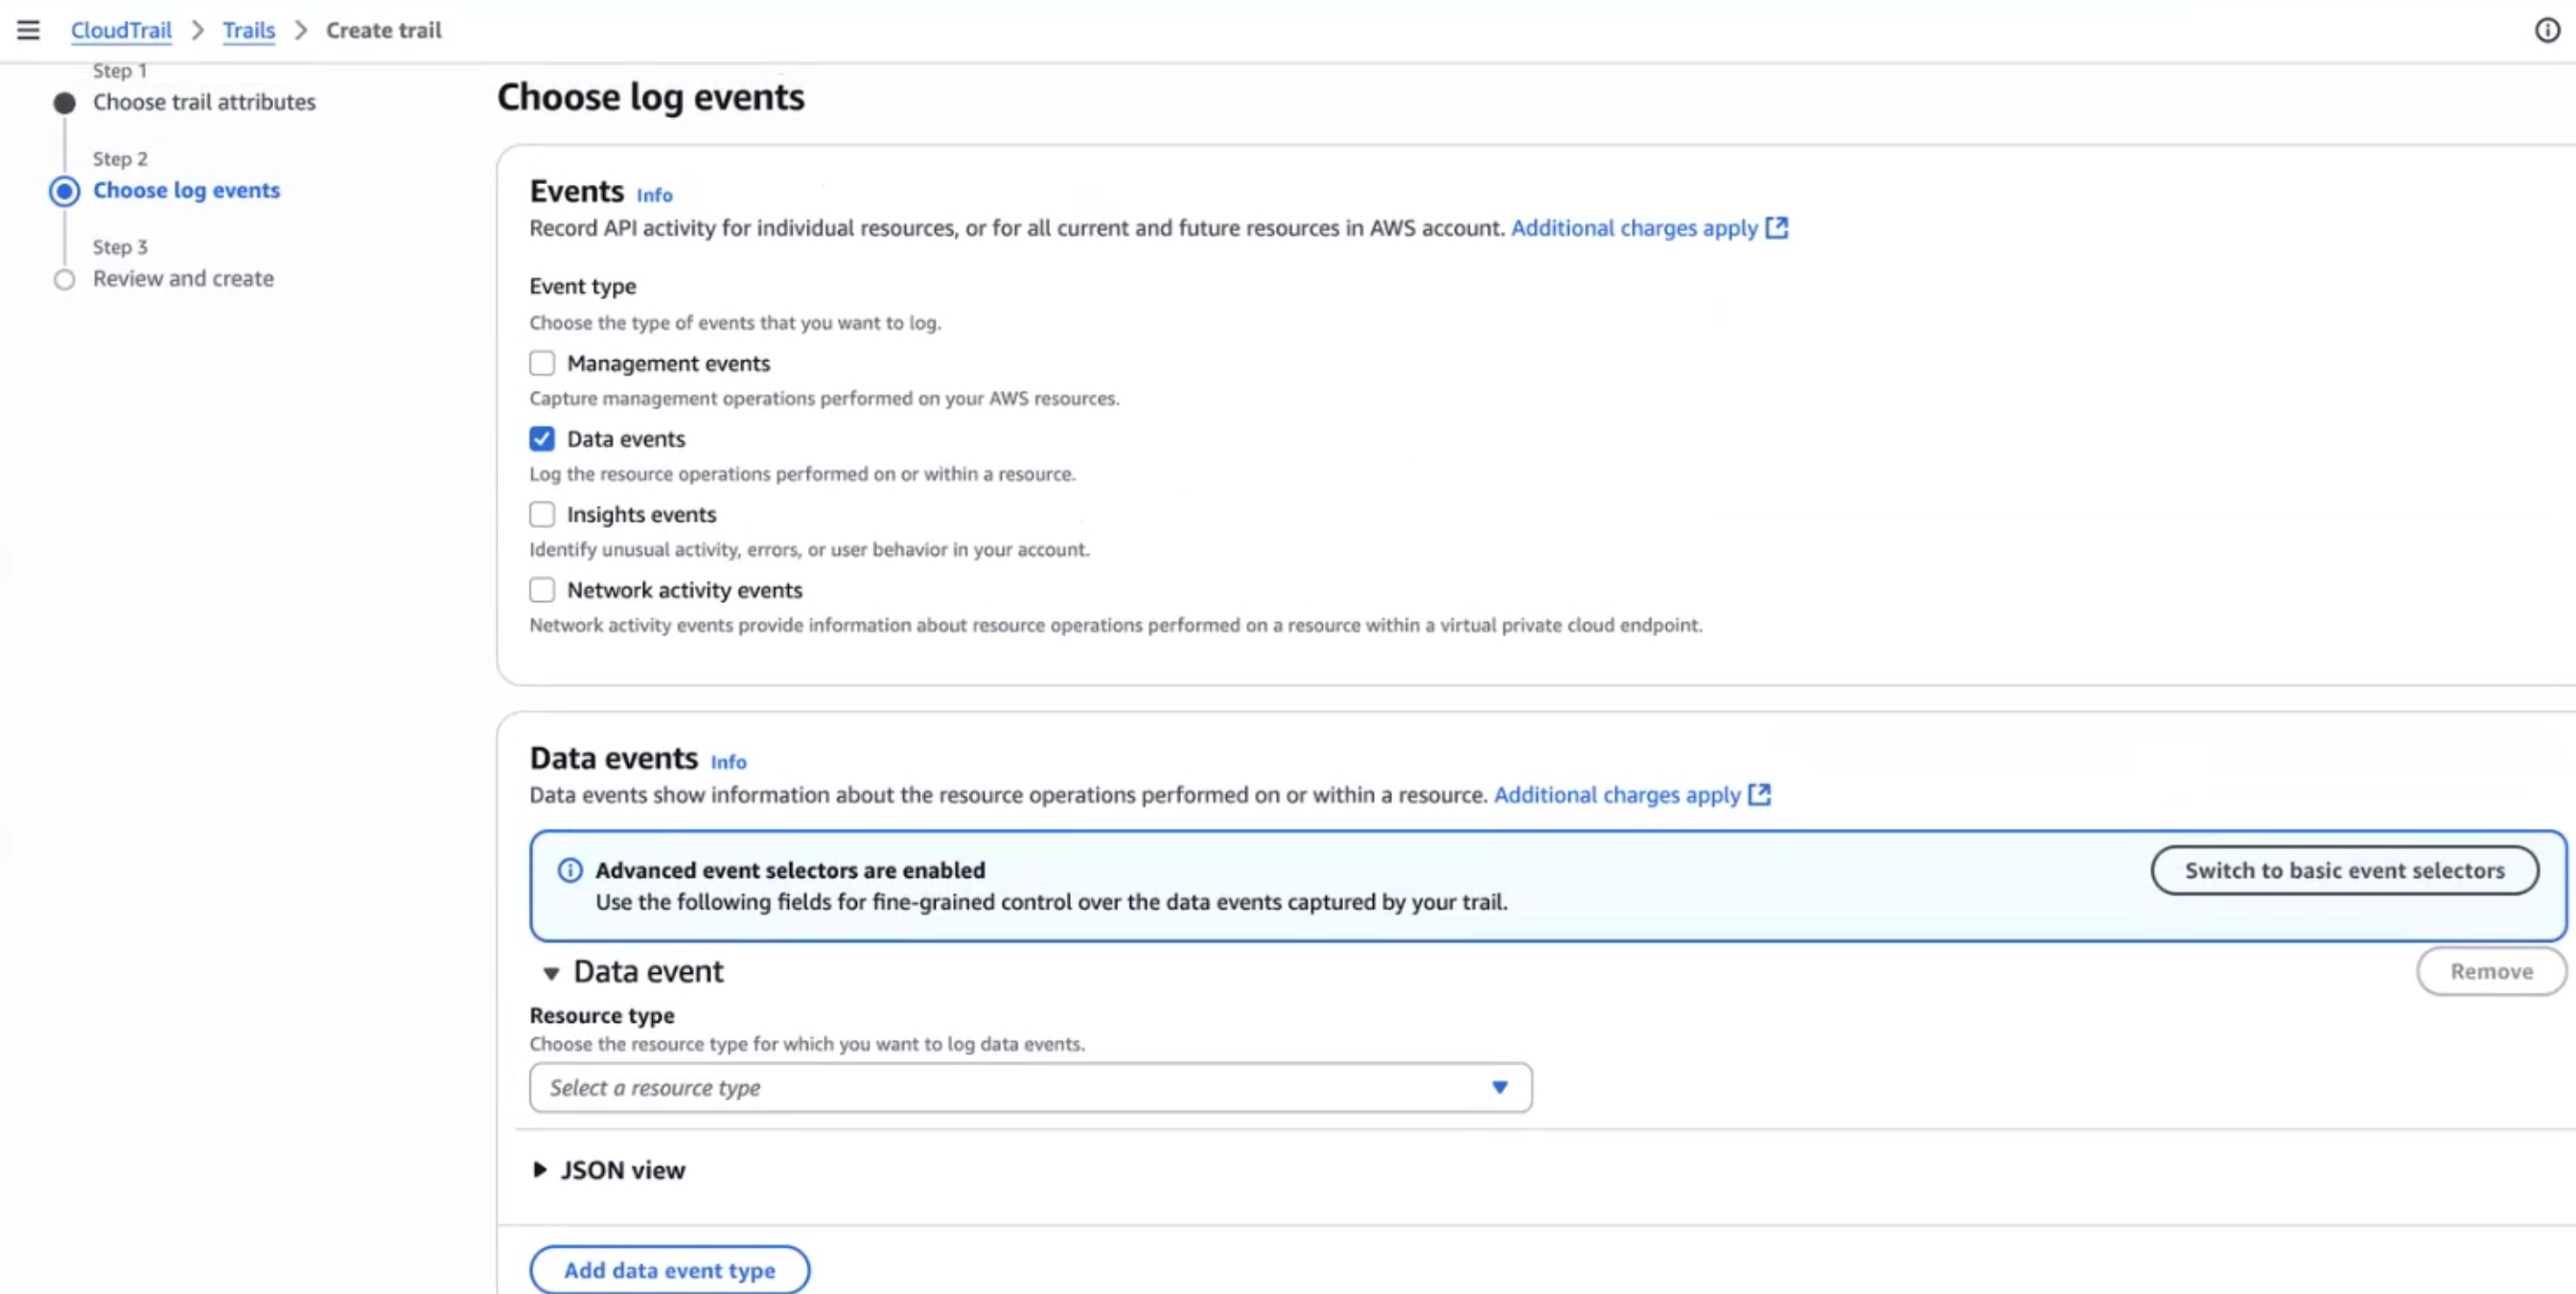
Configure CloudTrail logging, if you have not already done so.CloudTrail logging enables the Amazon S3 app to log management and data events to the CloudTrail buckets of your choice.- Copy your AWS account ID into memory by clicking on your username at the top right and copy the account number.You will need your account number later in this procedure.Select .Enter the Trail name prisma-saas-s3-trail.Deselect Log file SSE-KMS encryption.To create a bucket in which CloudTrail will store management and data event logs, enter the S3 bucket name as prisma-saas-s3-<AWS account ID> in the Storage location area.Take note of the S3 bucket (CloudTrail bucket name) and region.Select Next.In the Choose log events page, deselect Management Events and select Data events.In the Data events pane, select .
![]() Ensure you select S3 in the Data event source drop-down.You can choose to log read and/or write events for all buckets or choose individual buckets.
Ensure you select S3 in the Data event source drop-down.You can choose to log read and/or write events for all buckets or choose individual buckets.- Individual buckets—Operates as an allow list and requires ongoing maintenance.
Click Next, review the details and Create trail.Next Step: Proceed to adding the Amazon S3 app to .Add the Amazon S3 App
Add the Amazon S3 app to begin scanning your assets in S3 buckets with Data Security.After you set up your scan configuration for a single AWS account or for multiple AWS accounts, add the Amazon S3 app to Data Security to begin scanning your new Amazon S3 app for policy violations.Add Amazon S3 App
There are two methods to set up the Amazon S3 app on Data Security based on whether you are configuring a single account or multiple accounts.- Log in to Strata Cloud ManagerSelect .
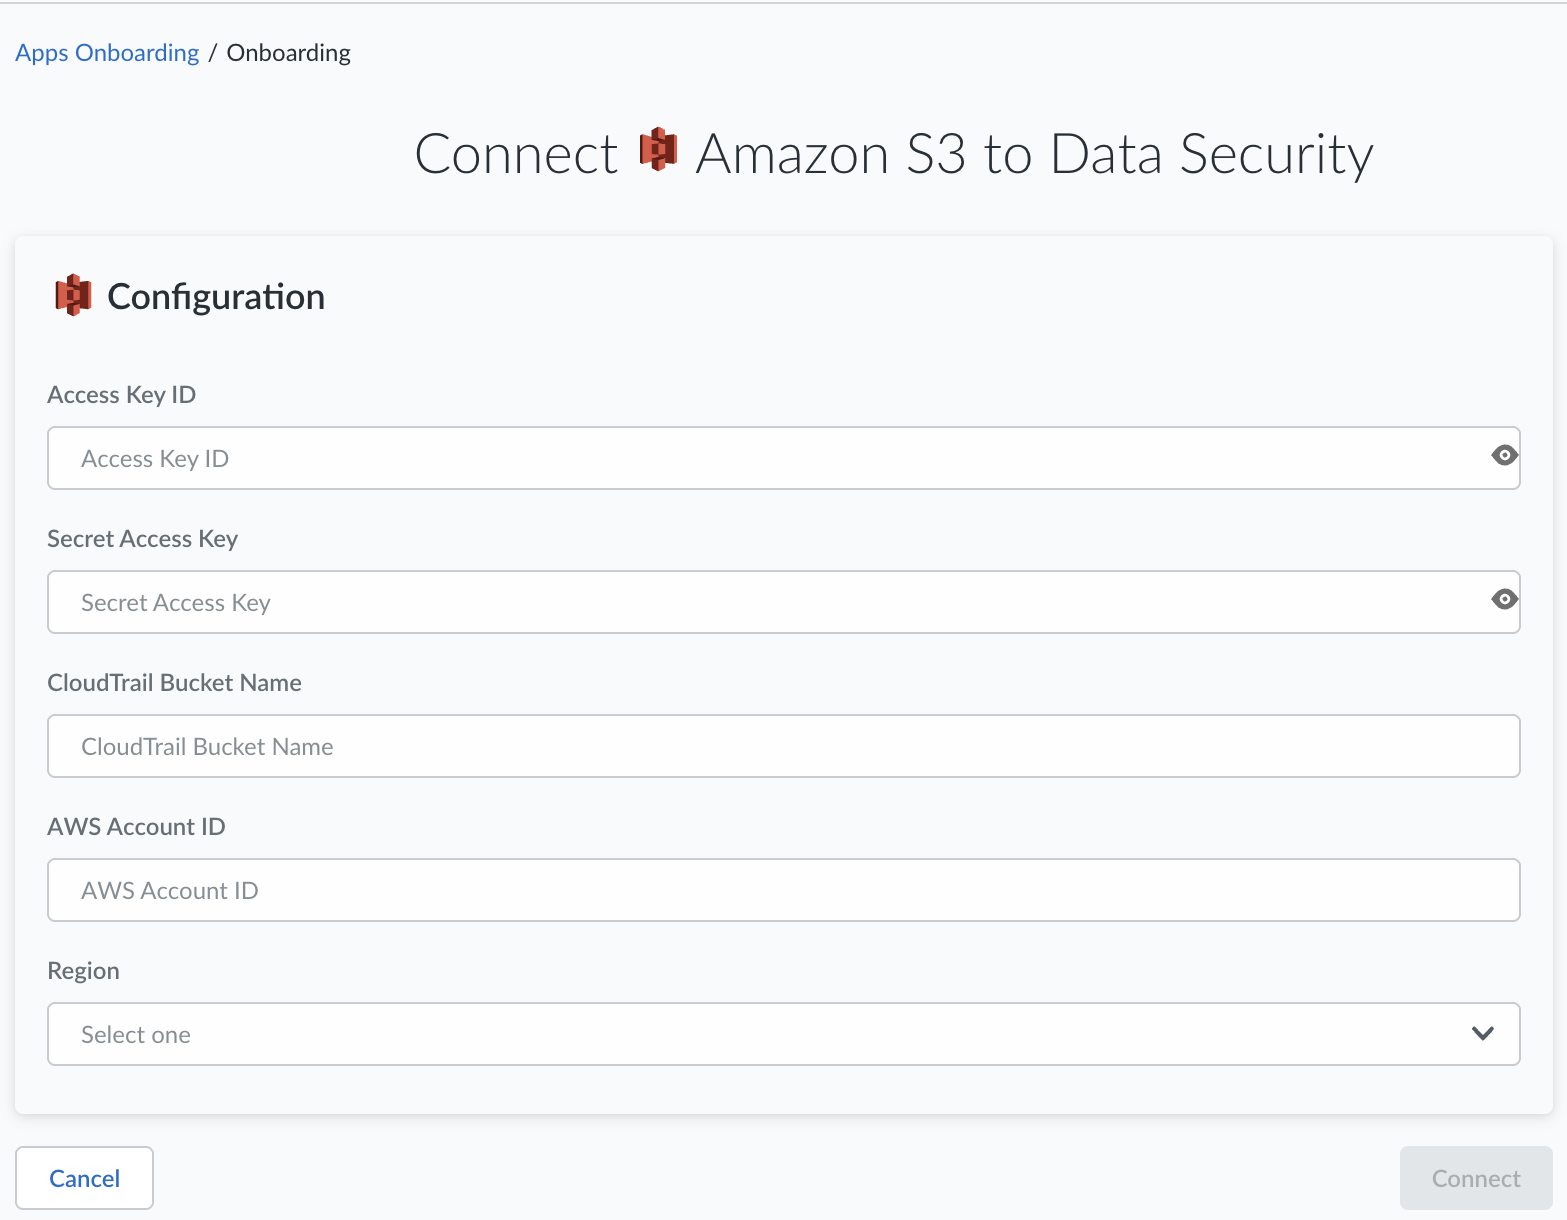
![]() Connect a single AWS account, if applicable.
Connect a single AWS account, if applicable.- Connect a single AWS account by clicking Connect to Account.Enter the Access Key ID and Secret Access Key that you noted earlier when you completed the worksheet for your app scan.Enter the CloudTrail Bucket Name (S3 bucket name) to the default exclusion list.Because S3 allows your bucket to be used as a URL that can be accessed publicly, the bucket name that you choose must be globally unique. If some other account has already created a bucket with the name that you chose, you must use another name.Enter the AWS Account ID.To find your AWS account ID number on the AWS Management Console, select Support on the navigation bar on the upper-right, and then select Support Center. Your signed-in account ID displays in the upper-right corner below the Support menu.Select the Region.Click OK. Data Security adds the Amazon S3 app to the list of Cloud Apps.
![]() Next Step: Proceed to Customize Amazon S3 App.
Next Step: Proceed to Customize Amazon S3 App.Customize Amazon S3 App
Customizations include modifying Amazon S3 app name. - Select the Amazon S3 link on the Cloud Apps list.Enter a descriptive Name to differentiate this instance of Amazon S3 from other instances you are managing.Click Done to save your changes.Next Step: Proceed to Identify Risks.
Identify Risks
When you add a new cloud app, then enable scanning, Data Security automatically scans the cloud app against the default data patterns and displays the match occurrences. You can take action now to improve your scan results and identify risks.- Start scanning the new Amazon S3 app for risks.Monitor the scan results.During the discovery phase, as Data Security scans files and matches them against enabled policy rules, verify that your default policy rules are effective. If the results don’t capture all risks or you see false positives, proceed to next step to improve your results.Add policy rules.When you add a new cloud app, Data Security automatically scans the app against the default data patterns and displays the match occurrences. As a best practice, consider the business use of your app to determine whether you want to Add a New Data Asset Policy Rule to look for incidents unique to the assets in the new app.(Optional) Configure or edit a data pattern.You can Configure Data Patterns to identify specific strings of text, characters, words, or patterns to make it possible to find all instances of text that match a data pattern you specify.If you selected All buckets for inclusion, but do not intend to specify specific buckets for exclusion, start scanning the new Amazon S3 app for risks.Review exposure details.
- To get more details on the exposure, select a Bucket to view the S3 Share Settings. This view displays the bucket policy and access control lists (ACL) with a link to the asset in the associated bucket so that you can get more context into the exposure.
Exclude Amazon S3 Buckets from Scans
Learn how Data Security enables you to create a custom list of S3 buckets to exclude archived data from asset scans.Data Security enables you to exclude specific S3 buckets from scans to meet your organization’s compliance needs. Sometimes organizations designate specific S3 buckets to store data that is not in use before that data moves to cold storage (for example, Amazon Glacier). If you have compliance reporting demands when such data is accessed, you can omit that data from scans.Data Security has two exclusion lists:- Default exclusion list—S3 buckets that Data Security automatically excludes from scans. CloudTrail logging enables the Amazon S3 to log management and data events to the CloudTrail buckets. Data Security depends on the CloudTrail to identify changes in the S3 account and buckets. Your log events do not display as assets in the Data Security web interface because the bucket that you specify in CloudTrail Bucket Name or Primary CloudTrail Bucket Name during onboarding will not be scanned. These bucket names display in the SaaS Security web interface under Buckets Ignored.
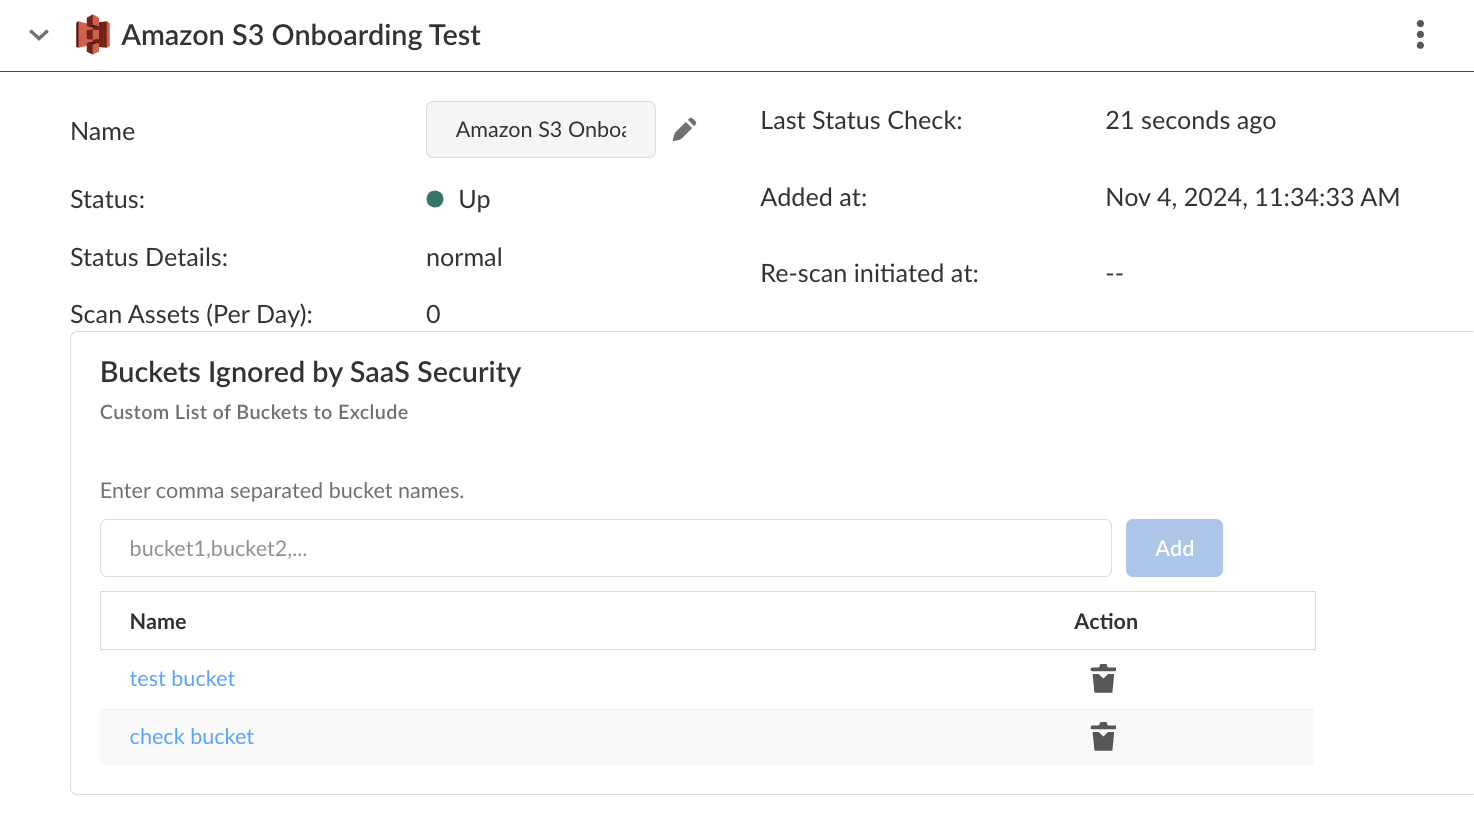
- Custom exclusion list—S3 buckets that you manually exclude from scans. If you specify All S3 buckets during single account or multiple accounts onboarding, you have the option to add a custom list of S3 buckets for exclusion.
In order for Data Security to enforce your custom exclusion list, you must add the bucket names after you onboard the Amazon S3 app—but before you start scanning. Otherwise, absent any bucket names, Data Security scans All S3 buckets, then displays those unwanted assets in the SaaS Security web interface. If you add the bucket names after the scan begins, Data Security stops scanning those buckets moving forward, but those unwanted assets remain in Data Security. To remove those assets, you must delete the Amazon S3 app and repeat the onboarding process. Similarly, you can delete a bucket name from exclusion, but previously discovered assets remain unless you delete the cloud app.- Log in to Strata Cloud Manager.Select .Click on the Amazon S3 app that you added.Specify a comma-separated list of bucket names in Custom List of Buckets to Exclude, then Add.
![]() Next Step: Start scanning, when you’re ready for Data Security to discover your assets.
Next Step: Start scanning, when you’re ready for Data Security to discover your assets.