Insert or Replace a SIM Card in a PA-500 Series 5G Firewall
Table of Contents

Insert or Replace a SIM Card in a PA-500 Series 5G Firewall
Insert nano SIM cards into the SIM card slots on the PA-520-5G firewall to enable 5G
cellular connectivity.
The PA-520-5G firewall has two nano SIM card slots (SIM 1 and SIM 2) on its side
panel. The firewall supports Active/Standby SIM selection, where one SIM card is
active at a time and the other operates as a standby.
Use only nano SIM cards. Inserting an incorrectly sized SIM card
can damage the SIM card slot.
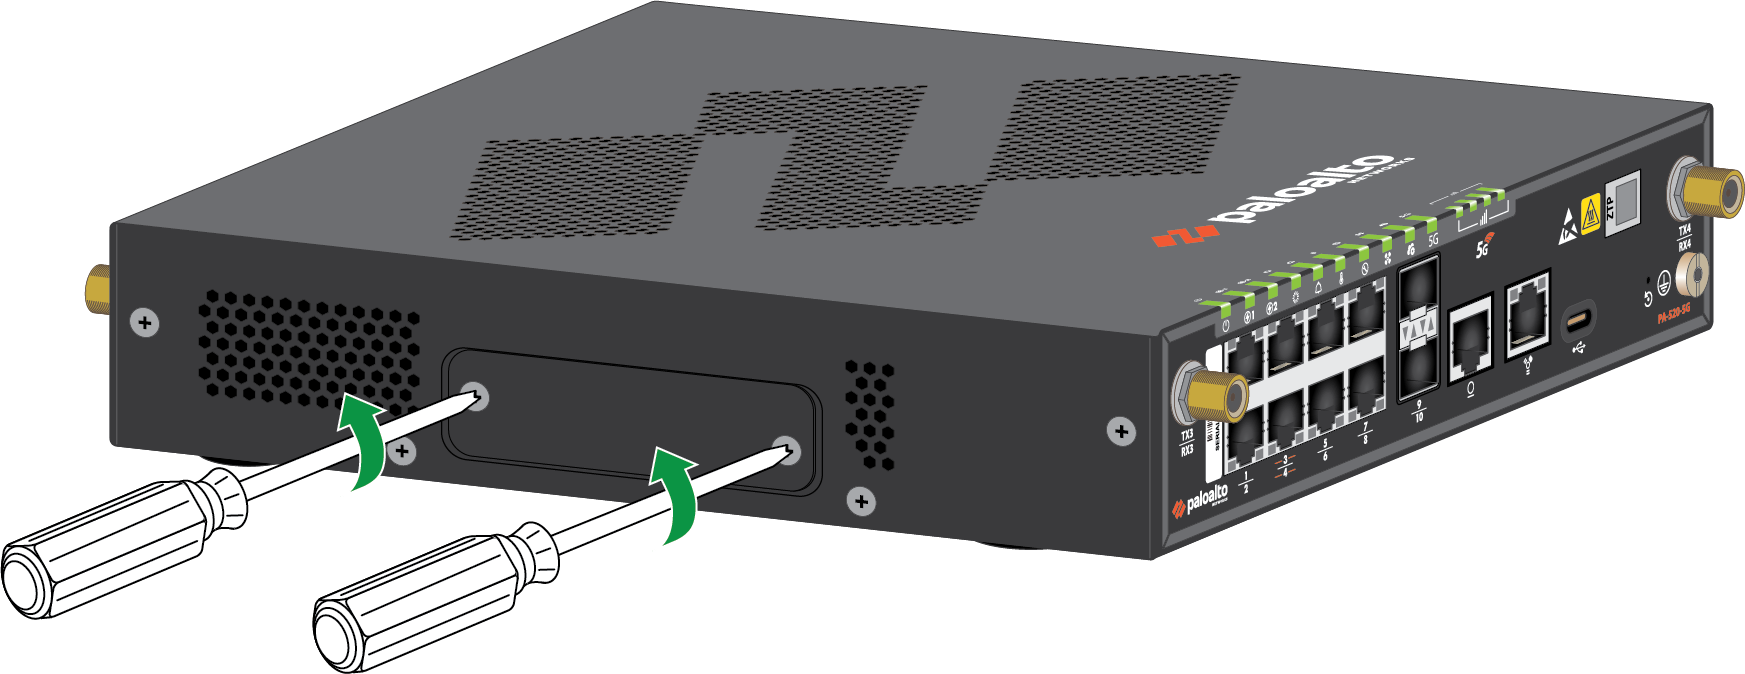
- Power off the PA-520-5G firewall before inserting or removing SIM cards.Locate the SIM cover on the side panel of the PA-520-5G firewall. Unfasten the two screws using a Philips head screwdriver, then remove the SIM cover.
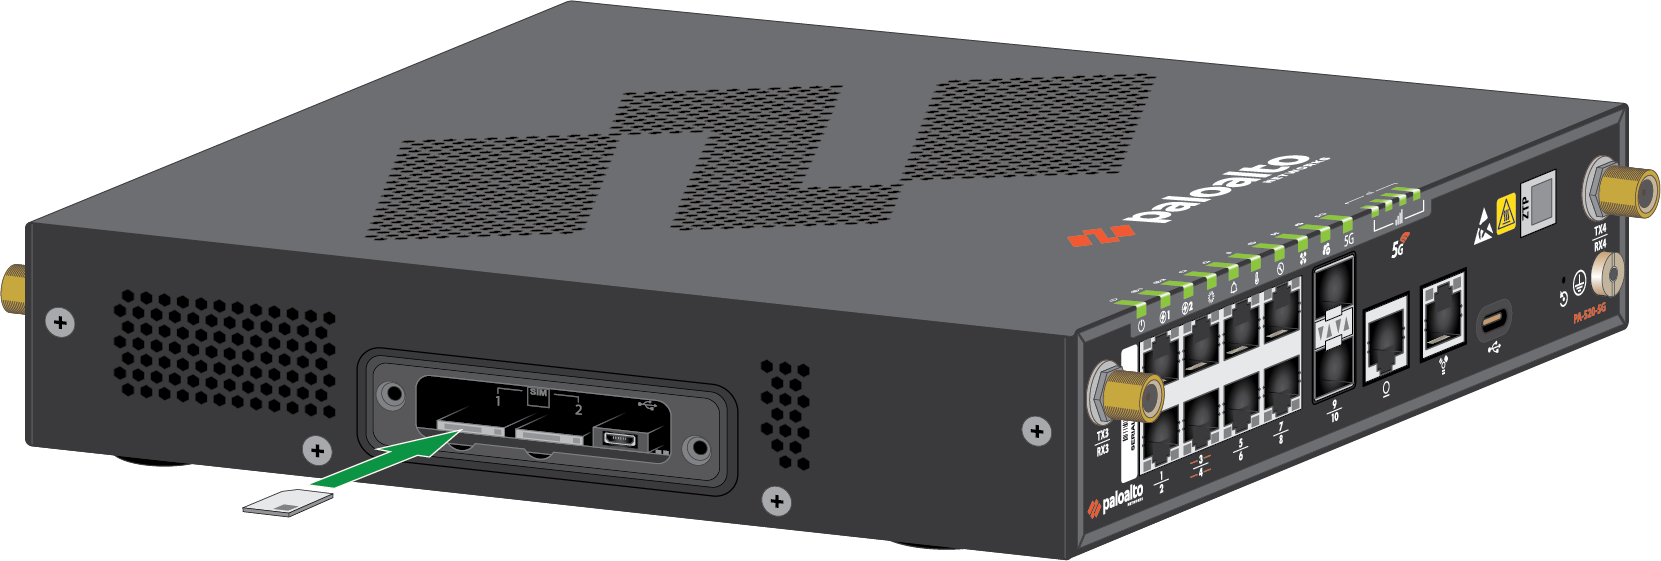
![]() (If replacing a SIM card) Remove the present SIM by gently pushing it inward using a tweezer tool. Release the tweezer and pull out the SIM.Insert the new nano SIM card into SIM slot 1 (SIM 1) with the gold contacts facing down and the notched corner aligned with the slot. Push the SIM card in until it clicks into place.
(If replacing a SIM card) Remove the present SIM by gently pushing it inward using a tweezer tool. Release the tweezer and pull out the SIM.Insert the new nano SIM card into SIM slot 1 (SIM 1) with the gold contacts facing down and the notched corner aligned with the slot. Push the SIM card in until it clicks into place.![]() The SIM may get damaged if you attempt to insert it into the slot by the wrong end.SIM 1 is the primary SIM slot by default. If you intend to use only one SIM, it is recommended to use SIM 1 as the primary slot. If you want to use SIM 2 as the primary slot, you must manually configure SIM 2 as the primary SIM slot using the Web Interface.(Optional) Insert a second nano SIM card into SIM slot 2 (SIM 2) for Active/Standby redundancy.Place the SIM cover back onto the device and refasten the two screws.Power on the PA-520-5G firewall.
The SIM may get damaged if you attempt to insert it into the slot by the wrong end.SIM 1 is the primary SIM slot by default. If you intend to use only one SIM, it is recommended to use SIM 1 as the primary slot. If you want to use SIM 2 as the primary slot, you must manually configure SIM 2 as the primary SIM slot using the Web Interface.(Optional) Insert a second nano SIM card into SIM slot 2 (SIM 2) for Active/Standby redundancy.Place the SIM cover back onto the device and refasten the two screws.Power on the PA-520-5G firewall.