Add a PA-7500 Series Firewall Logging Drive
Table of Contents

Add a PA-7500 Series Firewall Logging Drive
Learn how to add a logging drive to a PA-7500 Series firewall that does not have one
installed.
The Management Processing Card (MPC) has two logging drive slots; by default, neither
slot is populated. Adding a logging drive enables local log storage on the firewall.
A system reboot is required after physically inserting the drive so that the firewall
can initialize the drive before you can partition and mount it.
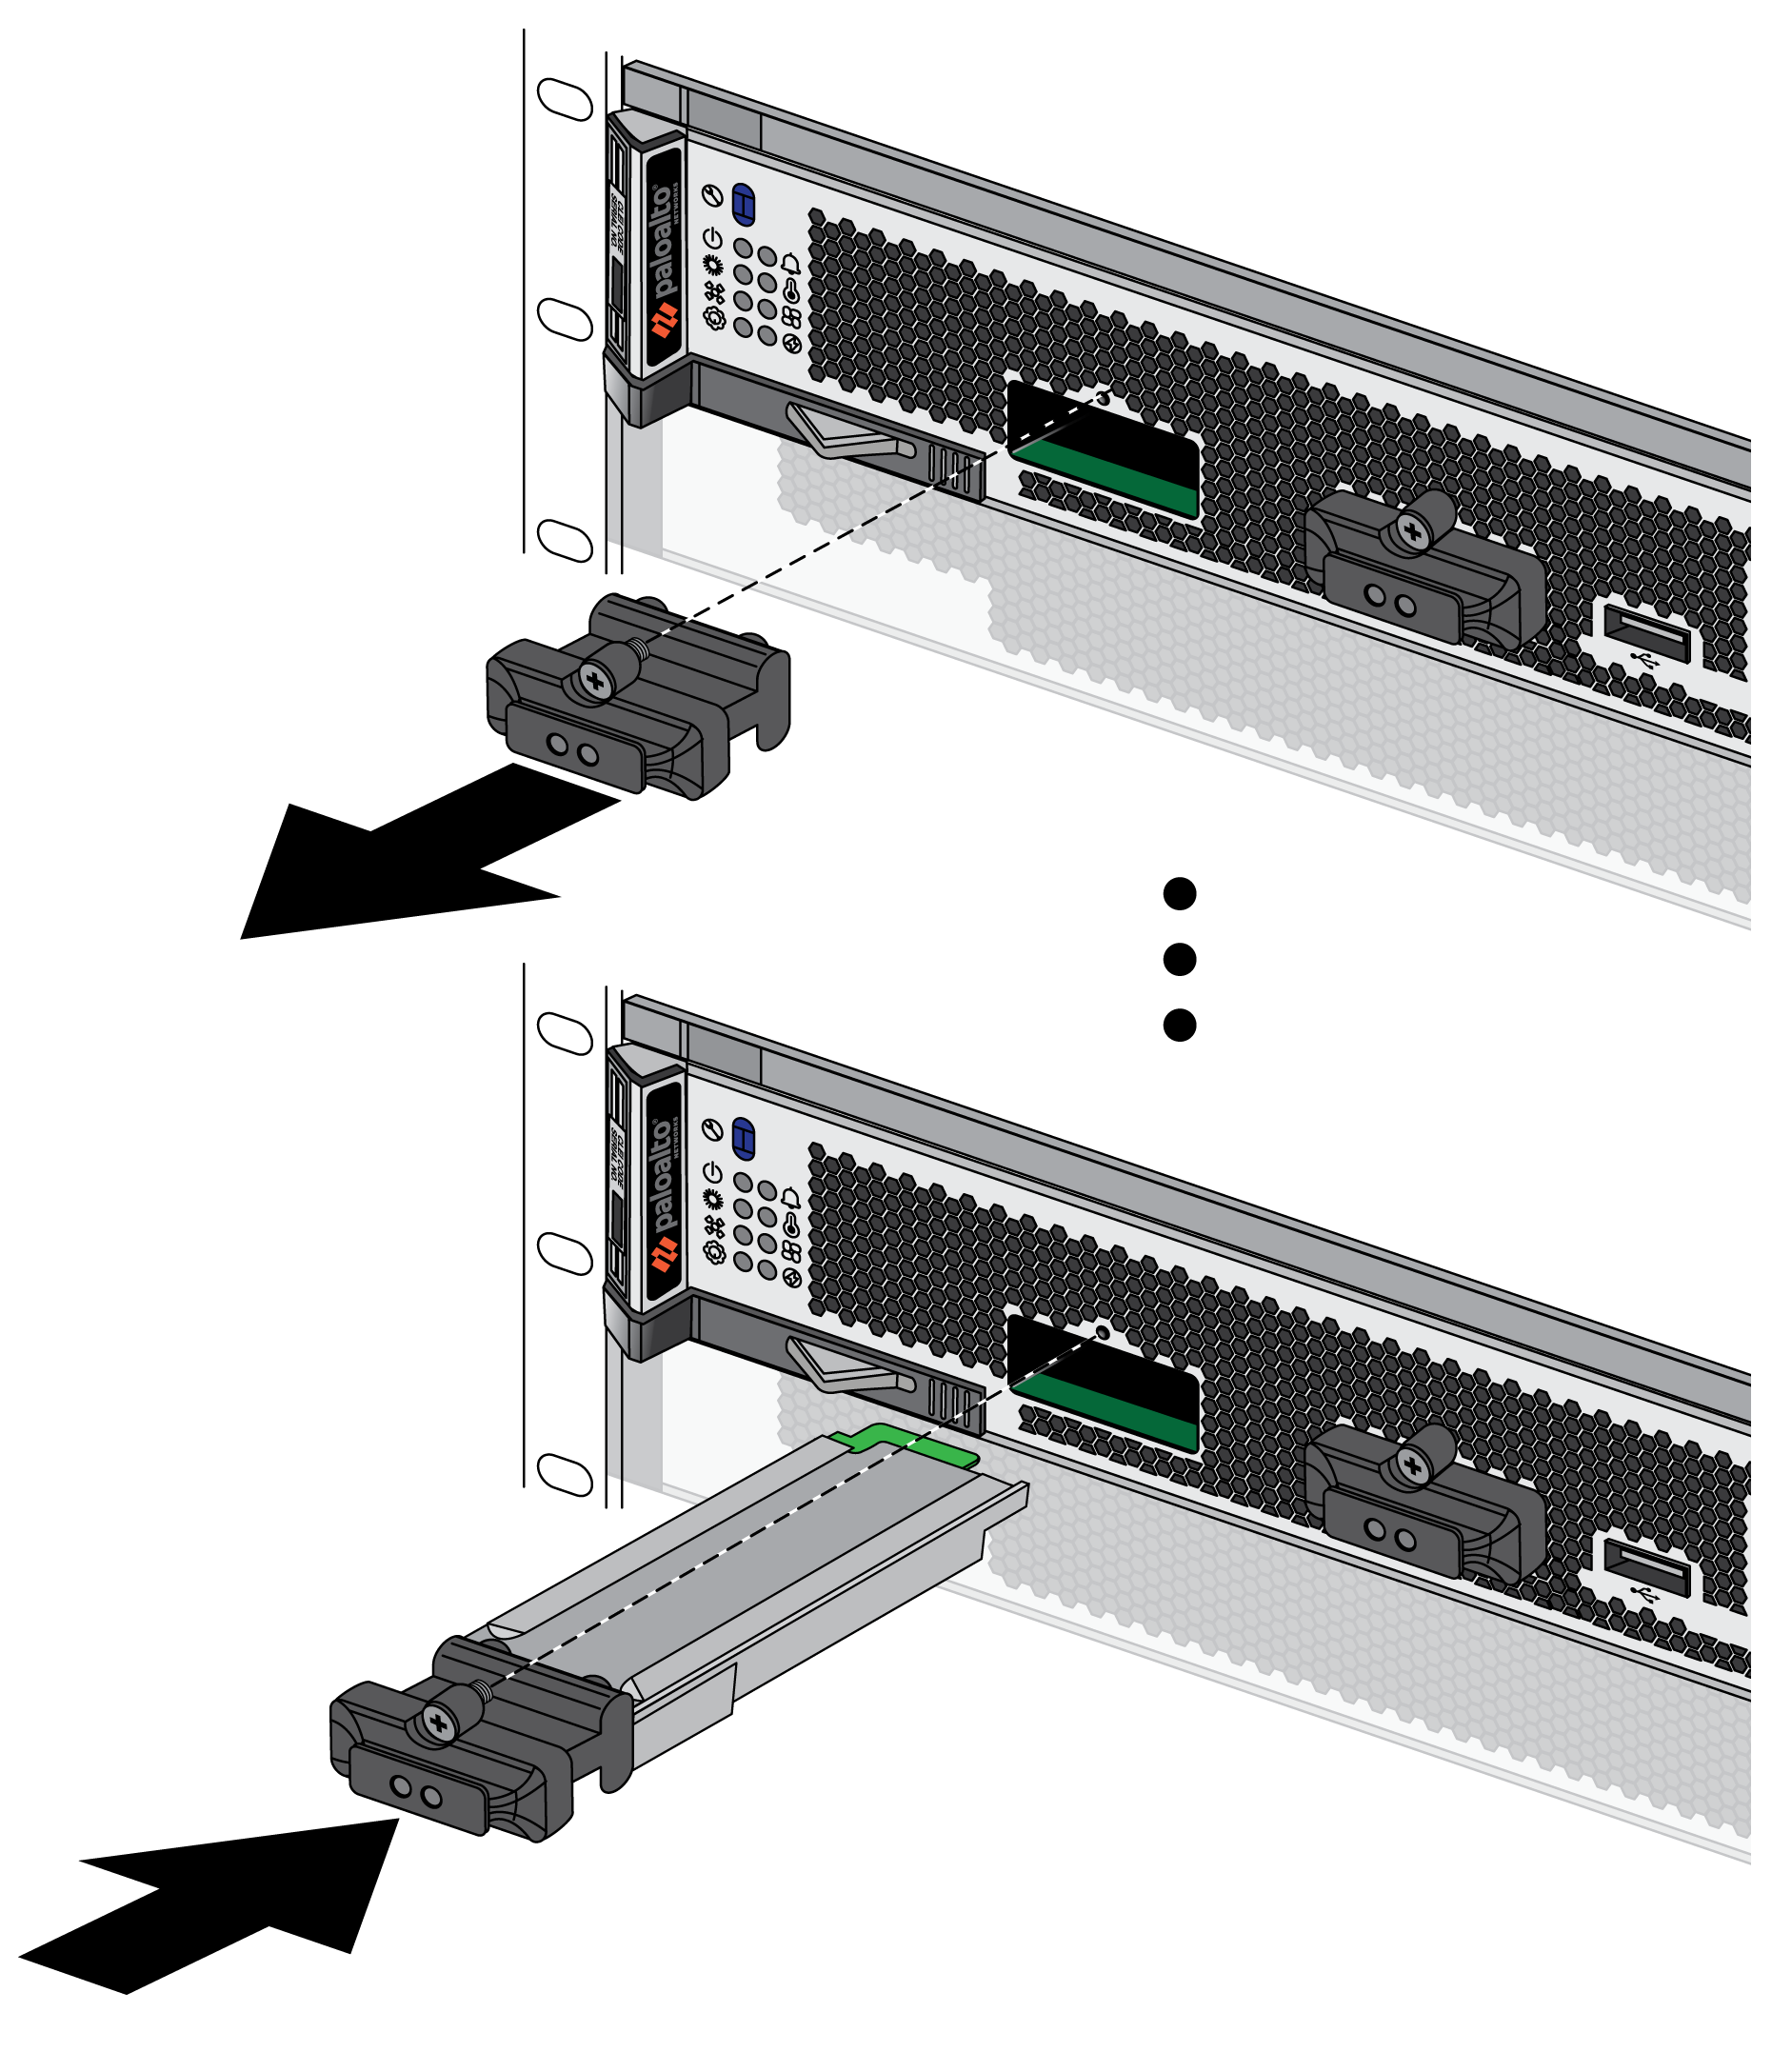
- Attach an ESD strap to your wrist and plug the other end in to the ESD port location on the chassis.Loosen the retaining screw on the logging drive blank cover while gently pulling on the pull tab. Proceed until the logging drive blank cover can be pulled out from the MPC faceplate.Attach the logging drive to the cover and re-insert it into the MPC faceplate. Align the retainer screw with the threaded hole and tighten to 4 in-lbs.Exceeding a torque of 4.5 in-lbs will damage the equipment.
![]() Reboot the firewall and wait for autocommit to complete:
Reboot the firewall and wait for autocommit to complete:admin@PA-7500> request restart systemVerify that the firewall detects the new drive and note the drive name:admin@PA-7500> show system disk detailThe logging drive appears as nvme2n1 or nvme3n1 with a State of Present.Partition and mount the logging drive:admin@PA-7500> request system disk add logging-drive-nameExecuting this command deletes all data on the drive.Adding the logging drive can take a few minutes. Run show system disk detail to check the status. The Reason field displays Admin enabled when the process is complete.