ESXi Simplified Onboarding
Table of Contents
ESXi Simplified Onboarding
Configure simplified onboarding of VM-Series on ESXi or vSphere client.
The ESXi Simplified Onboarding addresses the challenges faced by new users while
configuring and setting up the firewall. ESXi Simplified Onboarding aims at simplifying
the experience of deploying the Palo Alto Networks (PANW) firewalls on ESXi, and
reducing the need for in-depth configuration expertise at the outset.
Prerequisites
For simplified onboarding of VM-Series firewall on ESXi, ensure to use the following
PAN-OS versions and license types:
Supported PAN-OS Versions
- PAN-OS version 11.2.8 or above
- PAN-OS version 11.1.11 or above
Supported License Types
- BYOL (Bring your own license)
Supported ESXi versions
- ESXi 7.0 and vCenter server 7.0
- ESXi 8.0 and vCenter server 8.0
Bring up a VM-Series bootstrapped with any of the following desirable
parameters through your ESXi or vSphere client:
| Parameters | Description |
|---|---|
| Hostname | The name assigned to the firewall with which it is identified in the network and Panorama. |
| Type of management IP |
Defines the management interface IP address:
|
| IPv4 address | The static management IP address assigned to the VM-Series firewall. Used for management access (Web UI, CLI, Panorama). |
| IPv4 netmask | The subnet mask of the corresponding management IP address. |
| IPv4 default-gateway | The default gateway for management traffic. When the management IP needs to communicate outside its local subnet, IPv4 default-gateway is used, (e.g., reaching Panorama or external update servers). |
| Primary DNS server | The main DNS server used to resolve domain names. |
| Secondary DNS server | Backup DNS server used when the primary DNS server is unavailable. |
| Primary Panorama | The FQDN or the IP address of the primary Panorama management server to which the VM-Series firewall must connect. |
| Secondary Panorama (optional) | The FQDN or the IP address of the secondary Panorama server. |
| Template Stack name | The name of the template stack to which the firewall is attached in Panorama. Template stacks define interface, zone, and network configurations. |
| Device Group name | The device group to which the firewall belongs. Device groups define security policies and objects. |
| VM Authkey | A registration key generated in Panorama that allows the VM-Series firewall to securely connect and register with the Panorama during the bootstrap process. |
| Authcodes | The license authorization codes for the VM-Series firewall (for example, Threat Prevention, URL Filtering, GlobalProtect). These enable automated license activation during bootstrap. |
| Device certificate PIN ID | A pin identifier for retrieving the device certificate from the licensing portal. |
| Device certificate PIN value | The pin value that corresponds to the pin ID. The pin value is used to automatically retrieve and install the device certificate. |
| Option(s) | To cover bootstrap options that might be supported in the future. |
Simplified Onboarding of VM-Series in VMware ESXi or vSphere Client
- Log in to your VMware ESXi or vSphere client.
- In the Navigator section, click Virtual Machines and click Create to create a new virtual machine.
- Click Select creation type and click Deploy a virtual machine from an OVF or OVA file and click Next.
- In the Select OVF and VMDK files window:
- Enter a name for the virtual machine.
- Select or drag and drop the required OVF file
- Click Next.
- In the Select storage window, select the datastore required for your virtual machine click Next.
- In the Deployment options window:
- Select the required VM Network and the Disk provisioning type.
- Select Power on automatically, if you want your VM to power on automatically.
- Click Next.
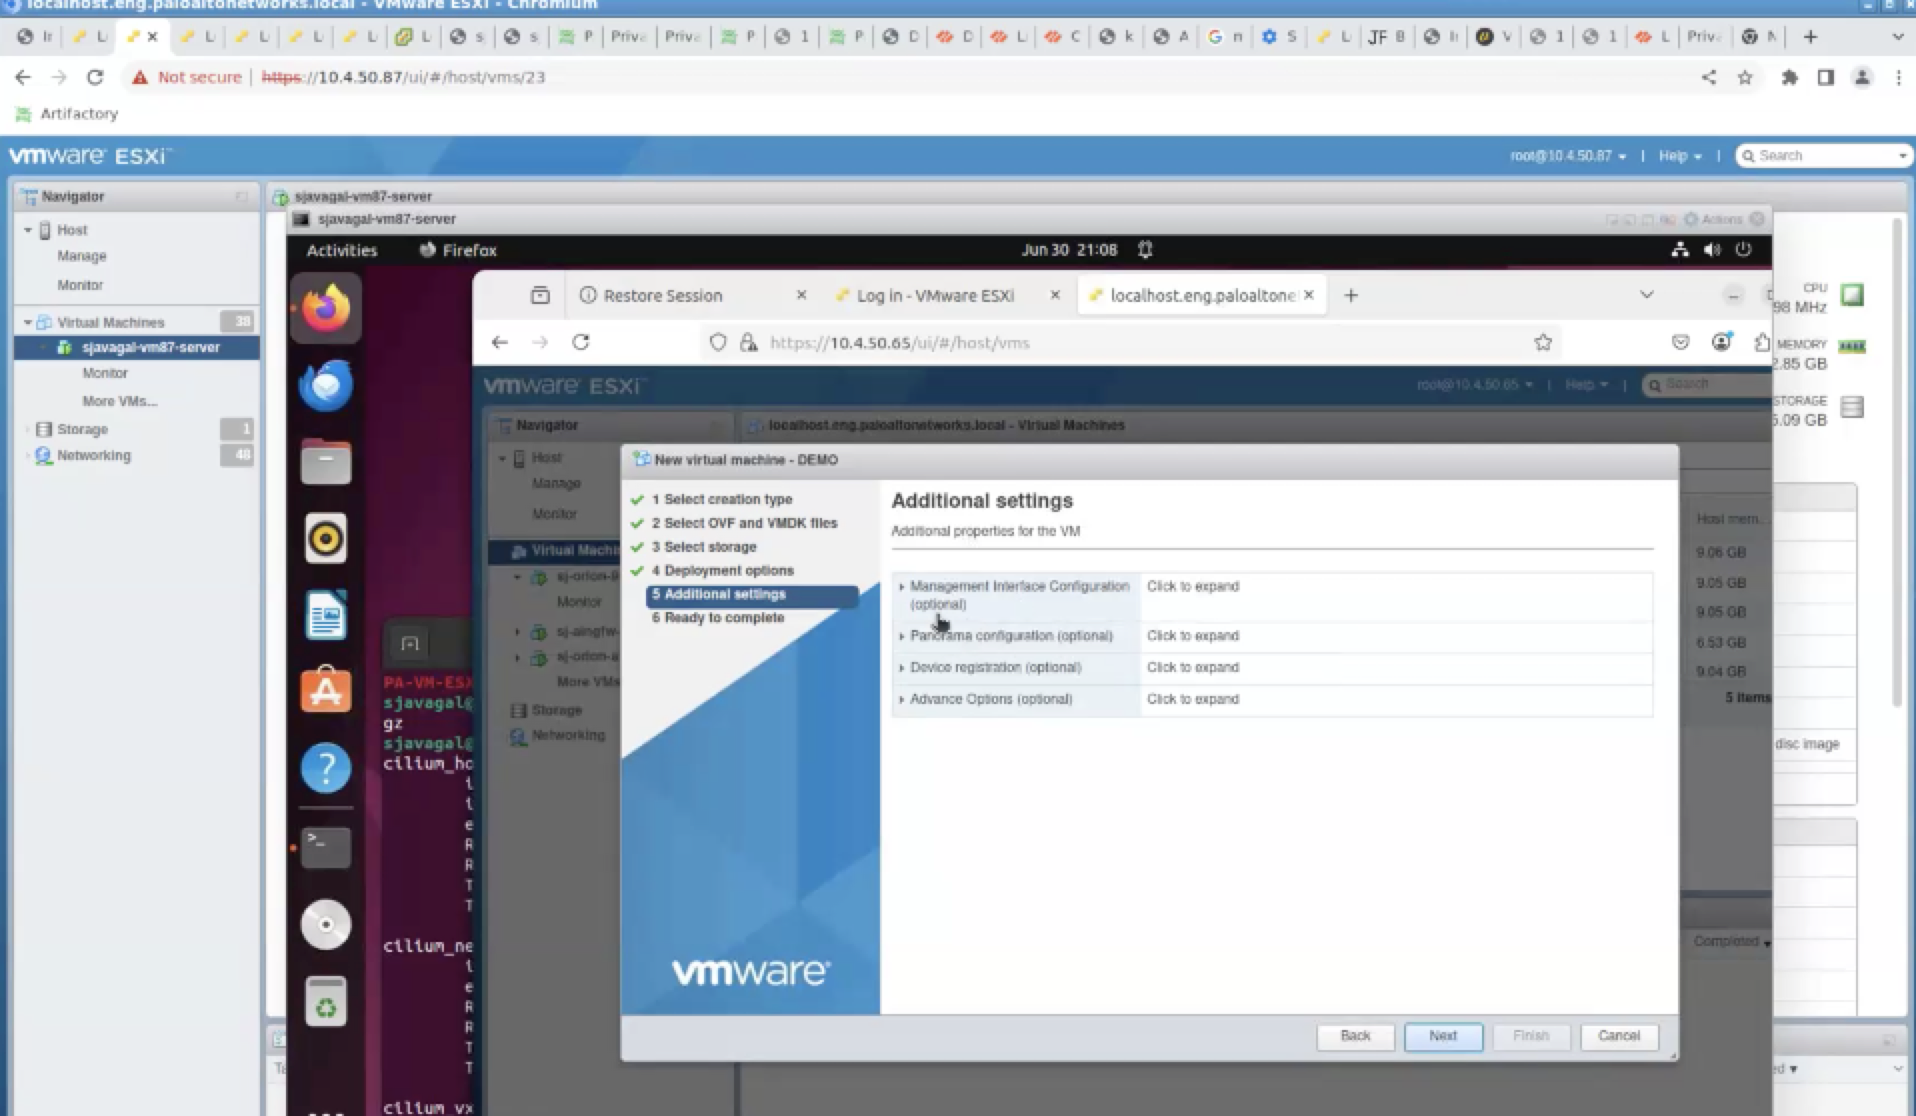
- In the Additional settings window:
- Enter the details of your Management Interface Configuration:
- Hostname
- Type of management IP - DHCP or static
- IPv4 address
- IPv4 netmask
- IPv4 default gateway
- Primary DNS server
- Secondary DNS server
- Enter the details of your Panorama Configuration:
- Primary Panorama
- Secondary Panorama
- Template Stack name
- Device Group name
- VM Authkey
- Enter the details of your Device registration:
- Authcodes
- Device certificate PIN ID
- Device certificate PIN value
![]()
- Advance Options: Advance options are currently unavailable for simplified onboarding. Click Next.
- Click Ready to complete, to review your settings and click Finish.
The ESXi server will now create the VM.
- Use vSphere client to deploy simplified onboarding on multiple ESXi servers.
- For terraform or orchestrator deployments, ensure that you use the parameters in vApp properties to bootstrap the VM.
Default Behaviour
While creating a virtual machine, if you do not configure any of the UI
elements listed above, then a virtual machine will be created with the host name as
PA-VM and the management interface will attempt to obtain an IP address via
DHCP.
If an authorization code (auth-code) is included, the VM-Series firewall
will automatically retrieve and activate its license. If no auth-code is provided,
the firewall must be manually licensed through the GUI or CLI. All the remaining
configuration follows the standard bootstrap process, and can be customized later as
needed.