Authenticate the Agent and the Cloud Identity Engine
Table of Contents
Expand all | Collapse all
-
- Cloud Identity Engine Attributes
- Collect Custom Attributes with the Cloud Identity Engine
- View Directory Data
- Cloud Identity Engine User Context
- Create a Cloud Dynamic User Group
- Configure Third-Party Device-ID
- Configure an IP Tag Cloud Connection
- View Mappings and Tags
- Configure Dynamic Privilege Access in the Cloud Identity Engine
- Send Cortex XDR Risk Signals to Okta
- Configure SSF Okta Receiver as a Risk Connection
- Configure the Secrets Vault
-
- Set Up Password Authentication
-
- Configure Azure as an IdP in the Cloud Identity Engine
- Configure Okta as an IdP in the Cloud Identity Engine
- Configure PingOne as an IdP in the Cloud Identity Engine
- Configure PingFederate as an IdP in the Cloud Identity Engine
- Configure Google as an IdP in the Cloud Identity Engine
- Configure a SAML 2.0-Compliant IdP in the Cloud Identity Engine
- Set Up a Client Certificate
- Configure an OIDC Authentication Type
- Set Up an Authentication Profile
- Configure Cloud Identity Engine Authentication on the Firewall or Panorama
- Configure the Cloud Identity Engine as a Mapping Source on the Firewall or Panorama
- Configure Dynamic Privilege Access in the Cloud Identity Engine
- Get Help
Authenticate the Agent and the Cloud Identity Engine
Generate certificates to authenticate communication between
the Cloud Identity agent and the Cloud Identity Engine.
The Cloud Identity Engine and the Cloud Identity
agent use a certificate for mutual authentication (i.e., the agent
authenticates the service and the service authenticates the agent)
over Transport Layer Security (TLS). If the certificate is valid,
the agent connects to the Cloud Identity Engine. If the certificate
is not valid, the Cloud Identity Engine rejects the connection.
To
authenticate the Cloud Identity Engine and the Cloud Identity agent,
generate a Cloud Identity Engine certificate using the Cloud Identity
Engine app and import it to the Local Computer certificate store
on the Windows server that hosts the agent. Each certificate expires
three months from the issuance date. The Cloud Identity agent version
1.5.0 and later versions automatically renews the certificate before
it expires.
Each agent must use a unique certificate to authenticate
with the service. Only use the certificate for the agent in the
selected tenant. Generate certificates on an as-needed basis and
do not use the certificate for other services or share them between
agents. You can generate up to 5 unused certificates and up to 100
total certificates per tenant. You can only use the certificate
for the specified tenant and you can only associate the certificate
with one agent.
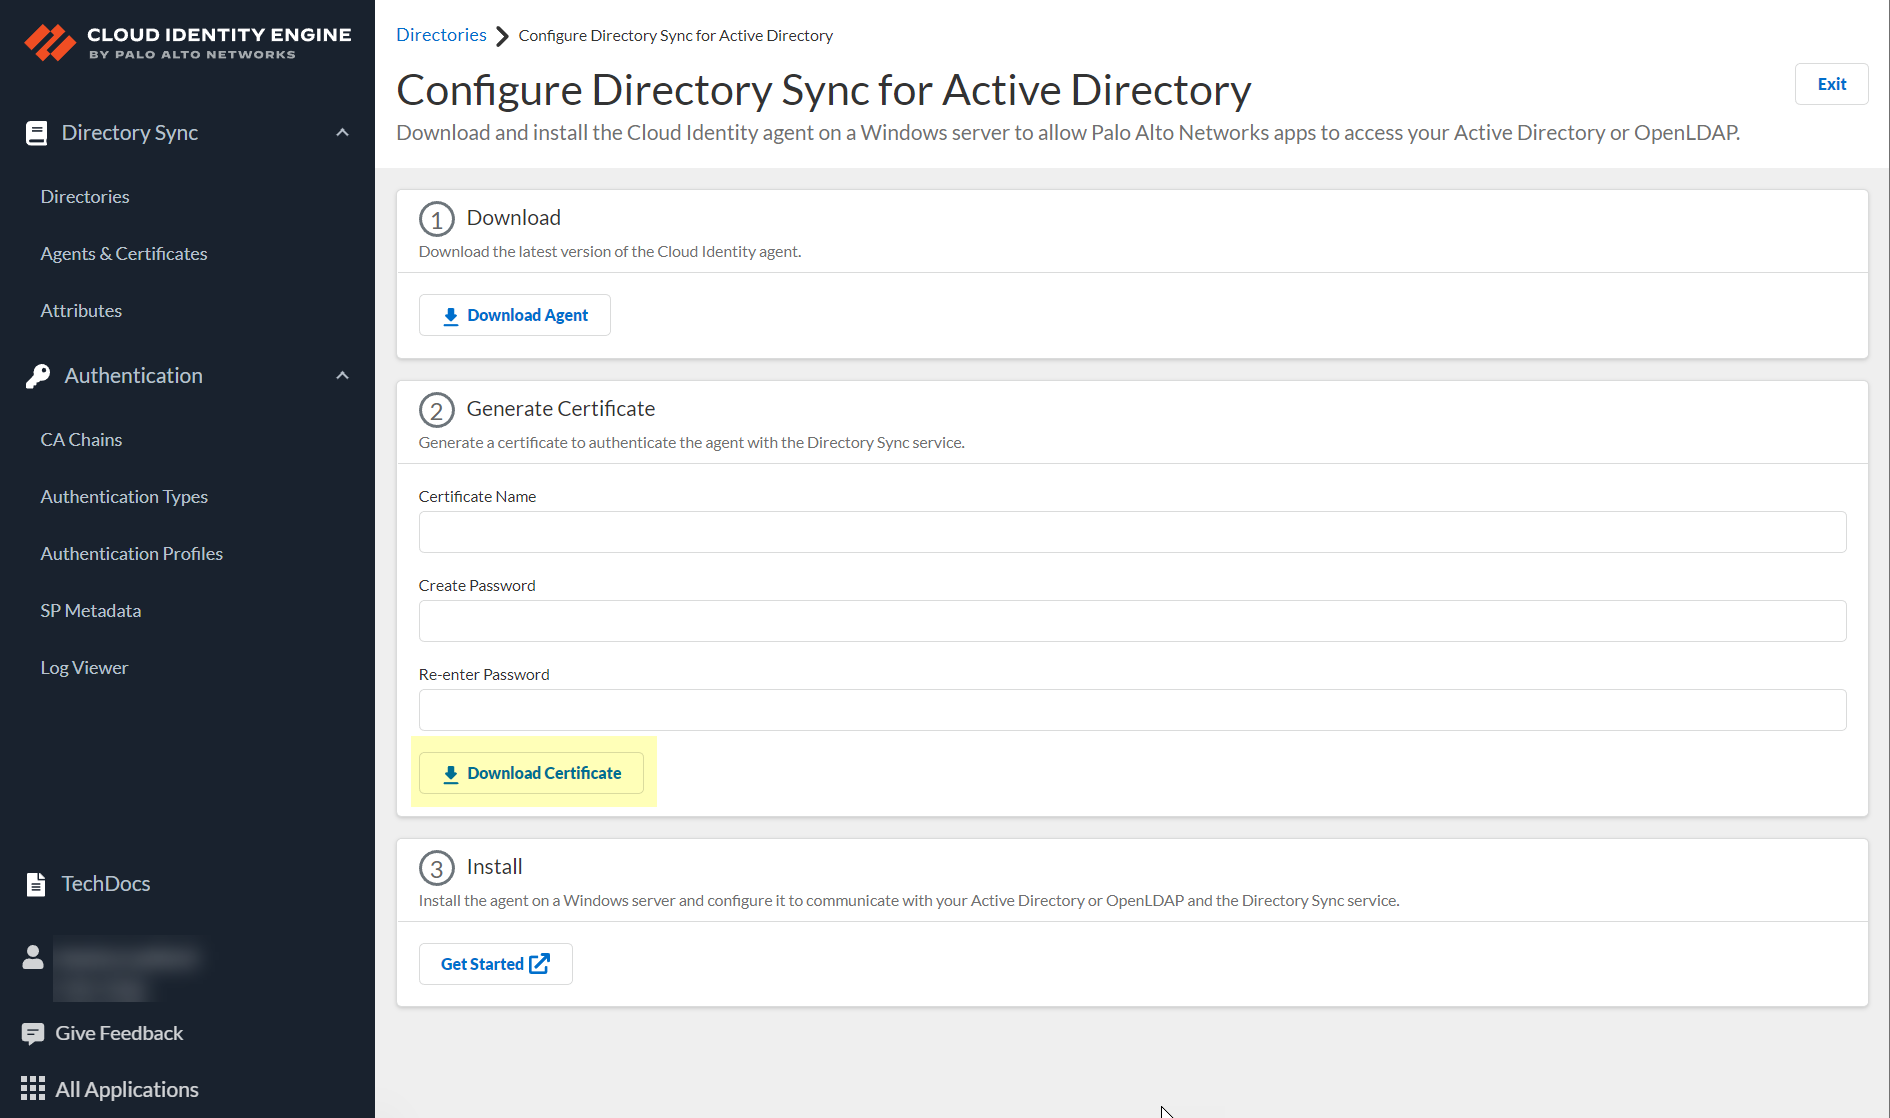
- Enter a unique Certificate Name.The name must be between 5 and 128 alphanumeric characters.Enter a secure password in the Create Password and Re-enter Password fields.The password must be between 12 to 25 characters. You will need to enter this password when you install the certificate on the agent host.Click Download Certificate.
![]() Store the certificate in the Local Computer Personal certificate store on the agent host.For more information on how to store certificates, see the following link.After the agent authenticates with the Cloud Identity Engine, it provides the directory attributes to the service. The service then shares the attributes with the apps that you with the Cloud Identity Engine for visibility and policy enforcement. For more information, refer to Manage Cloud Identity Engine Certificates.
Store the certificate in the Local Computer Personal certificate store on the agent host.For more information on how to store certificates, see the following link.After the agent authenticates with the Cloud Identity Engine, it provides the directory attributes to the service. The service then shares the attributes with the apps that you with the Cloud Identity Engine for visibility and policy enforcement. For more information, refer to Manage Cloud Identity Engine Certificates.Next Steps
- Use the Cloud Identity Engine app to create, view, delete, rename, or synchronize tenants and to view or customize the attributes that the Cloud Identity Engine collects.
- Learn how to manage the Cloud Identity agent by logging agent events, managing the certificates that the agent uses, starting or stopping the agent’s connection to the Cloud Identity Engine, and updating or removing the agent.

