Configure Entra ID Using the CIE Enterprise App
Table of Contents
Expand all | Collapse all
-
- Cloud Identity Engine Attributes
- Collect Custom Attributes with the Cloud Identity Engine
- View Directory Data
- Cloud Identity Engine User Context
- Create a Cloud Dynamic User Group
- Configure Third-Party Device-ID
- Configure an IP Tag Cloud Connection
- View Mappings and Tags
- Configure Dynamic Privilege Access in the Cloud Identity Engine
- Send Cortex XDR Risk Signals to Okta
- Configure SSF Okta Receiver as a Risk Connection
- Configure the Secrets Vault
-
- Set Up Password Authentication
-
- Configure Azure as an IdP in the Cloud Identity Engine
- Configure Okta as an IdP in the Cloud Identity Engine
- Configure PingOne as an IdP in the Cloud Identity Engine
- Configure PingFederate as an IdP in the Cloud Identity Engine
- Configure Google as an IdP in the Cloud Identity Engine
- Configure a SAML 2.0-Compliant IdP in the Cloud Identity Engine
- Set Up a Client Certificate
- Configure an OIDC Authentication Type
- Set Up an Authentication Profile
- Configure Cloud Identity Engine Authentication on the Firewall or Panorama
- Configure the Cloud Identity Engine as a Mapping Source on the Firewall or Panorama
- Configure Dynamic Privilege Access in the Cloud Identity Engine
- Get Help
Configure Entra ID Using the CIE Enterprise App
Learn how to configure Entra ID in the Cloud Identity Engine using the CIE Enterprise
app.
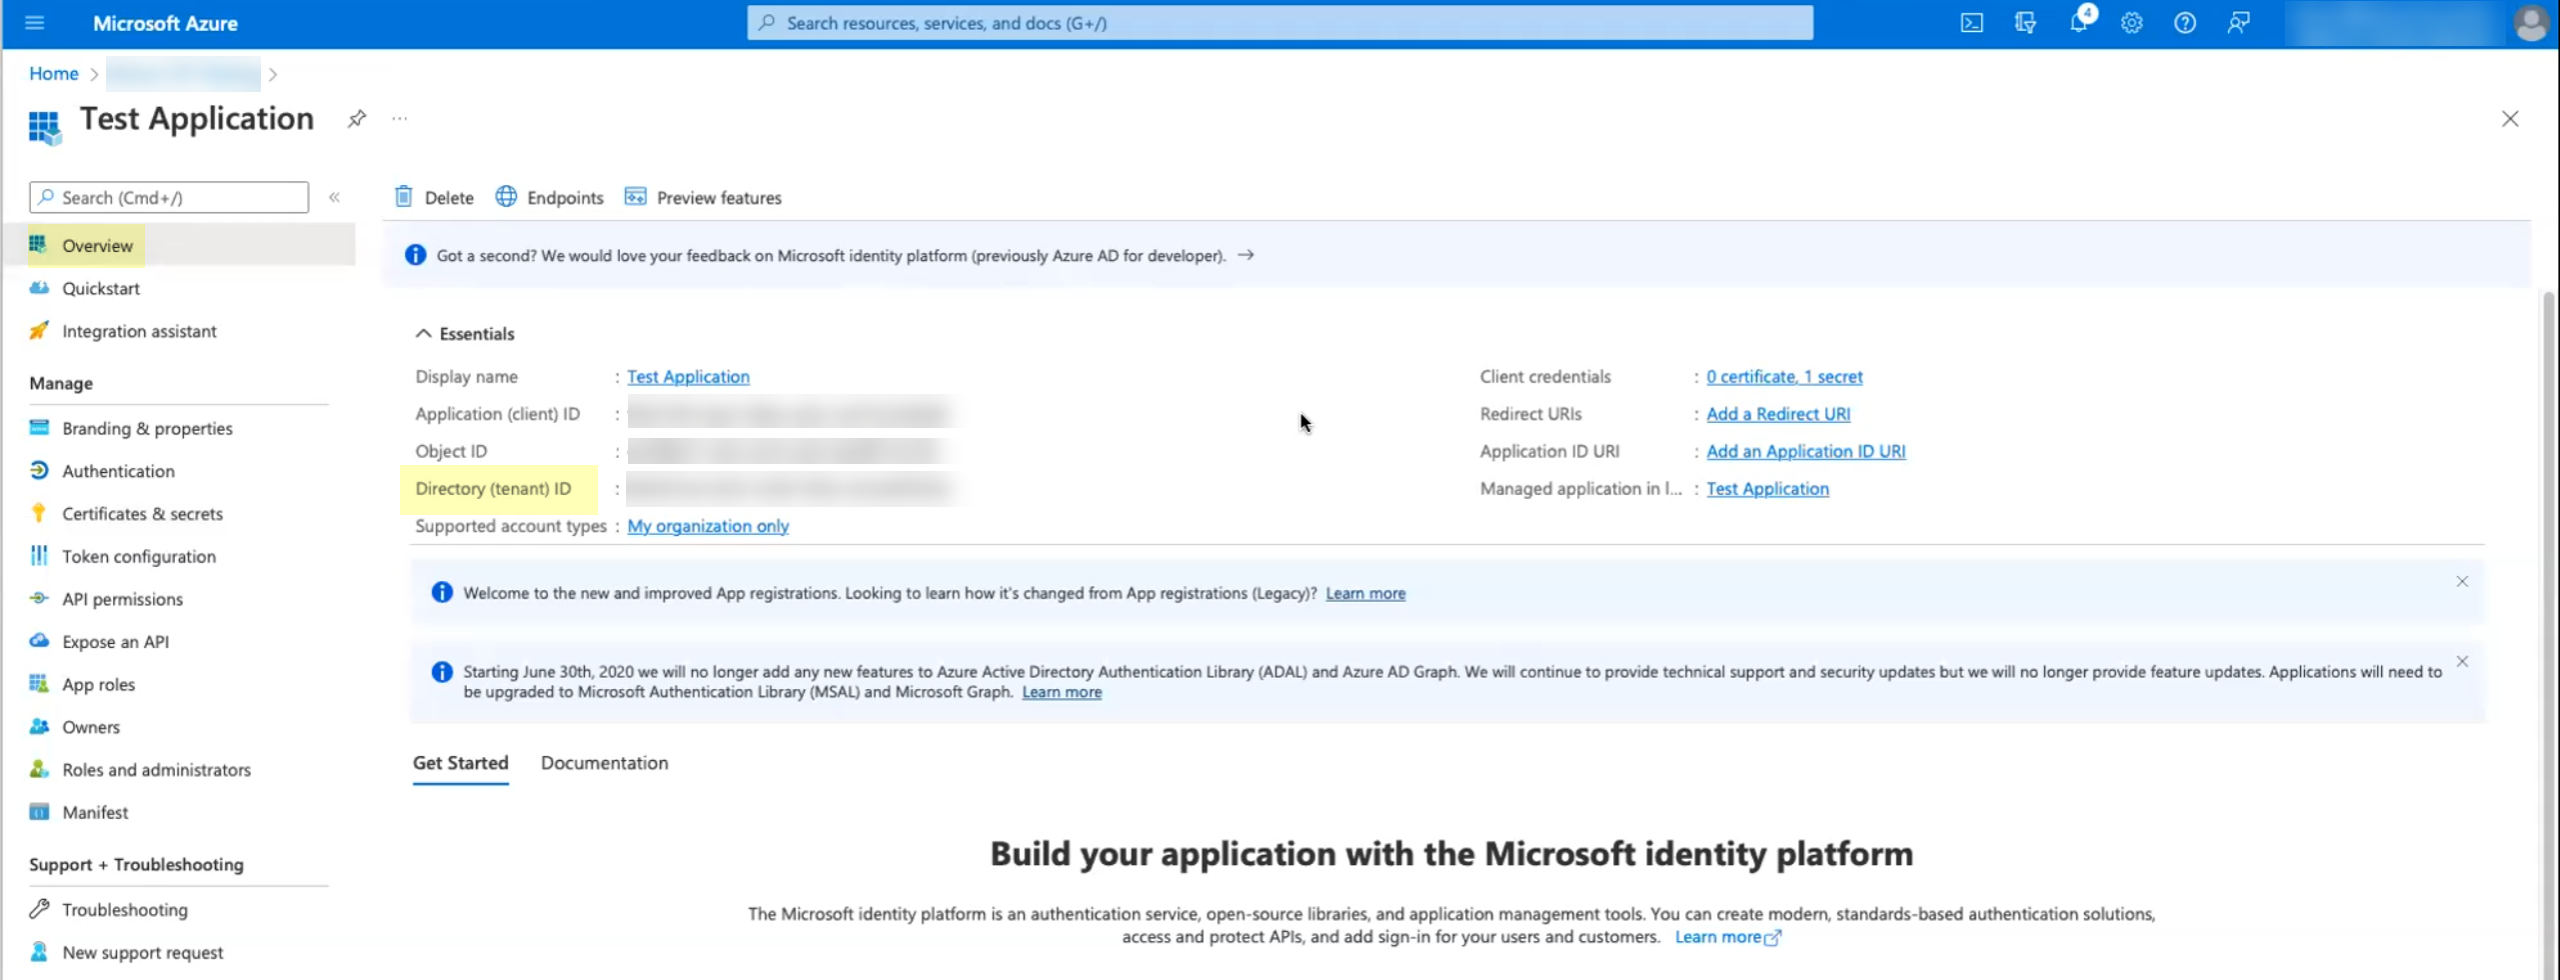
- Copy the directory ID for your Azure directory.
- Log in to the Azure administrator portal using the credentials of the account you want to use to connect to the Cloud Identity Engine (for example, a service account) and select Overview.Copy the Directory (tenant) ID and store it in a secure location.
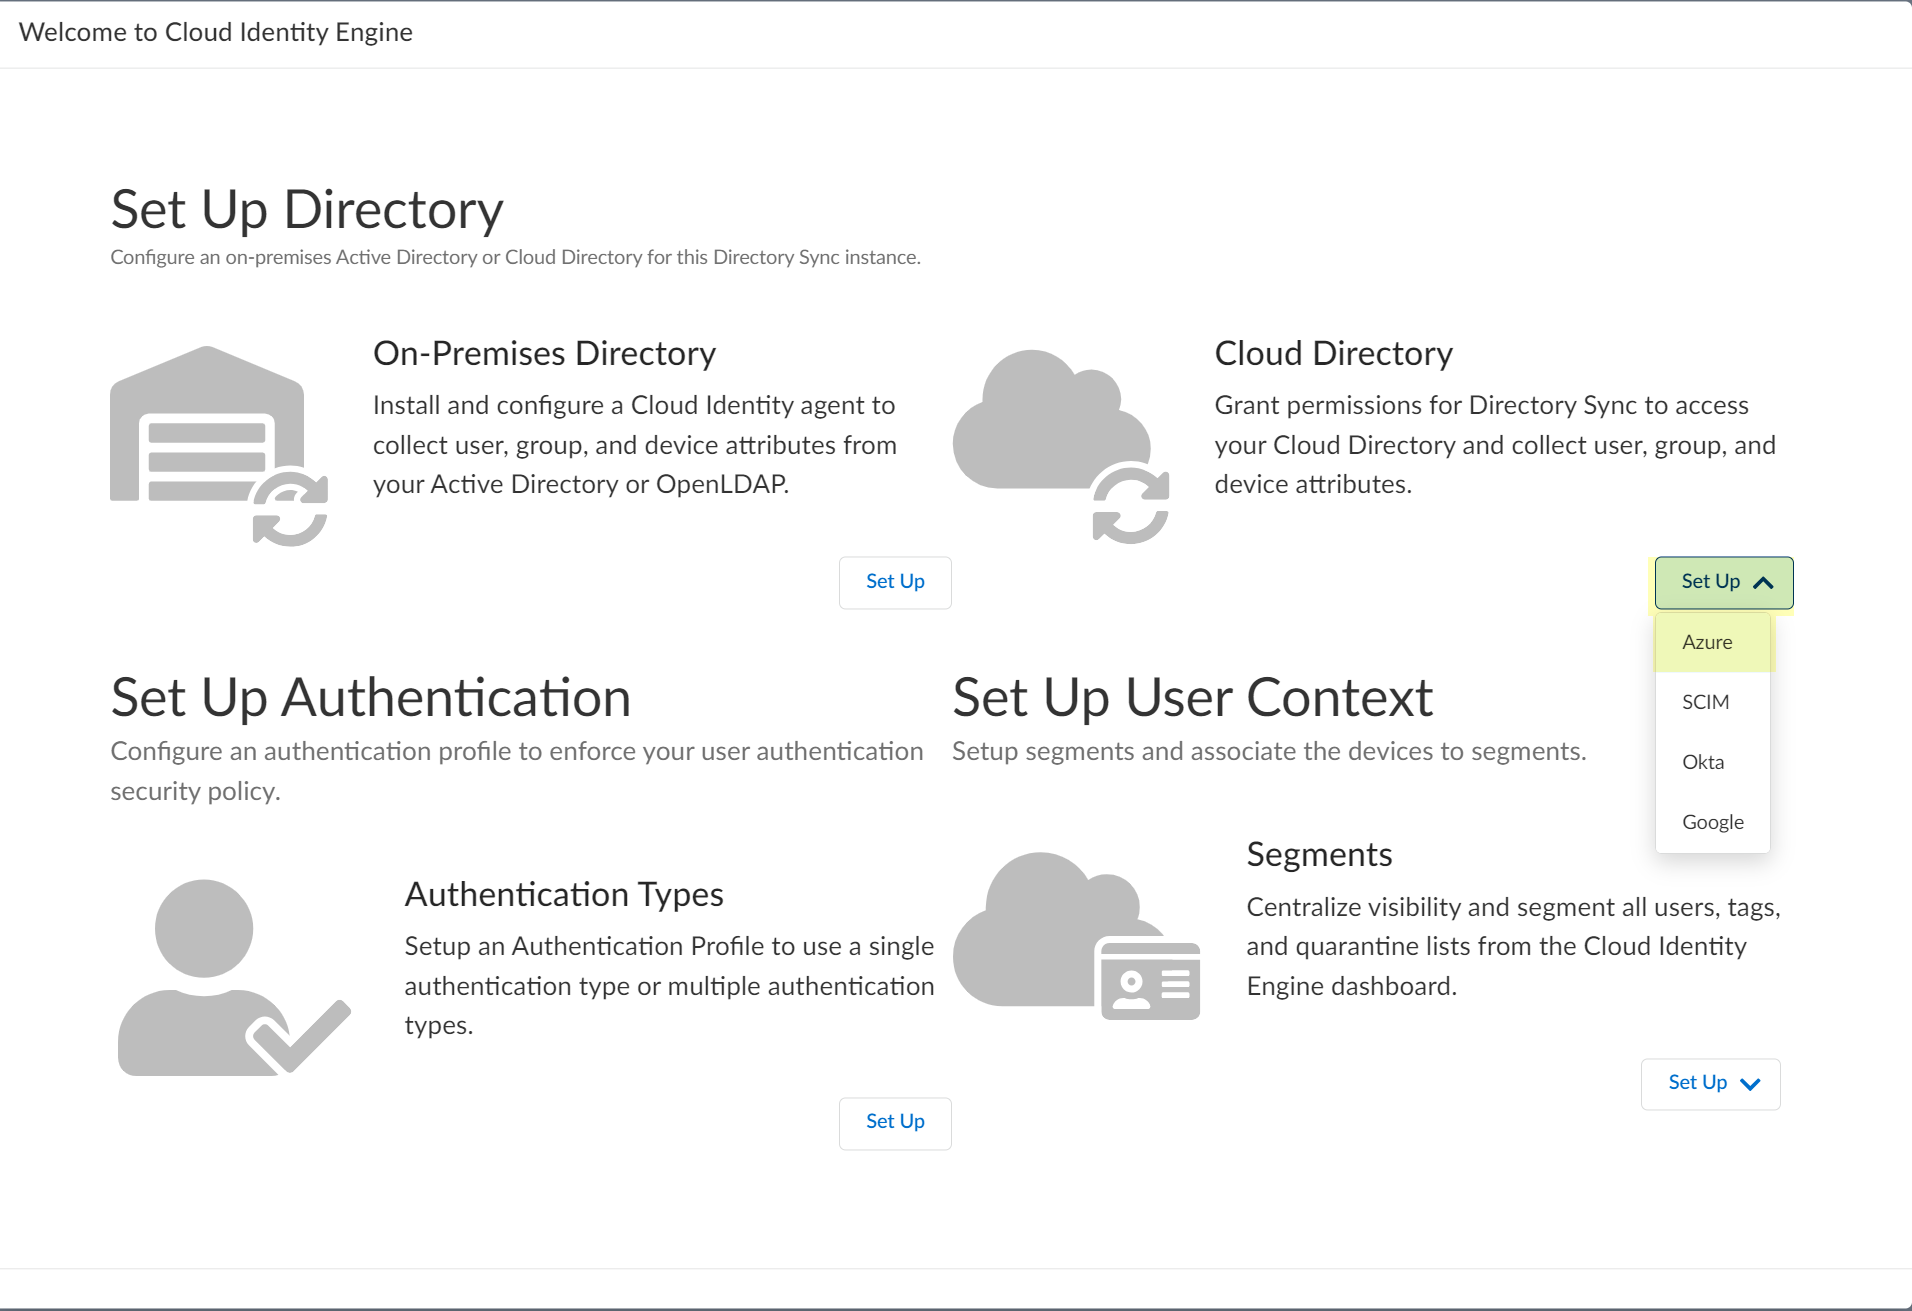
![]() Set up your Azure directory in the Cloud Identity Engine.
Set up your Azure directory in the Cloud Identity Engine.- In the Cloud Identity Engine app, select Directories then click Add New Directory.Set Up an Azure directory.
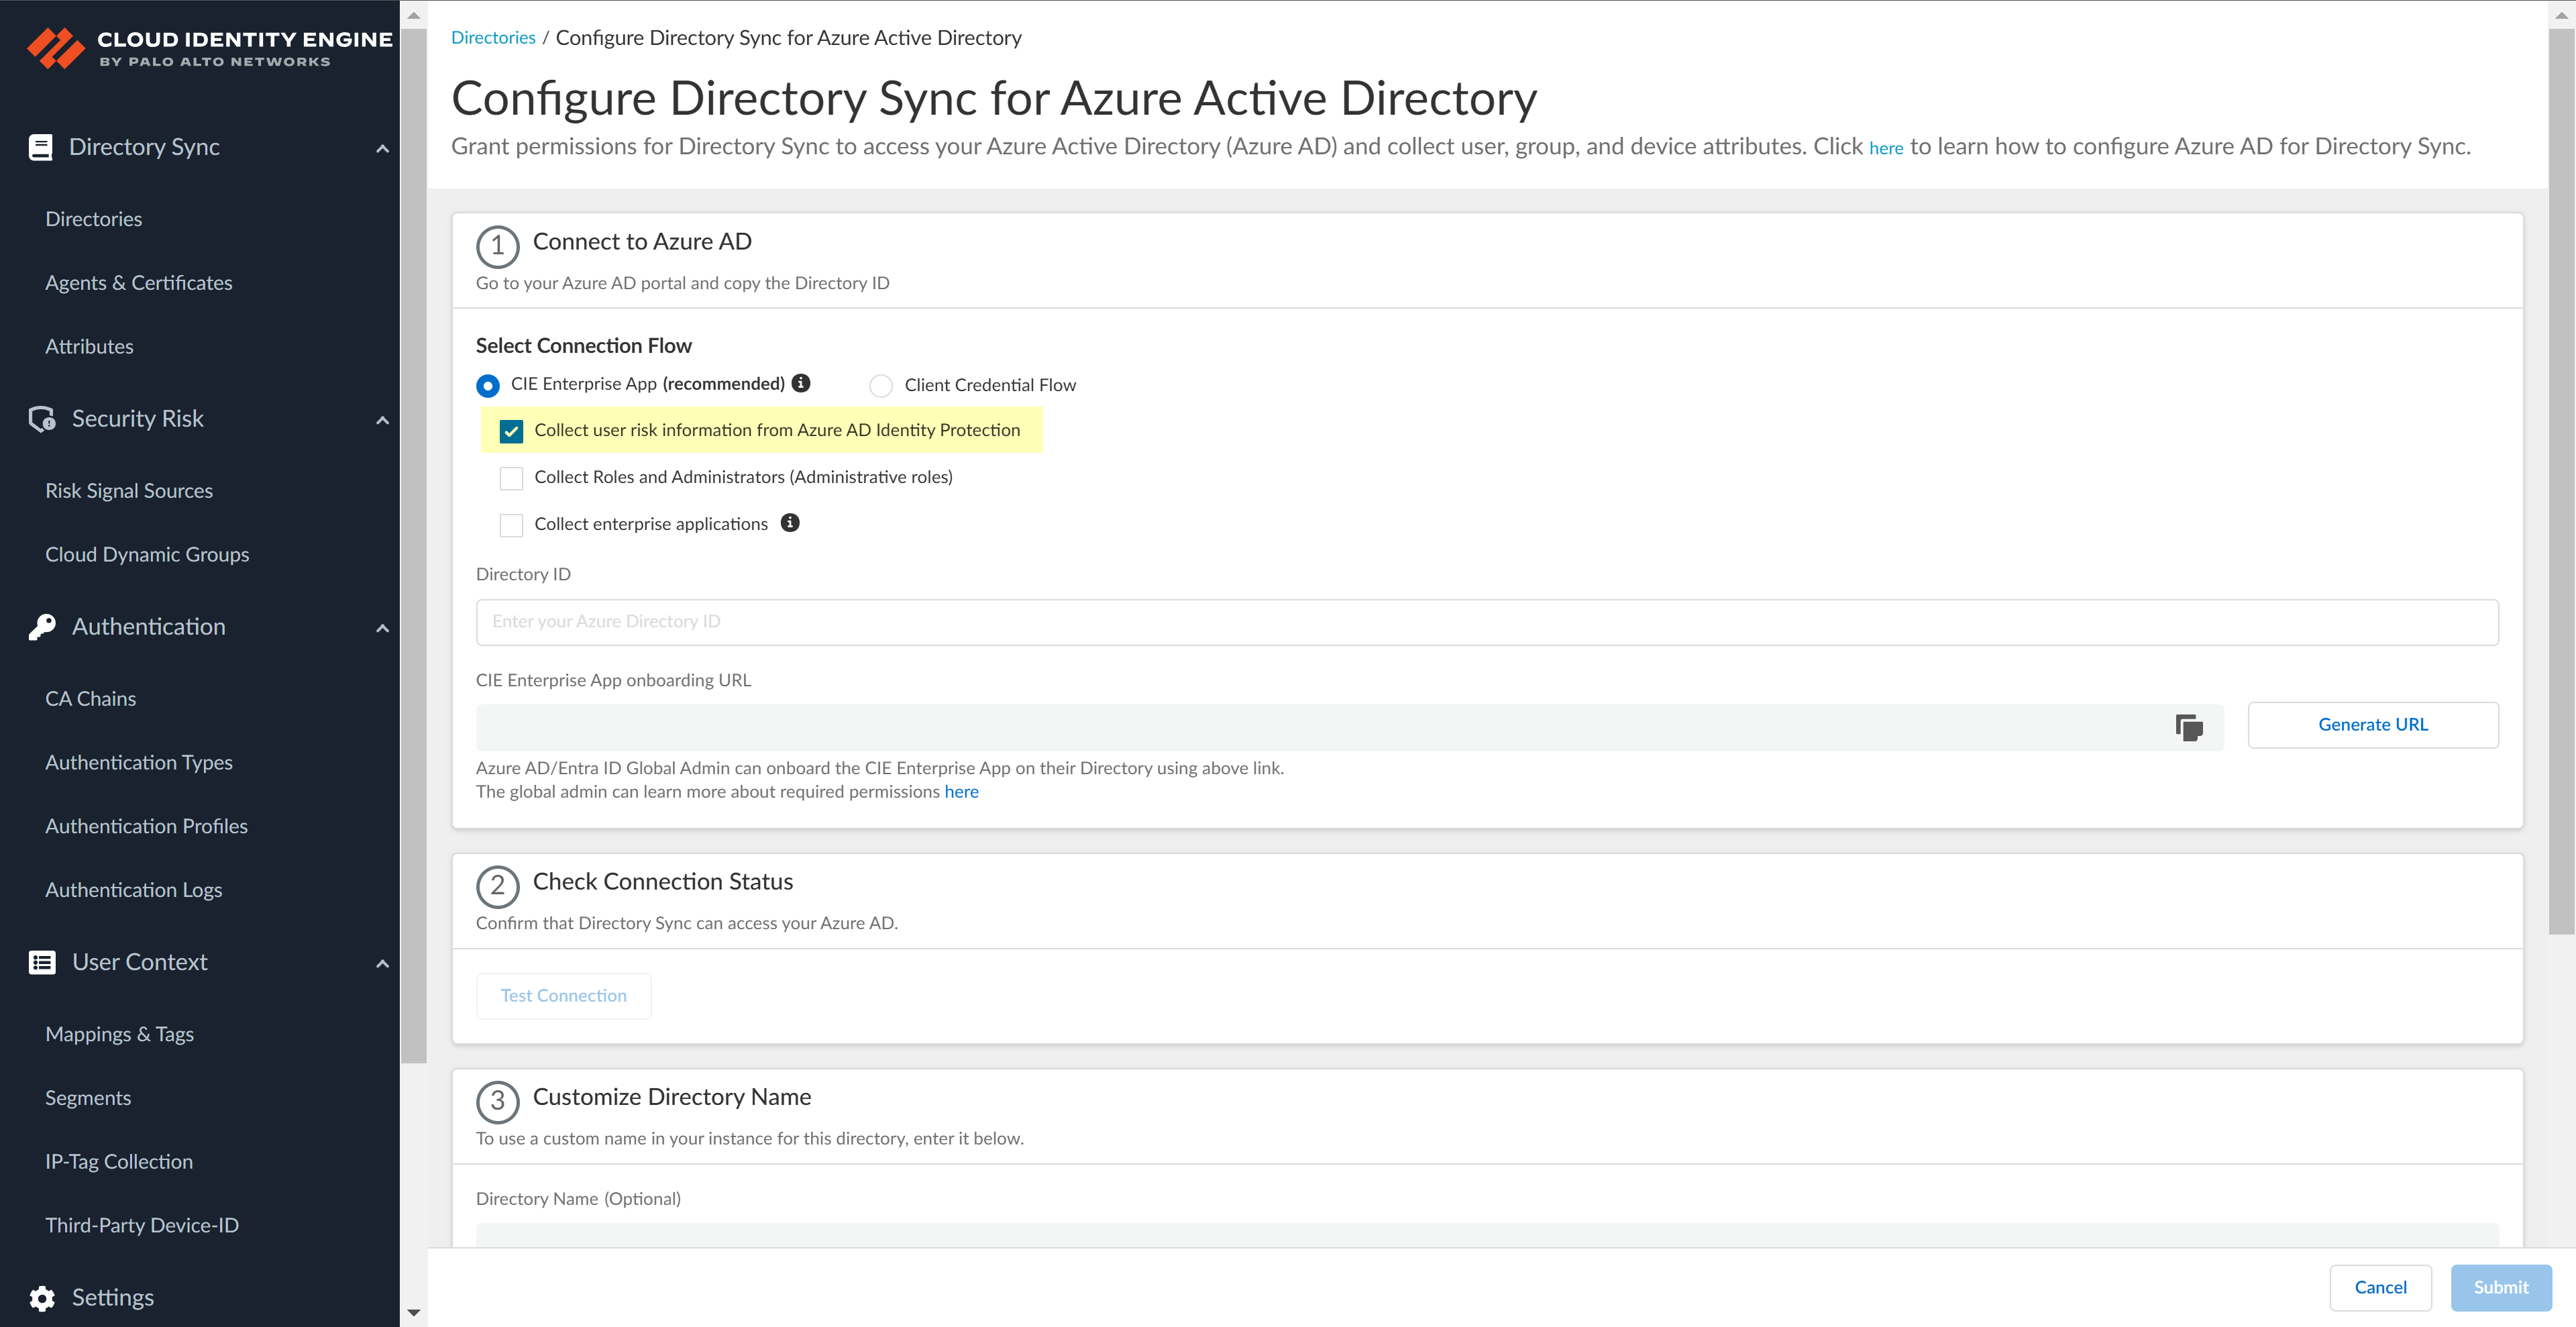
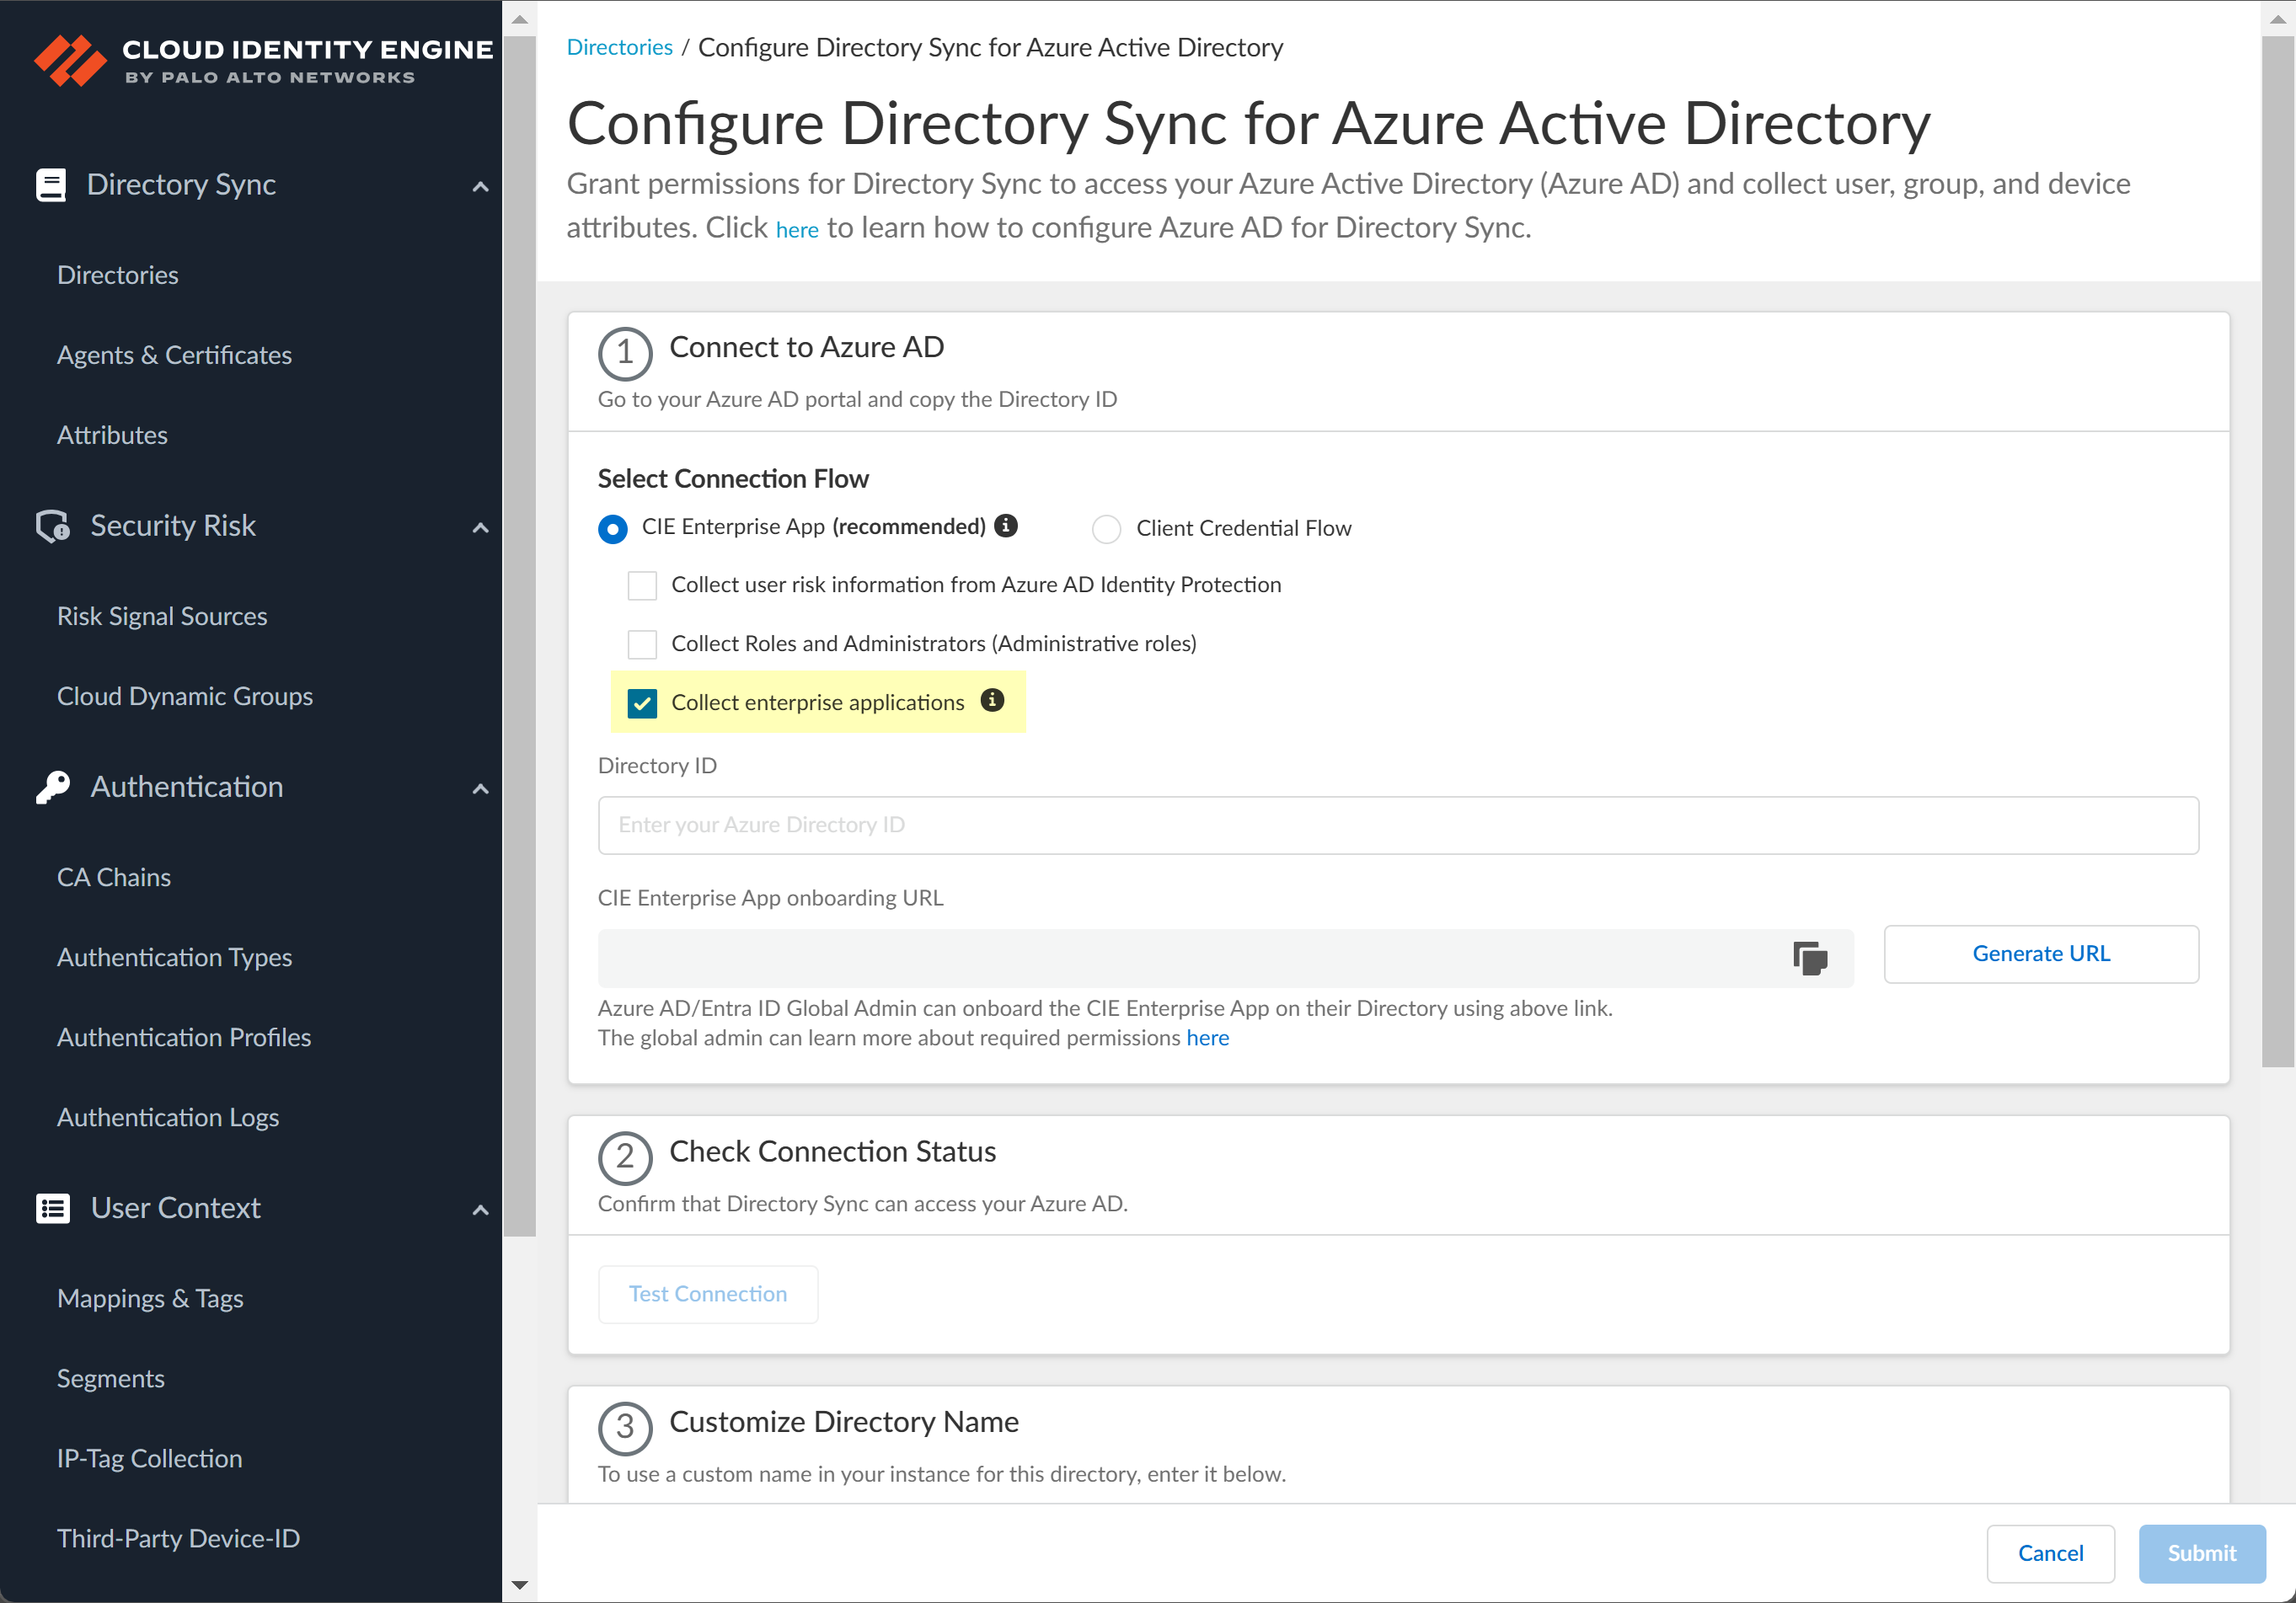
![]() (Optional) Select additional information types to collect from your Azure directory.The CIE Enterprise app automatically requests the privileges necessary to retrieve the directory information, including for any options you have selected. If you enable an option that requires additional privileges, you must reconnect the directory. For configurations that use the CIE Enterprise app, use the CIE Enterprise App onboarding URL in step 4.2 to ensure you grant the necessary privileges.After onboarding the app into the directory, you can revoke privileges if they are not necessary for your configuration. Do not revoke privileges for options that you have selected for your configuration. If you revoke a privilege that is necessary for an option you have select or that is required for the Cloud Identity Engine by default, the sync cannot complete successfully.To enable permissions that have been revoked, edit the directory configuration and complete steps 4.1 through 4.5.The following list provides the permissions for each additional information type.
(Optional) Select additional information types to collect from your Azure directory.The CIE Enterprise app automatically requests the privileges necessary to retrieve the directory information, including for any options you have selected. If you enable an option that requires additional privileges, you must reconnect the directory. For configurations that use the CIE Enterprise app, use the CIE Enterprise App onboarding URL in step 4.2 to ensure you grant the necessary privileges.After onboarding the app into the directory, you can revoke privileges if they are not necessary for your configuration. Do not revoke privileges for options that you have selected for your configuration. If you revoke a privilege that is necessary for an option you have select or that is required for the Cloud Identity Engine by default, the sync cannot complete successfully.To enable permissions that have been revoked, edit the directory configuration and complete steps 4.1 through 4.5.The following list provides the permissions for each additional information type.- Collect user risk information from Azure AD Identity
Protection:
- IdentityRiskyUser.Read.All
- IdentityRiskEvent.Read.All
- Collect Roles and Administrators (Administrative roles): Directory.Read.All or RoleManagement.Read.Directory.
- Collect enterprise applications: Application.Read.All
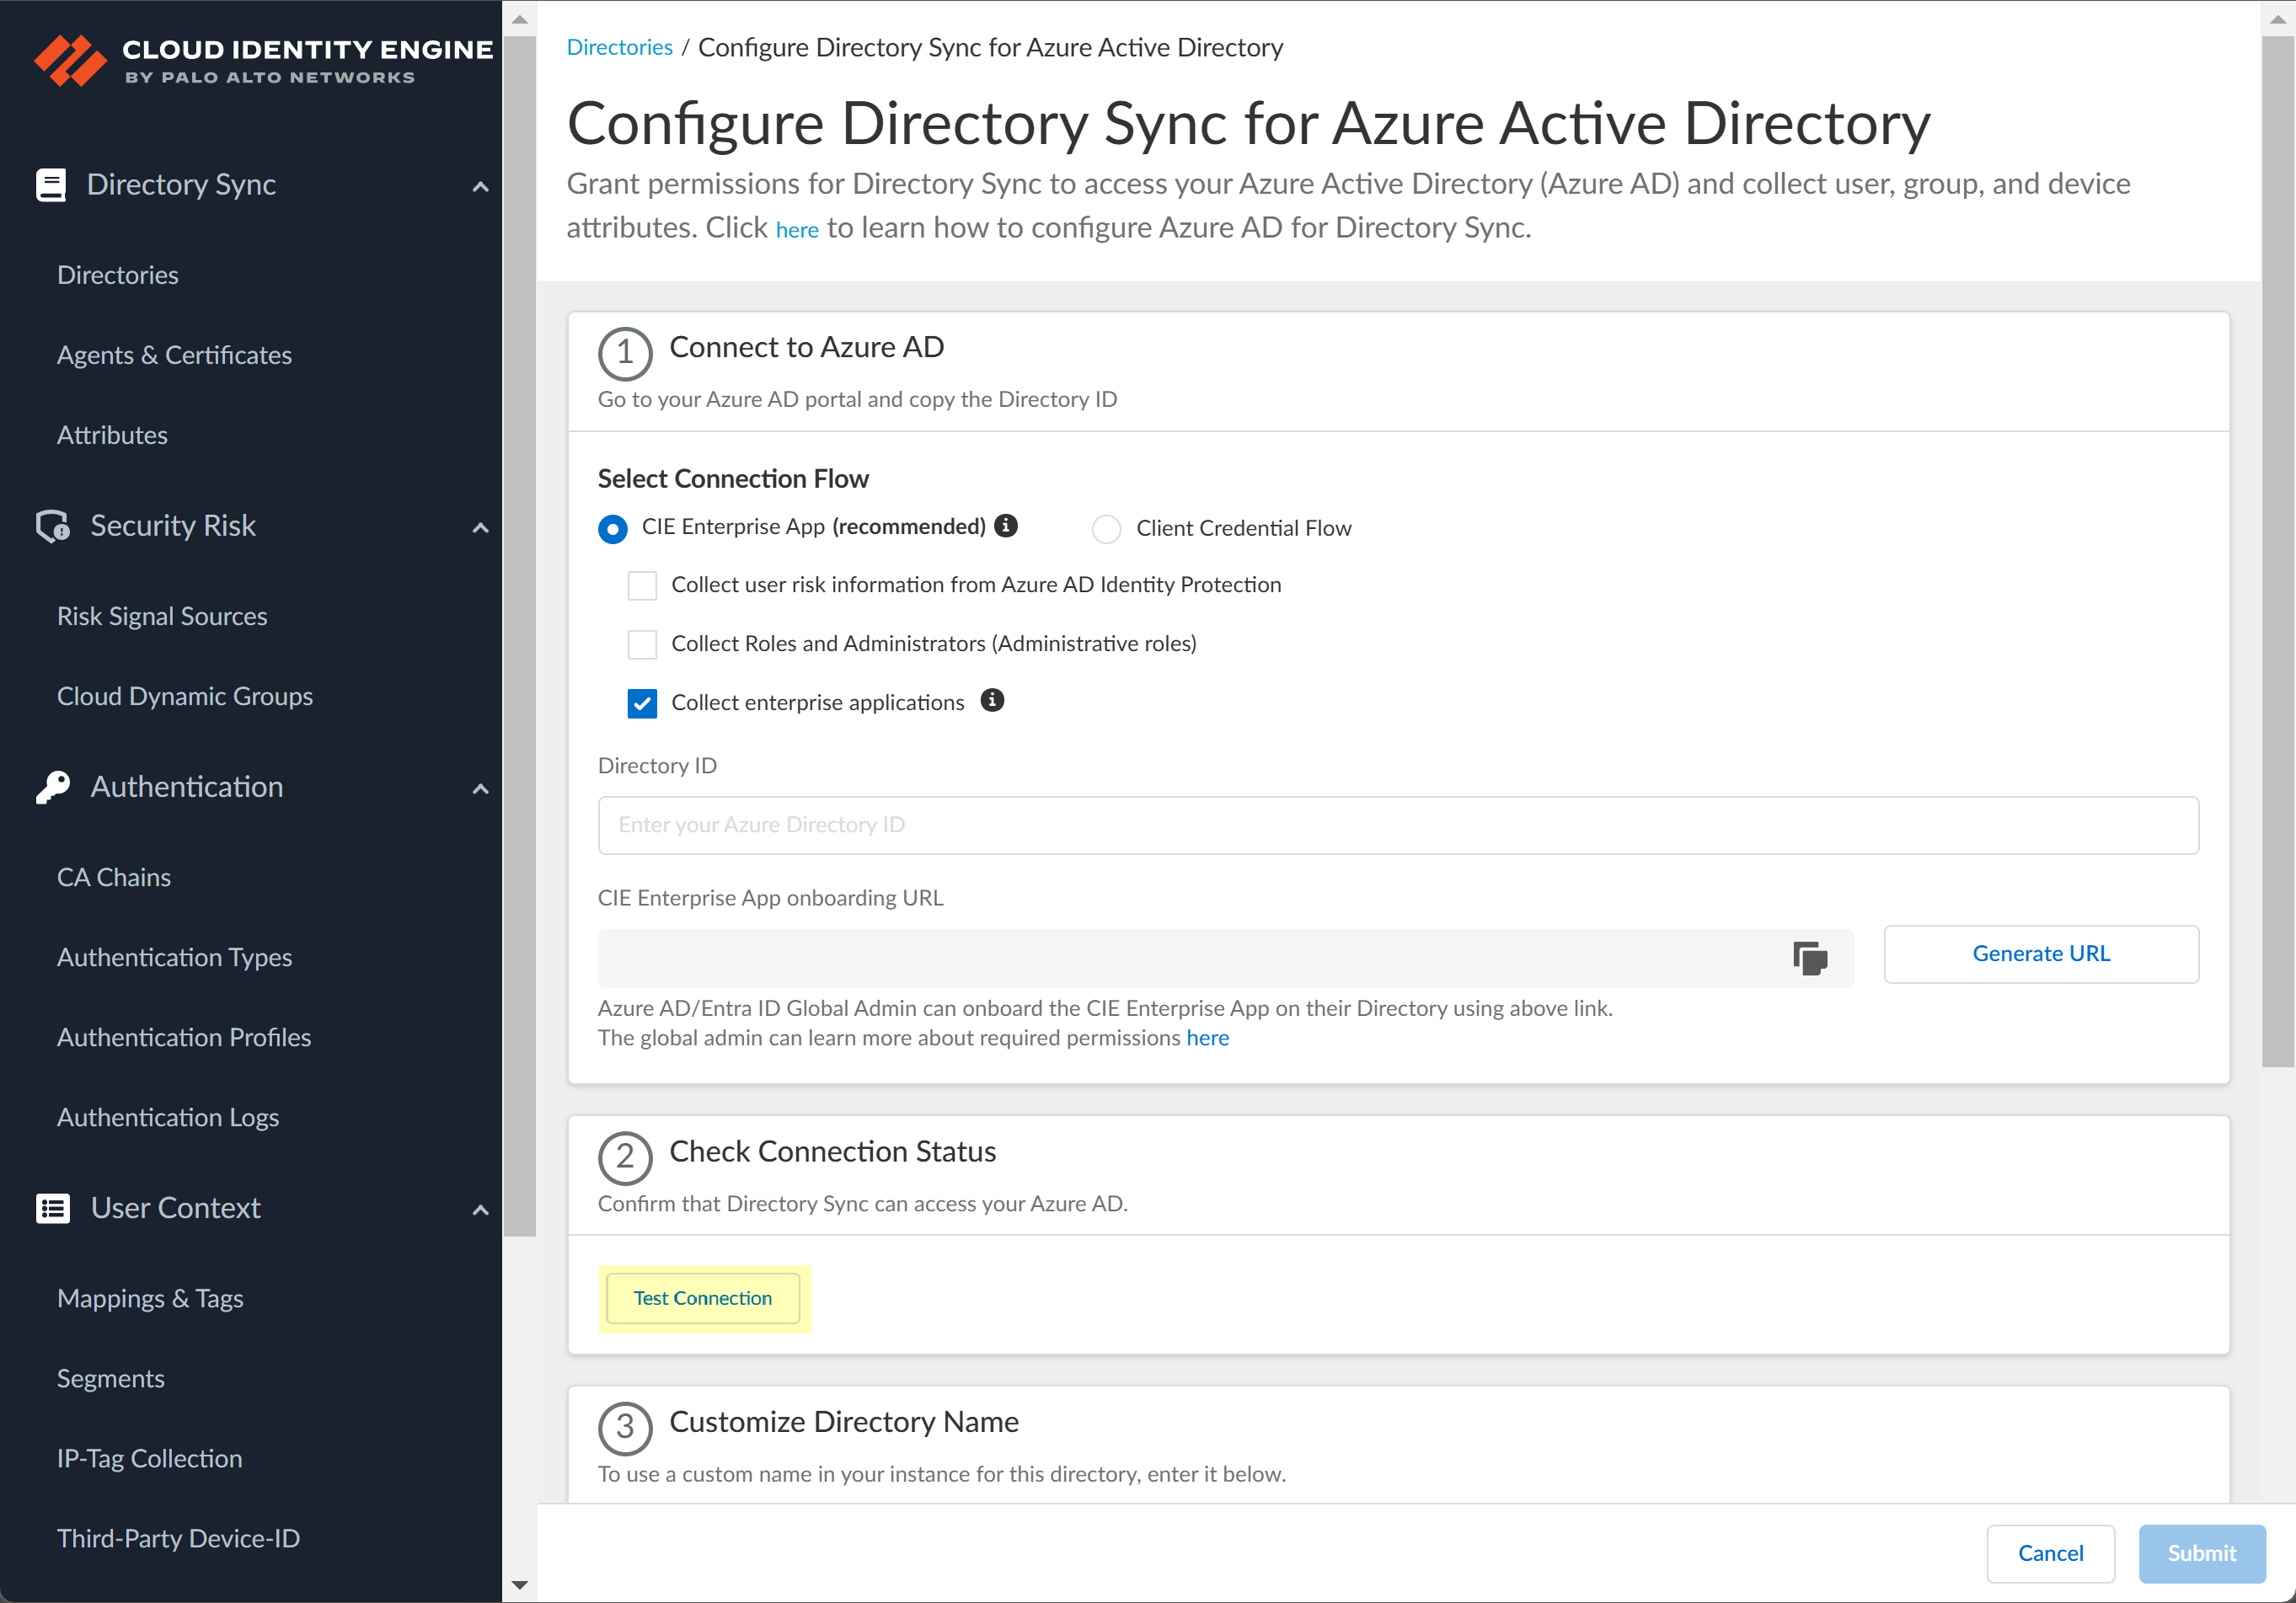
- Select whether you want to Collect user risk information from Azure AD Identity Protection to use in attribute-based Cloud Dynamic User Groups.
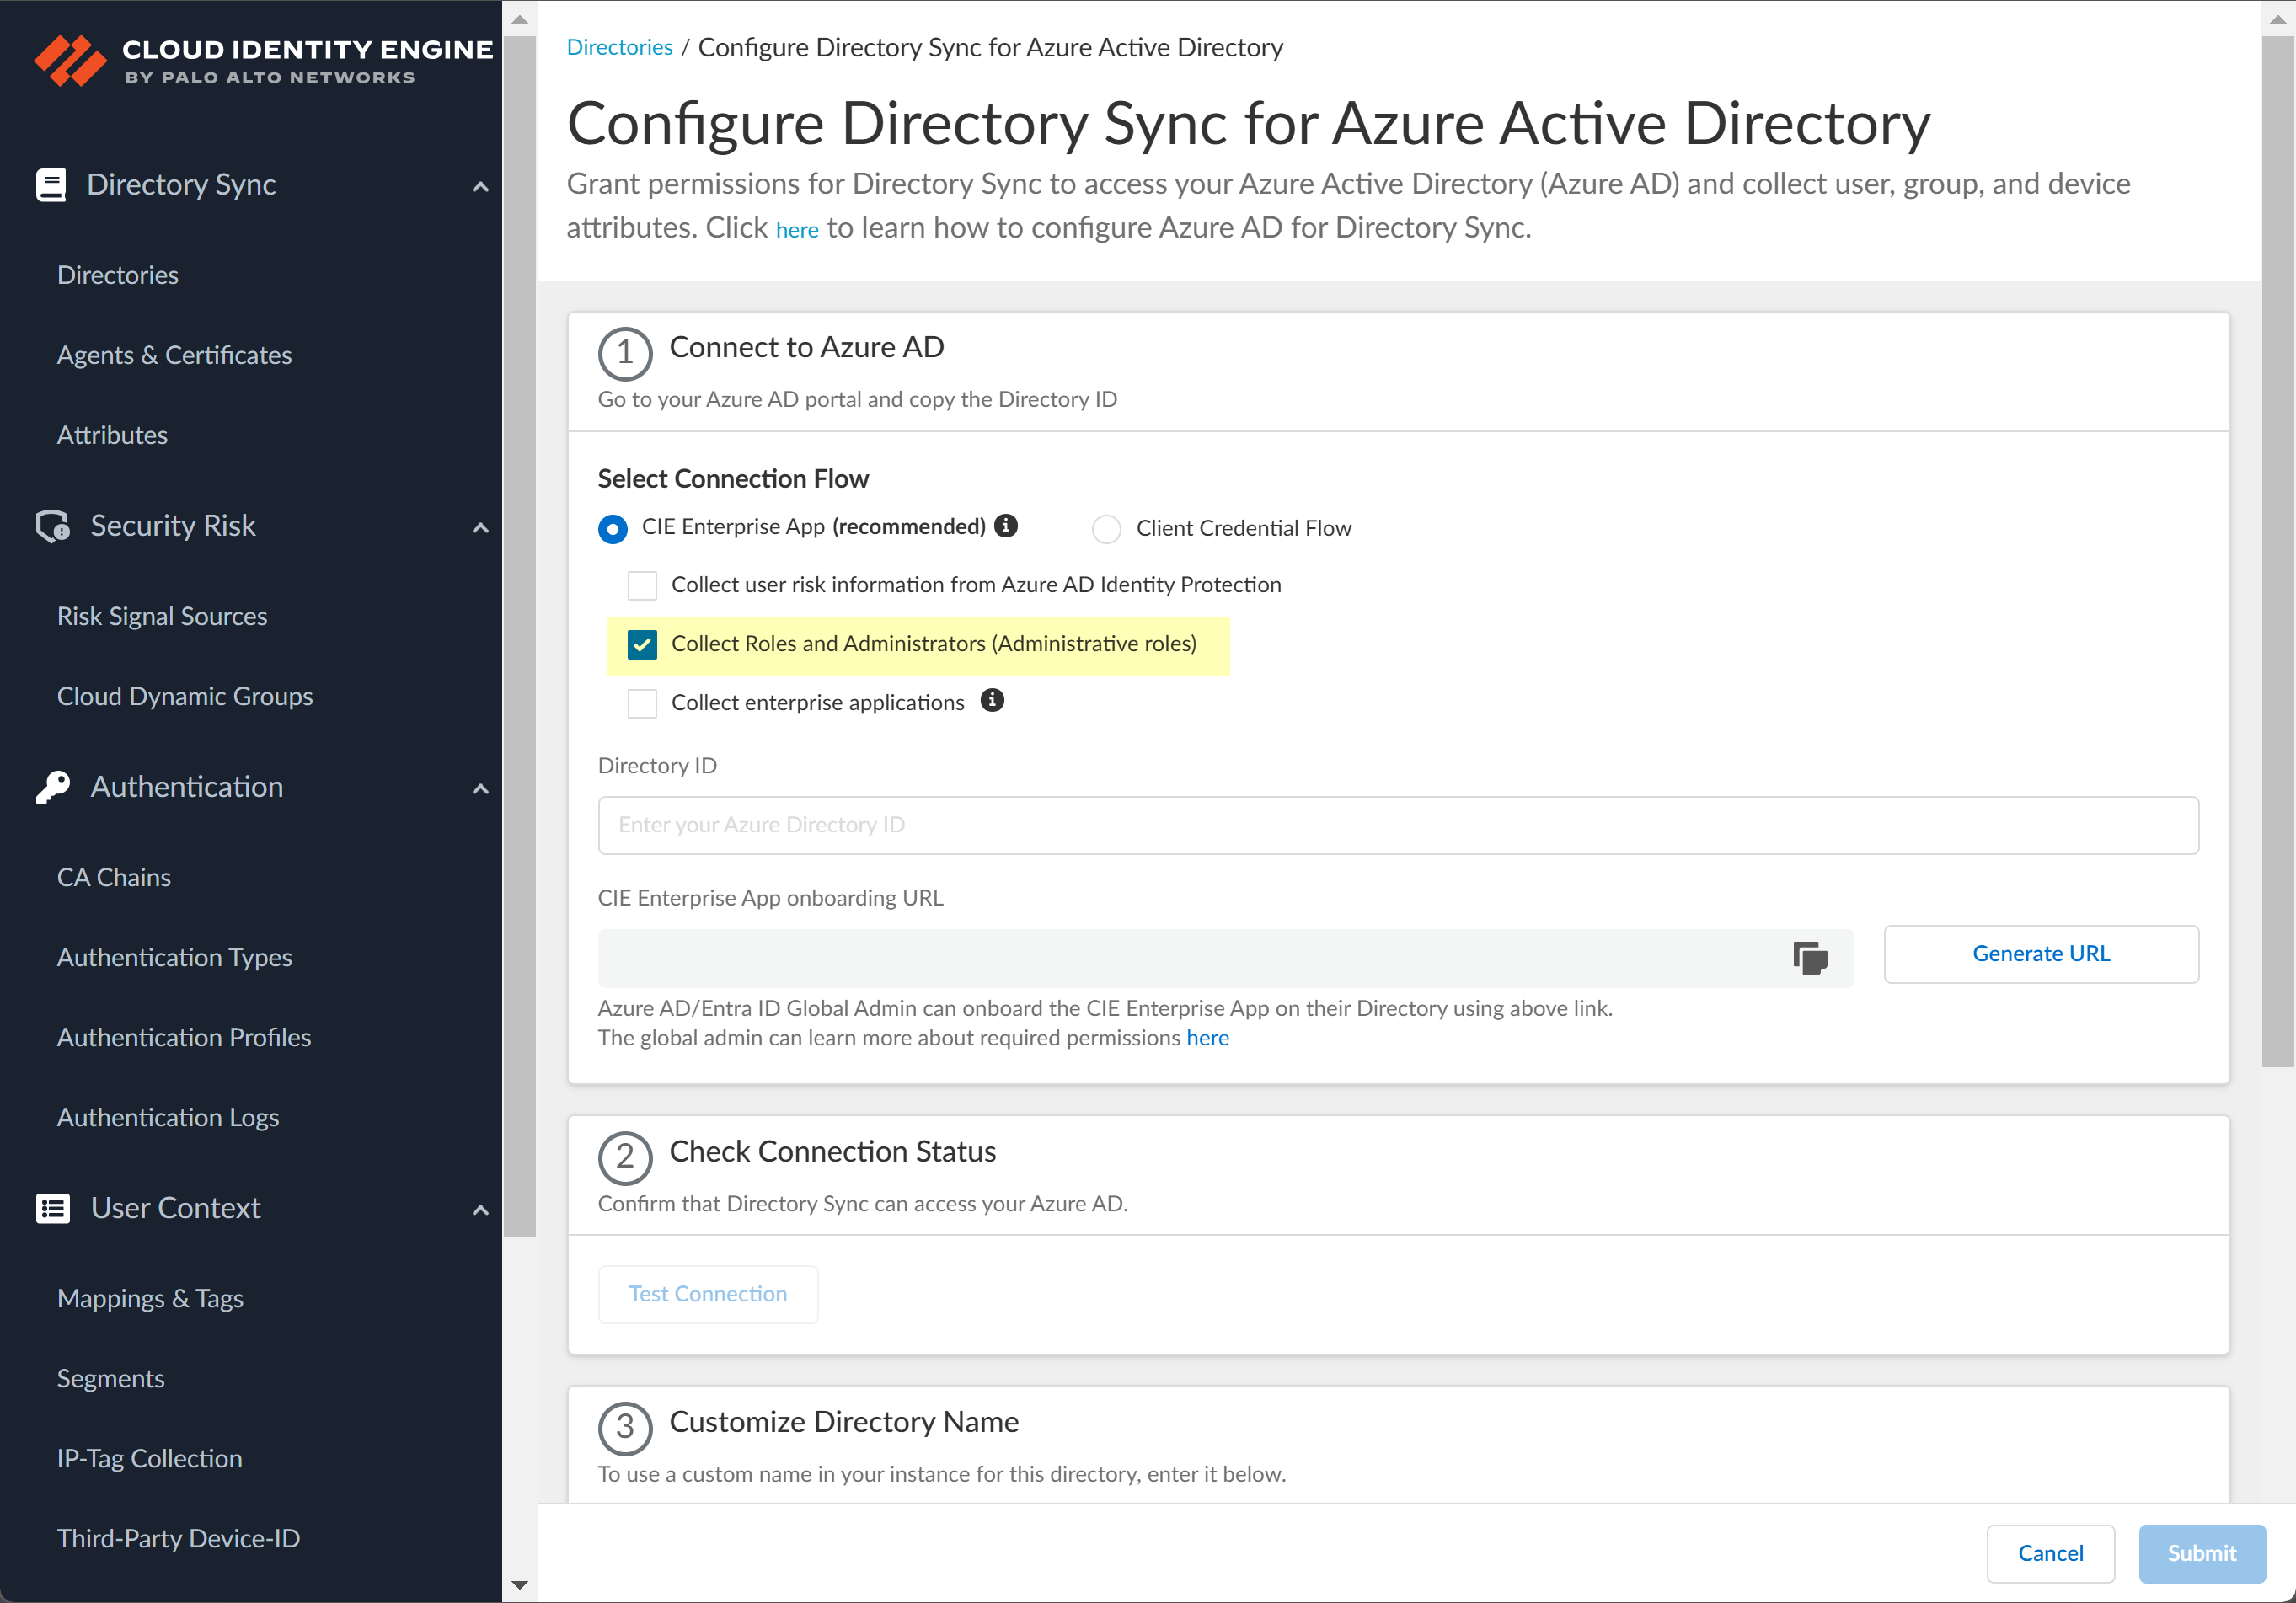
![]() Select whether you want to Collect Roles and Administrators (Administrative roles) to retrieve roleAssignments attribute information for users and groups. Allowing the Cloud Identity Engine to include this information for analysis helps to prevent role-based malicious attacks.By default, the Cloud Identity Engine enables this option for tenants who are associated with Cortex XDR.
Select whether you want to Collect Roles and Administrators (Administrative roles) to retrieve roleAssignments attribute information for users and groups. Allowing the Cloud Identity Engine to include this information for analysis helps to prevent role-based malicious attacks.By default, the Cloud Identity Engine enables this option for tenants who are associated with Cortex XDR.![]() Select whether you want to Collect enterprise applications data so that it displays when you View Directory Data. If you don't want to collect the application data or you don't use application data in your Security policy, deselect the check box to decrease the sync time.
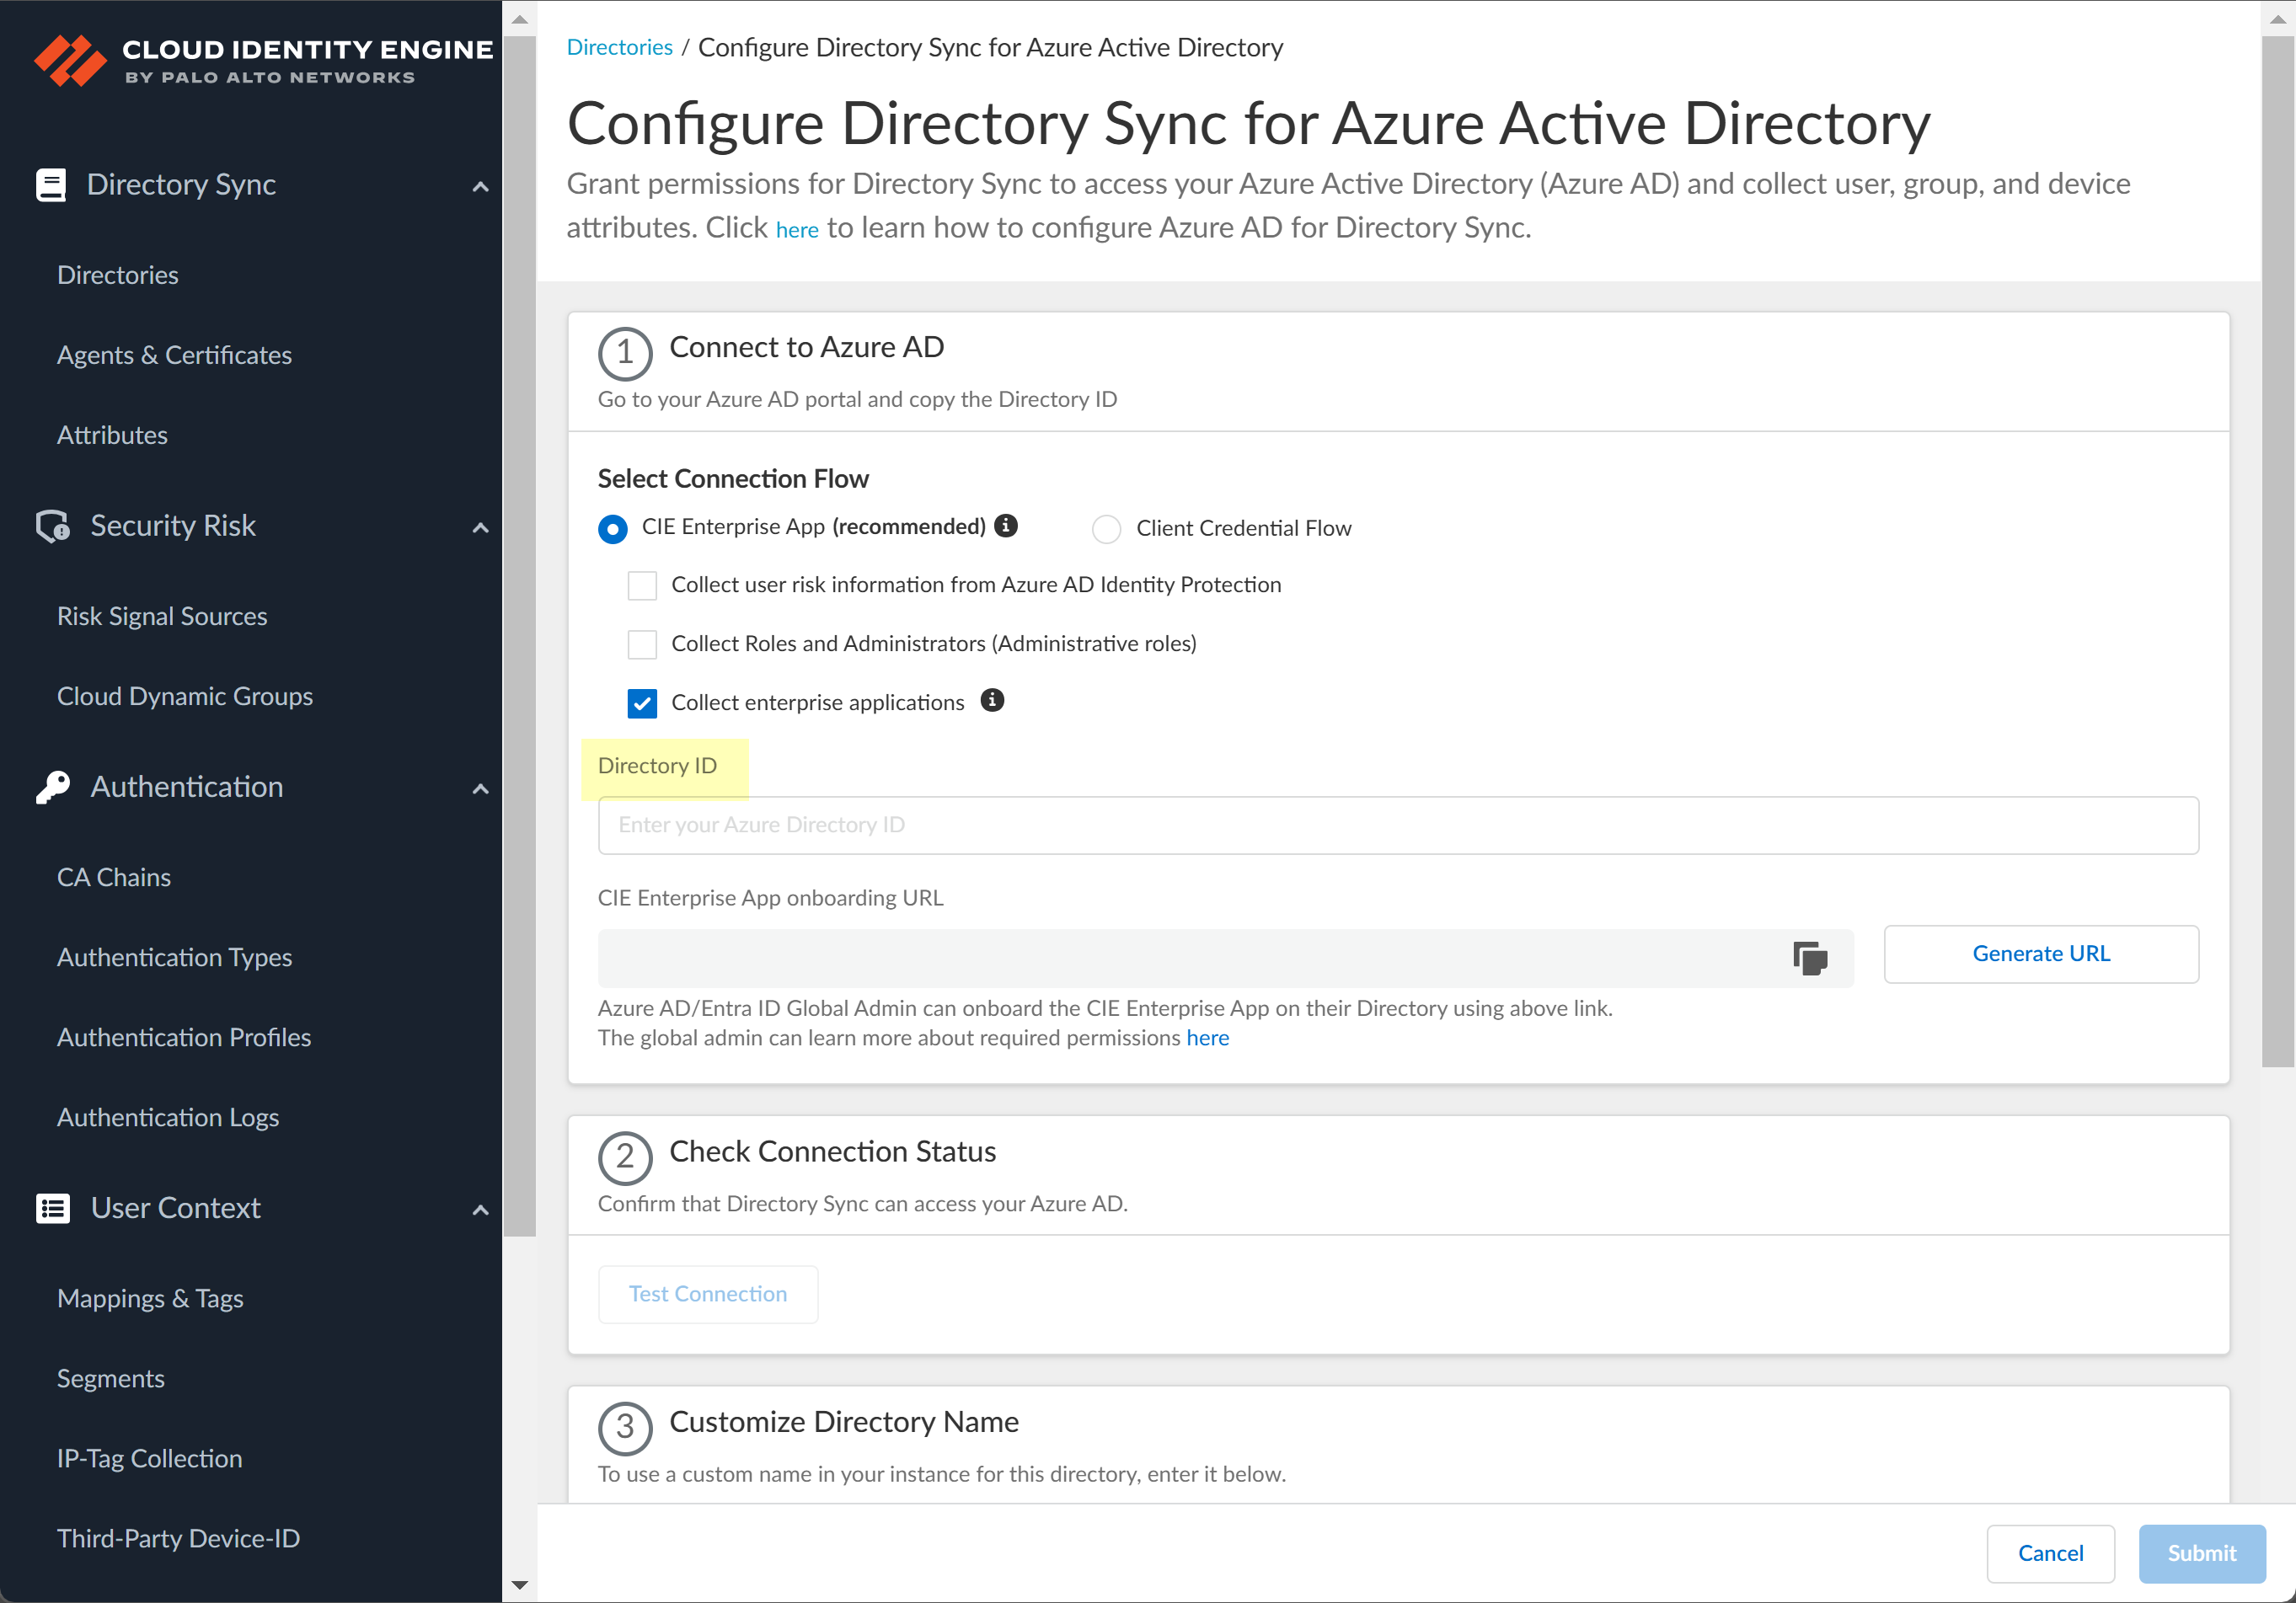
Select whether you want to Collect enterprise applications data so that it displays when you View Directory Data. If you don't want to collect the application data or you don't use application data in your Security policy, deselect the check box to decrease the sync time.![]() Configure your Azure directory information in the Cloud Identity Engine.
Configure your Azure directory information in the Cloud Identity Engine.- Enter the directory ID you copied in step 1.2 as the Directory ID.
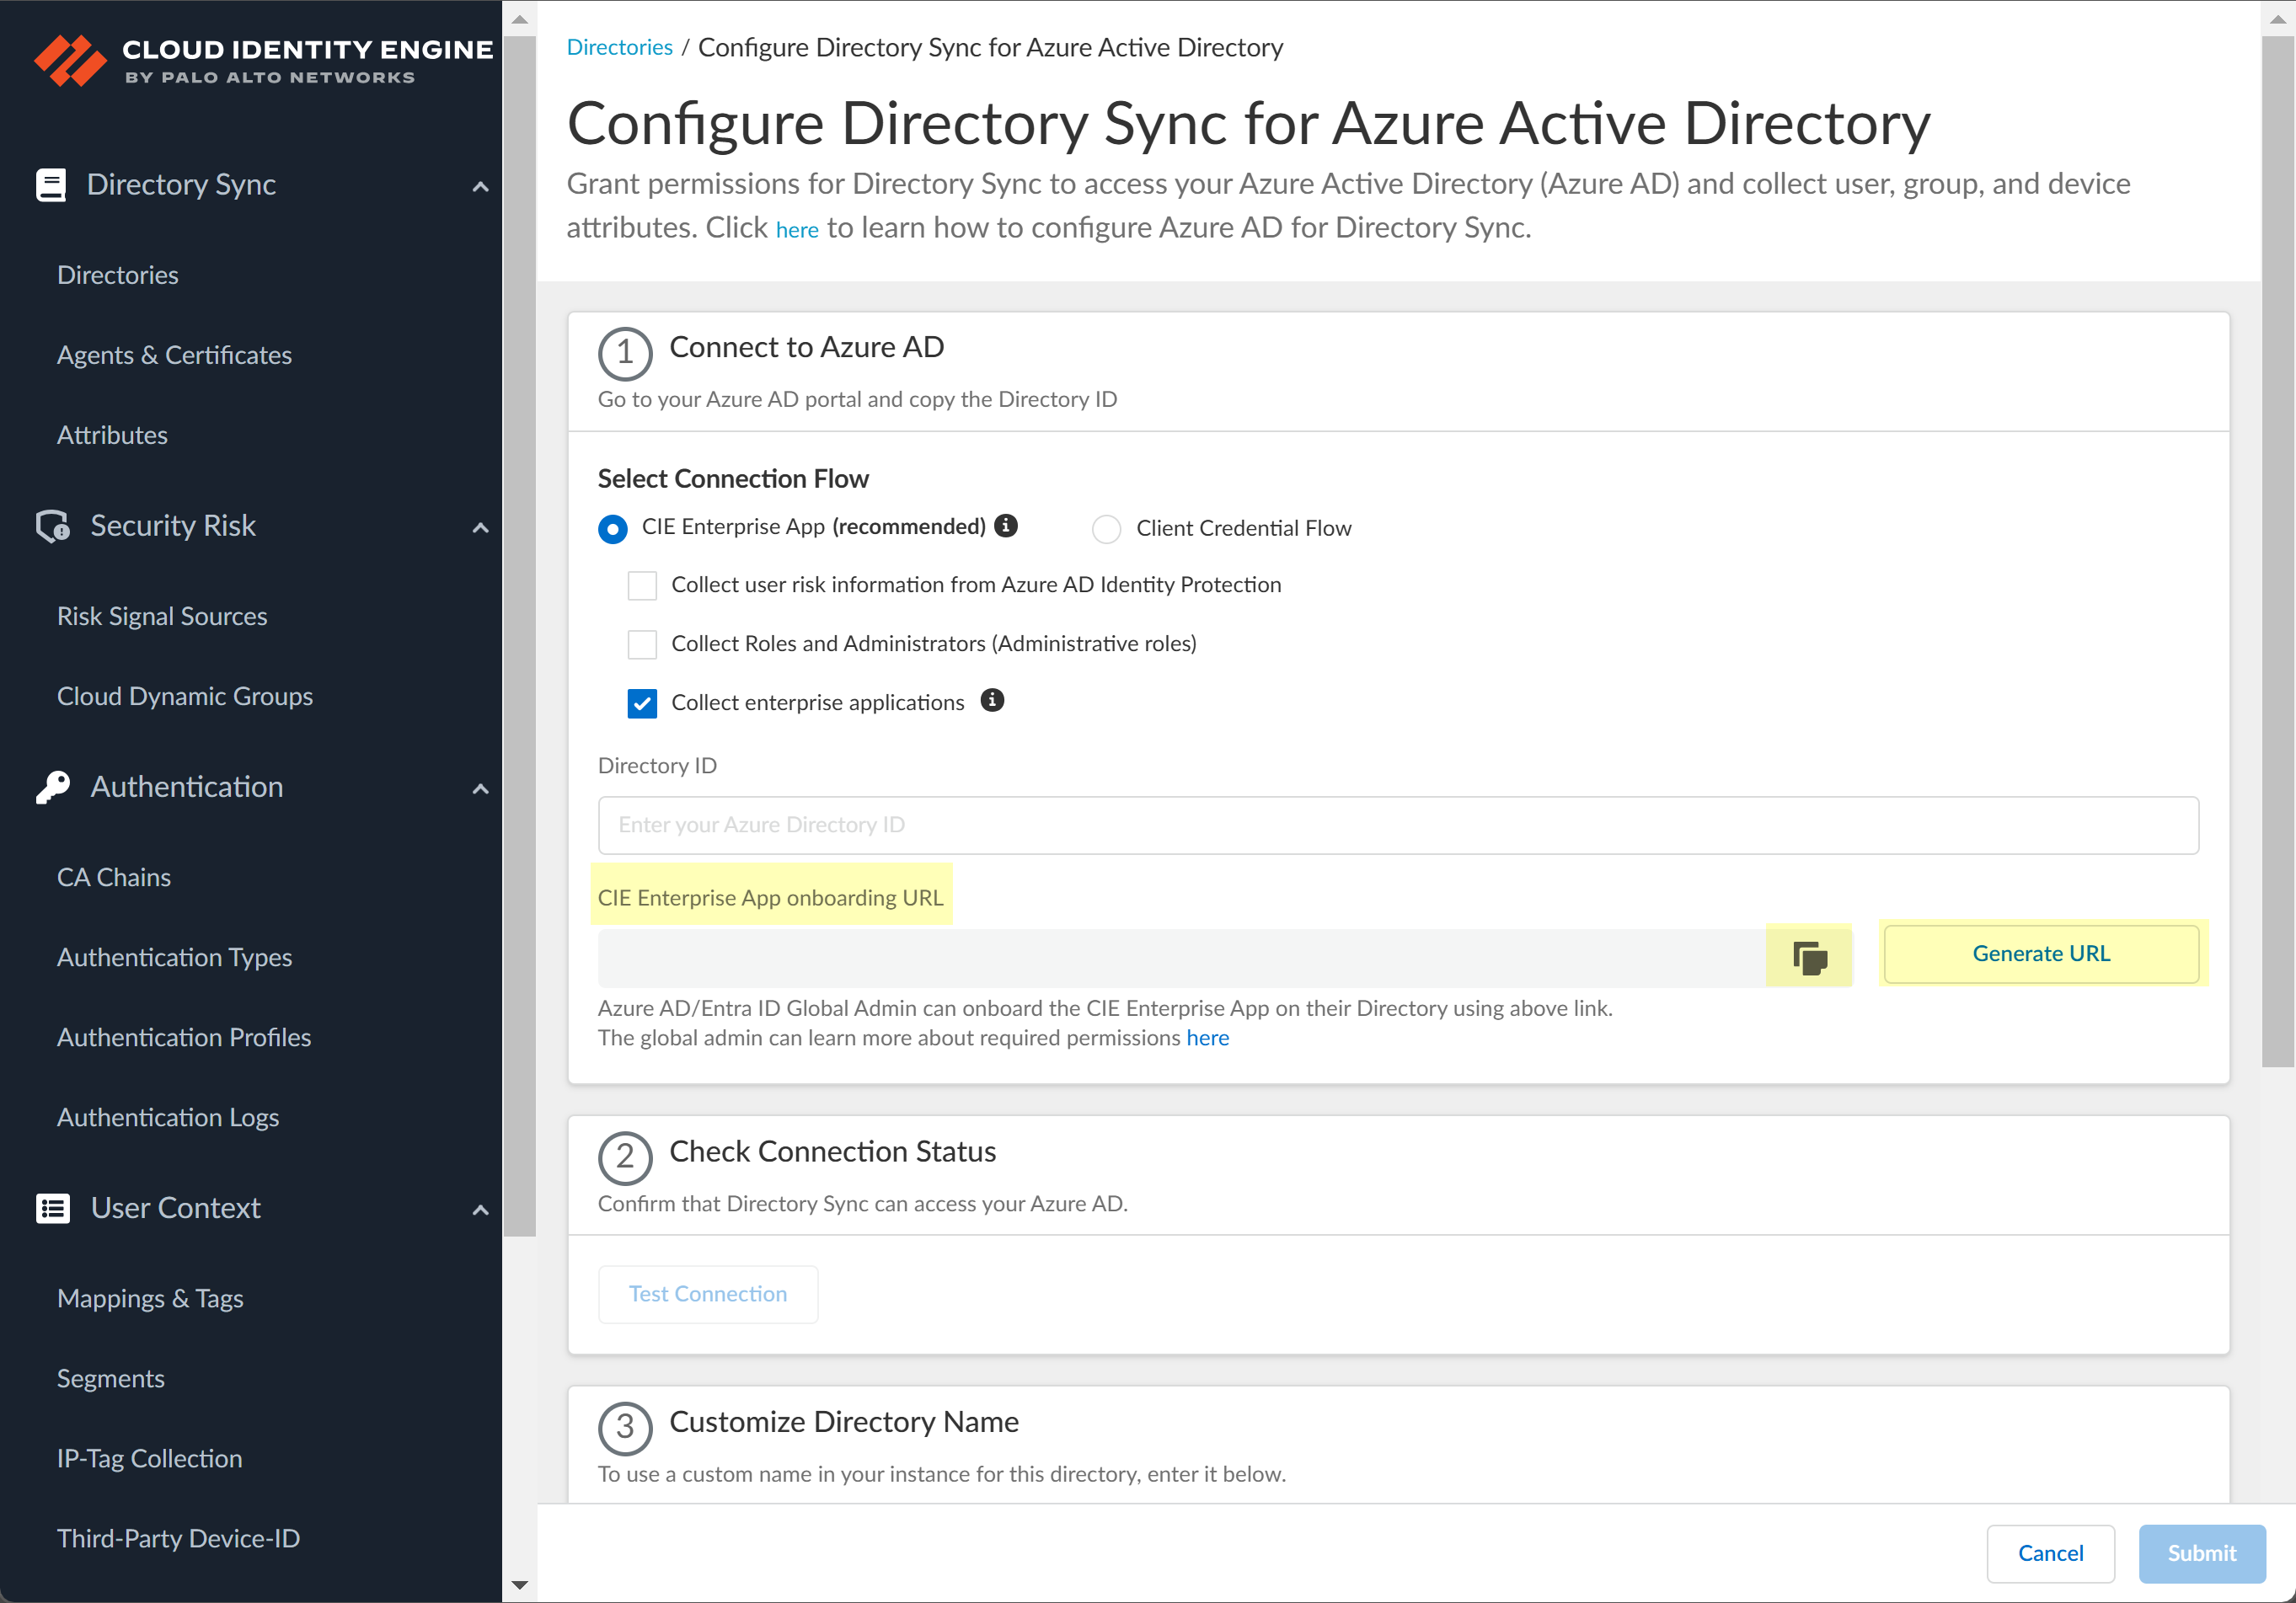
![]() To obtain the CIE Enterprise App onboarding URL, click Generate URL then Copy the URL and open it in a new tab or window.
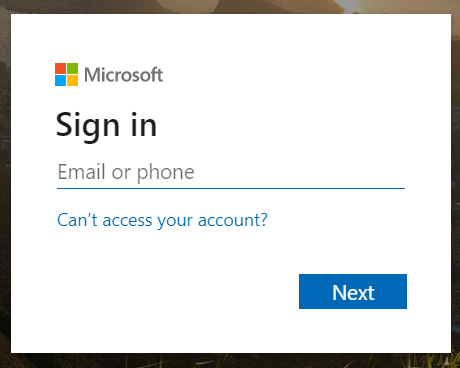
To obtain the CIE Enterprise App onboarding URL, click Generate URL then Copy the URL and open it in a new tab or window.![]() Enter the email address or phone number for the Global Administrator Role account you use to connect to the Cloud Identity Engine then click Next.
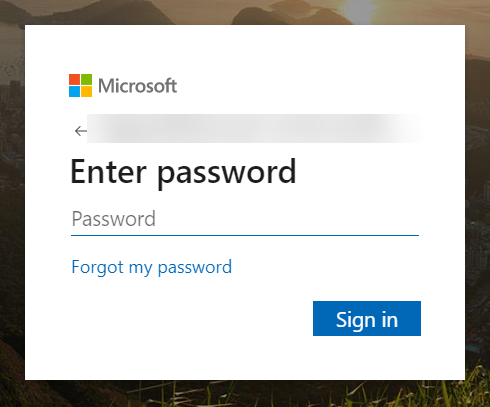
Enter the email address or phone number for the Global Administrator Role account you use to connect to the Cloud Identity Engine then click Next.![]() Enter your password and Sign in.
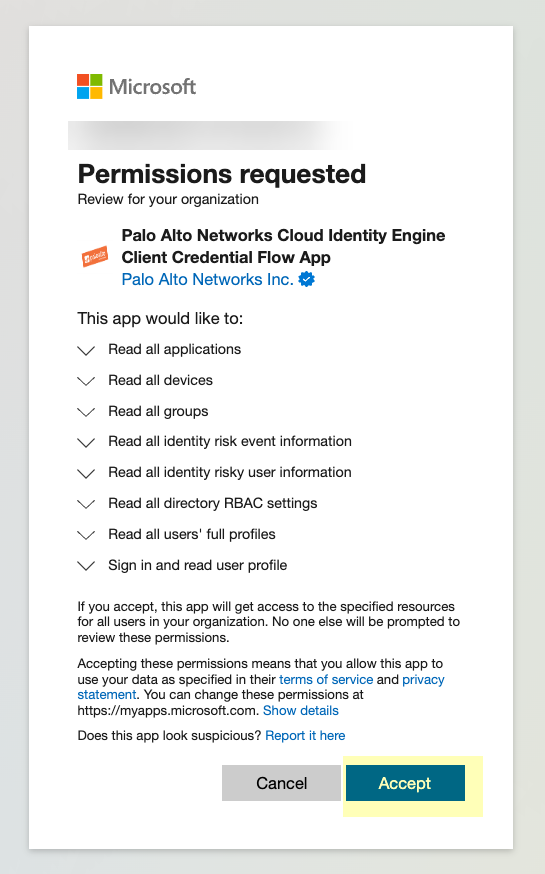
Enter your password and Sign in.![]() Click Accept to grant the necessary permissions for your Azure directory.When you accept, Azure automatically enables the following required permissions, as well as the additional information type permissions listed in step 3:
Click Accept to grant the necessary permissions for your Azure directory.When you accept, Azure automatically enables the following required permissions, as well as the additional information type permissions listed in step 3:- Device.Read.All—Application, Read all devices
- Group.Read.All—Application, Read all groups
- User.Read.All—Application, Read all users' full profiles
- User.Read—Delegated, Sign in and read user profile
![]() Click Test Connection to confirm that the Cloud Identity Engine can successfully connect to your Azure AD tenant.
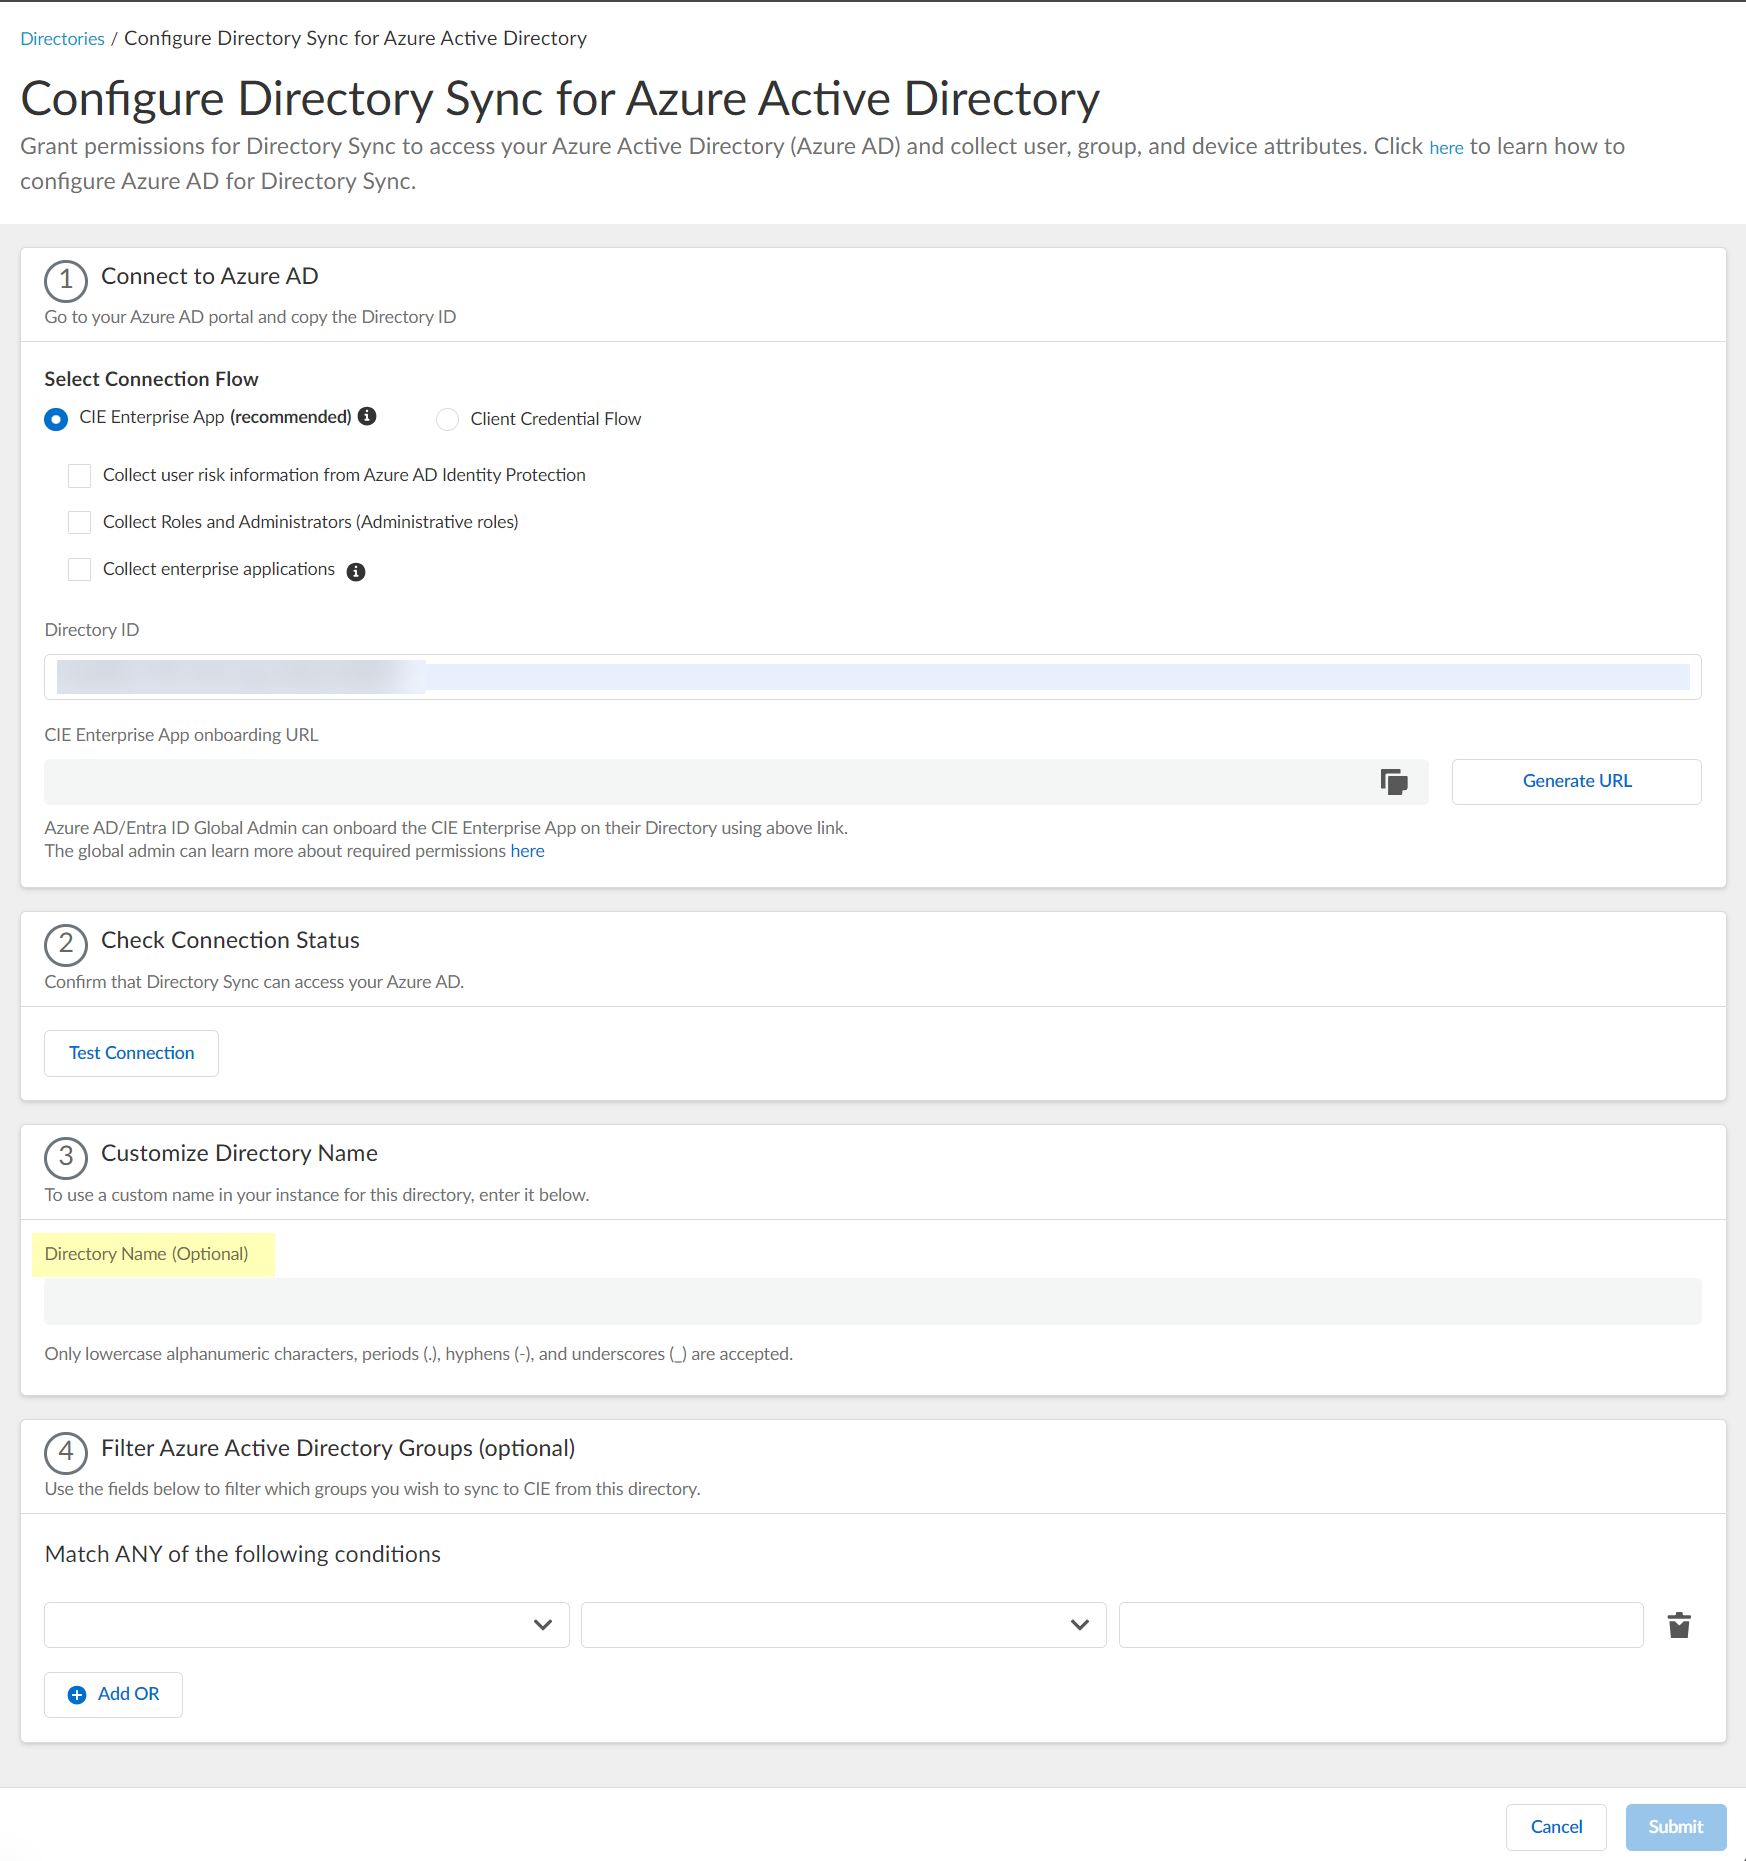
Click Test Connection to confirm that the Cloud Identity Engine can successfully connect to your Azure AD tenant.![]() (Optional) Enter a custom Directory Name (Optional) to use in the Cloud Identity Engine.
(Optional) Enter a custom Directory Name (Optional) to use in the Cloud Identity Engine.![]() (Optional) Upload a .CSV file to use as a filter for groups.
(Optional) Upload a .CSV file to use as a filter for groups.- Click Upload CSV to upload a comma-separated value (CSV) file to use as a filter.
![]() Drag and drop the .CSV file or click Browse files to select the .CSV file you want to use as a filter.
Drag and drop the .CSV file or click Browse files to select the .CSV file you want to use as a filter.![]() Select the Upload Type for the filter.
Select the Upload Type for the filter.- Update Filters—Update the existing filters with the .CSV data.
- Replace Existing Filters—Replace the existing filters with the .CSV data.
![]() Select the Attribute Name you want to use for the filter (Name or Unique Identifier).Click Apply to confirm the changes.
Select the Attribute Name you want to use for the filter (Name or Unique Identifier).Click Apply to confirm the changes.![]() (Optional) Select whether you want to Filter Azure Active Directory Groups.
(Optional) Select whether you want to Filter Azure Active Directory Groups.- Select the group attribute you want to use as a filter.
- Name—Filter the groups based on the group name.
- Unique Identifier—Filter the groups based on the unique identifier for the group.
![]() Select how you want to filter the groups.
Select how you want to filter the groups.- (for Name attribute only)
begins with—Filter the groups based on a
partial match for the text you enter. The filter supports spaces in the search query.
- is equal to—Filter the groups based on an exact match for the text you enter.
![]() Enter the search query you want to use to filter the groups (either alphanumeric characters for a name or numeric characters for a unique identifier).
Enter the search query you want to use to filter the groups (either alphanumeric characters for a name or numeric characters for a unique identifier).![]() (Optional) Configure an additional filter by clicking Add ORAdd Filter and repeating the previous three steps for each filter you want to include.If you select additional attributes as match conditions, the Cloud Identity Engine initially attempts to find a match for the first condition, then continues to match based on the additional conditions you specify.
(Optional) Configure an additional filter by clicking Add ORAdd Filter and repeating the previous three steps for each filter you want to include.If you select additional attributes as match conditions, the Cloud Identity Engine initially attempts to find a match for the first condition, then continues to match based on the additional conditions you specify.![]() Submit your changes and verify your directory information when the Directories page displays.
Submit your changes and verify your directory information when the Directories page displays.

