Install the PA-400R Series Firewall on a Wall
Table of Contents
Install the PA-400R Series Firewall on a Wall
Learn how to install a PA-400R Series firewall on a wall.
The PA-450R and PA-450R-5G firewalls can be installed
on a wall with the use of PAN-1RU-SMALL-WALLMNT.
The PA-455R-5G firewall can be installed on a wall with the use
of PAN-PA-455R-5G-WALL-MOUNT. To complete the installation, make sure that you
have:
- (Installing the wall mount) A 1.43cm (9/16”) SAE wrench or a torque driver capable of reaching 27nm (20 ft-lbs) torque.
- (Mounting the firewall) A hoist, drill (or hammer drill), T-45 Torx bit, and a torque driver or wrench capable of reaching 14nm (11 ft-lbs) torque.
The mounting bolts for the wall and pole mounts are
stainless steel. It is recommended that you apply anti-seize lubricant (not
provided) to the threads prior to installation to help prevent thread
galling.
The PA-410R and PA-410R-5G firewalls
can be installed on a wall using a VESA mount (not provided by Palo Alto Networks).
The firewall has a 100 x 100 VESA mount pattern and makes use of four M4 screws.
After installing, make sure to keep the device
clean and clear of dust to ensure optimal heat dissipation and maintain proper
hardware operation.
- Mark the locations on the wall that line up with the wall mount holes on the bottom of the wall mount.Ensure there are no building services (water, gas, or wiring) behind the wall where you intend to install the firewall.The PA-455R-5G should only be installed on a cement, brick, or mortar wall. You must use the provided anchors to mount the firewall.Skip this step if you intend to install a PA-455R-5G on a pole.Drill holes into the marked locations on the wall.PA-455R-5G
- Drill six holes using the provided 3/8 in. drill bit. Ensure that the holes are about 6.98cm (2.75in) deep.
- Remove any loose debris around the holes.
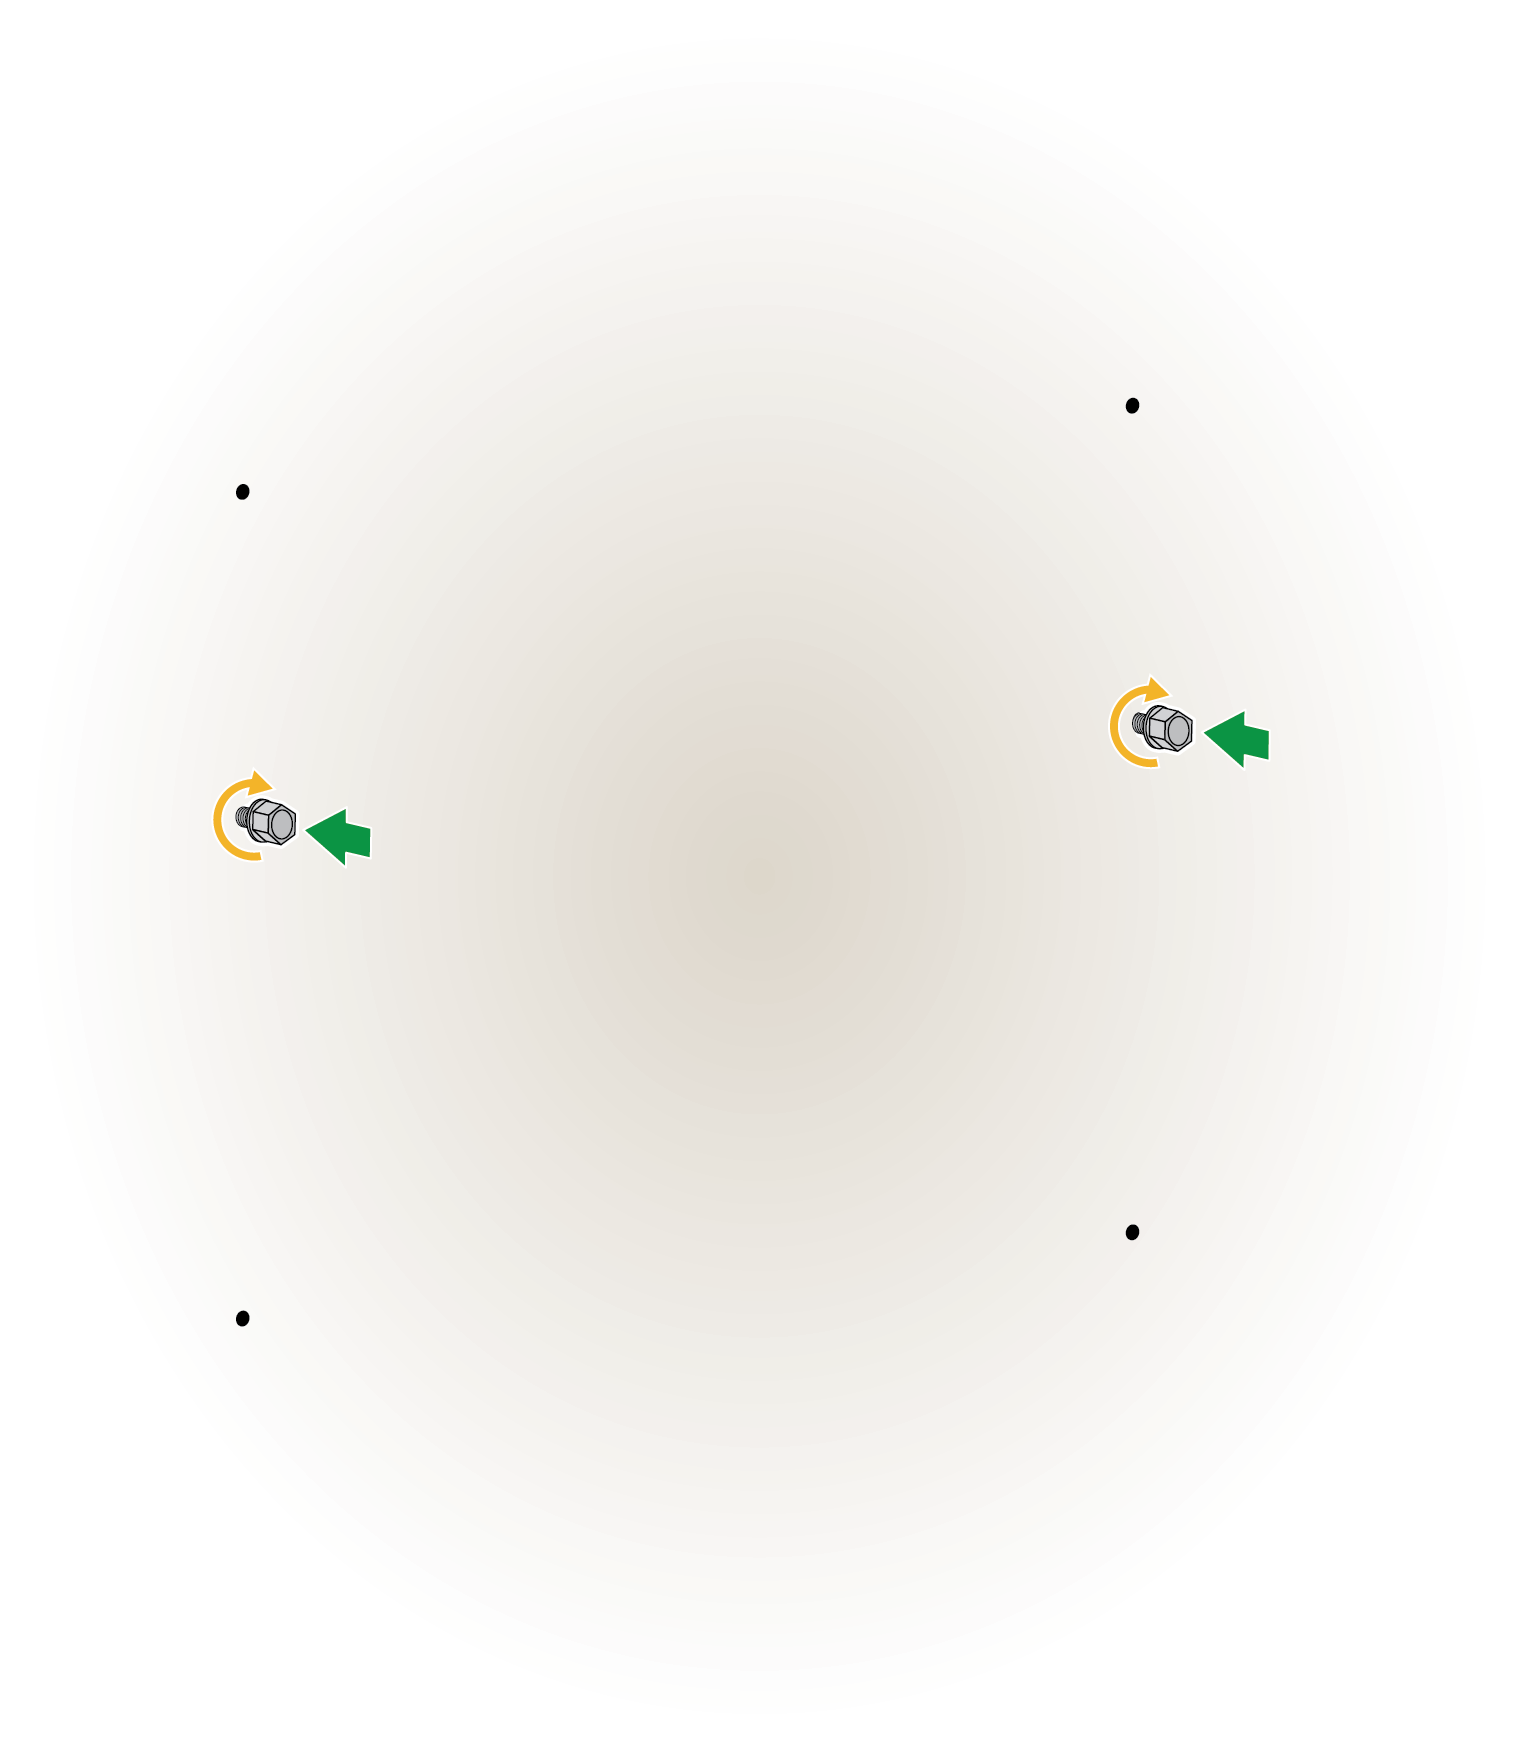
- Install two of the provided anchors into the middle holes. Ensure that
there is about a 5mm gap between the screw head and the wall.
![]()
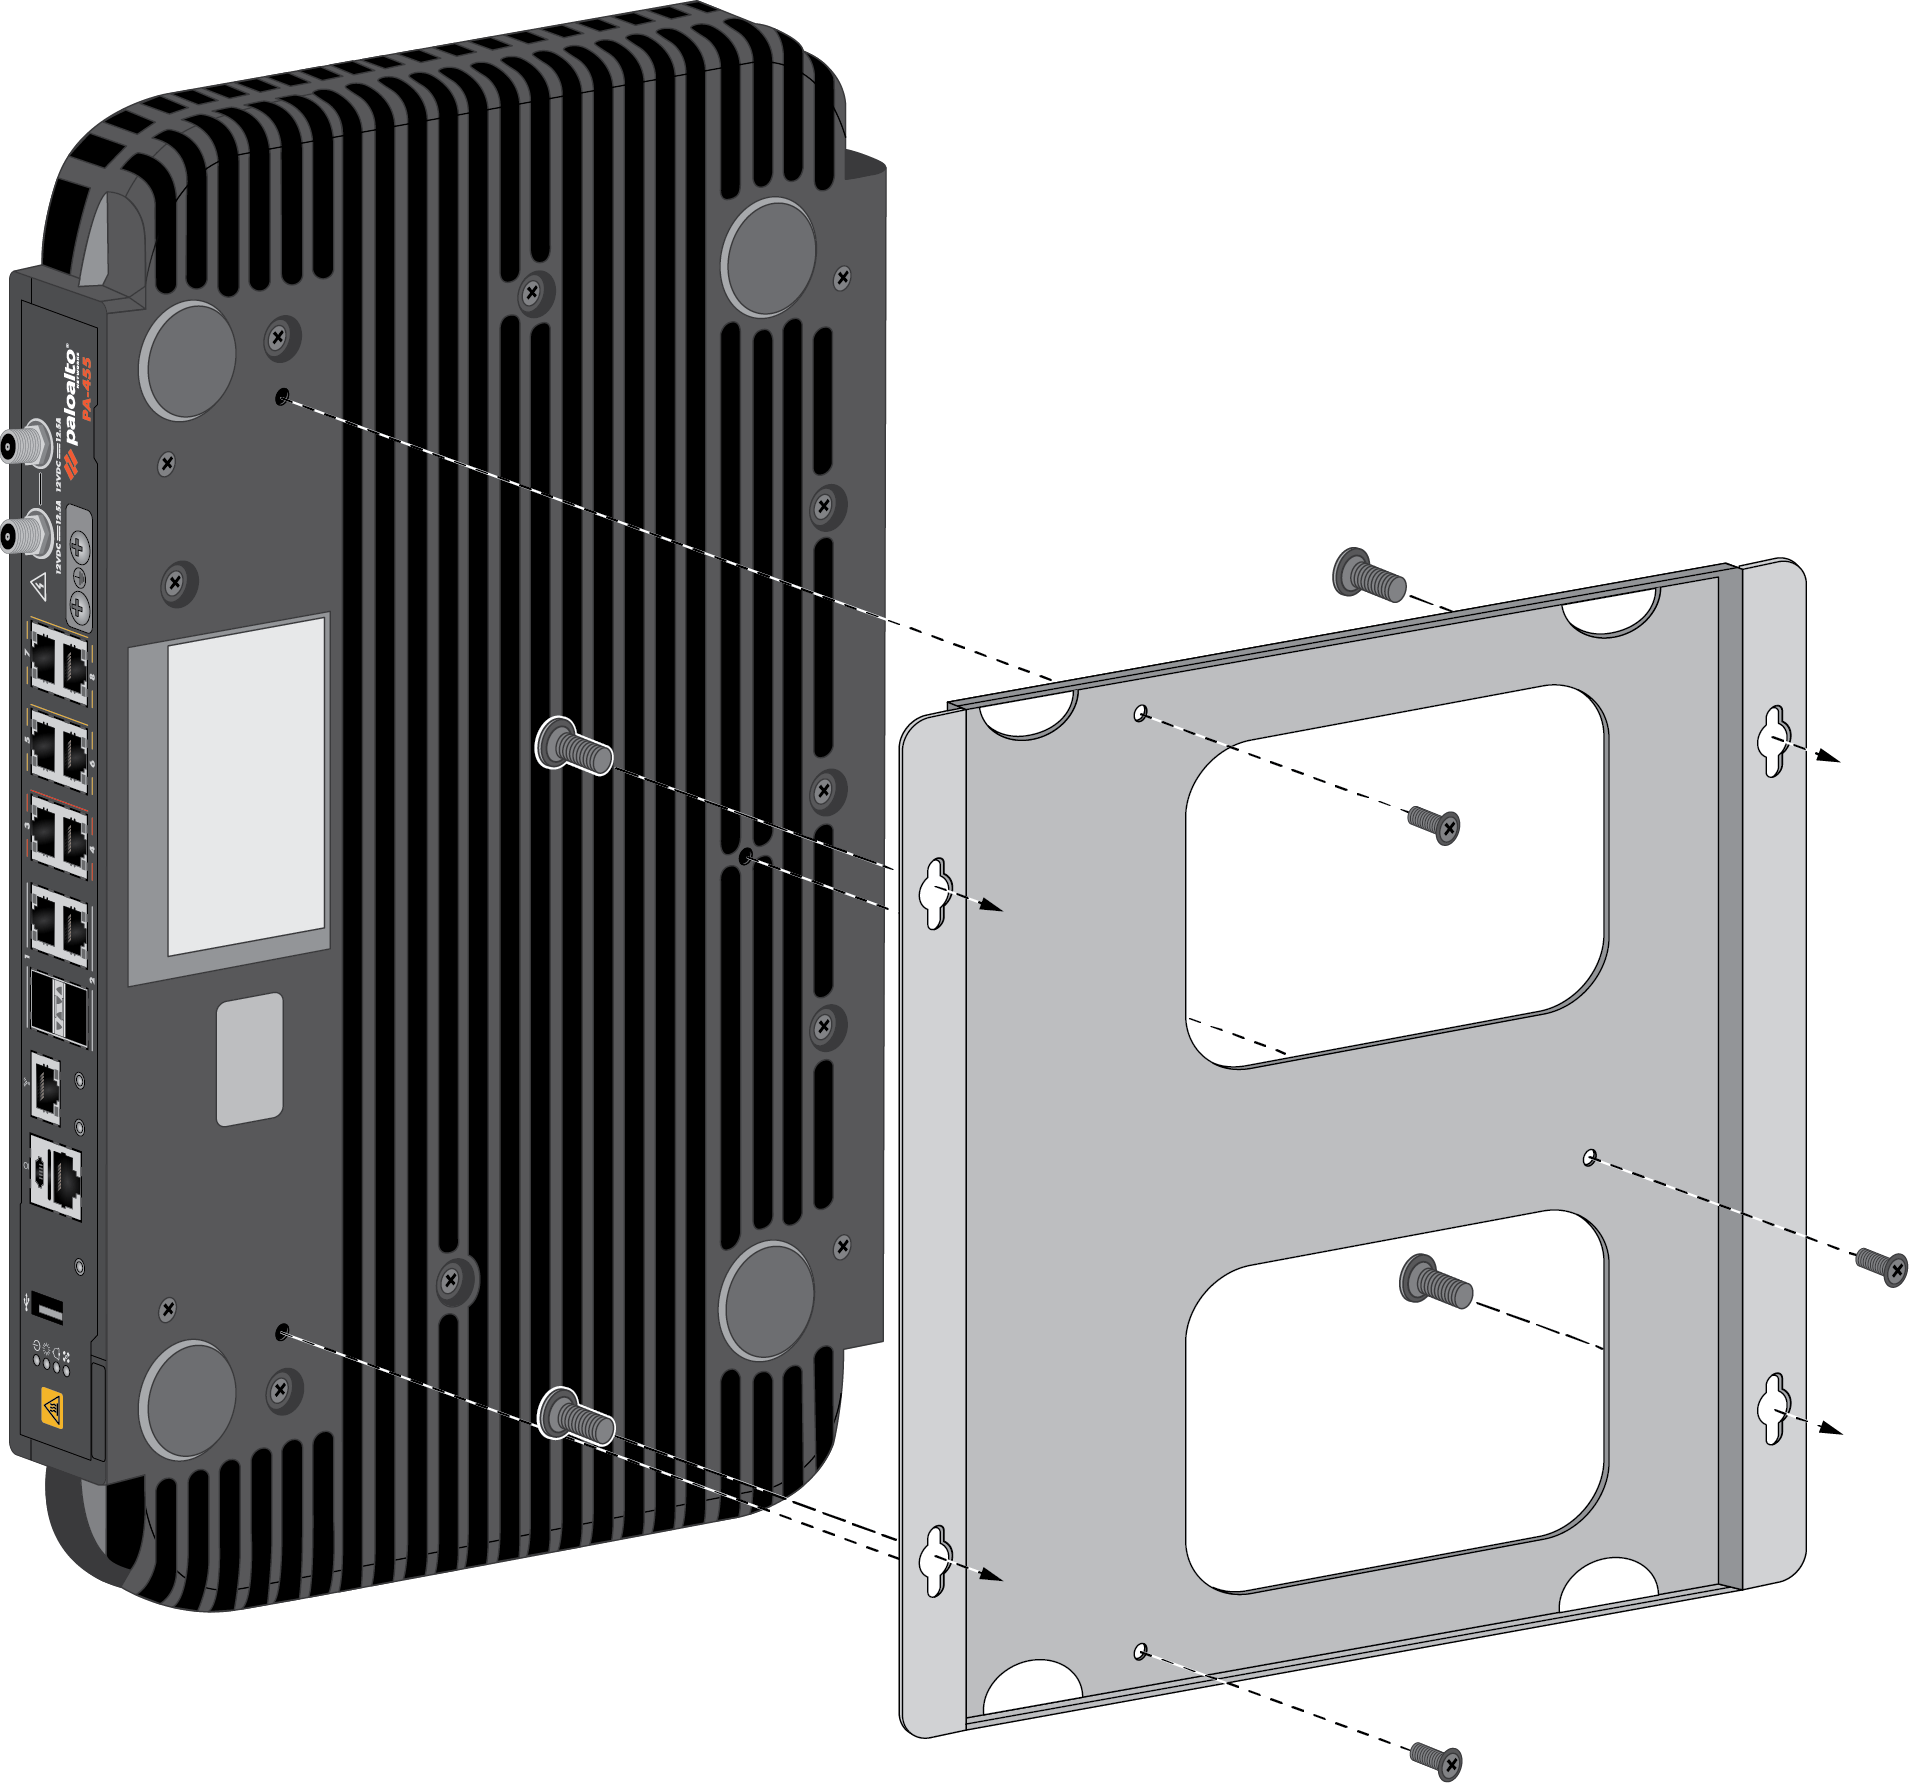
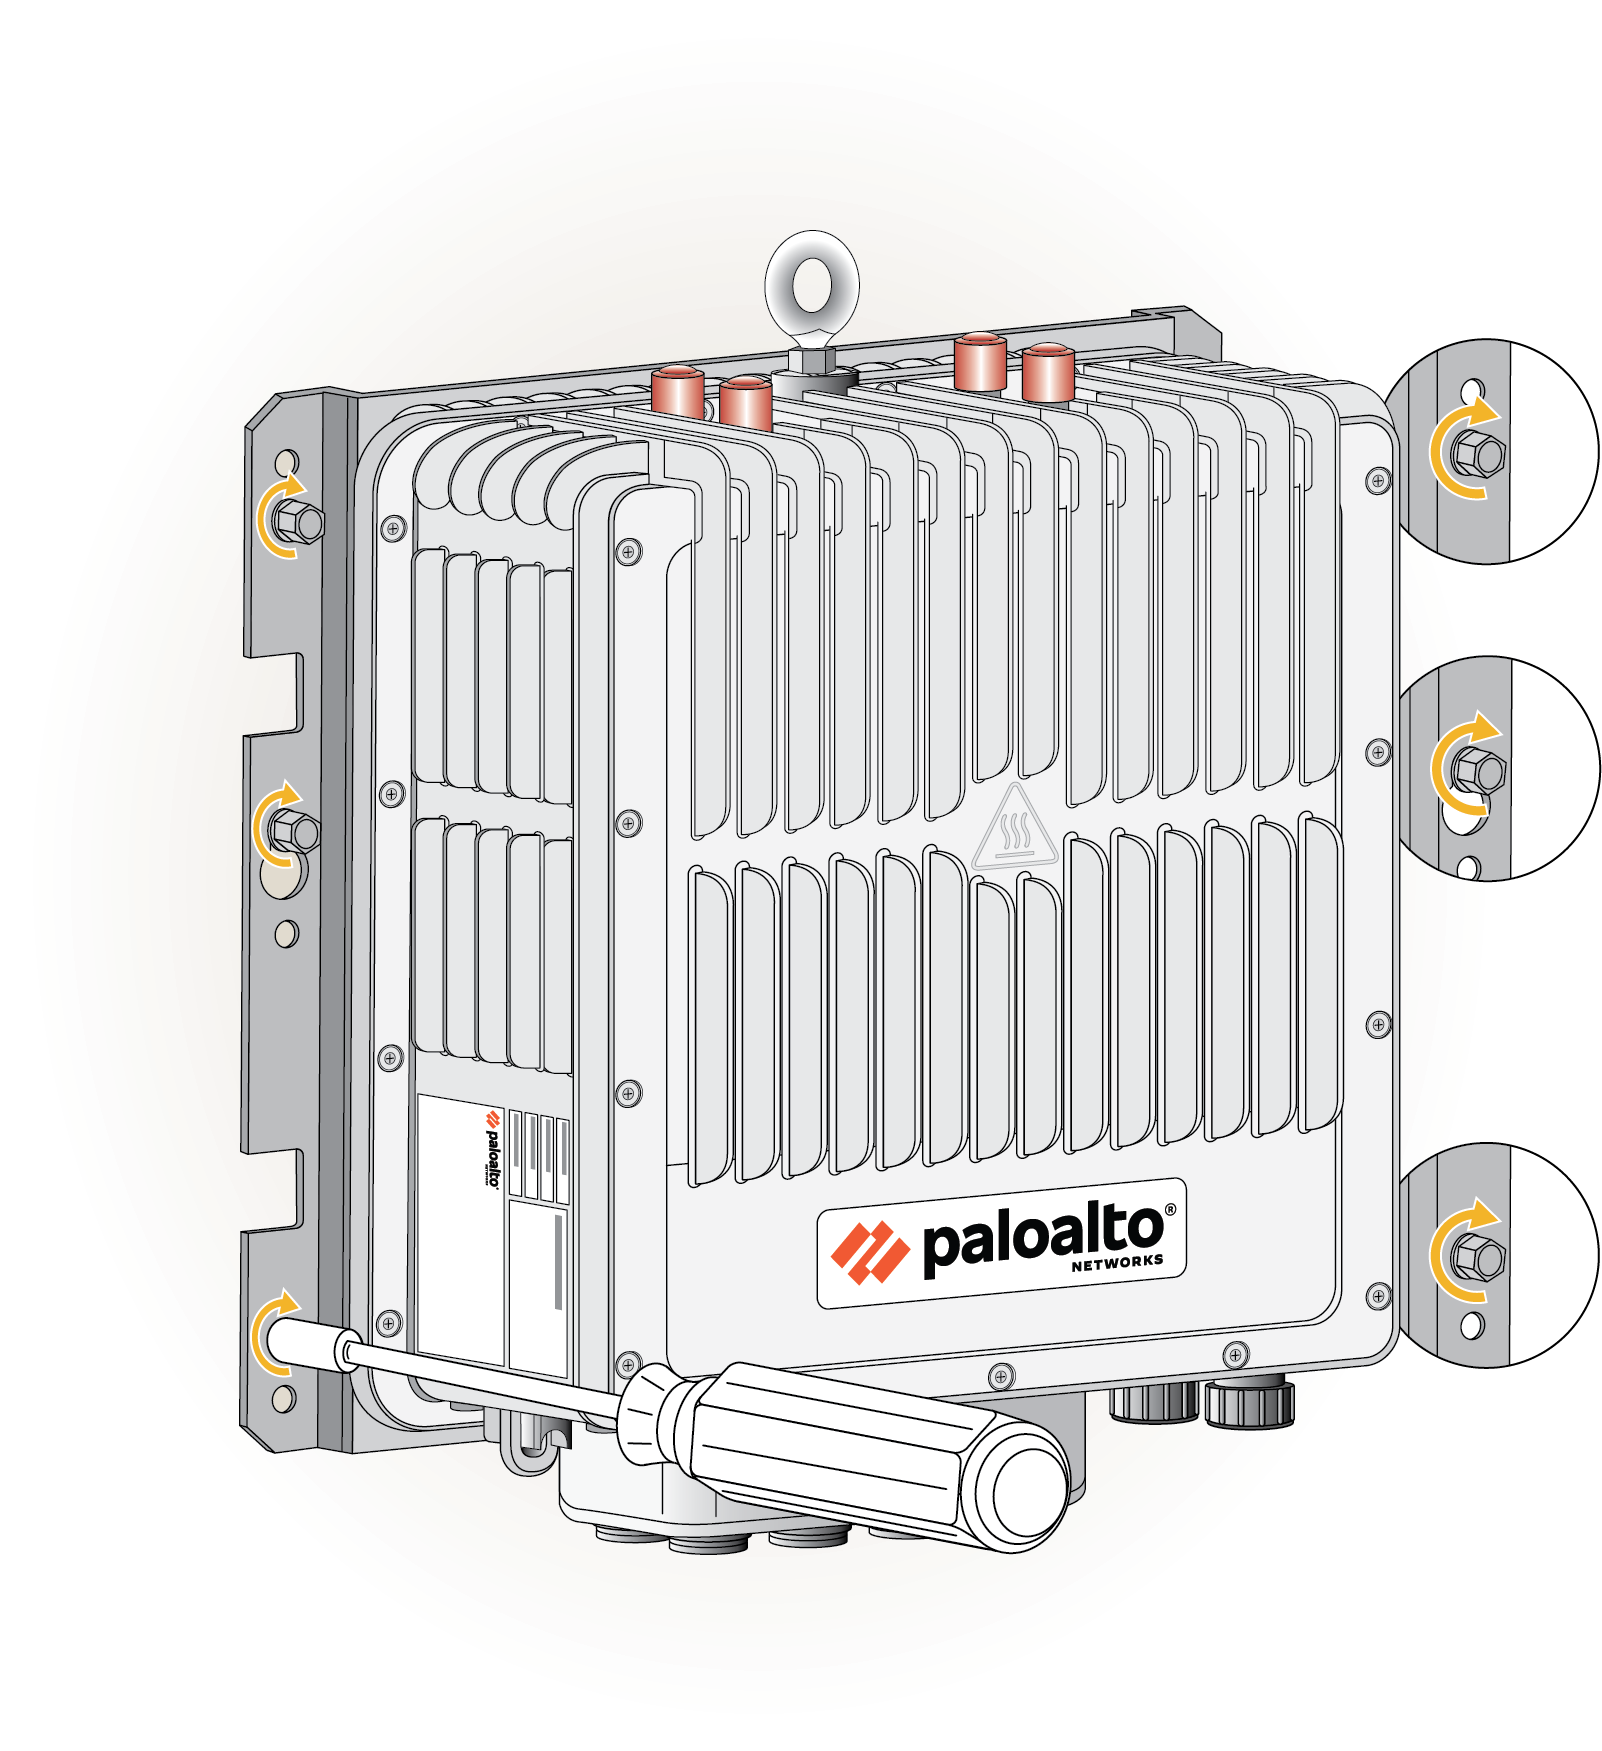
Attach the firewall to the wall mount.PA-450R and PA-450R-5G— Attach the firewall to the wall mount using three #6-32 screws and a #2 Phillips-head screwdriver.![]() PA-455R-5G—Attach the wall mount to the firewall using five #3/8"-16 hex bolts. Torque the bolts to 27nm (20±1 ft-lbs).
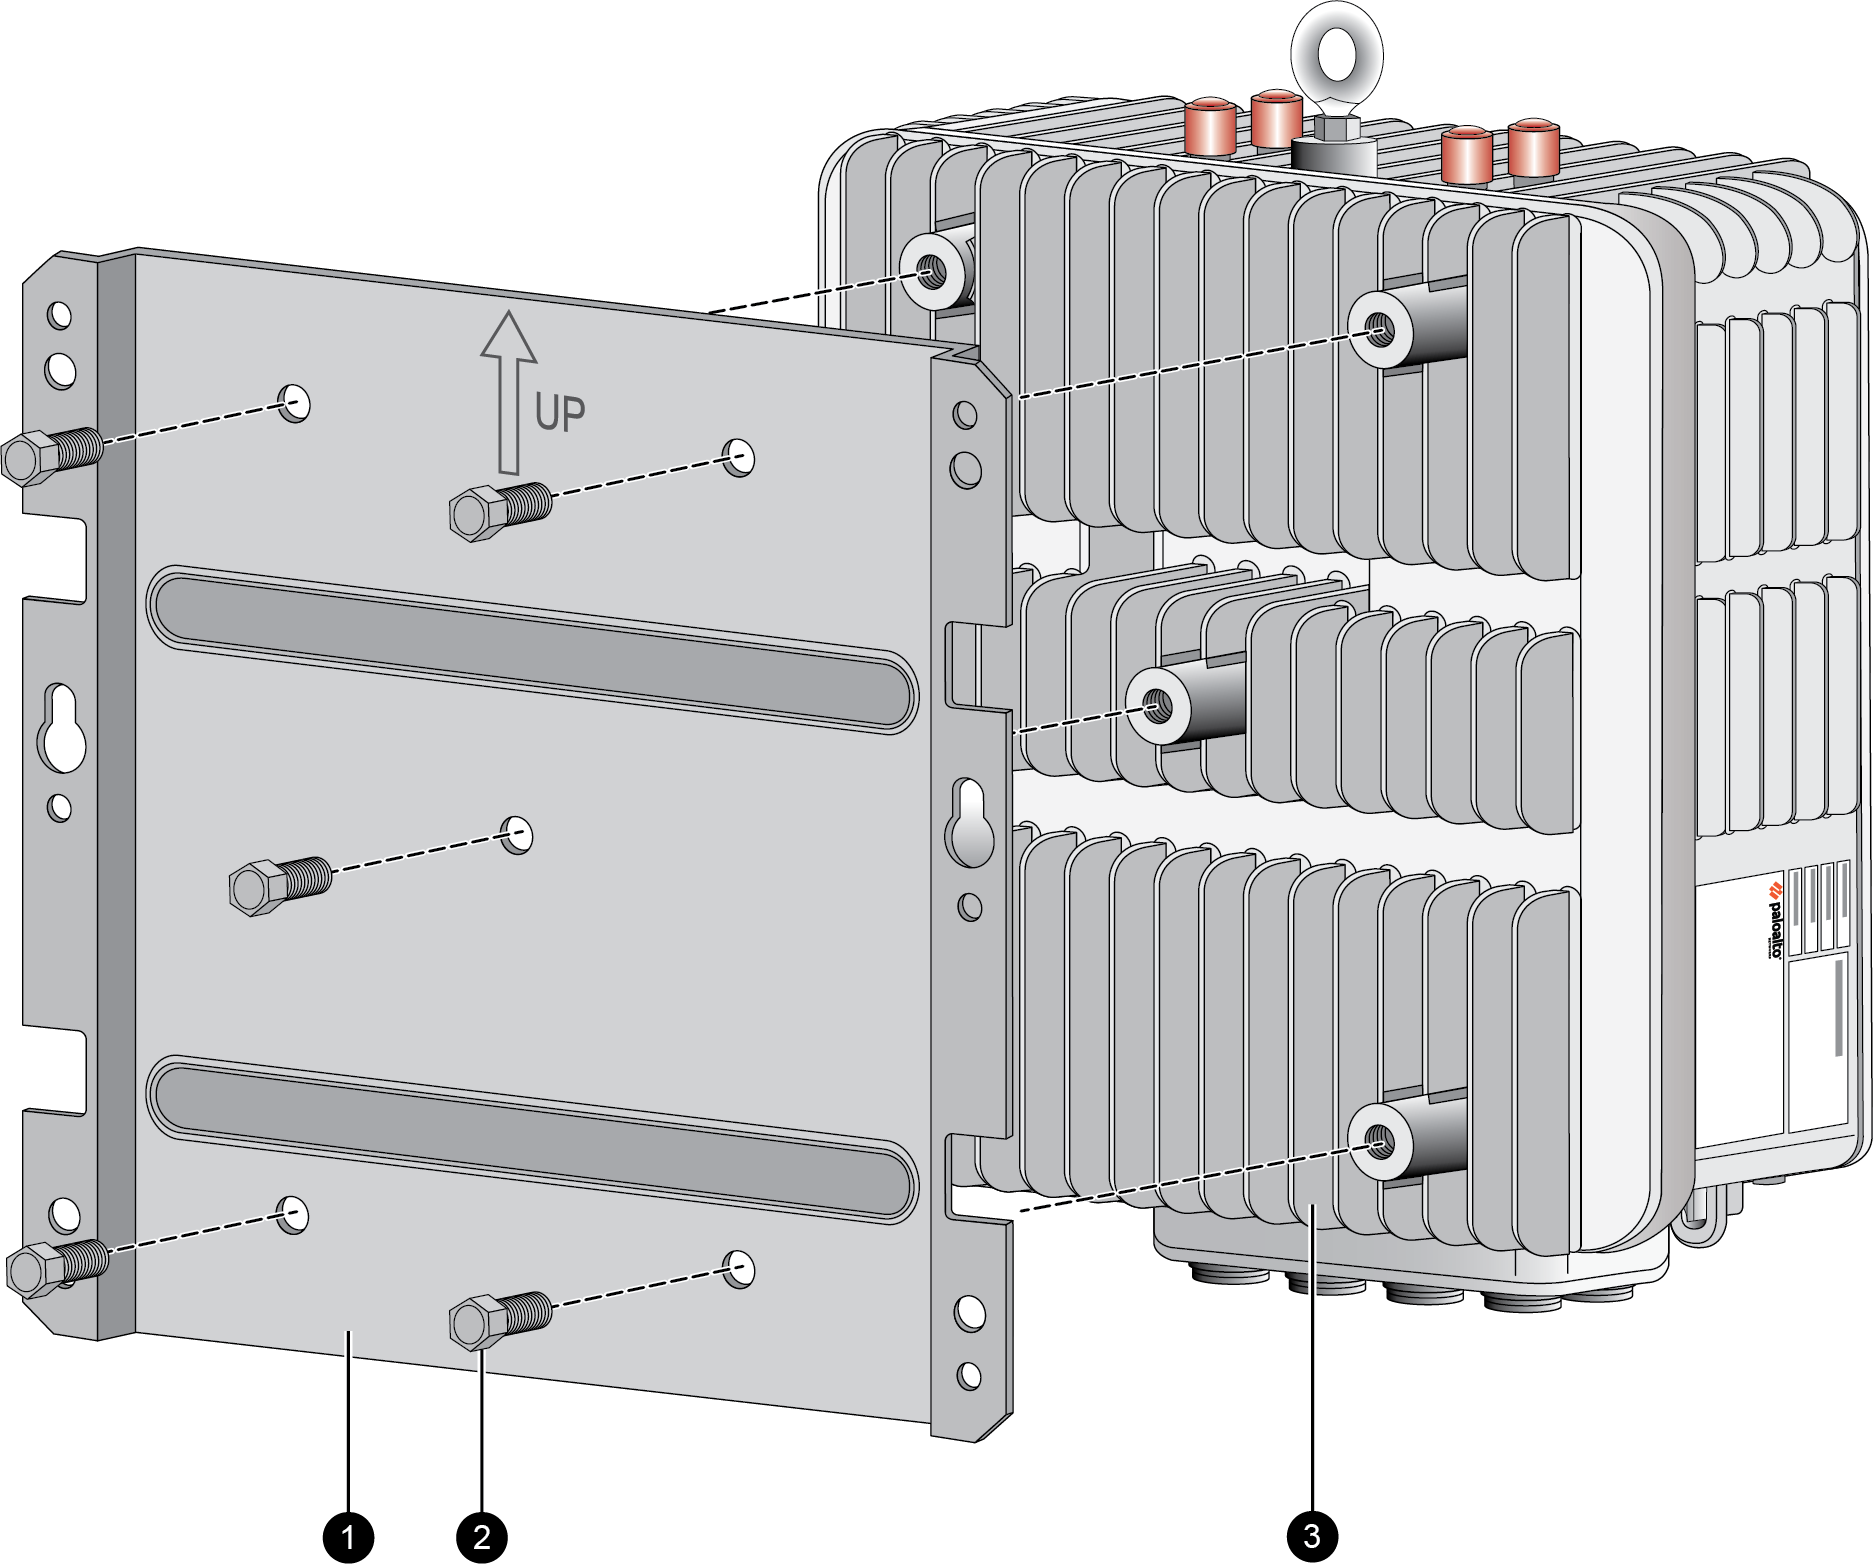
PA-455R-5G—Attach the wall mount to the firewall using five #3/8"-16 hex bolts. Torque the bolts to 27nm (20±1 ft-lbs).![]() Optionally, you can proceed to install the PA-455R-5G on a pole after the wall mount bracket has been secured to the firewall.Attach the wall mount to the wall.PA-450R and PA-450R-5G— Attach the wall mount to the wall using four screws that are appropriate for your wall. Sheet metal and drywall inserts are included with the wall mount kit.
Optionally, you can proceed to install the PA-455R-5G on a pole after the wall mount bracket has been secured to the firewall.Attach the wall mount to the wall.PA-450R and PA-450R-5G— Attach the wall mount to the wall using four screws that are appropriate for your wall. Sheet metal and drywall inserts are included with the wall mount kit.![]() PA-455R-5G
PA-455R-5G- Use a mechanical hoist to lift the firewall by the included eyebolt.
Slide the bracket's keyhole-shaped holes onto the two pre-installed
bolts in the wall.
![]()
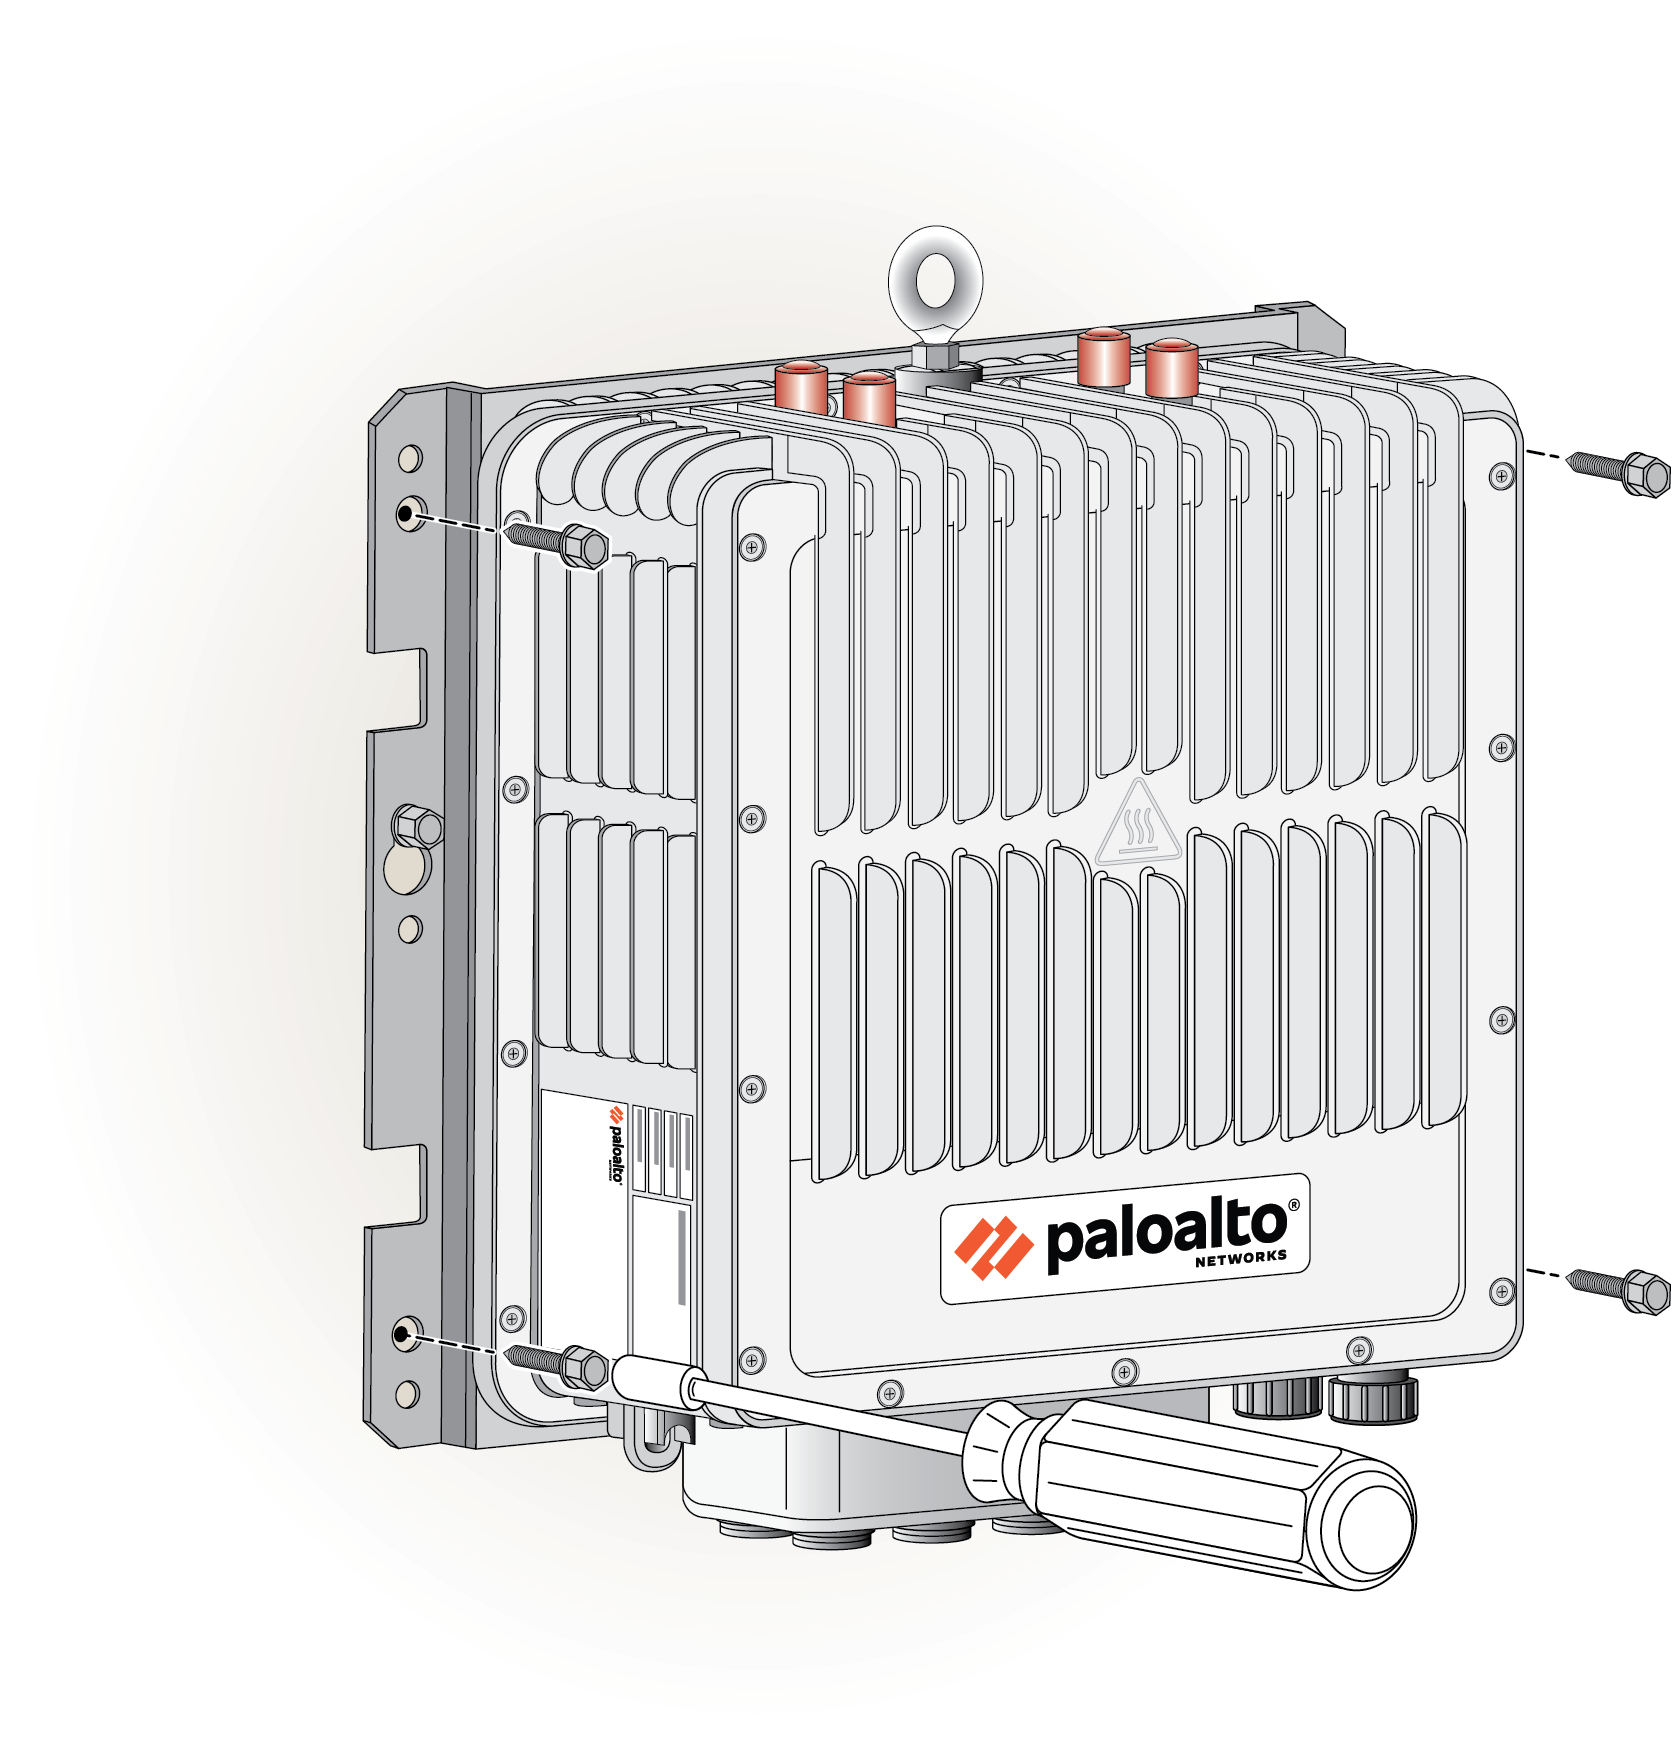
- While supporting the weight of the firewall on the two anchors,
install the four remaining bolts.
![]()
- Tighten all six bolts to 14nm (11±1 ft-lbs).
![]()