Prisma Browser
Manage Prisma Browser Users
Table of Contents
Expand All
|
Collapse All
Prisma Browser Docs
Manage Prisma Browser Users
Review the list of Prisma Browser users and user groups.
| Where Can I Use This? | What Do I Need? |
|---|---|
|
|
The User page can be used for several different needs.
- Review User Groups - Review the User Groups that are enabled to access your Prisma® Access Browser tenant.
- Manage User Groups - Manage the User Groups that are enabled to log in. In addition to the User configuration step in the Onboarding step, you can add or remove user groups from the User Groups page.
- Review Users - Review the status of your users - who is active, when they logged in, who has never logged in, and so on.
From the Users page, you perform the following actions:
- Review User Groups: Examine all user groups and identify those that have access to your tenant.
- Modify User Groups: Add or remove user groups, even after completing initial user configurations during onboarding.
- View Individual Users: Access individual user profiles, checking their status and tracking key details. These details include:
- Active or inactive statusThe status categories are as follows:
- Active - A regular user.
- Inactive - A user who is no longer using the Prisma Browser (They gave been removed or blocked).
- Invited - A user who has access to the Prisma Browser, but has not as yet started using it.
- Last login time
- Login history (including users who have never logged in)
- Connected devices
- Group membership
This page consolidates all essential user and group data in one location, which
streamlines your administrative tasks.
The page is tabbed so that you can choose which view you want to see:
Users or User Groups. The
User Groups tab allows you to create and examine groups
of users. This becomes important when defining rules and policies.
User Group Sync
-
If you did not configure which User Groups can access the Prisma Browser tenant compete the onboarding wizard, configure the authentication profile, and select the directories and User Groups that can access your tenant.
- Prisma Browser manages user access to your tenant by syncing only the selected user groups from selected directories. When a directory is first configured, Prisma Browser initiates a full synchronization, importing the permitted user groups. This initial sync can take a few minutes, depending on the number of users in the directory, and a banner is displayed on the top of the screen until the sync completes. After the initial sync, Prisma Browser checks for changes and modifications every few minutes, adding or removing users as needed.
Manage Synced Users Groups
- From Strata Cloud Manager, select ConfigurationPrisma BrowserDirectoryUsers. Select the User Groups tab.Click User Groups Sync.The following options are displayed in the window:
- Click Add directory. This will add a new row. Use the drop-down list to select a new directory. User name—The user's name. You can then select the user groups from the CIE, and the primary identification (Mail/UPN) for this directory.
- Use the drop-down to change the directory without selecting a new directory, then change the user groups as needed.
- Click the trash bin icon to remove the entire row. The empty row
will remain in the display. If there are no directories available, the Add directory button is disabled.
- Changing the primary identifier between UPN/Mail will trigger a full
synchronization between Prisma Browser and Cloud Identity Engine,
which can take several minutes. During this time, logged-in users
will not be affected.
![]()
Handling Duplicate Users
Prisma Browser supports environments that use multiple (IdPs). When the same user appears in more than one IdP—or when the same email address appears multiple times within a single IdP—Prisma Browser intelligently merges the related records into a single, unified user profile.Prisma Browser uses the user's primary identifier (email or UPN) for matching and normalizes all identifiers to lowercase to ensure consistency.Prisma Browser handles the following scenarios:- Adding a New User:When synchronization introduces a user that matches an existing Prisma Browser profile, the browser merges the accounts and retains all existing data, including bookmarks, browsing history, and saved passwords. This ensures users experience no disruption.
- User Group Handling:Prisma Browser merges group memberships additively. A user becomes a member of all groups associated with their identities across all directories.
- Attribute Conflict Resolution:If user attributes (such as first or last name) differ across directories, Prisma Browser displays and makes them searchable in the UI.
- User Removal:When you remove a directory or user group, Prisma Browser evaluates the user's presence in remaining directories:
- If the user exists in another directory, Prisma Browser retains the profile and updates access accordingly.
- If the user appears only in the removed directory, Prisma Browser de-provisions the profile and marks it as removed. You can reactivate the profile automatically if the user reappears in a future sync.
Enhanced User Deduplication: Seamless User Management Across Directories
Prisma Browser now offers enhanced deduplication capabilities to prevent duplicate user profiles across directories. This ensures smooth synchronization, consistent user experiences, and uninterrupted access to bookmarks, passwords, and other user data.Previously, Prisma Browser could encounter duplicate users from one or multiple identity providers (IdPs), which sometimes blocked syncs or disrupted proofs-of-concept (POCs). Issues included:- Local user creation followed by IDP sync.
- Multipler IdPs containing the same user email / UPN.
- `Case-sensitive email entries creating inconsistent profiles.
Key EnhancementsPrisma Browser now intelligently merges duplicate user profiles across directories into a single, unified profile making use of primary identifiers (email/UPN, normalized to lowercase).How it Works:- New User Merges
- When a new user sync triggers a merge, existing profile data (bookmarks, history, passwords) is fully preserved.
- Users experience uninterrupted access to their data.
- Additive Group Merging
- Group memberships from merged directories are combined additively.
- Users retain access to all relevant groups across directories.
- Attribute Visibility
- Differing user attributes (such as first name, last name) remain searchable and visible within the interface.
- User Removal
- Users removed from specific directories or groups retain their profiles.
- Users removed from ALL directories are de-provisioned, but can be reactivated if synced back in later.
Benefits- Eliminates duplicate profiles and conflicts across IDPs.
- Maintains a seamless, uninterrupted user experience.
- Ensures consistency in bookmarks, passwords, and group memberships
Review the User Group Data
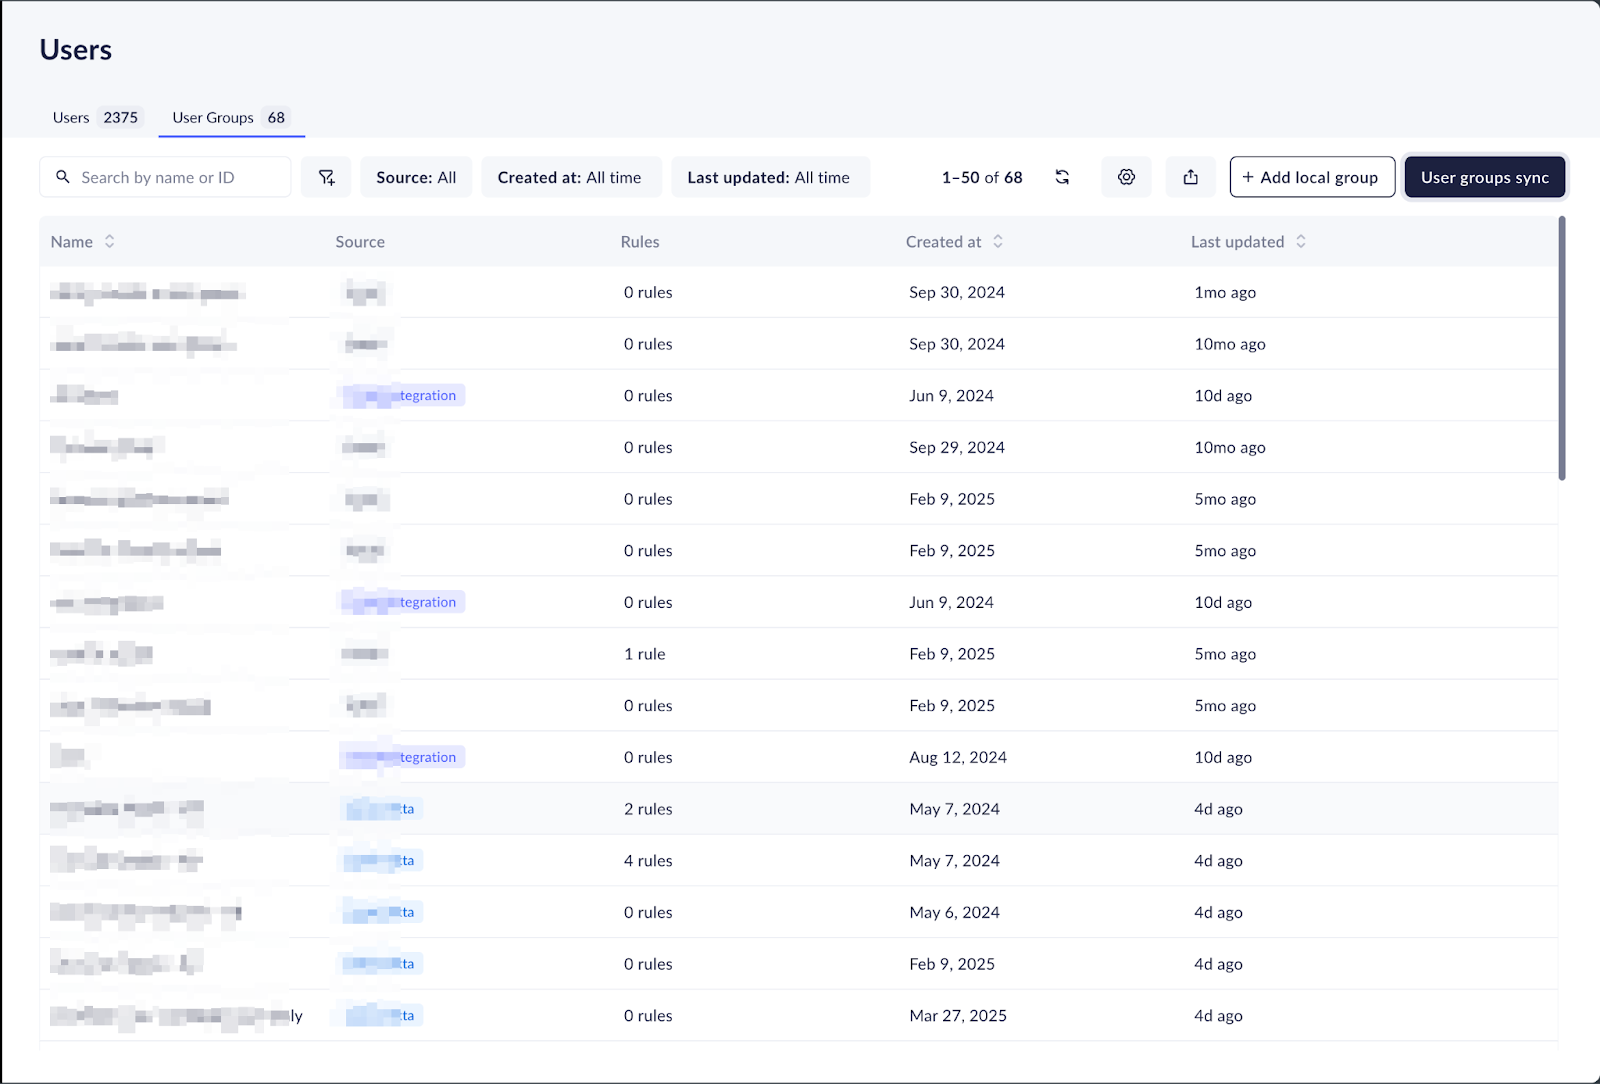
View the details about each user group, including:- Name - The user group name.
- Source—The Directory name of this User Group.
- Rules—The number of rules applied to the group.
- Created at—The group creation date. Hover over the field to see the full timestamp.
- Last updated—The time elapsed since the last group update. Hover over the field to see the full timestamp.
Investigate groups using search and filters:- Search by ID or Name.
- Filter the users based on Source, Created at, or Last Updated.
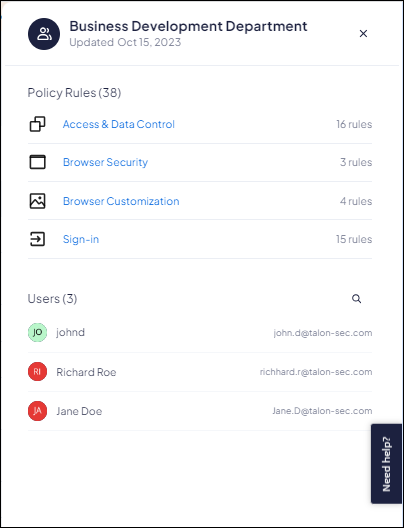
View details about a specific user group.- Click on a specific group on the list to see details about the group.
- Review the group-specific details, including:
- Policy Rules—Lists the policy rules that control the Prisma Browser's group's. Click on a policy type to view the rules governing the group's browser experience in that category.
- Users—Lists the members of the group. Click on a specific member to view details about the user.
Export user details for offline investigation.- Click the Export icon.
- In the Export window, select one of the following options:
- Export all - Export the data group.
- Export filtered data - Export User Group details based on the current filters.
![]()
Add Local User Groups
The Prisma Browser Local User Group function enables you to create groups that do not exist in your Identity Provider (IdP) or groups that span existing directory boundaries. You primarily use these for specific policy requirements. For instance, when you roll out a new policy for a subset of users, you create a dedicated local user group and add the specific users. Conversely, to exclude certain users from a rule, you create a user group and manage its membership directly from the UI or APIAPI.- Click Add Local Group.
- In the Add local group window, enter the following
information:
- Enter a name for the local group.
- Click the Add users drop down and select all users who need to become members of this group.
- Click Create Group.
Manage User Groups
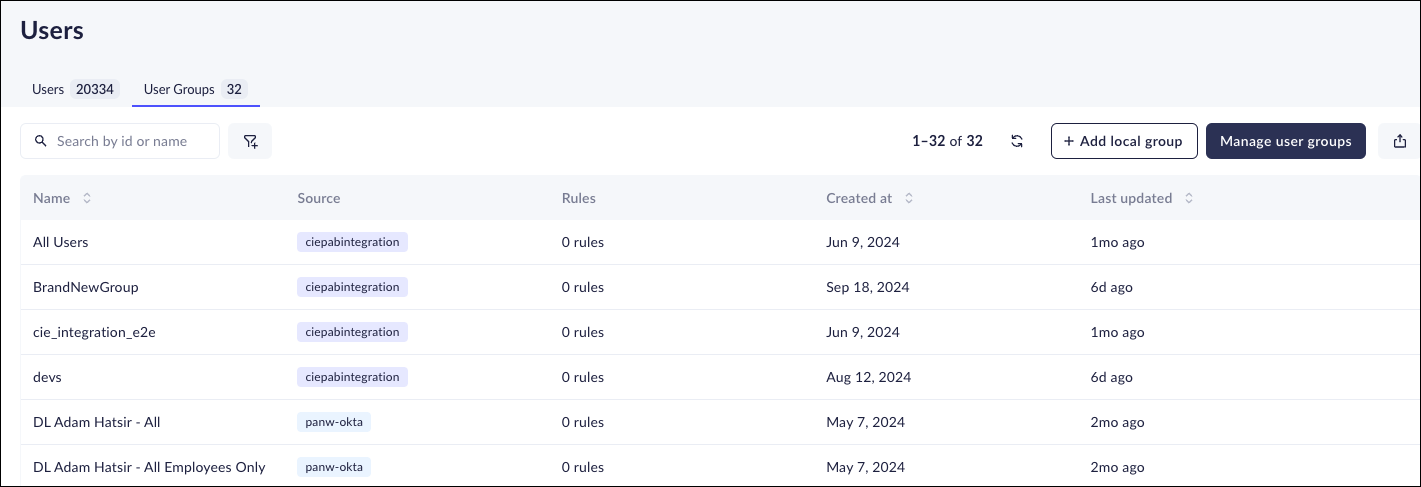
The Prisma Browser user group function allows you to create groups for different users. For example, you can set up a group for IT administrators, managed users, unmanaged users, or users with printing permissions. - From Strata Cloud Manager, select ConfigurationPrisma BrowserDirectoryUsers and select the User Groups tab.You can see the total number of user groups displayed at the top of the page.
![]() Review the user group data.View details about each user group, including:
Review the user group data.View details about each user group, including:- Name—The user group name.
- Source—The source directory of the user - the name of the directory.
- Rules—The number of rules applied to the group.
- Created at—The group creation date. Hover over the field to see the full timestamp.
- Last updated—The time elapsed since the last group update. Hover over the field to see the full timestamp.
Investigate groups using search and filters.- Search by id or name.
- Filter the users based on Source, Created at, or Last updated.
View details about a specific user group.- Click on a specific group on the list to see details about the group.Review the group-specific details, including:
- Policy Rules—Lists the policy rules that control the group's use of the Prisma Browser. Click on a policy type to view the rules governing the group's browser experience in that category.
- Users—Lists the members of the group. Click on a specific member to view details about the user.
![]() Export user details for offline investigation.
Export user details for offline investigation.- Click the Export icon.In the Export window, select one of the following options:
- Export all—Export all group data.
- Export filtered data—Export user group details based on the current filters.


