Connect AC Power to a PA-400R Series Firewall
Table of Contents
Connect AC Power to a PA-400R Series Firewall
Learn how to power the PA-455R-5G firewall with AC power.
The following procedure describes how to connect AC power to a PA-455R-5G.
Before continuing, ensure that you have a small flat blade screwdriver, a 22mm open
end wrench, and two sets of jacketed cables with each set including a 16 AWG 2
conductor and one ground cable. The cables should be long enough to reach from the
firewall to your power source.
To avoid injury to yourself or damage to your Palo Alto Networks® hardware or the
data that resides on the hardware, read the Safety Warnings.
Power off the AC power sources that you will connect to the power supplies before
you continue.
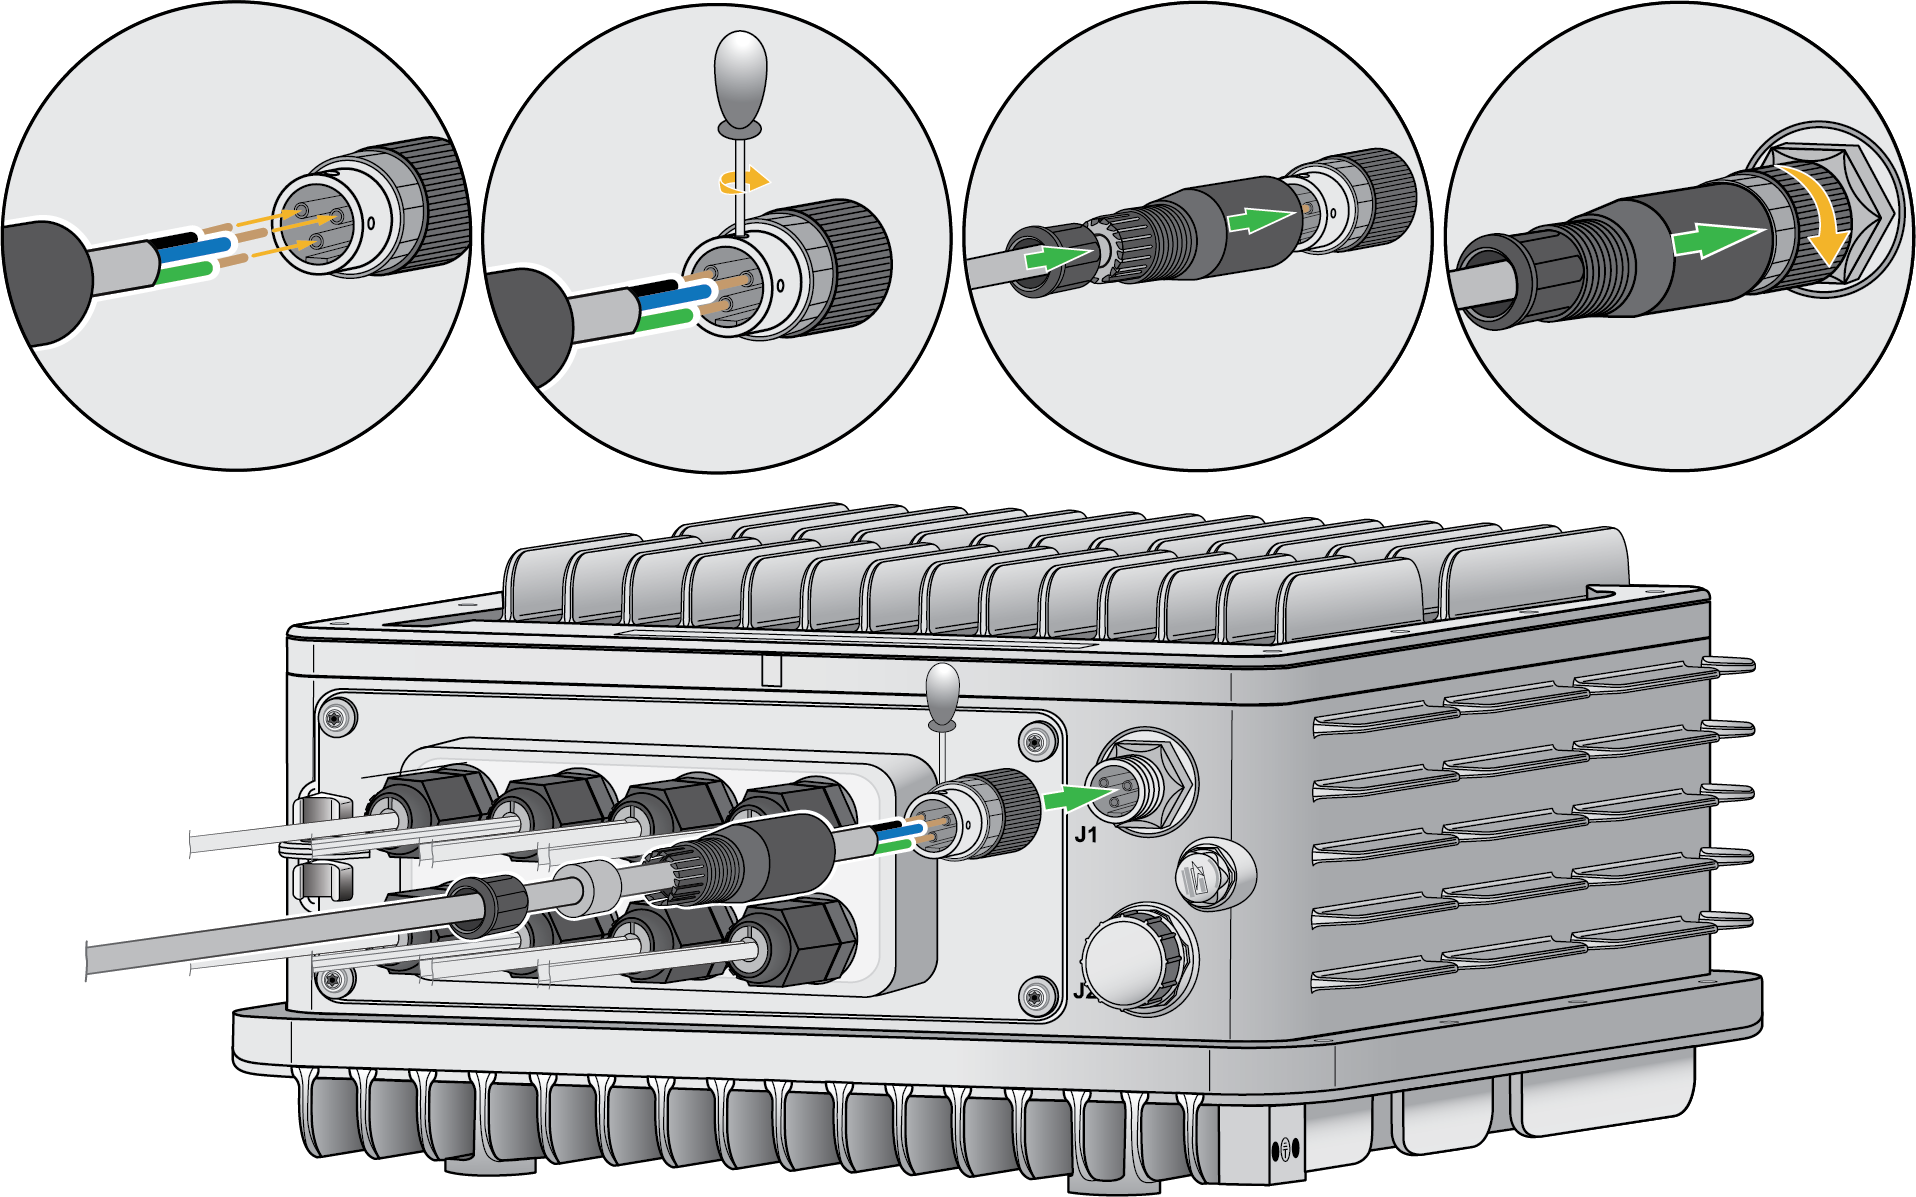
- Remove the power cable jacket and strip the three wires (two conductors and one ground cable).Assemble the connector using the provided instructions.
![]()
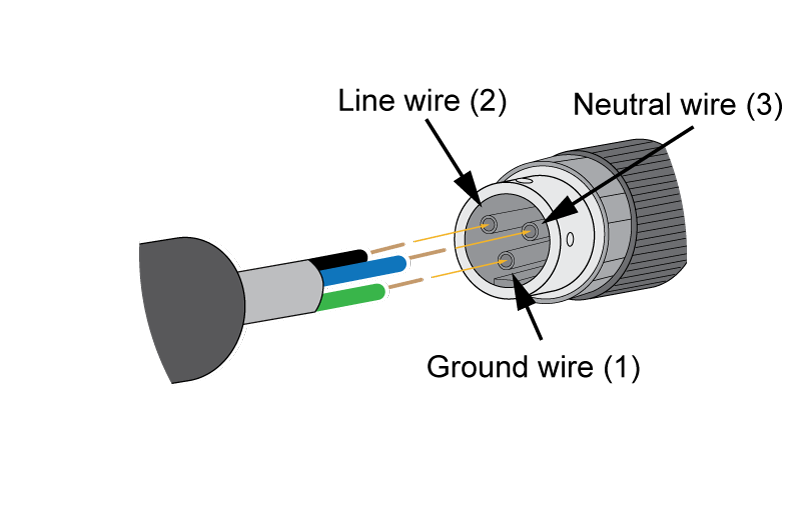
- Slide the clamping nut, cable sealing, and housing over the power cable.Insert the three stripped wires into the connector, making sure that holes 1, 2, and 3 in the connector correspond to the ground wire, line wire, and neutral wire respectively. Secure them in place using a screwdriver.
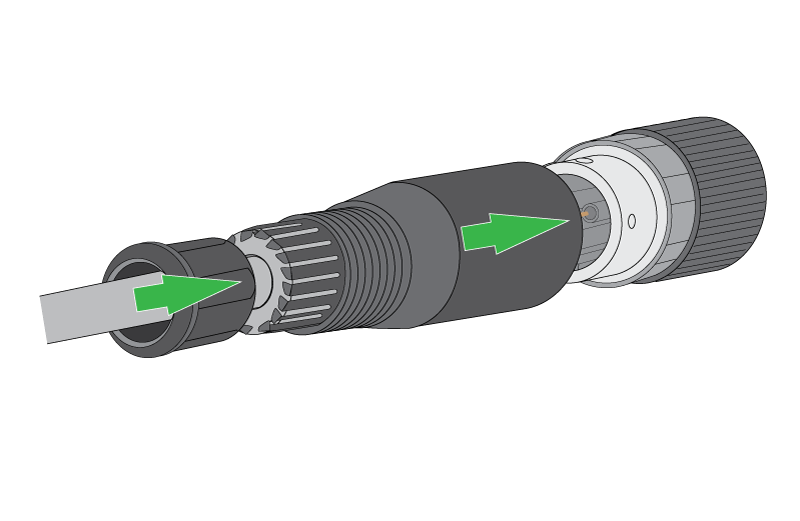
![]() Secure the housing to the connector. Slide the clamping seal into the bottom part of the housing, then slide the clamping nut over the clamping seal. Tighten the clamping nut to the housing.
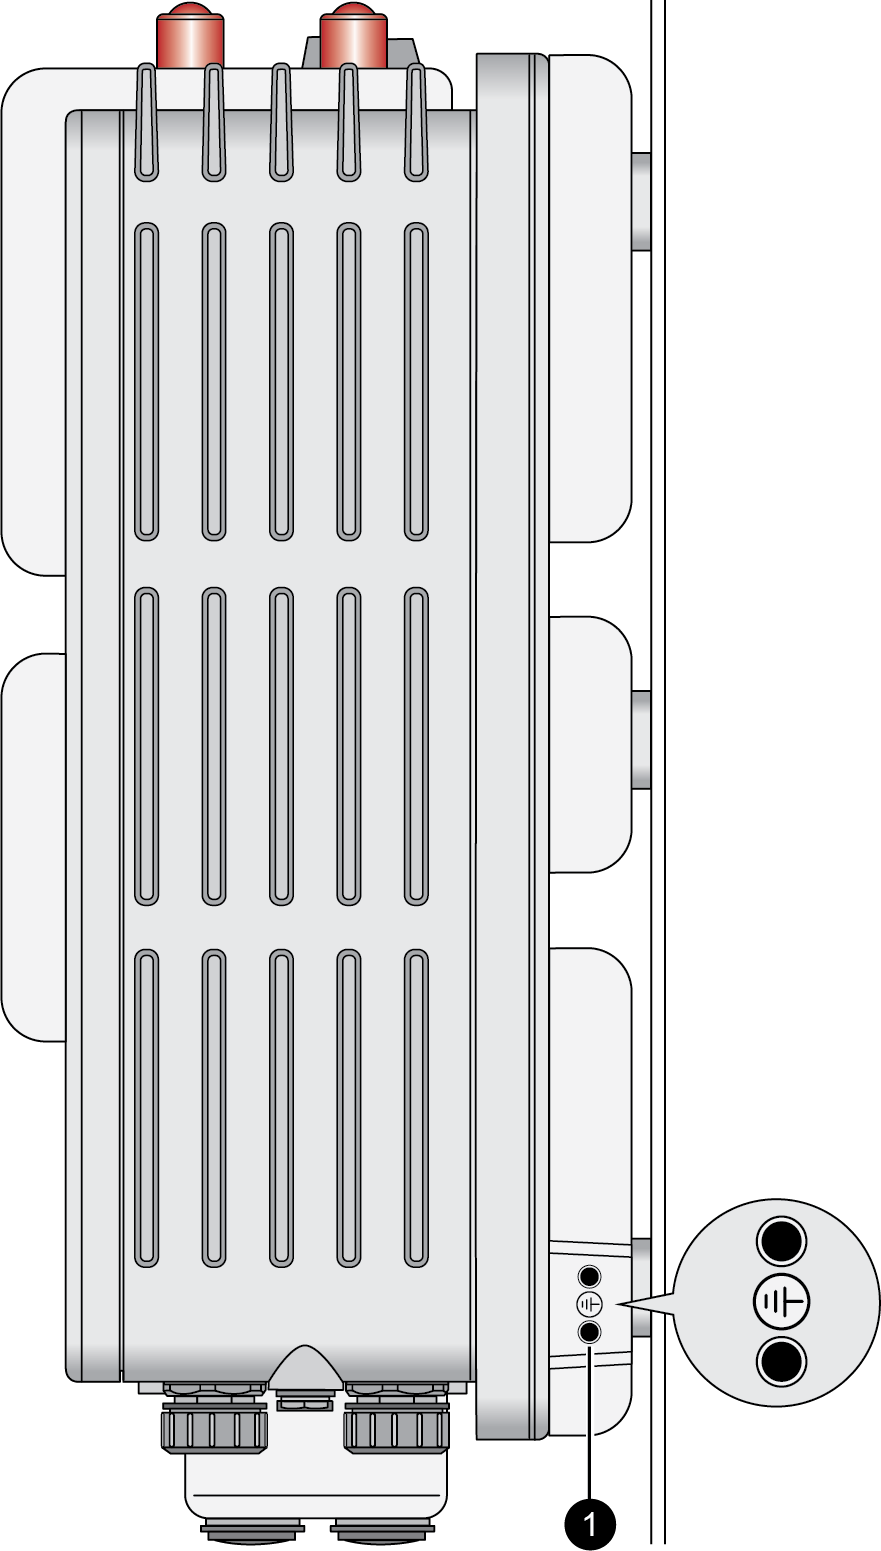
Secure the housing to the connector. Slide the clamping seal into the bottom part of the housing, then slide the clamping nut over the clamping seal. Tighten the clamping nut to the housing.![]() Connect one end of a 8 AWG ground cable (not included) to the provided dual-hole ground lug. Connect the other end of the cable to earth ground. Remove the two ground screws from the ground point on the side of the firewall. Hold the ground lug (that you previously attached to the ground cable) over the screw holes, and then attach the screws to secure the cable to the firewall.
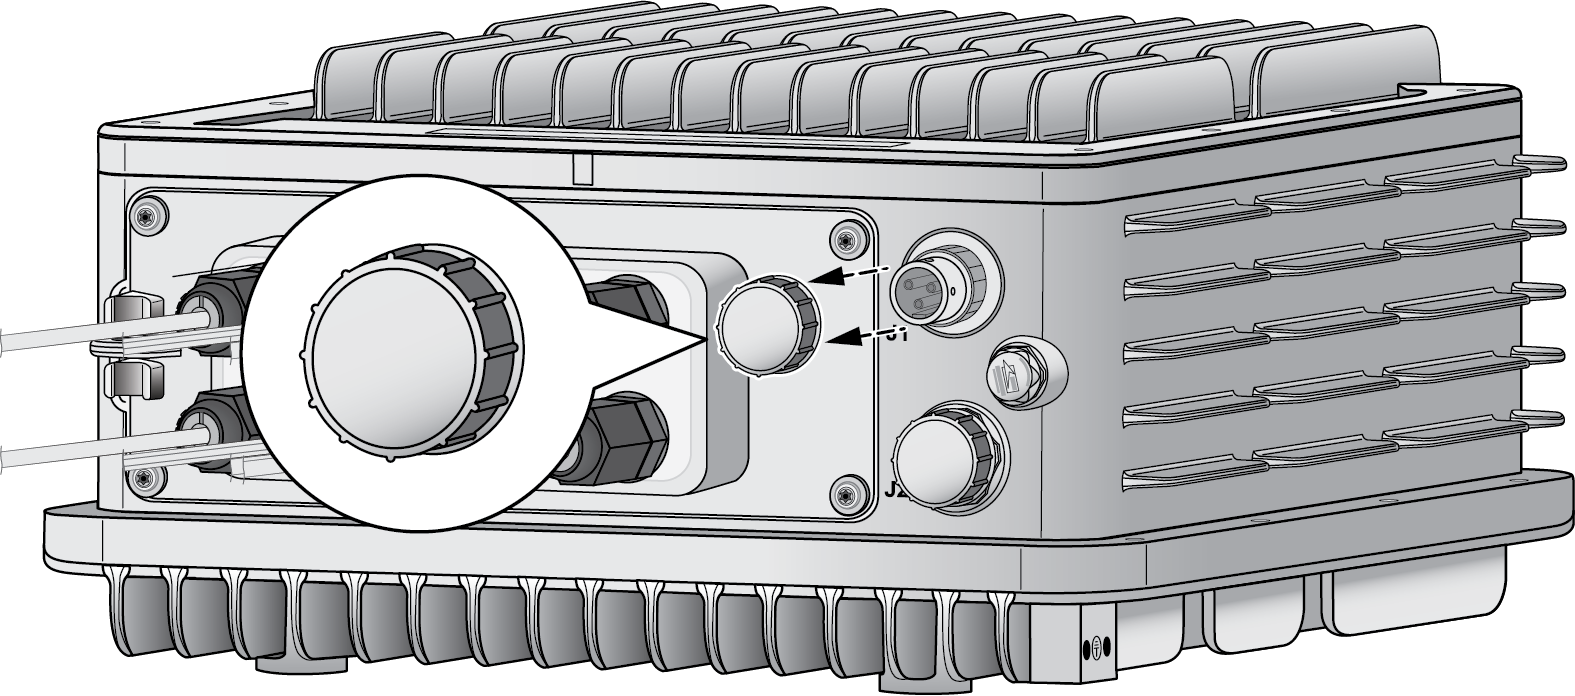
Connect one end of a 8 AWG ground cable (not included) to the provided dual-hole ground lug. Connect the other end of the cable to earth ground. Remove the two ground screws from the ground point on the side of the firewall. Hold the ground lug (that you previously attached to the ground cable) over the screw holes, and then attach the screws to secure the cable to the firewall.![]() Connect the AC power cord to the power input marked J1 on the bottom panel of the firewall. Ensure that the holes in the connector correspond to the prongs in the power input.
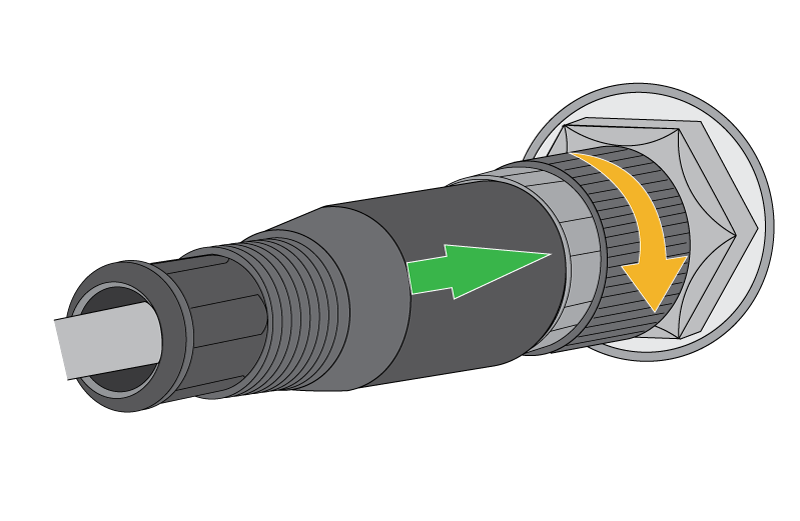
Connect the AC power cord to the power input marked J1 on the bottom panel of the firewall. Ensure that the holes in the connector correspond to the prongs in the power input.![]() Turn the connector clockwise by hand until the cable is securely fastened to the power input.
Turn the connector clockwise by hand until the cable is securely fastened to the power input.![]() Connect the other end of the power cord to an AC power source.Repeat Steps 1 through 6 to connect a second power cord to the J2 power input.Installing the second power cord is required so that the firewall can properly load share.Power on your AC power source. The power LED on the bottom panel of the firewall (under the cover) turns green.
Connect the other end of the power cord to an AC power source.Repeat Steps 1 through 6 to connect a second power cord to the J2 power input.Installing the second power cord is required so that the firewall can properly load share.Power on your AC power source. The power LED on the bottom panel of the firewall (under the cover) turns green.