Install the PA-400R Series Firewall on a Pole
Table of Contents
Install the PA-400R Series Firewall on a Pole
Learn how to install a PA-400R Series firewall on a pole.
The PA-455R-5G firewall can be mounted on a pole using the equipment provided in
PAN-PA-455R-5G-WALL-MOUNT and PAN-PA-SERIES-POLE-MOUNT.
Additional equipment that you need is a hoist, T-45 Torx bit, ratchet, 1.43cm (9/16”)
socket, and a torque driver or wrench capable of reaching 27nm (20 ft-lbs).
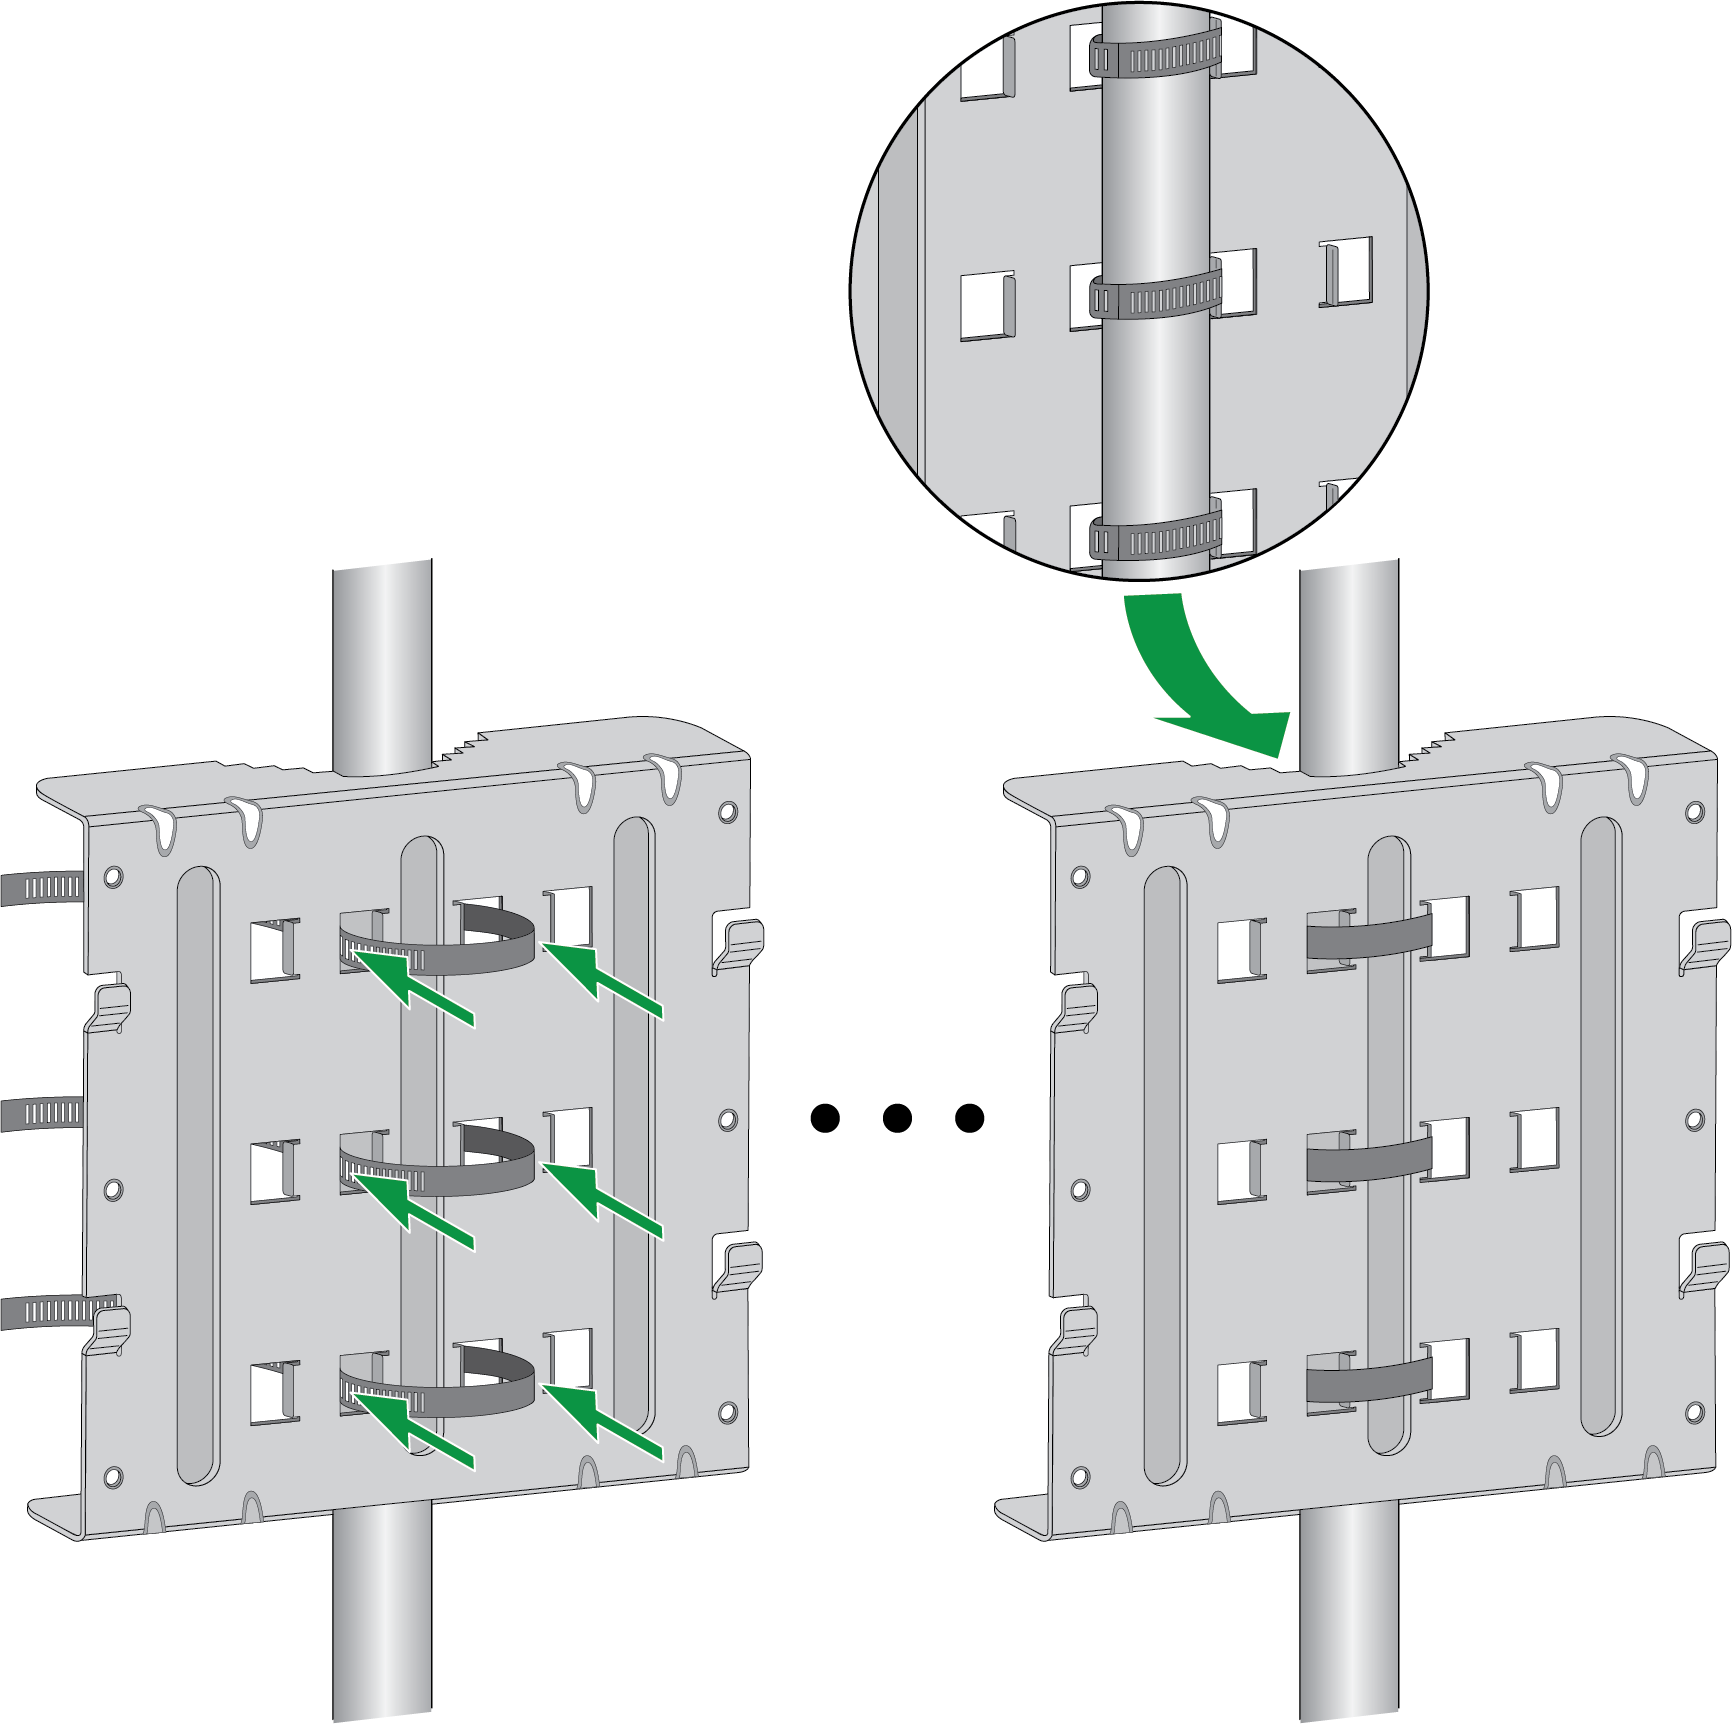
- Thread three of the provided straps through the slots on one side of the pole mount bracket. The slots that you choose depends on the width of the pole you are installing the firewall onto.Place the pole mount bracket at the location on the pole where you intend to install the firewall. Ensure that the curved cuts on the bracket are pressed against the pole.Wrap the three straps around the pole and then thread them through the slots on the opposite side of the pole mount bracket. The strap tightening hardware should be accessible on the side of the pole away from the bracket. Tighten the straps securely to ensure that the pole mount bracket does not shift or slide.The straps should be tightened enough so that the firewall does not slip but not so tight that the pole mount bracket bends.
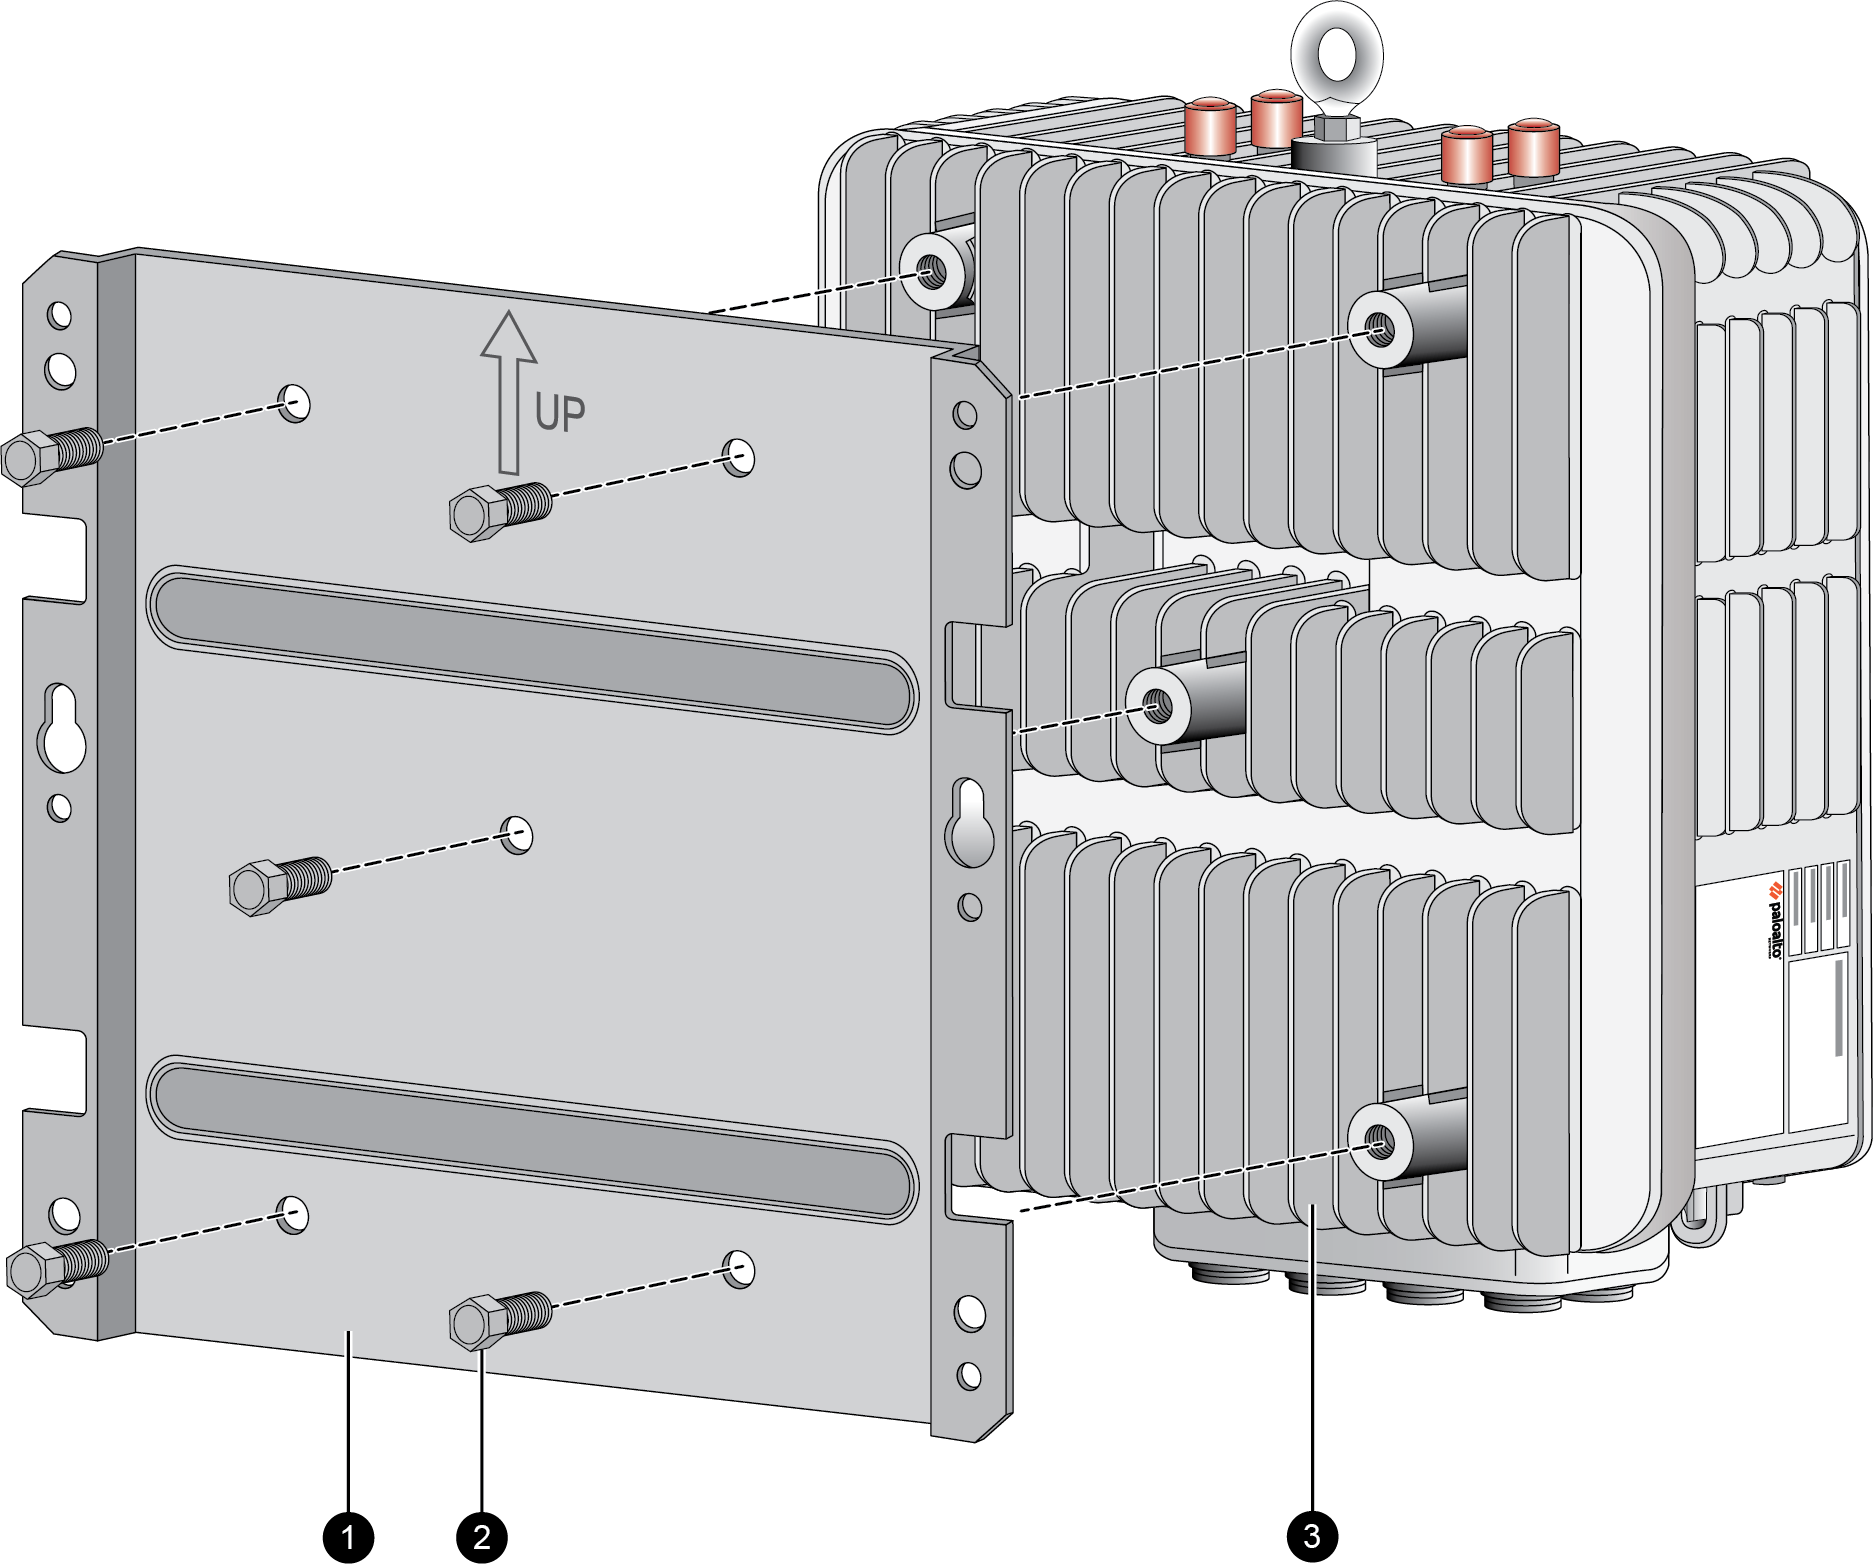
![]() Attach the firewall to the wall mount using five 3/8"-16 bolts. Torque the bolts to 27nm (20±1 ft-lbs).
Attach the firewall to the wall mount using five 3/8"-16 bolts. Torque the bolts to 27nm (20±1 ft-lbs).![]() Use a mechanical hoist to lift the firewall by the included eyebolt. Align the four lips of the wall mount bracket with the four hooks in the pole mount bracket. Hang the firewall by the hooks in the pole mount bracket.
Use a mechanical hoist to lift the firewall by the included eyebolt. Align the four lips of the wall mount bracket with the four hooks in the pole mount bracket. Hang the firewall by the hooks in the pole mount bracket.![]() Install six 5/16" Torx head cap screws after aligning the holes of the two brackets. Torque all six screws to 14nm (11±1 ft-lbs).Before installing the screws, it is recommended that you apply an anti-seize lubricant to the screw threads. This will help prevent thread galling from the pressure of the pole mount installation.
Install six 5/16" Torx head cap screws after aligning the holes of the two brackets. Torque all six screws to 14nm (11±1 ft-lbs).Before installing the screws, it is recommended that you apply an anti-seize lubricant to the screw threads. This will help prevent thread galling from the pressure of the pole mount installation.![]()