Install a PA-5400 Series Firewall Data Processor Card (DPC)
Table of Contents
Install a PA-5400 Series Firewall Data Processor Card (DPC)
Install one or more Data Processor Cards (DPCs) to increase
the processing power of the PA-5400 Series firewall.
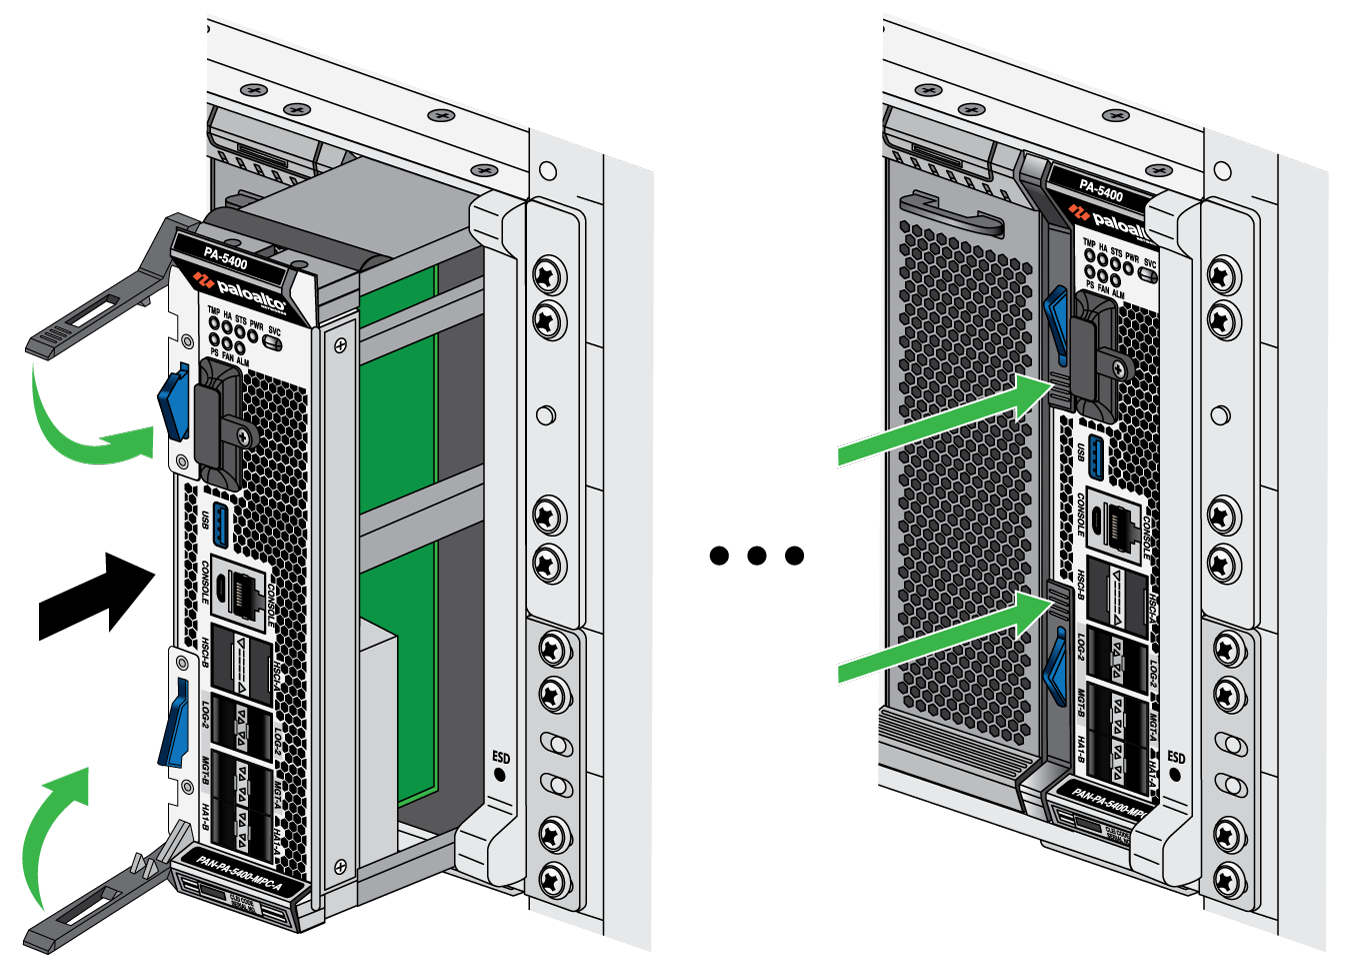
- Attach the provided ESD strap to your wrist and plug the other end in to the ESD port location on the front of the appliance. See PA-5450 Front Panel for the location of the ESD port.Remove the NC from the antistatic bag. Push the top and bottom ejector tabs towards each other to allow the ejector levers to rotate into an open position.The image below shows a Management Processor Card (MPC); however, the procedure to install the DPC is the same.
![]() Rotate the card and align it with the front of the appliance so that the Palo Alto Networks logo is readable at the top of the card. Gently push the DPC into slot 3 until the card reaches the end of the slot.The PA-5450 firewall makes use of paired Logical Card Slots in order to direct processing power from a DPC to a corresponding Networking Card (NC). When installing a DPC, you must install it in the correct slot to pair with the NC.Push on both ejector handles until they lock the card into place.(Optional) Repeat Steps 3 through 5 if you wish to install additional DPCs. You may install a DPC into slots 2, 4, 5, and 6.Slot 2 is the only slot that can either house a DPC or a second NC.(If you have unused front slots) Install a blank panel into each unused card slot to help the appliance maintain system air flow. Ensure that the bottom “teeth” of the blank panel fit into the notches on the bottom of the slot. Rotate the blank panel upwards until it snaps at the top of the slot.
Rotate the card and align it with the front of the appliance so that the Palo Alto Networks logo is readable at the top of the card. Gently push the DPC into slot 3 until the card reaches the end of the slot.The PA-5450 firewall makes use of paired Logical Card Slots in order to direct processing power from a DPC to a corresponding Networking Card (NC). When installing a DPC, you must install it in the correct slot to pair with the NC.Push on both ejector handles until they lock the card into place.(Optional) Repeat Steps 3 through 5 if you wish to install additional DPCs. You may install a DPC into slots 2, 4, 5, and 6.Slot 2 is the only slot that can either house a DPC or a second NC.(If you have unused front slots) Install a blank panel into each unused card slot to help the appliance maintain system air flow. Ensure that the bottom “teeth” of the blank panel fit into the notches on the bottom of the slot. Rotate the blank panel upwards until it snaps at the top of the slot.