Prisma Browser
Manage Prisma Browser Policy Rules
Table of Contents
Expand All
|
Collapse All
Prisma Browser Docs
Manage Prisma Browser Policy Rules
Learn how to manage policy rules for Prisma Access Secure Enterprise Browser (Prisma Browser).
| Where Can I Use This? | What Do I Need? |
|---|---|
|
|
To see the rules from Strata Cloud Manager, select ConfigurationPrisma Browser
PolicyRules.
You can use rules to specify the users, user groups, and device groups that
will be impacted by the various policies you create. These rules govern access to
web applications, security policies, and customization options. By utilizing rules
you can precisely control user access to organizational tools and components.
Each Rule is composed of different parameters and controls so that you can
create finely tuned Rules for each use case. Each Rule type has its specific
contents and requirements.
You have three available Rule types in the Prisma Browser. The
components are displayed on each tab's Policy Rules page.
For each Rule type, the Rules are evaluated according to their priority.
The first Rule that matches all the requirements creates the trigger that will be
enforced. When this happens, the browser stops looking for Rules.
Example with Access & Data Control rules:
Rule 1: Scope - Mike (a member of the General Contractors Users
group)
Web application - linkedin.com
Access to the named web application AllowedData controls - File
Download - Blocked
Rule 2: Scope -Gowri (a member of the General Contractors Users
group)
Web application - linkedin.com
Access to the named web application - AllowedData controls - File
Upload - Allowed When contains - email address.
Rule 3: Scope - Summer Interns Users Group
Web application - linkedin.com
Access to the named web application -Blocked
Rule 4: Scope - General Contractors Users Group
Web application - linkedin.com
Access to the named web application - AllowedData controls - File
Upload- Blocked
Mike will be allowed to access linkedin.com, however, he’ll be blocked when
he tries to download a file since his action matches Rule 1.
When he tries to upload a file, the Policy Engine will see that Rule 1 does
not apply. It then will move on to check the next Rule. Rule 2 does not apply due to
the Data controls. Rule 3 does not apply to Mike, as he is outside the Rule's scope.
Rule 4 will block Mike from uploading on linkedin.com.
As long as there is no matching rule, the Policy Engine will keep checking.
When it reaches the end of the list, the action will proceed according to the
default rule, as there is no other rule to apply.
| Rule | Scope | Access to linkedin.com | Download | Upload | When contains |
| 1 | Mike | Allowed | Blocked | ||
| 2 | Gowri | Allowed | Allowed | email address | |
| 3 | Summer Interns | Blocked | - - - - - - | - - - - - - | |
| 4 | General Contractors | Allowed | Blocked |
Mike wants to download a file from linkedin.com.
- Rule 1 applies, and the download is Blocked. Policy Engine stops looking for rule matches.
Mike wants to upload a file to linkedin.com.
- Rule 1 does not apply (The rule is for downloads). Policy Engine continues.
- Rule 2 does not apply (Mike is out of scope). Policy Engine continues.
- Rule 3 applies, and the upload is Blocked. Policy Engine stops looking for rule matches.
Gowri wants to upload a file to linkedin.com.
- Rule 1 does not apply (Gowri is out of scope). Policy Engine continues.
- Rule 2 applies - but only if the upload includes an email address; if not, Policy Engine continues.
- Rule 3 does not apply (Gowri isn't a Summer Intern). Policy Engine continues.
- Rule 4 applies, and the upload is Blocked.
Control the Rules List
- Edit - Opens the rule for editing.
- Display Presents the items from the Rule Menu. This menu provides the following options:
- Set to Monitoring (Access & Data Control Rules only) - Allows admins to toggle the rule mode if needed. Monitoring allows admins to see the effects of the rule before it is actually enabled.
- Set to disabled / enabled - Toggles the rule on or off.
- Clone - Creates a copy of the rule.
- Delete - Delete the rule.
Perform Bulk Actions & Move Rules
Administrators can perform bulk actions on multiple rules simultaneously to
streamline rule management in the Prisma Browser. By selecting one or more
rules, you can apply a single action to all selected entries. The available bulk
actions include:
- Set to Active
- Set to Monitoring
- Set to Disabled
- Delete selected rules
Move Rules
This feature allows you to quickly place rules at the top, or bottom, or specify
an exact position for the rules. This is much more efficient than dragging and
dropping rules, especially when dealing with large data sets.
Performing Bulk Actions on Rules
Follow these steps to apply bulk actions to multiple rules:
![]()
- Navigate to the Rules Page.
- Select the Rules Use the checkboxes next to each rule to select the rules you want to modify. You can select as many rules as needed. Once you select the first rule, the Bulk Actions menu will appear.
- Choose an Action Select one of the following actions:
- Active – Enables all selected rules.
- Monitoring – Enables Monitoring for selected rules.
- Disabled – Disables all selected rules
- Move – Moves the selected rules.
The following options are available for moving the rules:- Move to top – Move the selected rules to the top of the list.
- Move to position – Move the selected rules to the current position on the list.
- Move to bottom – Move the selected rules to the bottom of the list.

Choose an Action Select one of the following actions: Set to Set to . Set to
Monitoring Mode – Moves selected rules to monitoring-only status. Delete
Selected Rules – Permanently removes all selected rules. Confirm the Action (if
prompted) For actions like deletion, a confirmation dialog may appear. Review
the changes and confirm to proceed.
Organize Rules into Sections
Rule Sections allow you to enhance the organization and management of your
security policies in Prisma Browser. With this new feature, you can now
group your rules into collapsible sections, improving navigation and making it
easier to manage your policy rules. This allows you streamline your workflow and
make it mucch easier to find your rules.
For example, if you have several policy rules that are designed for contractors,
you can place them in the same section. When you need to change something in one
of the rules, instead of looking down the long list, all you need to do is look
for the contractor's group,
Adding a new section:
You can create as many sections as needed. The sections are created in the Policy
Rules page.
- Open the Policy Rules page.Select the controls group where the section is to be placed. You can choose from one of the following:
- Access & Data Control
- Browser Security
- Browser Customization.
Place the cursor at the point where you want to place the Section. A section tool will be shown on the screen.- Click the + to open the Policy Rules menu.
![]()
- Click Create new section.
- Enter a name for the section.
- Select either Create new rule, or Drag and drop existing
rule.
![]()
If you select Create New Rule, the appropriate Rule Policy type opens. You can then create the rule that is customized for the section.If you select Drag and drop existing rule, handles will appear that you can use to grab the rule and then drag and drop the rule.Click Save Changes.Manage Rule Sections
You can manage the Rule Sections very easily.- To manage the sections, click the rule menu.
![]()
- In the section menu, manage the section using the following controls:
- Create rule at top of section - Opens the appropriate Policy Rule tab.
- Rename section - Enables you to change the name of the section.
- Ungroup section - Removes all the rules from the group, and deletes the section. The rules will be avaialble to be added to new sections or left alone as an unsectioned rule.
- Delete section - Deletes the section and all the rules in
the section. If you delete a section, you will delete all the rules that are included. The action cannot be reversed.
Manage Rule Priority
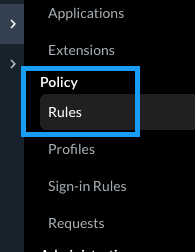
By default, every time you create a new rule, it is given the highest priority. This means that it becomes the first rule to be evaluated until a new rule is created; it will move down the list, and the newer rule moves into first place.There are situations where you may want to make a rule with a lower priority. You can do this as follows:- Select Policy > Rules from the menu.
![]()
- Scroll down the list of policy rules. There will be an indicator
wherever you can set a lower priority for the new rule.
![]()
- Click on the +, and you will be able to create a new rule that will be located at the selected place in the list. In the example provided above, the new rule will be 5 on the list, and all the rules below that location will be moved down 1 place.
When adding a rule in a filtered table view:- The rule is placed after the previous location based on absolute
priority.
- Example: If the filtered list shows rules at priorities 10, 20, and 30, adding a rule between 20 and 30 sets it at priority 21.
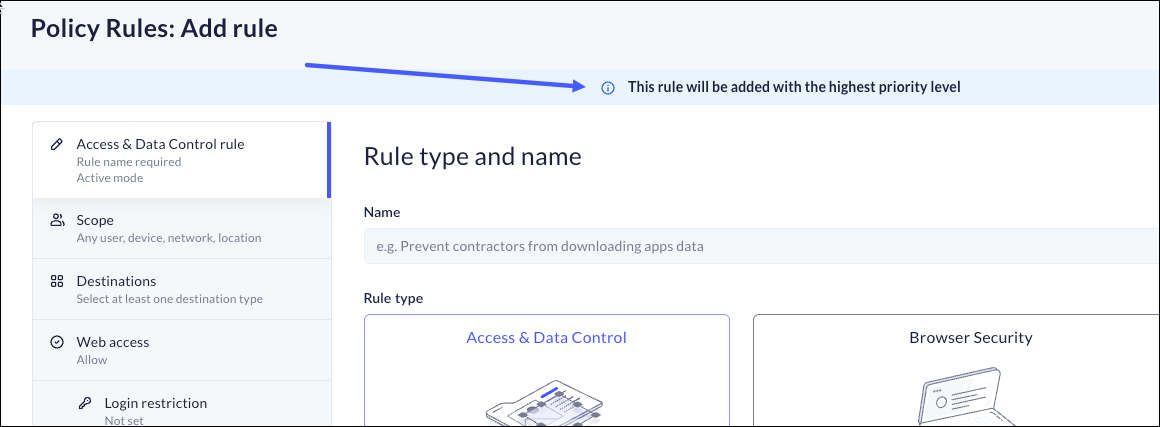
This means that you can only add a rule after a rule that appears in the filtered list.If you do not select a different priority for the rule, it will automatically default to have the highest priority. You will be reminded of this when you create a new rule without selecting a different priority.![]()
Edit Rules
On occasion, rules need to be edited based on changing circumstances and conditions. You can edit all rule types in the Prisma Browser.- On the Policy Rules page, filter the list to display the rules of a particular type, and if needed, continue the filtering to make it easier to find the rule that needs to be edited.Click the pencil icon (edit).Edit the rule based on the new requirements.
Delete Rules
There are rare occasions when a rule needs to be deleted. It could be that the rule is no longer required, or that a new rule covers the same requirements, or that the underlying scope is not longer applicable.NOTE: When a rule is deleted, it is no longer available, and any conditions that the rule established will no longer exist.- On the Policy Rules page, filter the list to display the rules of a particular type, and if needed, continue the filtering to make it easier to find the rule that needs to be deleted.Open the Rule Menu and select Delete.Delete at the prompt.The rule will be removed from the list.


