Perform Initial Configuration of the Panorama Virtual Appliance
Table of Contents
Perform Initial Configuration of the Panorama Virtual Appliance
Based on your Panorama model, use the AWS, Azure,
or GCP web
interface, KVM Virtual Machine Manager, Hyper-V Manager, VMware
vSphere Client, or vCloud Air web console to set up network access
to the Panorama virtual appliance. By default, the Panorama virtual
appliance is deployed in Panorama mode. For unified reporting, consider
using Greenwich Mean Time (GMT) or Coordinated Universal Time (UTC)
as the uniform time zone across Panorama and all the managed firewalls
and Log Collectors.
- Gather the required information from your network
administrator.Collect the following information for the management (MGT) interface:
- IP address for the management (MGT) interfaceThe default management interface IP address is 192.168.1.1. if you do not configure the management interface as described when you install the Panorama virtual appliance.
- Netmask
- Default gateway
- DNS server IP addressTo complete the configuration of the MGT interface, you must specify the IP address, netmask (for IPv4) or prefix length (for IPv6), and default gateway. If you omit settings (such as the default gateway), you can access Panorama only through the console port for future configuration changes. As a best practice, always commit a complete MGT interface configuration.
- Access the console of the Panorama virtual appliance.
- Access the console.On an ESXi server:
- Launch the VMware vSphere Client.
- Select the Console tab for the Panorama virtual appliance and press enter to access the login screen.
On vCloud Air:- Access the vCloud Air web console and select your Virtual Private Cloud OnDemand region.
- Select the Virtual Machines tab, right-click the Panorama virtual machine, and select Open In Console.
- Enter your username and password to log in (default
is admin for both).On AWS, Azure, GCP, KVM, and Hyper-V:
- Access the console.
- Configure the network access settings for the MGT interface.Panorama uses the MGT interface for management traffic, high availability synchronization, log collection, and communication within Collector Groups.Starting with PAN-OS 9.0.4, the default admin credentials are no longer supported. When you first install the Panorama virtual appliance, you are required to log in to the Panorama CLI to configure a unique admin password.If this is the first time you are logging in to the Panorama CLI, you are prompted to enter the Old Password and the New Password for the admin user before you can continue with the initial configuration of the Panorama virtual appliance.
- Enter the following commands, where <Panorama-IP> is
the IP address you want to assign to the Panorama management interface, <netmask> is
the subnet mask, <gateway-IP> is the IP address
of the network gateway, and <DNS-IP> is the
IP address of the DNS server:
> configure
# set deviceconfig system ip-address <Panorama-IP> netmask <netmask> default-gateway <gateway-IP> dns-setting servers primary <DNS-IP>
# commit
# exit
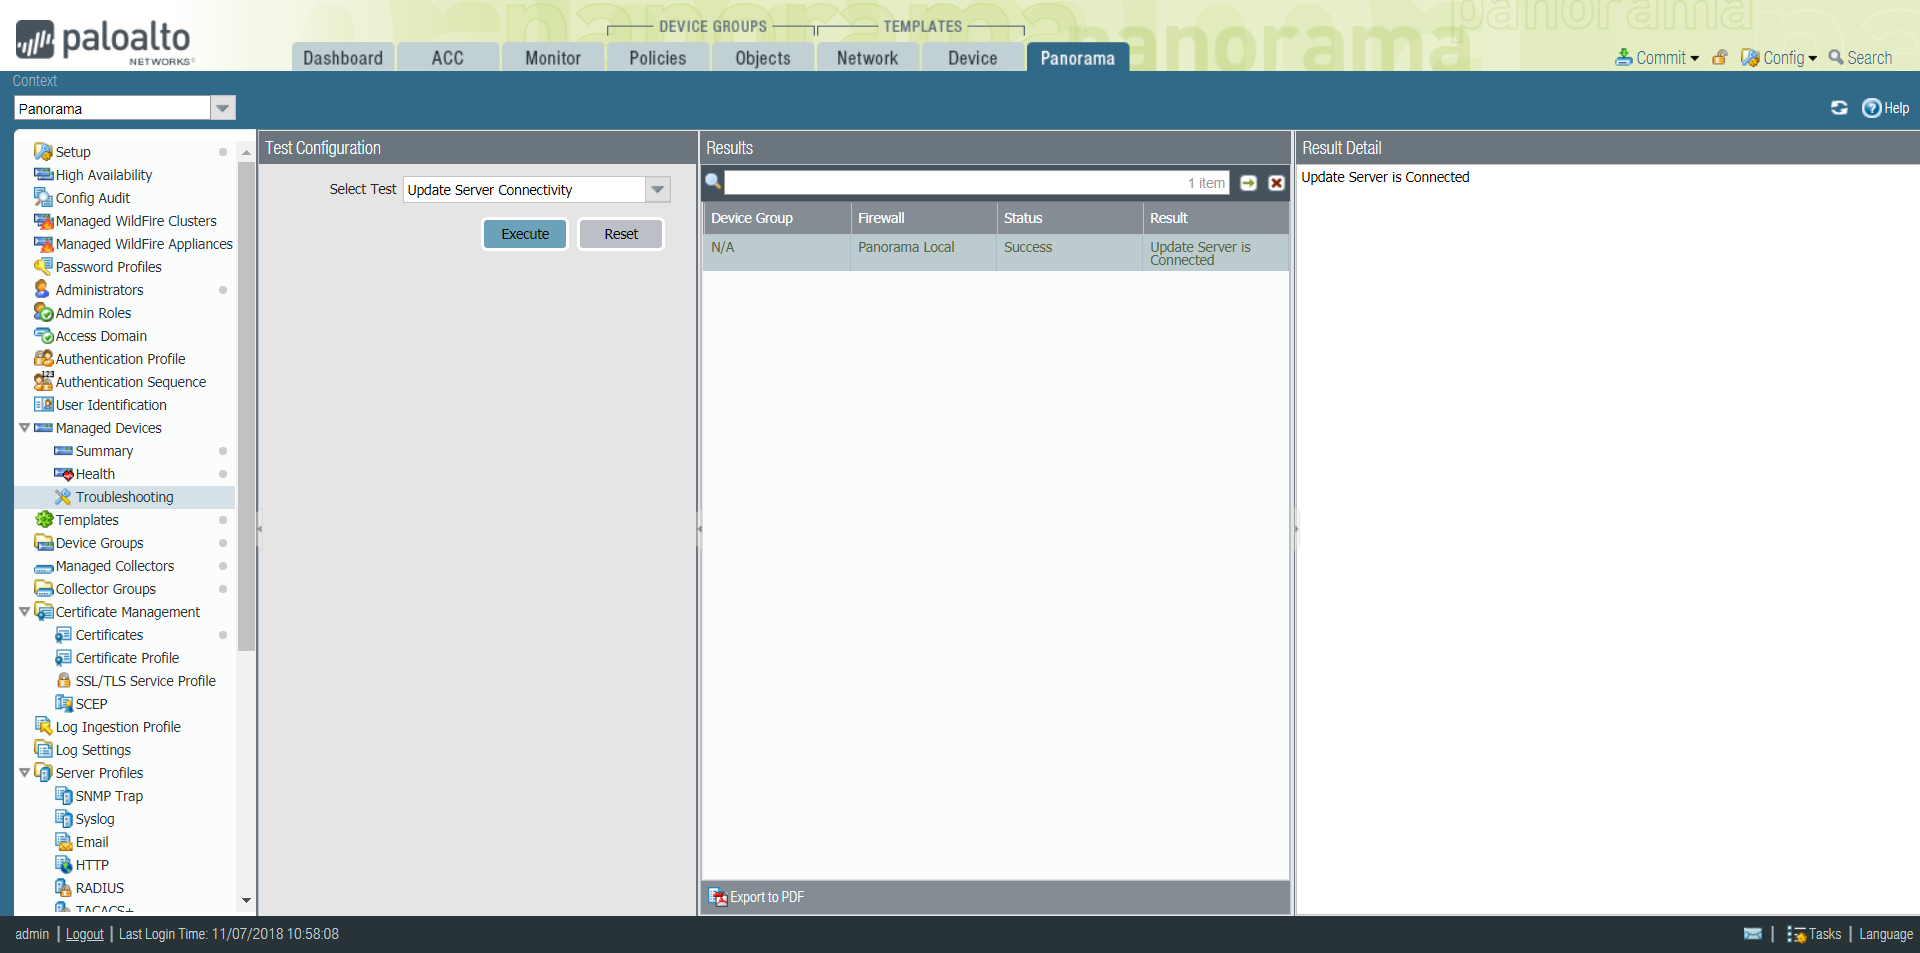
- Troubleshoot Connectivity to Network Resources to verify
network access to external services required for firewall management,
such as the default gateway, DNS server, and the Palo Alto Networks
Update Server, as shown in the following example:
![]()
- Enter the following commands, where <Panorama-IP> is
the IP address you want to assign to the Panorama management interface, <netmask> is
the subnet mask, <gateway-IP> is the IP address
of the network gateway, and <DNS-IP> is the
IP address of the DNS server:
- Configure the general settings.
- Using a secure connection (HTTPS) from a web browser, log in to the Panorama web interface using the IP address and password you assigned to the management interface (https://<IP address>).
- Select and edit the General Settings.
- Enter a Hostname for the server and enter the network Domain name. The domain name is just a label; Panorama doesn’t use it to join the domain.
- Align the clock on Panorama and the managed firewalls to use the same
Time Zone, for example GMT or UTC. If you
plan to use the Strata Logging Service, you must configure NTP so
that Panorama can stay in sync with the Strata Logging Service.Timestamps are recorded when Panorama receives the logs and the managed firewalls generate the logs. Aligning the time zones on Panorama and the firewalls ensures that the timestamps are synchronized and the process of querying logs and generating reports on Panorama is harmonious.
- Enter the Latitude and Longitude to enable accurate placement of the Panorama management server on the world map.
- Enter the Serial Number you received in the order fulfillment email.
- Click OK to save your changes.
- (Optional) Modify the management interface settings.To configure connectivity to Panorama using an IPv6 IP address, you must configure both an IPv4 and IPv6 to successfully configure Panorama using an IPv6 IP address. Panorama does not support configuring the management interface with only an IPv6 IP address.
- Select and click Management.
- If your firewalls connect to the Panorama management server using a public IP address that is translated to a private IP address (NAT), enter the public IP in the Public IP Address field, and the private IP in the IP Address field to push both addresses to your firewalls.
- Select which Network Connectivity Services to allow
on the interface (such as SSH access).Don’t select Telnet or HTTP. These services use plaintext and are less secure than the other services.
- Click OK to save your changes to the interface.
- Commit your configuration changes.Select and Commit your changes.
- Next steps...
- If necessary, Expand Log Storage Capacity on the Panorama Virtual Appliance.
- (Best Practice) Replace the default certificate that Panorama uses to secure HTTPS traffic over the management (MGT) interface.
- Activate a Panorama Support License.
- Activate/Retrieve a Firewall Management License when the Panorama Virtual Appliance is Internet-connected.
- Install Content and Software Updates for Panorama.
- Set Up Administrative Access to Panorama.