The Cloud NGFW manifests as two private IP
addresses (public and private) in your vNET. Using user-defined routes (with the
Cloud NGFW’s private IP address as the next hop), you can redirect traffic to the
Cloud NGFW for packet inspection and threat prevention.
The Azure Cloud NGFW
communicates with the Cloud NGFW to add rulestacks. The Cloud NGFW continuously meters
the usage of the Cloud NGFW resource, sending usage records for each Azure subscription
to the Azure metering service. This service is
responsible for billing.
After deploying the Cloud NGFW in a
vNET, see the sample configuration page for more
information.
Prerequisites
To deploy Cloud NGFW in a vNET, you
will need an Azure subscription. This subscription should have an owner or a
contributor role.
When deploying the Cloud NGFW in a vNET
using an existing vNET hub, the minimum size should be /25. You must have 2
subnets with the minimum size /26; these subnets must be delegated to the
PaloAltoNetworks.Cloudngfw/firewalls service.
For deployments supporting 100Gbps, you need a total of 80
free IP addresses; 40 IP addresses are used for public and 40 IP addresses
are used for private.
The following image illustrates Private Subnet
NSG requirements:
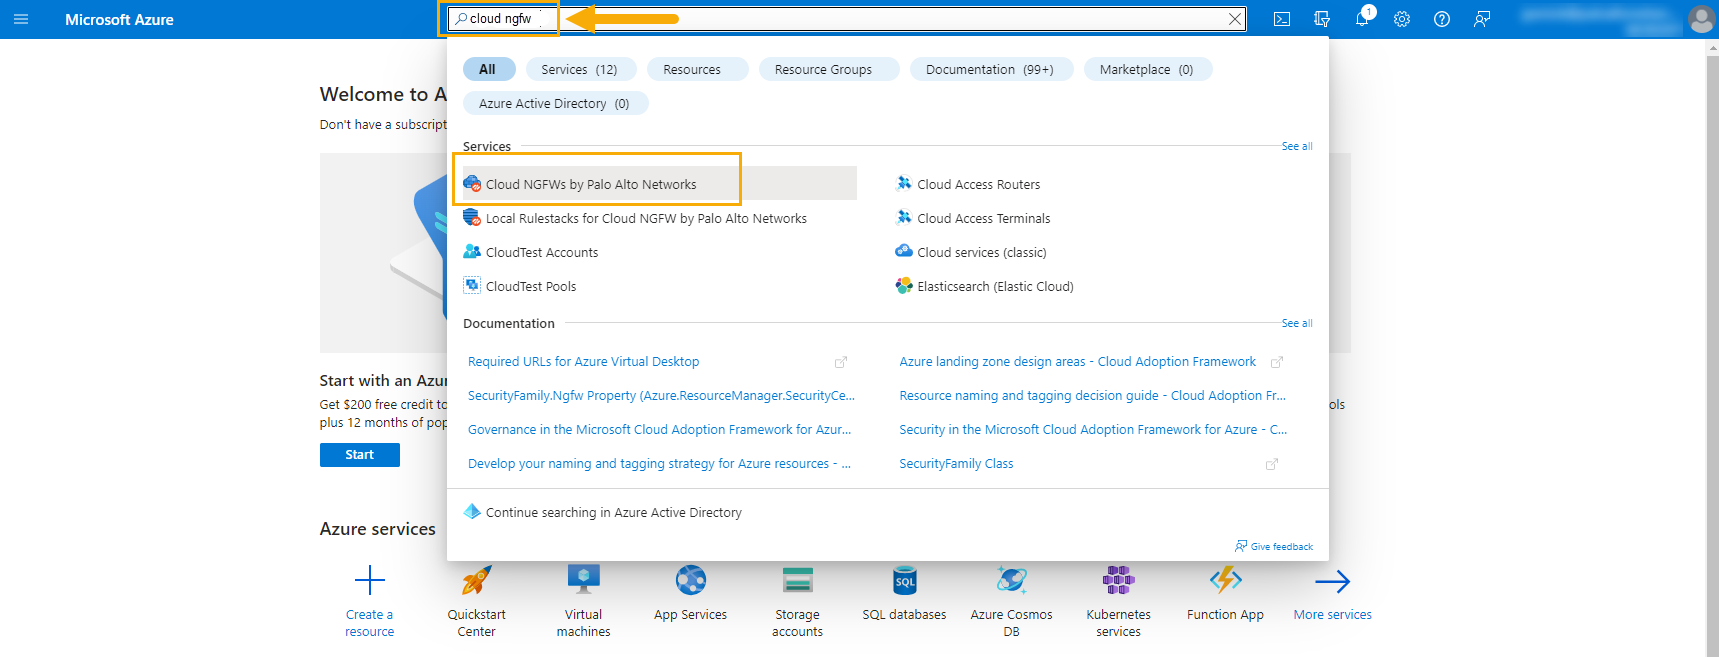
Log into the Azure portal and search for Cloud NGFW.
This search displays the Cloud NGFW service, Cloud NGFW by Palo Alto
Networks.
Click Cloud NGFWs to start creating the Palo Alto
Networks Cloud NGFW service for Azure.
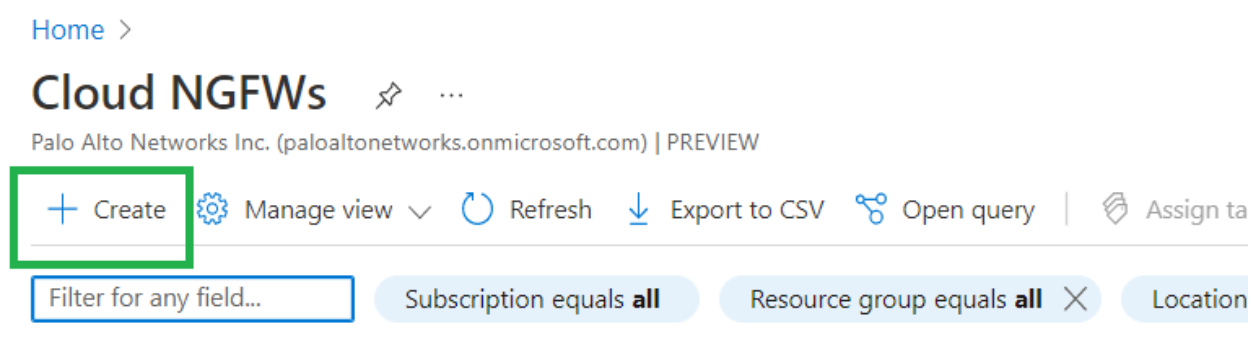
On the landing screen page for the Cloud NGFW resource, click
Create to start creating the Cloud NGFW
resource.
If your subscription was previously created, the landing page contains
information about Cloud NGFW resources.
After clicking Create, the Create Palo Alto
Networks Cloud NGFW screen appears.
Use the information in the following table to provide Basic
information, then click Next:Networking:
Field
Description
Subscription
Automatically selected based on the
subscription used while logged in.
Resource Group
Use one of the existing resource groups or
create a new one (using the Create
New option) in which the Cloud NGFW resource
is created.
Firewall Name
Name of the Cloud NGFW Firewall
resource.
For
Panorama-managed firewalls, do not use all capital
letters for the firewall name.
Region
Region in which Cloud NGFW is provisioned.
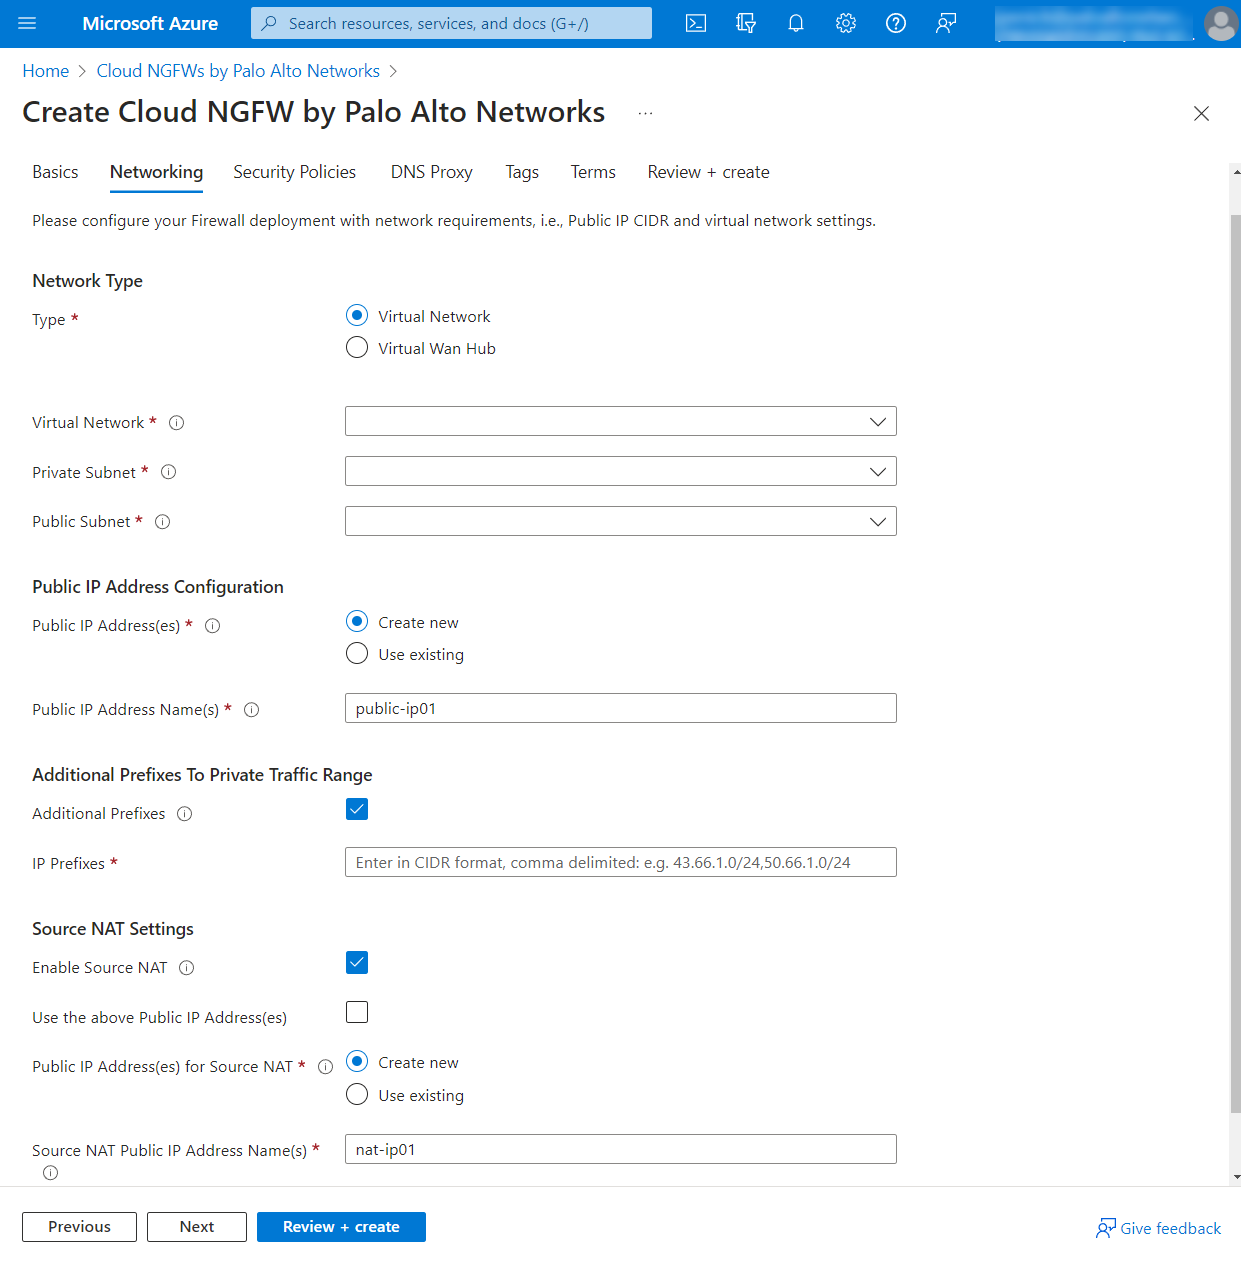
Provide information for the firewall deployment in the Networking
screen:
The Networking screen includes fields in the
following table:
Field
Description
Type
Automatically selected based on the
subscription used while logged in.
Virtual Network
Choose Virtual
network. Create a new virtual network or select
an existing virtual network.
Private Subnet
Choose a private subnet.
Public Subnet
Choose a public subnet.
Public IP Address Configuration
Specify Public IP
addresses. Click Create
new to establish a new address, or, click
Use existing to specify an
existing address.
Additional Prefixes to Private Traffic
Range
If you want to support additional private IP
address ranges besides those specified in RFC 1918, use the
option for Additional Prefixes to Private Traffic
Range. With this support you can use public
IP address blocks in your private network without routing
traffic to the internet.
Click the Additional
Prefixes check box. Enter addresses in
CIDR format (for example, 40.0.0.0/24). Use a comma
delimited list to include multiple addresses.
By default, RFC 1918 prefixes
are automatically included in the private traffic
range. If your organization uses public IP ranges,
explicitly specify those IP prefixes. You can
specify these public IP prefixes individually, or as
aggregates.
See the section
Edit an
Existing Firewall to Add Additional Private
Addresses for Non-RFC 1918 Support
to add
additional prefixes after deploying the
firewall.
Source NAT Settings
Include the Source NAT
option if Network Address Translation (NAT) is used on
traffic going out to the internet.
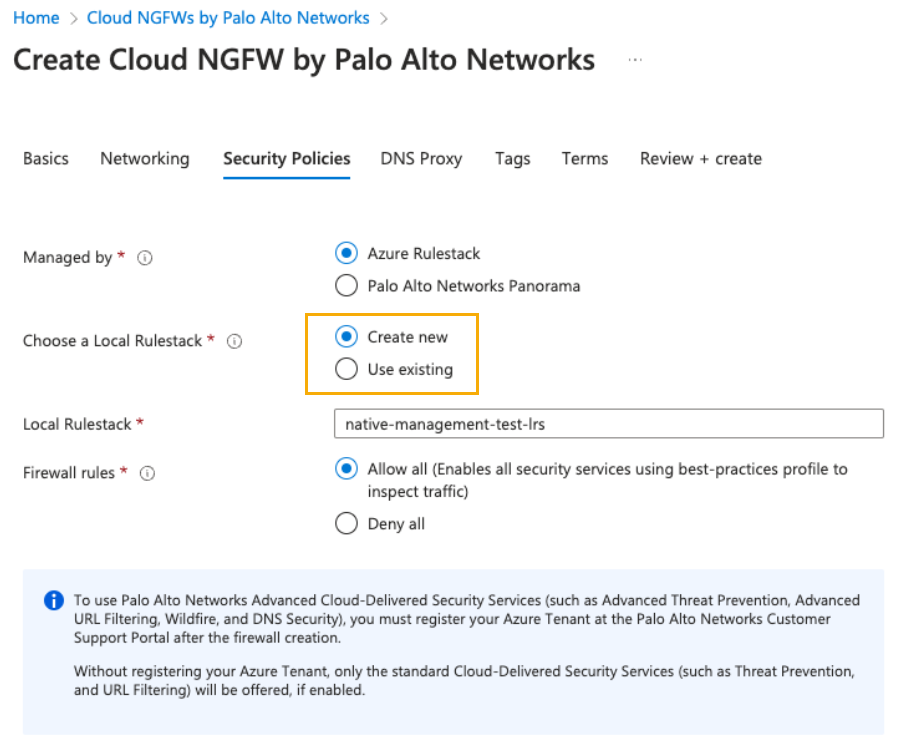
Click Next:Security Policies.
On the Security Policies page, create a local rulestack
or select an existing rulestack. A new rulestack contains no rules. You can
define security rules after deploying the Cloud NGFW resource.
As an administrator, you can either manage a
security policy using a native Azure rulestack, or you can use Palo Alto
Networks Panorama for policy management. For more information, see Link the Cloud NGFW to Palo Alto Networks
Management.
If you would like to use Palo Alto
Networks advanced security services (such as Advanced Threat Prevention and
Advanced URL Filtering) you must register your Azure Tenant at the Palo Alto Networks Customer Support Portal after
creating your firewall. To learn more about registering a tenant, see Start with Cloud NGFW for Azure.
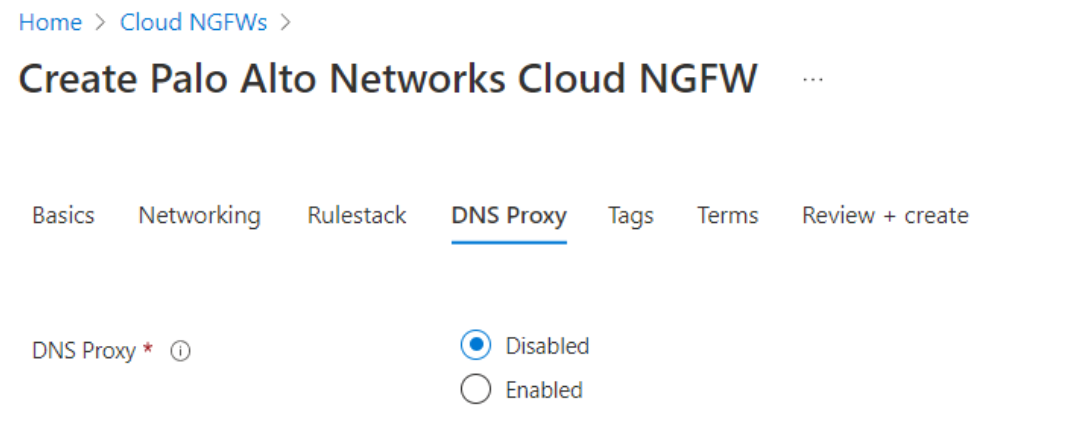
Click Next: DNS Proxy to configure the Cloud NGFW resource as a DNS
proxy. You can configure the Cloud NGFW to inspect all DNS traffic by acting as
a proxy for vNET resources. When configured, the DNS Proxy forwards the DNS
request to the default Azure DNS server, or, a DNS server you specify. By
default, DNS Proxy is disabled.
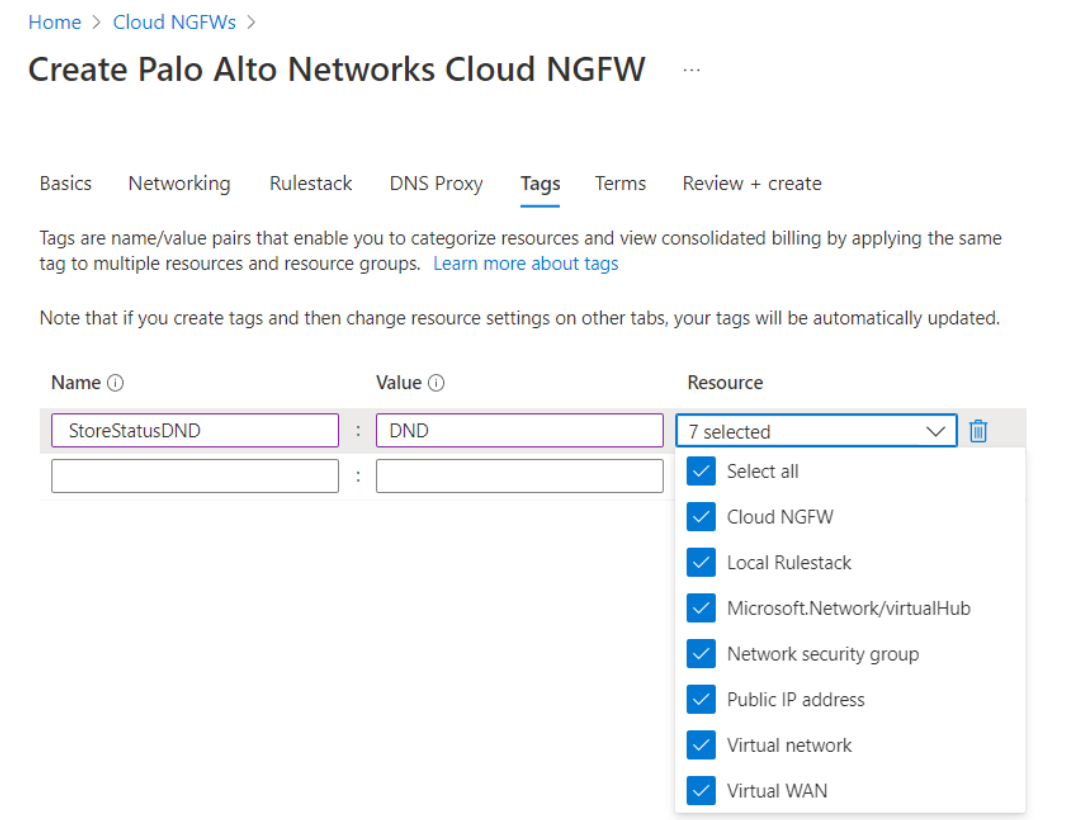
Click Next:Tags to specify tags for your Azure requirements. Tags are
predefined labels that can help you manage the vulnerabilities in your
environment and view consolidated billing related to your Azure account They are centrally
defined and can be set to vulnerabilities and as policy exceptions.
Tags are used as:
Vulnerability labels. They provide a convenient way to categorize the
vulnerabilities in your environment.
Policy exceptions. They can be a part of your rules in order to have a
specific effect on tagged vulnerabilities.
View consolidated billing for your Azure account.
Tags are useful when you have large container
deployments with multiple teams working in the same environment. For
example, you might have different teams handling different types of
vulnerabilities. Then you can set tags in order to define
responsibilities over vulnerabilities. Other uses would be to set
the status of fixing the vulnerability, or to mark vulnerabilities
to ignore when they are a known problem that can’t be fixed in the
near future.
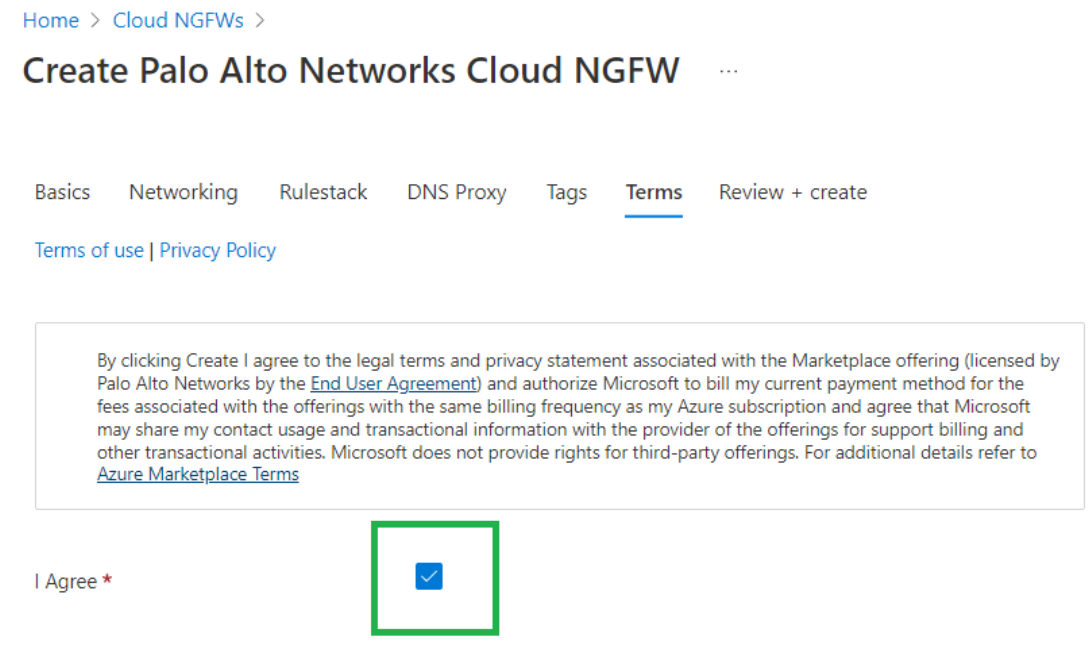
Click Next:Terms and accept the terms and the conditions
for the deployment
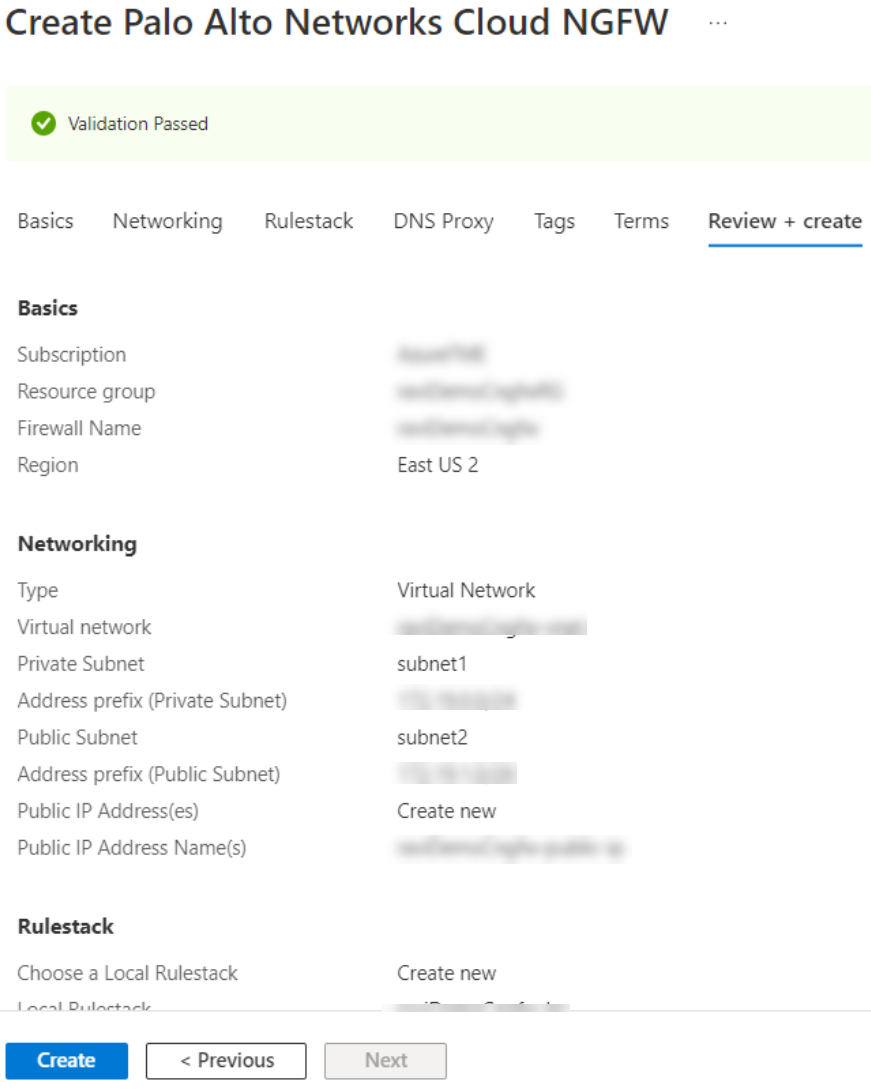
Click Next:Review + create to review validate your Azure
subscription for the Cloud NGFW resource. The resource is validated first, then
created. The screen shows Validation Passed. Click
Create to deploy the Cloud NGFW service:
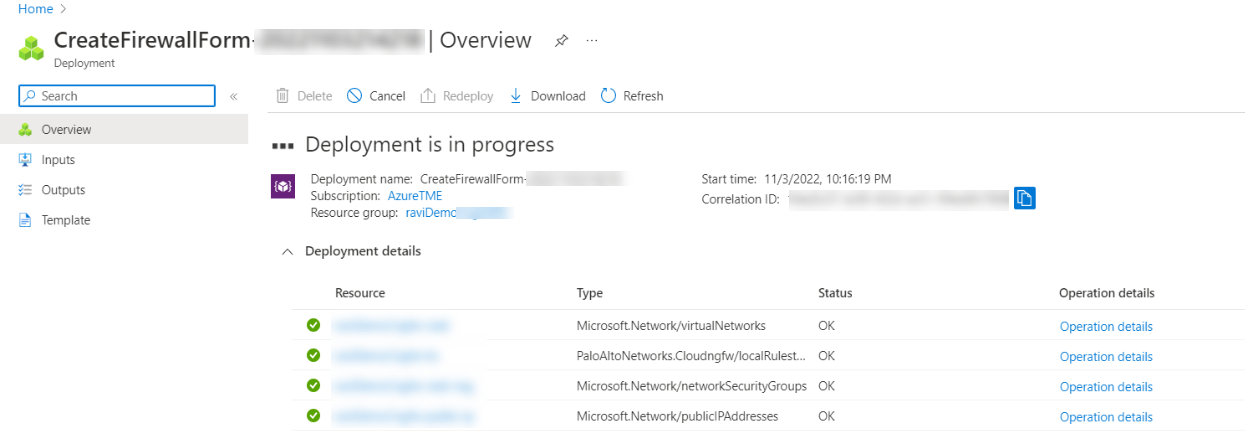
Verify the deployment of the Cloud NGFW in the vNET
After creating the Cloud NGFW service, the deployment progress appears.
Deploying a Cloud NGFW resource takes approximately 30
minutes to deploy.
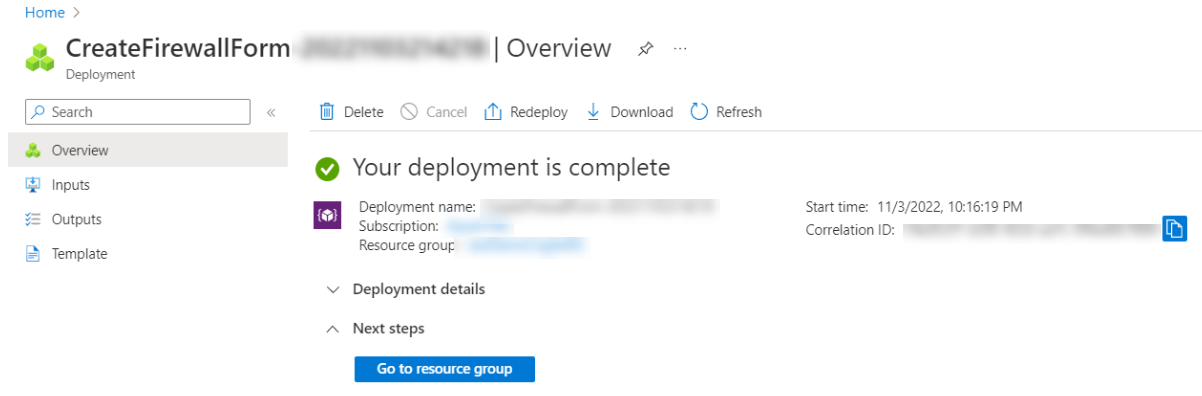
On a successful deployment, the following screen appears. Click Go to
resource group to verify the resources created for this
deployment:
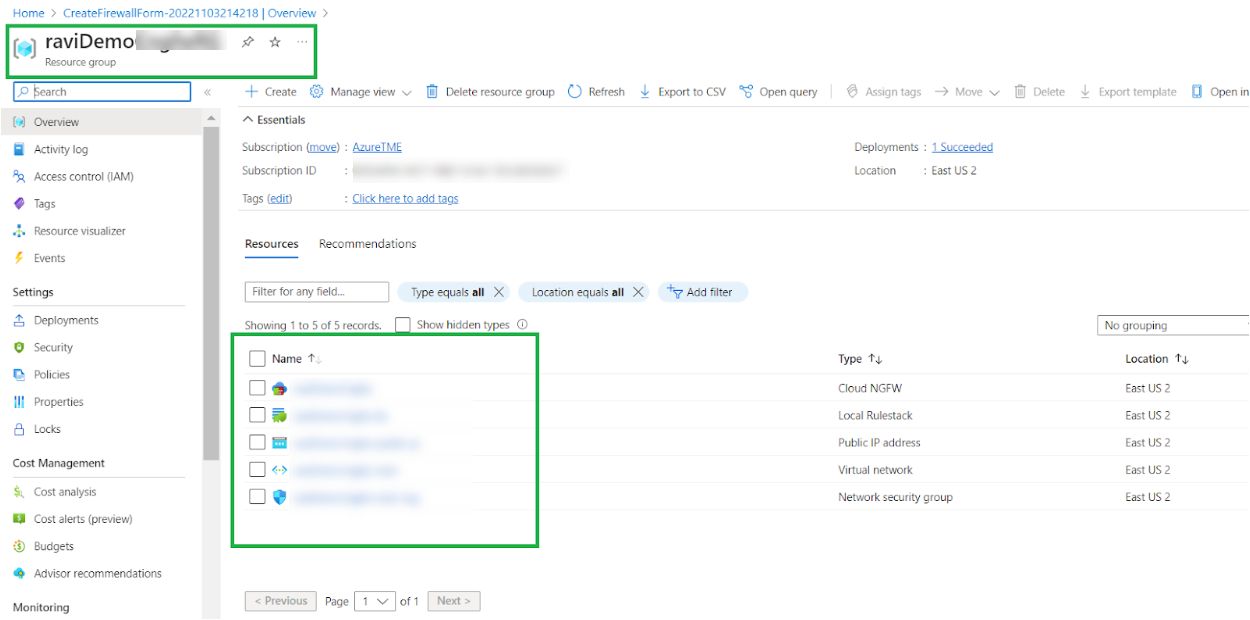
Five resources are created. They include Cloud NGFW, Local Rulestack, Public IP
address, Virtual Network, and security group:
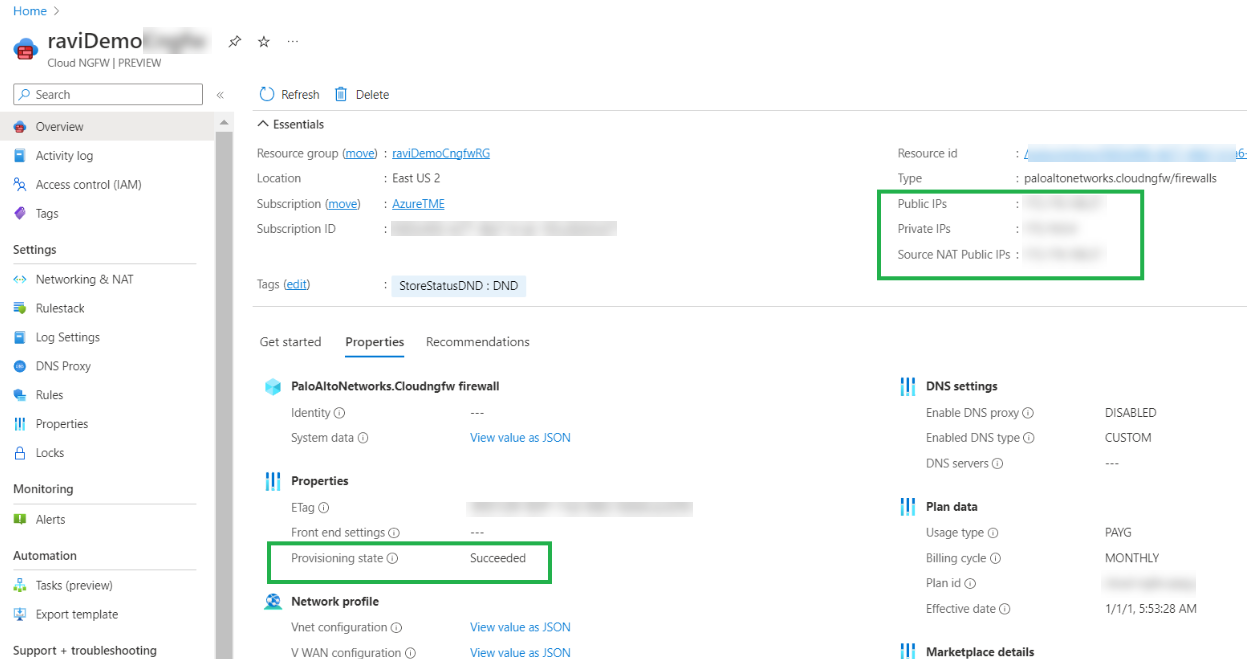
Once the Cloud NGFW resource is created, select it to verify that the
provisioning state shows Succeeded. This screen also
displays the public and private IP addresses associated with the Cloud NGFW
service.
After deploying the Cloud NGFW in a vNET, see the sample configuration for more
information.
Edit an Existing Firewall to Add Additional Private Addresses for Non-RFC 1918
Support
To edit an existing firewall to add additional private addresses:
Locate the Cloud NGFW in the Azure Portal.
In the Settings section, select
Networking & NAT.
Click Edit.
In the Additional Prefixes to Private Traffic Range
section, select the check box for Additional
Prefixes.
Enter addresses in CIDR format (for example, 40.0.0.0/24). Use a comma
delimited list to include multiple addresses.
Click Save.
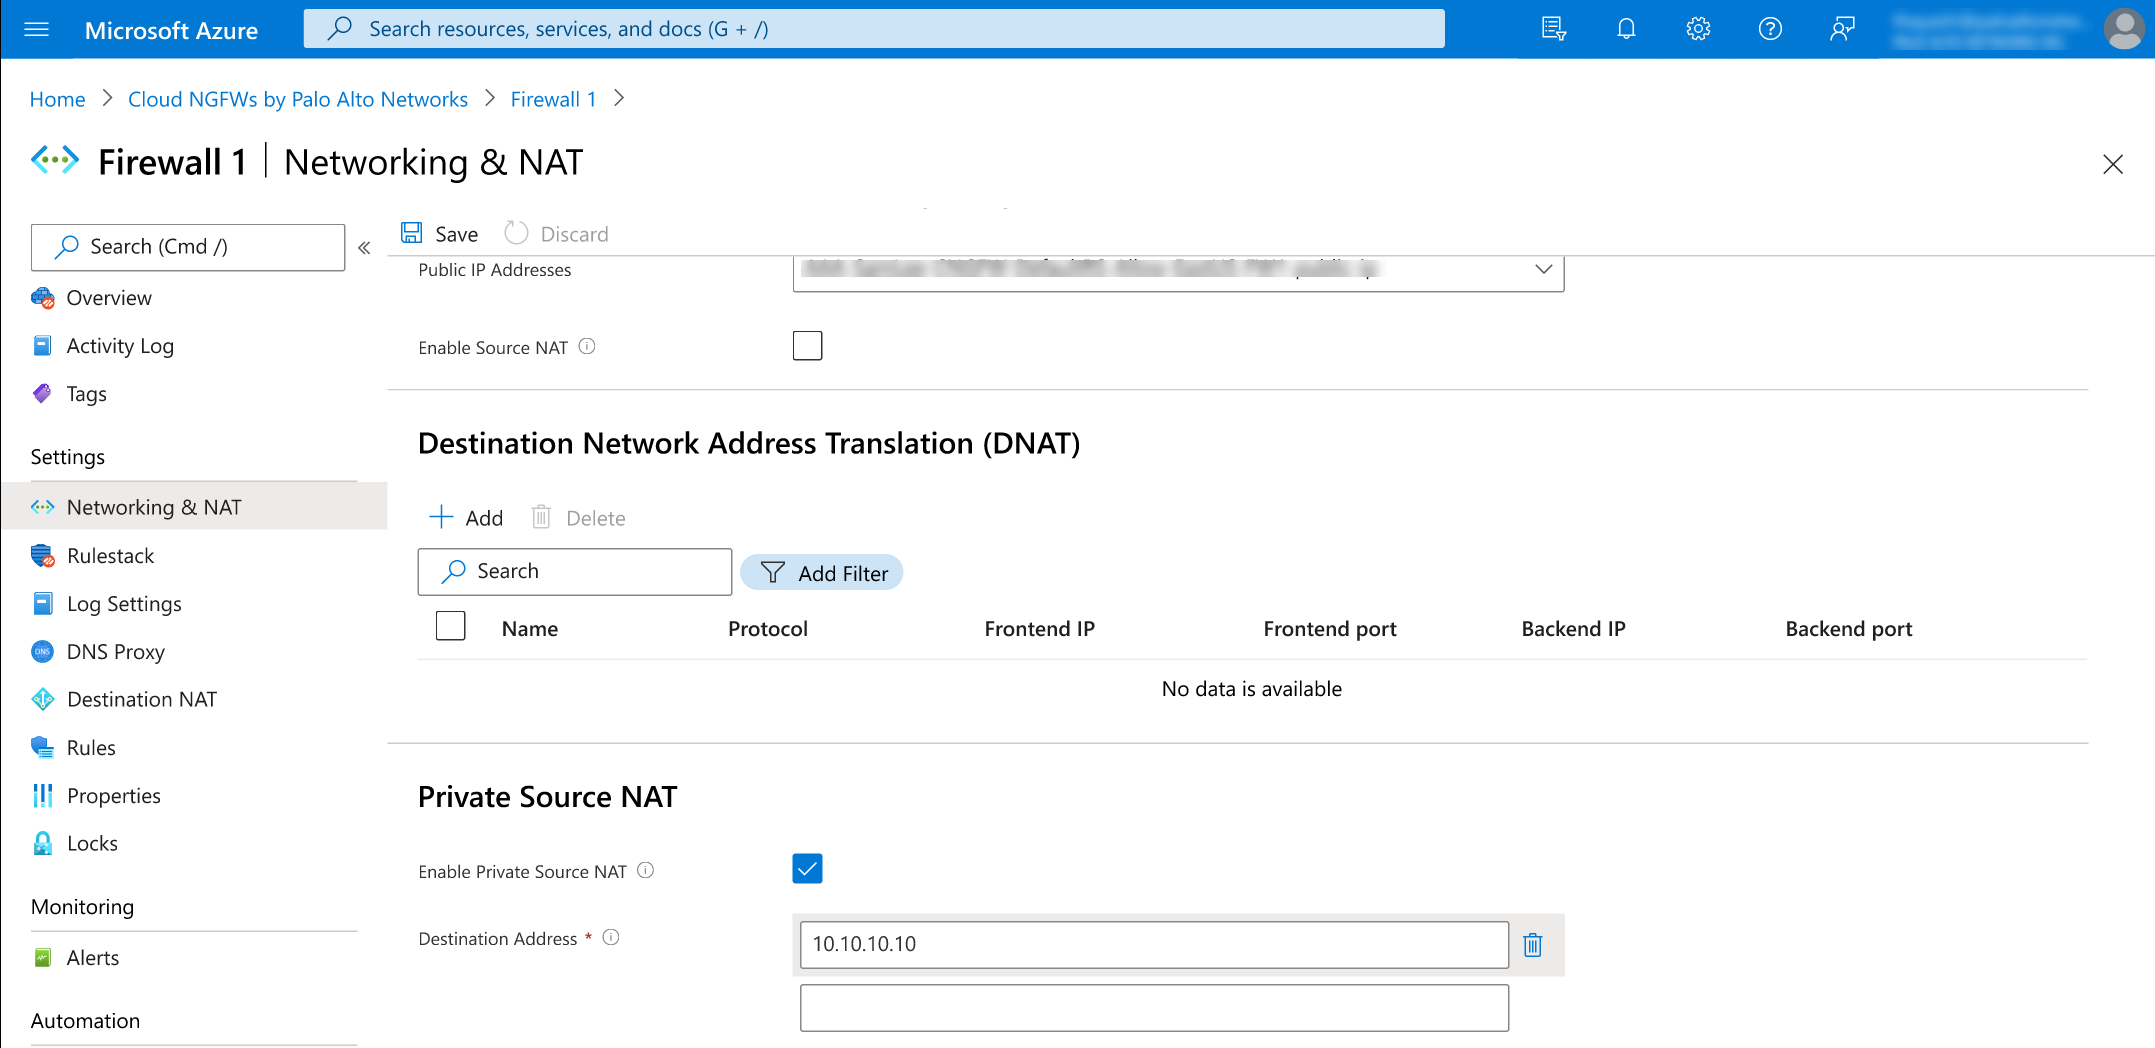
Edit an Existing Firewall to Enable Private Source NAT
Use the Private Source NAT option if you want to perform
source network address translation on requests from an instance in a
non-routeable subnet. This option allows you to send traffic to a routeable IP
address assigned to the Application Load Balancer (ALB). After enabling Private
Source NAT, include the destination IP address.
Cloud NGFW east-west traffic relies on user defined routes (UDR) to forward
traffic to the firewall. This dependency is supported by typical east-west
traffic when both ends of the network are part of the private network.
However, this poses challenges for a new type of traffic; one side of the
deployment is the private network, while the other side of the deployment
supports a partner or PaaS service accessible over a private endpoint in the
virtual network. In such environments, you may not have management access to
the entire (other) network to configure UDR. Traffic is directed to the
Cloud NGFW by UDR, but return traffic is sent to the client’s source IP
without transiting the Cloud NGFW. As a result, an asymmetric route problem
occurs, and the resulting TCP handshake cannot be completed by the firewall.
Cloud NGFW uses Private Source NAT to translate the
source IP address to the firewall's instance's private interface IP, thus
ensuring that return traffic is processed by the Cloud NGFW to the
appropriate interface.
Locate the Cloud NGFW in the Azure Portal.
In the Settings section, select
Networking & NAT.
Click Edit.
In the Private Source NAT section, select the check
box for Enable Private Source NAT.