Register Panorama with the ZTP Service for Existing Deployments
Table of Contents
Register Panorama with the ZTP Service for Existing Deployments
Register the Panorama™ management server with the ZTP
service for existing ZTP deployments.
After you install the ZTP plugin on the Panorama™
management server, you must register Panorama with the ZTP service
to enable the ZTP service to associate firewalls with the Panorama.
As part of the registration process, add your ZTP firewalls to the existing ZTP device
group and template stack that contain the required ZTP configuration
to connect your ZTP firewalls with the ZTP service after they first connect
to Panorama.
- Install the Panorama Device Certificate.
- Log in to the Palo Alto Networks Customer Support Portal (CSP).
- Associate your Panorama with the ZTP Service on the Palo
Alto Networks CSP.The ZTP Service supports associating up to two Panoramas only if they are in a high availability (HA) configuration. If Panorama is not in an HA configuration, only a single Panorama can be associated.
- Select and Modify Association.
- Select the serial number of the Panorama managing your ZTP firewalls.
- (HA only) Select the serial number of the Panorama HA peer.
- Click OK.
- Log in to the Panorama Web Interface.
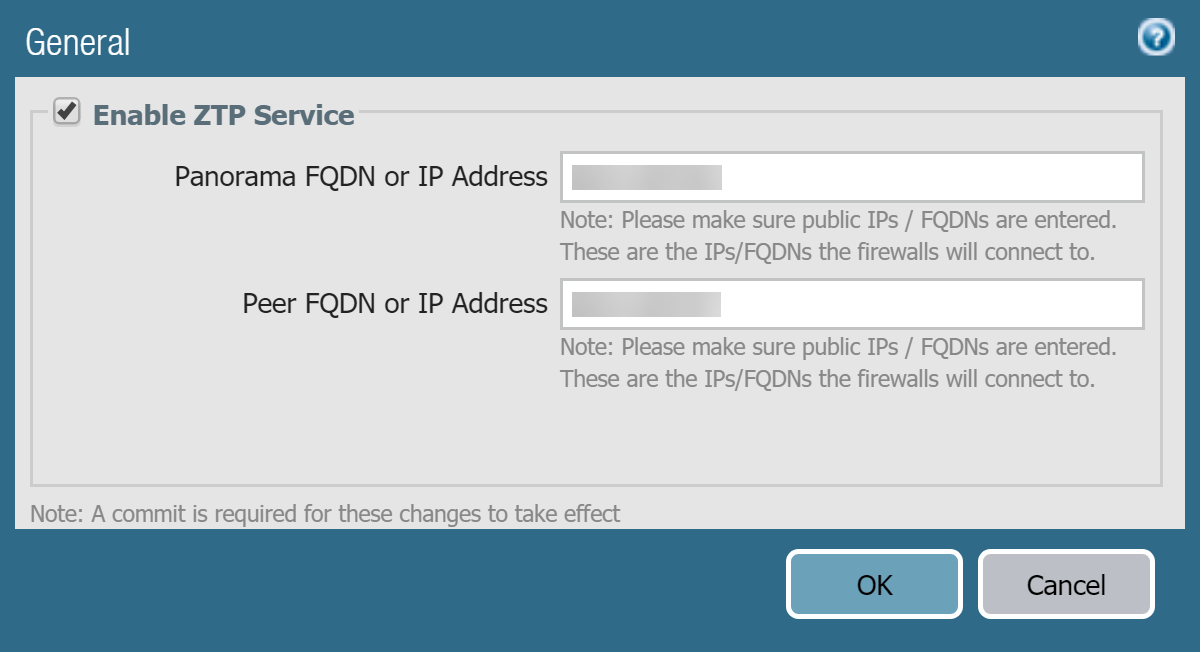
- Select and edit the General ZTP settings.
- Register Panorama with the ZTP service.
- Enable ZTP Service.
- Enter the Panorama FQDN or IP Address.This is the FQDN or public IP address of the Panorama the ZTP plugin is installed on and that the CSP pushes to the ZTP firewalls.(All ZTP-enabled managed firewalls) Enter the Panorama IP address to avoid the managed firewall disconnecting from Panorama on reboot or after a successful PAN-OS upgrade.If you need to use the Panorama FQDN, configure a static destination route to avoid the managed firewall disconnecting from Panorama on reboot or after a successful PAN-OS upgrade.
- (HA only) Enter the Peer FQDN
or IP Address.This is the FQDN or public IP address of the Panorama peer on which the ZTP plugin is installed and that the CSP pushes to the ZTP firewalls in case of failover.(All ZTP-enabled managed firewalls) Enter the Panorama IP address to avoid the managed firewall disconnecting from Panorama on reboot or after a successful PAN-OS upgrade.If you need to use the Panorama FQDN, configure a static destination route to avoid the managed firewall disconnecting from Panorama on reboot or after a successful PAN-OS upgrade.
- Click OK to save your configuration changes.
![]()
- Modify
the ZTP device group, templates, and template stack as needed.Moving a ZTP firewall to a different device group or template stack is not supported. You must keep the ZTP onboarded firewalls in the ZTP device group and templates that were created. This is required for the firewall to maintain connectivity with Panorama and prevent any unintended configuration reverts on the firewall.When considering your device group hierarchy and template priority in your template stack, ensure that the device group and template containing the required ZTP configuration that allows the ZTP firewall and Panorama to communicate have priority such that the configuration is not overridden in the event of conflicting configurations.If modifying the ZTP device group and template used to onboard the ZTP firewall, be careful to not modify any of the ZTP configuration that was automatically populated when you created the device group and template in the previous step. This includes configurations like the Panorama IP address, virtual router, the ethernet1/1 interface, Security zone of the ethernet1/1 interface, the loopback.900 loopback interface, the rule1 Security policy rule, ztp-nat NAT policy rule, and the service route. These configurations are required to connect your ZTP firewall to Panorama and can lead to connectivity issues if modified.
- Select Commit and Commit to Panorama
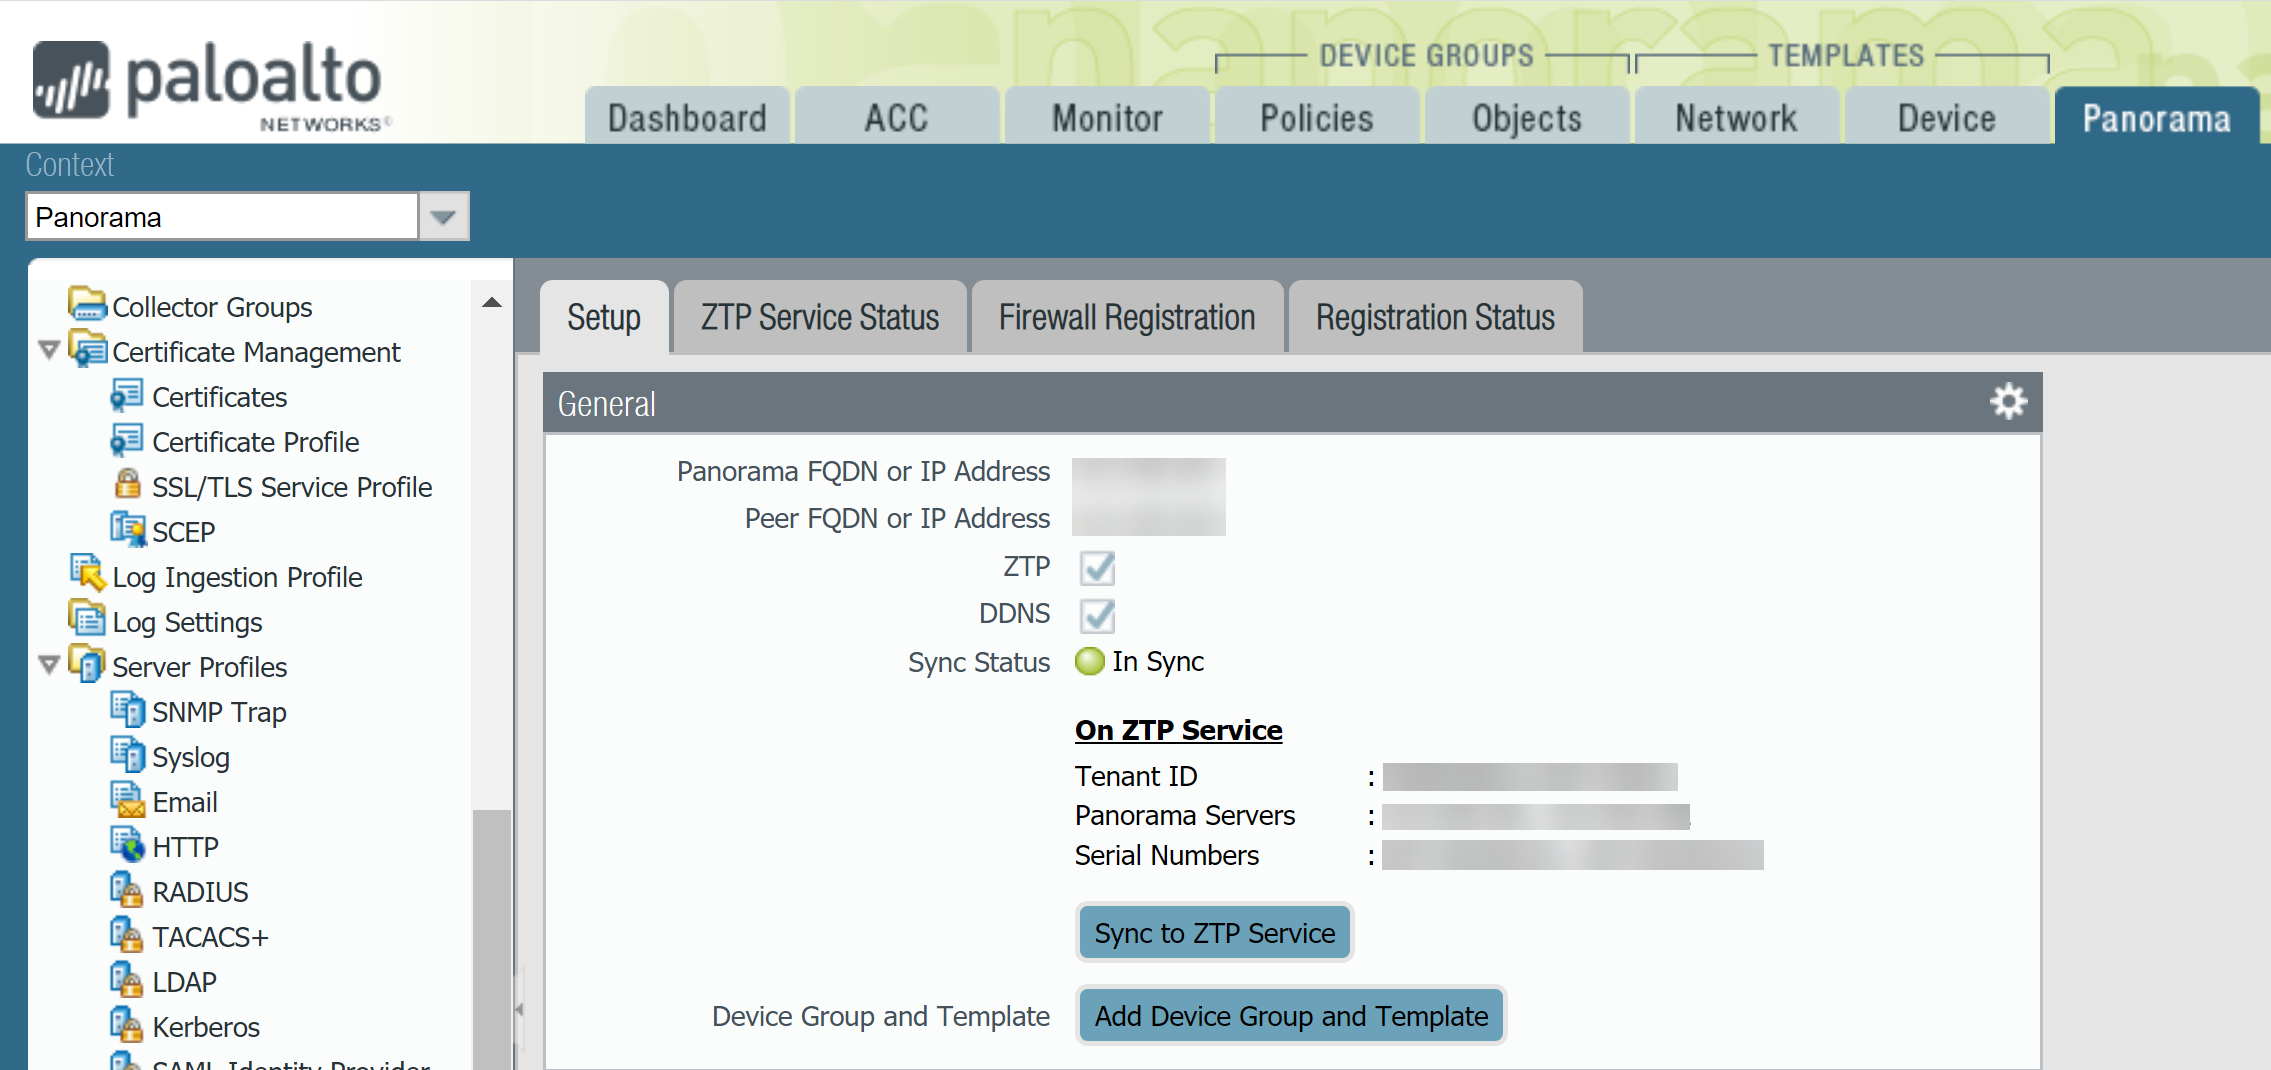
- Sync to ZTP Service and verify
that the Panorama Sync Status displays as In Sync.
![]()
- add-ztp-firewalls-to-panorama.html#id24ae36fe-b2b7-4c77-9f15-367334debbf3_id1d38c2a5-2fc9-4dba-93bd-212e632e2adc.