GlobalProtect
Enable SSO Wrapping for Third-Party Credentials with the Windows Registry
Table of Contents
Enable SSO Wrapping for Third-Party Credentials with the Windows Registry
Use the following steps in the Windows Registry
to enable SSO to wrap third-party credentials on Windows 7 endpoints.
- Open the Windows Registry and locate the globally
unique identifier (GUID) for the third-party credential provider
that you want to wrap.
- From the command prompt, enter the regedit command to open the Windows Registry Editor.
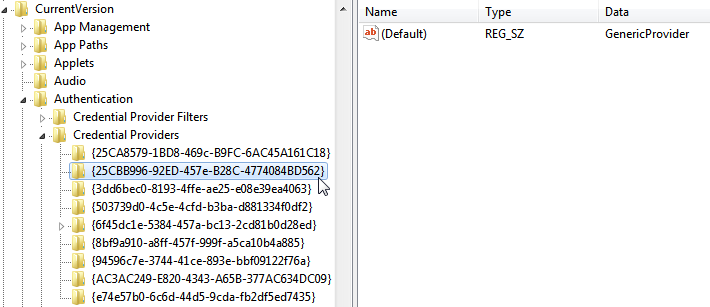
- Go to the following Windows Registry location to view
the list of currently installed credential providers:HKEY_LOCAL_MACHINE\SOFTWARE\Microsoft\Windows\ CurrentVersion\Authentication\Credential Providers.
- Copy the GUID key for the credential provider that
you want to wrap (including the curly brackets — { and } —
on either end of the GUID):
![]()
- Enable SSO wrapping for third-party credential providers
by adding the wrap-cp-guid setting to the
GlobalProtect Registry.
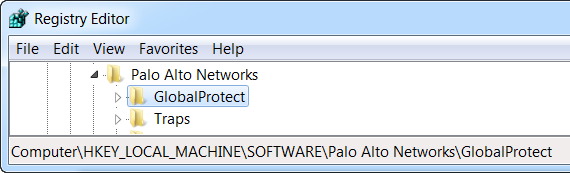
- Go to the following Windows Registry location:
HKEY_LOCAL_MACHINE\SOFTWARE\Palo Alto Networks\ GlobalProtect:
![]()
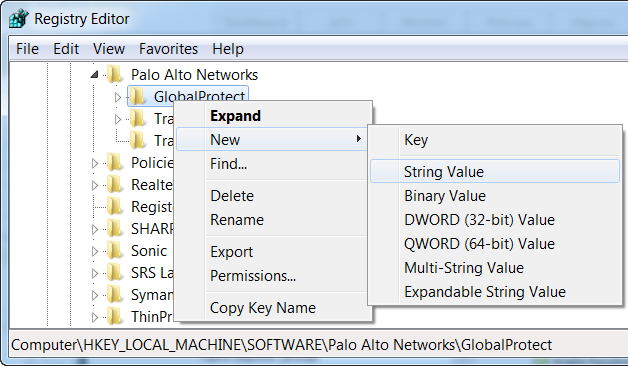
- Right-click the GlobalProtect folder,
and then select to add a new string value:
![]()
- Configure the following String Value fields:
- Name: wrap-cp-guid
- Value data: {<third-party credential provider GUID>}For the Value data field, the GUID value that you enter must be enclosed with curly brackets: { and }.The following is an example of what a third-party credential provider GUID in the Value data field might look like:
{A1DA9BCC-9720-4921-8373-A8EC5D48450F}
For the new String Value, wrap-cp-guid is displayed as the string value’s Name and the GUID is displayed as the Value Data.![]()
- Go to the following Windows Registry location:
- Next Steps:
- With this setup, the native Windows logon tile is displayed to users on the logon screen. When users click the tile and log in to the system with their Windows credentials, that single login authenticates the users to Windows, GlobalProtect, and the third-party credential provider.
- (Optional) If you want to display multiple tiles on the logon screen (for example, the native Windows tile and the tile for the third-party credential provider), continue to step 4.
- (Optional) If you want to assign a default credential provider for users, continue to step 5.
- (Optional) If you want to hide a third-party credential provider tile from the logon screen, continue to step 6.
- (Optional)
Allow the third-party credential provider tile to be displayed to
users at login.Add a second String Value with the Name filter-non-gpcp and enter no for the string’s Value data:
![]() After you add this string value to the GlobalProtect settings, two login options are presented to users on the Windows logon screen: the native Windows tile and the third-party credential provider’s tile.
After you add this string value to the GlobalProtect settings, two login options are presented to users on the Windows logon screen: the native Windows tile and the third-party credential provider’s tile. - Assign a default credential provider for user login.
- Open the Windows Registry to locate the
globally unique identifier (GUID) for the third-party credential
provider that you want to assign as the default credential provider.
- From the command prompt, enter the regedit command to open the Windows Registry Editor.
- Go to the following Windows Registry location to view the list of currently installed credential providers:HKEY_LOCAL_MACHINE\SOFTWARE\Microsoft\Windows\ CurrentVersion\Authentication\Credential Providers.
- Copy the complete GUID key for the credential provider (including the curly brackets — { and } —on either end of the GUID).
- Open the Local Group Policy Editor to enable and assign
a default credential provider.
- From the command prompt, enter the gpedit.msc command to open the Local Group Policy Editor.
- Select .
- Under Setting, double-click Assign a default credential provider to open the Assign a default credential provider window.
- Set the policy to Enabled.
- Under Assign the following credential provider as the default credential provider, enter the GUID of the credential provider (copied from the Windows Registry).
- Click Apply, and the click OK to save your changes.
- Open the Windows Registry to locate the
globally unique identifier (GUID) for the third-party credential
provider that you want to assign as the default credential provider.
- (Optional) Hide a third-party credential provider
tile from the Windows logon screen.
- Open the Windows Registry to locate the
globally unique identifier (GUID) for the third-party credential
provider that you want to hide.
- From the command prompt, enter the regedit command to open the Windows Registry Editor.
- Go to the following Windows Registry location to view the list of currently installed credential providers:HKEY_LOCAL_MACHINE\SOFTWARE\Microsoft\Windows\ CurrentVersion\Authentication\Credential Providers.
- Copy the complete GUID key for the credential provider that you want to hide (including the curly brackets — { and } — on either end of the GUID).
- Open the Local Group Policy Editor to hide the third-party
credential provider.
- From the command prompt, enter the gpedit.msc command to open the Local Group Policy Editor.
- Select .
- Under Setting, double-click Exclude credential providers to open the Exclude credential providers window.
- Set the policy to Enabled.
- Under Exclude the following credential providers, enter the GUID of the credential provider you want to hide (copied from the Windows Registry).To hide multiple credential providers, separate each GUID with a comma.
- Click Apply, and then click OK to save your changes.
- Open the Windows Registry to locate the
globally unique identifier (GUID) for the third-party credential
provider that you want to hide.
- Finalize your changes.Once your changes are finalized, reboot your system for the changes to take effect.