PA-52R-5G
Table of Contents

PA-52R-5G
Learn how to install a DIN clip on the firewall and then mount it on a DIN
rail.
You must attach the DIN rail bracket (PAN-PA-52R-DIN-CLIP) before installing the
PA-52R-5G on a DIN rail. You can either attach the bracket to the bottom or back panel of the firewall depending on your
desired deployment orientation.
Install the DIN Rail Bracket on the Bottom Panel
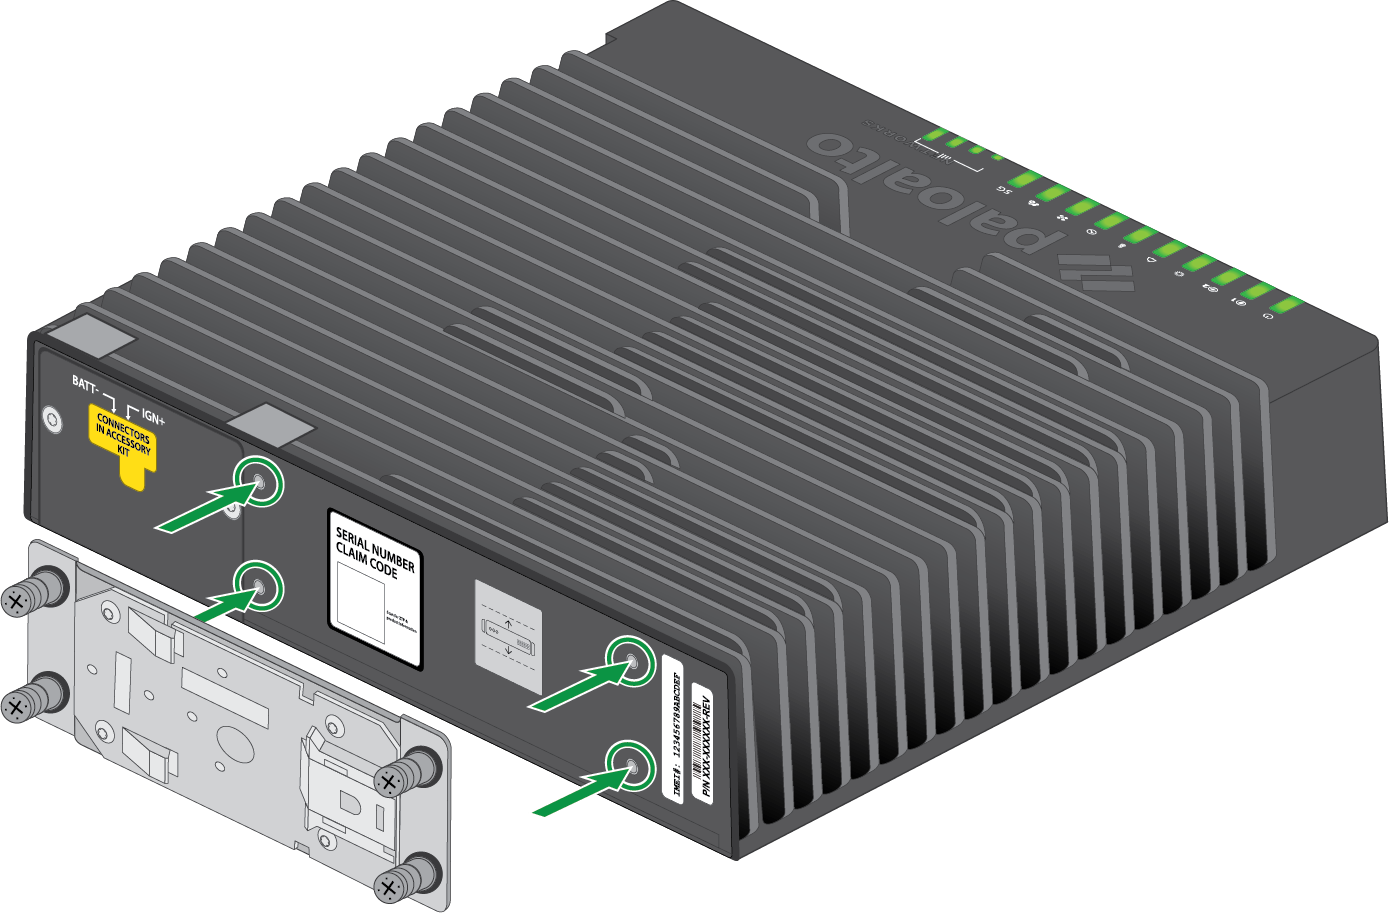
- Align the four holes in the DIN rail bracket with the four holes on the bottom
panel of the firewall.
![]()
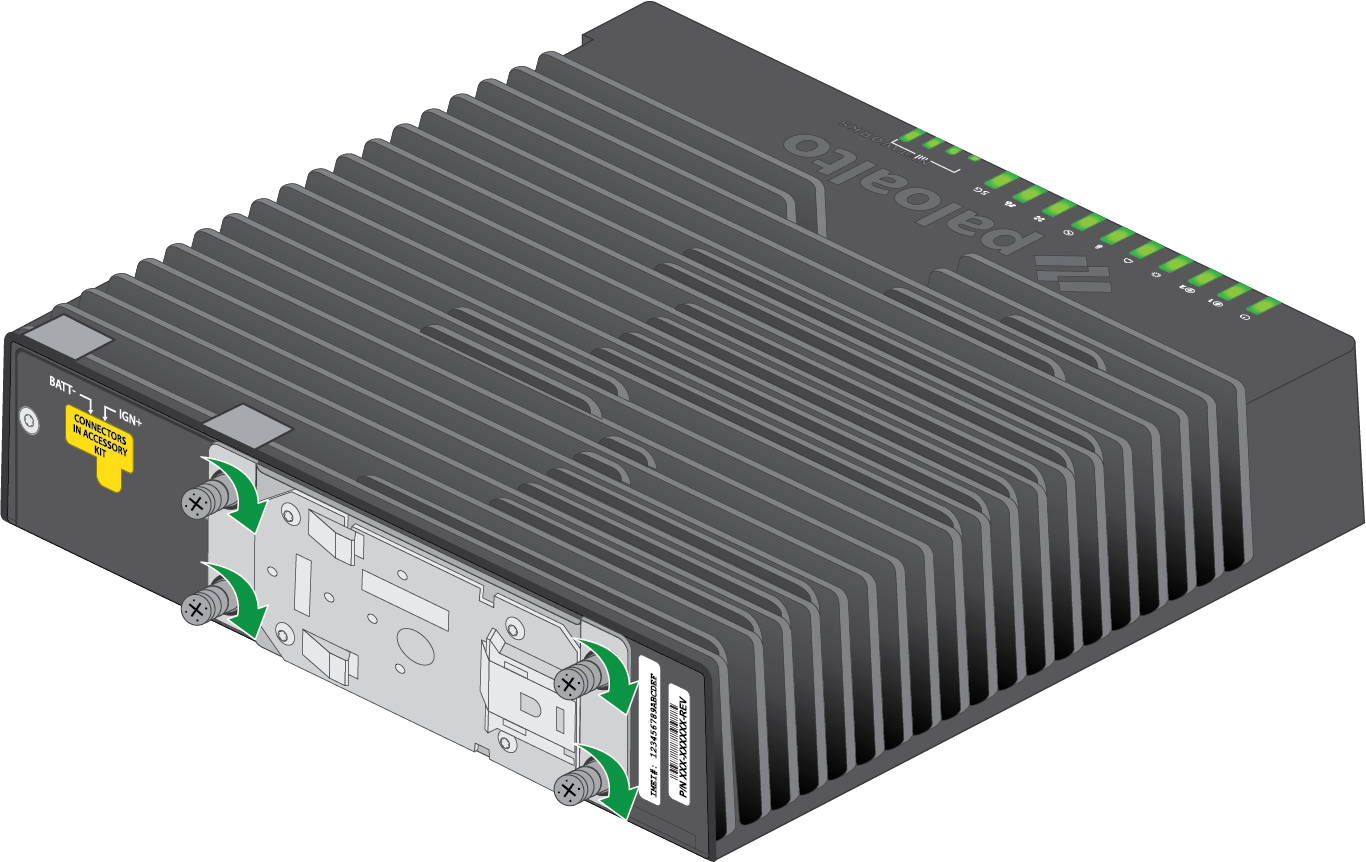
- Secure the DIN rail bracket to the device by tightening the four captive M3
screws.
![]()
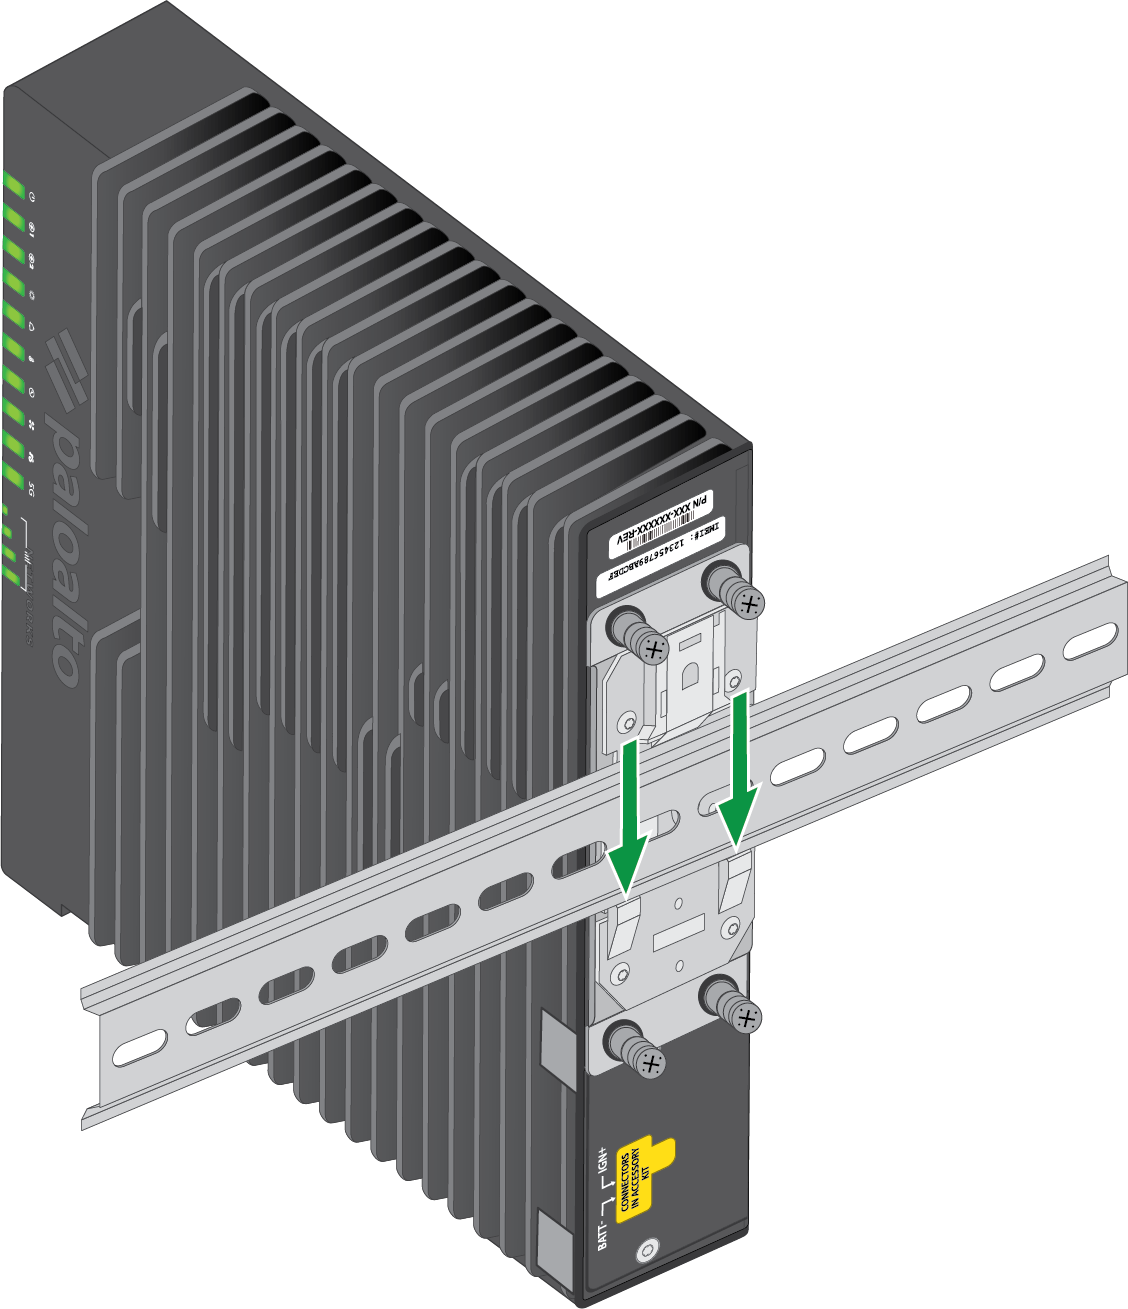
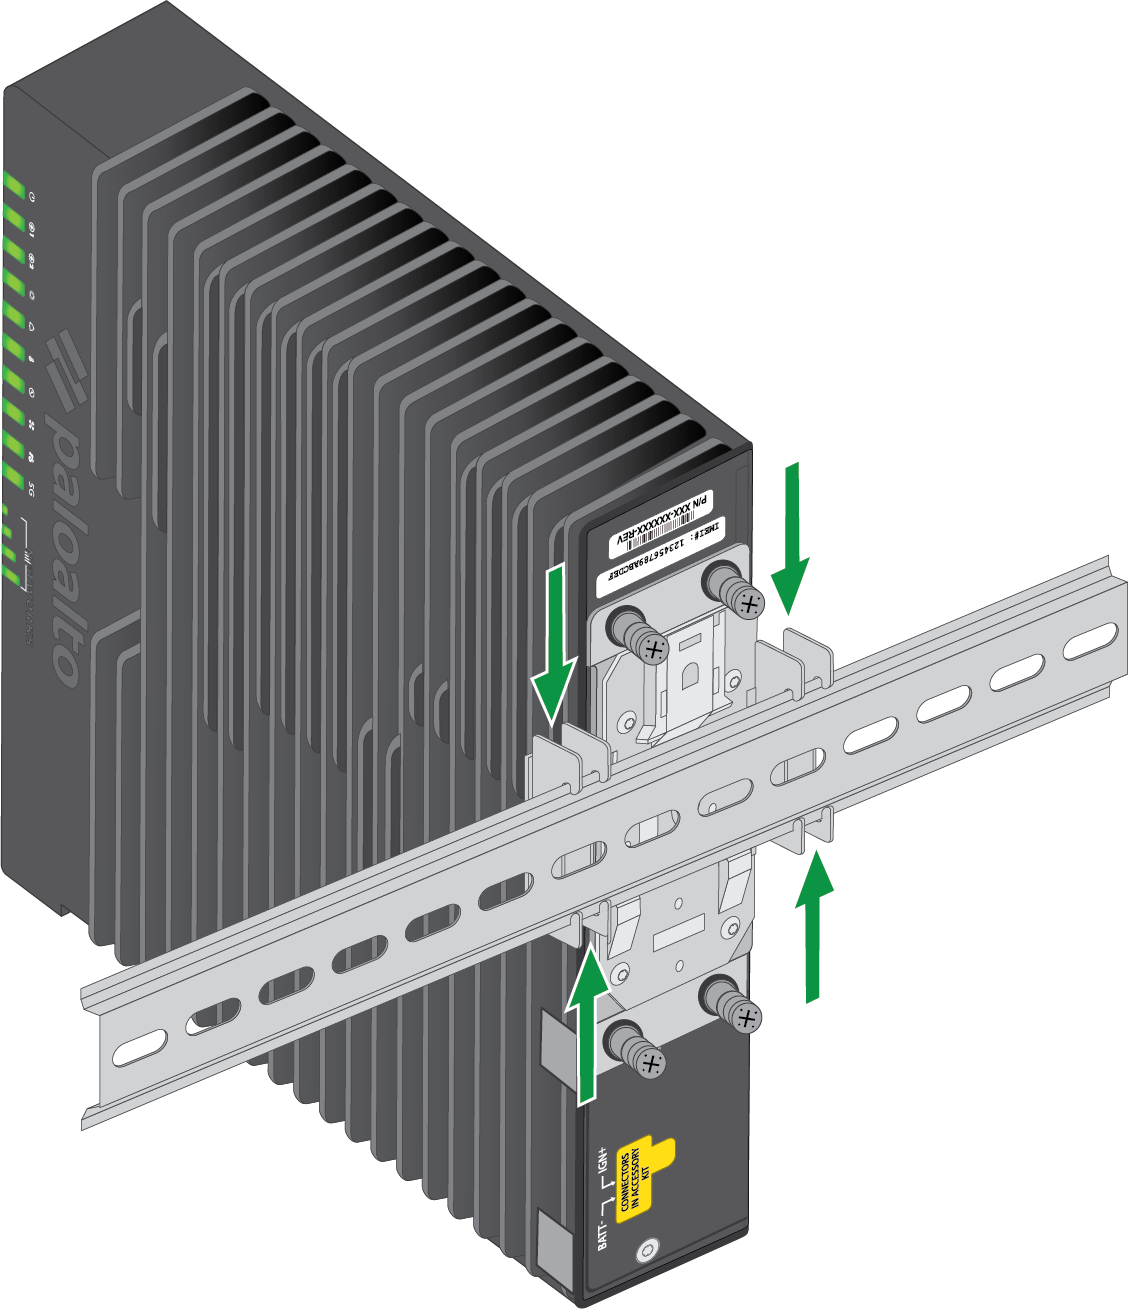
- Bring the device to the DIN rail and push the rail down into the two "hooks" in
the bracket. Ensure that the lever (opposite the hooks) locks into place
securely.
![]()
- Attach two stoppers on the DIN rail at both ends of the firewall, making sure
that they are flush with the device.
![]()
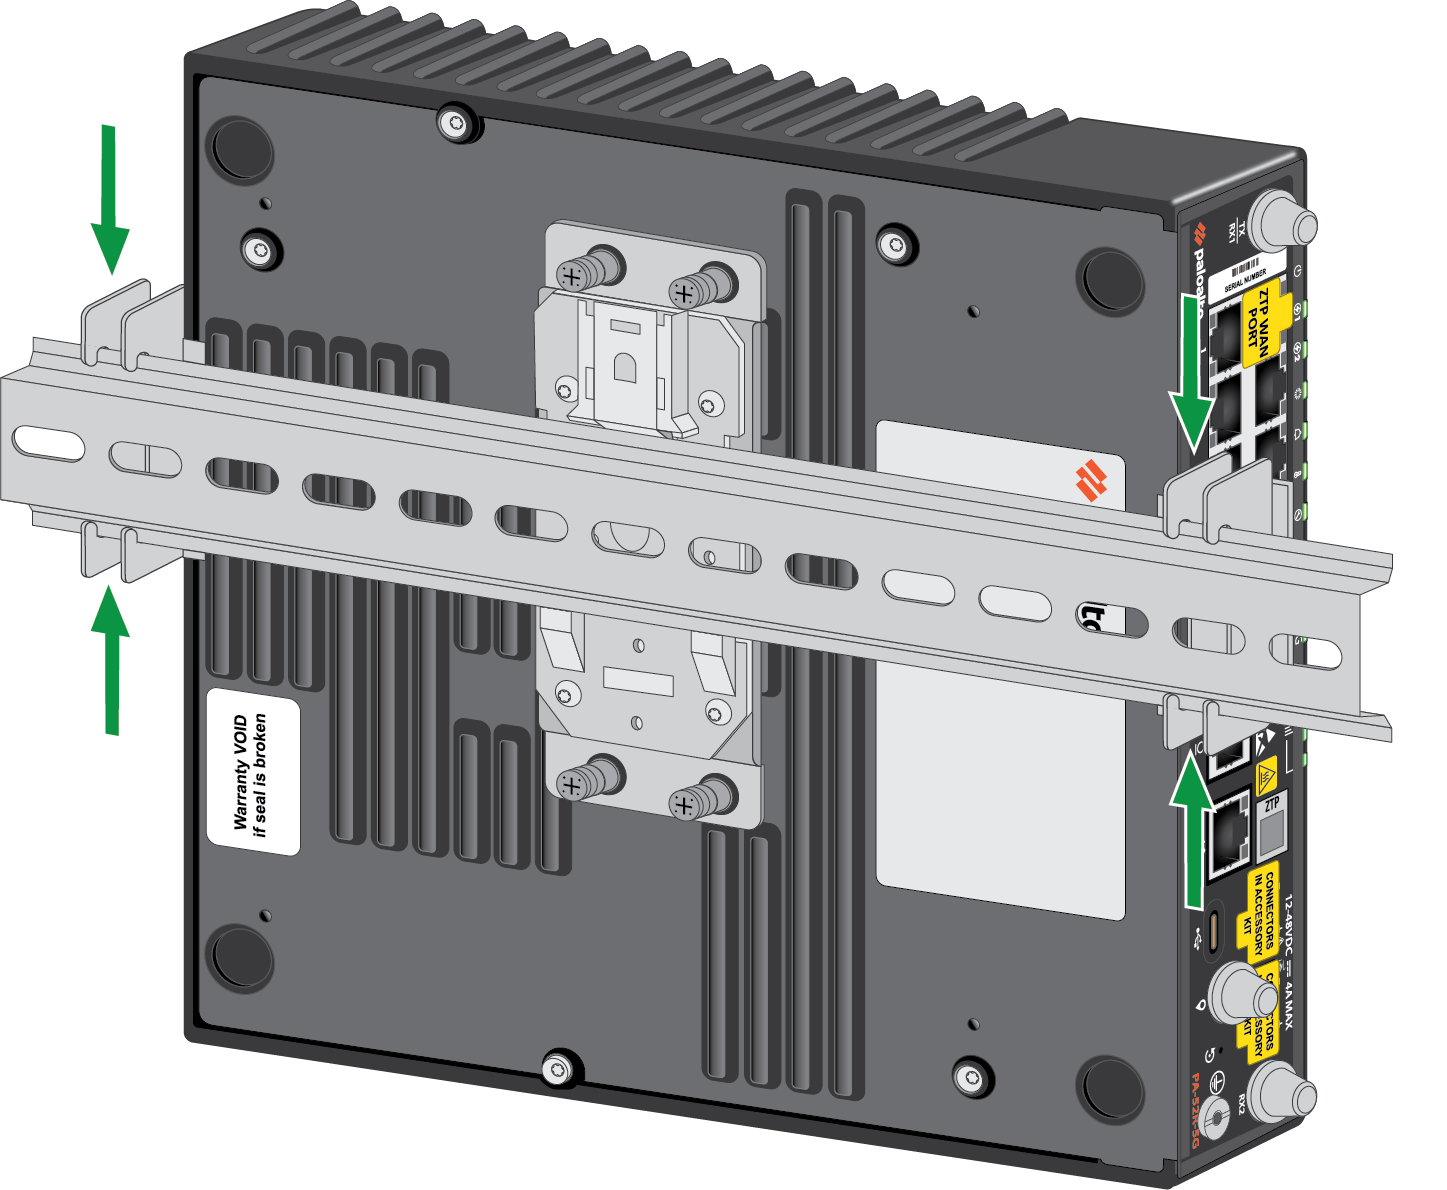
Install the DIN Rail Bracket on the Back Panel
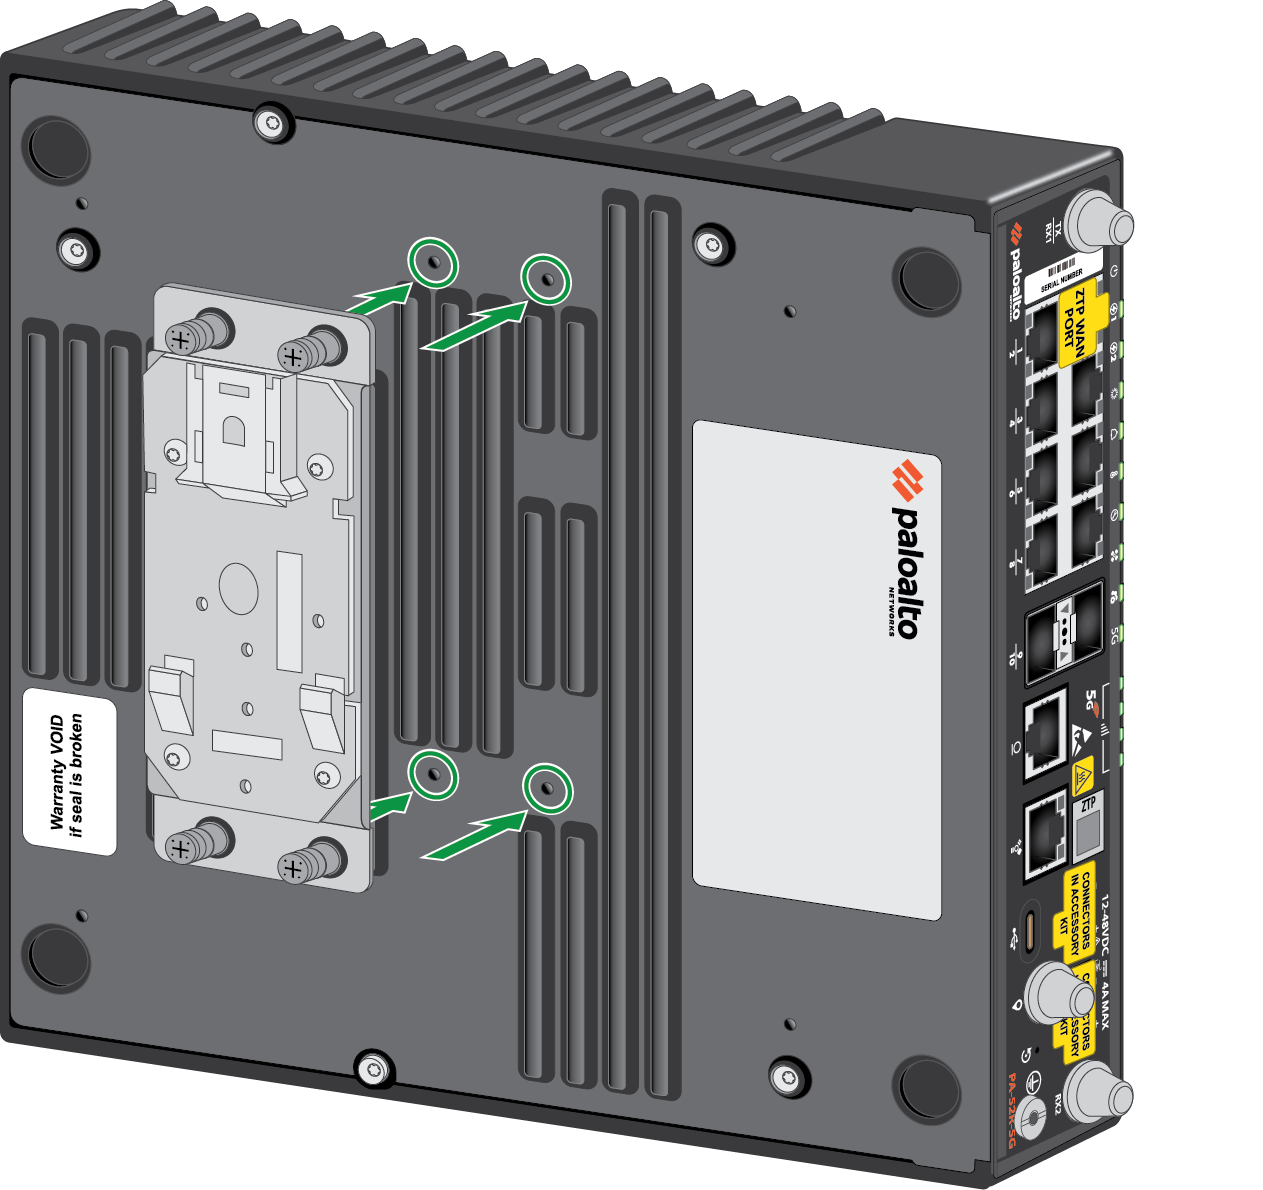
- Align the four holes in the DIN rail bracket with the four holes on the back
panel of the firewall.
![]()
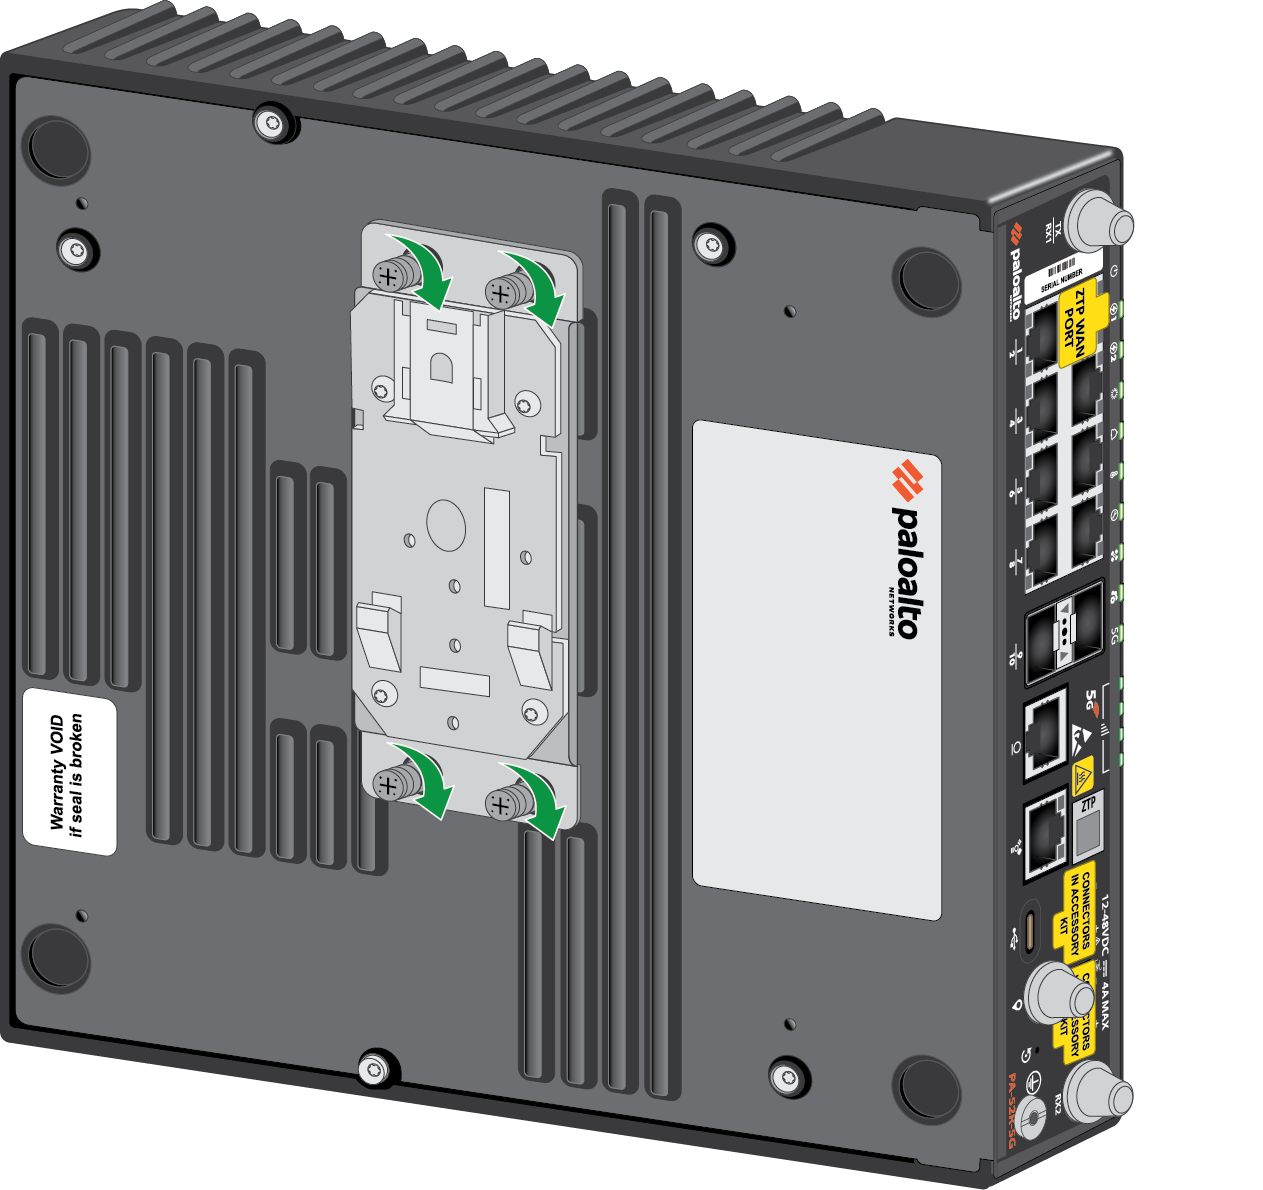
- Secure the DIN rail bracket to the device by tightening the four captive M3
screws.
![]()
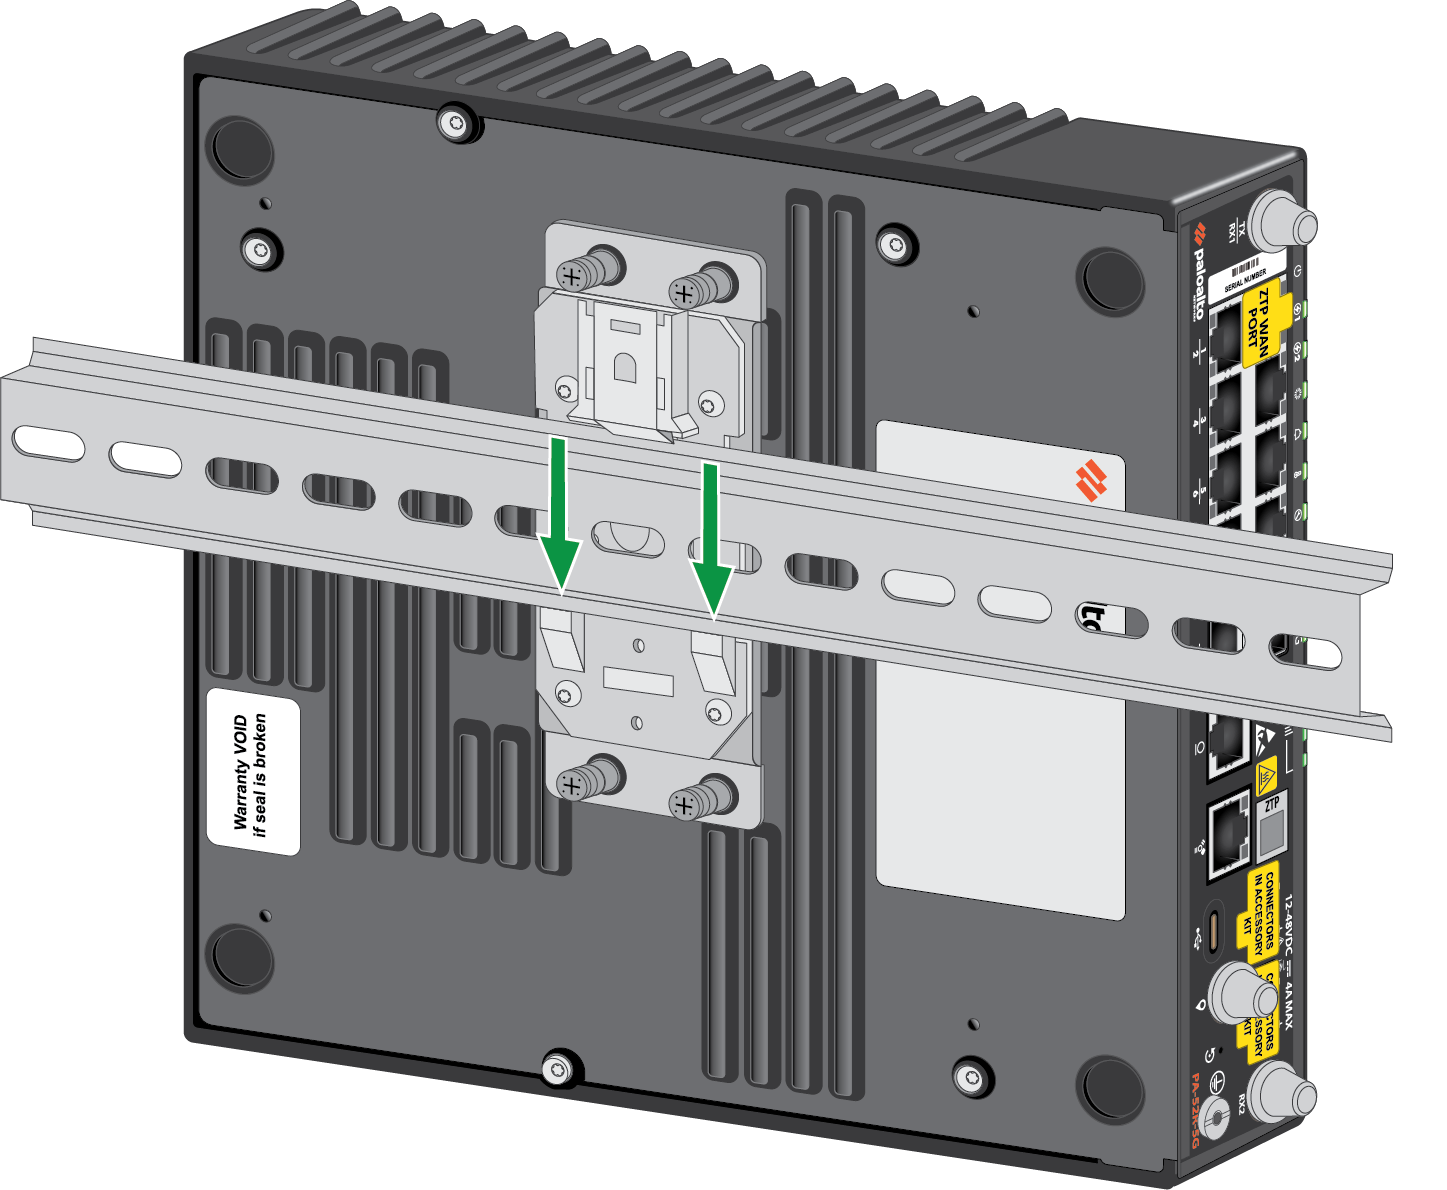
- Bring the device to the DIN rail and push the rail sideways into the two "hooks"
in the bracket. Ensure that the lever (opposite the hooks) locks into place
securely.
![]()
- Attach two stoppers on the DIN rail at both ends of the firewall, making sure
that they are flush with the device.
![]()
Uninstall the DIN Rail Bracket
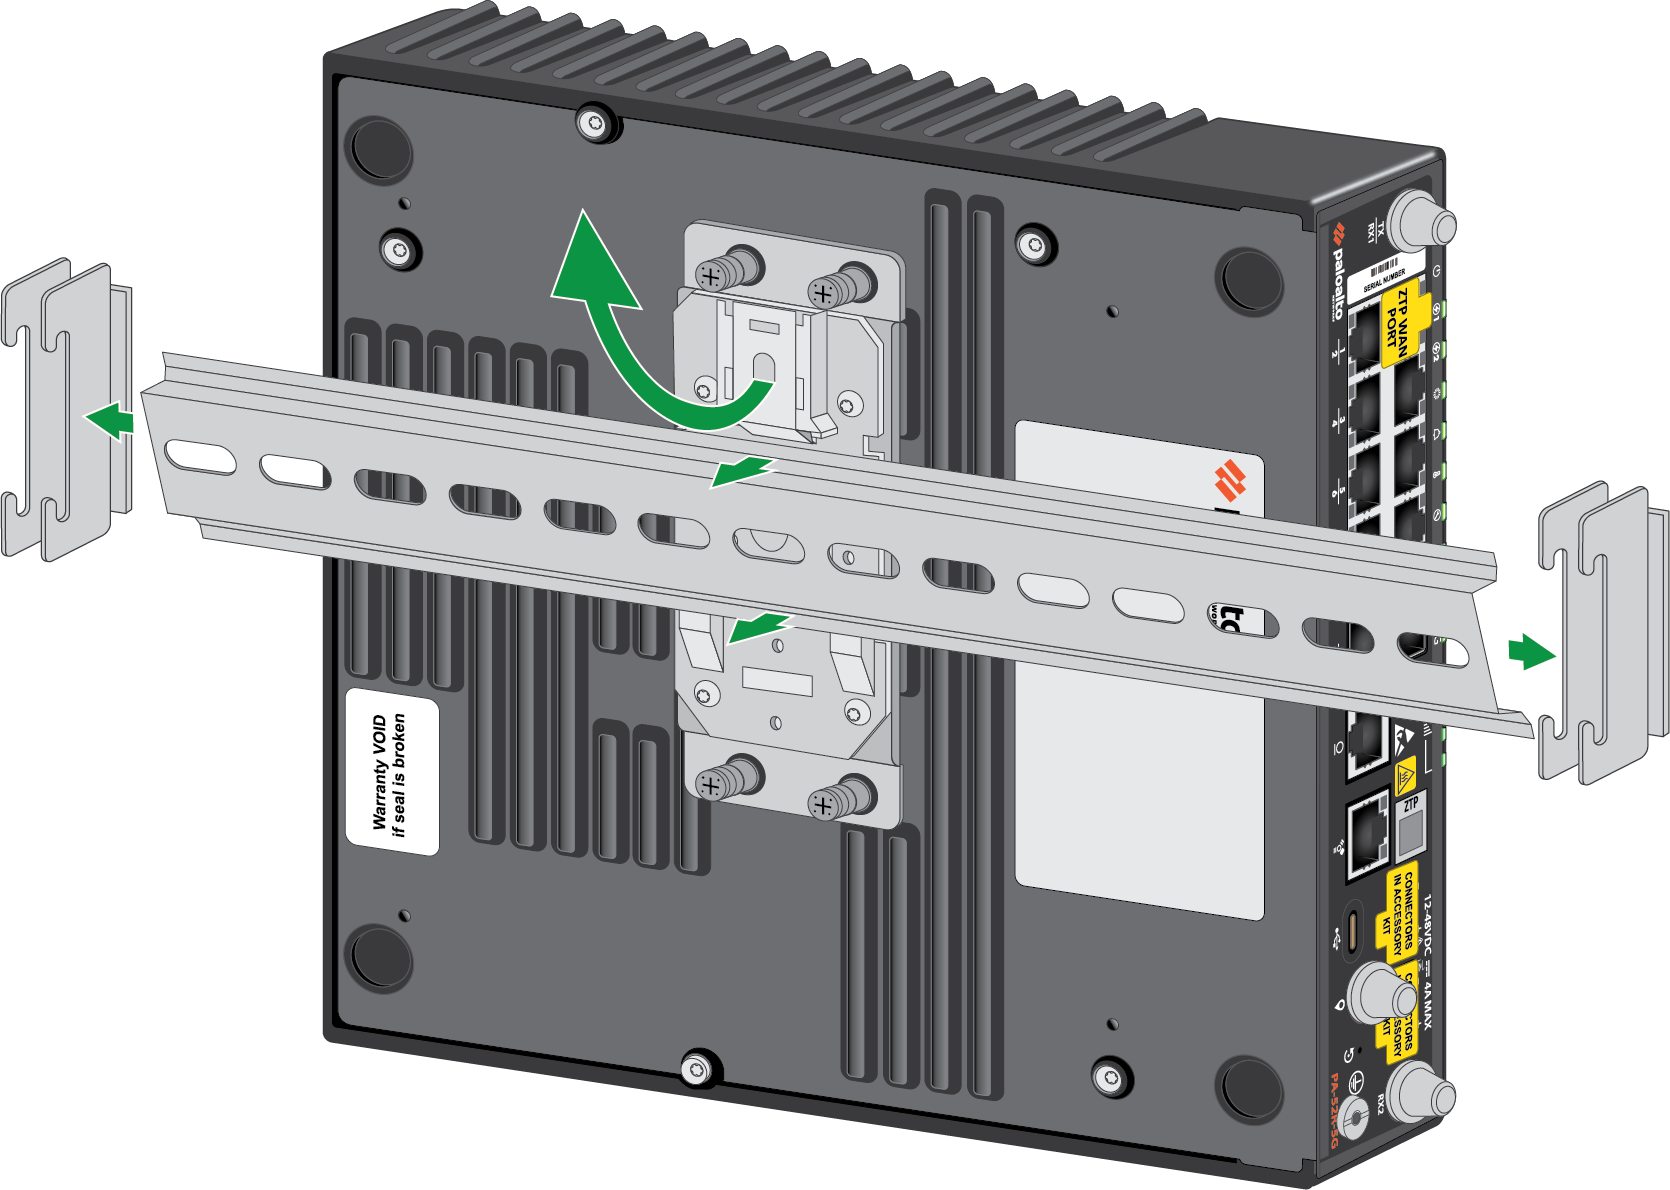
- Pull the lever on the DIN rail bracket upwards so that it releases the rail.
![]()
- Remove the stoppers, then carefully pull the device off of the DIN rail.
- Unscrew the four M3 screws in the DIN rail bracket to detach it from the device.