PA-56R-POE-5G
Table of Contents

PA-56R-POE-5G
Learn how to mount the PA-50R Series firewall on a wall.
The following table lists the items included in the PAN-PA-56R-WALL-MNT kit.
| Quantity | Item |
|---|---|
| 1 | Wall mount bracket |
| 4 | Phillips pan head screw — M4 × 8mm, stainless steel |
| 4 | Phillips pan head screw with plastic anchor — #6-20, 1.25"L, zinc-plated steel |
| 2 | Desiccant |
- Mark the locations on the wall that line up with the four wall mount holes on the bottom of the wall mount bracket.Ensure there are no building services (water, gas, or wiring) behind the wall where you intend to install the firewall.Drill holes into the four marked locations on the wall. Make sure to remove any loose debris around the holes.Install the two provided wall anchors into the upper two holes.Attach the firewall to the wall mount.
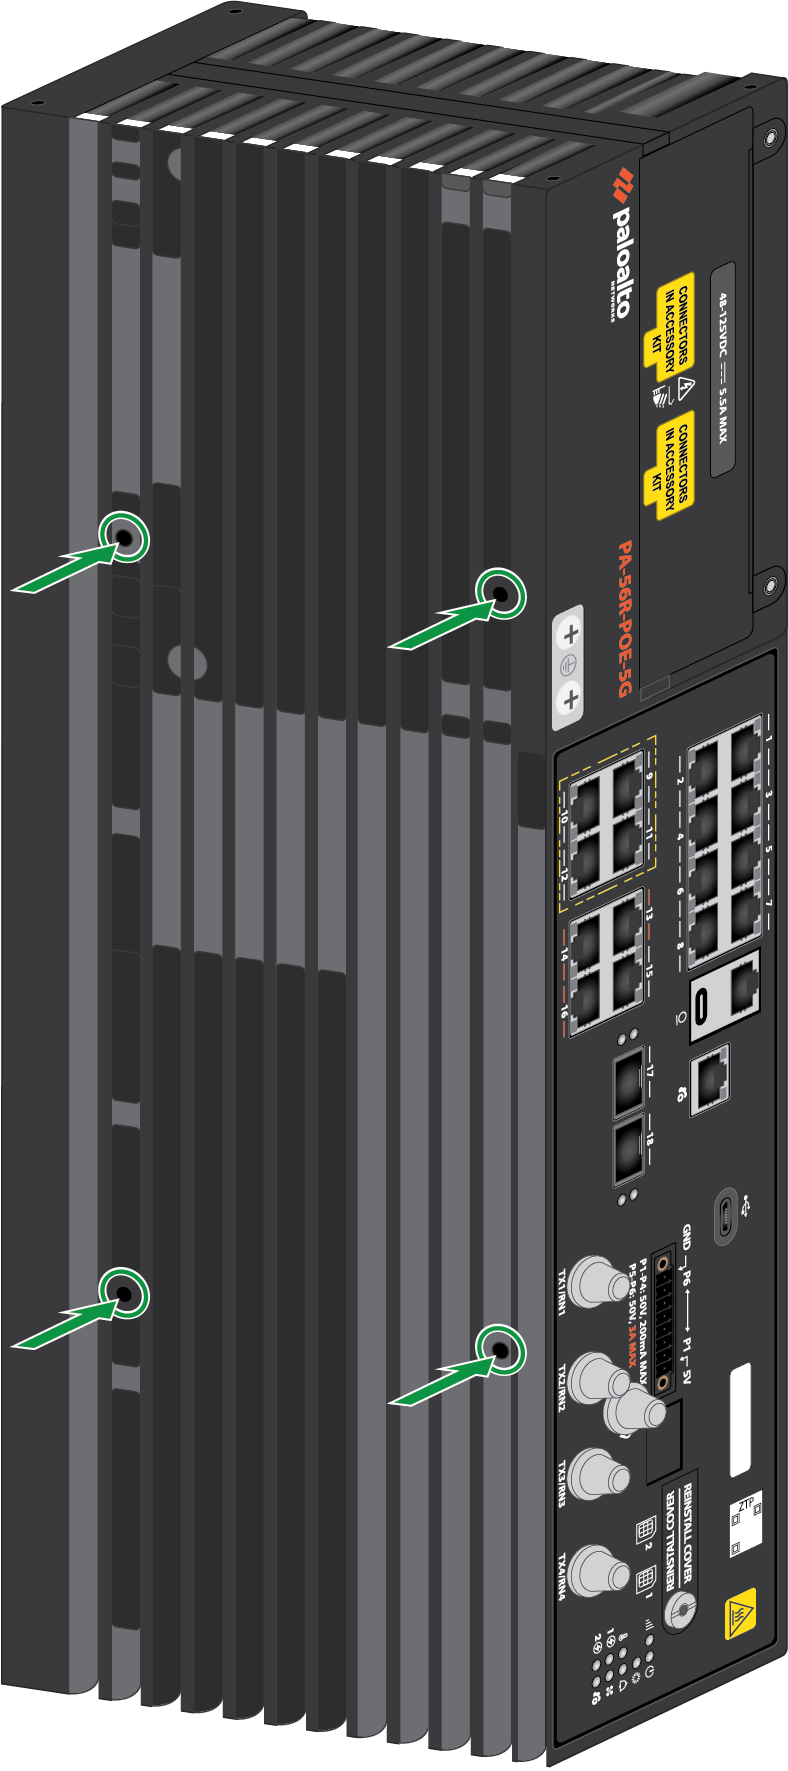
- Identify the four screw holes on the bottom panel of the PA-56R-POE-5G.
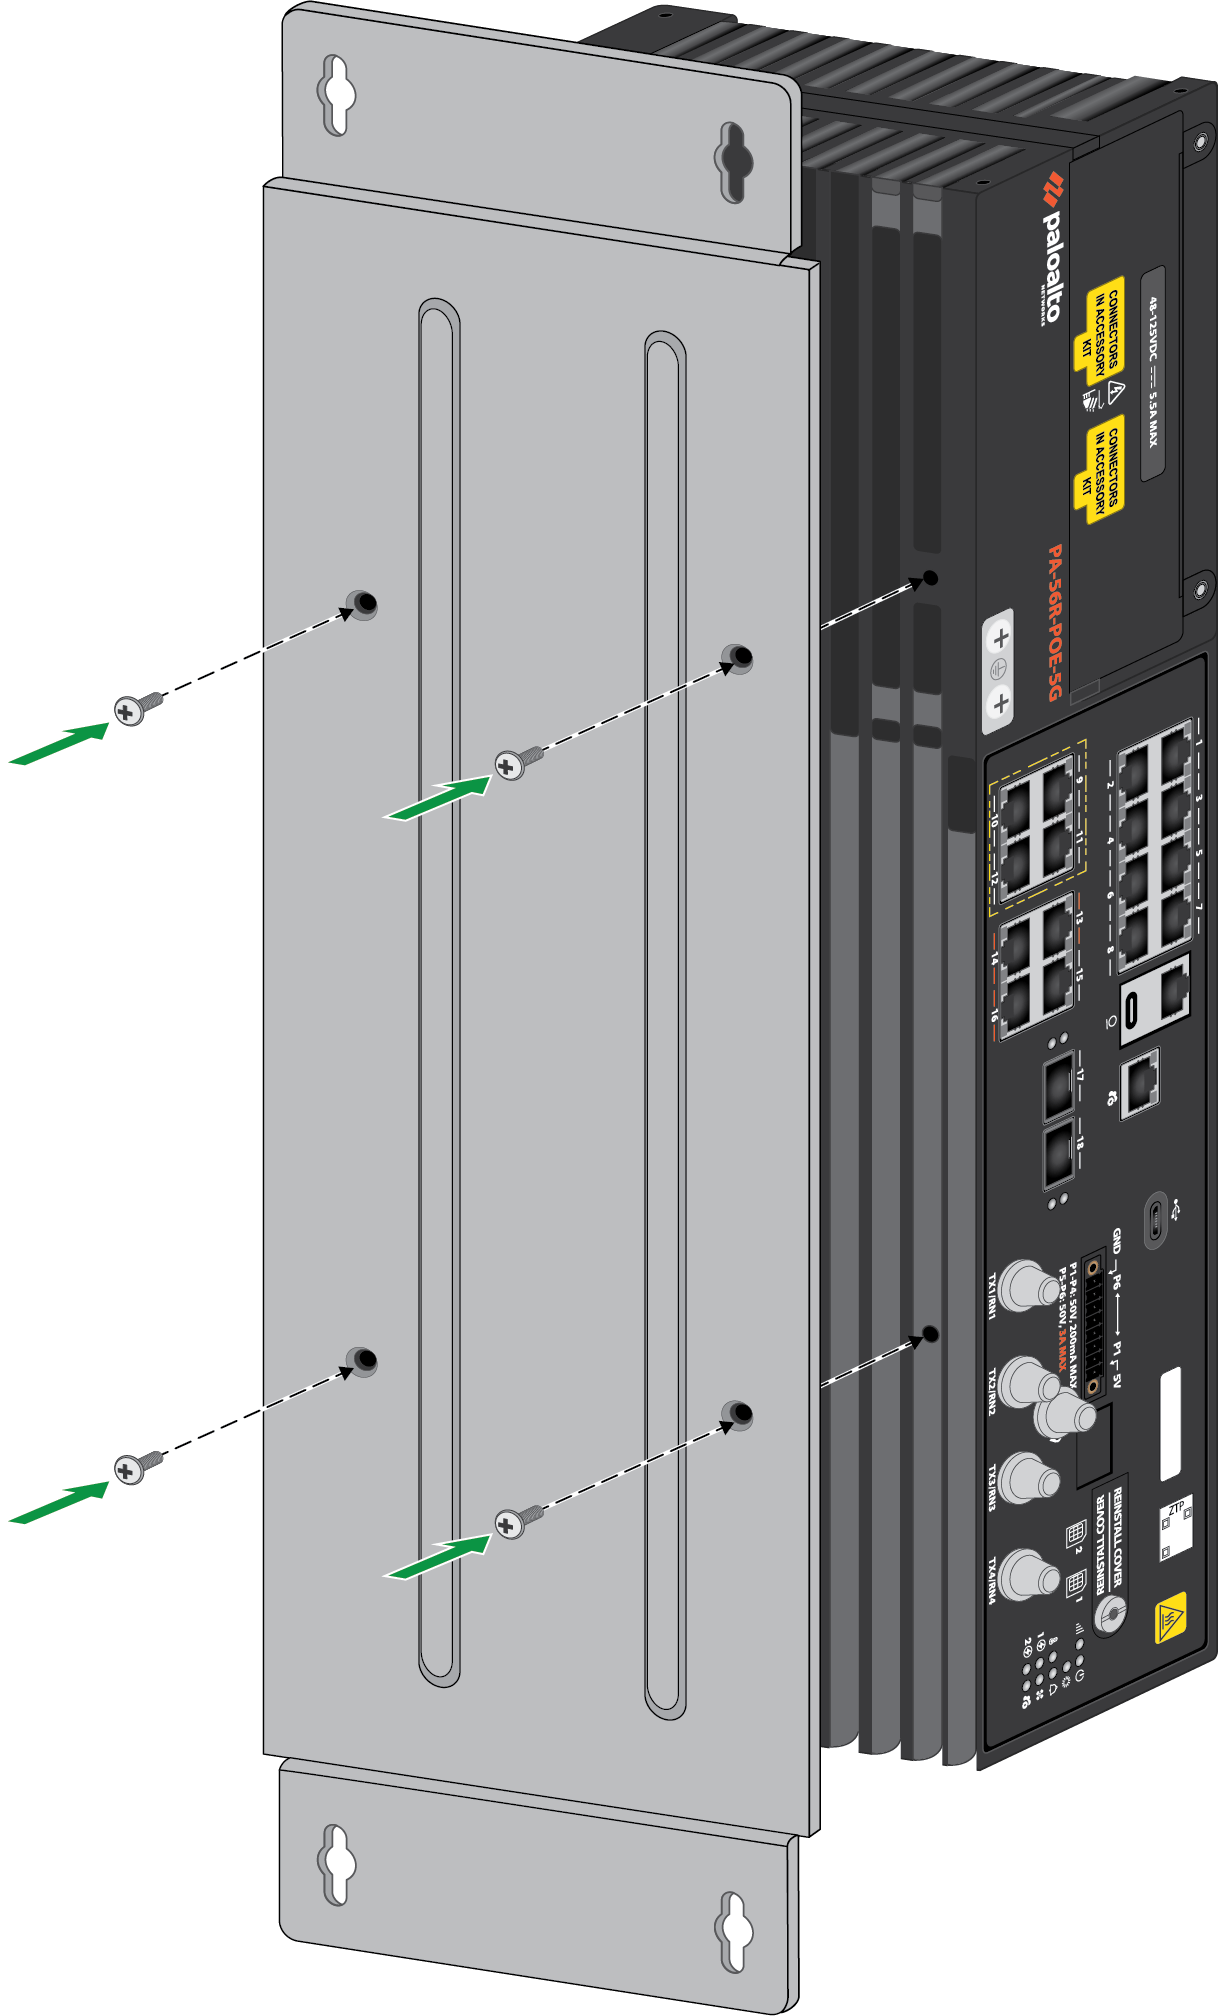
![]() Align the wall mount bracket with the four screw holes.Secure the wall mount bracket to the firewall using the four provided M4 Pan head screws.
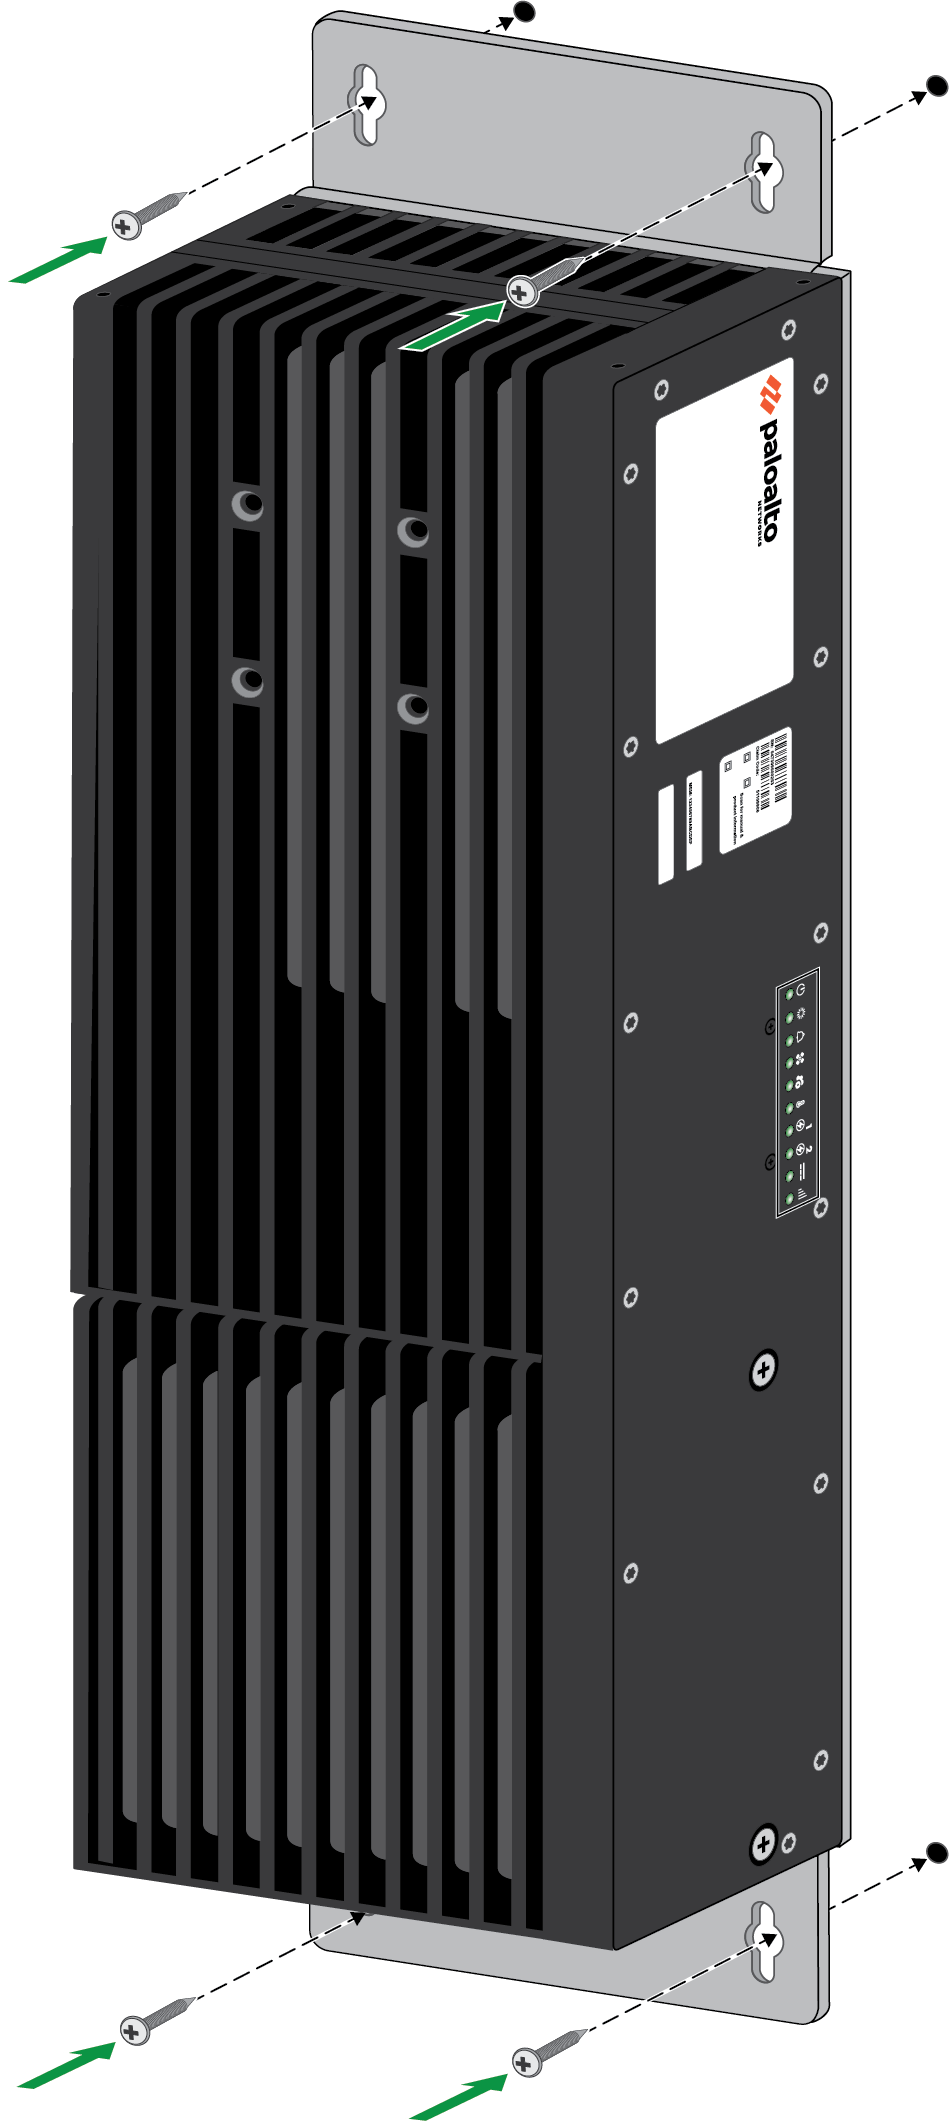
Align the wall mount bracket with the four screw holes.Secure the wall mount bracket to the firewall using the four provided M4 Pan head screws.![]() Using four #6-20 screws, install the wall mount bracket to the anchors in the wall.
Using four #6-20 screws, install the wall mount bracket to the anchors in the wall.![]()