Enterprise DLP
Edit the Enterprise DLP Data Filtering Settings
Table of Contents
Edit the Enterprise DLP Data Filtering Settings
Edit the Enterprise Data Loss Prevention (E-DLP) data filtering settings to specify the actions the
firewall using Enterprise DLP takes if the data filtering settings are
exceeded.
| Where Can I Use This? | What Do I Need? |
|---|---|
|
Or any of the following licenses that include the Enterprise DLP license
|
Edit and apply Enterprise Data Loss Prevention (E-DLP) data filtering settings. These network
settings are determine the networking and file size parameters for files scanned by
the DLP cloud service and specify the actions Enterprise DLP takes when these
parameters are exceeded.
(NGFW and Prisma Access managed by Panorama)
If you want to enable non-file inspection for your NGFW and Prisma Access tenants you must enable the setting from Panorama.
For NGFW and Prisma Access managed by Panorama,
enabling non-file inspection from Strata Cloud Manager is not supported and
causes Panorama commits to fail.
Edit the Enterprise DLP Data Filtering Settings on Strata Cloud Manager
Edit the Enterprise Data Loss Prevention (E-DLP) data filtering settings for Prisma Access (Managed by Strata Cloud Manager) and NGFW (Managed by Strata Cloud Manager).
- Log in to Strata Cloud Manager.
- Select and edit the Data Transfer settings.
- Edit the File Based Settings.
- Specify the File Movement Max Latency (sec) for a file forward before an action is taken by Enterprise DLP.For inspection of files greater than 20 MB, Palo Alto Networks recommends setting the max latency to greater than 60 seconds.
- Specify the Action When Max Latency is Reached (Allow or Block) Enterprise DLP takes if no verdict was received for a file forward due to the file forward time exceeding the configured Max Latency.Selecting Block applies only to DLP rules configured to block files. This setting does not impact Enterprise DLP data profiles configured to alert when traffic containing sensitive data is scanned.
- Specify the Scan Limit Max File Size for Alert (MB) to enforce the maximum file size for file forwarded to Enterprise DLP when a DLP rules is configured to Alert.
- Specify the Scan Limit Max File Size for Block (MB) to enforce the maximum file size for files forwarded to Enterprise DLP for inspection.
- Specify the Action on Max File Size (Allow or Block) Enterprise DLP takes if no verdict was received for a file forward due to the file size being larger than the configured Max File Size.Selecting Block applies only to DLP rules configured to block files. This setting does not impact Enterprise DLP data filtering profiles configured to alert when traffic containing sensitive data is scanned.
- Check (enable) Log Files Not Scanned to generate an alert in the DLP incident when Enterprise DLP can't scan a forwarded file.
- Specify the Action When Scanning Error Occurred (Alert or Block) the NGFW or Prisma Access tenant takes when any kind of error occurs that prevents Enterprise DLP from inspecting a forwarded file and rendering a verdict.
- Save.
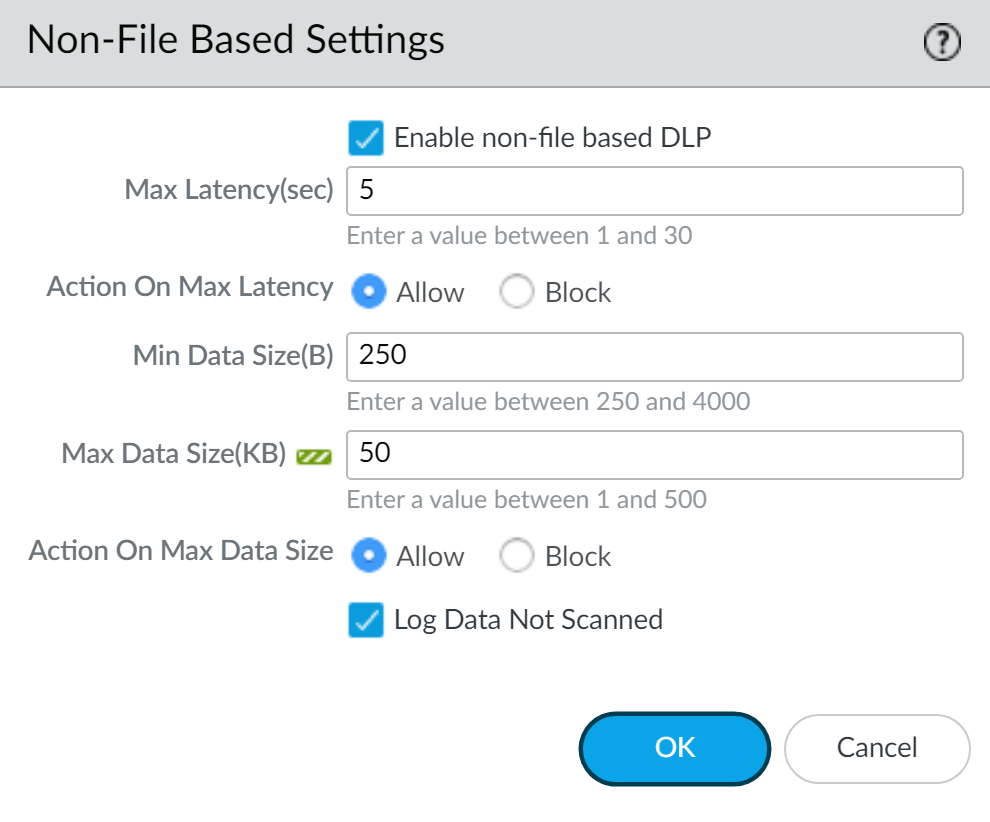
- Edit the Non-File Based Settings.
- Enable non-file based DLP.Enable this setting to prevent exfiltration of sensitive data in non-file format traffic for collaboration apps, web forms, cloud and SaaS apps, and social media on your network.
- Specify the Max Latency (sec) to configure the allowable time for a non-file data forwards to determine the allowable time before the NGFW or Prisma Access tenant take the configured Action on Max Latency.
- Specify the Action on Max Latency (Allow or Block) NGFW or Prisma Access tenant takes if it did not receive a verdict from Enterprise DLP due to the forward time exceeding the configured Max Latency.Selecting Block applies only to DLP rules configured to block non-file data. This setting does not impact Enterprise DLP data profiles configured to alert when traffic containing sensitive data is scanned.
- Specify the Min Data Size (B) to enforce a minimum size for non-file data to be scanned by Enterprise DLP. By default, Enterprise DLP supports a minimum non-file traffic data size of 250 bytes.
- Specify the Max Data Size (KB) to enforce a maximum size for non-file data to be scanned by Enterprise DLP.
- Specify the Action on Data Size (Allow or Block) NGFW or Prisma Access tenant takes if it did not receive a verdict from Enterprise DLP for a non-file traffic due to the traffic data size being larger than the Max Data Size.Selecting Block applies only to DLP rules configured to block non-file data. This setting does not impact Enterprise DLP data profiles configured to alert when traffic containing sensitive data is scanned.
- Check (enable) Log Data Not Scanned to generate an alert in the DLP incident when Enterprise DLP can't scan non-file traffic.
- Save.
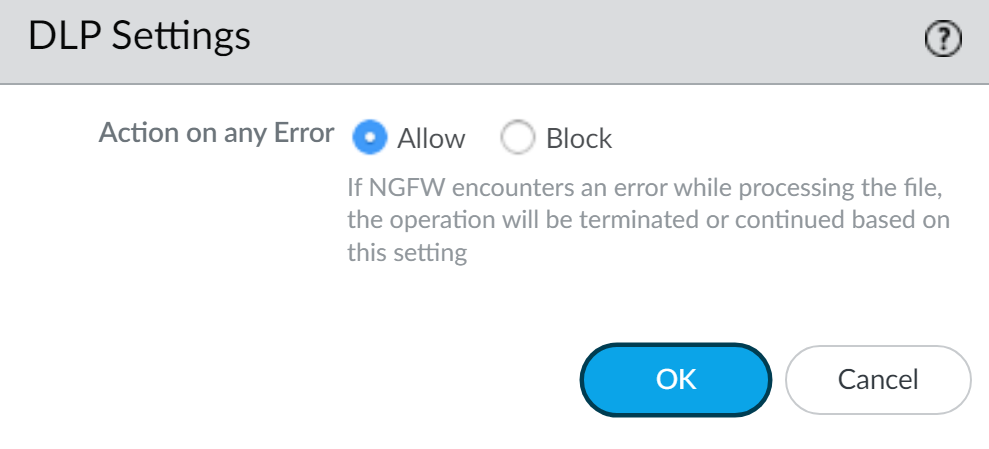
- In the DLP Settings, configure the Action on any Error to specify the action the NGFW or Prisma Access tenant takes when any kind of error occurs that prevents Enterprise DLP from inspecting forwarded file or non-file traffic and rendering a verdict.Select Allow to allow the file or non-file traffic to continue to the intended destination when Enterprise DLP encounters an error or select Block to block the file or non-file traffic. This includes when the NGFW or Prisma Access tenant encounter file or non-file traffic smaller than the configured Min Data Size (B) (non-file), and the Action on Max File Size (file) and Max Data Size (KB) (non-file).Save.
- Push your DLP rule.
- Push Config and Push.
- Select (enable) Remote Networks and Mobile Users.
- Push.
Edit the Enterprise DLP Data Filtering Settings on Panorama
Edit the data filtering settings to specify the actions the NGFW or Prisma Access tenant takes on traffic scanned to the DLP cloud service.
- Log in to the Panorama web interface.
- Select and select the Template associated with the NGFW or Prisma Access tenant using Enterprise DLP.
- Edit the Data Filtering Settings.
- Specify the Max Latency (sec) for a file upload before an action is taken by the NGFW or Prisma Access tenant.For inspection of files greater than 20 MB, Palo Alto Networks recommends setting the max latency to greater than 60 seconds.
- Specify the Action on Max Latency (Block or Allow) the NGFW or Prisma Access tenant takes if no verdict was received for a file upload due to the upload time exceeding the Max Latency.Selecting Block applies only to data profiles configured to block files. This setting doesn’t impact Enterprise DLP data filtering profiles configured to alert when traffic containing sensitive data is scanned.
- Specify the Max File Size (MB) to enforce a maximum file size for files uploaded to the DLP cloud service for inspection.
- Specify the Action on Max File Size (Block or Allow) the NGFW or Prisma Access tenant takes if no verdict was received for a file upload due to the file size being larger than the configured Max File Size.Selecting Block applies only to data profiles configured to block files. This setting doesn’t impact Enterprise DLP data filtering profiles configured to alert when traffic containing sensitive data is scanned.(DLP 3.0.3 only) Increasing the max file size for the Enterprise DLP data filtering settings to 21 MB or greater when Panorama has the Enterprise DLP 3.0.3 plugin installed is supported only from the Panorama CLI.admin>configureCode copied to clipboardUnable to copy due to lack of browser support.admin#set template <template_name> config shared dlp-settings max-file-size <1 - 100>Code copied to clipboardUnable to copy due to lack of browser support.
- Check (enable) Log Files Not Scanned to generate an alert in the data filtering log when a file can’t be scanned to the DLP cloud service.
- Click OK to save your configuration changes.

- Edit the Non-File Data Filtering Settings.
- Verify that Enable Non File DLP is checked (enabled).Non-File DLP is enabled by default when you install Panorama plugin for Enterprise DLP 3.0.1.
- Specify the Max Latency (sec) to configure the allowable time for non-file data uploads to determine the allowable time before an action is taken by the NGFW or Prisma Access tenant.
- Specify the Action on Max Latency (Allow or Block) the NGFW or Prisma Access tenant takes if no verdict was received for a non-file traffic data upload due to the upload time exceeding the configured Max Latency.Selecting Block applies only to data profiles configured to block non-file data. This setting doesn’t impact Enterprise DLP filtering profiles configured to alert when traffic containing sensitive data is scanned.
- Specify the Min Data Size (B) to enforce a minimum size for non-file data to be scanned by Enterprise DLP.
- Specify the Max Data Size (KB) to enforce a maximum size for non-file data to be scanned by Enterprise DLP.
- Specify the Action on Data File Size (Allow or Block) the NGFW or Prisma Access tenant takes if no verdict was received for a non-file traffic data upload due to the traffic data size being larger than the configured Max Data Size.Selecting Block applies only to data profiles configured to block non-file data. This setting doesn’t impact Enterprise DLP data filtering profiles configured to alert when traffic containing sensitive data is scanned.
- Check (enable) Log Data Not Scanned to generate an alert in the data filtering log when non-file data can’t be scanned by the DLP cloud service.
- Click OK to save your configuration changes.
- Specify the Action on any Error the NGFW or Prisma Access tenant takes when any kind of error occurs that prevents Enterprise DLP from inspecting forwarded file or non-file traffic and rendering a verdict.This includes when the NGFW or Prisma Access tenant encounter file or non-file traffic smaller than the configured Min Data Size (B) (non-file), and the Action on Max File Size (file) and Max Data Size (KB) (non-file).
- Select Allow (default) to continue if the NGFW or Prisma Access tenant experiences any type of error.
- Select Block to stop uploading if the NGFW or Prisma Access tenant experiences any type of error.
Click OK to continue.
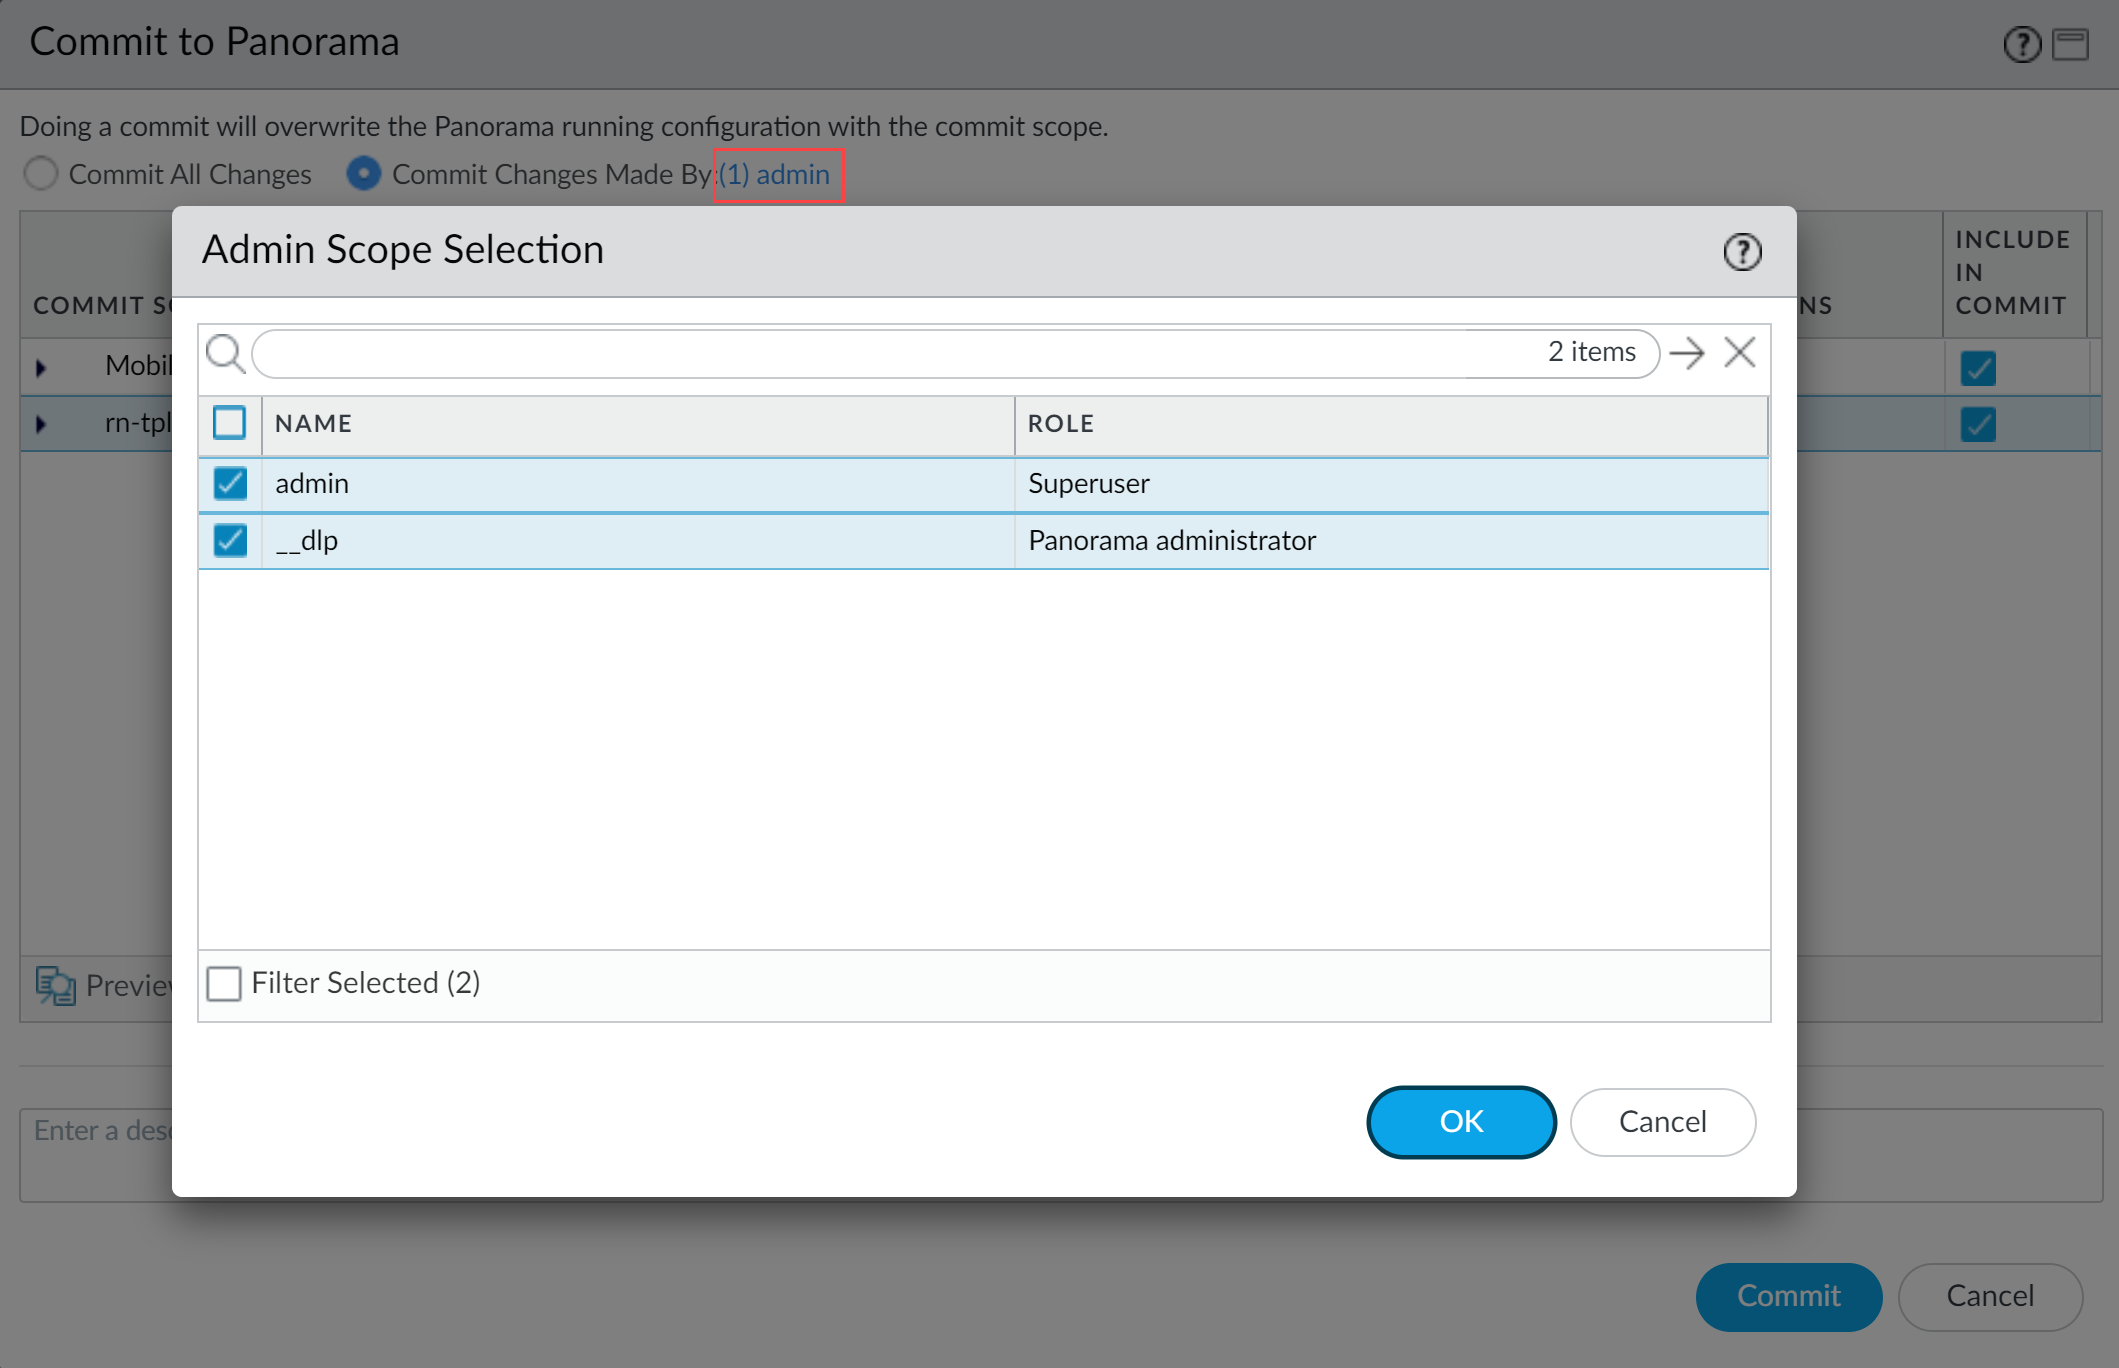
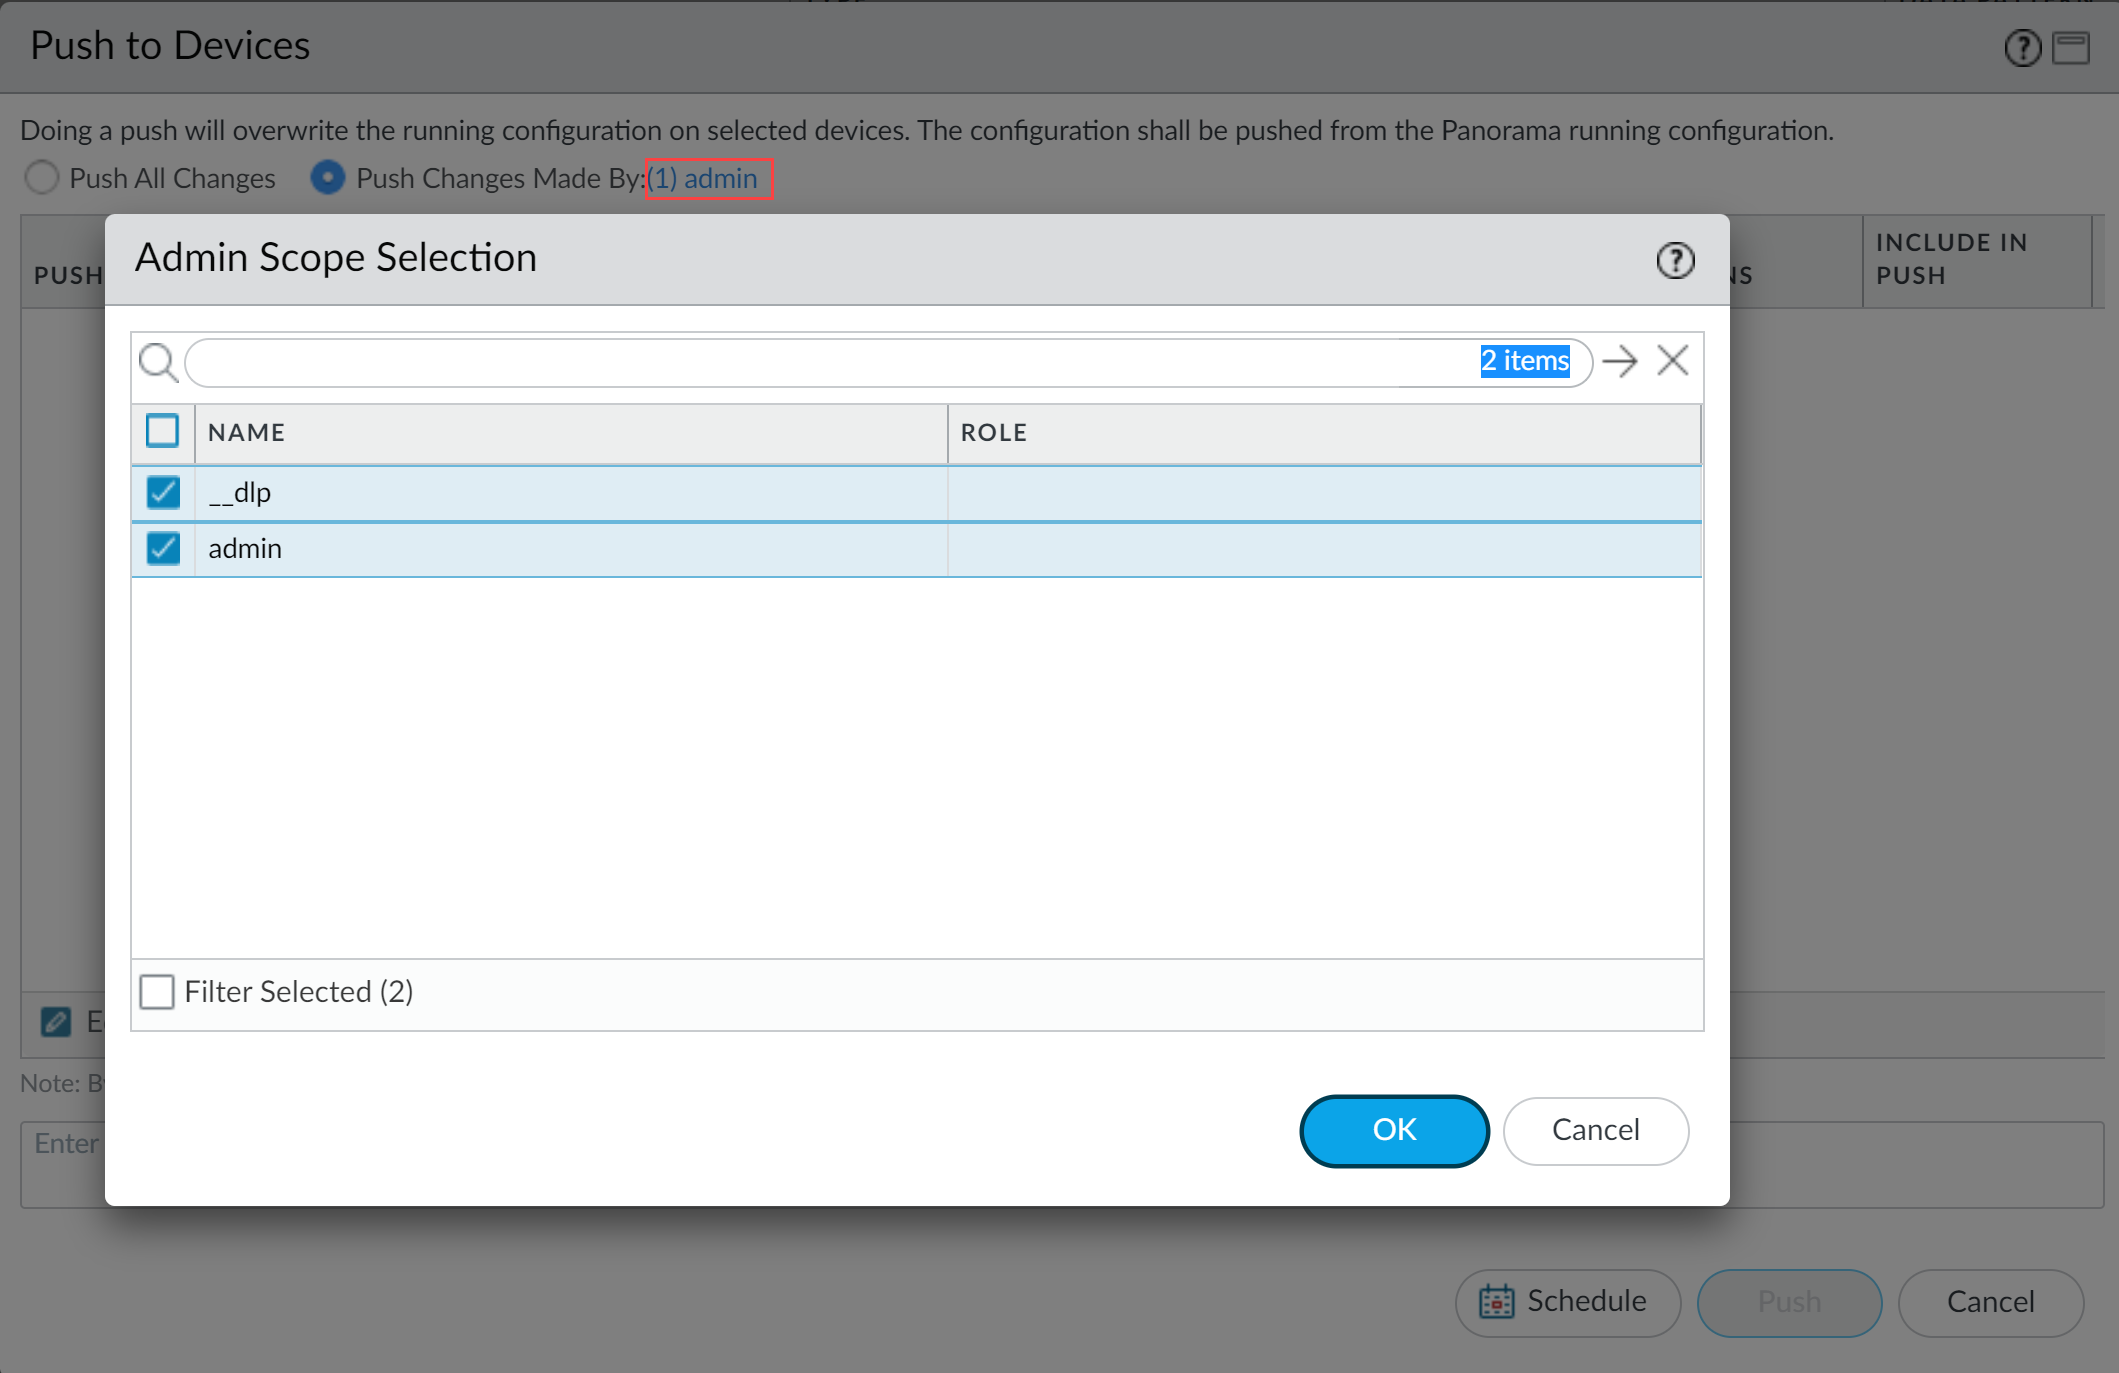
- Commit and push the new configuration to your NGFW or Prisma Access tenant.The Commit and Push command isn’t recommended for Enterprise DLP configuration changes. Using the Commit and Push command requires the additional and unnecessary overheard of manually selecting the impacted templates and NGFW or Prisma Access tenant in the Push Scope Selection.

Edit the Enterprise DLP Data Filtering Settings for Email DLP
Edit the Enterprise Data Loss Prevention (E-DLP) data filtering settings for Email DLP on Strata Cloud Manager.
- Log in to Strata Cloud Manager.
- Select .
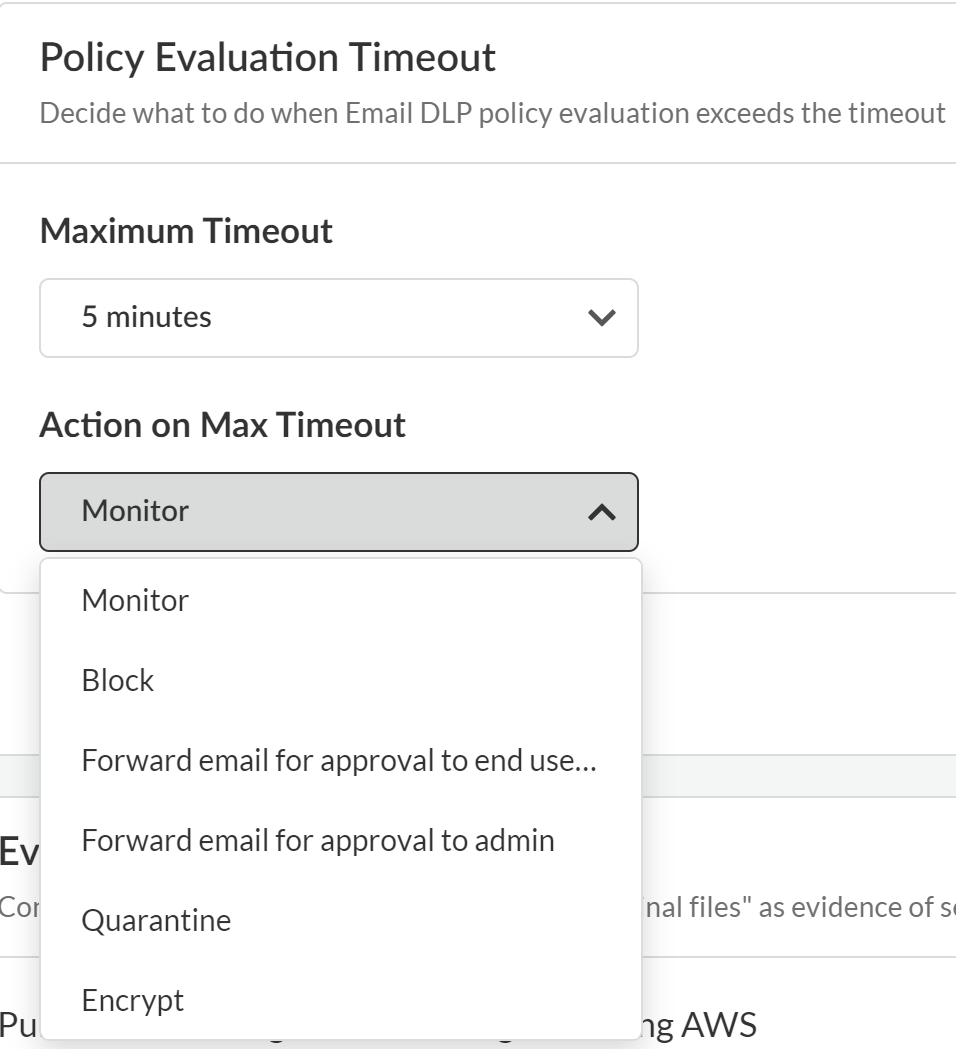
- Edit the Policy Evaluation Timeout to configure what Enterprise DLP does when Email DLP policy evaluation exceeds the configured timeout.
- Maximum Timeout—Maximum time allowed for Enterprise DLP to inspect an outbound email. Minimum timeout is 1 minute. Maximum timeout is 5 minutes.
- Action on Max Timeout—The action Enterprise DLP takes if the maximum timeout is exceeded. The possible actions are the same as those you configure in the Email DLP policy rule Response. Default is Monitor.
- Save Settings.
Edit the Enterprise DLP Data Filtering Settings for Endpoint DLP
Edit the Enterprise Data Loss Prevention (E-DLP) data filtering settings for Endpoint DLP on Strata Cloud Manager.
You can customize the data filtering settings for your USB, printer, and Network
Share peripheral devices independently of one another.
- Log in to Strata Cloud Manager.
- Select to edit the data filtering settings.
- Edit the File Based Settings for Endpoint DLP.You can configure the data filtering settings for each type of peripheral device (USB Devices, Printers, and Network Shares) independently of one another.
- Verify that the correct Endpoint DLP Data Scan Region is selected.By default, the Nearest Data Scan Region is selected and automatically resolves to the region closest to your Enterprise DLP tenant. You can select a specific region to ensure you meet any data residency requirements if required.For example, your Endpoint DLP administrator sets the Data Scan Region to America instead of Nearest Data Scan Region. Your US based worker travels to Europe with their protected endpoint and generates a DLP Incident. In this case, the traffic is forwarded to an Enterprise DLP cloud service tenant in the US for inspection and verdict rendering even though the endpoint was in Europe when the incident was generated. Additionally the DLP Incident displays under the US Region when filtering your incidents.The data filtering settings are shared across all data scan regions. You cannot configure unique data filtering settings for each data scan region. Changing the data filtering settings for one data scan region changes it for all other supported data scan regions.
- Specify the File Movement Max Latency (Sec) for a file upload to a peripheral device before an action is taken by Enterprise DLP.For inspection of files greater than 20 MB, Palo Alto Networks recommends setting the max latency to greater than 60 seconds.
- Specify the Action When Max Latency is Reached (Alert or Block) Enterprise DLP takes if no verdict was received for a file upload to a peripheral device due to the upload time exceeding the configured Max Latency.Selecting Alert allows the file upload to the peripheral device but generates a DLP Incident.Selecting Block blocks the file upload to the peripheral device and generates a DLP incident.
- Specify the Scan Limit Max File Size for Block (MB) to enforce the maximum file size for file uploads to a peripheral device for a Data in Motion Endpoint DLP policy rule configured to Block.
- Specify the Scan Limit Max File Size for Alert (MB) to enforce the maximum file size for file uploads to a peripheral device for a Data in Motion Endpoint DLP policy rule configured to Alert.
- Specify the Scan Limit Action on Max File Size (Alert or Block) Enterprise DLP takes if no verdict was received for a file upload due to the file size being larger than the configured Max File Size.Selecting Block applies only to DLP rules configured to block files. This setting doesn’t impact Enterprise DLP data filtering profiles configured to alert when traffic containing sensitive data is scanned.
- Specify the Action When File Size Exceeds Max Limit (Alert or Block) Enterprise DLP takes if an inspected file exceeds the maximum alert or block file size limit configured in the previous steps.
- Check (enable) Log Files Not Scanned to generate an alert in the DLP incident when a file can’t be scanned to the DLP cloud service.
- Specify the Action When Scanning Error Occurred (Alert or Block) when any kind of error occurs that prevents Enterprise DLP from inspecting a file upload to a peripheral device and rendering a verdict.
- Specify the Action When Endpoint is Offline (Alert or Block) Enterprise DLP takes if the peripheral device is offline and cannot forward traffic for inspection.
- Save.
- Push your new Endpoint DLP data filtering settings to the Prisma Access Agent.
- Select and Push Policies.
- (Optional) Enter a Description for the Endpoint DLP policy push.
- Review the Push Policies scope to understand the changes included the Endpoint DLP configuration push.
- Push.