GlobalProtect
Deploy Machine Certificates for Authentication
Table of Contents
Deploy Machine Certificates for Authentication
To confirm that the endpoint belongs to your
organization, use your own public-key infrastructure (PKI) to issue
and distribute machine certificates to each endpoint (recommended)
or generate a self-signed machine certificate for export. With the
pre-logon connect methods, a machine certificate is required and
must be installed on the endpoint before GlobalProtect components
grant access.
To confirm that the endpoint belongs to your
organization, you must also configure an authentication profile
to authenticate the user (see Two-Factor
Authentication).
Use the following workflow to create
the client certificate and manually deploy it to an endpoint. For
more information, see About
GlobalProtect User Authentication. For an example configuration,
see Remote
Access VPN (Certificate Profile).
- Issue client
certificates to GlobalProtect apps and endpoints.This enables the GlobalProtect portal and gateways to validate that the endpoint belongs to your organization.
- Create the root CA certificate for issuing self-signed certificates for the GlobalProtect components.
- Select , and then click Generate.
- Enter a Certificate Name. The certificate name cannot contain any spaces.
- Enter the IP address or FQDN that will appear on the certificate in the Common Name field.
- Select your root CA from the Signed By drop-down.
- Select an OCSP Responder to verify the revocation status of certificates.
- Configure the Cryptographic Settings for
the certificate, including the encryption Algorithm,
key length (Number of Bits), Digest algorithm
(use sha1, sha256, sha384, or sha512), and Expiration (in
days) for the certificate.If the firewall is in FIPS-CC mode and the key generation algorithm is RSA, the RSA keys must be 2,048 bits or 3072 bits.
- In the Certificate Attributes area, Add and define the attributes that uniquely identify the endpoints as belonging to your organization. Keep in mind that if you add a Host Name attribute (which populates the SAN field of the certificate), it must be the same as the Common Name value you defined.
- Click OK to generate the certificate.
- Install
certificates in the personal certificate store on the endpoints.If you are using unique user certificates or machine certificates, you must install each certificate in the personal certificate store on the endpoint prior to the first portal or gateway connection. Install machine certificates to the Local Computer certificate store on Windows and in the System Keychain on macOS. Install user certificates to the Current User certificate store on Windows and in the Keychain on macOS.For example, to install a certificate on a Windows system using the Microsoft Management Console:
- From the command prompt, enter mmc to launch the Microsoft Management Console.
- Select .
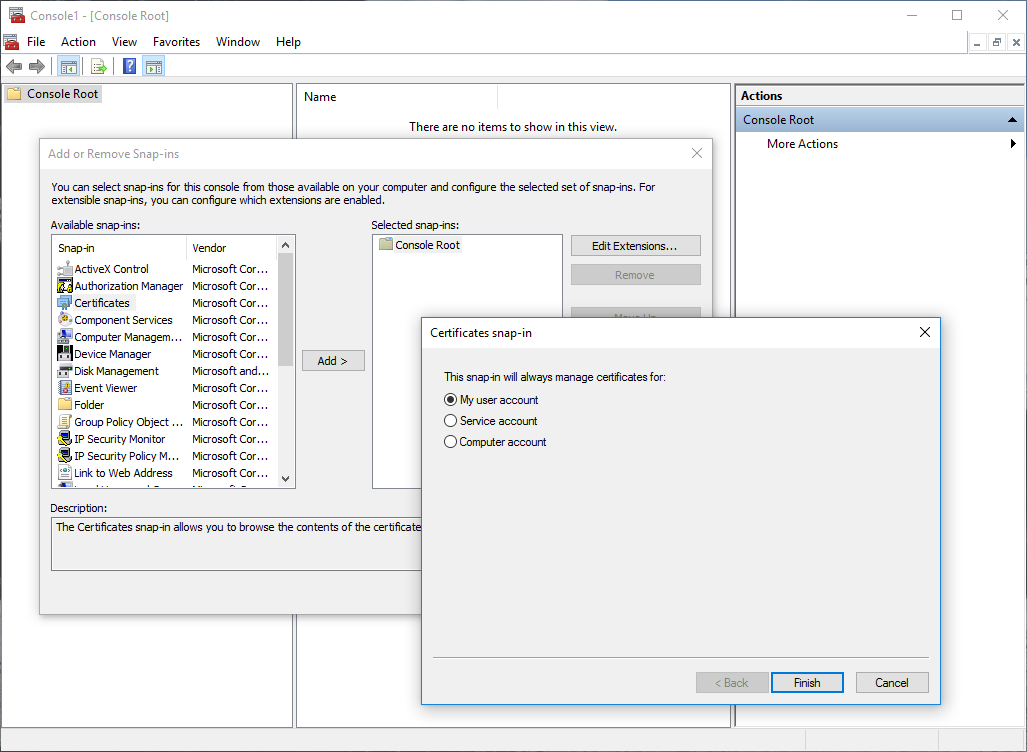
- From the list of Available snap-ins,
select Certificates, and then Add and
select one of the following certificate snap-ins, depending on what
type of certificate you are importing:
- Computer account—Select this option if you are importing a machine certificate.
- My user account—Select this option if you are importing a user certificate.
![]()
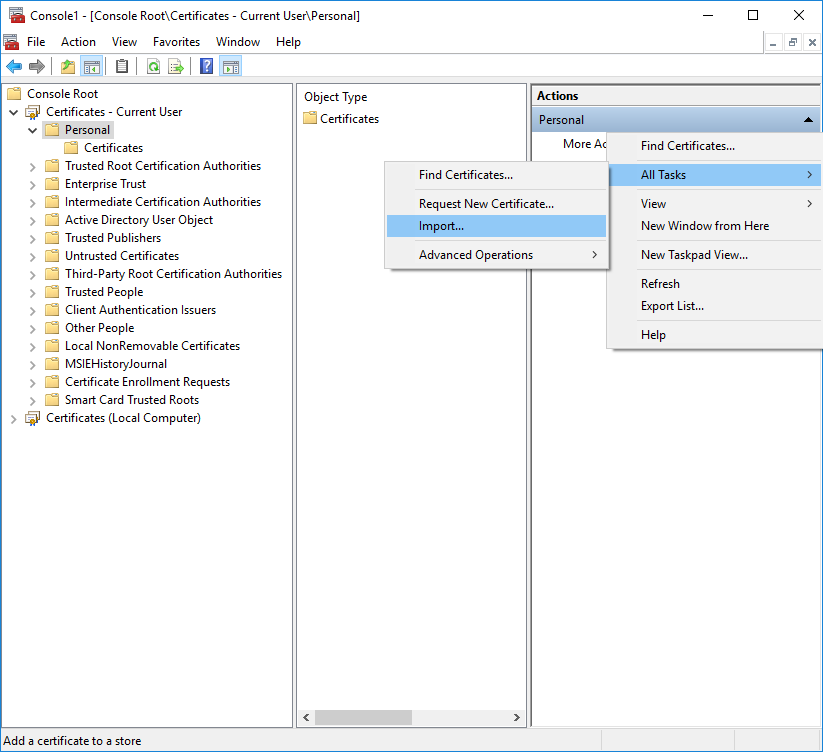
- From the Console Root, expand Certificates, and then select Personal.
- In the Actions column, select and
follow the steps in the Certificate Import Wizard to import the
PKCS file you received from the CA.
![]()
- Browse to and select the .p12 certificate file to import (select Personal Information Exchange as the file type to browse for) and enter the Password that you used to encrypt the private key. Set the Certificate store to Personal.
- Verify that the certificate has been added to the personal
certificate store.Navigate to the personal certificate store from the Console Root (:
![]()
- Import
the root CA certificate used to issue the client certificates onto
the firewall.This step is required only if an external CA issued the client certificates, such as a public CA or an enterprise PKI CA. If you are using self-signed certificates, the root CA is already trusted by the portal and gateways.
- Download the root CA certificate used to issue the client certificates (Base64 format).
- Import the root CA certificate from the CA that generated
the client certificates onto the firewall:
- Select and click Import
- Set the Certificate Type to Local (default).
- Enter a Certificate Name that identifies the certificate as your client CA certificate.
- Browse to and select the Certificate File you downloaded from the CA.
- Set the File Format to Base64 Encoded Certificate (PEM), and then click OK.
- On the Device Certificates tab, select the certificate you just imported to open the Certificate Information.
- Select Trusted Root CA and then click OK.
- Create
a client certificate profile.
- Select to Add a new certificate profile.
- Enter a profile Name.
- Select a Username Field value
to specify which field in the certificate will contain the user’s
identification information.If you plan to configure the portal or gateways to authenticate users with only certificates, you must specify the Username Field. This enables GlobalProtect to associate a username with the certificate.If you plan to set up the portal or gateway for two-factor authentication, you can leave the default value of None, or, to add an additional layer of security, specify a username. If you specify a username, your external authentication service verifies that the username in the client certificate matches the username requesting authentication. This ensures that the user is the one to which the certificate was issued.Users cannot change the username that is included in the certificate.
- In the CA Certificates area, click Add. Select the Trusted Root CA certificate you imported in step 4 from the CA Certificate drop-down, and then click OK.
- Save the configuration.Commit the changes.