GlobalProtect
Deploy the GlobalProtect App for Android on Managed Chromebooks Using Workspace ONE
Table of Contents
Deploy the GlobalProtect App for Android on Managed Chromebooks Using Workspace ONE
Starting with GlobalProtect app 5.0, you can deploy the GlobalProtect app for Android on managed
Chromebooks that are enrolled with Workspace ONE. After you deploy the app,
configure and deploy a VPN profile to set up the GlobalProtect app for end users
automatically.
The GlobalProtect app for Android
is supported only on certain Chromebooks. Chromebooks
that do not support Android applications must continue to run the
GlobalProtect app for Chrome, which is not supported starting with
GlobalProtect app 5.0 and later.
Do
not deploy both the GlobalProtect app for Android and GlobalProtect
app for Chrome on the same Chromebook.
Use the following steps to deploy the GlobalProtect app for Android on managed Chromebooks using
Workspace ONE:
- Set up the Google Admin console.The Google Admin console enables you to manage Google services for users in your organization. Workspace ONE uses the Google Admin console for integration with Chromebooks.
- Log in to the Google Admin console as an administrator.
- From the console, select .
- In the Client Name field, enter the Client ID that was provided to you by Workspace ONE.
- In the One or More API Scopes field, enter
the following Google API scopes to which you want to control application access:Each API scope must be separated by a comma.
- https://www.googleapis.com/auth/chromedevicemanagementapi
- https://www.googleapis.com/auth/admin.directory.user
- https://www.googleapis.com/auth/admin.directory.device.chromeos
- Click Authorize.
- Enable Chrome Management - Partner Access for device policies () and user policies ().
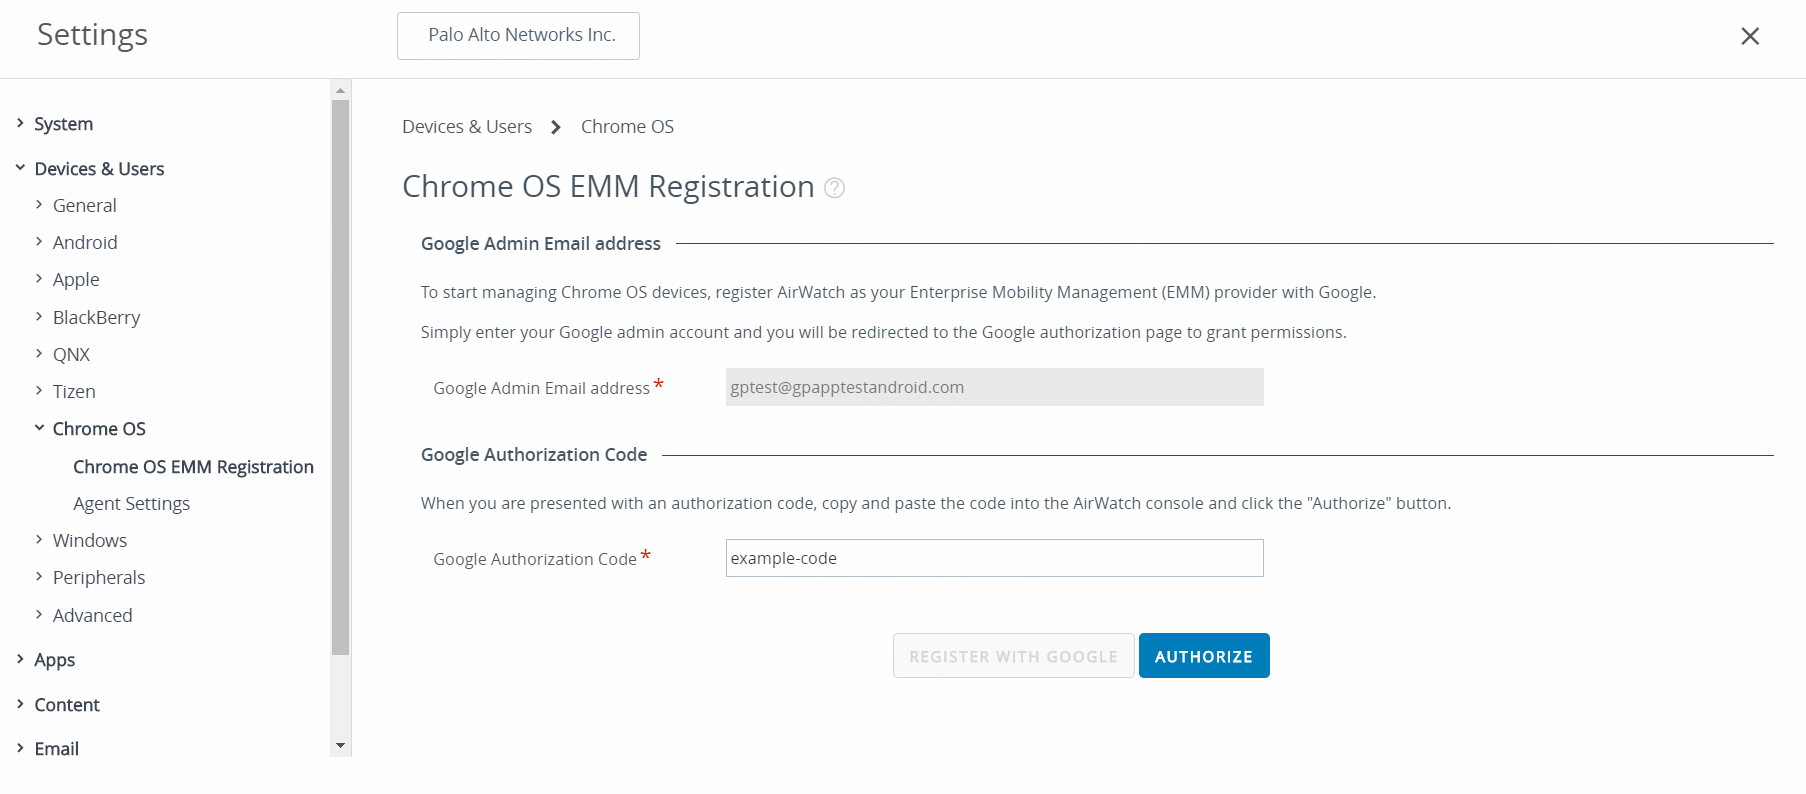
- Register Workspace ONE as your Enterprise Mobility Management (EMM) provider
for Google.To manage Chromebooks using Workspace ONE, you must register Workspace ONE with the Google Admin console.
- Log in to your Workspace ONE console.
- Select .
- Enter the Google Admin Email address that you used to access the Google Admin console.
- Click REGISTER WITH GOOGLE. You will be
redirected to the Google authorization page, where you can obtain a
Google authorization code.
![]()
- Enter the Google Authorization Code that you obtained from the Google authorization page.
- Click AUTHORIZE to complete the
registration.
![]()
- Enroll Chromebooks with Workspace ONE.Before you can begin managing Chromebooks using Workspace ONE, you must enroll and sync your Chromebooks to Workspace ONE.
- From your Chromebook, press CTRL+ALT+E to open the enterprise enrollment screen.
- Enter the username and password from your Google Admin welcome letter or enter your existing G Suite user credentials.
- Click Enroll device. You will receive a confirmation message when the Chromebook is successfully enrolled.
- Log in to your Workspace ONE console.
- Select .
- Click Device Sync to sync all enrolled Chromebooks to Workspace ONE.
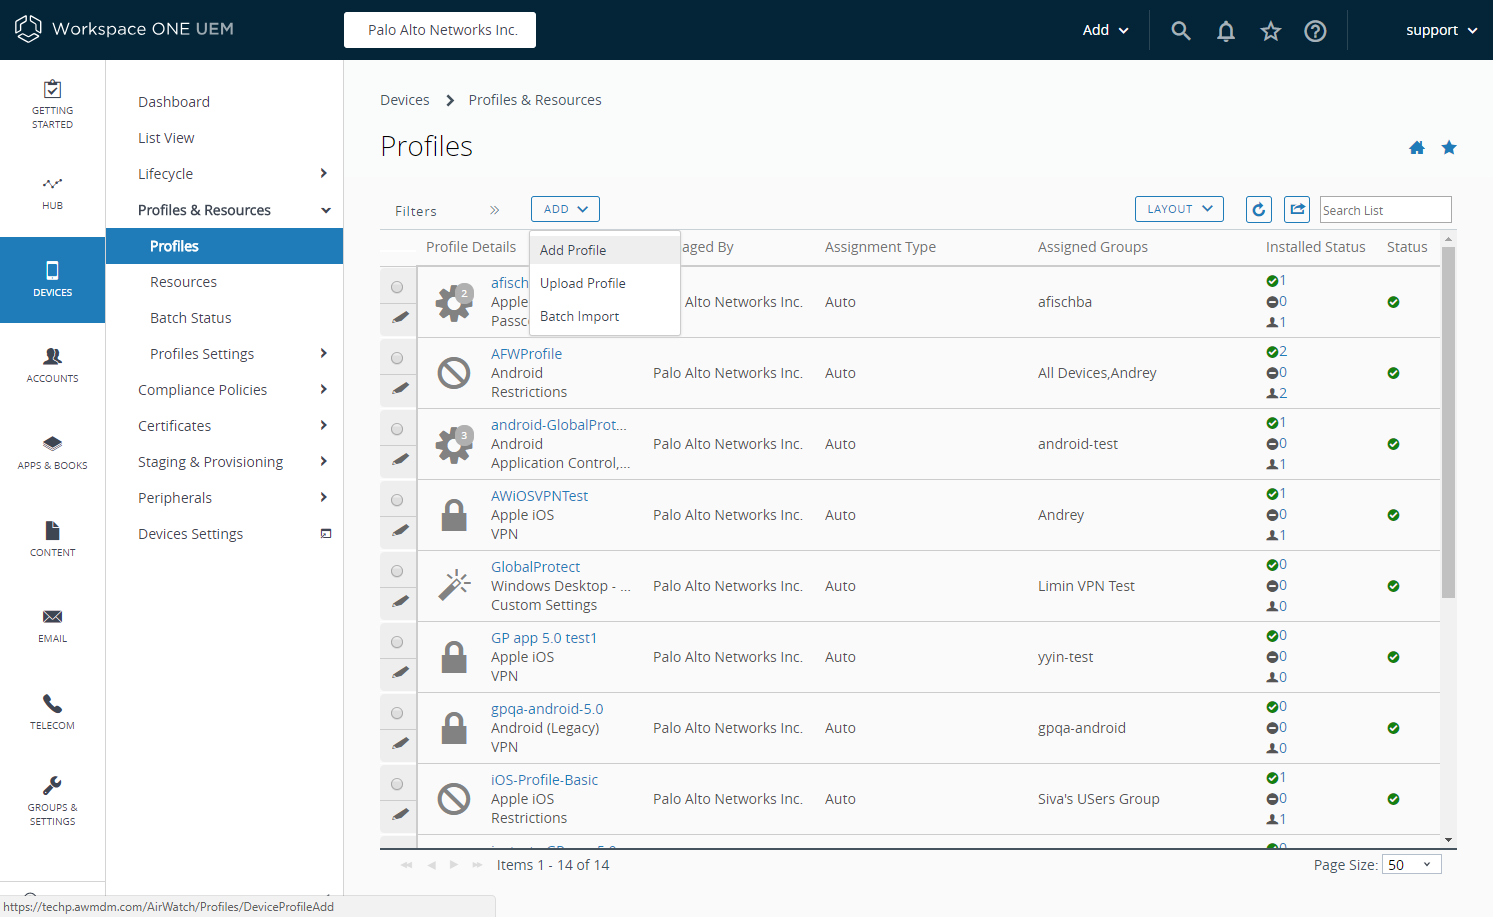
- Add the GlobalProtect app for Android to a Chrome OS profile on Workspace
ONE.The Application Control profile enables you to add apps from Google Play and the Chrome Web Store.
- Log in to your Workspace ONE console.
- Select to ADD a new Chrome OS
profile.
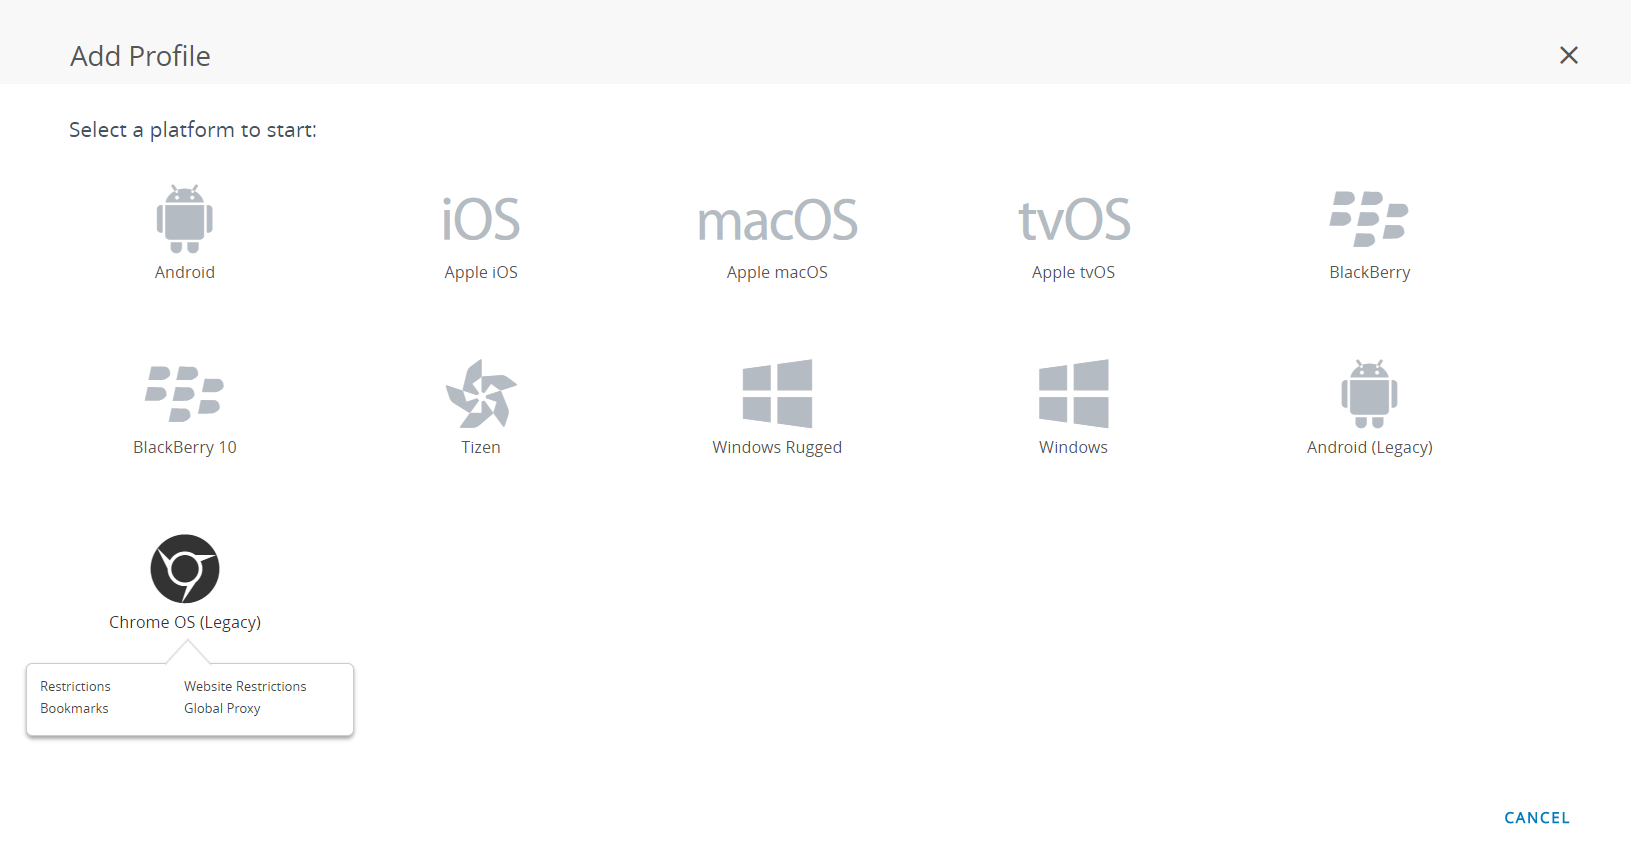
![]()
- Select Chrome OS (Legacy) from the platform
list.
![]()
- Configure the General settings.
- Configure the Application Control
settings.
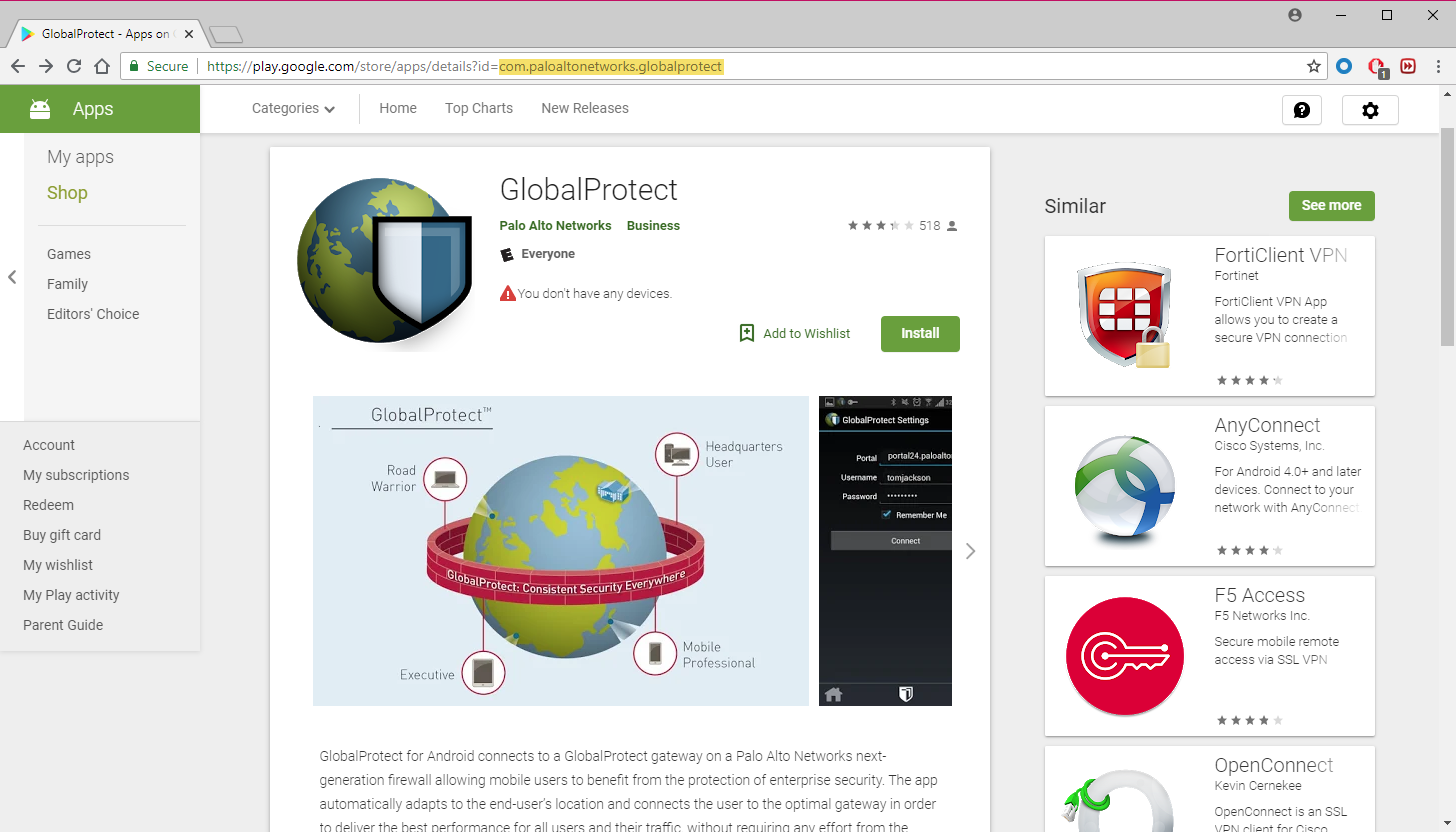
-
Enter the GlobalProtect App ID displayed in the Google Play URL (com.paloaltonetworks.globalprotect).
![]()
-
Enter the app Name.
-
Specify whether you want to Pin App to Shelf. Enter Y to pin the app to the Chromebook app shelf.
-
SAVE & PUBLISH your changes.
-