Enterprise DLP
Strata Cloud Manager
Table of Contents
Strata Cloud Manager
Create an Enterprise Data Loss Prevention (E-DLP) data profile on Strata Cloud Manager.
- Log in to Strata Cloud Manager.Edit the data filtering settings on Strata Cloud Manager to configure the minimum and maximum data size limits and the actions the enforcement point takes when forwarding traffic to Enterprise DLP.Select and .You can also create a new data profile by copying an existing data profile. This allows you to quickly modify an existing data profile with additional match criteria while preserving the original data profile from which the new data profile was copied.Data profiles created by copying an existing data profile are appended with Copy - <name_of_original_data_profile>. This name can be edited as needed.Enter a descriptive Data Profile Name.Add Pattern Group and Add Data Pattern.You must add data pattern match criteria for traffic that you want to allow to the Primary Rule. You can add data pattern match criteria for traffic that you want to block to either Primary Rule or Secondary Rule.Configure the Primary Rule match criteria.You must add data pattern match criteria for traffic that you want to allow to the Primary Rule. You can add data pattern match criteria for traffic that you want to block to either Primary Rule or Secondary Rule.Configure the data pattern match criteria.
- Predefined ML-based data patterns support only the Any occurrence condition with either High or Lowconfidence. You can't configure any other traffic match criteria other than the confidence level for Predefined ML-based data patterns.
- Occurrence Condition—Specify the occurrences condition required to trigger a Security policy rule action.
- Any—Security policy rule action triggered if Enterprise DLP detects at least one instance of matched traffic.
- Less than or equal to—Security policy rule action triggered if Enterprise DLP detects instances of matched traffic, with the maximum being the specified Count.
- More than or equal to—Security policy rule action triggered if Enterprise DLP detects instances of matched traffic, with a minimum being the specified Count.
- Between (inclusive)—Security policy rule action triggered if Enterprise DLP detects any number of instances of matched traffic between the specific Count range.
- Count—Specify the number of instances of matched traffic required to trigger a Security policy rule action.For example, to match a pattern that appears three or more times in a file, select More than or equal to as the Occurrence Condition and specify 3 as the Threshold.
- Default Range—1 - 500
- Increased Range—1 - 1,500Contact Palo Alto Networks Support to increase the occurrence count supported by your Enterprise DLP tenant.
- Confidence—Specify the confidence level required for a Security policy rule action to be taken (High or Low).
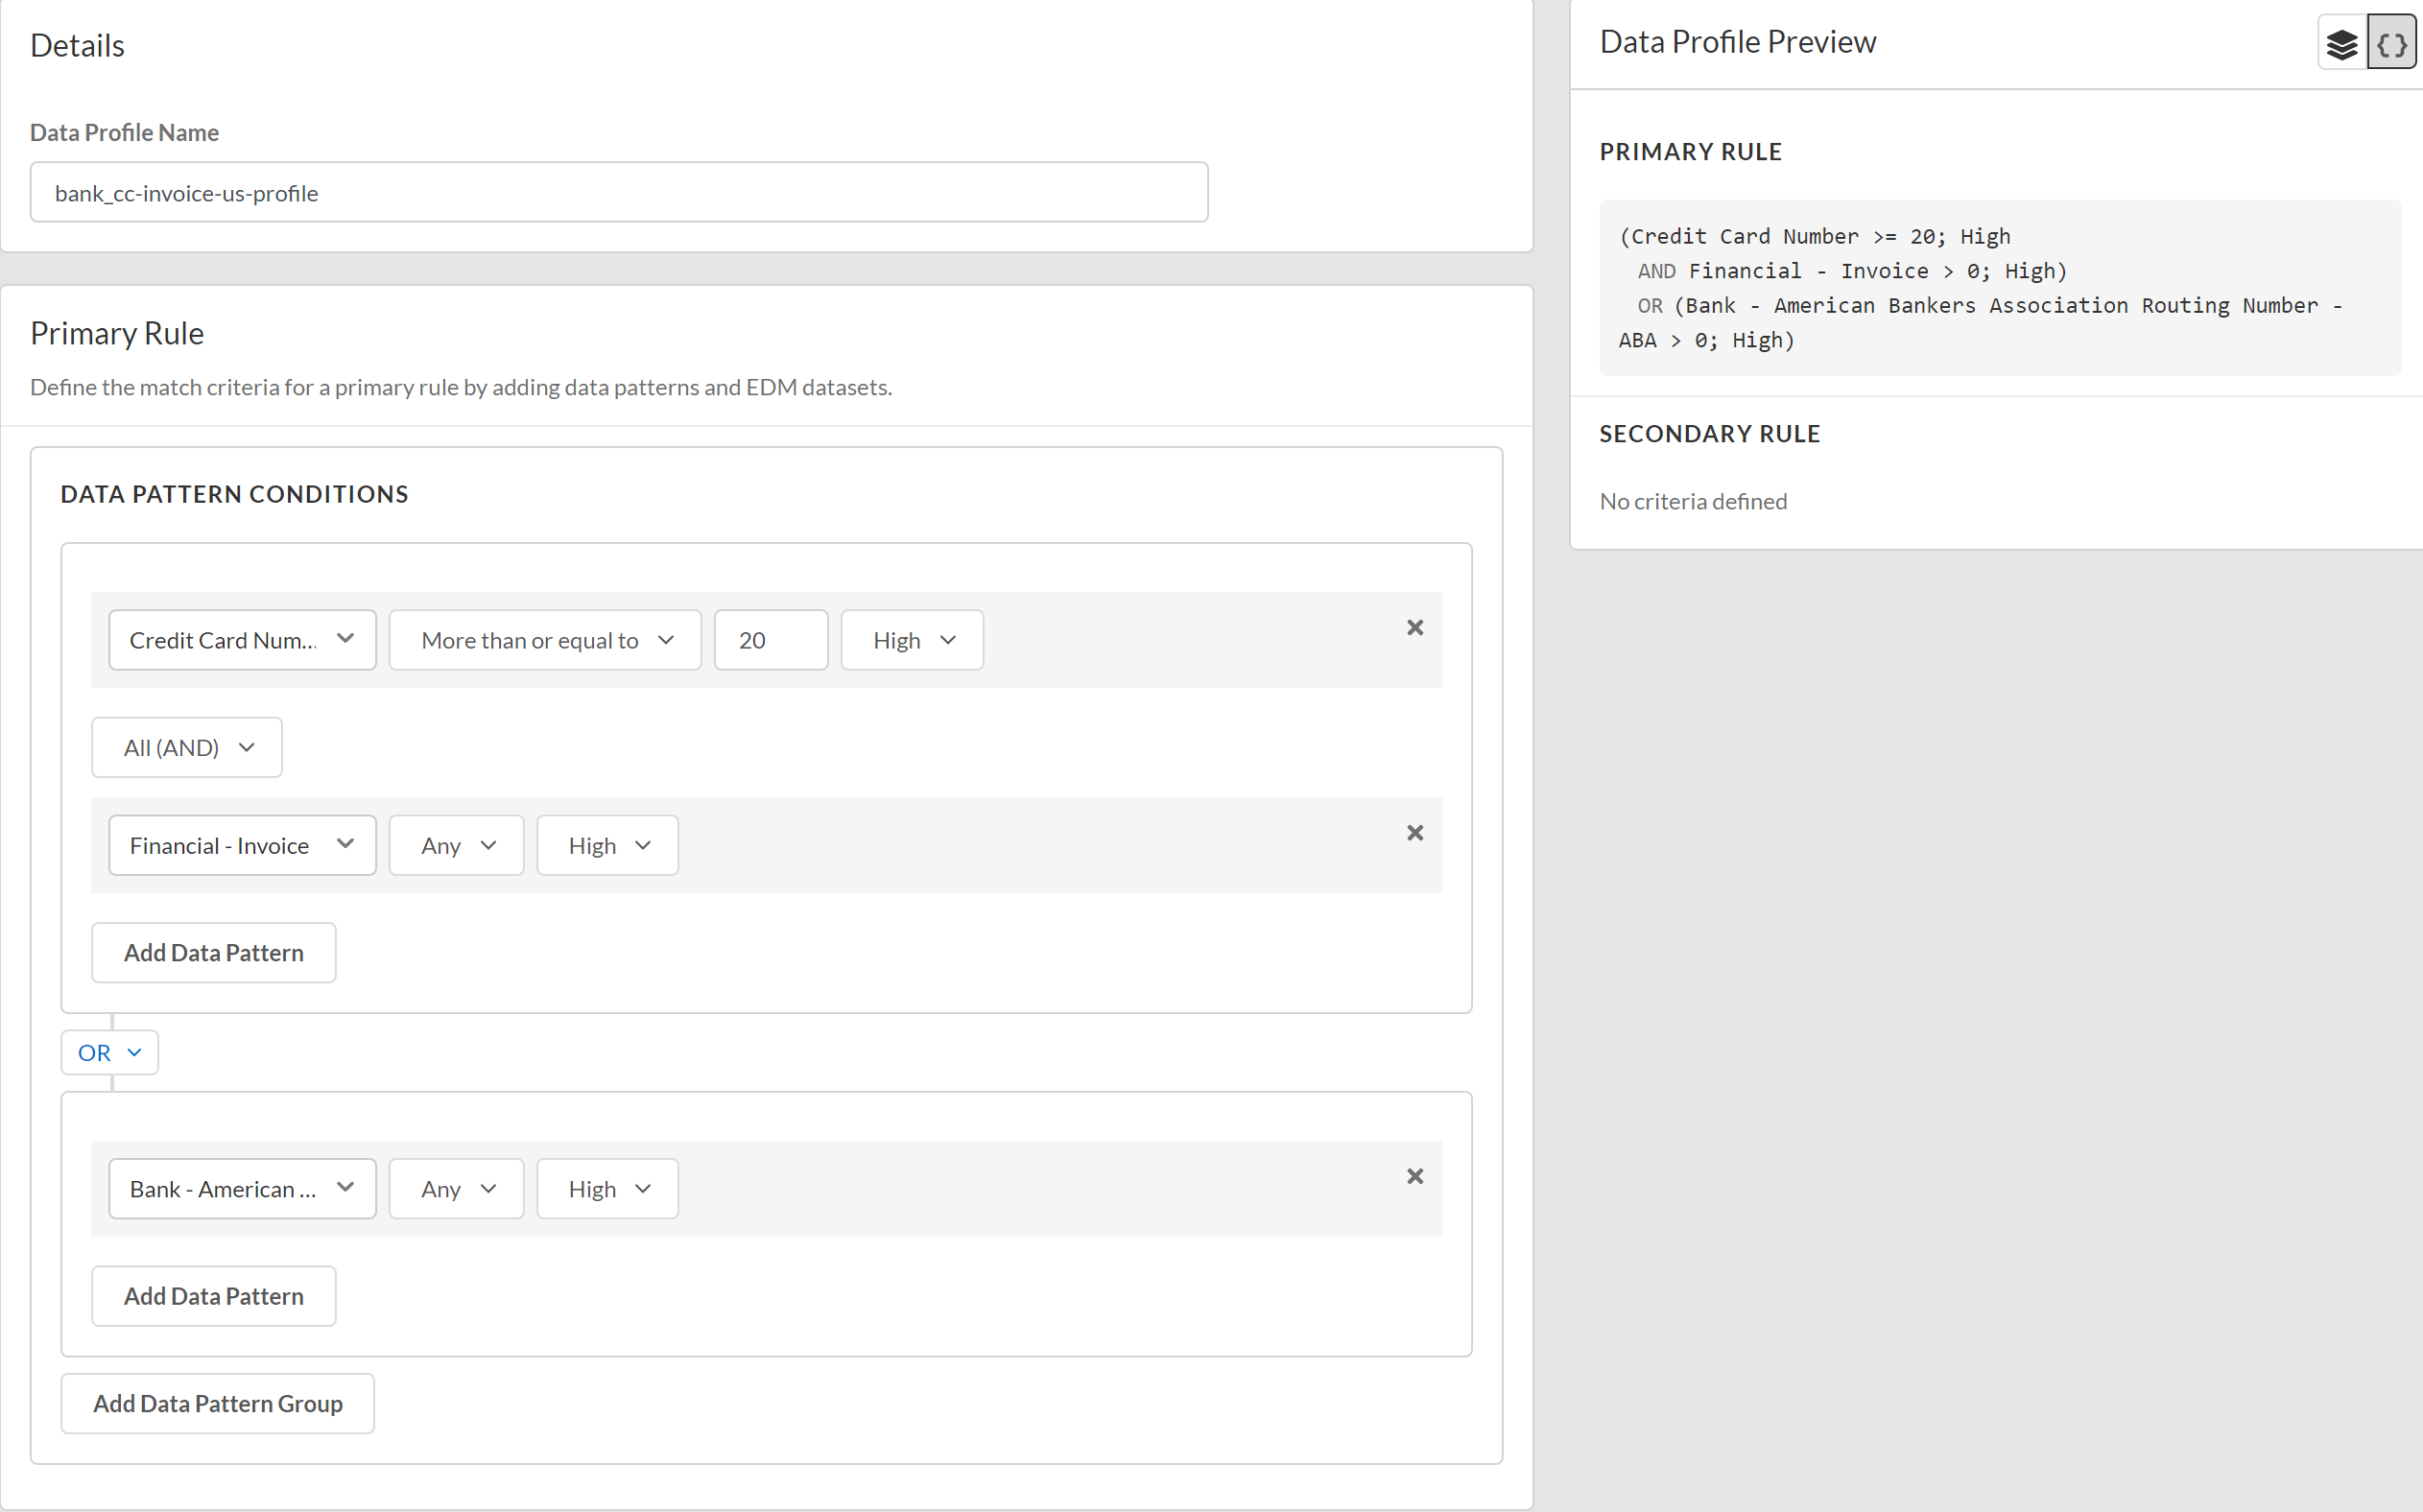
(Optional) Add Data Pattern to add additional data pattern match criteria to the Primary rule.(Optional) Add Data Pattern Group to add additional data pattern conditions using AND or OR operators to the Primary Rule.Refer to the descriptions above to configure any additional data pattern conditions as needed.![]() (Optional) Configure a Secondary Rule.Data pattern match criteria added to the Secondary Rule block all traffic that meets the match criteria for the data pattern conditions. If you want to allow traffic that matches a data pattern match criteria, add it to the Primary Rule.Review the Data Profile Preview to verify the data profile match criteria.Click Test Run to test and verify the data profile accurately detects the sensitive data you configured it to detect.Save the data profile.In Data Profiles, search for the data profile you created to verify it was successfully created.Modify a DLP rule to attach the data profile to a Security policy rule.The DLP rule defines the type of traffic to inspect, the impacted file types, action, log severity, and more for the data profile match criteria. Enterprise DLP automatically creates a DLP rule with an identical name as the data profile from which it was created.
(Optional) Configure a Secondary Rule.Data pattern match criteria added to the Secondary Rule block all traffic that meets the match criteria for the data pattern conditions. If you want to allow traffic that matches a data pattern match criteria, add it to the Primary Rule.Review the Data Profile Preview to verify the data profile match criteria.Click Test Run to test and verify the data profile accurately detects the sensitive data you configured it to detect.Save the data profile.In Data Profiles, search for the data profile you created to verify it was successfully created.Modify a DLP rule to attach the data profile to a Security policy rule.The DLP rule defines the type of traffic to inspect, the impacted file types, action, log severity, and more for the data profile match criteria. Enterprise DLP automatically creates a DLP rule with an identical name as the data profile from which it was created.